Introduction
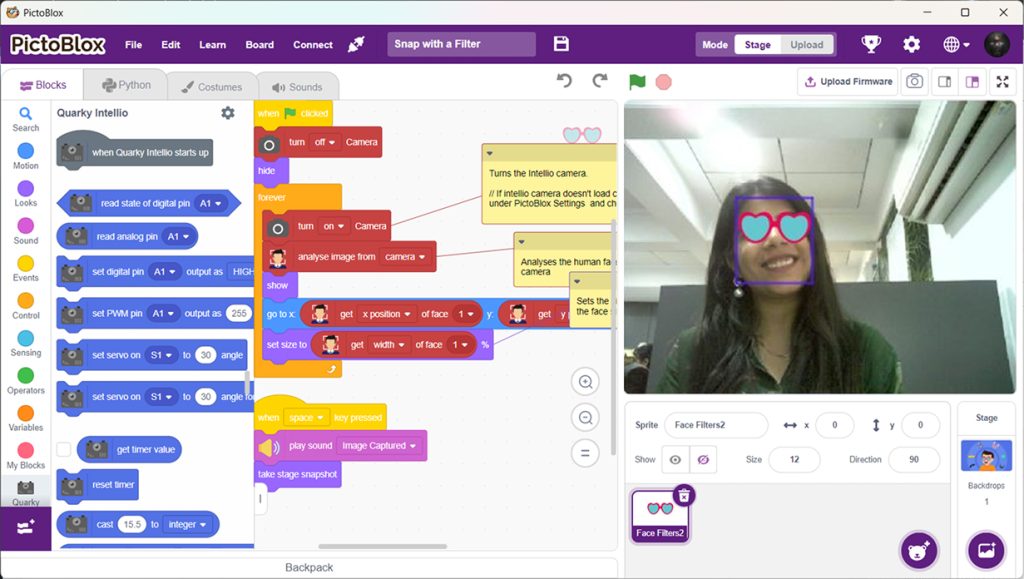
The time has come to do something super exciting! We are going to create an AI-powered camera filter in PictoBlox! the aim of the project is to build a face filter that follows our face.
We are going to use Quarky’s AI capabilities and the Face Detection extension to track our movements in real-time. We’ll even add a cool feature to snap a photo with a sound effect whenever we strike a pose!
Let’s make the Snap with a filter using Intellio.
Prerequisites
- Quarky Intellio device (charged and powered on)
- PictoBlox installed on a Wi-Fi connected device
- Firmware uploaded to Quarky Intellio via the Upload Firmware button in PictoBlox
Connecting your intellio to Pictoblox Blocks
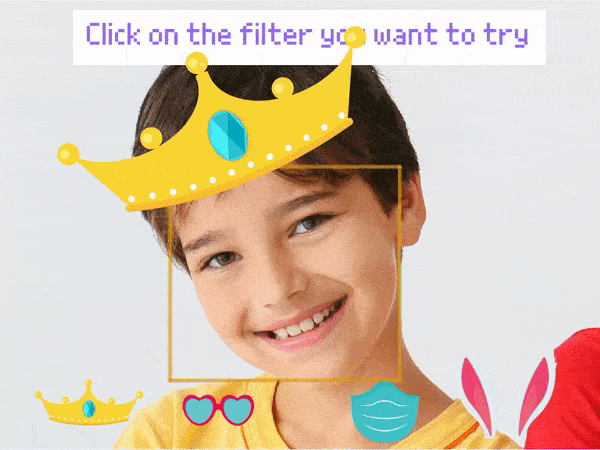
- Add the face filter sprite using the ‘Choose a sprite’ option.
- Delete the Tobi.
- Slide up the power switch to turn on Quarky Intellio.
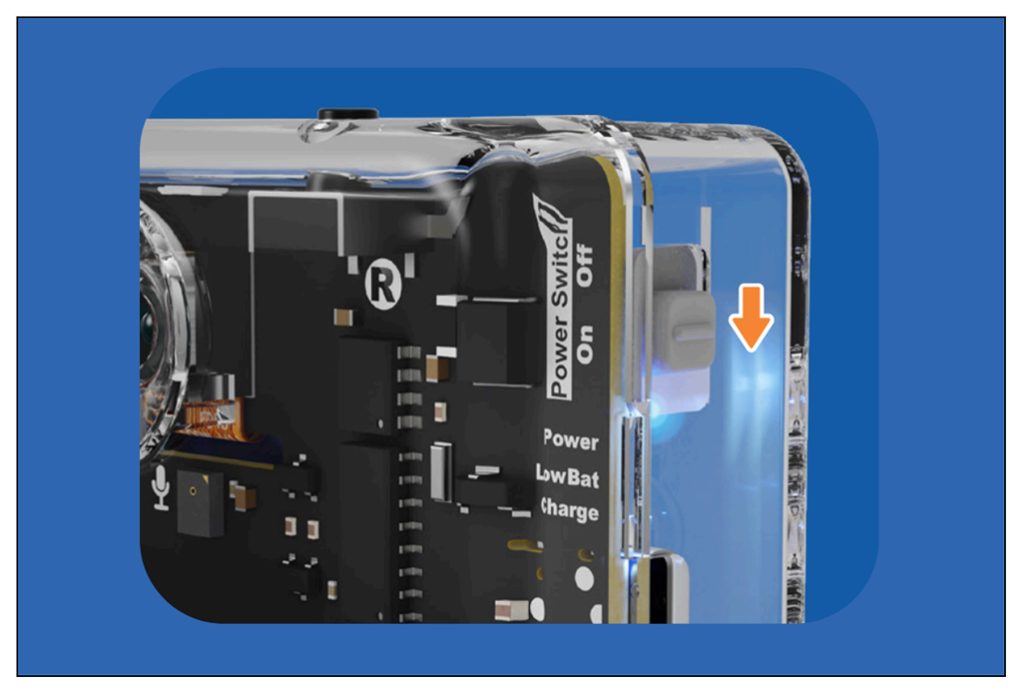
- Blue light will turn on from Intellio; that means Intellio is ON.
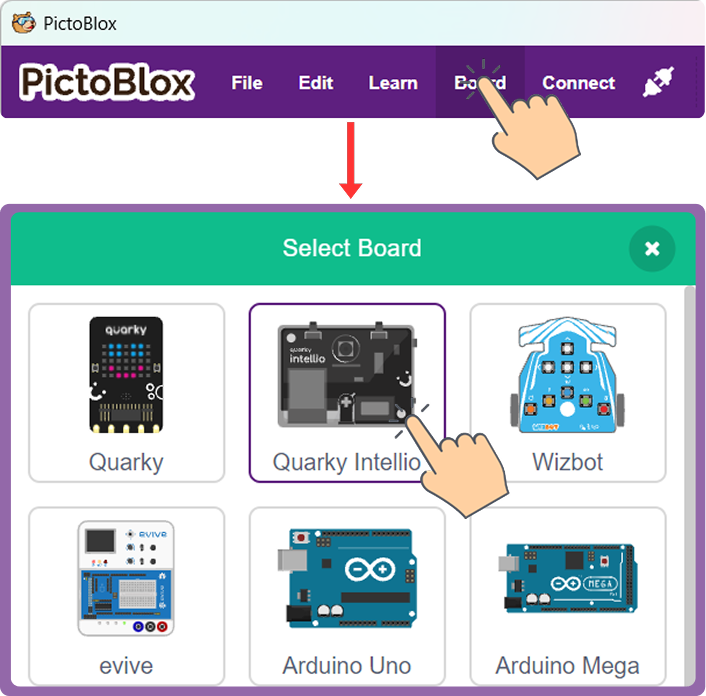
- Click on Board at the top of your screen. Select Quarky Intellio!
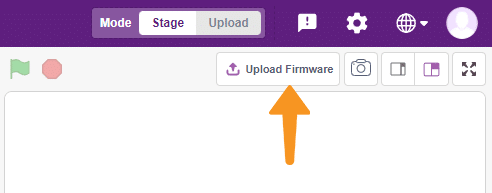
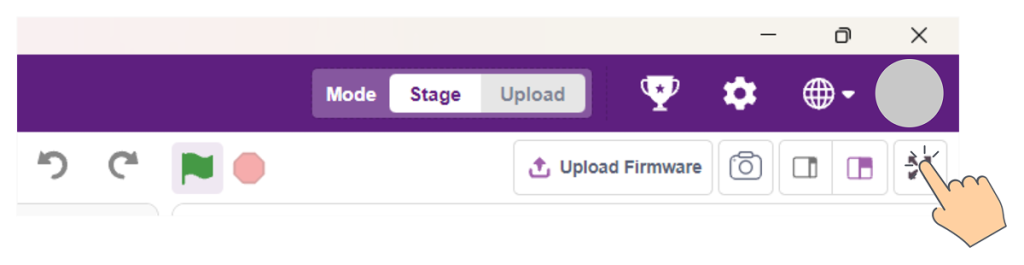
- Click the Connect tab in the top menu to connect with the serial port (USB); be sure to Upload Firmware (top right corner) for Intellio.
- Once the Upload Firmware is done, then choose the Wi-Fi tab to connect Intellio with PictoBlox.
- Check out the Connection guide for Wi-Fi method – https://ai.thestempedia.com/docs/quarky-intellio/quarky-intellio-getting-started/quarky-intellio-connection-guide/#method2
- Once you successfully connect Intellio with Pictoblock, add the Face Detection Extension (Extension > Search > Face Detection)
- Add the Face Filter sprite in the sprite library. Click the ‘choose a sprite’ option > use the search option to find the face filter > select Face Filter.
- Click the delete icon on top of the Tobi sprite. In the project, we are not going to use Tobi.
Building the Face Filter Script
Main Script – Real-Time Face Tracking
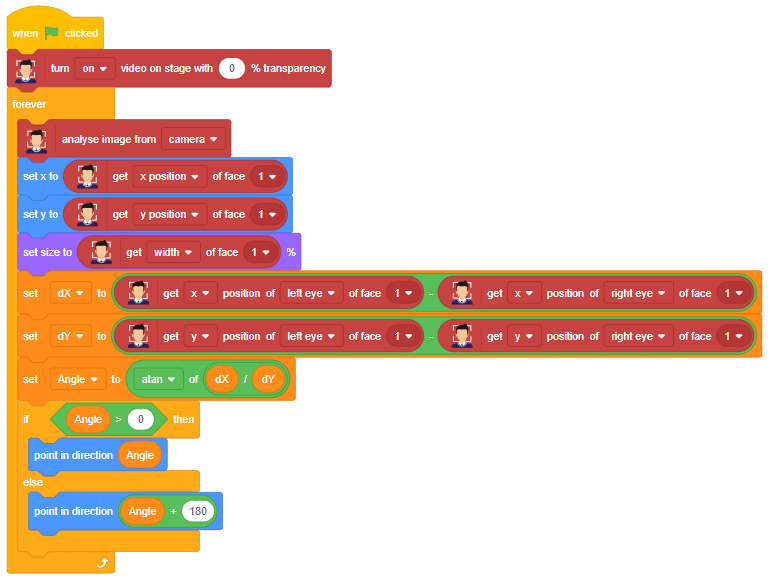
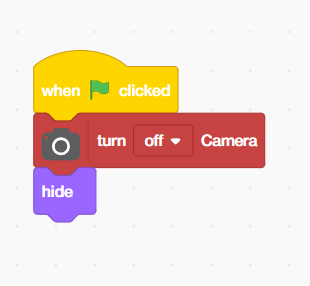
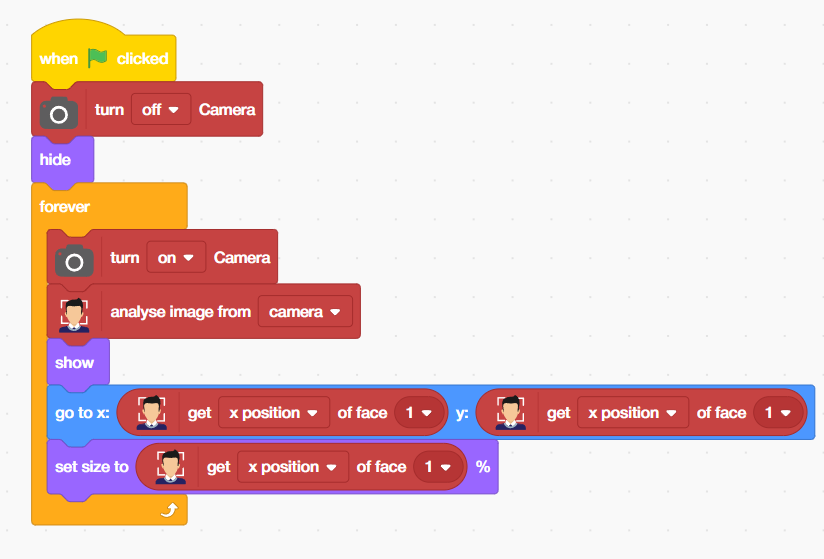
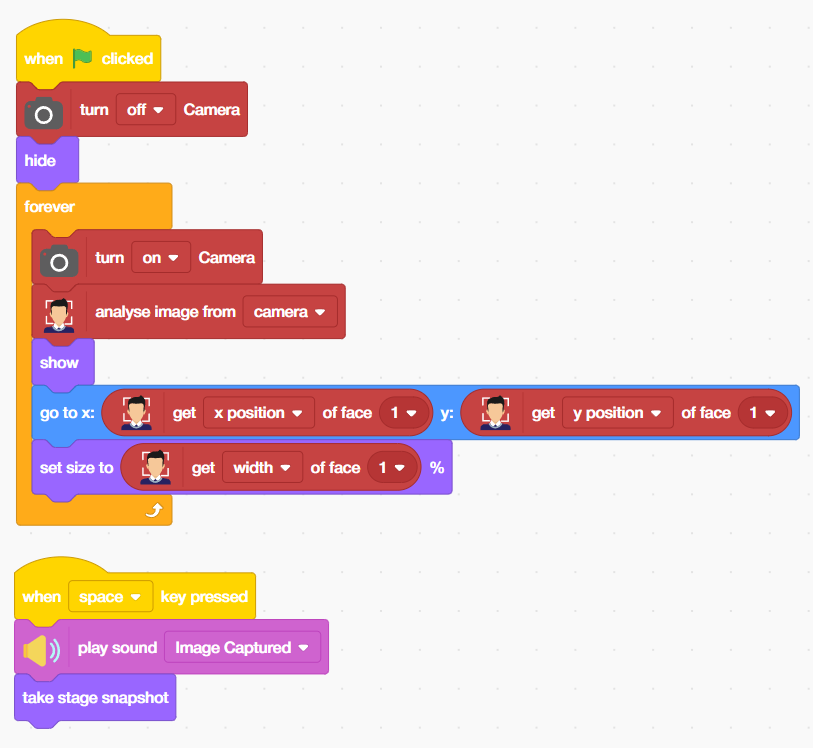
- Go to Events and drag the When Green Flag clicked block into your coding area.
- Add a turn-on-camera block from the camera palette and set the camera off.
- Add the Hide Block from the looks palette.
- Add the Forever block from the Control Palette.
- Inside the Forever block,
- Add the turn-on-camera block from the camera palette.
- From the ‘face detection extension’, add the ‘analyse image from camera’. It will analyse the images when you turn on the camera.
- Add the ‘Show’ block from the looks palette.
- Add the ‘go to x: 0 y: 0′ block’ from the Motion palette.
- Add the ‘get x position of face 1’ block from the face detection palette and add it inside the X text box.
- Again, add the ‘get x position of face 1’ block from the face detection palette and add it inside the Y text box. Change the X position into the Y position.Inside the Forever block, Moves the sprite to the exact coordinates of Face 1 as detected by the AI engine. The get X position of face 1 and get Y position of face 1 reporter blocks return live X and Y stage coordinates of the centre of the first detected face, making the sprite track the face in real time.
- Add the set size to 100% block from the looks palette.
- Add the ‘get x position of face 1’ block from the Face Detection extension. Change the X position into the width.
Snapshot Script — Press Space to Capture
This is a completely separate, independent script that listens for the space key and captures a snapshot whenever it is pressed.
- Go to Events and drag the “When space key pressed” block.
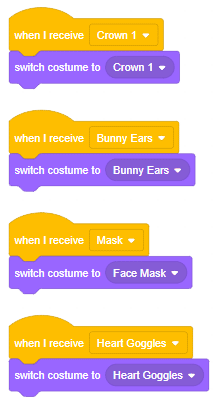
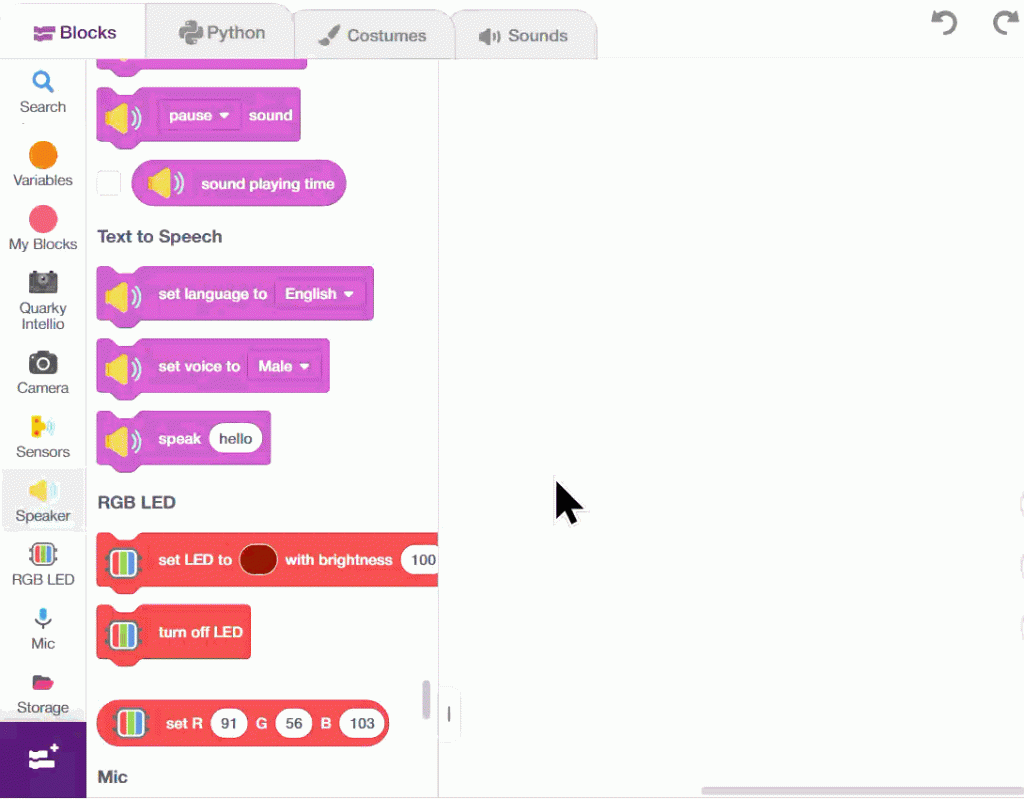
- Add the play sound block. Hi, I am Quarky Intellio block from Speaker Palette.
- Change ‘Hi, I am Quarky Intellio’ into ‘Image captured’.
- From the looks palette, add the take stage snapshot block.
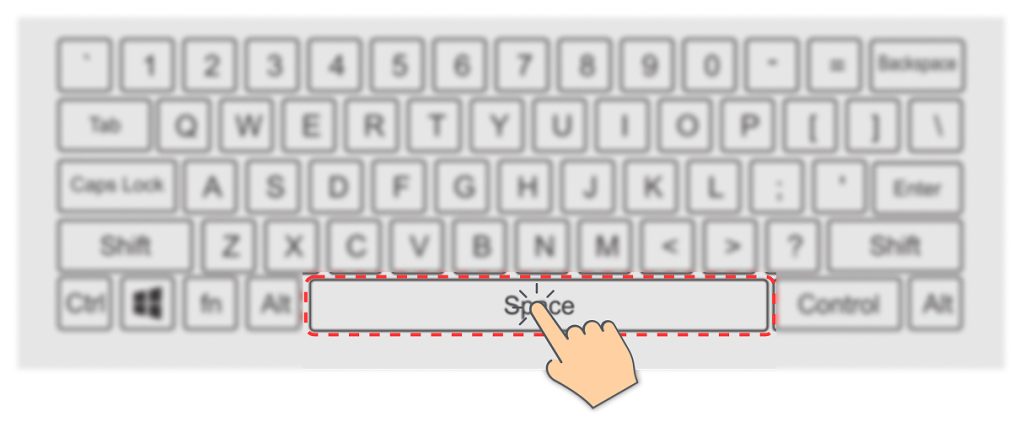
- Now click the flag icon to run the blocks and press the space bar to click the photos.
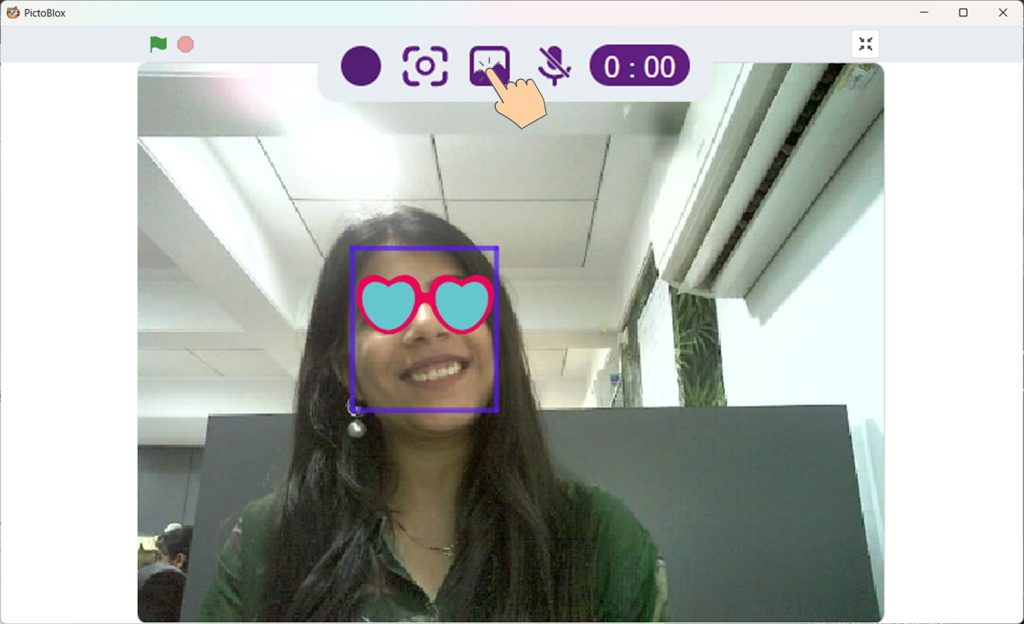
- Once you’ve clicked the photos, click the Maximise icon from the stage (top right corner), then click the Open Gallery icon to view your captured photos.
Output
- In Block Coding, click the Green Flag to execute the program.
- Stand in front of the camera of Quarky Intellio and watch the filter follow your face.
- Press the Space key on your keyboard to capture a photo with the filter applied.
- To view the captured photo, follow the steps below:
- Click the Maximize icon in the top-right corner of PictoBlox if it is not already maximized.
- In the maximized view, click the Gallery icon at the top-center of the screen, as shown below.
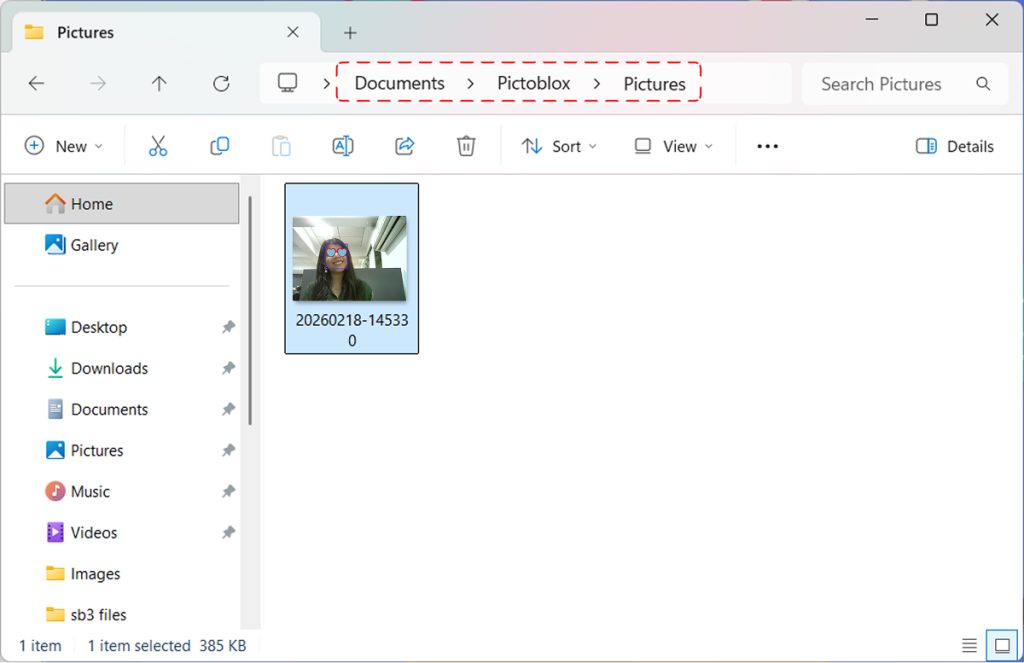
- Open the Pictures folder in PictoBlox to view your captured photos.
Conclusion
In this project, we learned how to create an AI-powered face filter camera in PictoBlox using the Face Detection extension and Quarky Intellio. We required a Quarky Intellio device, a Wi-Fi connected computer with PictoBlox installed, and the Face Detection extension. We used the analyse image block to run the AI model on live camera frames, the get x/y position of face blocks to move the filter sprite in real time, and the get width of face block to scale it automatically. We also added a snapshot script that plays a sound and captures the stage when the Space bar is pressed. With this project, kids and learners will have a better understanding of AI face detection, real-time computer vision, and how to use machine learning extensions in PictoBlox.