Table of Contents

get () of face ()

Description

The get () of face () block reports the following attributes of the face:

  1. X position: X coordinate of the center of the image on the stage
  2. Y position: Y coordinate of the center of the image on the stage
  3. Width: Width of the face
  4. Height: Height of the face
evive Notes Icon
Note: This block reports an accurate position when the image is analyzed from the stage or camera feed.

Using this block, you can make the bounding box for the face like this:

Example

The example shows how to create a face filter with Face Detection. It also includes how to make the filter tilt with face angles.

Script

Exmaple

Read More
Learn about AI-based face expression detection, computer vision techniques to analyze images or videos of human faces and recognize emotions or expressions.

Introduction

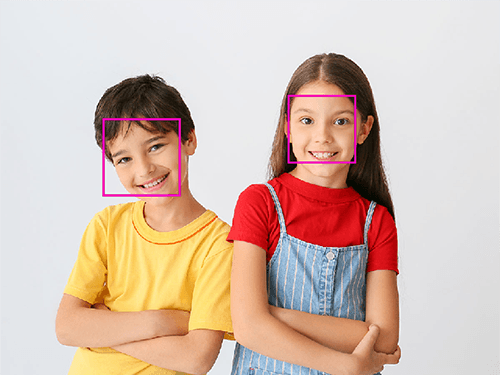
AI-based face expression detection refers to the use of artificial intelligence algorithms and computer vision techniques to analyze images or videos of human faces and recognize the emotions or expressions being displayed. The technology can detect and analyze subtle changes in facial features, such as eye movement, mouth shape, and eyebrow position, to determine whether a person is happy, sad, angry, surprised, or expressing other emotions.

Discover the various fields that utilize this technology, including psychology, marketing, and human-computer interaction. Additionally, read about the logic and code behind face detection with a camera feed, including the initialization of parameters, face detection library, loop execution, and if-else conditions. Explore how the technology continuously analyzes emotions, and how the Humanoid responds with different facial expressions and movements.

Code

sprite = Sprite('Tobi')
fd = FaceDetection()
quarky = Quarky()
import time

humanoid = Humanoid(7, 2, 6, 3, 8, 1)

# Turn the video ON with 0% transparency
fd.video("ON", 0)
fd.enablebox()

# Run this script forever
while 1:
  fd.analysecamera()          # Analyse image from camera 
  sprite.say(fd.expression()) # Say the face expressions
  
  if fd.isexpression(1, "happy"): # if face expression is happy
    quarky.showemotion("happy")   # show happy emotion on Quarky
    humanoid.action("dance2", 1000, 1)
    
  if fd.isexpression(1, 'sad'):
    quarky.showemotion("crying")
    humanoid.action("updown", 1000, 1)
    
  if fd.isexpression(1, 'surprise'):
    quarky.showemotion('surprise')
    humanoid.action("moonwalker", 1000, 1)
    
  if fd.isexpression(1, 'angry'):
    quarky.showemotion('angry')    
    humanoid.action("flapping2", 1000, 1)
  else:
    humanoid.home()
    
# Comment the above script, uncomment the below script and 
# run this script to clear the stage and quarky display

fd.disablebox()
fd.video("off")    
quarky.cleardisplay()

Logic

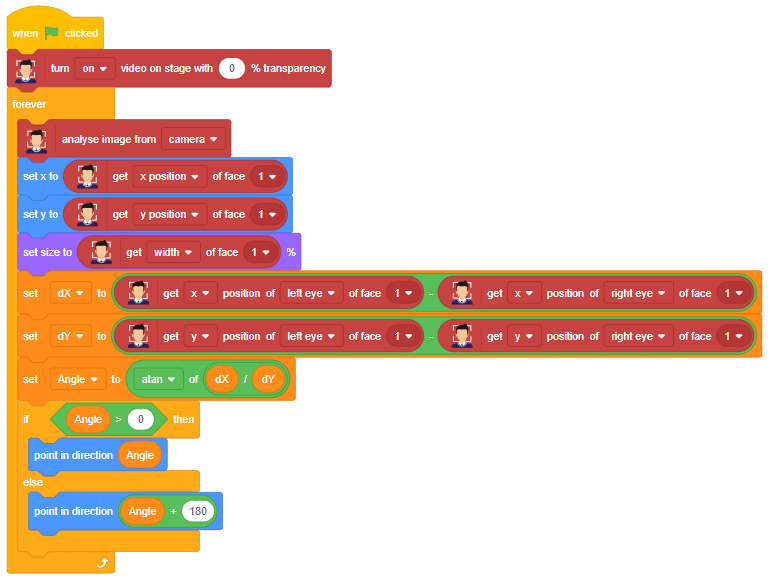
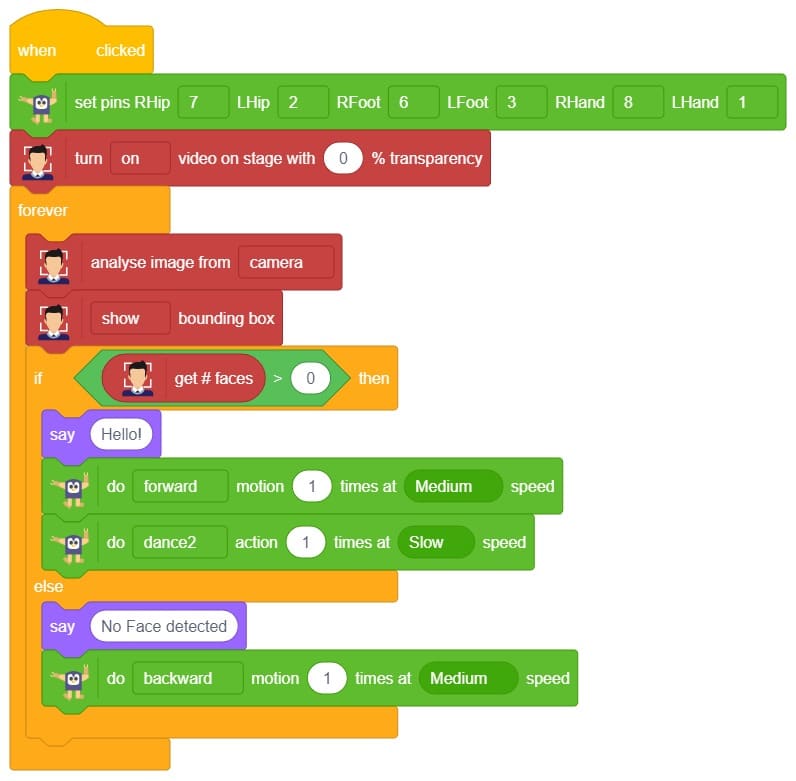
The example demonstrates how to use face detection with a camera feed. Following are the key steps happening:

  1. Creates a sprite object named ‘Tobi’. A sprite is typically a graphical element that can be animated or displayed on a screen.also creates a Quarky object.
  2. Creates a face detection object named ‘fd’. This object is responsible for detecting faces in images or video using fd = FaceDetection()
  3. Imports the ‘time’ module, which provides functions to work with time-related operations using import time.
  4.  Creates a humanoid object with specific pins assigned to control various actions of the humanoid robot.
  5.  Turns on the video display with 0% transparency for the face detection module using fd.video(“ON”, 0).
  6.  Enables the face detection module to draw boxes around detected faces using fd.enablebox().
  7. The code enters an infinite loop using while 1, which means it will keep running indefinitely until interrupted.
  8. Analyzes the image from the camera for face detection using fd.analysecamera().
  9. The sprite says the detected face expressions obtained from the face detection module using sprite.say(fd.ex * pression()).
  10. The code checks for different face expressions using if statements and performs corresponding actions.
  11. For example, if the face expression is determined to be “happy“, the Quarky device shows a “happy” emotion, and the humanoid performs a dance action.
  12. Similarly, other face expressions like “sad”, “surprised”, and “angry” trigger specific emotional displays on Quarky and corresponding actions on the humanoid.
  13. If none of the predefined face expressions match, the humanoid goes back to its default or “home” position.

Output

Read More
Incorporate a fun activity into your artificial intelligence learning journey by using Humanoid robots to learn about face detection.

Introduction

As we start learning artificial intelligence, let’s make it more engaging by incorporating a fun activity. One of the most popular topics in AI is face detection, and we can make it even more exciting by learning it with the help of Humanoid robots. Are you interested in learning it together?

Code

Logic

  1. Simply drag and drop the RHip(), LHip(), RFoot(), LFoot(), RHand(), LHand() block from the Humanoid extension.
  2. Start the program by initializing the sprite and face detection library parameters.
  3. Use the forever loop block to create a continuous loop.
  4. If the camera detects more than one face, the Humanoid will move forward with a specific time, speed, and dance move with do() motion() times at () speed() block.
  5. If no face is detected, the Humanoid will move backward at a specific time and speed using do() motion() times at () speed() block.

Output

Read More
Learn about face-tracking, and how to code a face-tracking Quadruped robot using sensors and computer vision techniques.

Introduction

A face-tracking robot is a type of robot that uses sensors and algorithms to detect and track human faces in real-time. The robot’s sensors, such as cameras or infrared sensors, capture images or videos of the surrounding environment and use computer vision techniques to analyze the data and identify human faces.
Face-tracking robots have many potential applications, including in security systems, entertainment, and personal robotics. For example, a face-tracking robot could be used in a museum or amusement park to interact with visitors, or in a home as a companion robot that can recognize and follow the faces of family members.

One of the most fascinating activities is face tracking, in which the Quadruped can detect a face and move its head in the same direction as yours. How intriguing it sounds, so let’s get started with the coding for a face-tracking Quadruped robot.

Logic

  1. If the face is tracked at the center of the stage, the Quadruped should be straight.
  2. As the face moves to the left side, the Quadruped will also move to the left side.
  3. As the face moves to the right side, the Quadruped will also move to the right side.

Code Explain

  1. Drag and drop the when green flag clicked block from the Events palette.
  2. Then, add a turn () video on stage with () % transparency block from the Face Detection extension and select one from the drop-down. This will turn on the camera.
  3. Add the set pins FR Hip () FL Hip () FR Leg () FL Leg() BR Hip () BL Hip () BR Leg () BL Leg () block from the Humanoid extension.
  4. Click on the green flag and your camera should start. Make sure this part is working before moving further.
  5. Add the forever block below turn () video on stage with () % transparency from the Control palette.
  6. Inside the forever block, add an analyzed image from the () block. This block will analyze the face the camera detects. Select the camera from the dropdown.
  7. Create a variable called Angle that will track the angle of the face. Based on the angle, the robot will move to adjust its position.
  8. Here comes the logical part as in this, the position of the face on the stage matters a lot. Keeping that in mind, we will add the division () / () block from the Operator palette into the scripting area.
  9. Place get () of the face () at the first place of addition () + (), and 3 at the second place. From the dropdown select X position.
  10. If the angle value is greater than 90, the Humanoid will move left at a specific speed. If the angle is less than 90, the Humanoid will move right at a specific speed. If the angle is exactly 90, the Humanoid will return to its home position.
Block Explained

  1. Create a variable called Angle and assign it the value of the face’s position.
  2. At the center of the stage, we will get the X position value which is zero.
  3. As we move to the left side the X position value will give you the negative value and as we move to the right side the X position value will give you the positive value.
  4. The x position value is divided by 3 which gives precise positioning.
  5. To set the angle at 90 when the face is at the center of the stage we have added 90 to the X position value.
  6. As we move to the left side the angle value will get decreased as the X position value is going in negative.
  7. As we move to the right side the angle value will get increased as the X position value is going in positive.

Code

Output

Our next step is to check whether it is working right or not. Whenever your face will come in front of the camera, it should detect it and as you move to the right or left, the head of your  Quadruped robot should also move accordingly.

Read More
All articles loaded
No more articles to load