
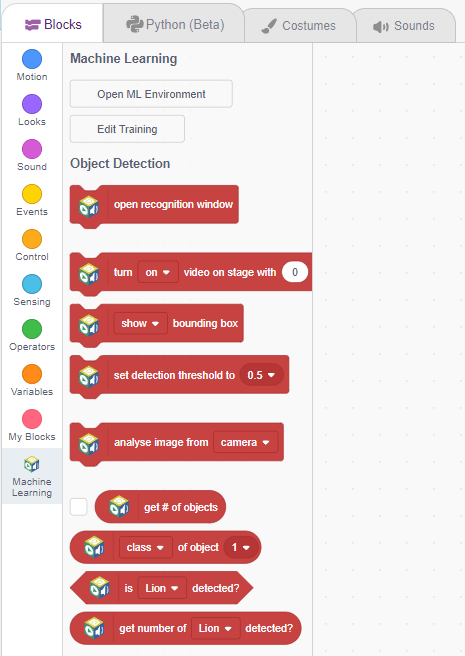
The Object Detection extension of the PictoBlox Machine Learning Environment is used to detect particular targets present in a given picture.
There is always confusion between image classification and object detection. Let’s look at it.
Image Classification deals with categorizing images based on their characteristics. These characteristics are observed and extracted from the images by the training model. Once extracted, these characteristics can be used as a set of rules to classify previously unseen data. Let’s understand this with an example.
Observe these images:
Image 1:
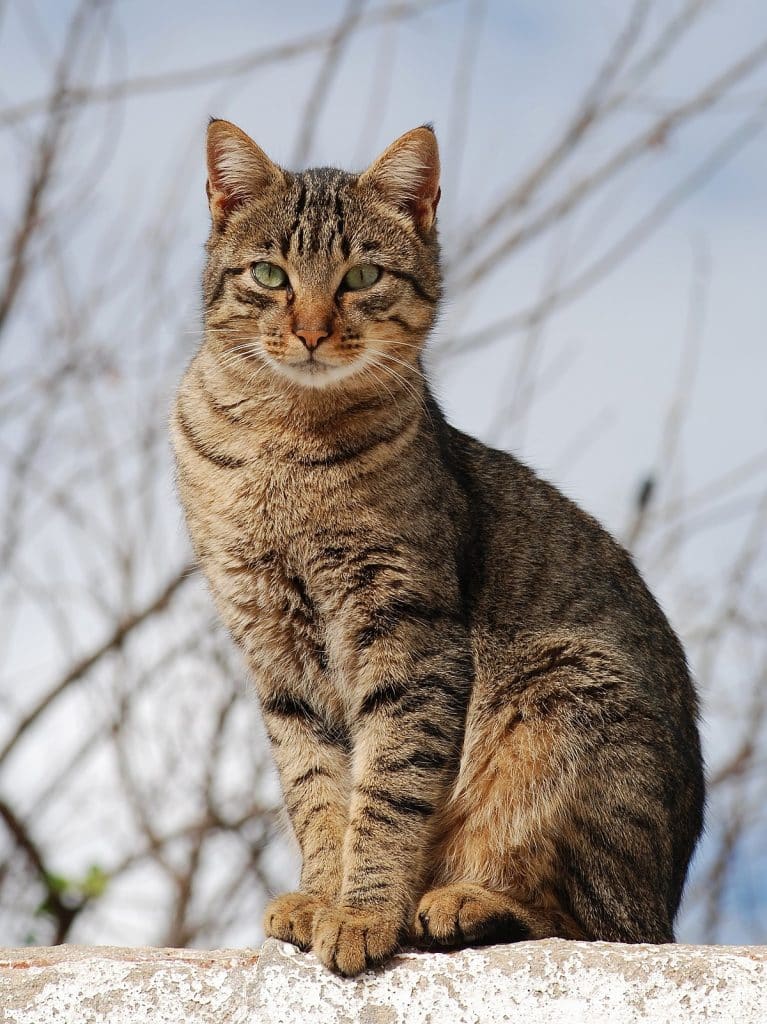
Image 2:
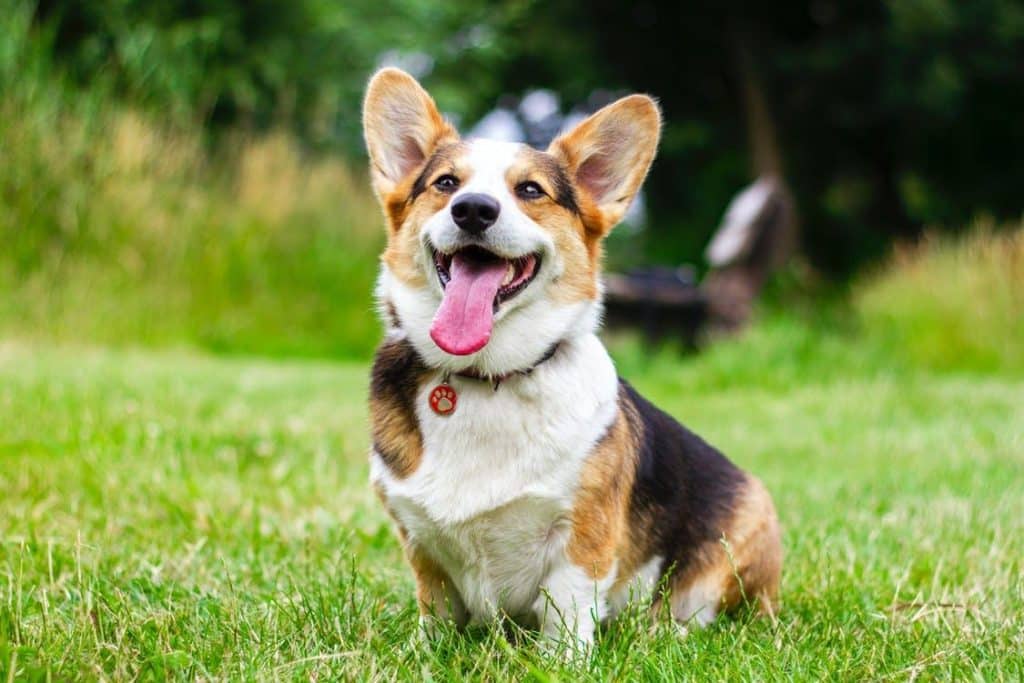
Thanks to the human brain, it’s no big feat for us to make out that Image 1 is that of a cat and Image 2 is that of a dog. However, computers do not possess the intelligence we do, hence we need to train them to recognize such images. The same is true for any scenario where we want the computer to categorize data.
Now observe this image:
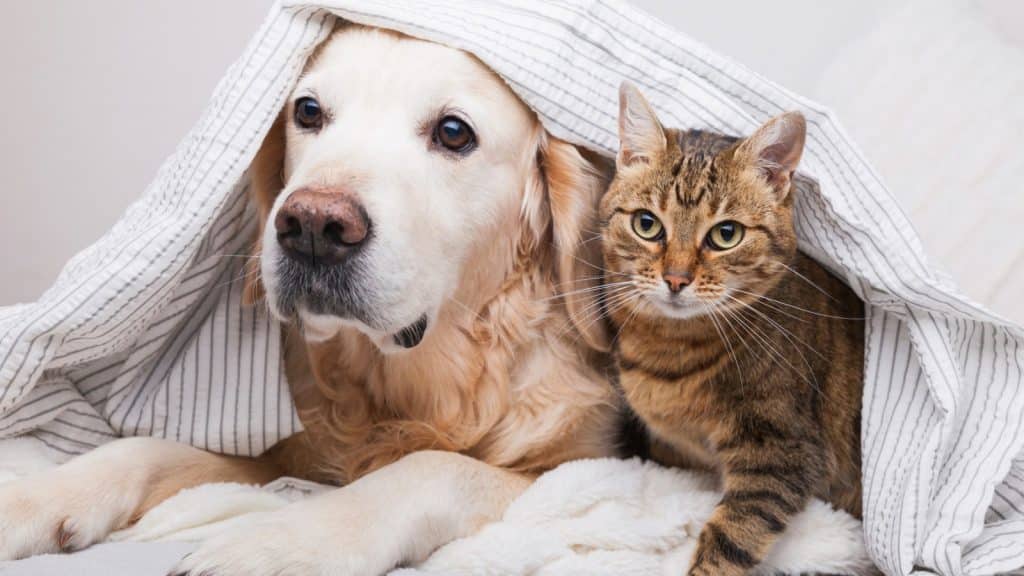
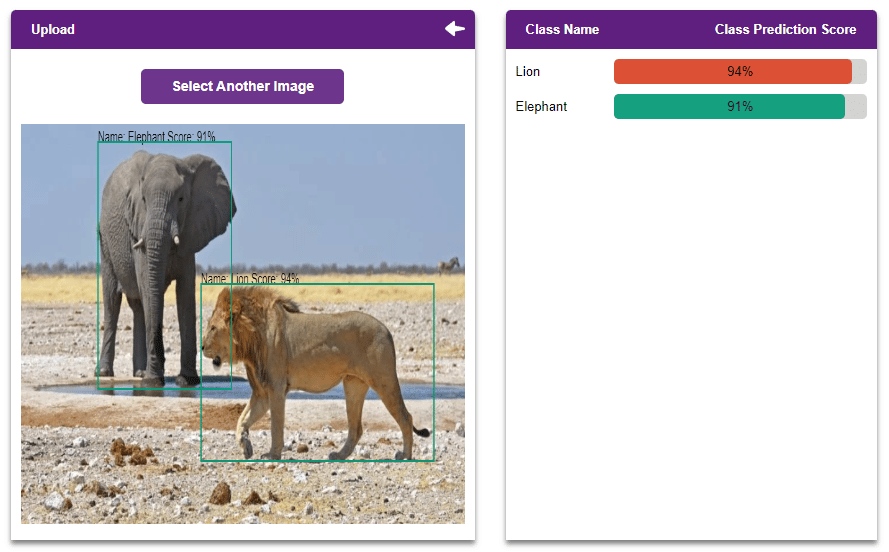
Again, our human brain doesn’t break a sweat in making out that there are two animals in the picture, one cat, and one dog. However, a computer trained to recognize cats and dogs separately will not be able to make complete sense of the image. This is where object detection comes into play.
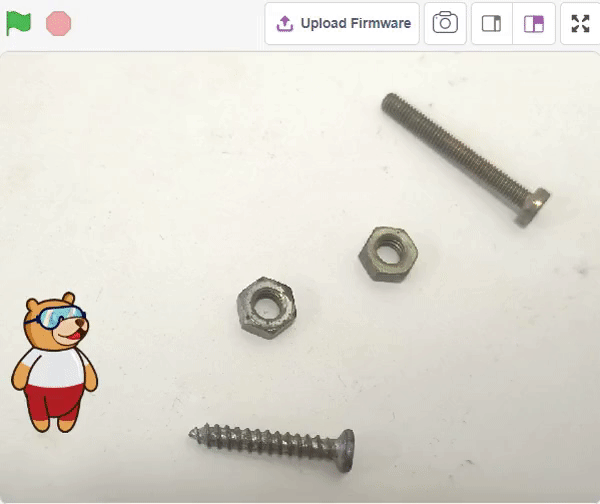
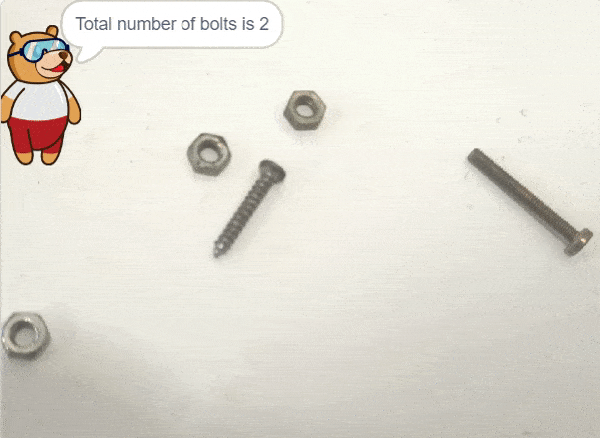
The biggest characteristic of Object Detection is the fact that it takes the location of objects into consideration. Object Detection algorithms can detect not only the class of the target objects but also their location.
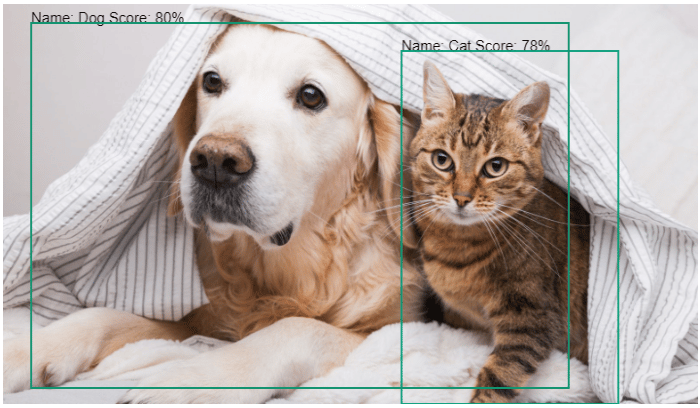
Hence, Object Detection is extremely useful when there are multiple objects present in an image.

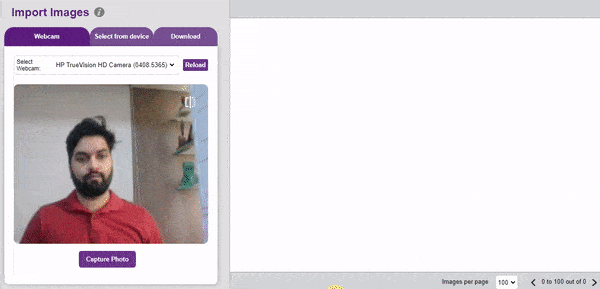
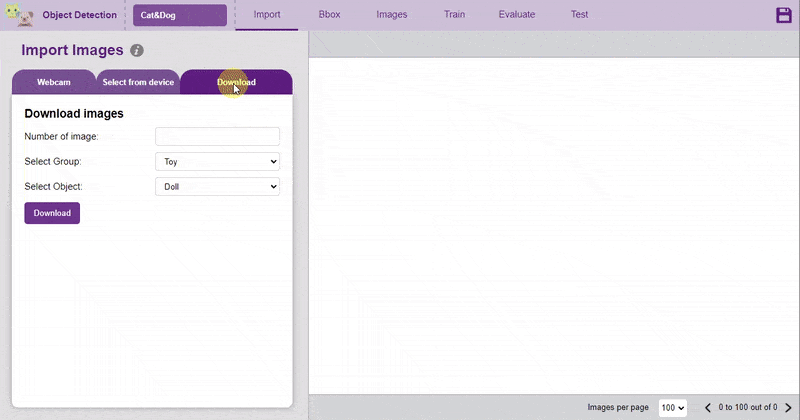
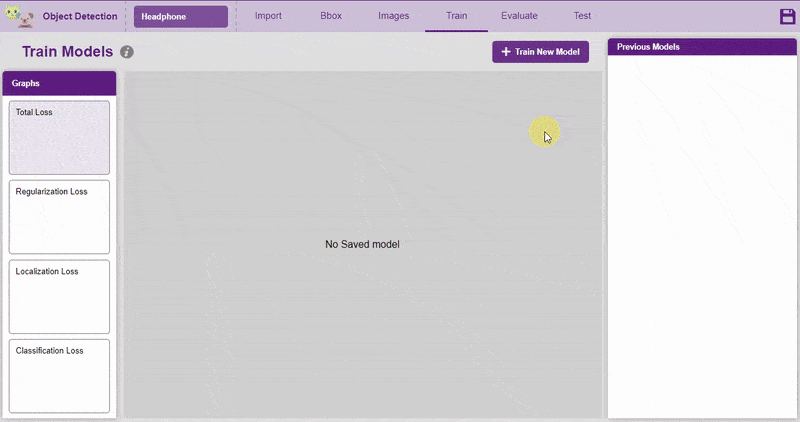
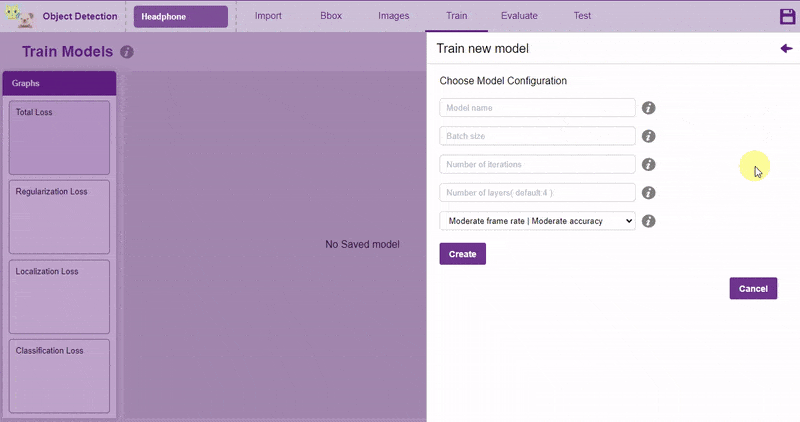
Follow the steps below:


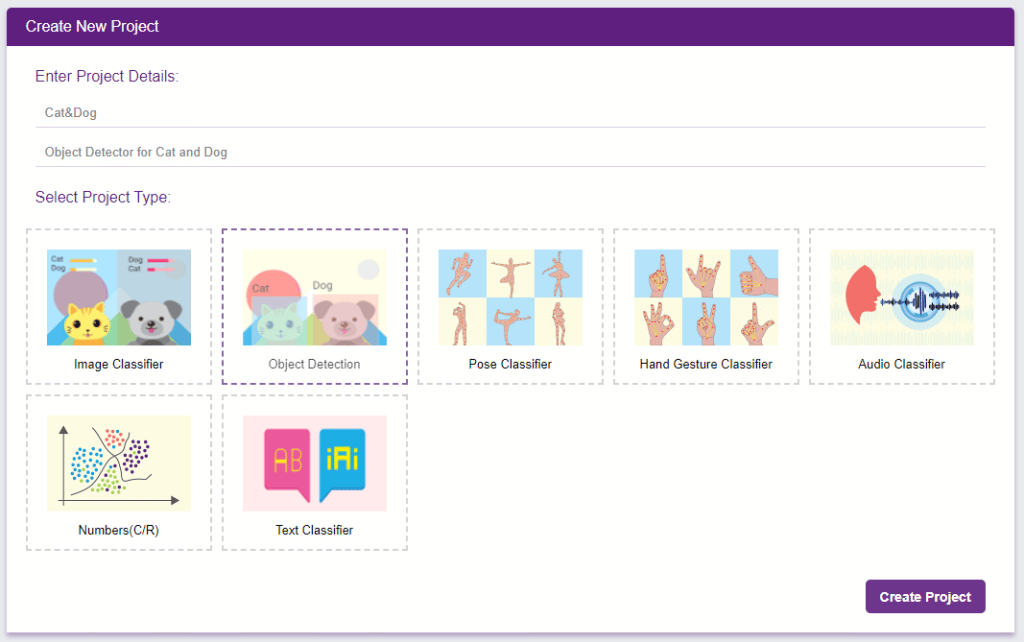
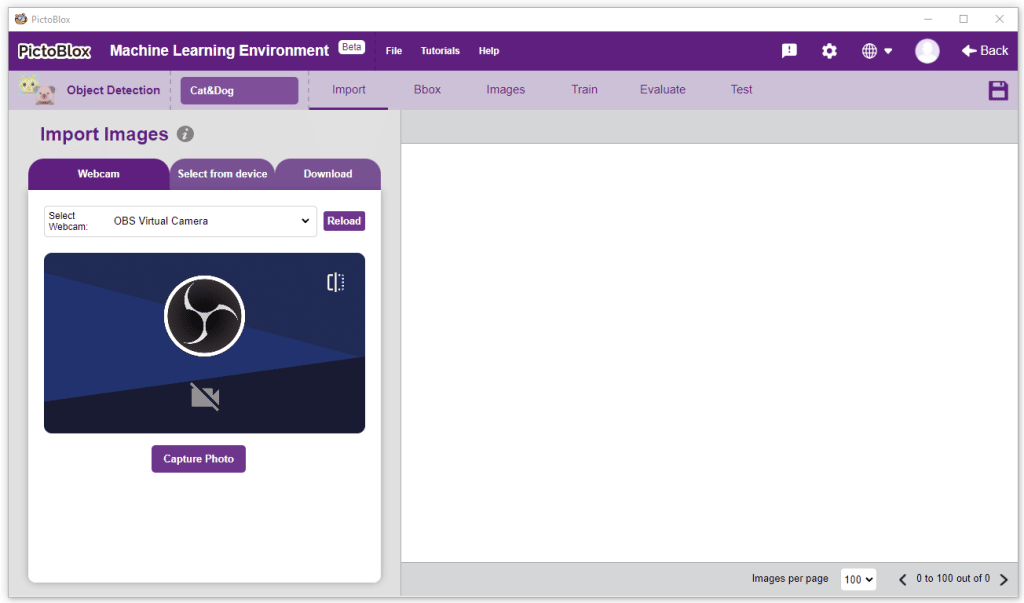
There are 3 ways to add the images to the project:
 The images imported from the Database are already labeled for training.
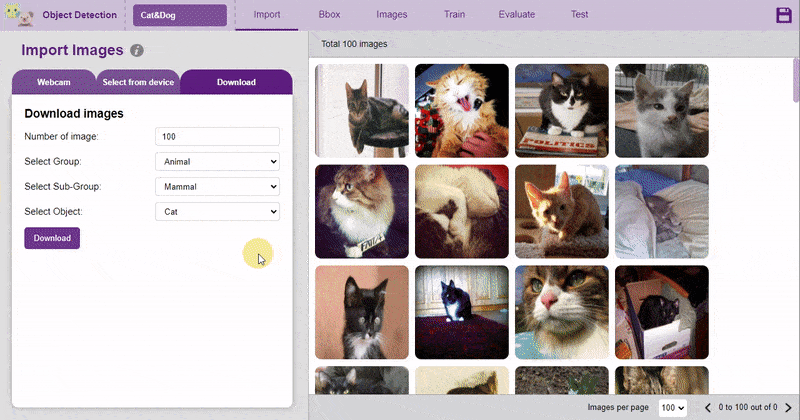

A bounding box is an imaginary rectangle that serves as a point of reference for object detection and creates a collision box for that object.
We draw these rectangles over images, outlining the object of interest within each image by defining its X and Y coordinates. This makes it easier for machine learning algorithms to find what they’re looking for, determine collision paths, and conserves valuable computing resources.
Object detection has two components: object classification and object localization. In other words, to detect an object in an image, the computer needs to know what it is and where it is.
Take self-driving cars as an example. An annotator will draw bounding boxes around other vehicles and label them. This helps train an algorithm to understand what vehicles look like. Annotating objects such as vehicles, traffic signals, and pedestrians makes it possible for autonomous vehicles to maneuver busy streets safely. Self-driving car perception models rely heavily on bounding boxes to make this possible.
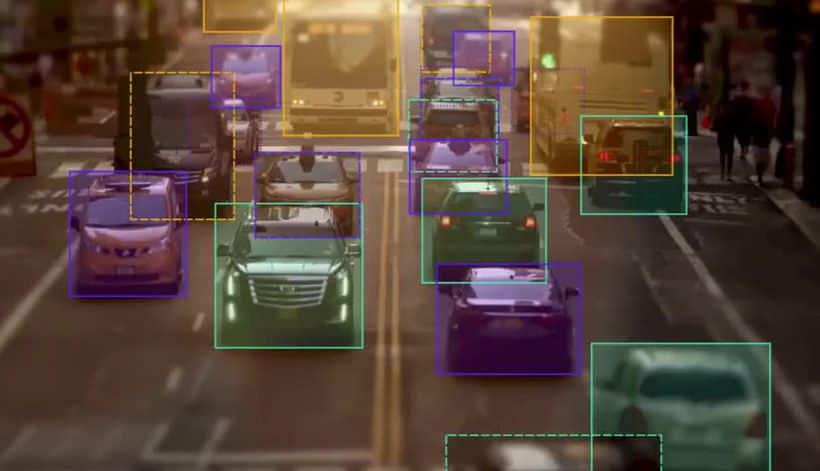
Bounding boxes are used in all of these areas to train algorithms to identify patterns.
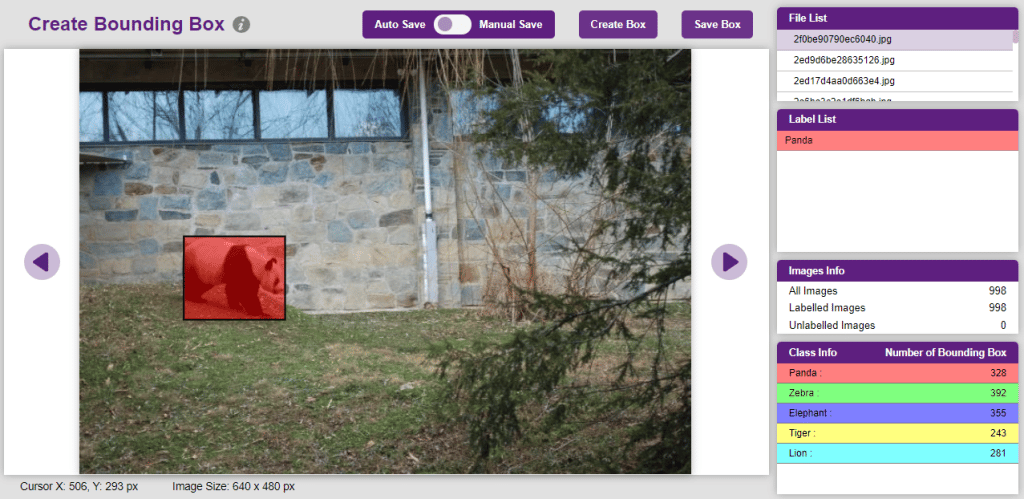
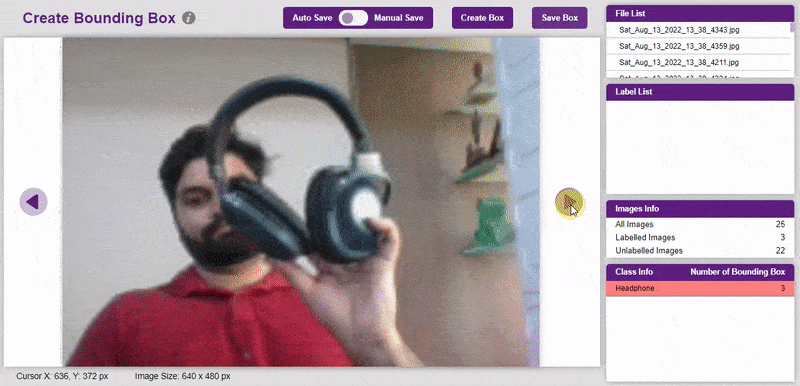
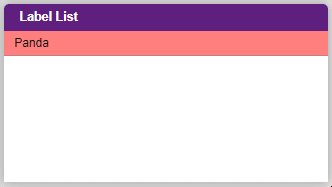
To create the bounding box in the images, click on the “Create Box” button, to create a bounding box. After the box is drawn, go to the “Label List” column and click on the edit button, and type in a name for the object under the bounding box. This name will become a class. Once you’ve entered the name, click on the tick mark to label the object.
Once you’ve labeled an object, its count is updated in the “Class Info” column. You can simply click on the class to classify another object under that label.
Options in Bounding Box:

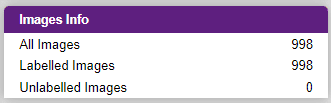
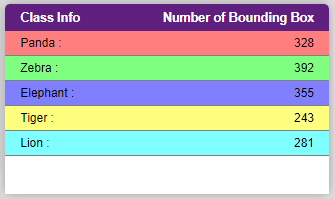
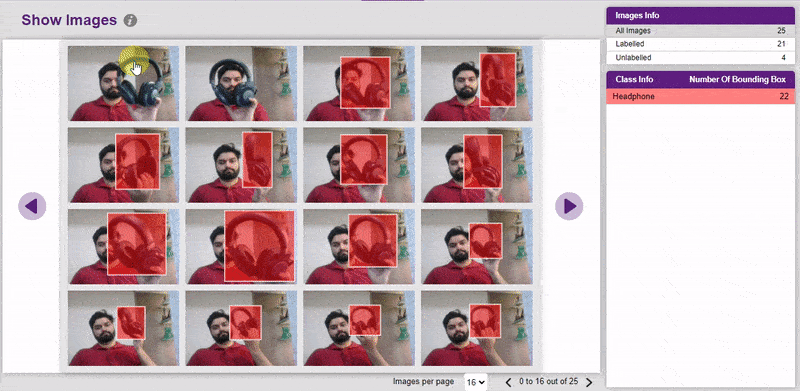
It is important that we analyze how the images are labeled. The Images tab allows you to analyze the images.
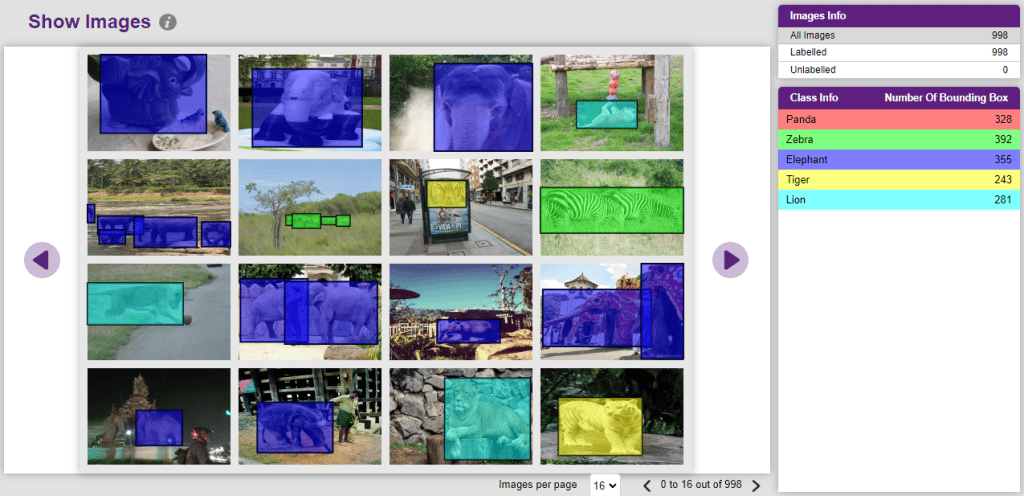
You can edit the images by clicking directly on the images.
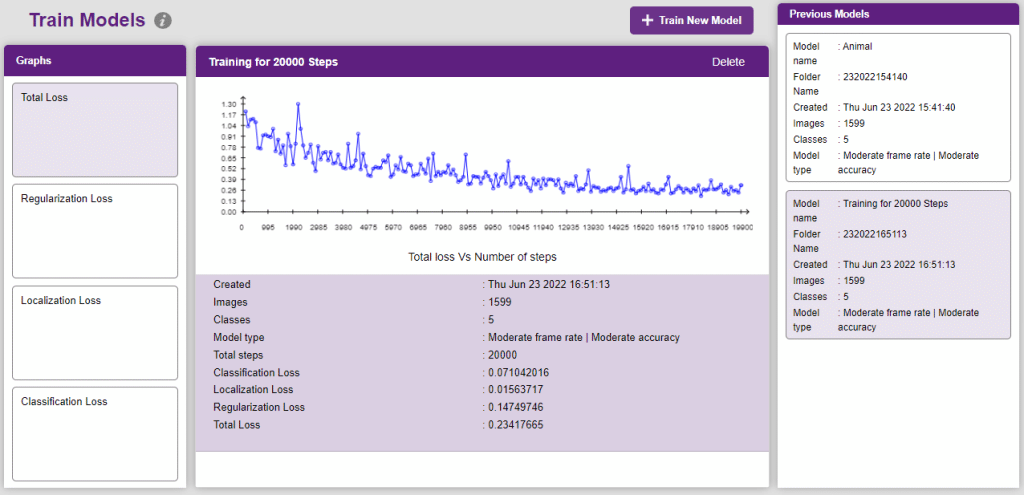
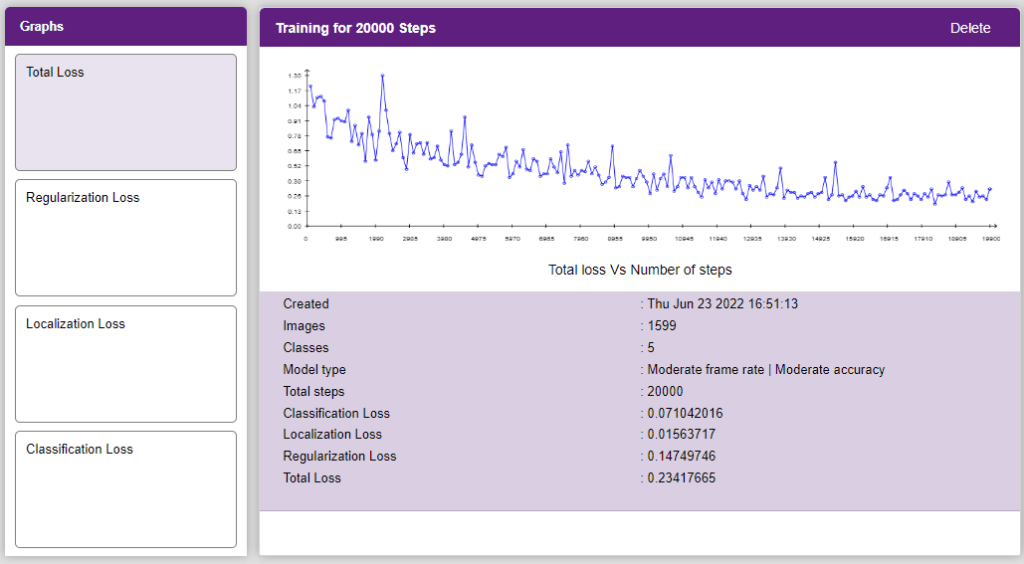
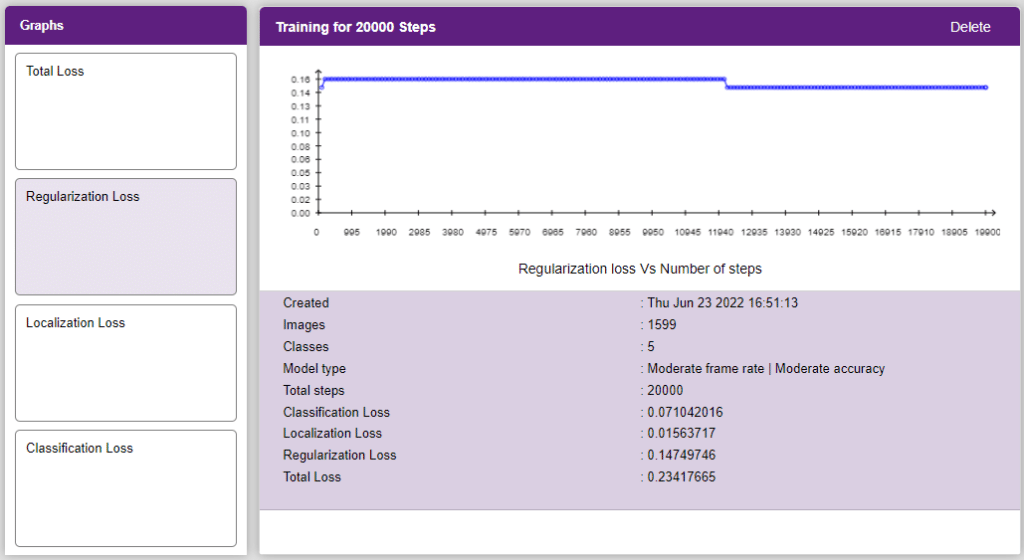
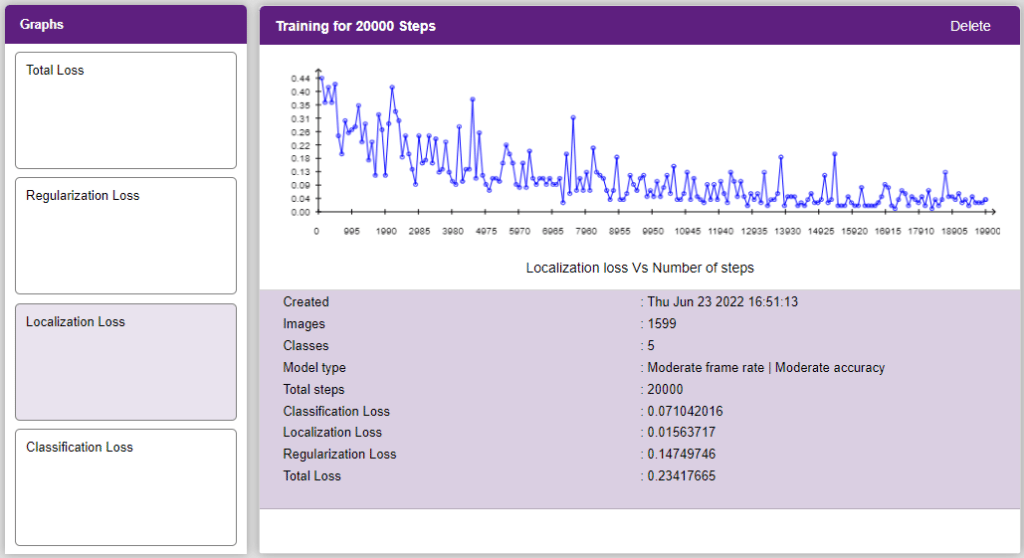
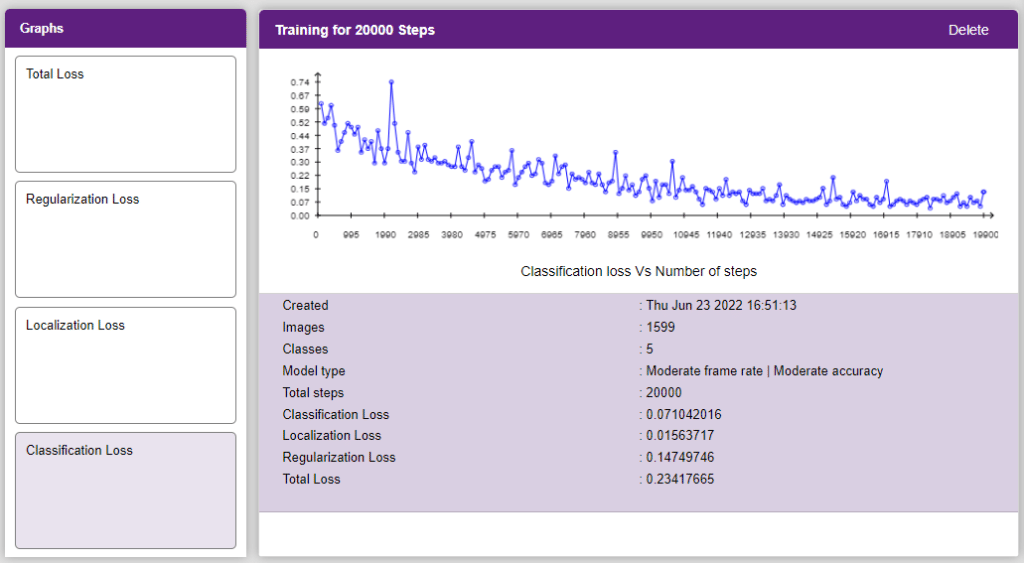
In Object Detection, the model must locate and identify all the targets in the given image. This makes Object Detection a complex task to execute. Hence, the hyperparameters work differently in the Object Detection Extension.
Follow the process:
Now, let’s move to the “Evaluate” tab. You can view True Positives, False Negatives, and False Positives for each class here along with metrics like Precision and Recall.
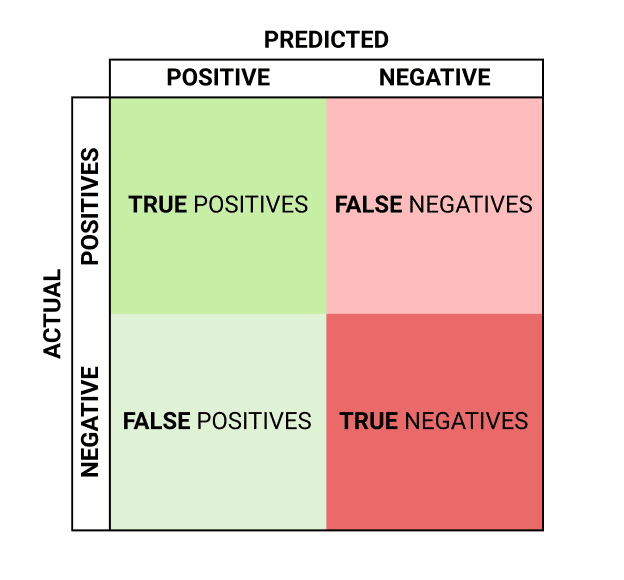
Precision and recall are two numbers that together are used to evaluate the performance of object detection.
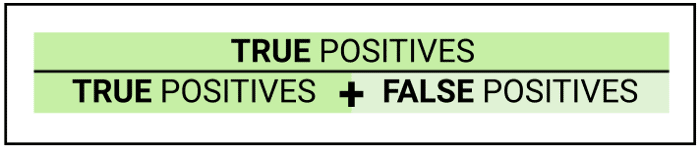
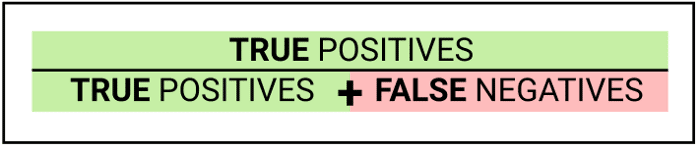
A perfect model has precision and recalls both equal to 1.
You can visualize the Precision and Recall in the Evaluation graphs of the class or the whole model:
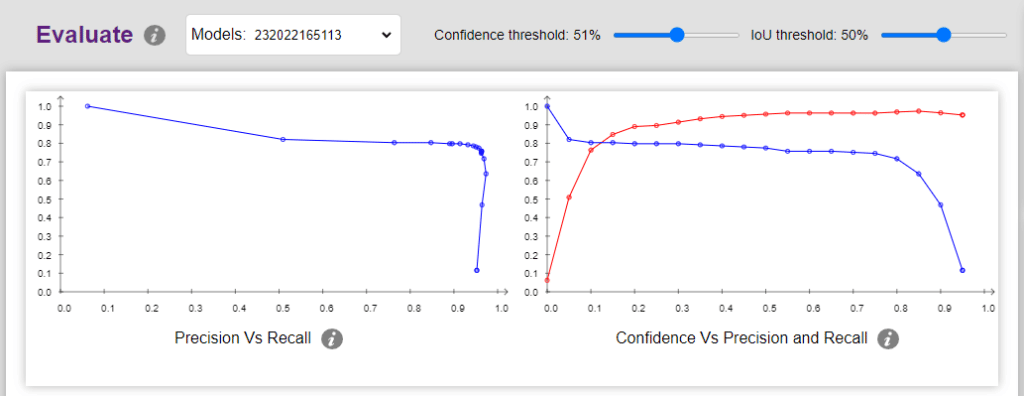
You can select the individual class and look at the performance of the class:
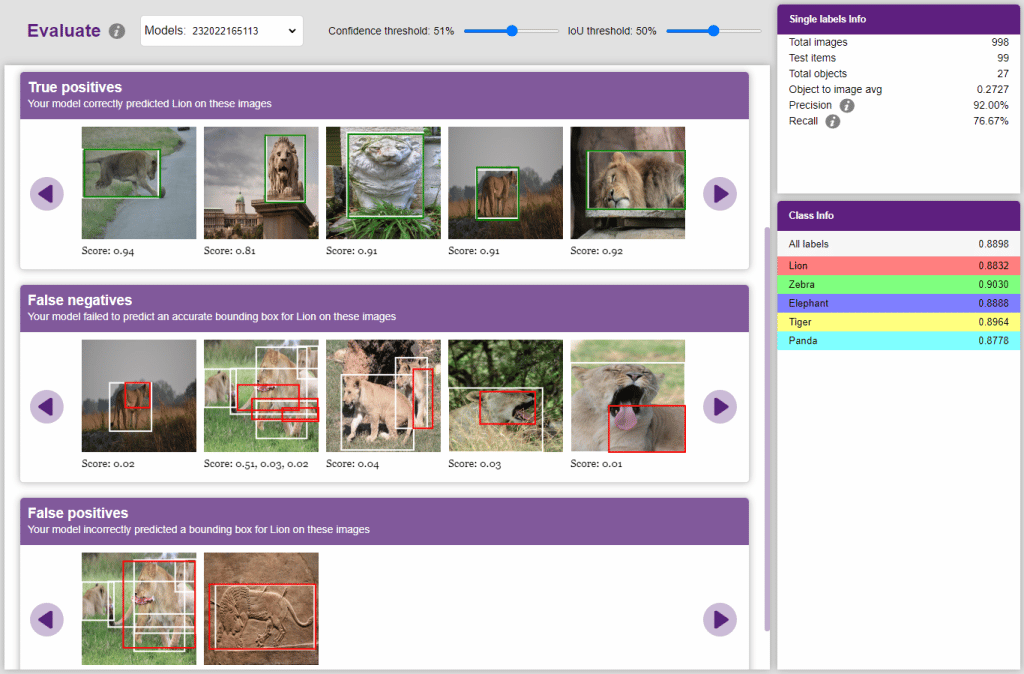
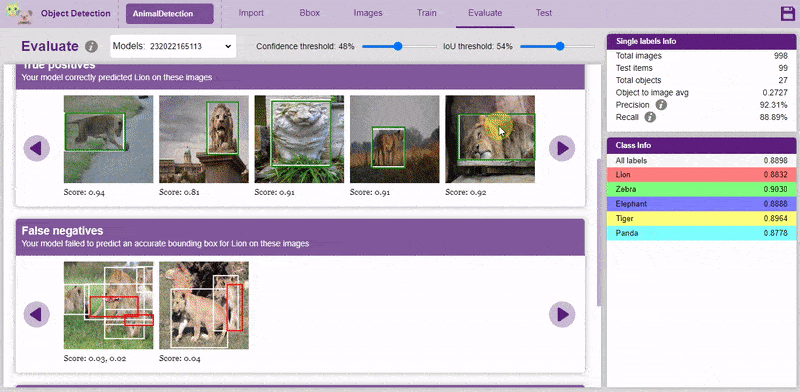
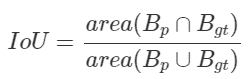
Both confidence score and IoU are used as the criteria that determine whether detection is a true positive or a false positive.
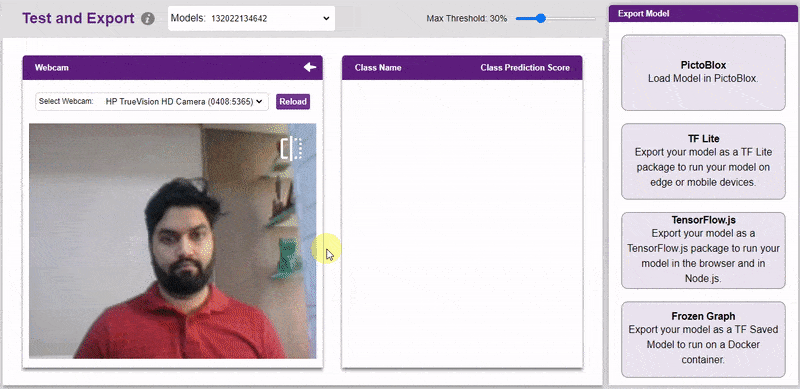
The model can be tested with the following methods:
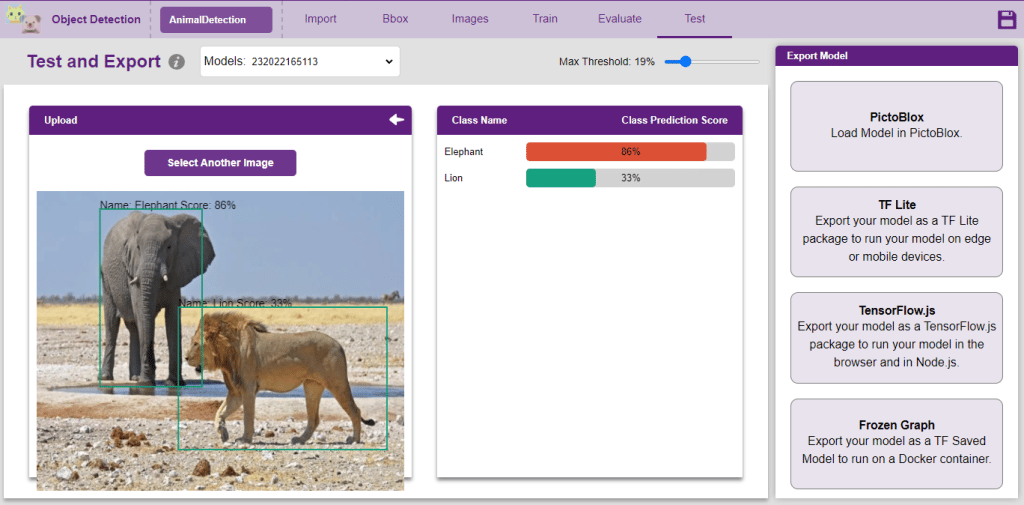
The model will return the probability of the input belonging to the classes.
The Model can be exported to 4 different forms:
Click on the “PictoBlox” button, and PictoBlox will load your model into the Block Coding Environment if you have opened the ML Environment in the Block Coding.
Click on the “PictoBlox” button, and PictoBlox will load your model into the Python Coding Environment if you have opened the ML Environment in Python Coding.
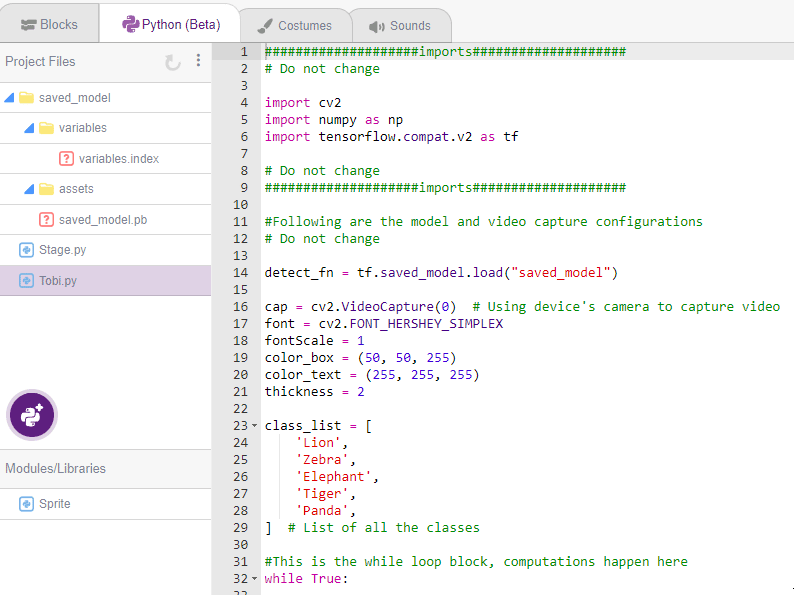
The following code appears in the Python Editor of the selected sprite.
####################imports####################
# Do not change

import cv2
import numpy as np
import tensorflow.compat.v2 as tf

# Do not change
####################imports####################

#Following are the model and video capture configurations
# Do not change

detect_fn = tf.saved_model.load("saved_model")

cap = cv2.VideoCapture(0)  # Using device's camera to capture video
font = cv2.FONT_HERSHEY_SIMPLEX
fontScale = 1
color_box = (50, 50, 255)
color_text = (255, 255, 255)
thickness = 2

class_list = [
    'Lion',
    'Zebra',
    'Elephant',
    'Tiger',
    'Panda',
]  # List of all the classes

#This is the while loop block, computations happen here
while True:

  ret, image_np = cap.read()  # Read Frame
  height, width, channels = image_np.shape  # Get height, wdith
  image_resized = cv2.resize(image_np,
                             (320, 320))  # Resize image to model input size
  input_tensor = tf.convert_to_tensor(image_resized)  # Convert image to tensor
  input_tensor = input_tensor[tf.newaxis,
                              ...]  # Expanding the tensor dimensions

  detections = detect_fn(input_tensor)  #Pass image to model

  num_detections = int(detections.pop('num_detections'))  #Postprocessing
  detections = {
      key: value[0, :num_detections].numpy()
      for key, value in detections.items()
  }
  detections['num_detections'] = num_detections
  detections['detection_classes'] = detections['detection_classes'].astype(
      np.int64)

  # Draw recangle around detection object
  for j in range(len(detections['detection_boxes'])):
    # Set minimum threshold to 0.3
    if (detections['detection_scores'][j] > 0.3):
      # Starting and end point of detected object
      starting_point = (int(detections['detection_boxes'][j][1] * width),
                        int(detections['detection_boxes'][j][0] * height))
      end_point = (int(detections['detection_boxes'][j][3] * width),
                   int(detections['detection_boxes'][j][2] * height))
      # Class name of detected object
      className = class_list[detections['detection_classes'][j] - 1]
      # Starting point of text
      starting_point_text = (int(
          detections['detection_boxes'][j][1] *
          width), int(detections['detection_boxes'][j][0] * height) - 5)
      # Draw rectangle and put text
      image_np = cv2.rectangle(image_np, starting_point, end_point, color_box,
                               thickness)
      image_np = cv2.putText(image_np, className, starting_point_text, font,
                             fontScale, color_text, thickness, cv2.LINE_AA)
  # Show image in new window
  cv2.imshow("Detection Window", image_np)

  if cv2.waitKey(25) & 0xFF == ord(
      'q'):  # Press 'q' to close the classification window
    break

cap.release()  # Stops taking video input
cv2.destroyAllWindows()  # Closes input window