Table of Contents

Function Definition: runtimedrobot(direction = "FORWARD", speed = 100, time = 1)

Parameters

NameTypeDescriptionExpected ValuesDefault Value
directionstringThe specific motion you want to give the robot."FORWARD", "BACKWARD", "LEFT", or "RIGHT""FORWARD"
speedintThe speed of the robot.0 to 100100
timeintTime in seconds for the motion.Integer1

Description

The function moves the Quarky robot in the specified direction for the specified time. The direction can be “FORWARD”, “BACKWARD”, “LEFT”, and “RIGHT”.

Example

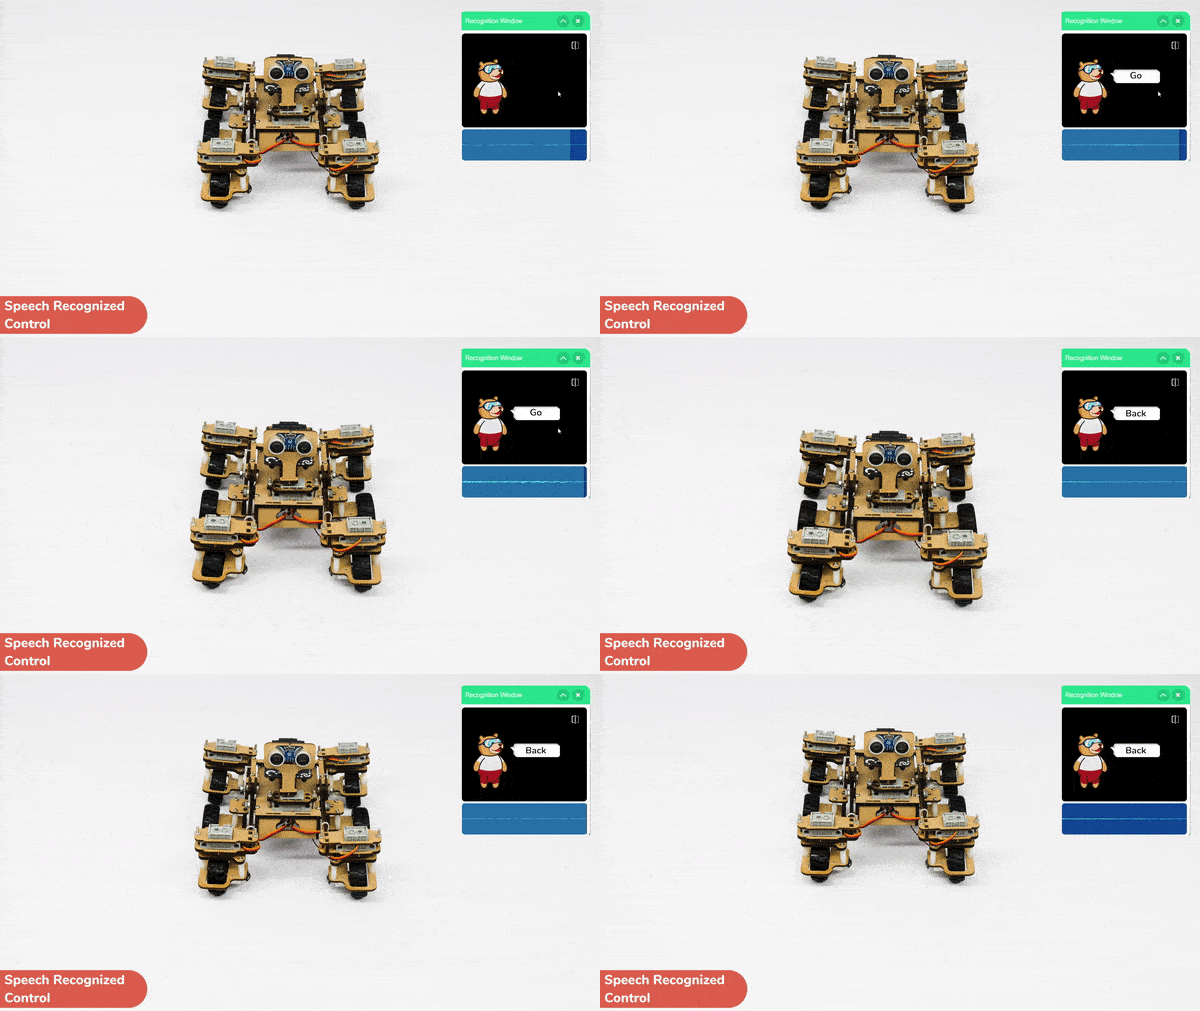
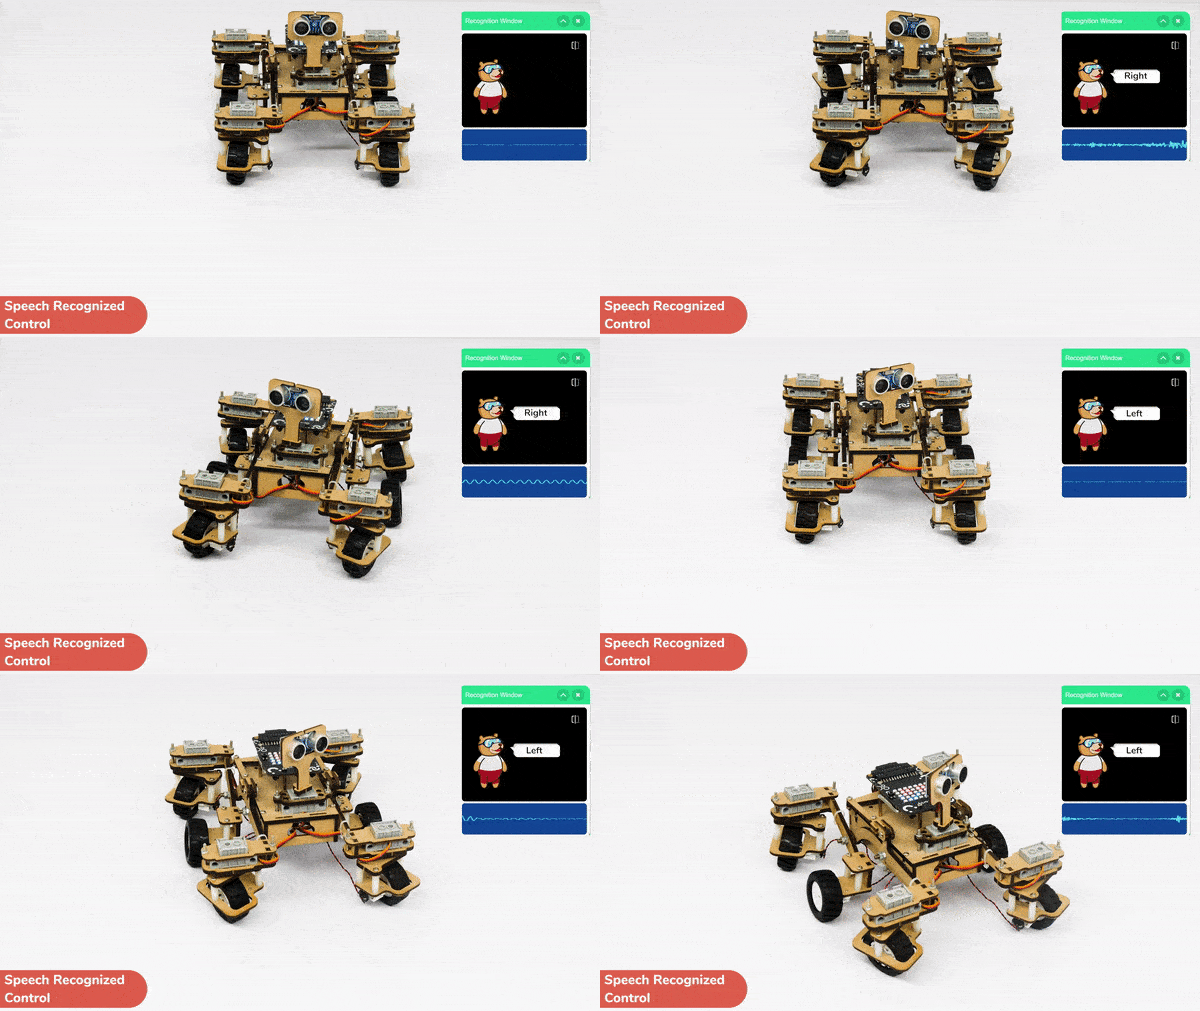
Learn how to code logic for speech recognized control of Mars Rover with this example block code. You will be able to direct your own Mars Rover easily by just speaking commands.

Learn how to code logic for speech-recognized control of Mars Rover with this example block code. You will be able to direct your own Mars Rover easily by just speaking commands.

Introduction

A speech-recognized controlled Mars Rover robot is a robot that can recognize and interpret our speech, and verbal commands, given by a human. The code uses the speech recognition model that will be able to record and analyze your speech given and react accordingly on the Mars Rover.

Speech recognition robots can be used in manufacturing and other industrial settings to control machinery, perform quality control checks, and monitor equipment.

They are also used to help patients with disabilities to communicate with their caregivers, or to provide medication reminders and other health-related information.

Code

sprite=Sprite('Tobi')
import time
rover = MarsRover(4, 1, 7, 2, 6)
quarky = Quarky()
sr = SpeechRecognition()
ts = TexttoSpeech()
sr.analysespeech(4, "en-US")
command = sr.speechresult()
command = command.lower()
if 'forward' in command:
  rover.home()
  rover.setinangle(0)
  quarky.runtimedrobot("F",100,3)
elif 'back' in command:
  rover.home()
  rover.setinangle(0)
  quarky.runtimedrobot("B",100,3)
elif 'right' in command:
  rover.home()
  rover.setinangle(40)
  quarky.runtimedrobot("R",100,3)
elif 'left' in command:
  rover.home()
  rover.setinangle(40)
  quarky.runtimedrobot("L",100,3)

time.sleep(10)
sprite.stopallsounds()

Logic

  1. Firstly, the code initializes the Mars Rover pins and starts recording the microphone of the device to store the audio command of the user.
  2. The code then checks conditions whether the command included the word “Go” or not. You can use customized commands and test for different conditions on your own.
  3. If the first condition stands false, the code again checks for different keywords that are included in the command.
  4. When any condition stands true, the robot will align itself accordingly and move in the direction of the respective command.

Output

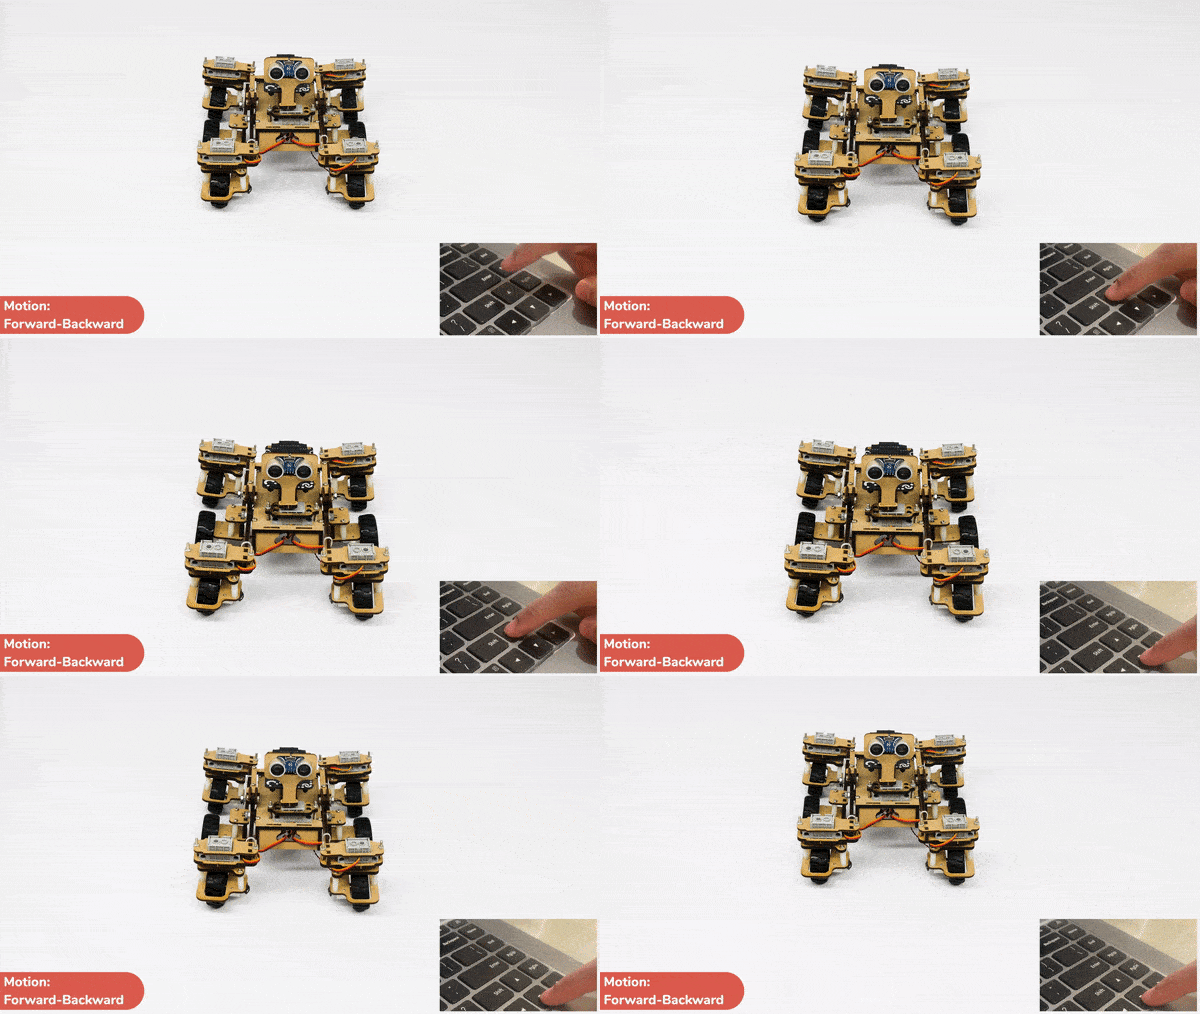
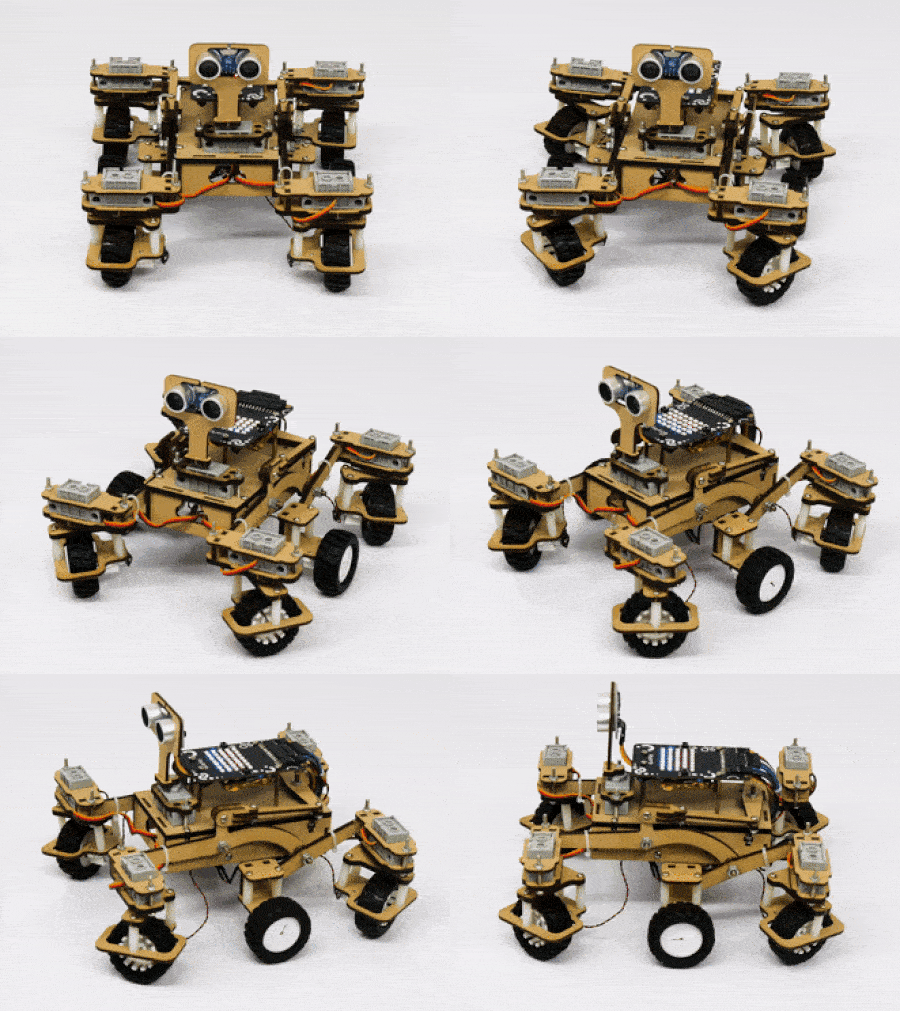
Forward-Backward Motions:

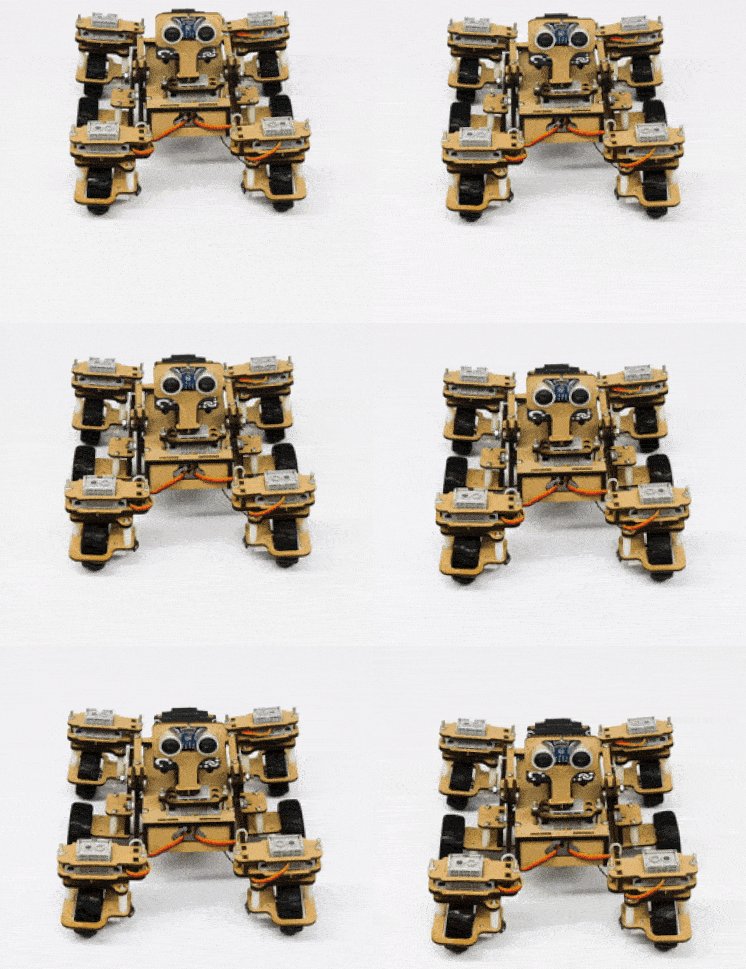
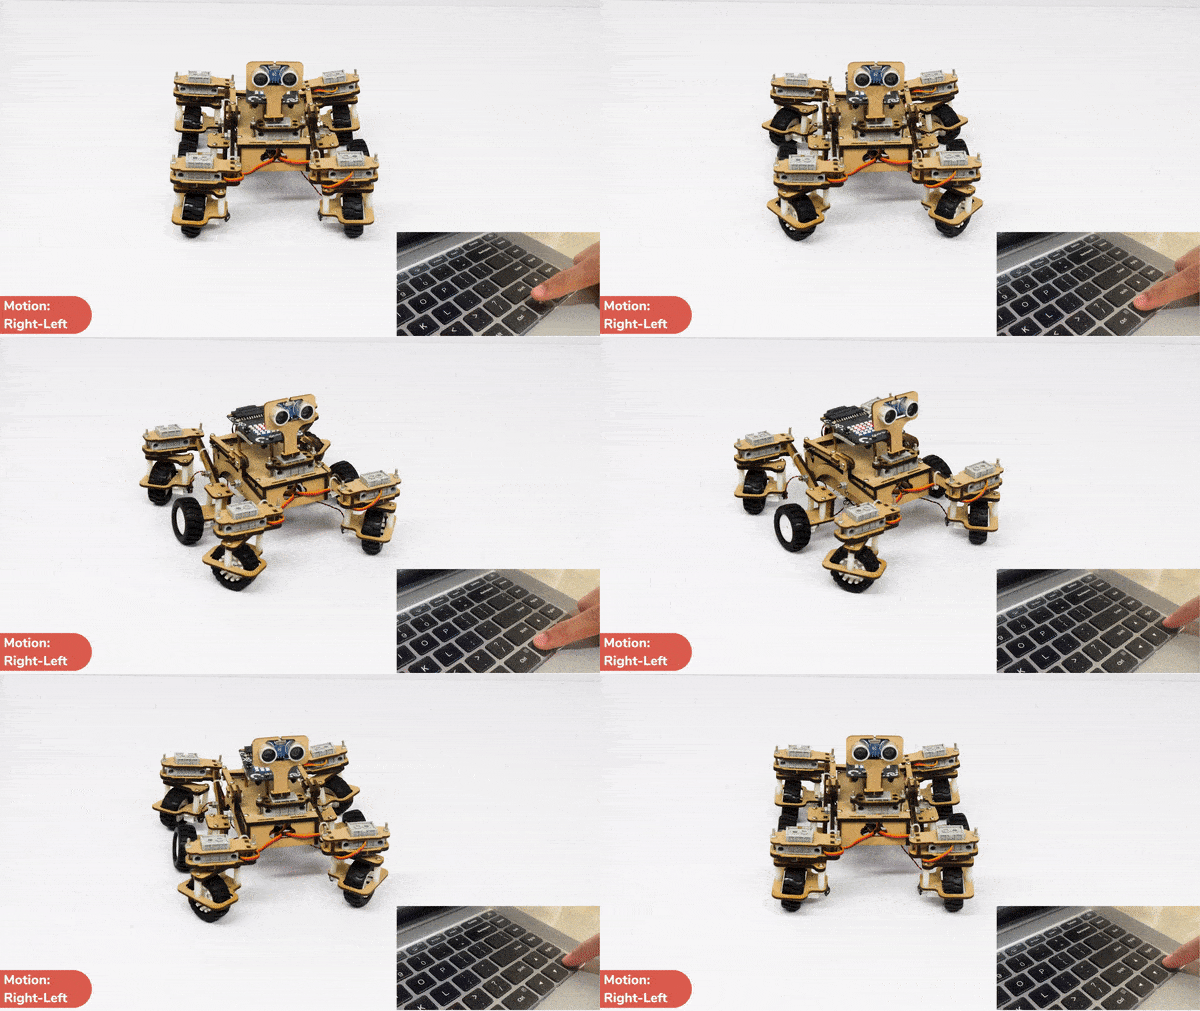
Right-Left Motions:

Read More
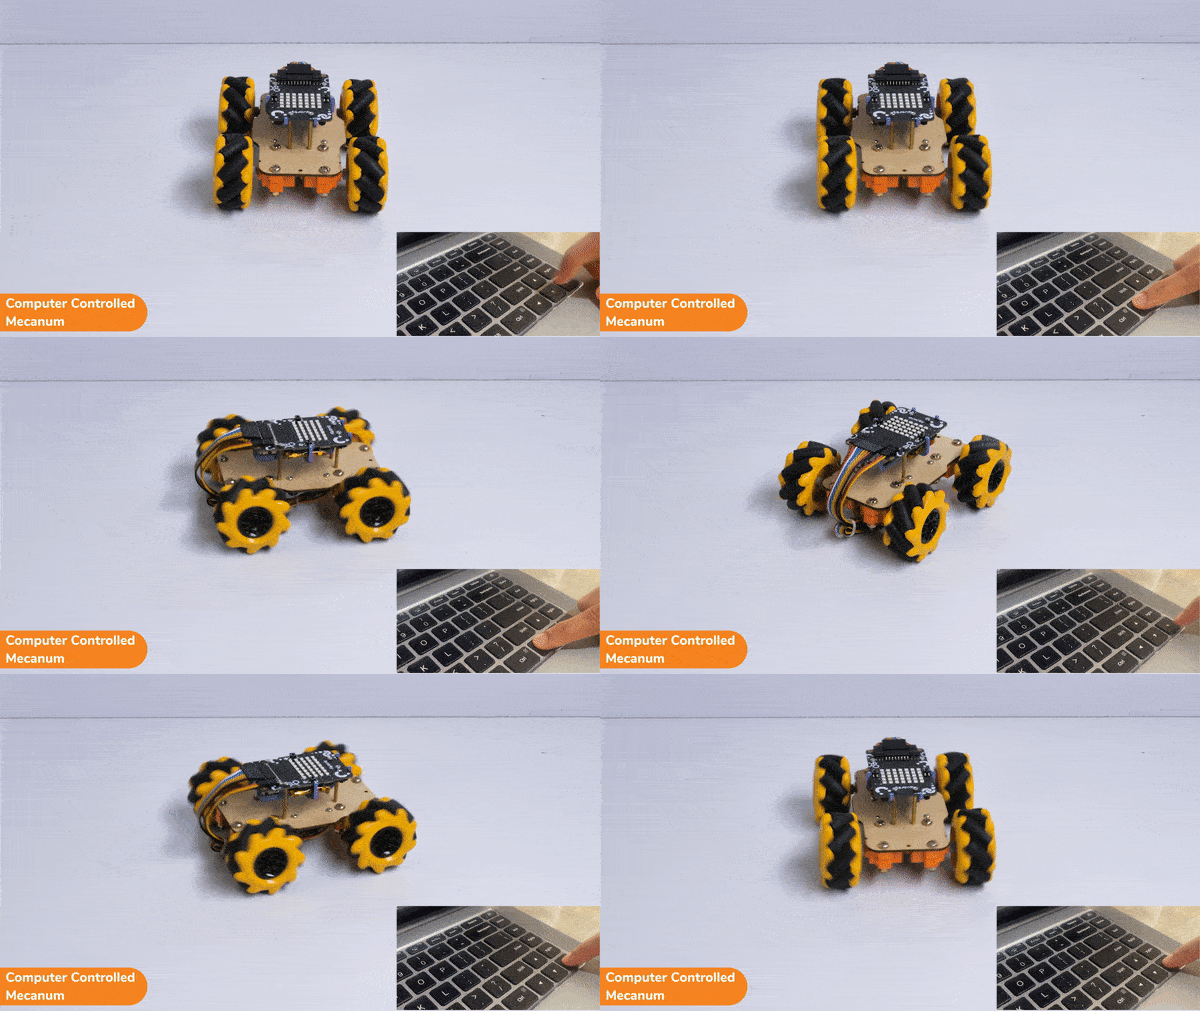
Learn how to control the Mecanum using PictoBlox with keyboard inputs using Python. Make the Mecanum move forward, backward, turn left, and turn right along with unique lateral motions!

In this activity, we will make the computer program that controls the Mecanum Robot. It’s like a remote-control car. You can press different keys on the keyboard to make the Mecanum move forward, backward, left, and right.

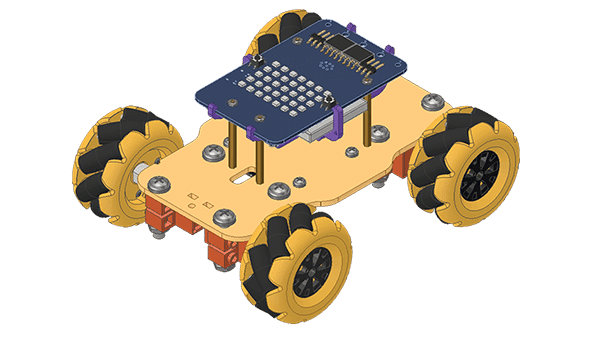
The Quarky Mecanum Wheel Robot is a type of robot that uses a special type of wheel to move. The wheel is made of four rollers mounted at 45- degree angles to the wheel‘s hub. Each roller has its own motor and can spin in either direction. This allows the wheel to move in any direction, making it an ideal choice for navigating around obstacles and tight spaces. The Mecanum wheel robot can also turn on the spot, allowing it to make sharp turns without having to reverse direction.

Coding Steps

Follow the steps:

  1. Open a new project in PictoBlox.
  2. Connect Quarky to PictoBlox.
  3. Click on the Add Extension button and add the Quarky Mecanum extension.
  4. Now we will first initialize the Mecanum robots and the servos before starting the main code.
  5. The main code will consist of nested if-else conditions that will check specific conditions on which key is pressed and will react accordingly. We will use the arrow keys for basic movements (Forward, Backward, Left Right) and the keys “a” for lateral left movement and “d” for lateral right movement.

Code

sprite=Sprite('Tobi')
import time
quarky = Quarky()
robot = Mecanum(1, 2, 7, 8)
while True:
  if sprite.iskeypressed("up arrow"):
	  robot.runtimedrobot("forward",100,2)
	
  if sprite.iskeypressed("down arrow"):
    robot.runtimedrobot("backward",100,1)
  
  if sprite.iskeypressed("right arrow"):
    robot.runtimedrobot("circular right",70,1)
  
  if sprite.iskeypressed("left arrow"):
    robot.runtimedrobot("circular left",70,1)
  
  if sprite.iskeypressed("a"):
    robot.runtimedrobot("lateral left",100,1)
  if sprite.iskeypressed("d"):
    robot.runtimedrobot("lateral right",100,1)

Output

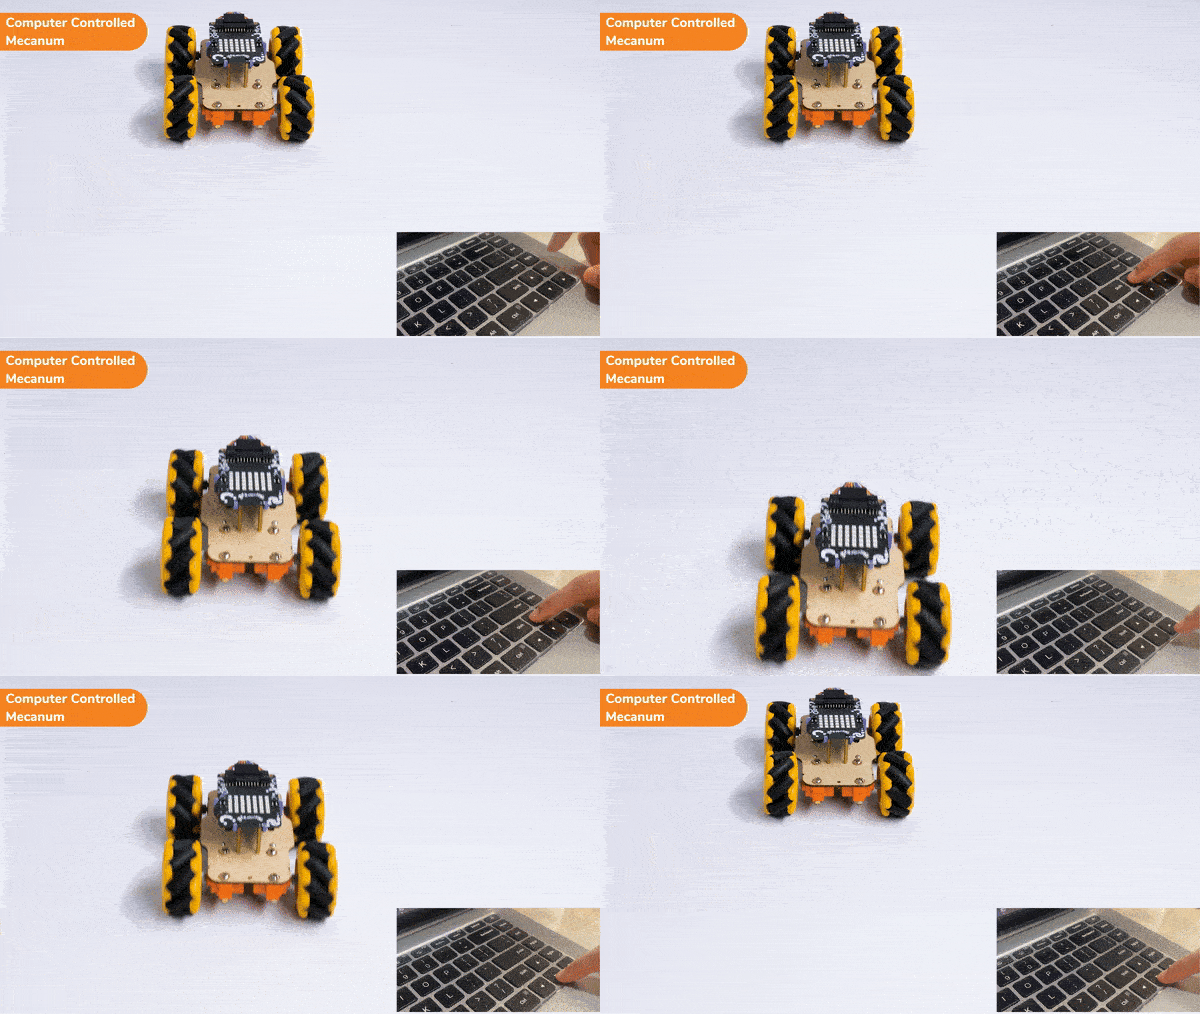
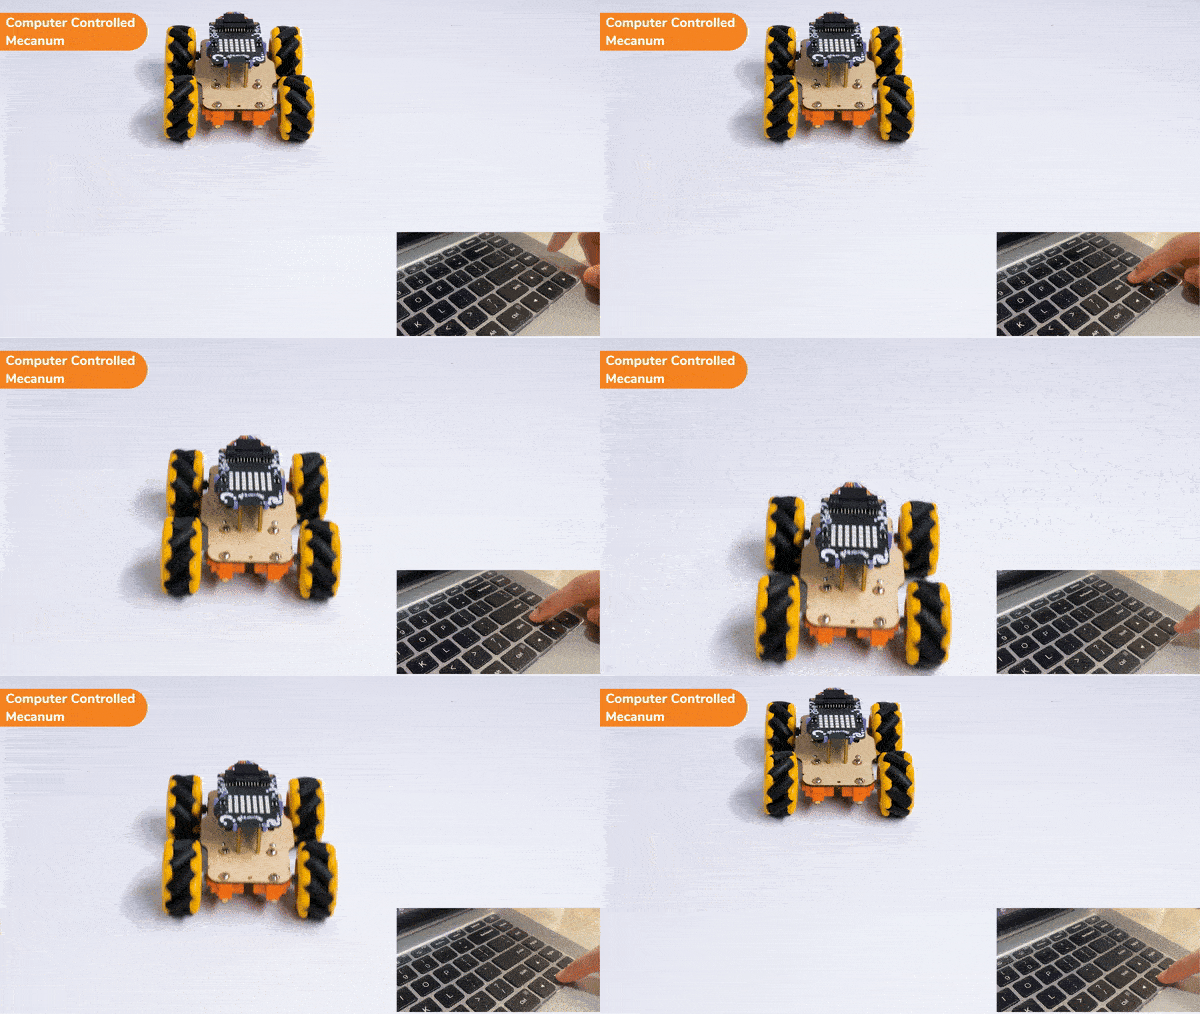
Forward-Backward Motion:

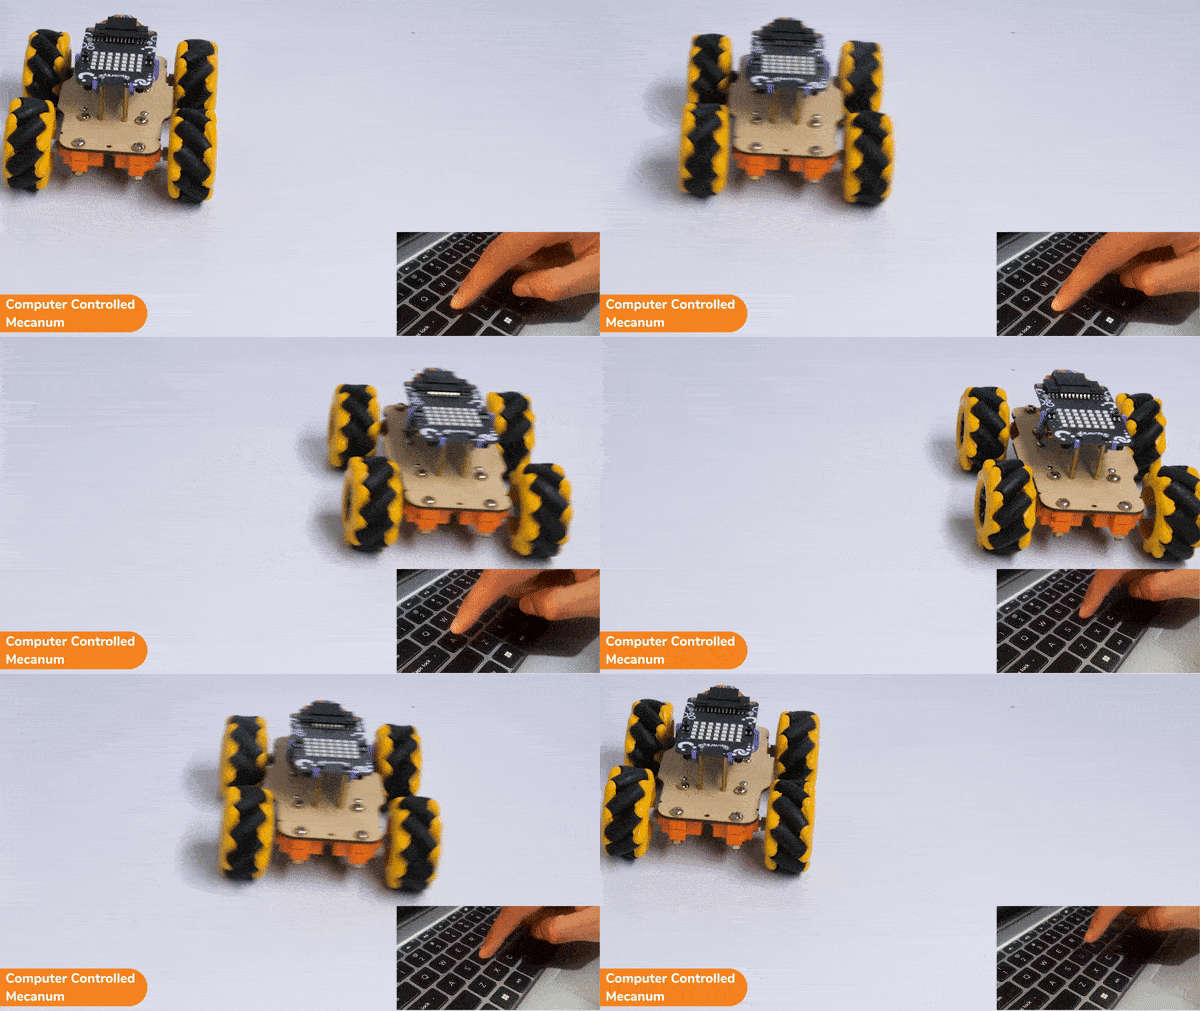
Lateral Right-Left Motion:

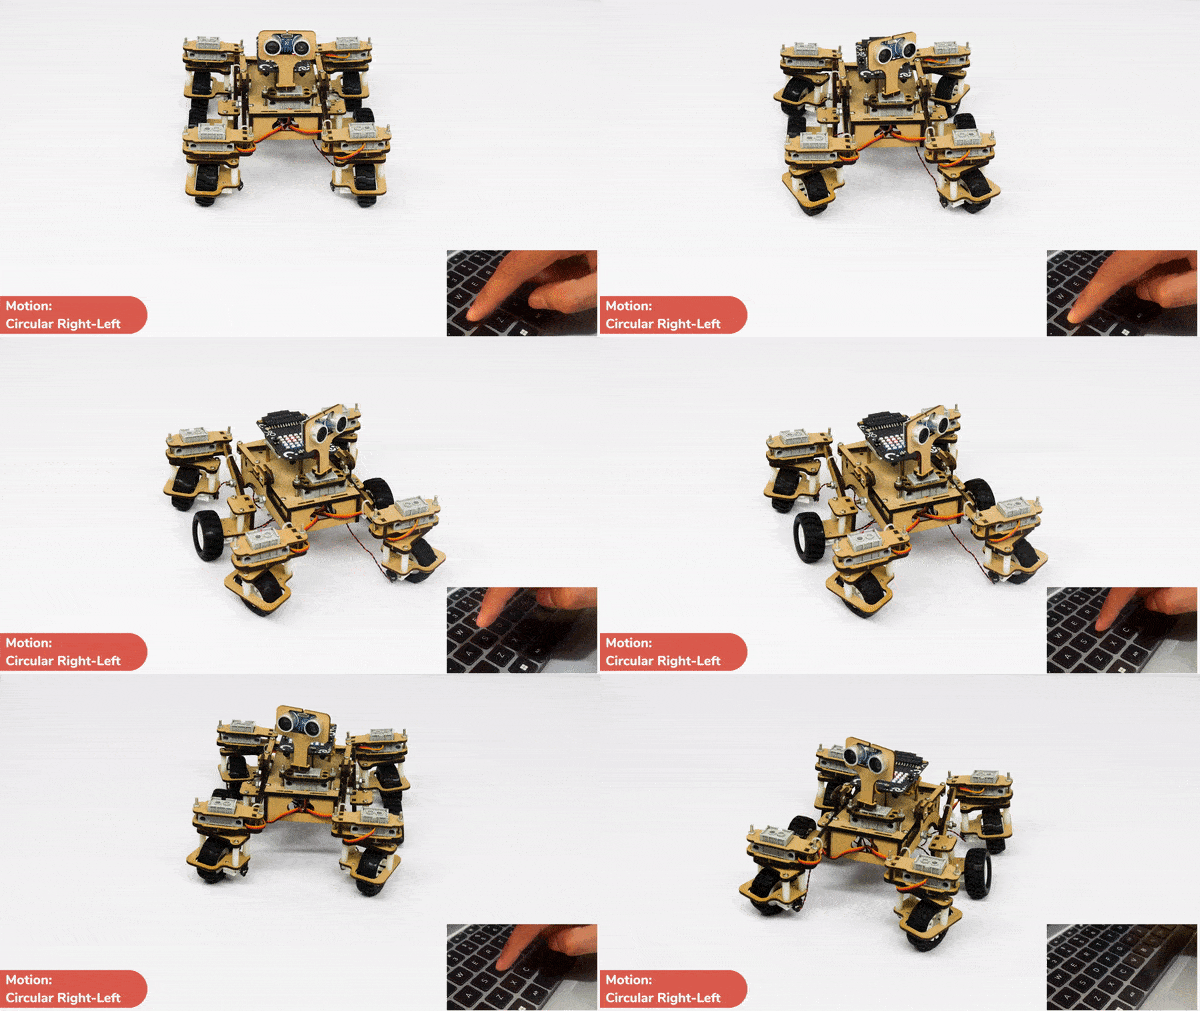
Circular Right-Left Motion:

Read More
In this tutorial, you'll discover how to use Python programming to control the Mars Rover. You'll learn how to use different keys on your keyboard to move the rover forward, backward, turn left, and turn right.

In this activity, we will make the computer program that controls the Mars Rover. It’s like a remote-control car. You can press different keys on the keyboard to make the Mars Rover move forward, backward, turn left and turn right.

Motor and Servo Motor

In our Mars rover, there are a total of 6 motors and 5 servo motors. 

The motors provide rotation to the wheels which helps the rover to attain motion in both forward and backward directions. All the left side motors (3 motors) are connected to the left motor port of Quarky and all the right side motors (3 motors) are connected to the right motor port of Quarky using a 3 port wire. This means that to control the Mars rover we have to control only 2 motors – Left and Right.

Also, there are 2 parameters to control – Direction (Forward or Backward) and Speed. With this control, the Mars rover can do all the desired motions.

The servo motors help in providing rotation to the complete wheel assembly so that the rover can change its wheel alignments and its path. These play a major role in turning cases of the Mars Rover.

We will need to turn the servo motors to the Inside Servo Position to make Mars Rover turn left and right.

Python Code

  1. We will make sure we have initialized Quarky and Mars Rover correctly.
  2. We will use the while loop to continuously detect the keys of the keyboard and react according to the way.
  3. We will use the python function of sprite “.iskeypressed()” to know which key has been pressed and act respectively.
  4. When the up arrow key is pressed, we will set all the servos to 90 degree angle with the help of the rover.home() function. We will run the mars rover with the help of quarky.runtimedrobot() function.
  5. With the same set of functions we will create the structure for when the users press the backward key to create the respective motion.
  6. When the user presses the right or left arrow key, we will set the servo angles to a specific degree – 40 to complete the turn successfully.
  7. By this way we will be able to turn the rover according to our needs by using the runtimedrobot()  function.
sprite=Sprite('Tobi')
import time
quarky = Quarky()
rover = MarsRover(4, 1, 7, 2, 6)
while True:
  if sprite.iskeypressed("up arrow"):
	  rover.home()
	  rover.setinangle(0)
	  quarky.runtimedrobot("F",100,3)
	
  if sprite.iskeypressed("down arrow"):
    rover.home()
    rover.setinangle(0)
    quarky.runtimedrobot("B",100,3)
  
  if sprite.iskeypressed("right arrow"):
    rover.home()
    rover.setinangle(40)
    quarky.runtimedrobot("R",100,3)
  
  if sprite.iskeypressed("left arrow"):
    rover.home()
    rover.setinangle(40)
    quarky.runtimedrobot("L",100,3)

Output

Forward-Backward Motions

Normal Right-Left Motions

Read More
Learn to move your Quarky Mecanum Wheel Robot in a square and make an axe figure with PictoBlox's Python Interface. Use the arrow keys to activate the custom movements!

In this activity, we will create a custom activity where you will be able to move the Mecanum robot in a square effortlessly along with making an Axe type figure.

The Quarky Mecanum Wheel Robot is a type of robot that uses a special type of wheel to move. The wheel is made of four rollers mounted at 45- degree angles to the wheel’s hub. Each roller has its own motor and can spin in either direction. This allows the wheel to move in any direction, making it an ideal choice for navigating around obstacles.

Coding Steps

Follow the steps:

  1. Open a new project in PictoBlox and select Python Coding Environment.
  2. Connect Quarky to PictoBlox.
  3. Click on the Add Extension button and add the Quarky Mecanum extension.
  4. Now we will first initialize the Mecanum robots and the servos before starting the main code.
  5. Here there are two parts specifically : To make a Square and To make an Axe

To make a Square (Logic):

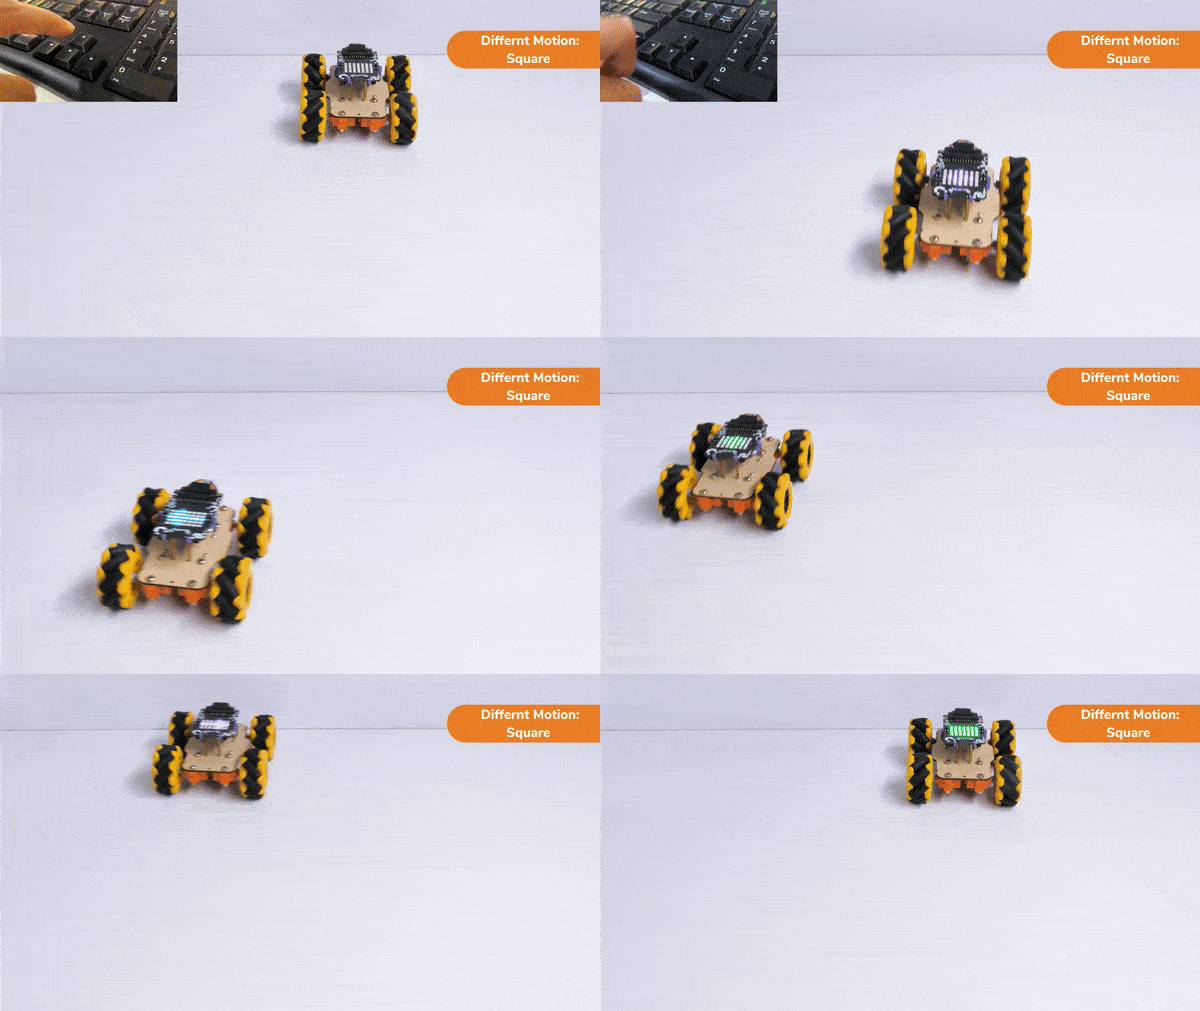
The main steps would include to display the lights in arrow forms before implementing the specific move. The moves would be implemented in the following order:

Forward -> Lateral Right -> Backward -> Lateral Left.

Code for Square Motion:

def Square():
    quarky.drawpattern("jjjgjjjjjgggjjjgggggjjjjgjjjjjjgjjj")
    meca.runtimedrobot("forward",Speed,1)
    quarky.drawpattern("jjjjfjjjjjjffjfffffffjjjjffjjjjjfjj")
    meca.runtimedrobot("lateral right",Speed,1)
    quarky.drawpattern("jjjcjjjjjjcjjjjcccccjjjcccjjjjjcjjj")
    meca.runtimedrobot("backward",Speed,1)
    quarky.drawpattern("jjgjjjjjggjjjjgggggggjggjjjjjjgjjjj")
    meca.runtimedrobot("lateral left",Speed,1)
    quarky.drawpattern("ccccccccccccccccccccccccccccccccccc")
    time.sleep(1)
    quarky.cleardisplay()

To make an Axe (Logic):

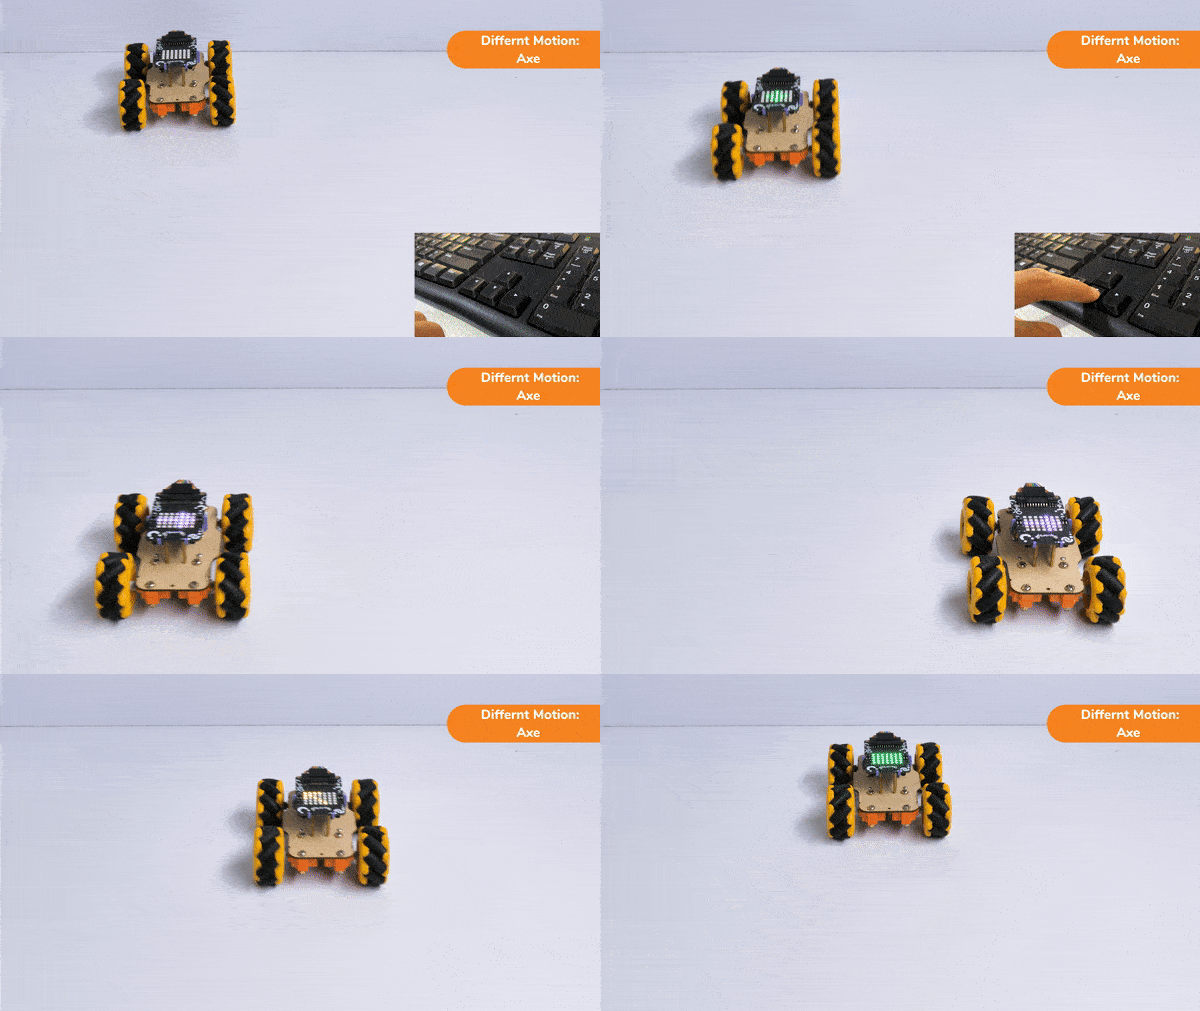
The main steps would include to display the lights in arrow forms before implementing the specific move. The moves would be implemented in the following order:

Forward ( 2 steps ) -> Lateral Left ( 1 step ) -> Backward Right ( 1 step ) -> Backward ( 1 step )

We will display the arrows with the help of Quarky LED’s and implement the code.

Code for Axe Motion:

def Axe():
    quarky.drawpattern("jjjcjjjjjcccjjjcccccjjjjcjjjjjjcjjj")
    meca.runtimedrobot("forward",Speed,2)
    quarky.drawpattern("jjgjjjjjggjjjjgggggggjggjjjjjjgjjjj")
    meca.runtimedrobot("lateral left",Speed,1)
    quarky.drawpattern("jjhjjjjjjjhjjjjjjjhjhjjjjjhhjjjhhhh")
    meca.runtimedrobot("backward right",Speed,1)
    quarky.drawpattern("jjjdjjjjjjdjjjjdddddjjjdddjjjjjdjjj")
    meca.runtimedrobot("backward",Speed,1)
    quarky.drawpattern("ccccccccccccccccccccccccccccccccccc")
    time.sleep(1)
    quarky.cleardisplay()

Main Code

Now we will keep a specific condition on when to activate the Square Motion and when to activate the Axe Motion.

We will use the if-else conditions where on pressing the “up” arrow key, we will initiate the Square Motion and on pressing the “down” arrow key, we will initiate the Axe Motion with the help of Mecanum Robot.

sprite = Sprite('Tobi')
quarky=Quarky()
import time

def Square():
    quarky.drawpattern("jjjgjjjjjgggjjjgggggjjjjgjjjjjjgjjj")
    meca.runtimedrobot("forward",Speed,1)
    quarky.drawpattern("jjjjfjjjjjjffjfffffffjjjjffjjjjjfjj")
    meca.runtimedrobot("lateral right",Speed,1)
    quarky.drawpattern("jjjcjjjjjjcjjjjcccccjjjcccjjjjjcjjj")
    meca.runtimedrobot("backward",Speed,1)
    quarky.drawpattern("jjgjjjjjggjjjjgggggggjggjjjjjjgjjjj")
    meca.runtimedrobot("lateral left",Speed,1)
    quarky.drawpattern("ccccccccccccccccccccccccccccccccccc")
    time.sleep(1)
    quarky.cleardisplay()

def Axe():
    quarky.drawpattern("jjjcjjjjjcccjjjcccccjjjjcjjjjjjcjjj")
    meca.runtimedrobot("forward",Speed,2)
    quarky.drawpattern("jjgjjjjjggjjjjgggggggjggjjjjjjgjjjj")
    meca.runtimedrobot("lateral left",Speed,1)
    quarky.drawpattern("jjhjjjjjjjhjjjjjjjhjhjjjjjhhjjjhhhh")
    meca.runtimedrobot("backward right",Speed,1)
    quarky.drawpattern("jjjdjjjjjjdjjjjdddddjjjdddjjjjjdjjj")
    meca.runtimedrobot("backward",Speed,1)
    quarky.drawpattern("ccccccccccccccccccccccccccccccccccc")
    time.sleep(1)
    quarky.cleardisplay()


meca=Mecanum(1,2,7,8)


Speed = 100
quarky.drawpattern("jjjjjjjjjjjjjjjjjjjjjjjjjjjjjjjjjjj")
while True:
  if sprite.iskeypressed("up arrow"):
    Square()
  else:
    if sprite.iskeypressed("down arrow"):
      Axe()

Final Output

Square Motion:

Axe Motion:

Read More
Learn how to code the Mars Rover to turn left and right on a circle with the set () to () block. Try different left and right orientations and move the Mars Rover with the up and down keys.

Introduction

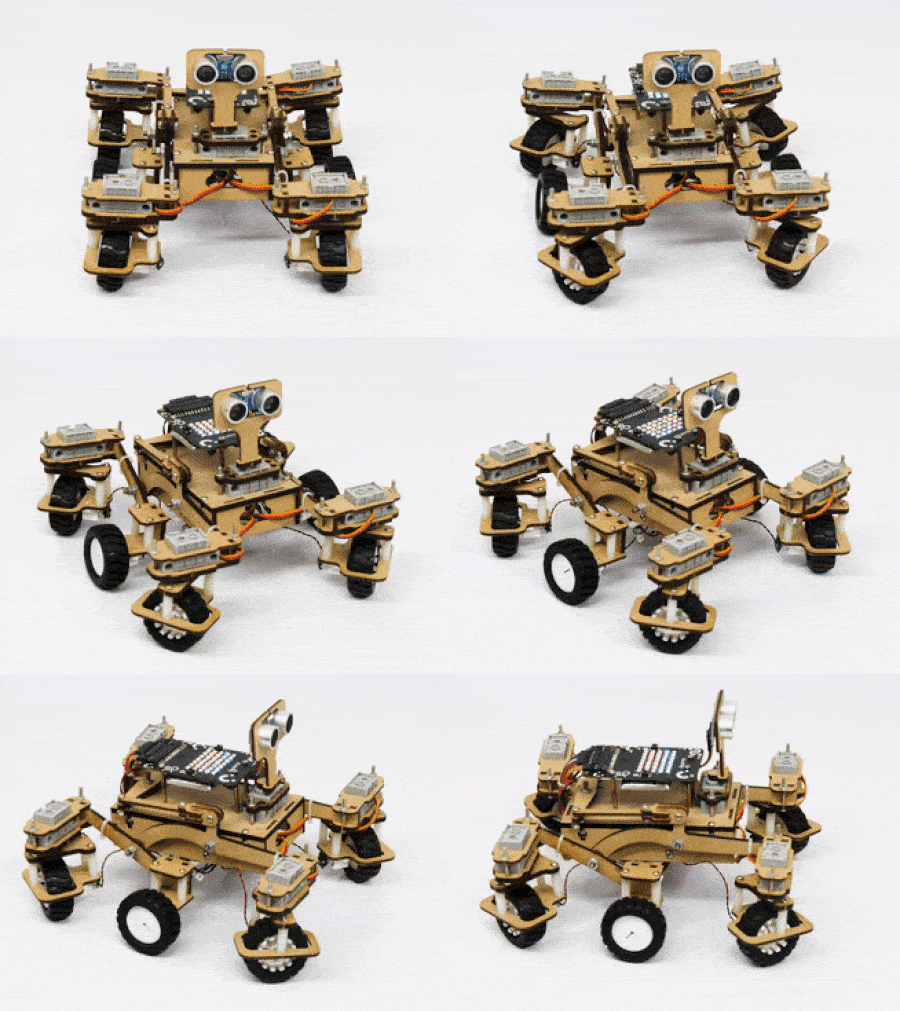
Instead of rotating the Mars Rover at a place to turn left or right, you can alternatives make the Mars Rover move in a circle.

  1. Turning left on a circle:
  2. Turning right on a circle:
  3. Turning right backwards in a circle:
  4. Turning left backwards in a circle:

Coding Steps

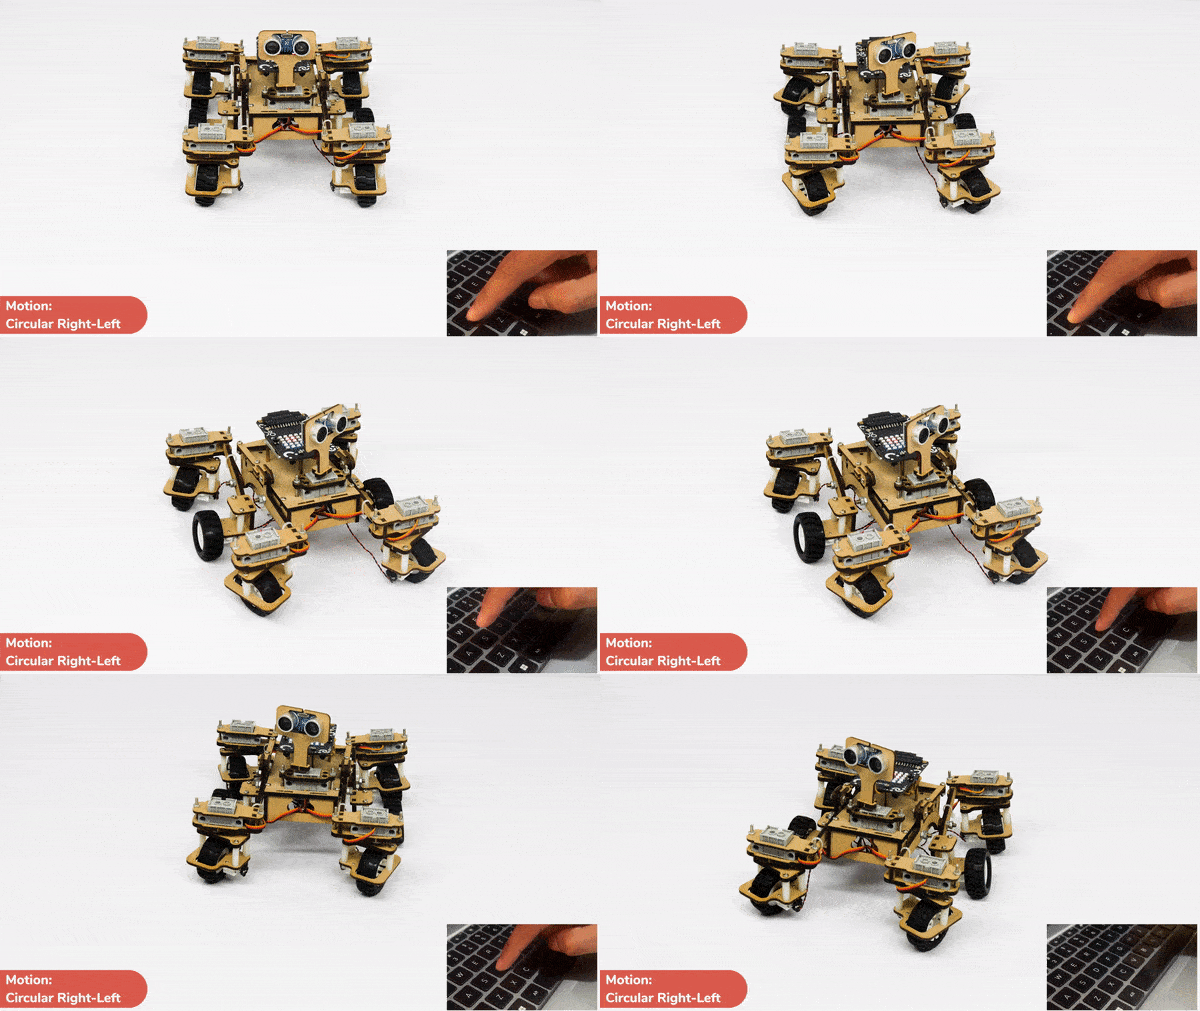
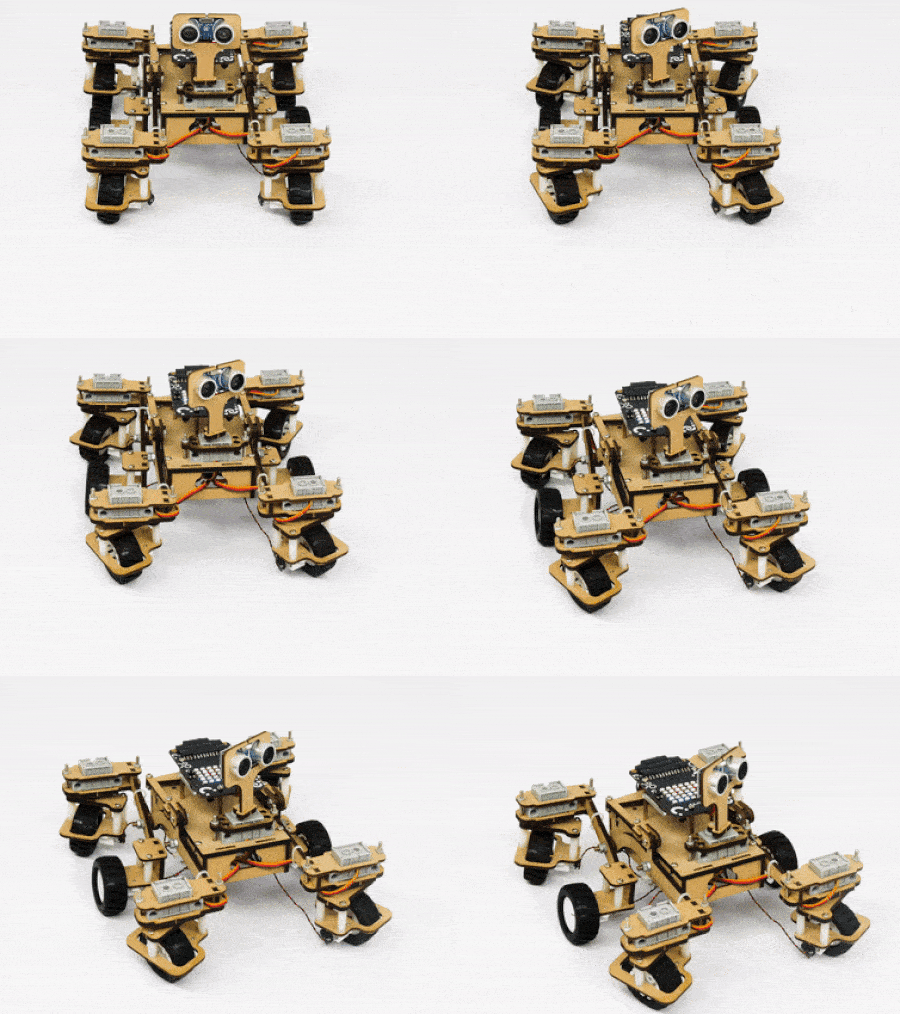
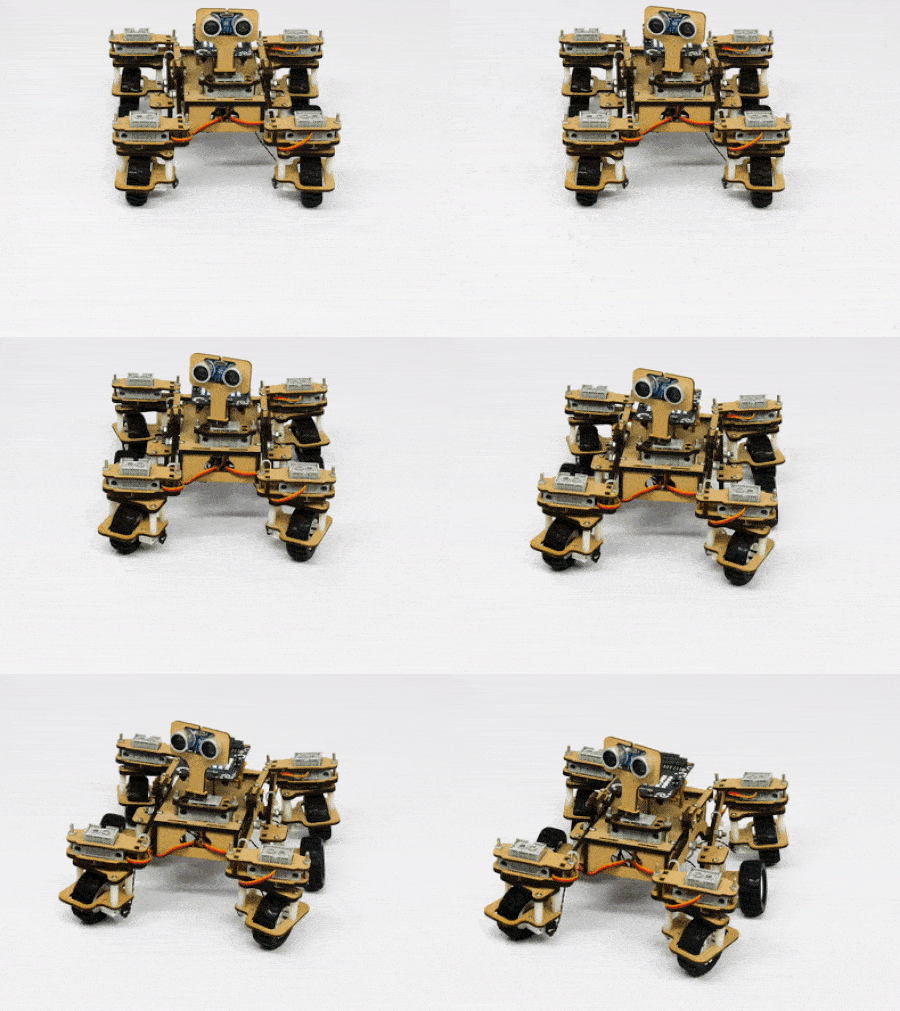
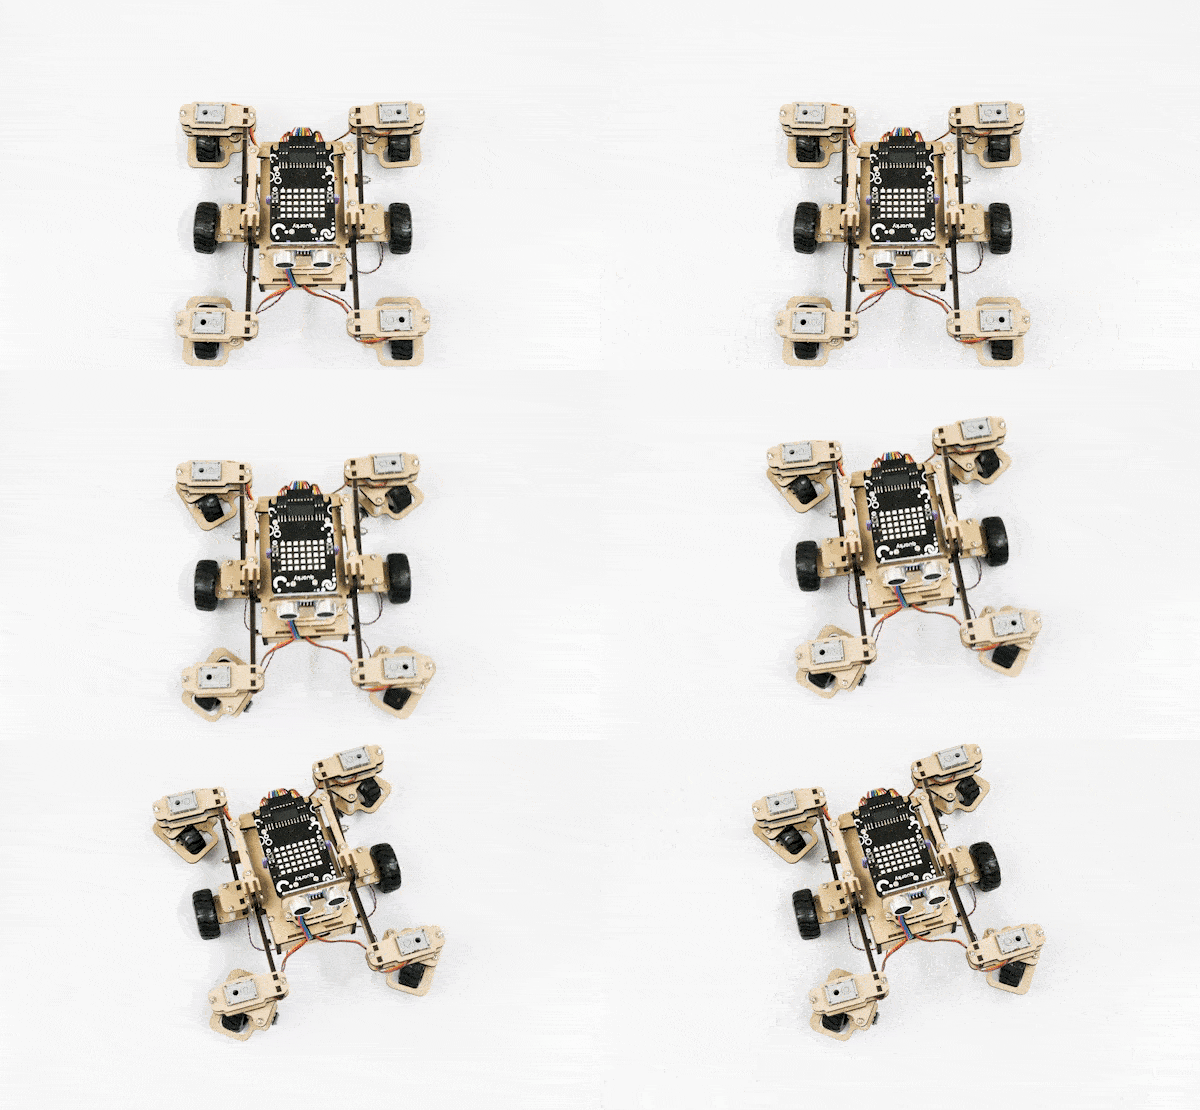
The following code uses the four arrow keys to travel forward (up arrow key), backwards (down arrow key) , forward right in a circle( right arrow key) and forward left in a circle. (left arrow key)

We will also use the keys specially for backward left and right motion. We will use the “a”  key for backward left motion and “d” key for backward right motion.

Make the code and play with the Mars Rover. Try to use different keys and combine different motions.

Code

sprite=Sprite('Tobi')
import time
quarky = Quarky()
rover = MarsRover(4, 1, 7, 2, 6)
# setwheelsangle(Front Left = 40, Front Right = 40, Back Left = 90, Back Right = 90)
while True:
  if sprite.iskeypressed("up arrow"):
	  rover.home()
	  rover.setinangle(0)
	  quarky.runtimedrobot("F",100,2)
	
  if sprite.iskeypressed("down arrow"):
    rover.home()
    rover.setinangle(0)
    quarky.runtimedrobot("B",100,2)
  
  if sprite.iskeypressed("right arrow"):
    rover.home()
    rover.setrightturnangle(40)
    # rover.setwheelsangle(180,180,180,180)
    # rover.setheadangle(0)
    quarky.runtimedrobot("F",100,2)
  
  if sprite.iskeypressed("left arrow"):
    rover.home()
    rover.setleftturnangle(40)
    # rover.setwheelsangle(0,0,0,0)
    quarky.runtimedrobot("F",100,2)
  
  if sprite.iskeypressed("A"):
    rover.home()
    rover.setleftturnangle(40)
    quarky.runtimedrobot("B",100,2)
  
  if sprite.iskeypressed("D"):
    rover.home()
    rover.setrightturnangle(40)
    quarky.runtimedrobot("B",100,2)

Output

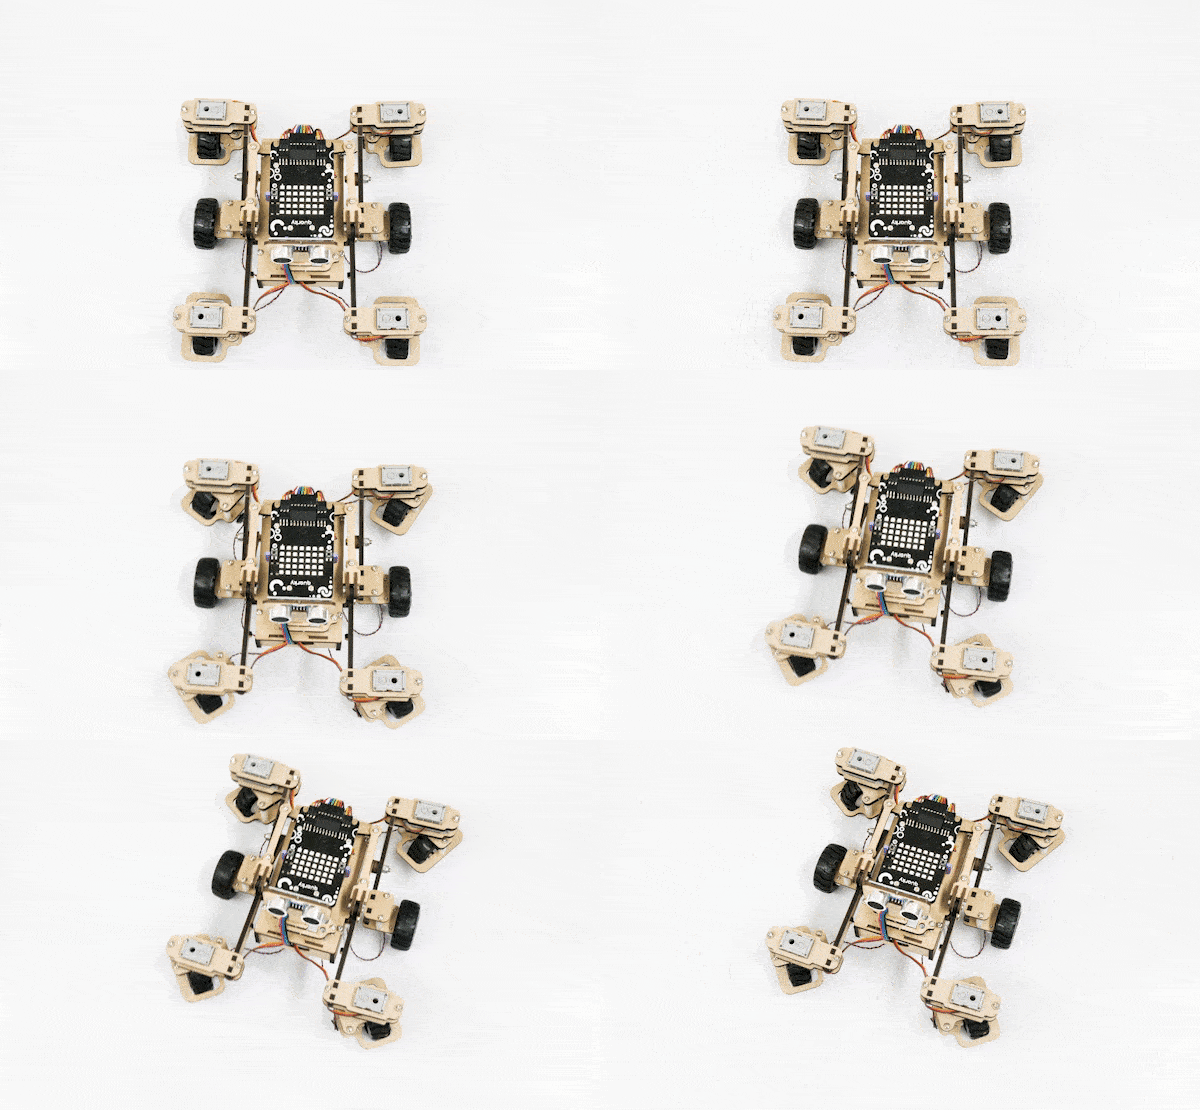
Circular Right-Left Motion:

Read More
Learn how to code logic for video input detection with this example code. You will be able to direct your own Mars Rover easily by just showing signs through the camera input.

Introduction

A sign detector Mars Rover robot is a robot that can recognize and interpret certain signs or signals, such as hand gestures or verbal commands, given by a human. The robot uses sensors, cameras, and machine learning algorithms to detect and understand the sign, and then performs a corresponding action based on the signal detected.

These robots are often used in manufacturing, healthcare, and customer service industries to assist with tasks that require human-like interaction and decision making.

Code

sprite = Sprite('Tobi')
# sprite = Sprite('Tobi')
quarky = Quarky()
import time

recocards = RecognitionCards()
rover = MarsRover(4, 1, 7, 2, 6)

recocards.video("on flipped")
recocards.enablebox()
recocards.setthreshold(0.6)

while True:
  recocards.analysecamera()
  sign = recocards.classname()
  sprite.say(sign + ' detected')
  
  if recocards.count() > 1:
    if 'Go' in sign:
      rover.home()
      rover.setinangle(0)
      quarky.runtimedrobot("F",100,3)
      
    if 'Turn Left' in sign:
      rover.home()
      rover.setinangle(40)
      quarky.runtimedrobot("L",100,3)

    if 'Turn Right' in sign:
      rover.home()
      rover.setinangle(40)
      quarky.runtimedrobot("R",100,3)
      
    if 'U Turn' in sign:
      rover.home()
      rover.setinangle(0)
      quarky.runtimedrobot("B",100,3)

Logic

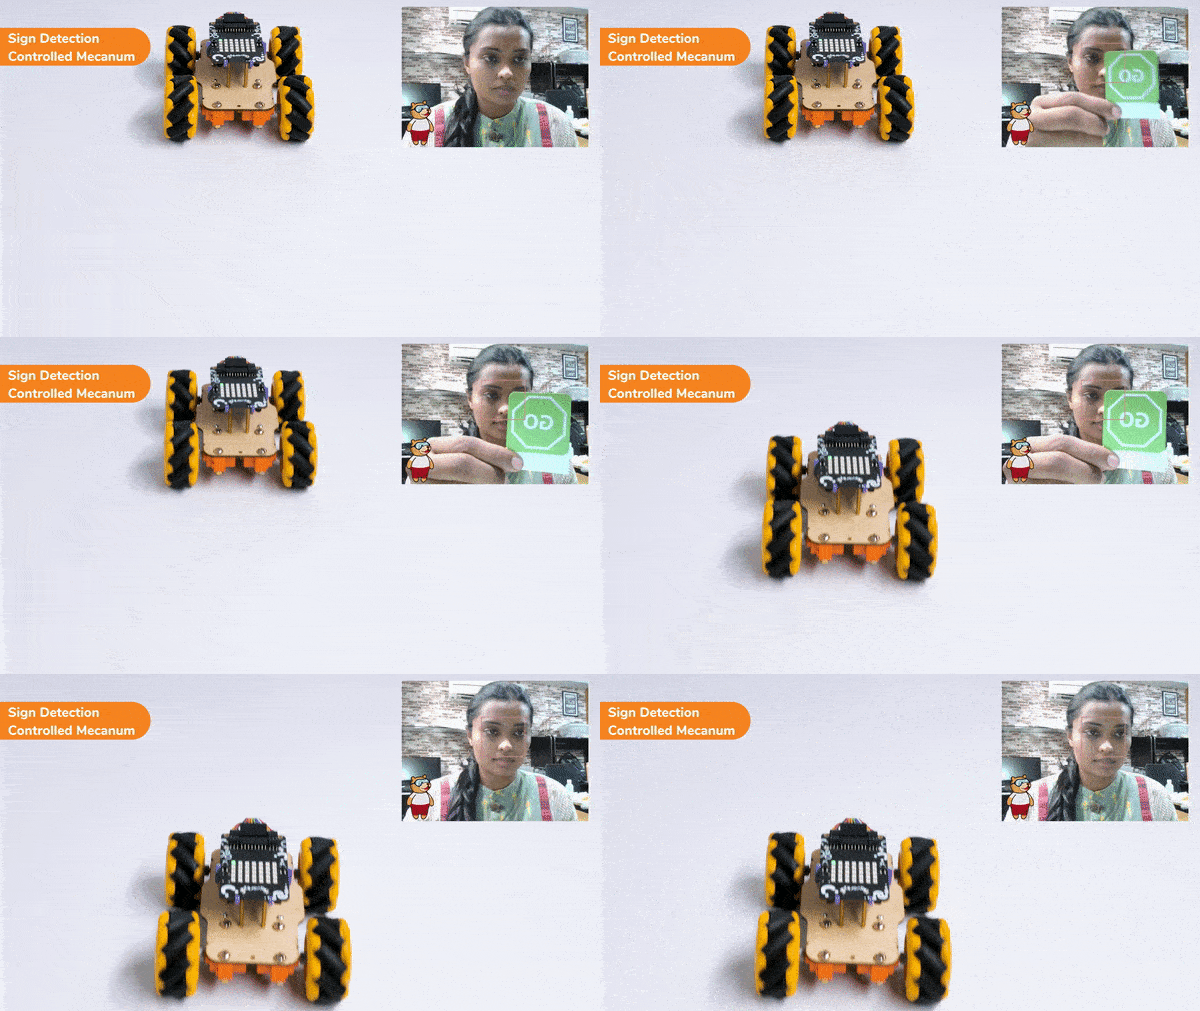
  1. Firstly, the code sets up the stage camera to look for signs and detects and recognizes the signs showed on the camera.
  2. Next, the code starts a loop where the stage camera continuously checks for the signs.
  3. Finally, if the robot sees certain signs (like ‘Go’, ‘Turn Left’, ‘Turn Right’, or ‘U Turn’), it moves in a certain direction (forward, backward, left, or backward) based on the respective signs.
  4. This can help the Mars Rover to manoeuvre through the terrain easily by just showing signs on the camera.

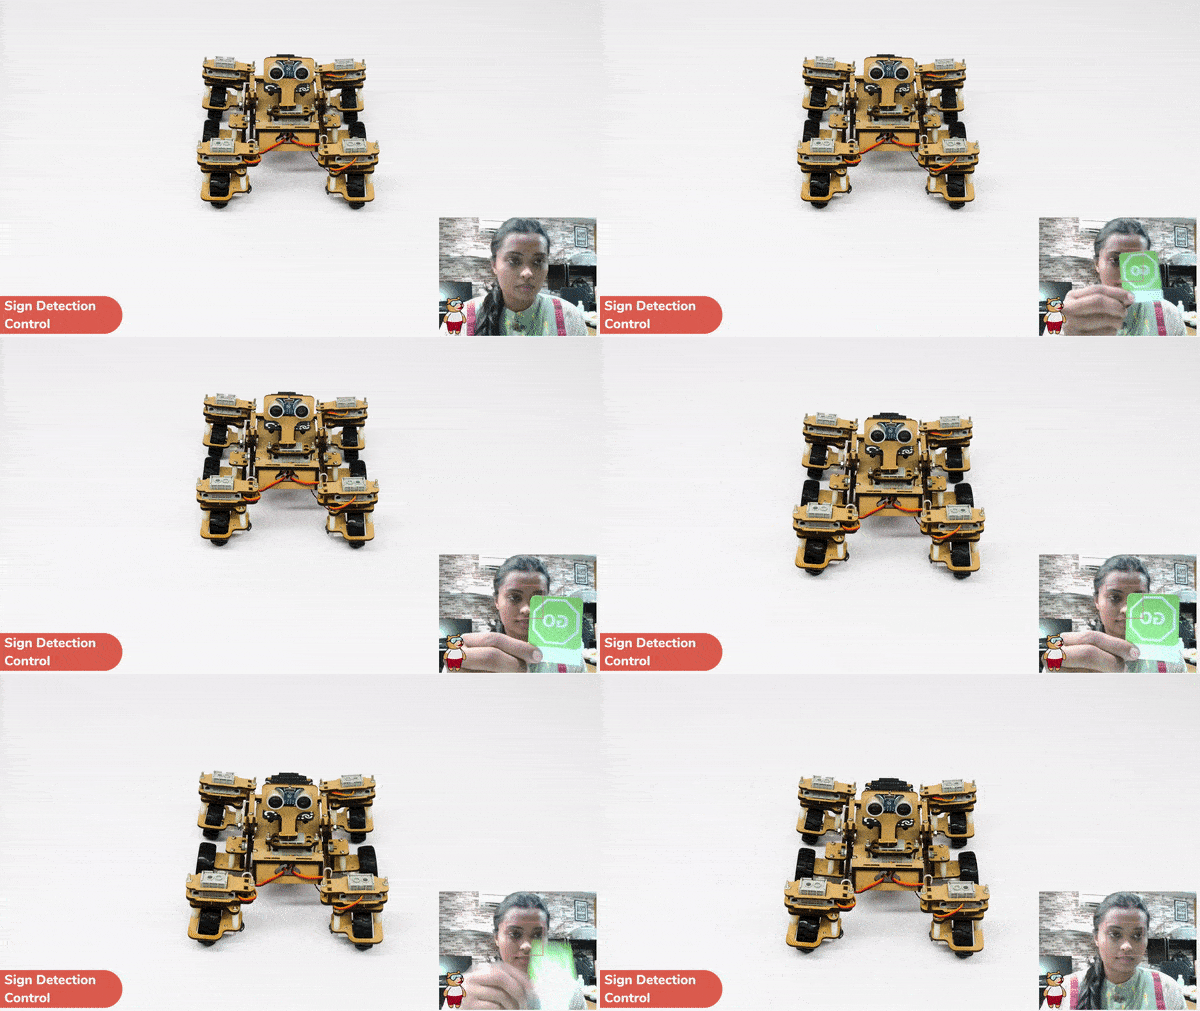
Output

Forward-Backward Motions:

Right-Left Motions:

Read More
Learn how to code logic for video input detection with this example code. You will be able to direct your own Mecanum easily by just showing signs through the camera input.

Introduction

A sign detector Mecanum robot is a robot that can recognize and interpret certain signs or signals, such as hand gestures or verbal commands, given by a human. The robot uses sensors, cameras, and machine learning algorithms to detect and understand the sign, and then performs a corresponding action based on the signal detected.

These robots are often used in manufacturing, healthcare, and customer service industries to assist with tasks that require human-like interaction and decision making.

Code

sprite = Sprite('Tobi')
quarky = Quarky()
import time
meca=Mecanum(1,2,7,8)
recocards = RecognitionCards()

recocards.video("on flipped")
recocards.enablebox()
recocards.setthreshold(0.6)

while True:
  recocards.analysecamera()
  sign = recocards.classname()
  sprite.say(sign + ' detected')
  if recocards.count() > 1:
    if 'Go' in sign:
      meca.runtimedrobot("forward",100,2)
    if 'Turn Left' in sign:
      meca.runtimedrobot("lateral left",100,2)
    if 'Turn Right' in sign:
      meca.runtimedrobot("lateral right",100,2)
    if 'U Turn' in sign:
      meca.runtimedrobot("backward",100,2)

Logic

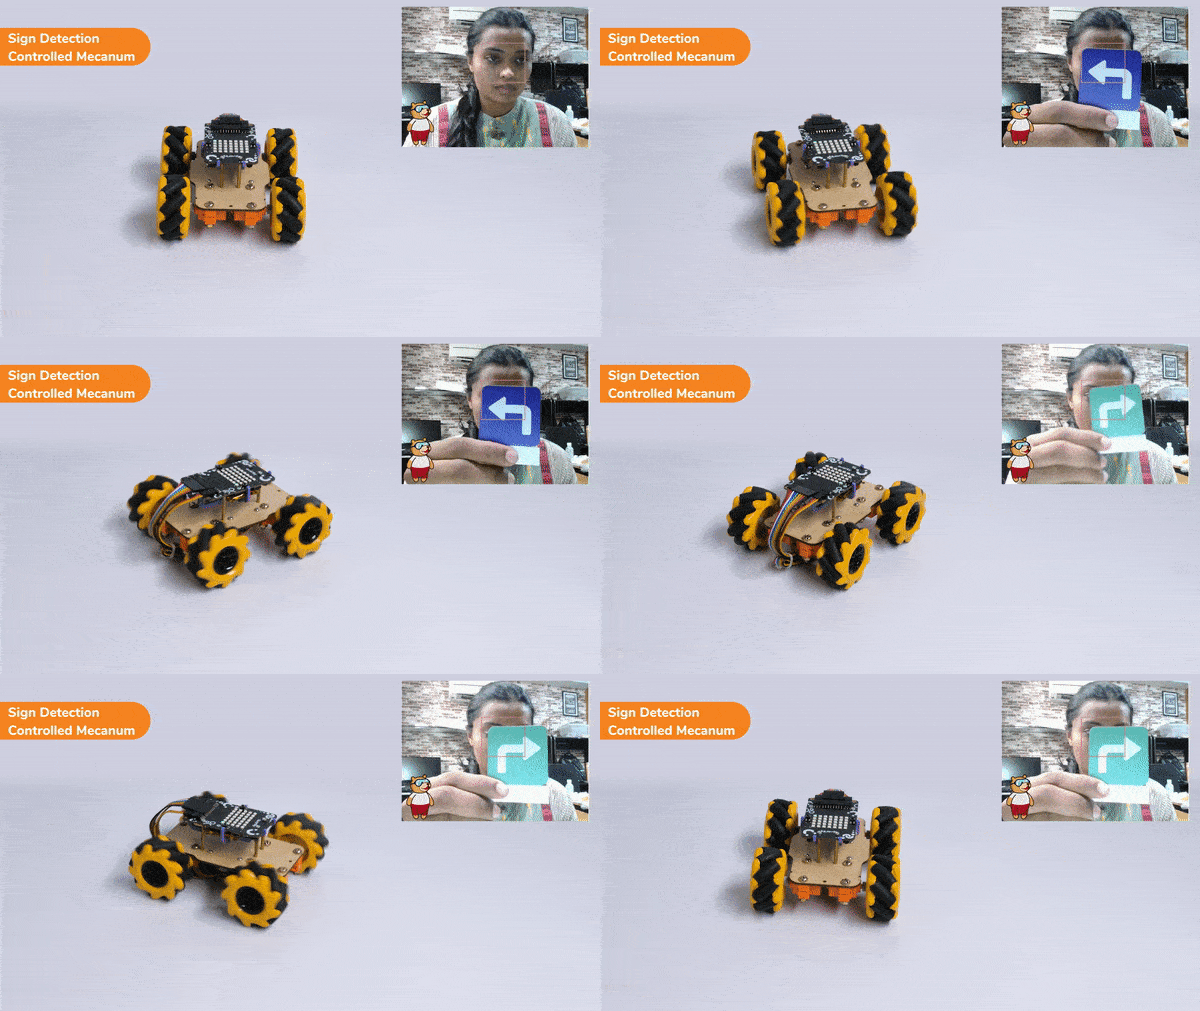
  1. Firstly, the code sets up the stage camera to look for signs and detects and recognizes the signs showed on the camera.
  2. Next, the code starts a loop where the stage camera continuously checks for the signs.
  3. Finally, if the robot sees certain signs (like ‘Go’, ‘Turn Left’, ‘Turn Right’, or ‘U Turn’), it moves in a certain direction (forward, backward, left, or backward) based on the respective signs.
  4. This can help the Mecanum to manoeuvre through the terrain easily by just showing signs on the camera.

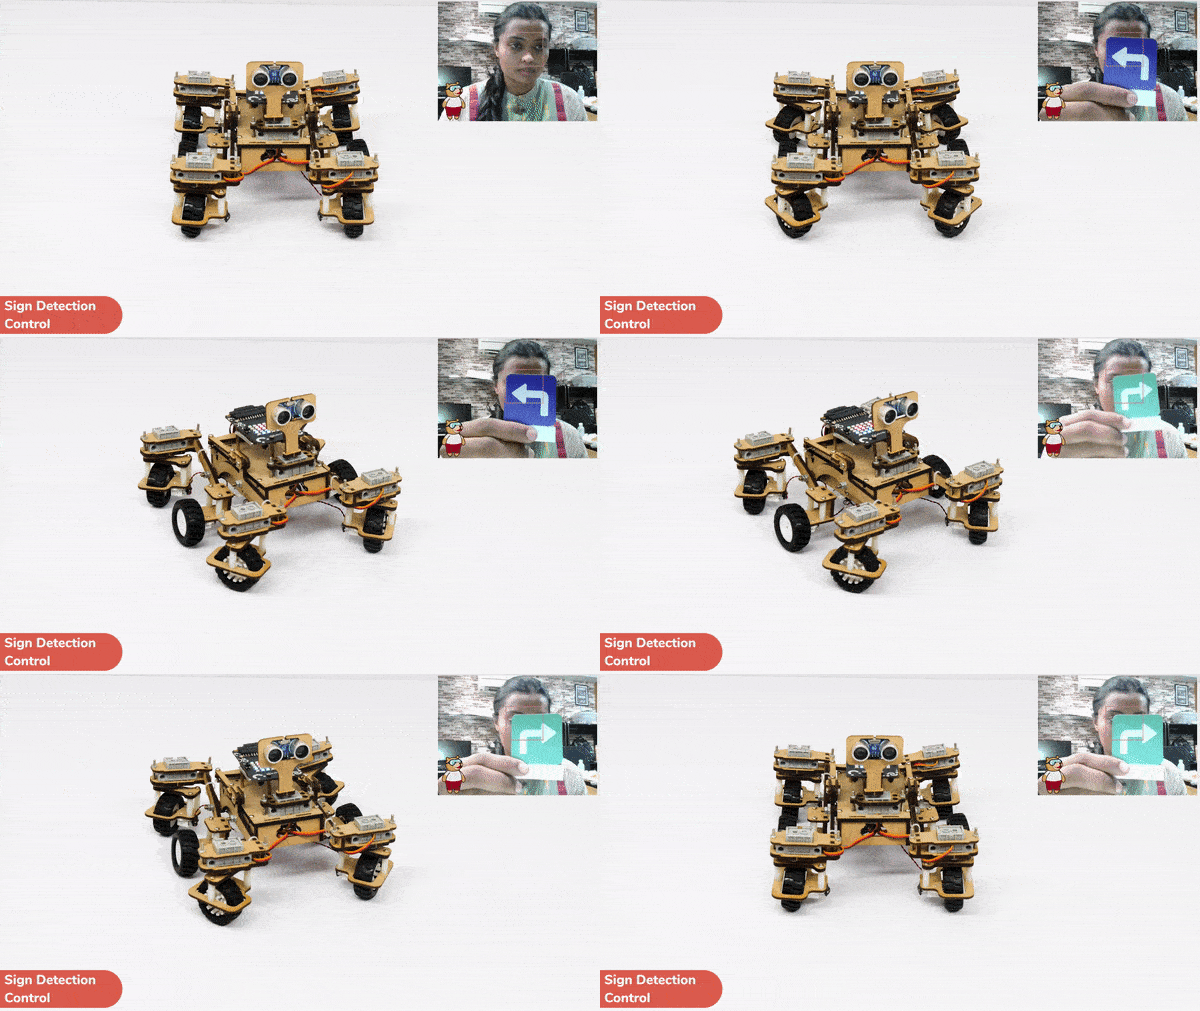
Final Output

Forward Motion:

Right-Left Motions:

Read More
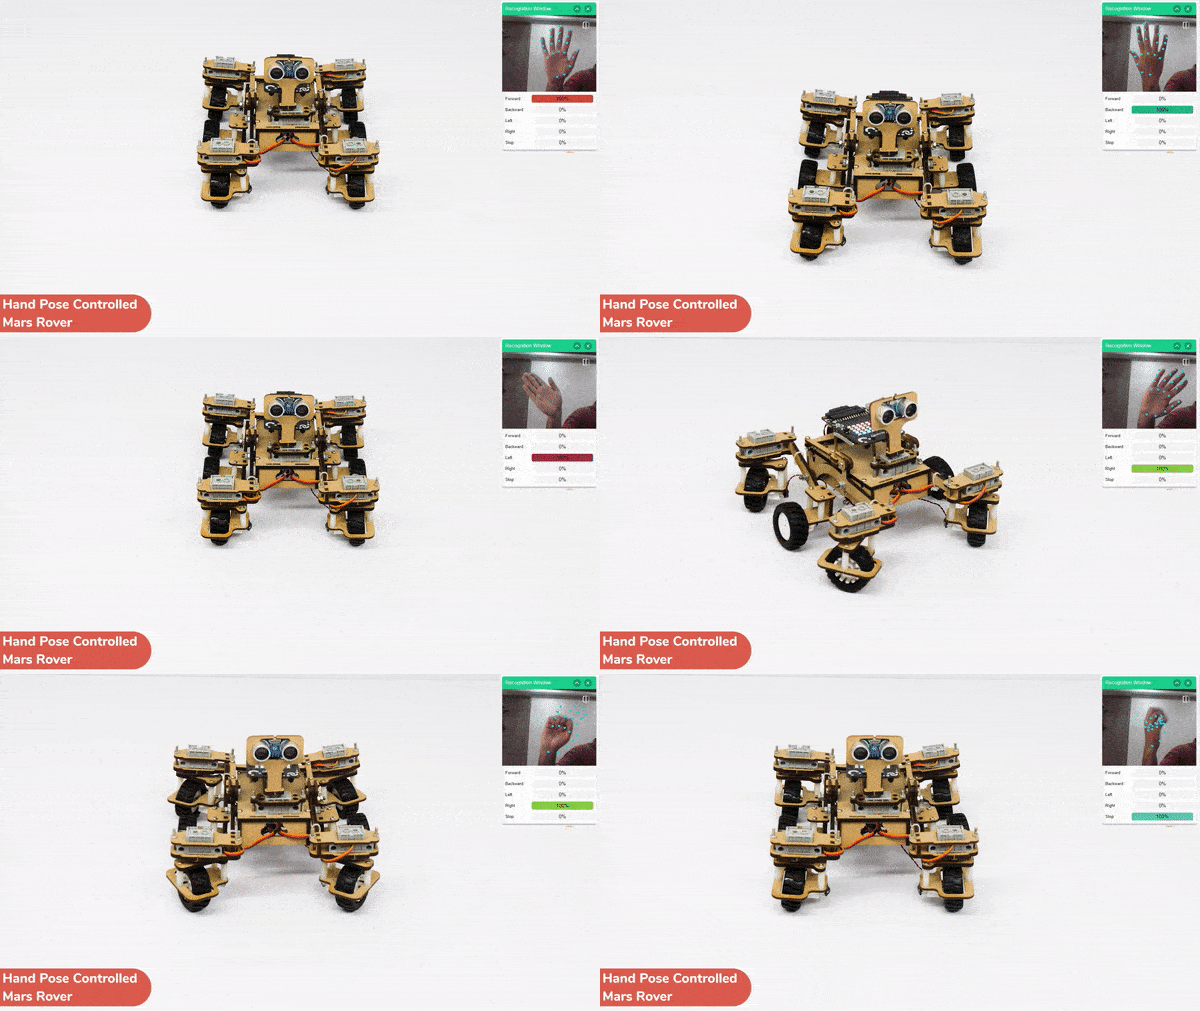
Learn how to use the Hand Gesture Classifier of the Machine Learning Environment to make a machine-learning model that identifies hand gestures and makes the Mars Rover move accordingly.

This project demonstrates how to use Machine Learning Environment to make a machine–learning model that identifies hand gestures and makes the Mars Rover move accordingly.

We are going to use the Hand Classifier of the Machine Learning Environment. The model works by analyzing your hand position with the help of 21 data points.

Hand Gesture Classifier Workflow

Follow the steps below:

  1. Open PictoBlox and create a new file.
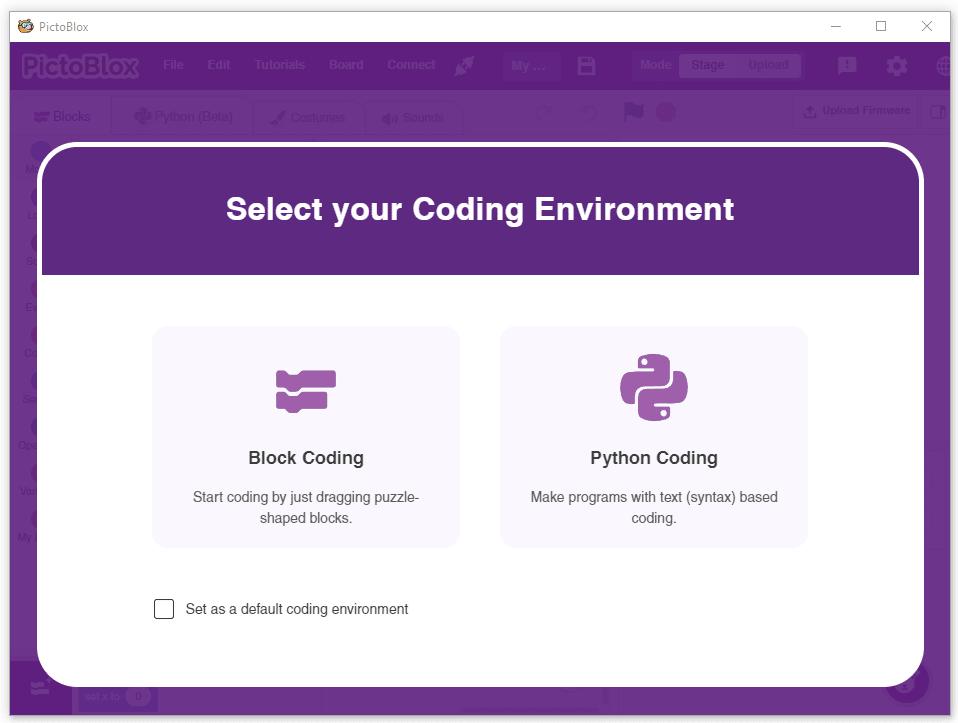
  2. Select the coding environment as appropriate Coding Environment.
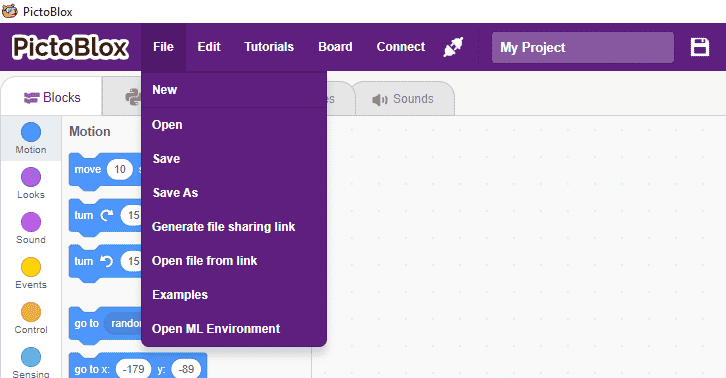
  3. Select the “Open ML Environment” option under the “Files” tab to access the ML Environment.
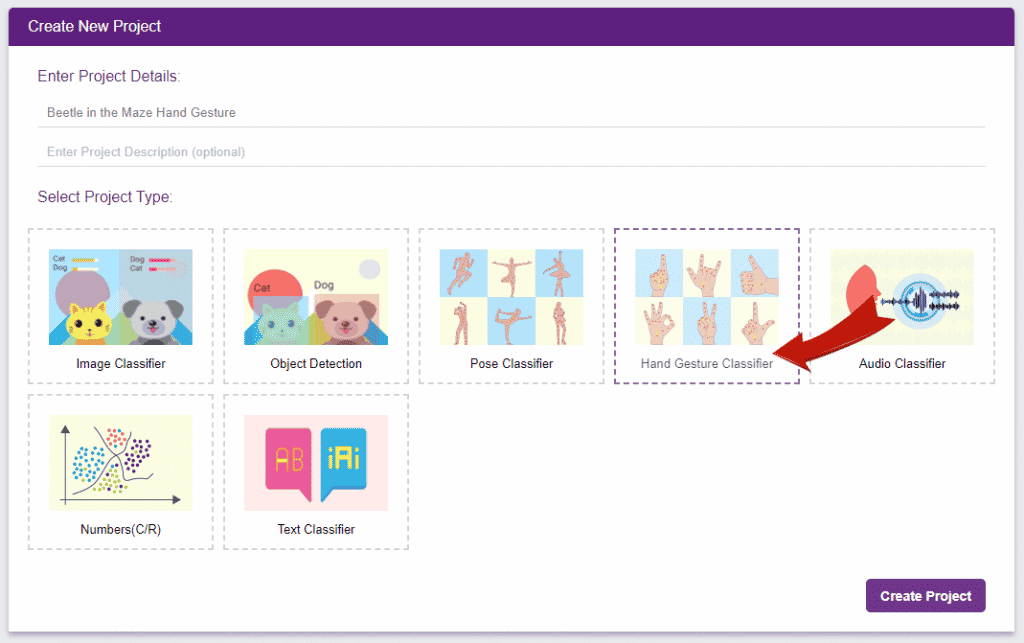
  4. Click on “Create New Project“.
  5. A window will open. Type in a project name of your choice and select the “Hand Gesture Classifier” extension. Click the “Create Project” button to open the Hand Pose Classifier window.
  6. You shall see the Classifier workflow with two classes already made for you. Your environment is all set. Now it’s time to upload the data.
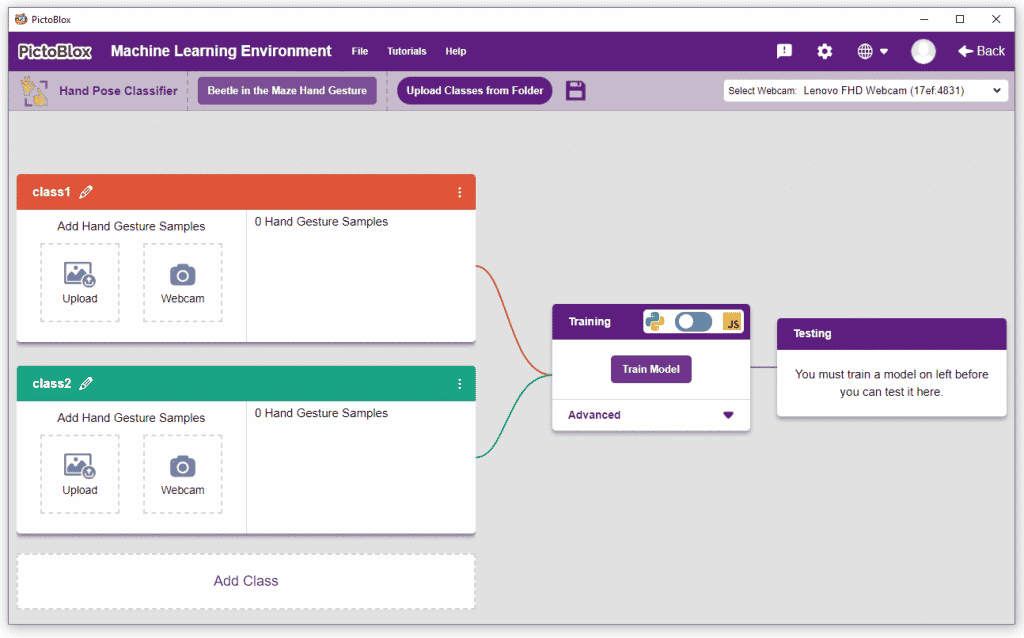
Class in Hand Gesture Classifier

There are 2 things that you have to provide in a class:

  1. Class Name: It’s the name to which the class will be referred as.
  2. Hand Pose Data: This data can either be taken from the webcam or by uploading from local storage.

Note: You can add more classes to the projects using the Add Class button.
Adding Data to Class

You can perform the following operations to manipulate the data into a class.

  1. Naming the Class: You can rename the class by clicking on the edit button.
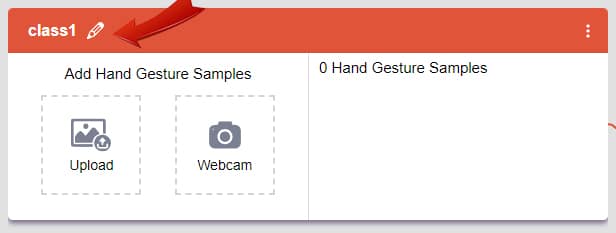
  2. Adding Data to the Class: You can add the data using the Webcam or by Uploading the files from the local folder.
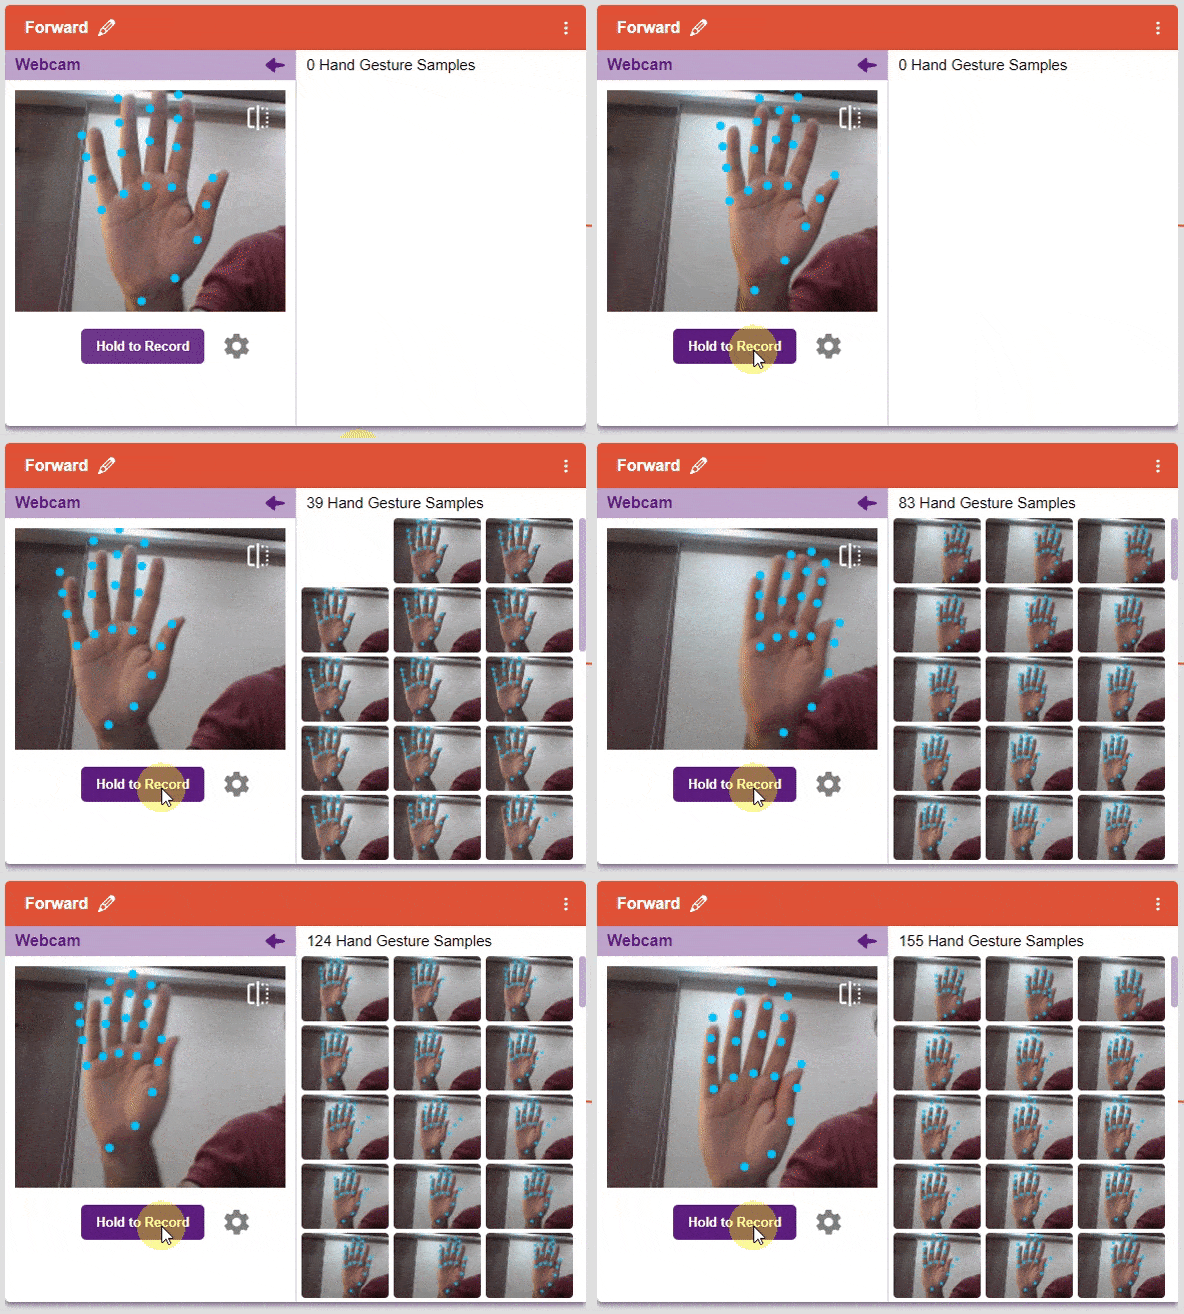
    1. Webcam:
Note: You must add at least 20 samples to each of your classes for your model to train. More samples will lead to better results.
Training the Model

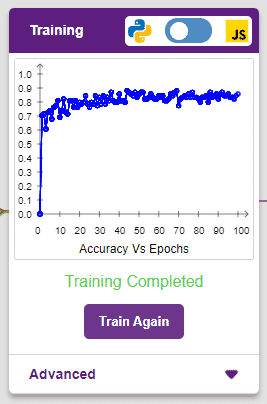
After data is added, it’s fit to be used in model training. In order to do this, we have to train the model. By training the model, we extract meaningful information from the hand pose, and that in turn updates the weights. Once these weights are saved, we can use our model to make predictions on data previously unseen.
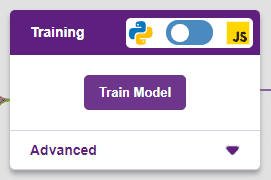
The accuracy of the model should increase over time. The x-axis of the graph shows the epochs, and the y-axis represents the accuracy at the corresponding epoch. Remember, the higher the reading in the accuracy graph, the better the model. The range of the accuracy is 0 to 1.
Testing the Model
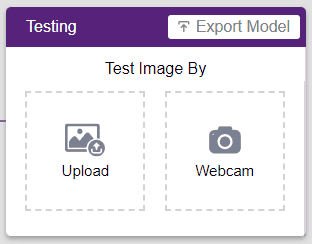
To test the model, simply enter the input values in the “Testing” panel and click on the “Predict” button.
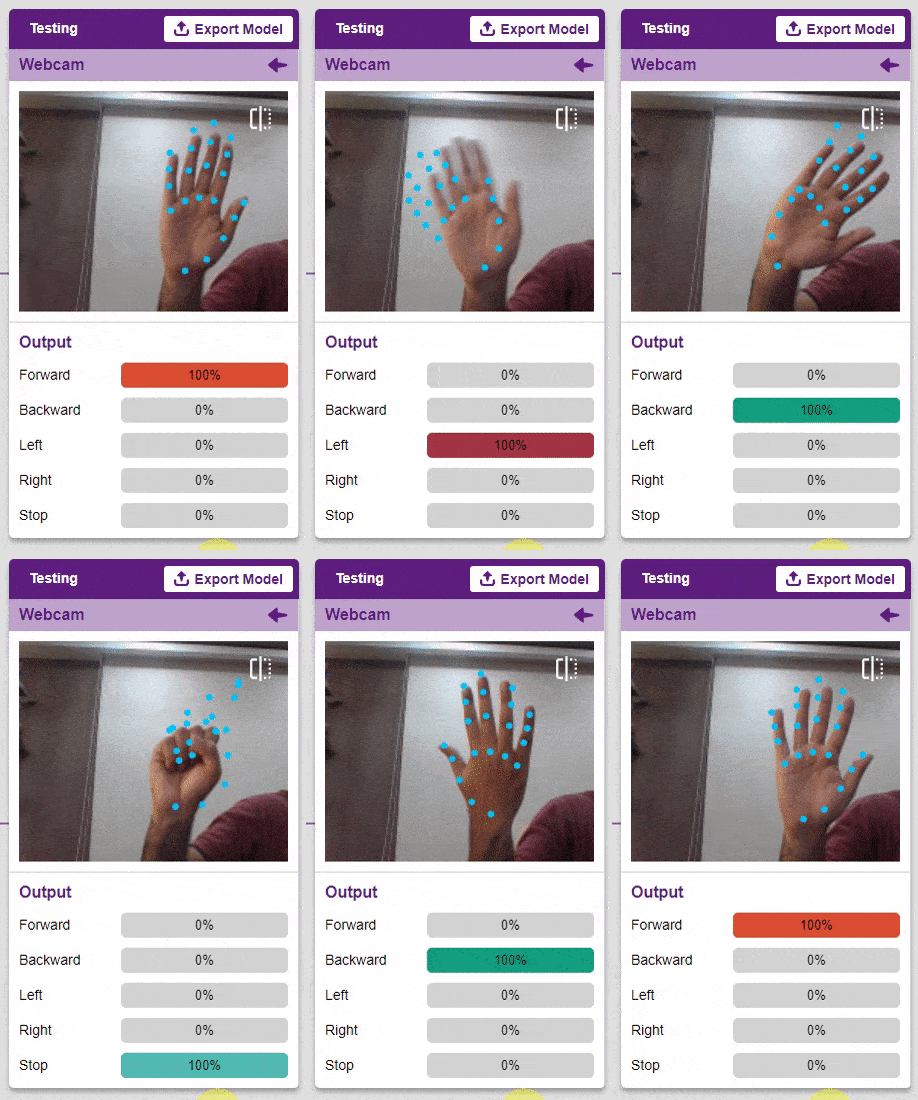
The model will return the probability of the input belonging to the classes.

Export in Python Coding

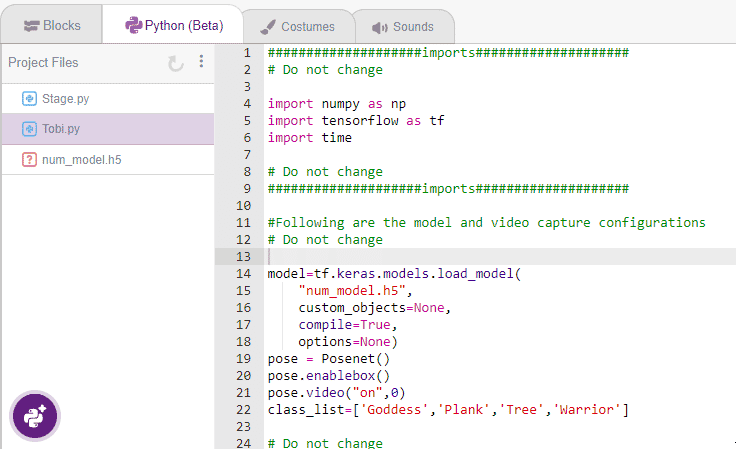
Click on the “Export Model” button on the top right of the Testing box, and PictoBlox will load your model into the Python Coding Environment if you have opened the ML Environment in Python Coding.
Code

The following code appears in the Python Editor of the selected sprite.

####################imports####################
# Do not change

import numpy as np
import tensorflow as tf
import time
sprite=Sprite('Tobi')
import time
quarky = Quarky()
rover = MarsRover(4, 1, 7, 2, 6)
# Do not change
####################imports####################

#Following are the model and video capture configurations
# Do not change

model=tf.keras.models.load_model(
    "num_model.h5",
    custom_objects=None,
    compile=True,
    options=None)
pose = Posenet()                                                    # Initializing Posenet
pose.enablebox()                                                    # Enabling video capture box
pose.video("on",0)                                                  # Taking video input
class_list=['forward','backward','left','right','stop']                  # List of all the classes
def runQuarky(predicted_class):
    if pose.ishanddetected():
      if predicted_class == "forward":
        rover.home()
        rover.setinangle(0)
        quarky.runtimedrobot("F",100,3)
      if predicted_class == "backward":
        rover.home()
        rover.setinangle(0)
        quarky.runtimedrobot("B",100,3)
      if predicted_class == "left":
        rover.home()
        rover.setinangle(40)
        quarky.runtimedrobot("L",100,3)
      if predicted_class == "right":
        rover.home()
        rover.setinangle(40)
        quarky.runtimedrobot("R",100,3)
      if predicted_class == "stop":
        quarky.stoprobot()
    else:
      quarky.stoprobot()

# Do not change
###############################################

#This is the while loop block, computations happen here
# Do not change

while True:
  pose.analysehand()                                             # Using Posenet to analyse hand pose
  coordinate_xy=[]
    
    # for loop to iterate through 21 points of recognition
  for i in range(21):
    if(pose.gethandposition(1,i,0)!="NULL"  or pose.gethandposition(2,i,0)!="NULL"):
      coordinate_xy.append(int(240+float(pose.gethandposition(1,i,0))))
      coordinate_xy.append(int(180-float(pose.gethandposition(2,i,0))))
    else:
      coordinate_xy.append(0)
      coordinate_xy.append(0)
            
  coordinate_xy_tensor = tf.expand_dims(coordinate_xy, 0)        # Expanding the dimension of the coordinate list
  predict=model.predict(coordinate_xy_tensor)                    # Making an initial prediction using the model
  predict_index=np.argmax(predict[0], axis=0)                    # Generating index out of the prediction
  predicted_class=class_list[predict_index]                      # Tallying the index with class list
  print(predicted_class)
  runQuarky(predicted_class)
    
  # Do not change

Logic

  1. If the identified class from the analyzed image is “forward,” the Mars Rover will move forward at a specific speed.
  2. If the identified class is “backward,” the Mars Rover will move backward.
  3. If the identified class is “left,” the Mars Rover will move left.
  4. If the identified class is “right,” the Mars Rover will move right.
  5. Otherwise, the Mars Rover will be in the home position , stopped.
def runQuarky(predicted_class):
    if pose.ishanddetected():
      if predicted_class == "forward":
        rover.home()
        rover.setinangle(0)
        quarky.runtimedrobot("F",100,3)
      if predicted_class == "backward":
        rover.home()
        rover.setinangle(0)
        quarky.runtimedrobot("B",100,3)
      if predicted_class == "left":
        rover.home()
        rover.setinangle(40)
        quarky.runtimedrobot("L",100,3)
      if predicted_class == "right":
        rover.home()
        rover.setinangle(40)
        quarky.runtimedrobot("R",100,3)
      if predicted_class == "stop":
        quarky.stoprobot()
    else:
      quarky.stoprobot()

Output
Read More
All articles loaded
No more articles to load