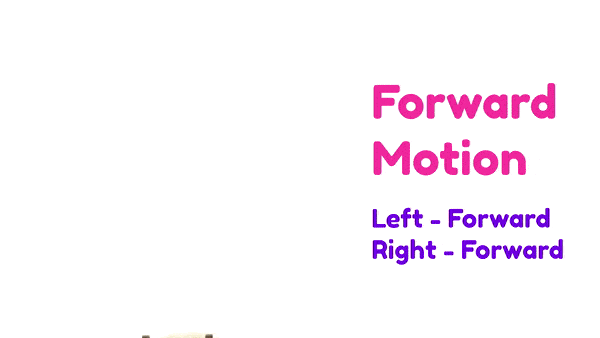
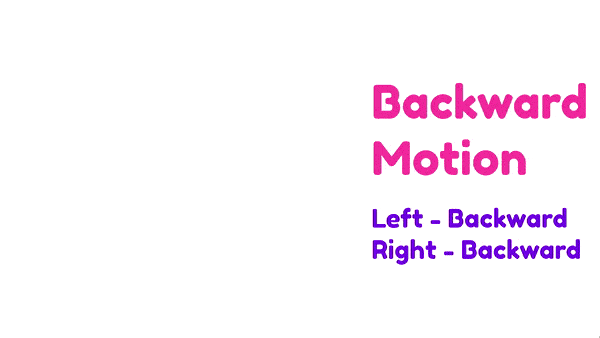
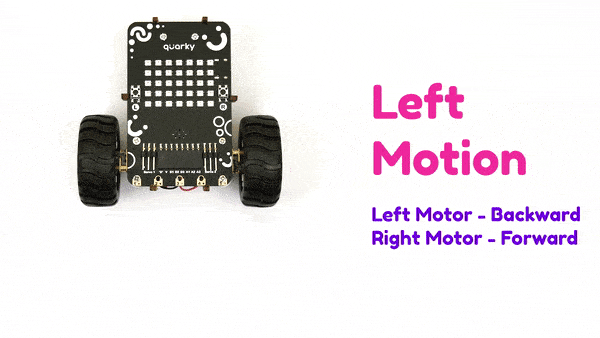
The function moves the Quarky robot in the specified direction. The direction can be “FORWARD”, “BACKWARD”, “LEFT”, and “RIGHT”.
- Forward:
- Backward:
- Left:
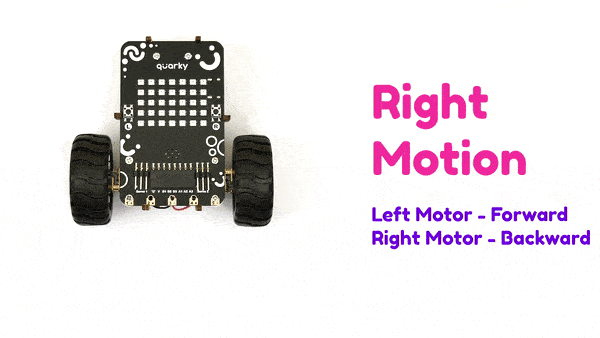
- Right:
Function Definition: runrobot(direction = "FORWARD", speed = 100)
| Name | Type | Description | Expected Values | Default Value |
|---|---|---|---|---|
| direction | string | The specific motion you want to give the robot. | "FORWARD", "BACKWARD", "LEFT", or "RIGHT" | "FORWARD" |
| speed | int | The speed of the robot. | 0 to 100 | 100 |
The function moves the Quarky robot in the specified direction. The direction can be “FORWARD”, “BACKWARD”, “LEFT”, and “RIGHT”.
sprite = Sprite('Tobi')
quarky = Quarky()
import time
quarky.setorientation(2)
quarky.setirthreshold("IRL", 3000)
quarky.setirthreshold("IRR", 3000)
while True:
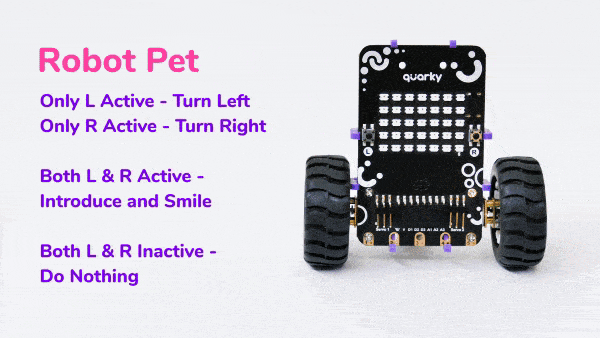
if quarky.getirstate("IRL"):
if quarky.getirstate("IRR"):
quarky.cleardisplay()
else:
pass
quarky.runrobot("LEFT", 100)
time.sleep(0.3)
quarky.stoprobot()
else:
pass
if quarky.getirstate("IRR"):
quarky.runrobot("RIGHT", 100)
time.sleep(0.3)
quarky.stoprobot()
else:
pass
quarky.showemotion("happy")
quarky.playsounduntildone("QuarkyIntro")
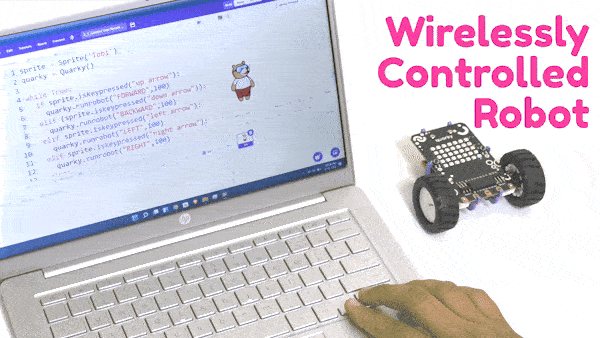
sprite = Sprite('Tobi')
quarky = Quarky()

while True:

  if sprite.iskeypressed("up arrow"):
    quarky.runrobot("FORWARD", 50)
  elif sprite.iskeypressed("down arrow"):
    quarky.runrobot("BACKWARD", 50)
  elif sprite.iskeypressed("left arrow"):
    quarky.runrobot("LEFT", 50)
  elif sprite.iskeypressed("right arrow"):
    quarky.runrobot("RIGHT", 50)
  else:
    quarky.stoprobot()
sprite = Sprite('Tobi')
quarky = Quarky()
# imported modules
import time
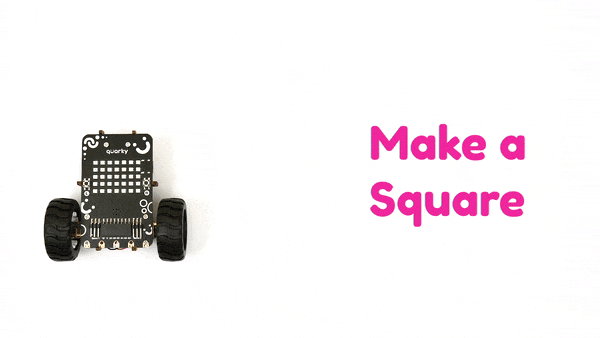
for i in range(0, 4):
quarky.runrobot("FORWARD", 100)
time.sleep(1)
quarky.stoprobot()
quarky.runrobot("LEFT", 100)
time.sleep(1.2)
quarky.stoprobot()
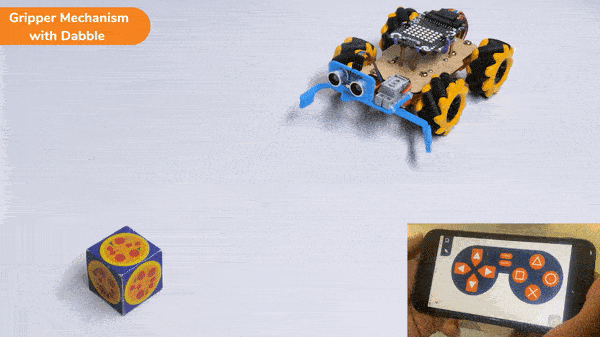
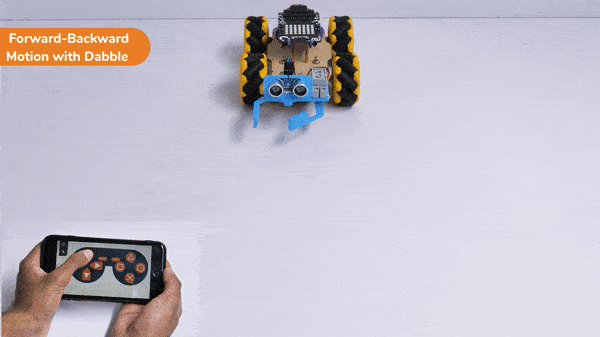
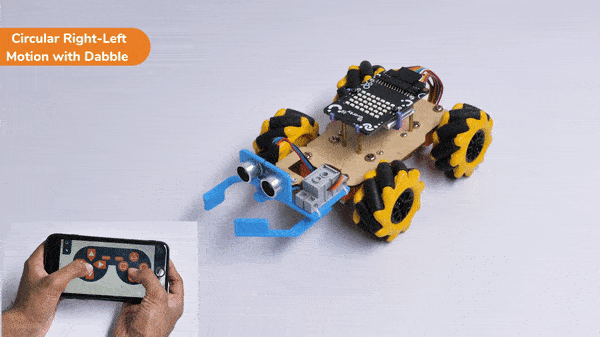
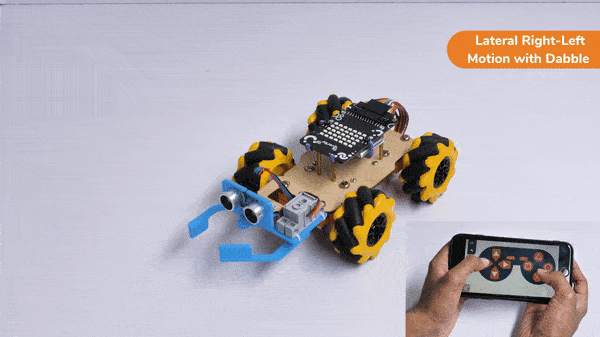
In this activity, we will control the Mecanum Gripper according to our needs using the Dabble application on our own Devices.
We will first understand how to operate Dabble and how to modify our code according to the requirements. The following image is the front page of the Dabble Application.

Select the Gamepad option from the Home Screen and we will then use the same gamepad to control our Mecanum Gripper.

The following blocks represent the different functions that are created to control the Mecanum Gripper for different types of motions. We will use the arrow buttons to control the basic movements.( Forward, Backward, Lateral Left, Lateral Right ). We will use custom functions to control the gripper actions. We will use the Triangle button to close the gripper arms and the Circle button to open the gripper arms. We will use the Cross button to rotate to the right direction and we will use the Square button to rotate to the left direction. We can use the Select button to stop the Mecanum whenever possible.
Note: You can always customize each and every function and button, and make your own activities easily. You will have to add the extensions of Mecanum and also of Dabble to access the functions. To access the basic extensions required, make sure to select the Board as Quarky first. Select the Python Coding Environment and on the top right click on the Upload Mode only for the code to work properly.
from quarky import *
# imported modules
from expansion_addon import Mecanum
import dabble

# User Defined Functions
def Initialization():
	meca.initialisegripper(5)
	meca.setcloseangle(90)
	meca.stoprobot()


meca=Mecanum(1,2,7,8)
gp=dabble.Gamepad()


Initialization()
while True:
	gp.processinput()
	if gp.ispressed("up"):
		meca.runrobot("forward",100)

	else:
		pass
		if gp.ispressed("down"):
			meca.runrobot("backward",100)

		else:
			pass
			if gp.ispressed("right"):
				meca.runrobot("lateral right",100)

			else:
				pass
				if gp.ispressed("left"):
					meca.runrobot("lateral left",100)

				else:
					pass
					if gp.ispressed("triangle"):
						meca.closearm()

					else:
						pass
						if gp.ispressed("circle"):
							meca.openarm()

						else:
							pass
							if gp.ispressed("cross"):
								meca.runrobot("circular right",100,1)

							else:
								pass
								if gp.ispressed("square"):
									meca.runrobot("circular left",100,1)

								else:
								  pass
								  if gp.ispressed("select"):
								    meca.stoprobot()


								  else:
									  pass
									  meca.stoprobot()
You will have to connect the Quarky with the Dabble Application on your device. Make sure Bluetooth is enabled on the device before connecting. Connect the Mecanum to the Dabble application after uploading the code. You will be able to connect by clicking on the plug option in the Dabble Application as seen below. Select that plug option and you will find your Quarky device. Connect by clicking on the respective Quarky.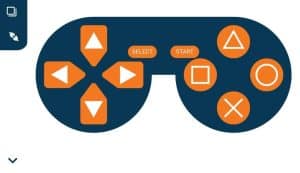
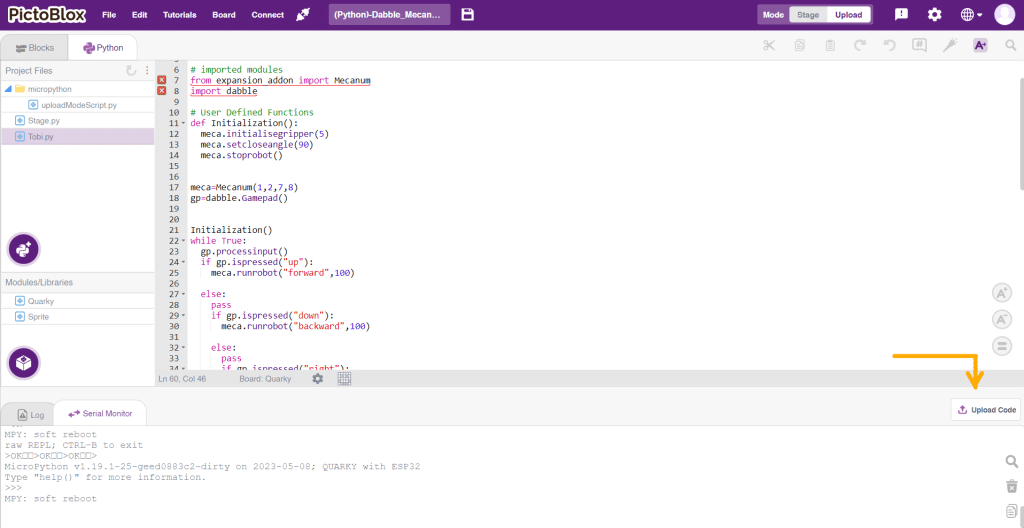
Forward-Backward Motion:
Circular Right-Left Motion:
Lateral Right-Left Motion:
Gripper Mechanism: