


The block displays a speech bubble with the specified text for the sprite that runs it, which appears on the screen for the specified amount of seconds.
Script
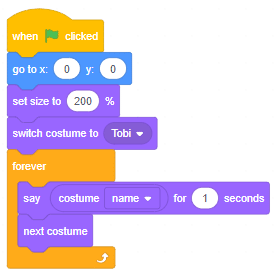
Output
The block displays a speech bubble with the specified text for the sprite that runs it, which appears on the screen for the specified amount of seconds.
A noun detector is a tool or algorithm designed to identify and extract nouns from a given text or speech input. Nouns are a type of word that typically represent people, places, things, or ideas. In the context of chat-based applications, a noun detector can be useful for extracting key information or identifying specific entities mentioned in a conversation. It can help in tasks such as named entity recognition, information retrieval, sentiment analysis, and many more.
A noun detector serves as a valuable component in language processing systems, helping to extract and utilize meaningful information from text or speech inputs in chat-based interactions.
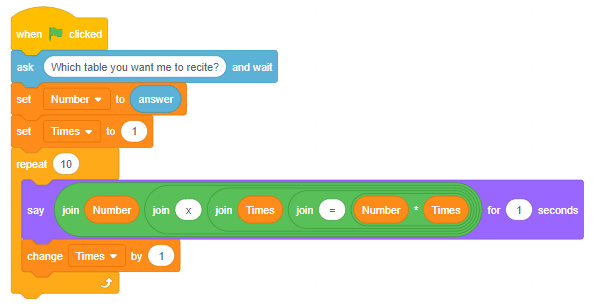
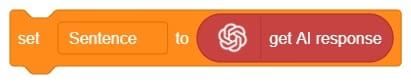
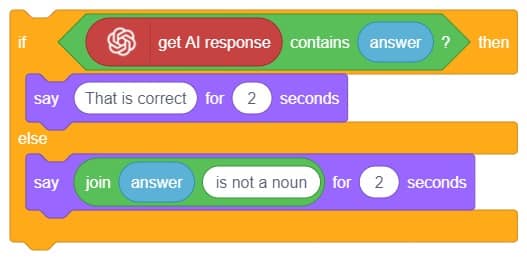
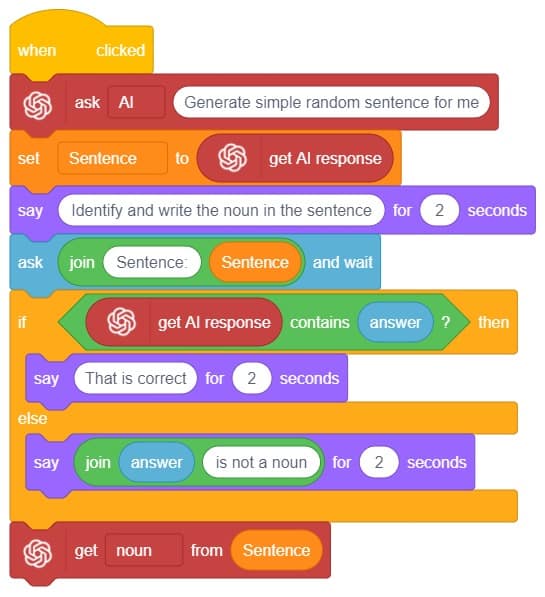
First, ChatGPT generates random sentences, and we save this response in a variable. Then, it asks users to identify a noun from the given sentence. If the user’s answer matches the response generated by ChatGPT, it will say “Correct.” Otherwise, it will say “Incorrect answer.”


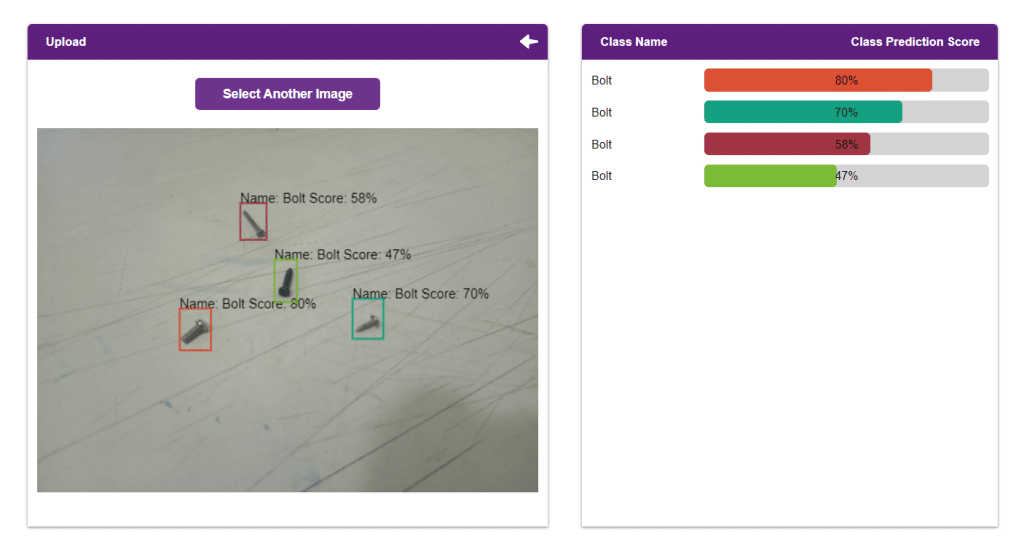
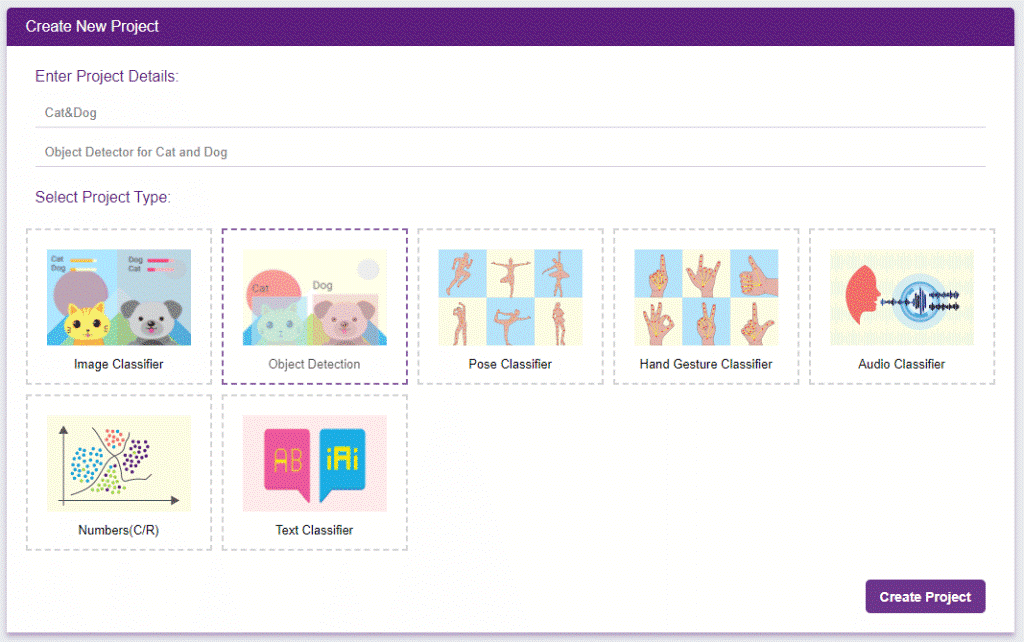
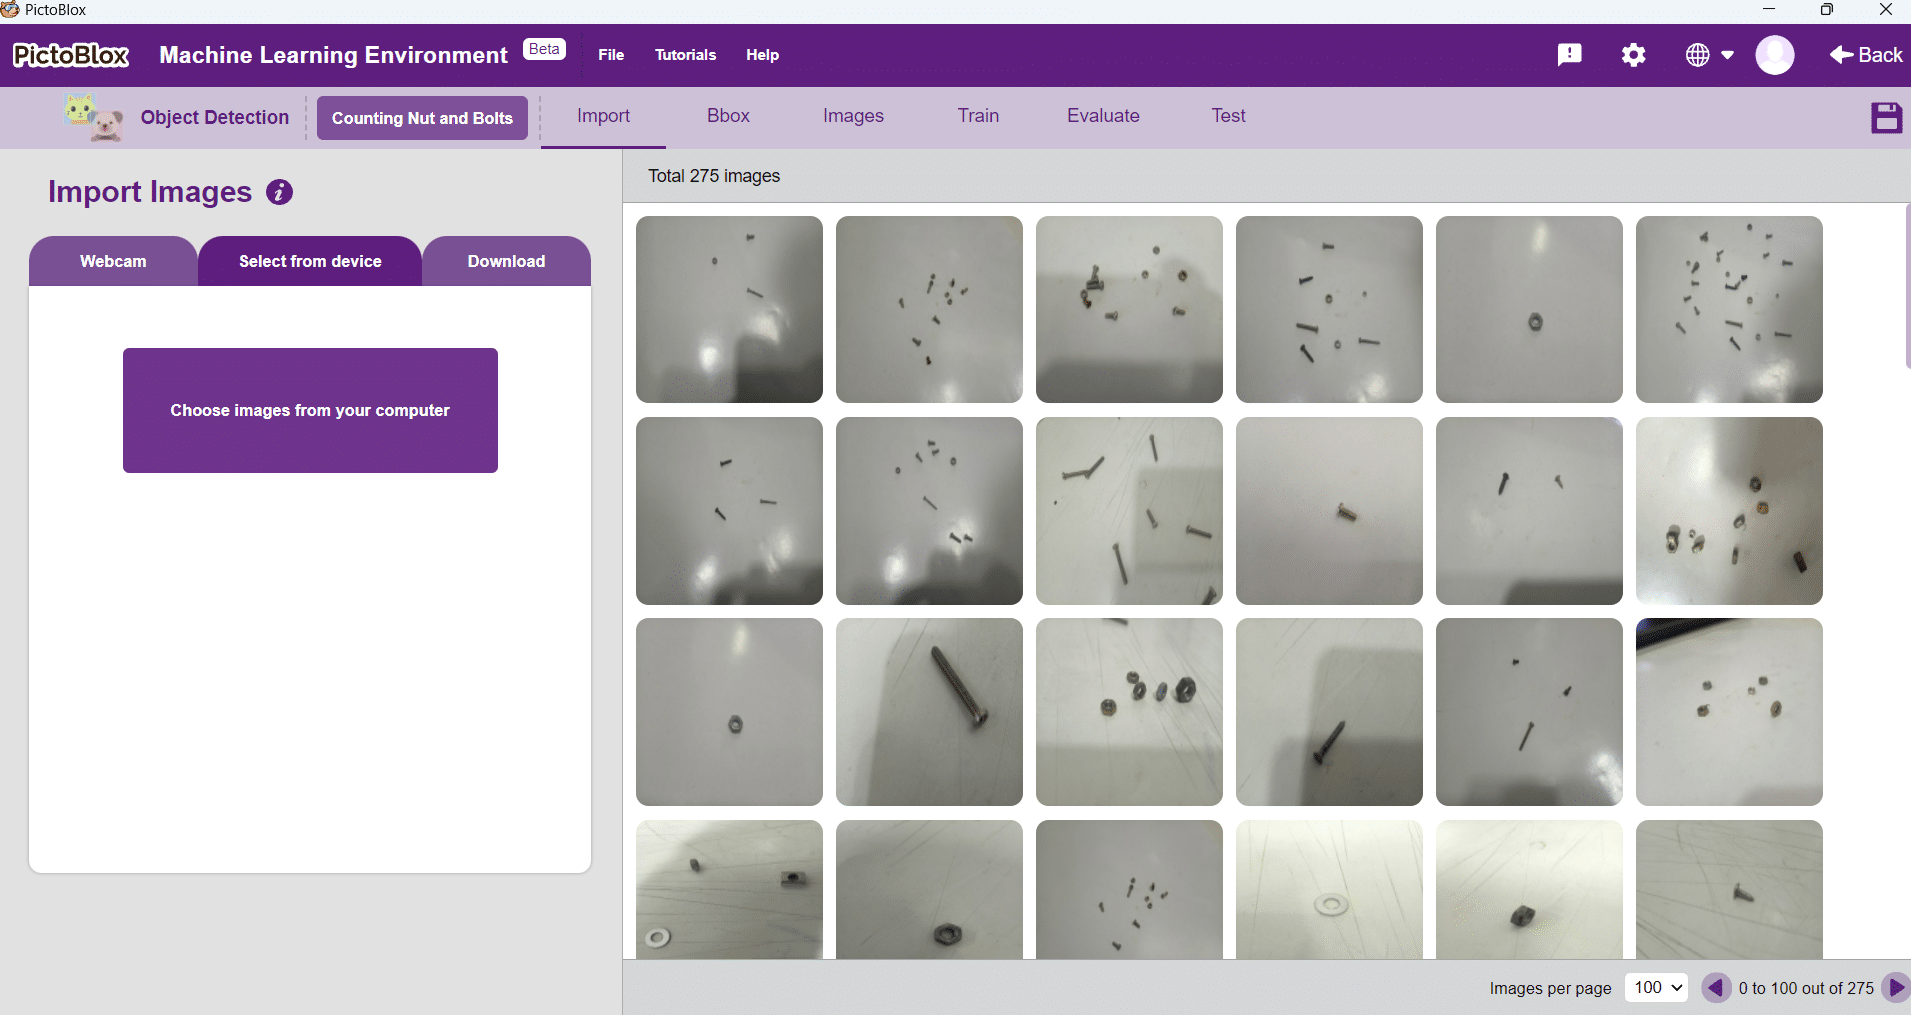
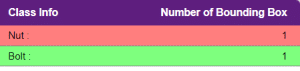
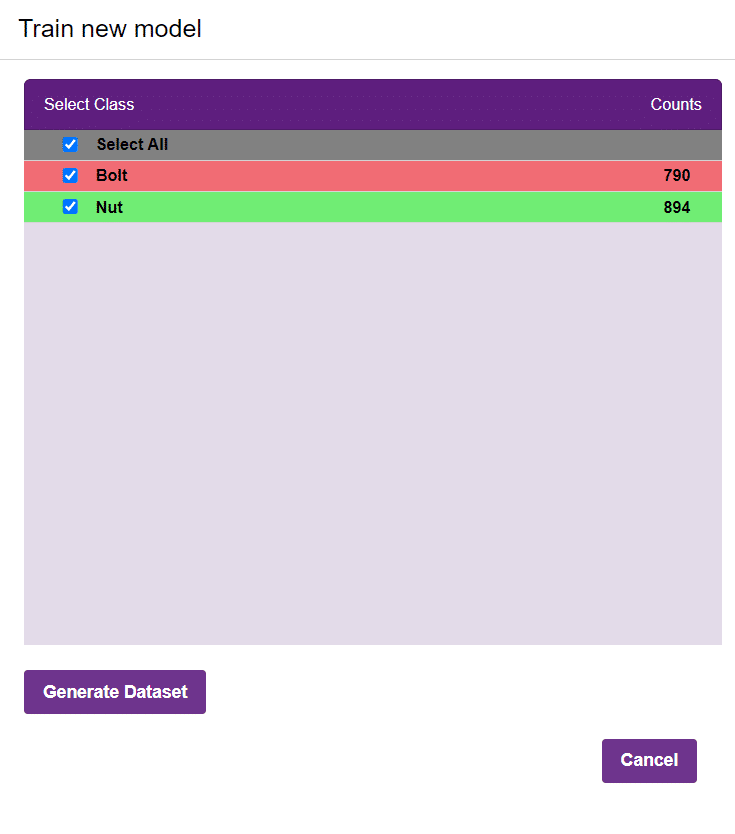
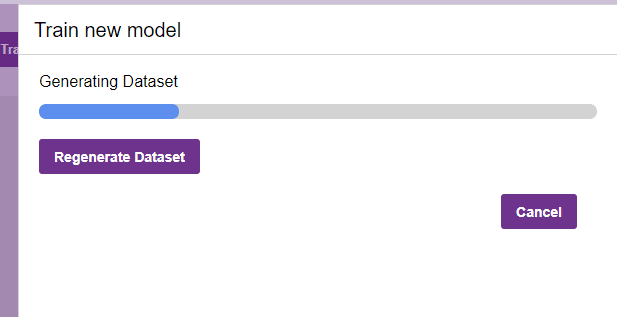
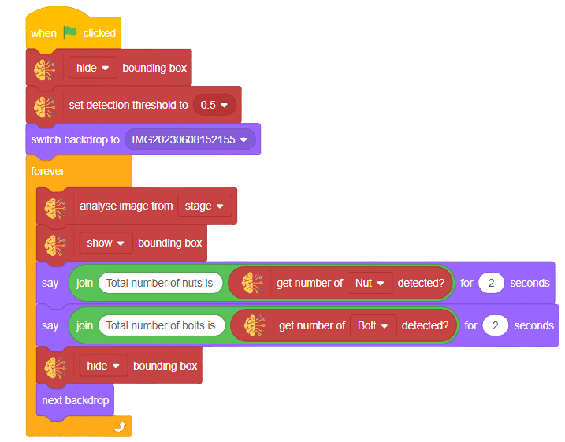
In this example project we are going to create a Machine Learning Model which can count number of nuts and bolts from the camera feed or images.
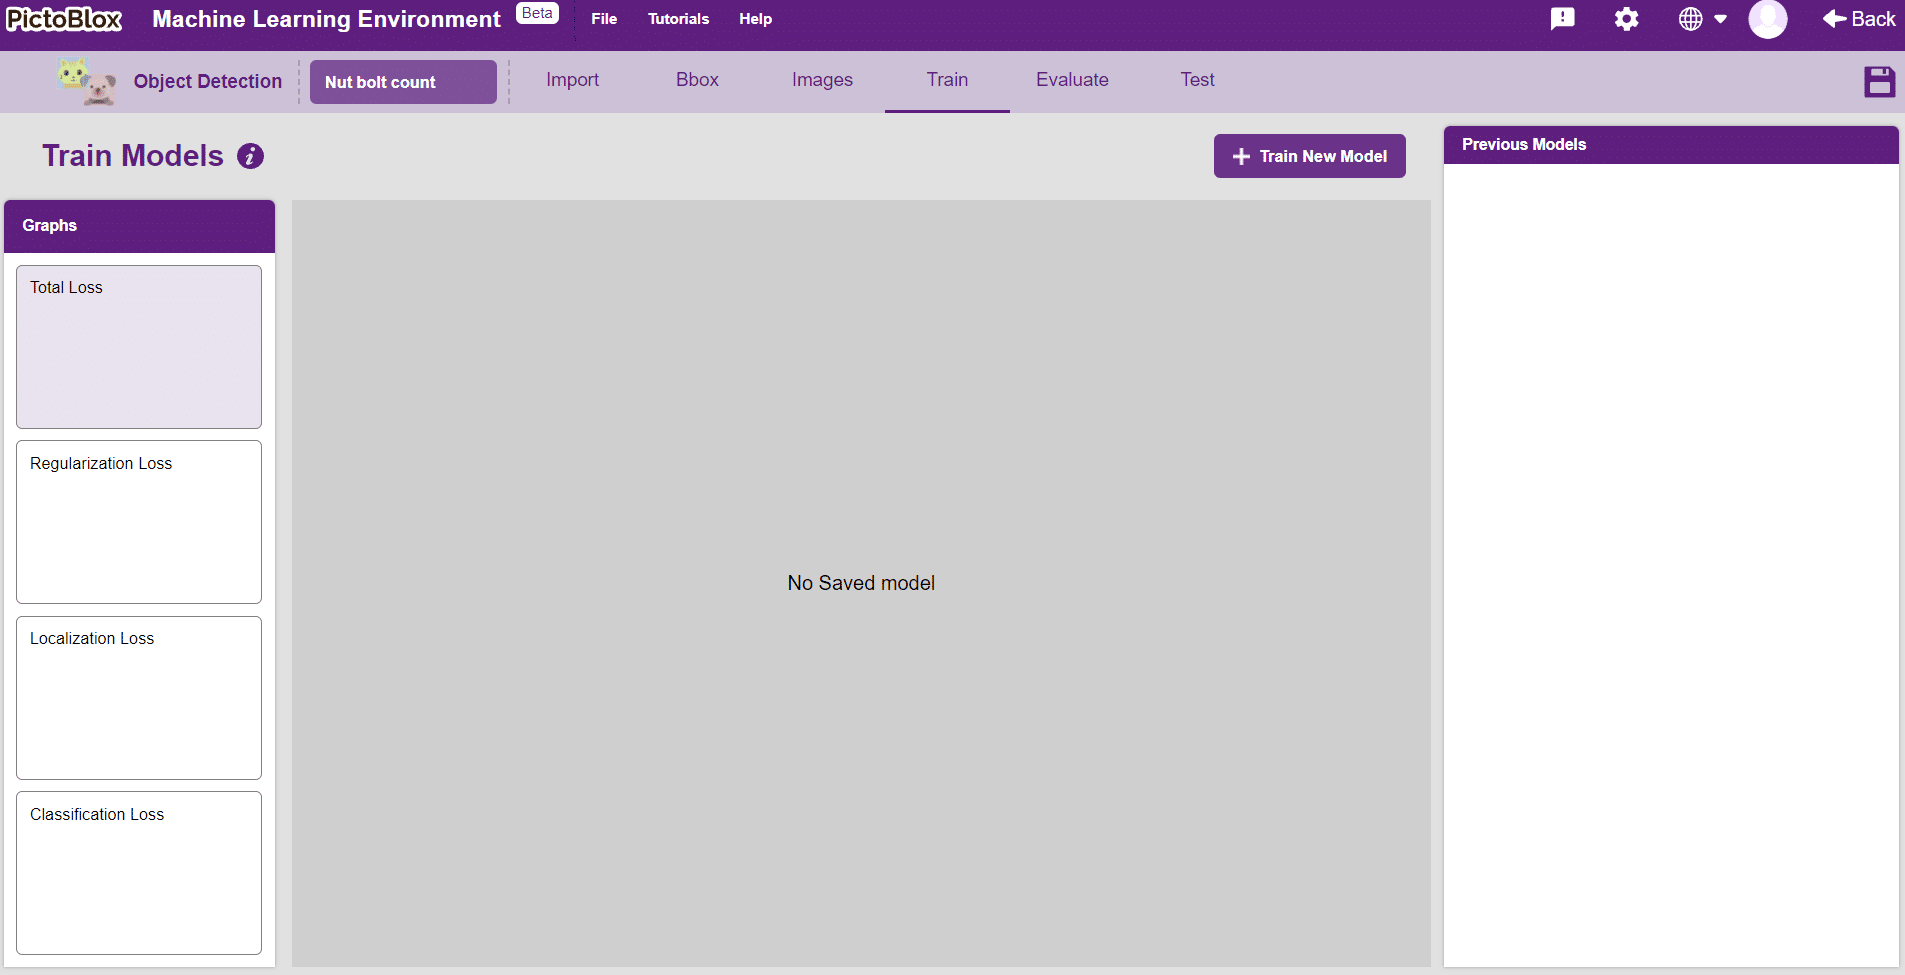
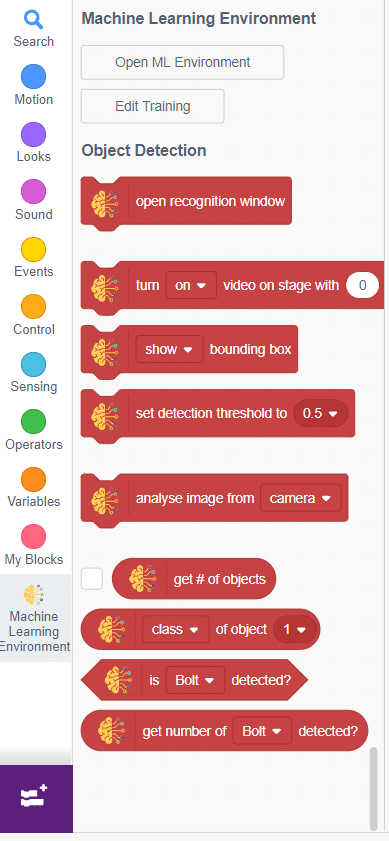
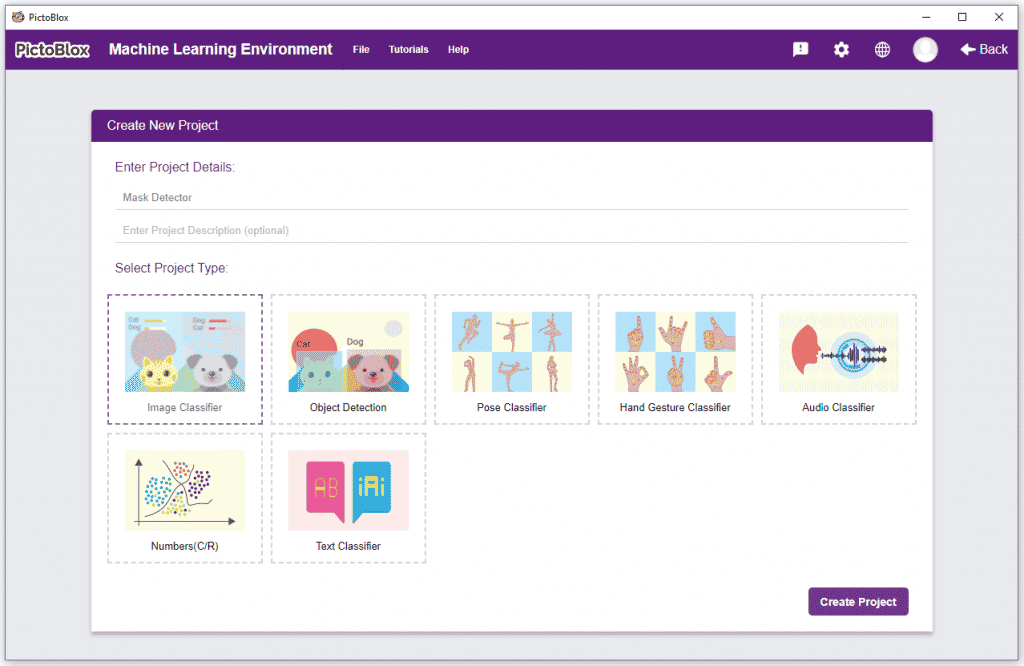
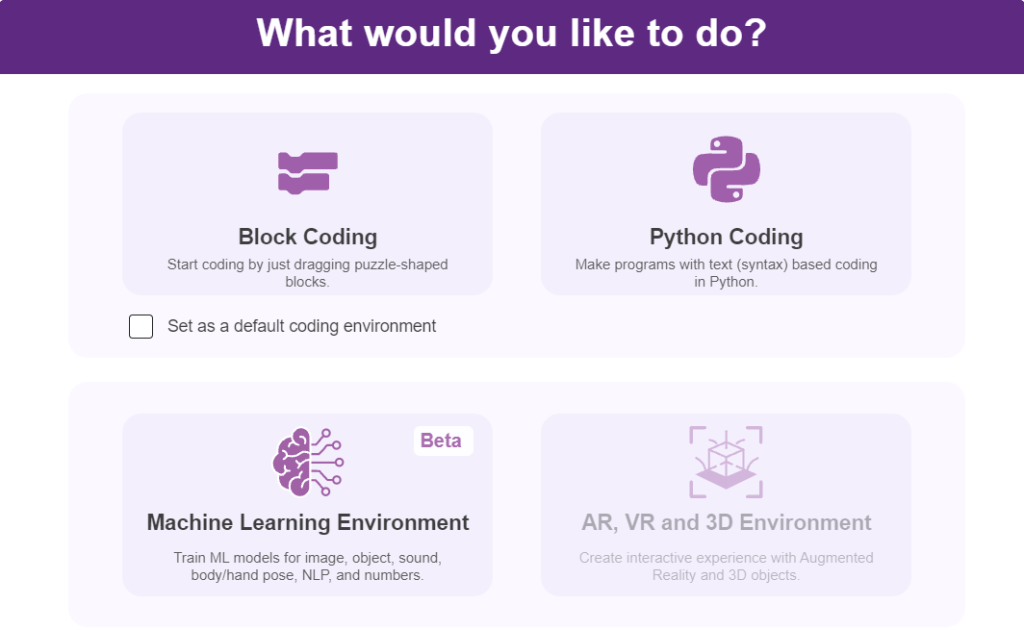
Object Detection is an extension of the ML environment that allows users to detect images and making bounding box into different classes. This feature is available only in the desktop version of PictoBlox for Windows, macOS, or Linux. As part of the Object Detection workflow, users can add classes, upload data, train the model, test the model, and export the model to the Block Coding Environment.

Alert: The Machine Learning Environment for model creation is available in the only desktop version of PictoBlox for Windows, macOS, or Linux. It is not available in Web, Android, and iOS versions.
Follow the steps below:
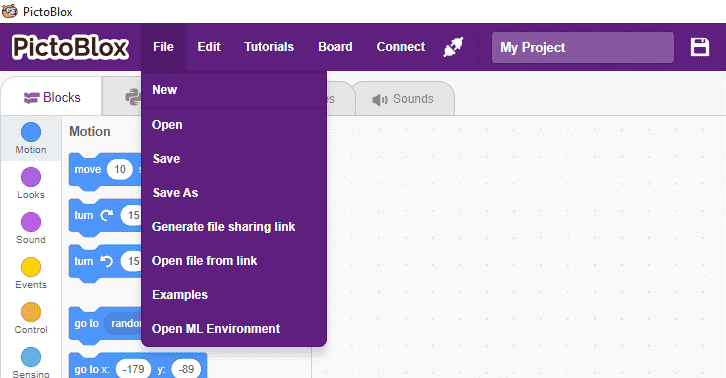

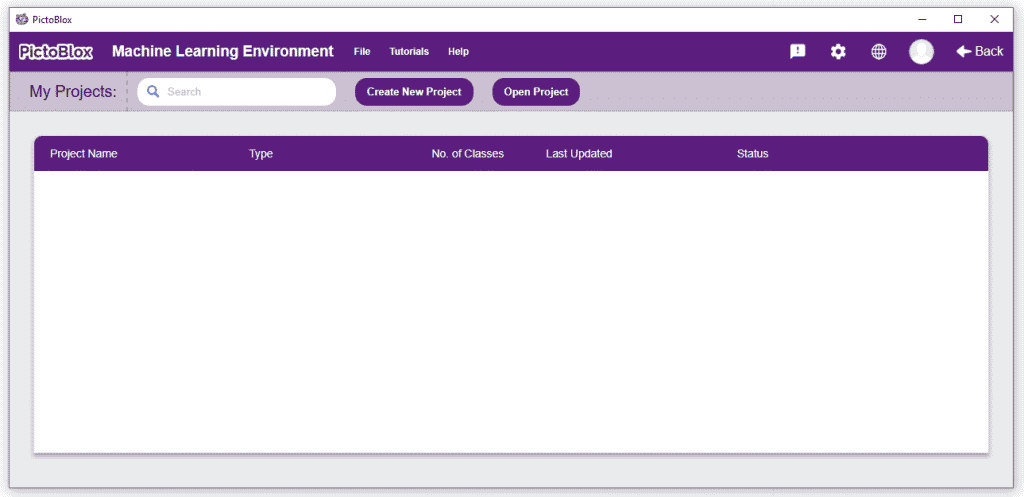
You shall see the Object Detection workflow. Your environment is all set.

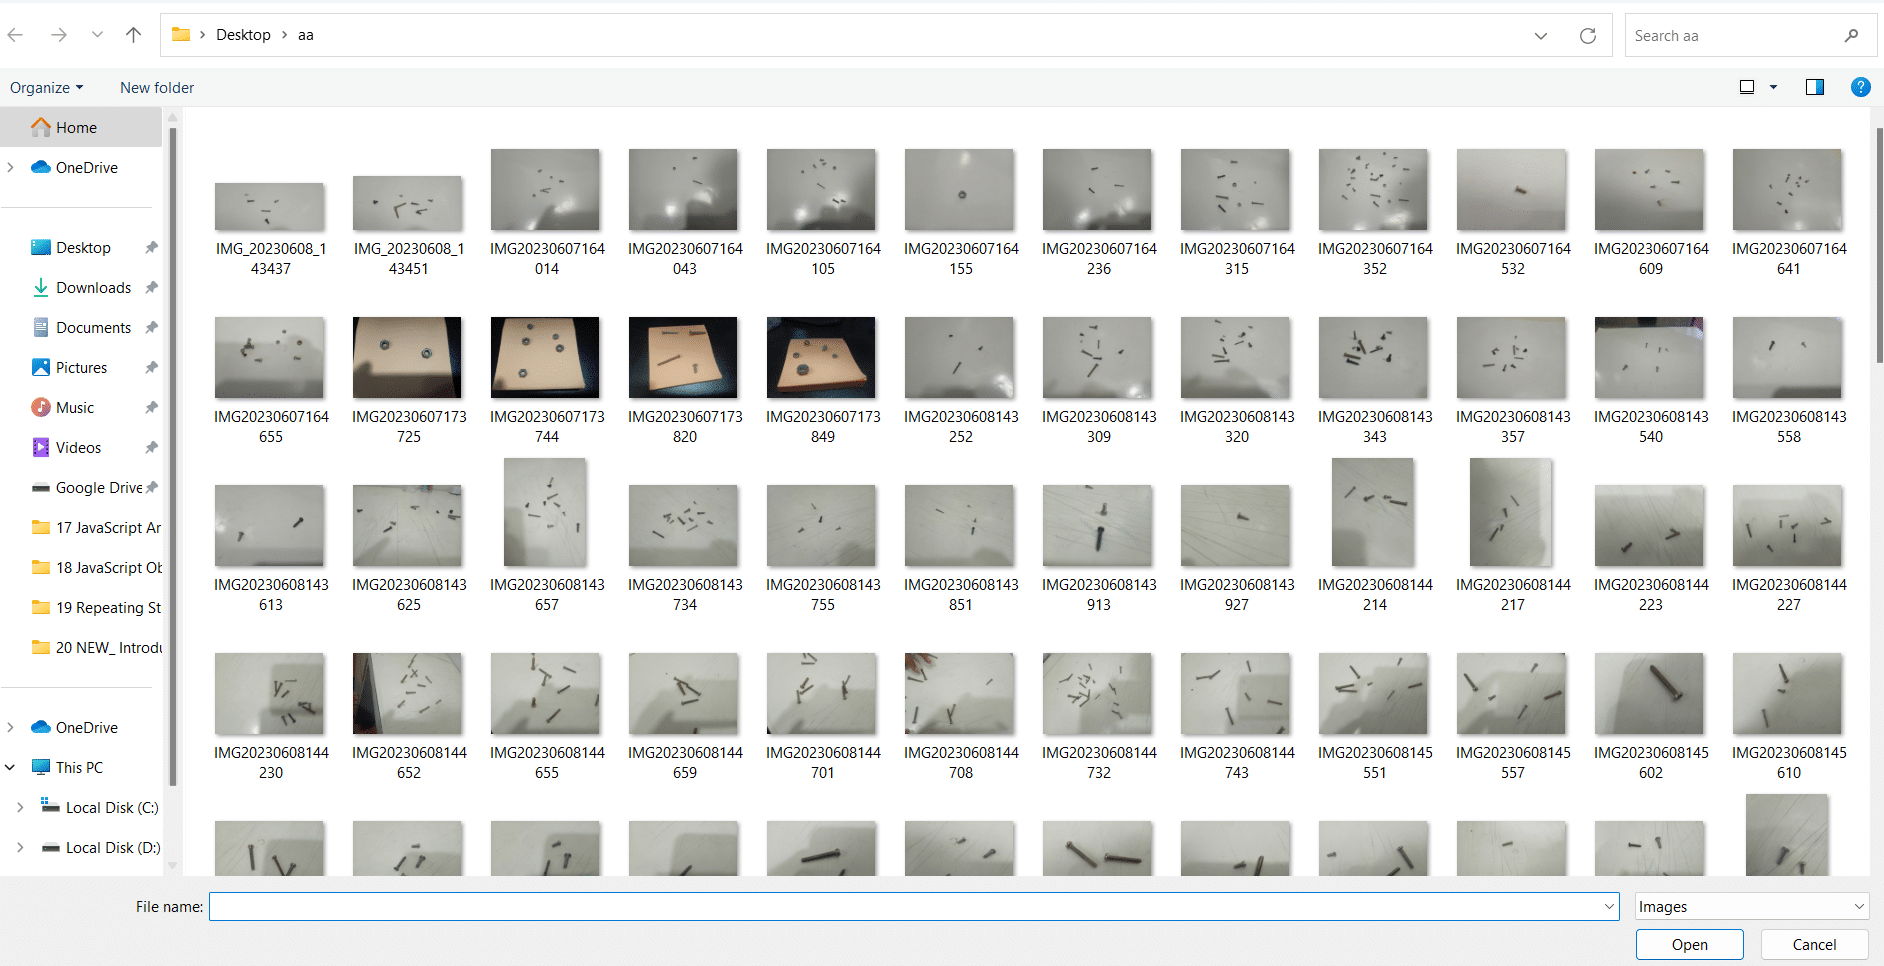
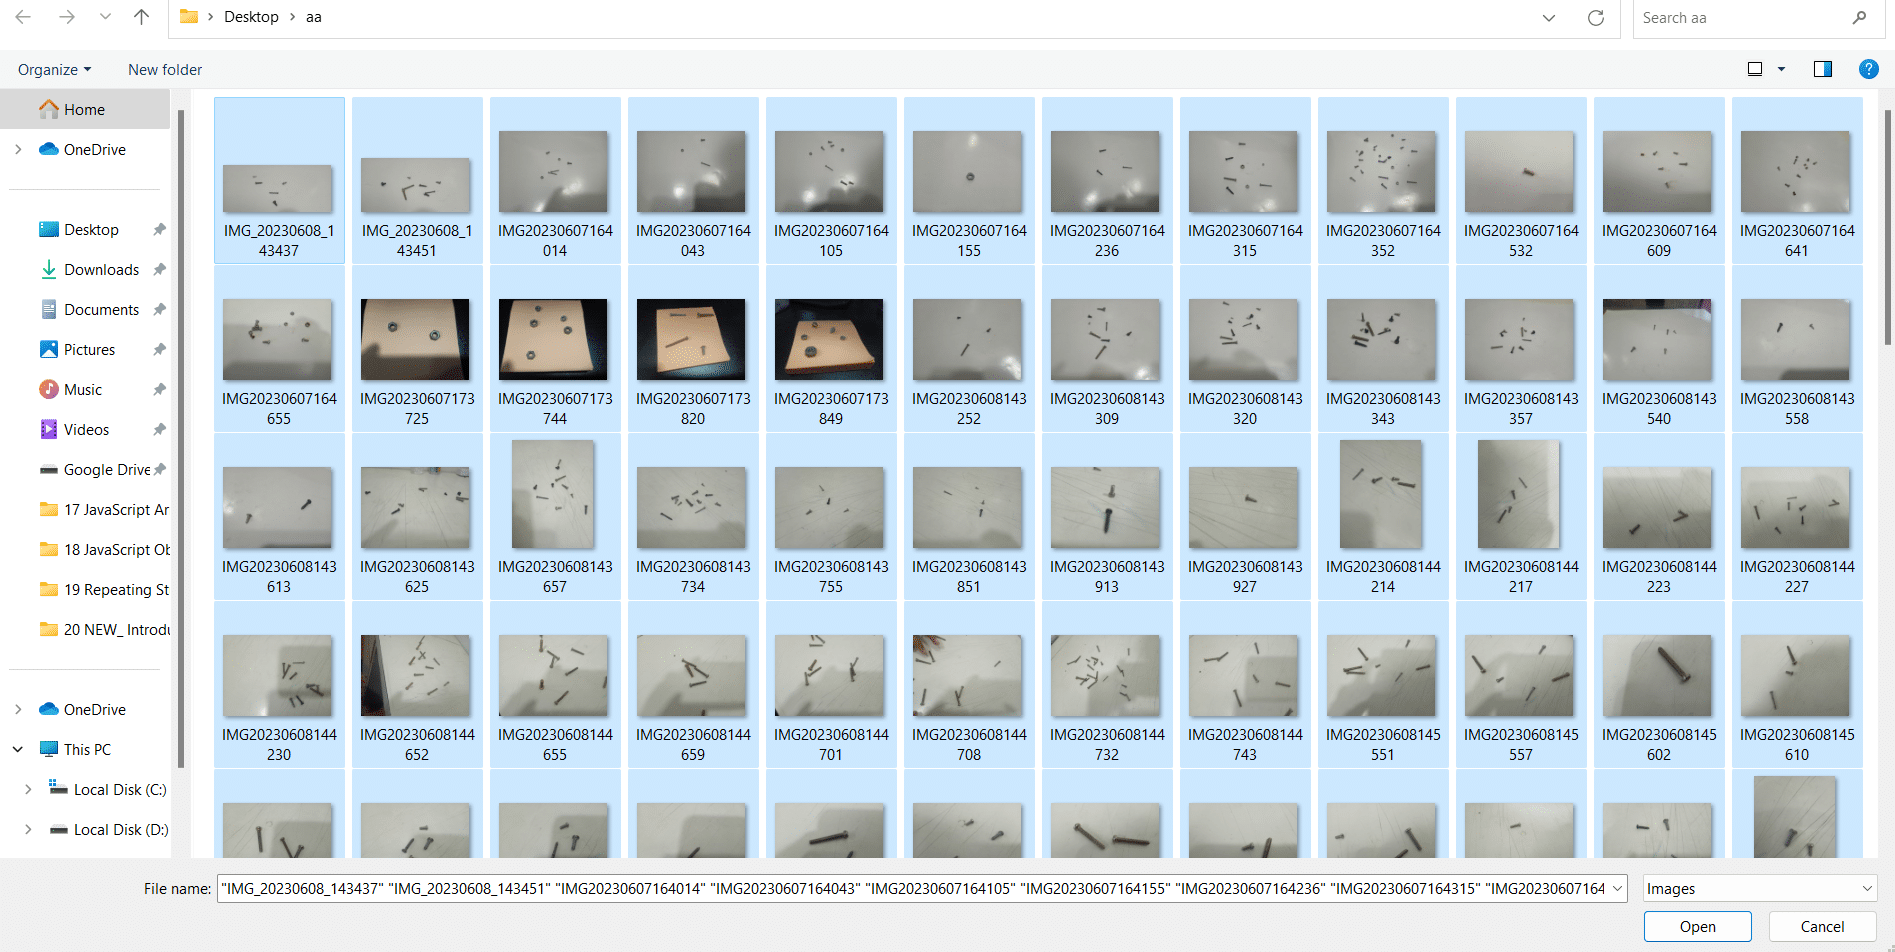
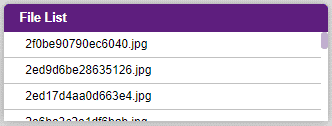
Uploading images from your device’s hard drive
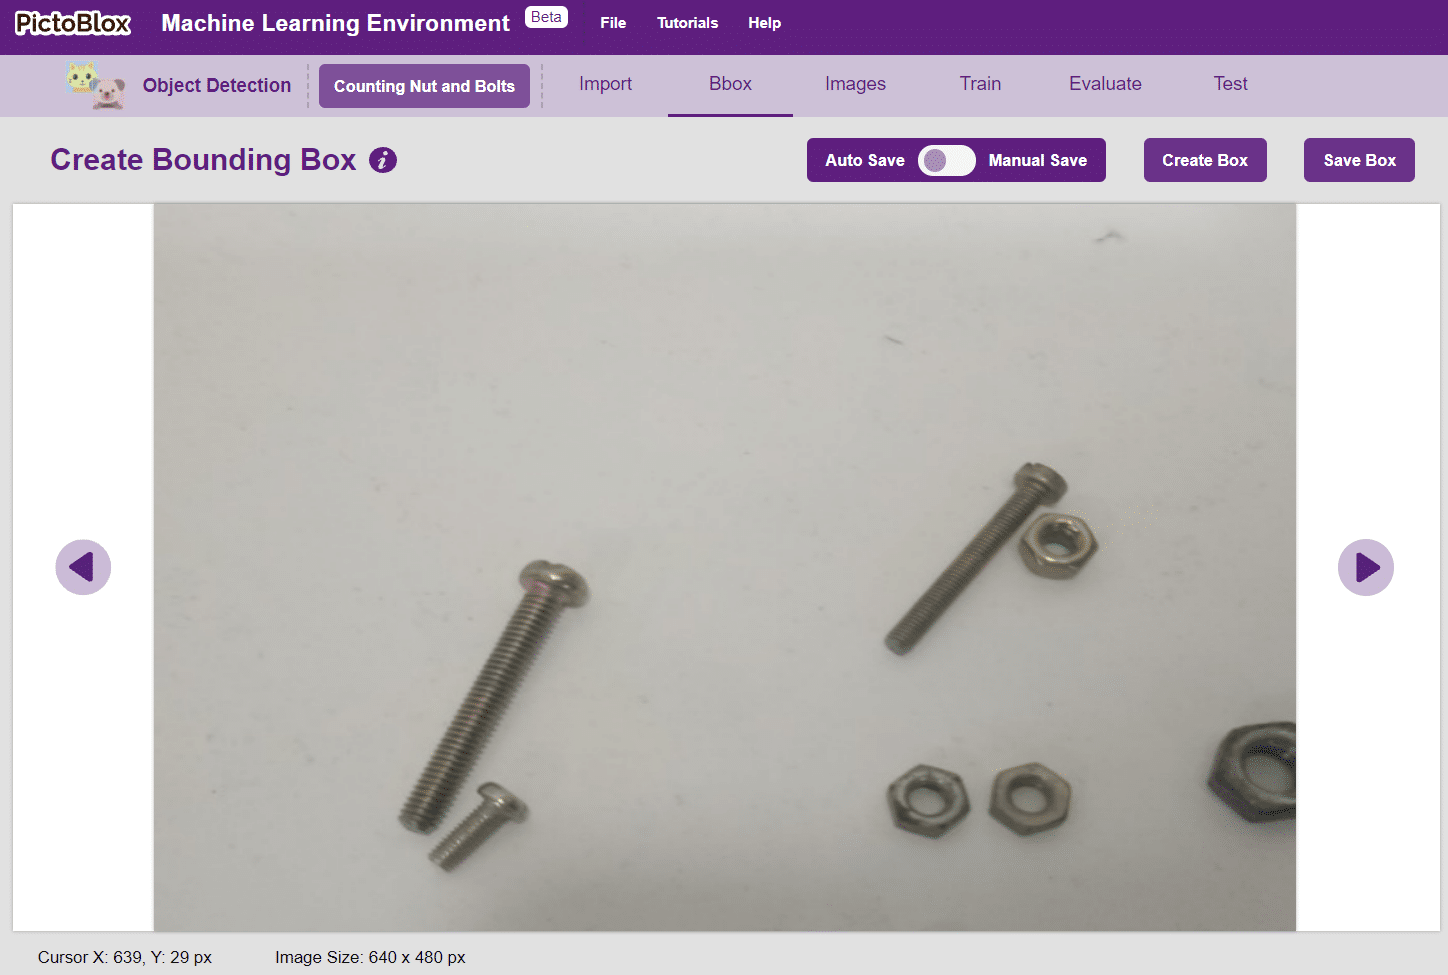

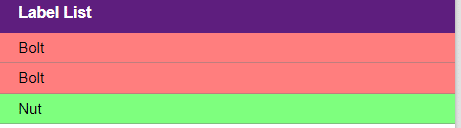
Notes: Notice how the targets are marked with a bounding box. The labels appear in the “Label List” column on the right.

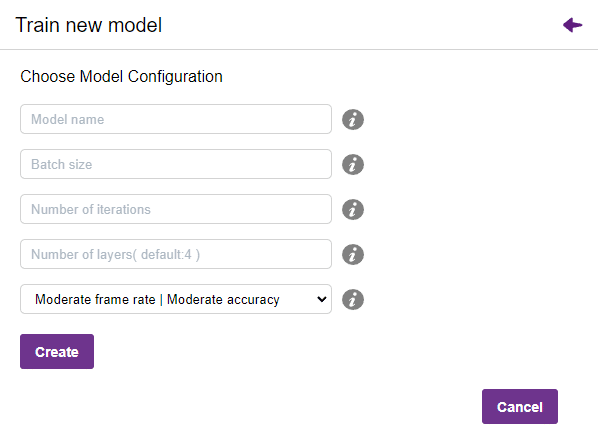
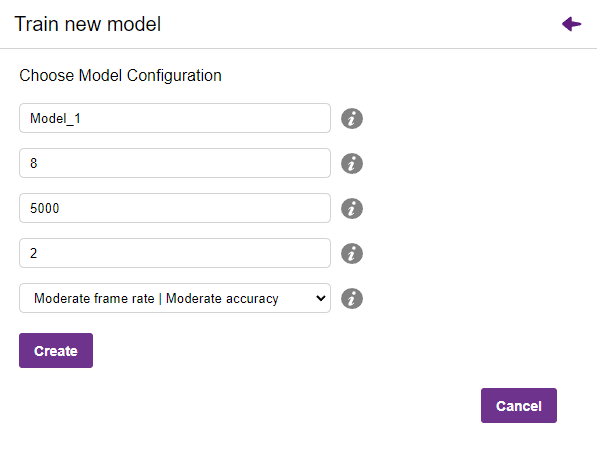
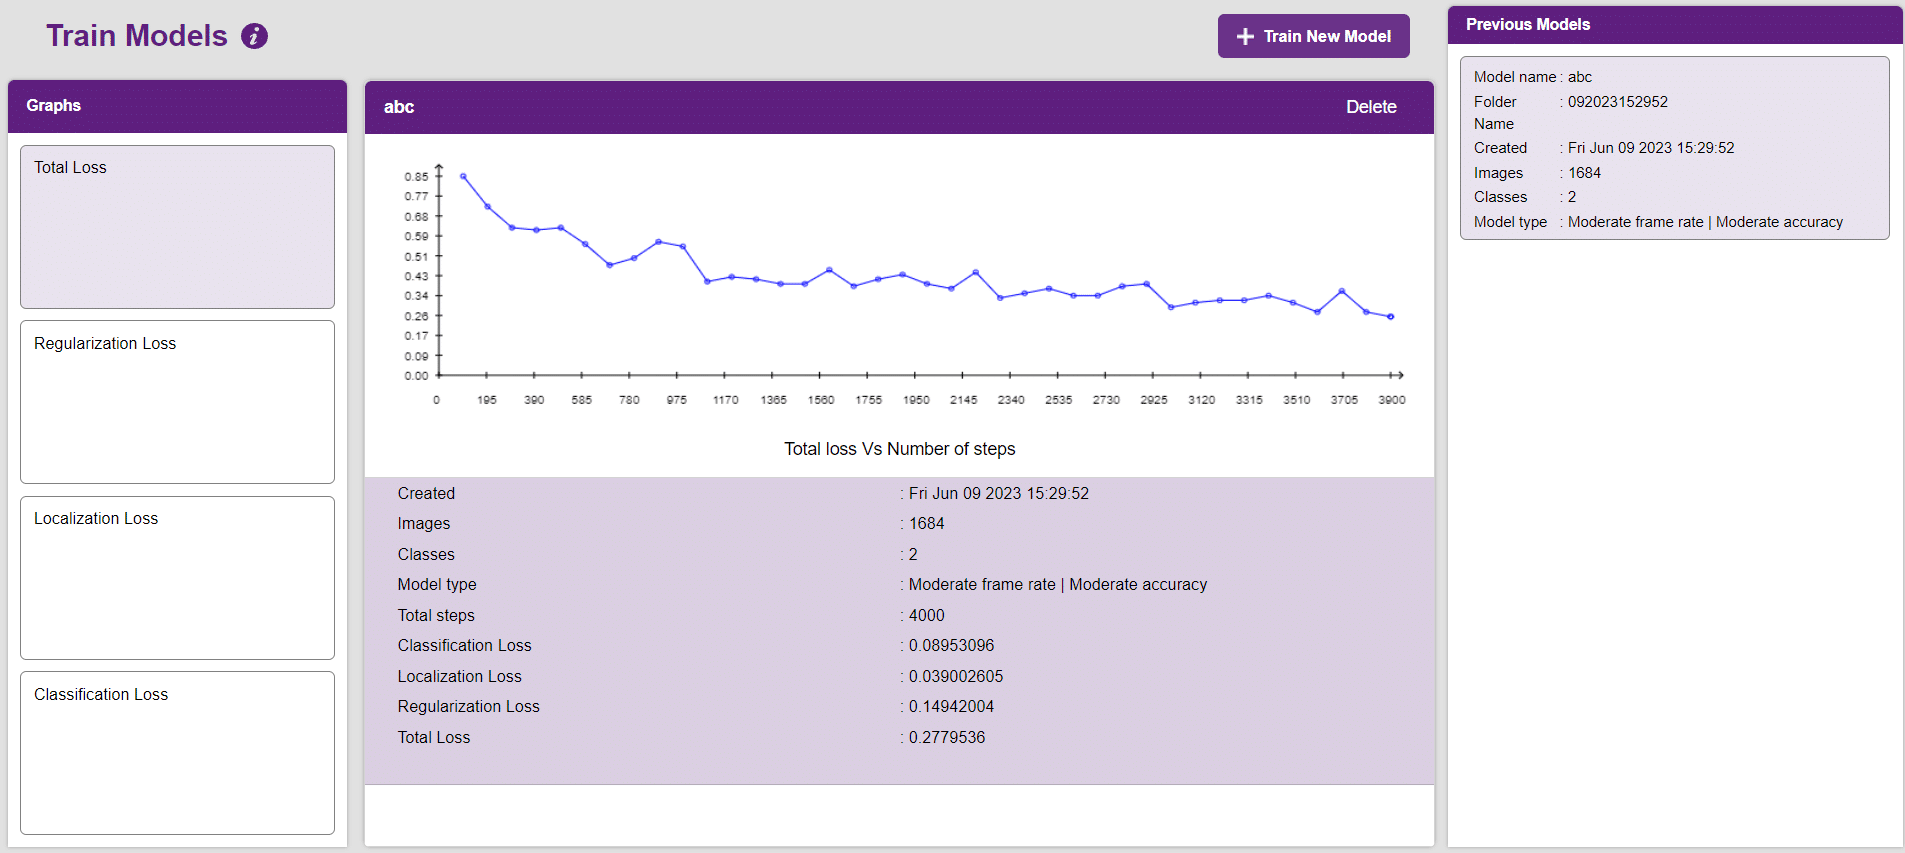
In Object Detection, the model must locate and identify all the targets in the given image. This makes Object Detection a complex task to execute. Hence, the hyperparameters work differently in the Object Detection Extension.
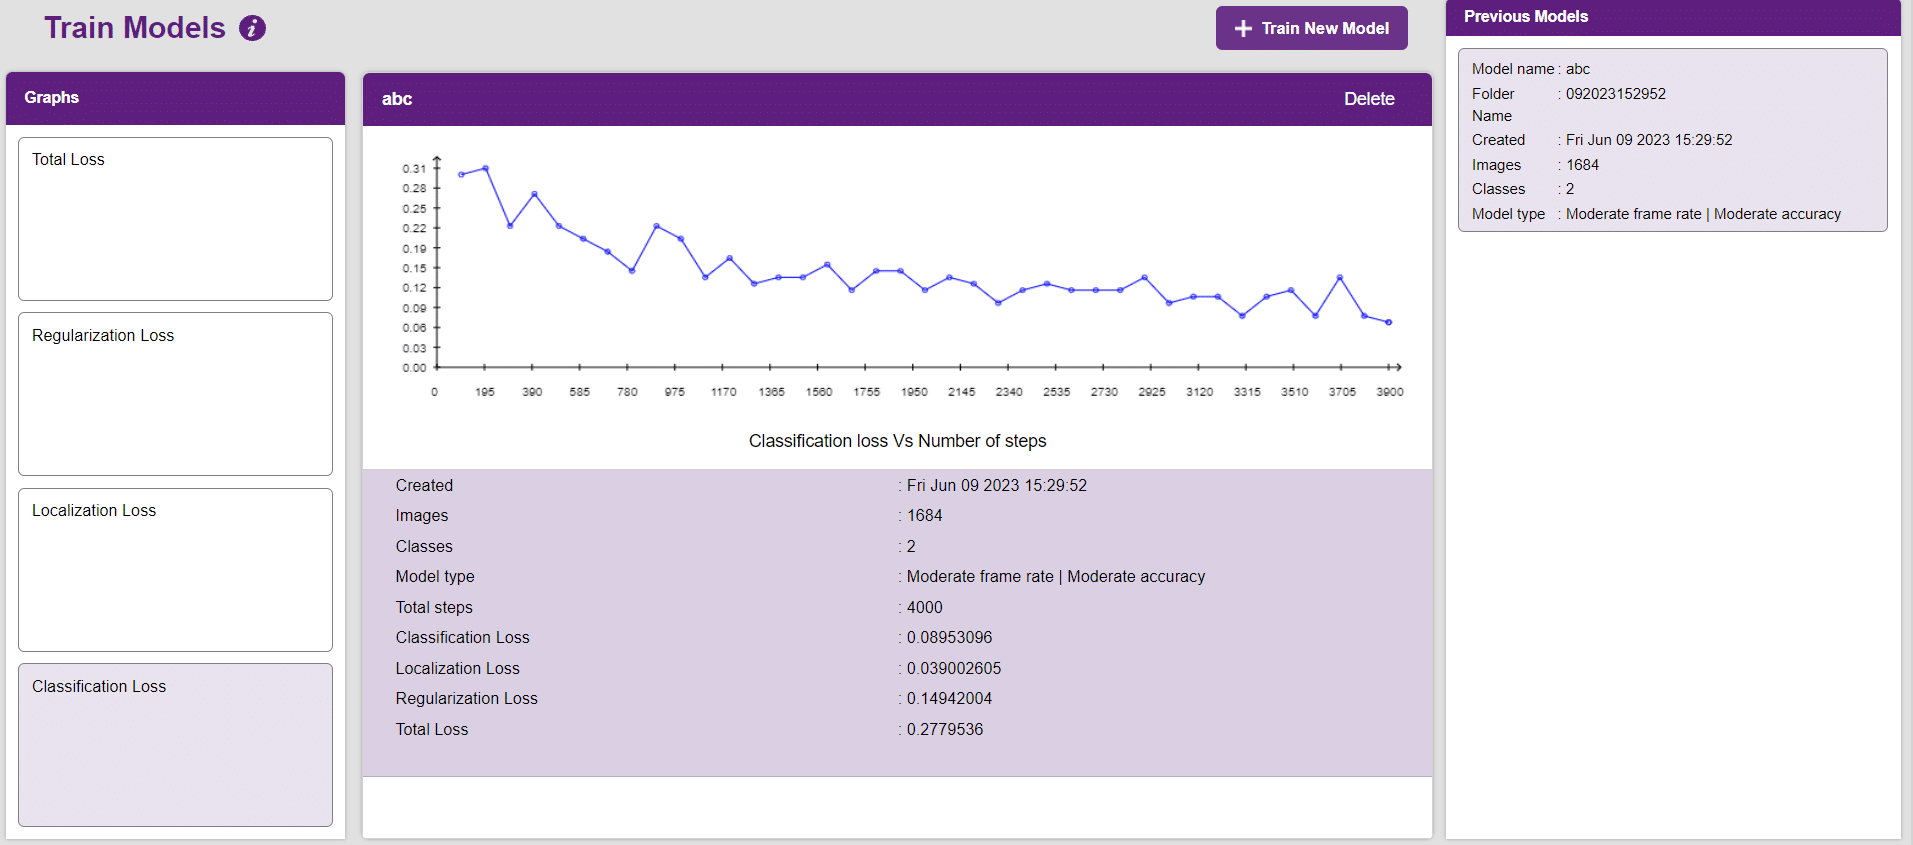
Now, let’s move to the “Evaluate” tab. You can view True Positives, False Negatives, and False Positives for each class here along with metrics like Precision and Recall.
The model will be tested by uploading an Image from device:
Click on the “PictoBlox” button, and PictoBlox will load your model into the Block Coding Environment if you have opened the ML Environment in the Block Coding.
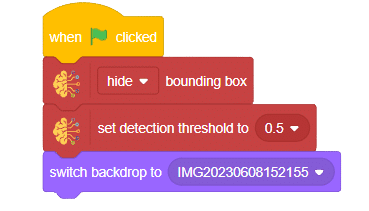
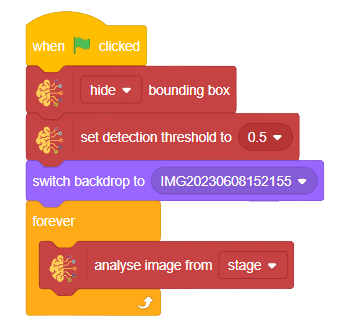
The idea is simple, we’ll add image samples in the “Backdrops” column. We’ll keep cycling through the backdrops and keep predicting the image on the stage.
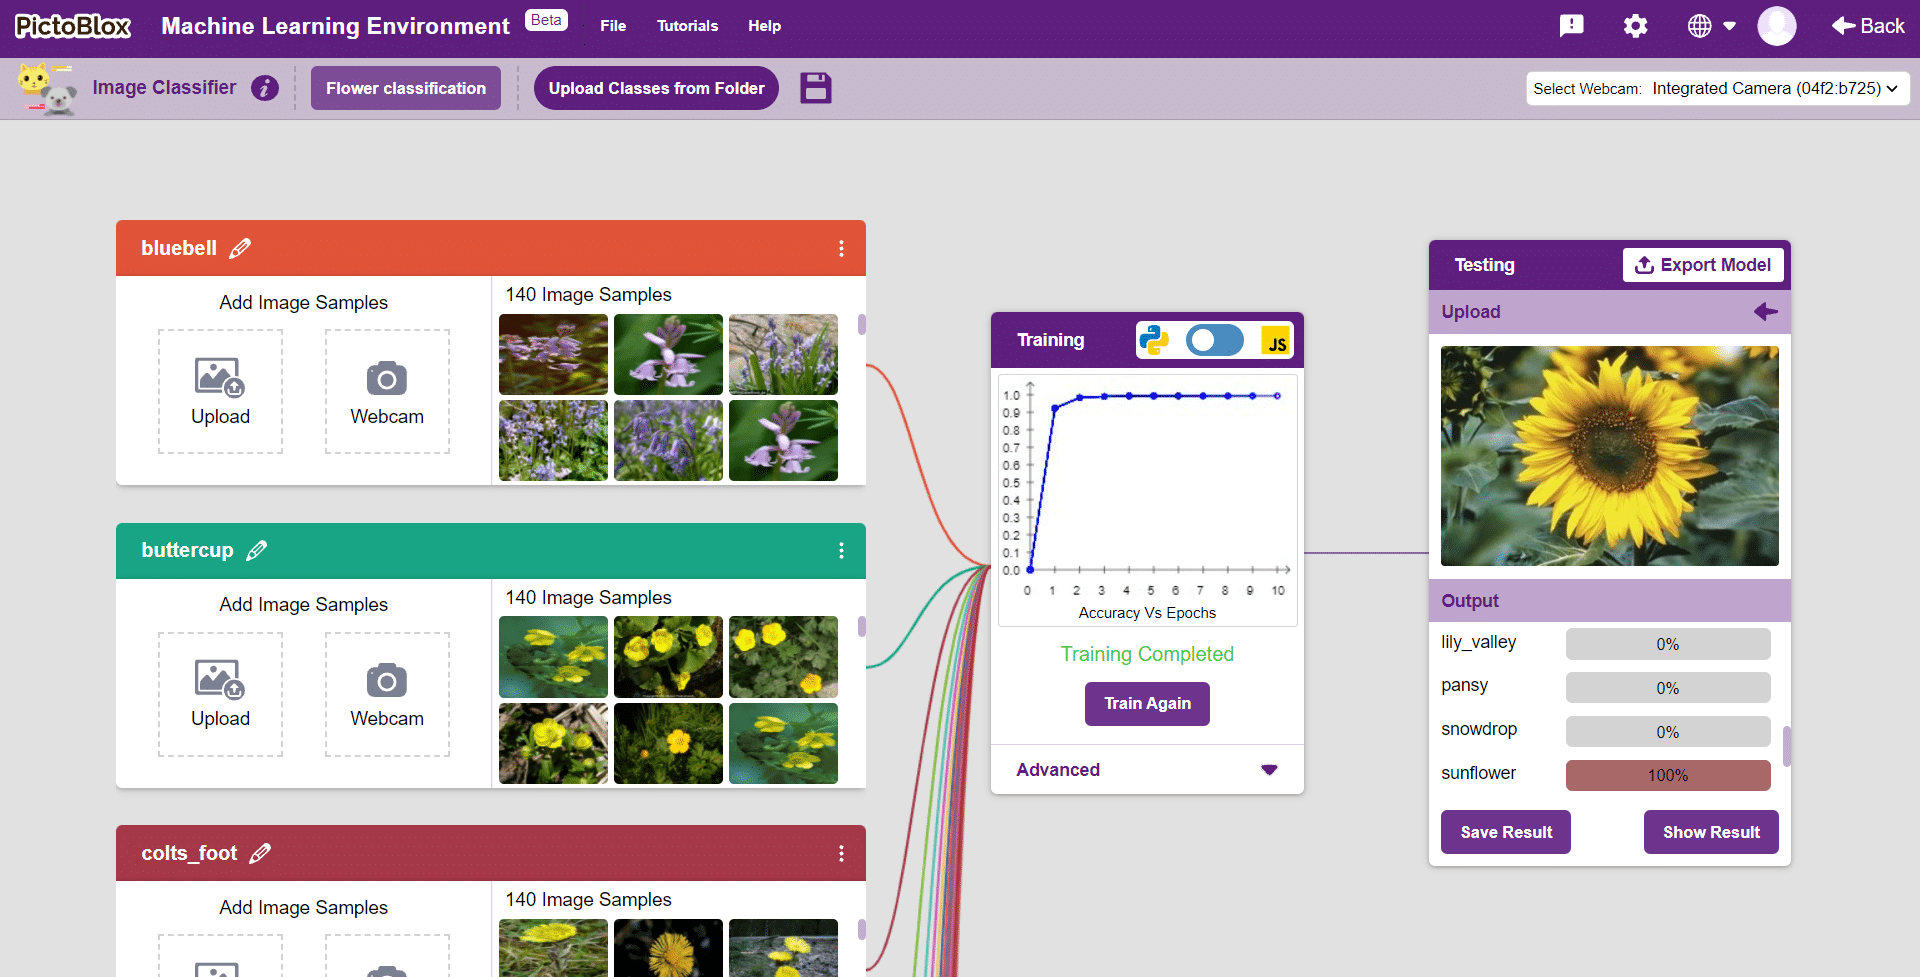
In this example project we are going to create a Machine Learning Model which can identify the type of flower from the camera feed or images.
Image Classifier is an extension of the ML environment that allows users to classify images into different classes. This feature is available only in the desktop version of PictoBlox for Windows, macOS, or Linux. As part of the Image Classifier workflow, users can add classes, upload data, train the model, test the model, and export the model to the Block Coding Environment.
Let’s create the ML model.
Alert: The Machine Learning Environment for model creation is available in the only desktop version of PictoBlox for Windows, macOS, or Linux. It is not available in Web, Android, and iOS versions.
Follow the steps below:


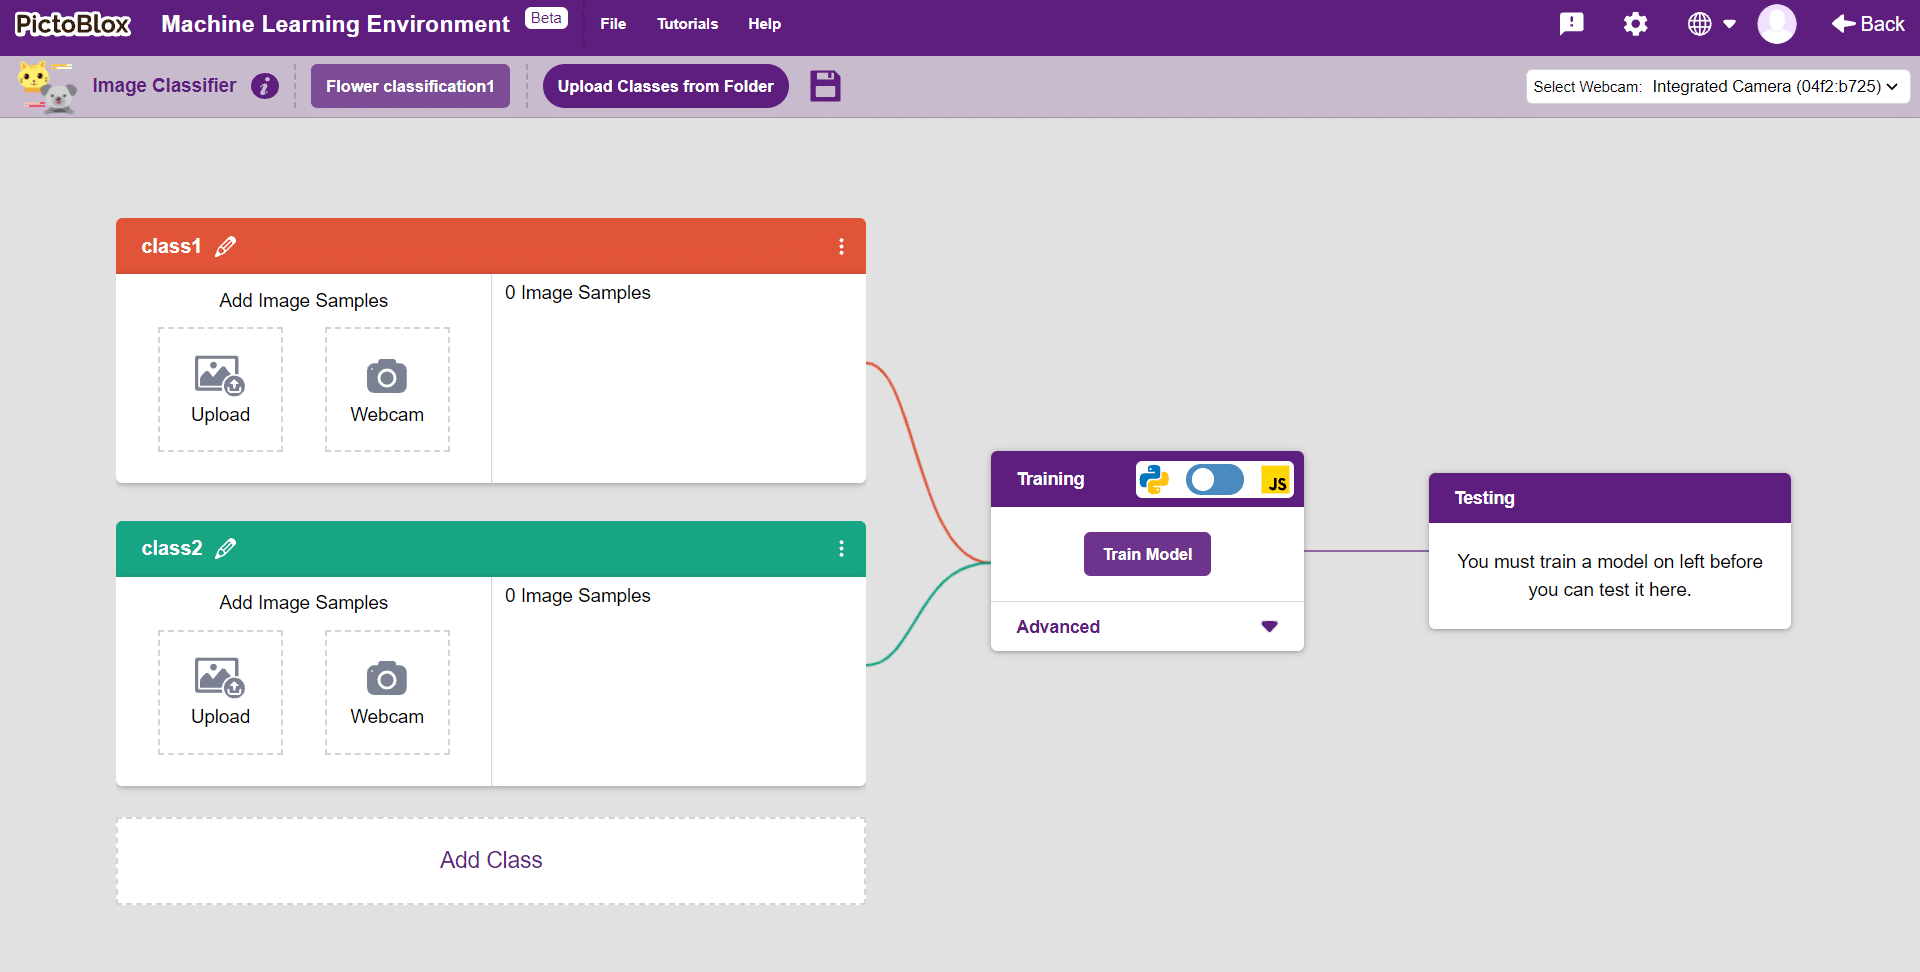
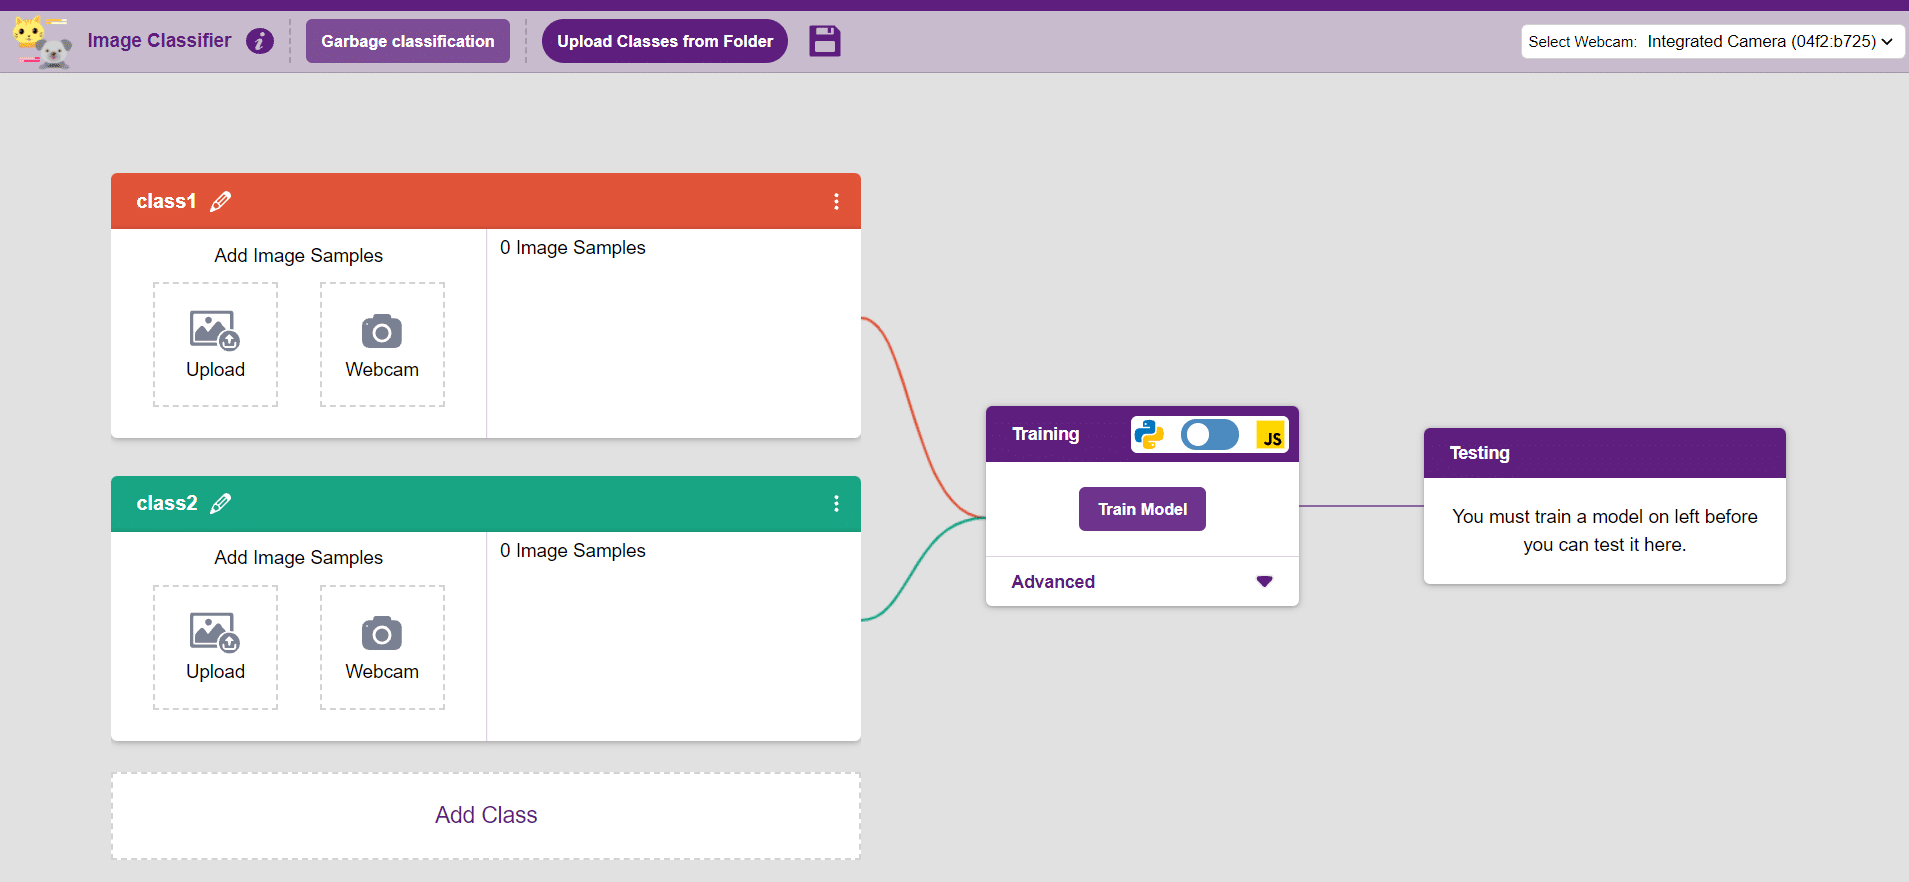
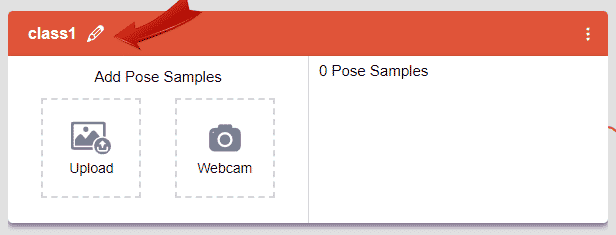
Class is the category in which the Machine Learning model classifies the images. Similar images are put in one class.
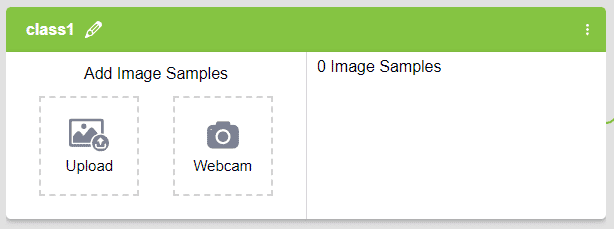
There are 2 things that you have to provide in a class:

You can perform the following operations to manipulate the data into a class.
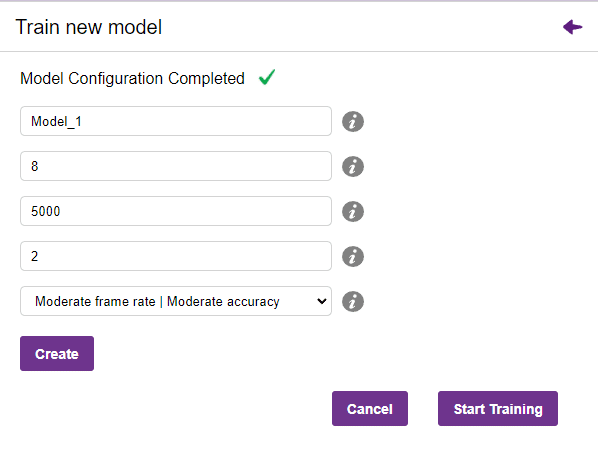
After data is added, it’s fit to be used in model training. In order to do this, we have to train the model. By training the model, we extract meaningful information from the images, and that in turn updates the weights. Once these weights are saved, we can use our model to make predictions on data previously unseen.
However, before training the model, there are a few hyperparameters that you should be aware of. Click on the “Advanced” tab to view them.
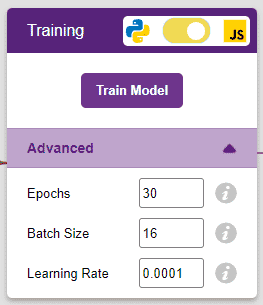
It’s a good idea to train a numeric classification model for a high number of epochs. The model can be trained in both JavaScript and Python. In order to choose between the two, click on the switch on top of the Training panel.
Note: These hyperparameters can affect the accuracy of your model to a great extent. Experiment with them to find what works best for your data.
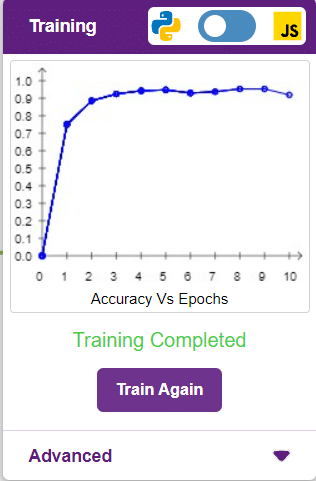
The accuracy of the model should increase over time. The x-axis of the graph shows the epochs, and the y-axis represents the accuracy at the corresponding epoch. Remember, the higher the reading in the accuracy graph, the better the model. The x-axis of the graph shows the epochs, and the y-axis represents the corresponding accuracy. The range of the accuracy is 0 to 1.
Other evaluating parameter we can see by clicking on Train Report
Here we can see confusion matrix and training accuracy of individual classes after training.

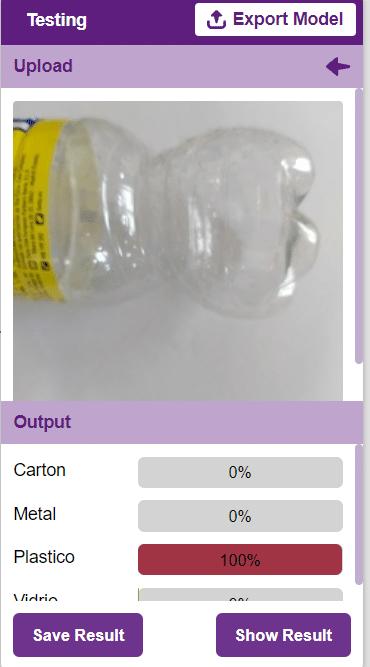
To test the model, simply enter the input values in the “Testing” panel and click on the “Predict” button.
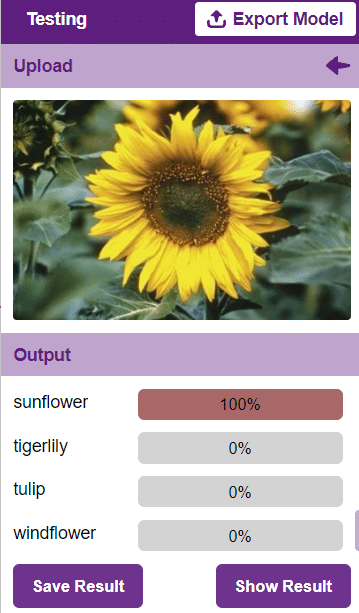
The model will return the probability of the input belonging to the classes.
Click on the “Export Model” button on the top right of the Testing box, and PictoBlox will load your model into the Block Coding Environment if you have opened the ML Environment in the Block Coding.
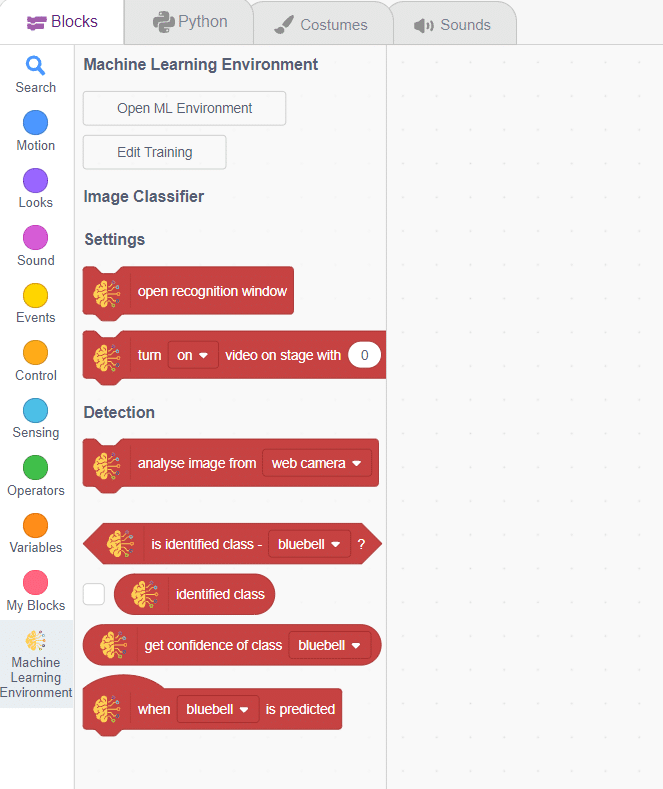
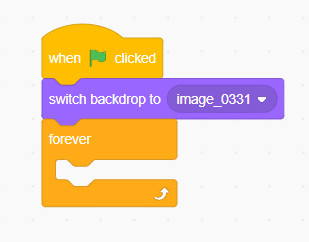
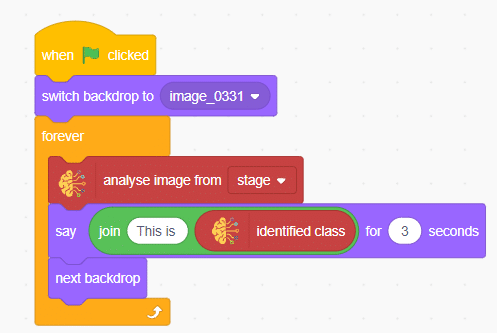
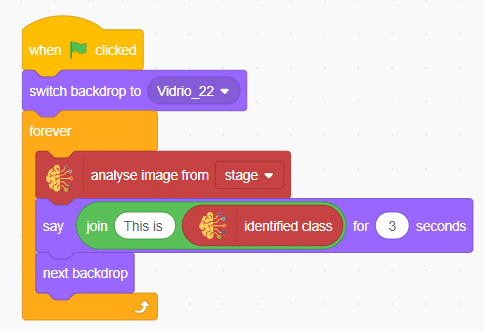
The idea is simple, we’ll add image samples in the “Backdrops” column. We’ll keep cycling through the backdrops and keep classifying the image on the stage.
In this example project we are going to create a Machine Learning Model which can identify the type of waste from the camera feed or images.
Image Classifier is an extension of the ML environment that allows users to classify images into different classes. This feature is available only in the desktop version of PictoBlox for Windows, macOS, or Linux. As part of the Image Classifier workflow, users can add classes, upload data, train the model, test the model, and export the model to the Block Coding Environment.

Let’s create the ML model.
Alert: The Machine Learning Environment for model creation is available in the only desktop version of PictoBlox for Windows, macOS, or Linux. It is not available in Web, Android, and iOS versions.
Follow the steps below:
Class is the category in which the Machine Learning model classifies the images. Similar images are put in one class.
There are 2 things that you have to provide in a class:
You can perform the following operations to manipulate the data into a class.
After data is added, it’s fit to be used in model training. In order to do this, we have to train the model. By training the model, we extract meaningful information from the images, which in turn updates the weights. Once these weights are saved, we can use our model to make predictions on data previously unseen.
However, before training the model, there are a few hyperparameters that you should be aware of. Click on the “Advanced” tab to view them.
It’s a good idea to train an image classification model for a high number of epochs. The model can be trained in both JavaScript and Python. In order to choose between the two, click on the switch on top of the Training panel.
Note: These hyperparameters can affect the accuracy of your model to a great extent. Experiment with them to find what works best for your data.
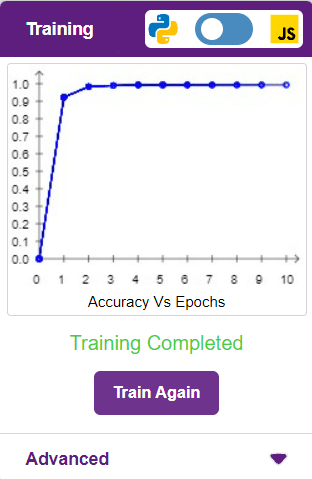
The accuracy of the model should increase over time. The x-axis of the graph shows the epochs, and the y-axis represents the accuracy at the corresponding epoch. Remember, the higher the reading in the accuracy graph, the better the model. The x-axis of the graph shows the epochs, and the y-axis represents the corresponding accuracy. The range of accuracy is 0 to 1.
Here we can see the confusion matrix and training accuracy of individual classes after training.
To test the model, simply enter the input values in the “Testing” panel and click on the “Predict” button.
The model will return the probability of the input belonging to the classes.
Click on the “Export Model” button on the top right of the Testing box, and PictoBlox will load your model into the Block Coding Environment if you have opened the ML Environment in the Block Coding.
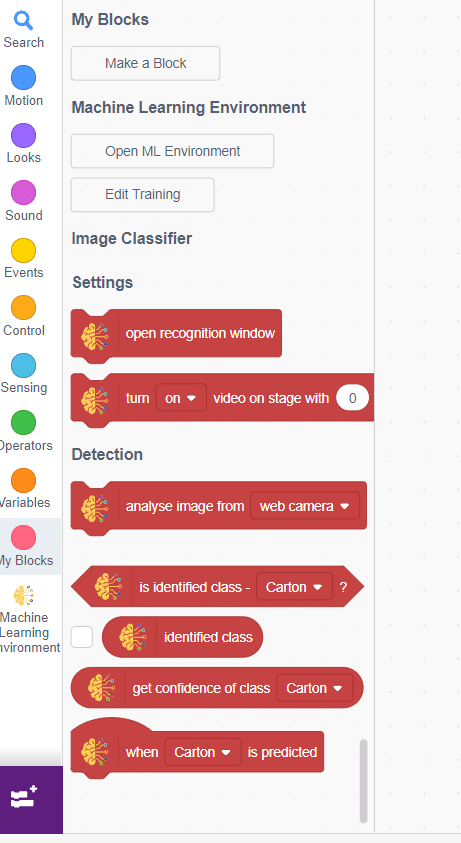
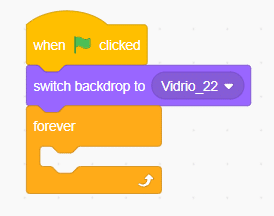
The idea is simple, we’ll add image samples in the “Backdrops” column. We’ll keep cycling through the backdrops and keep classifying the image on the stage.

You can build more applications on top of this waste classifier.
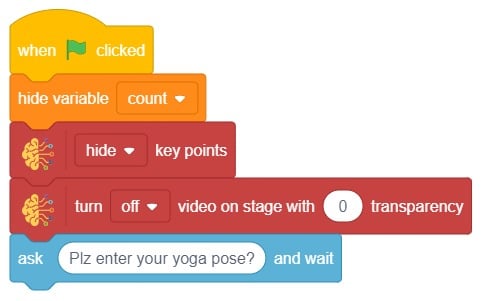
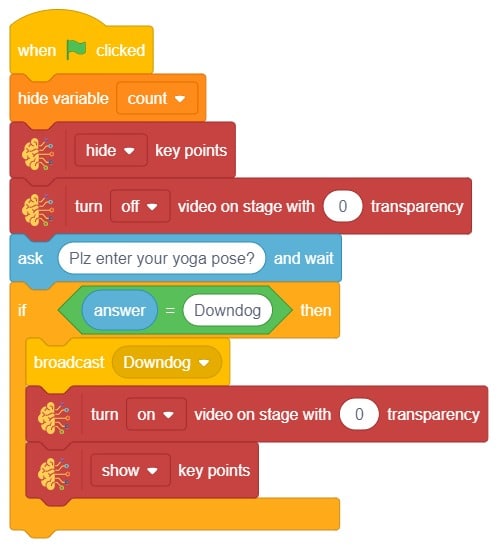
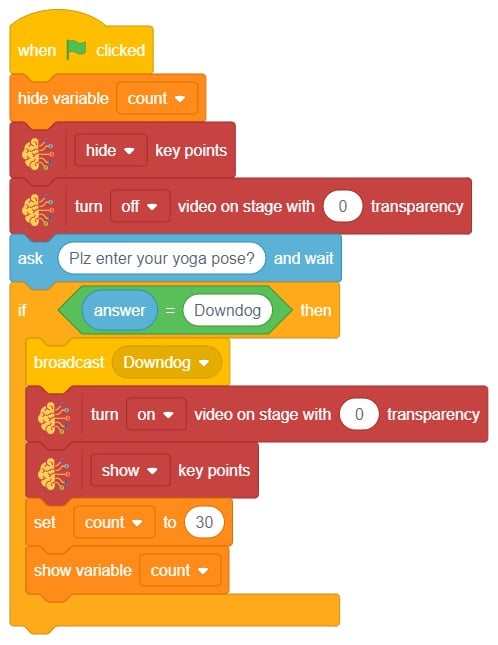
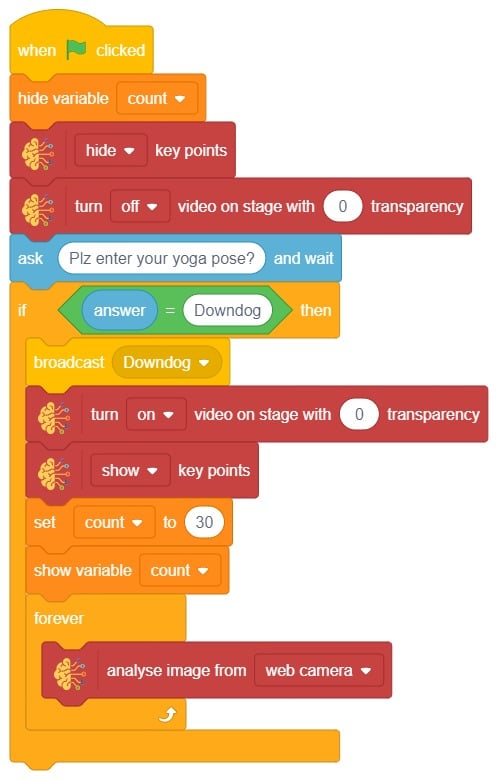
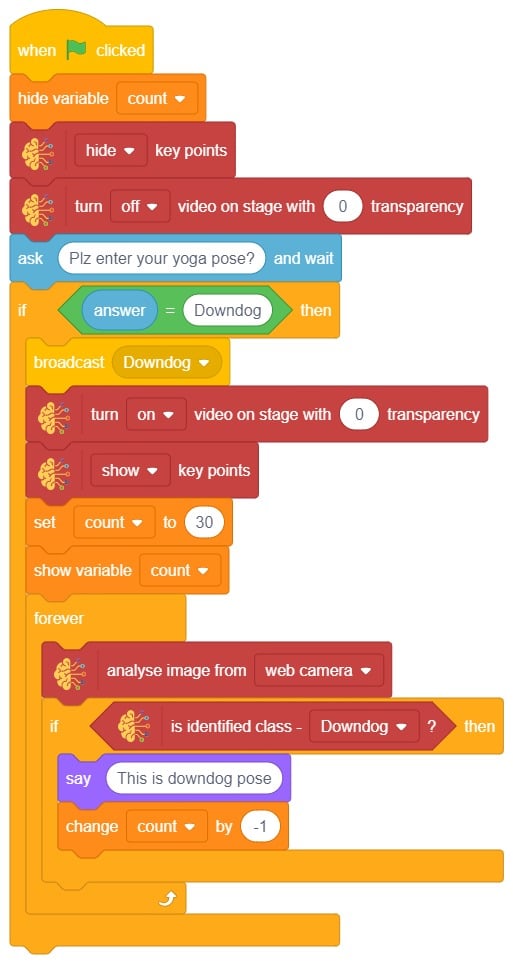
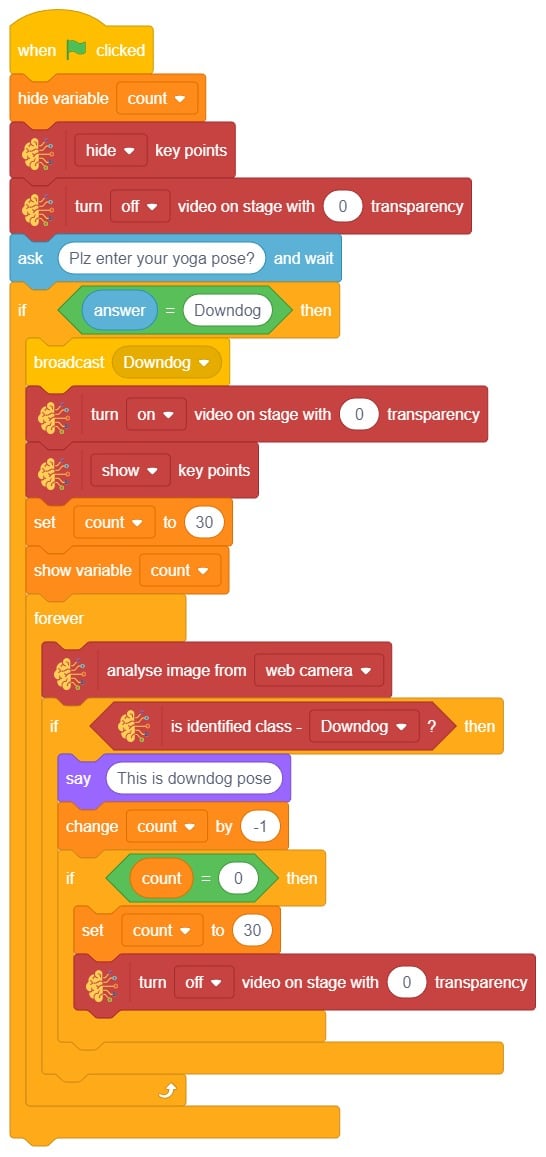
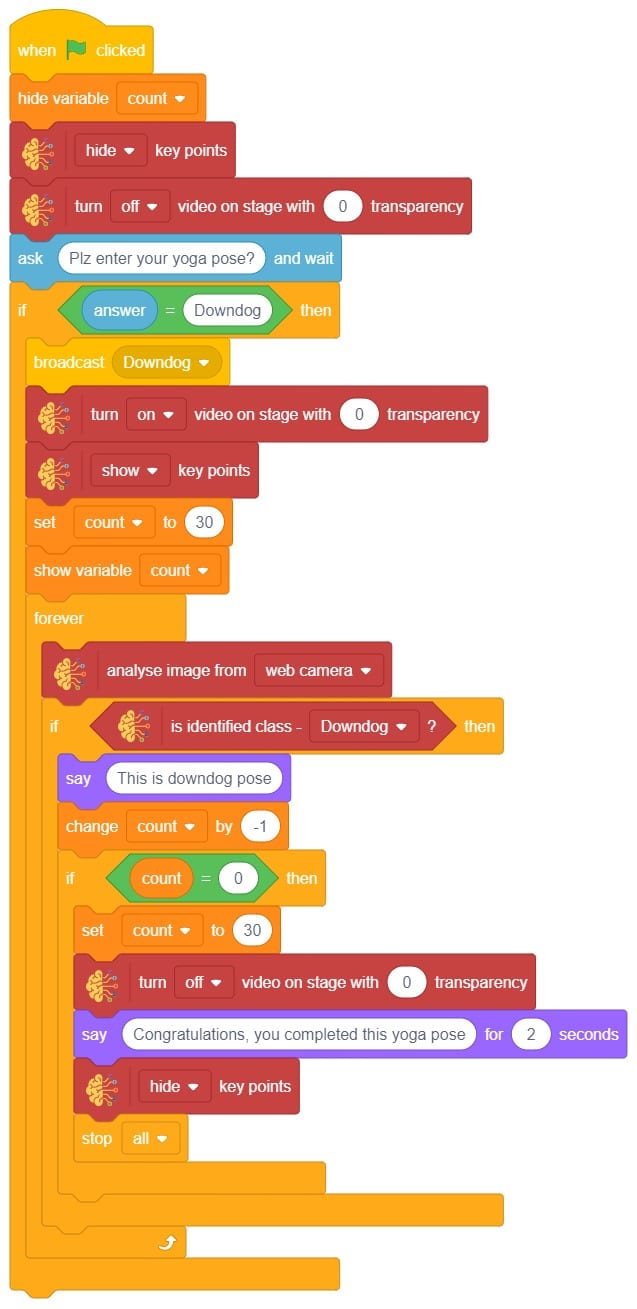
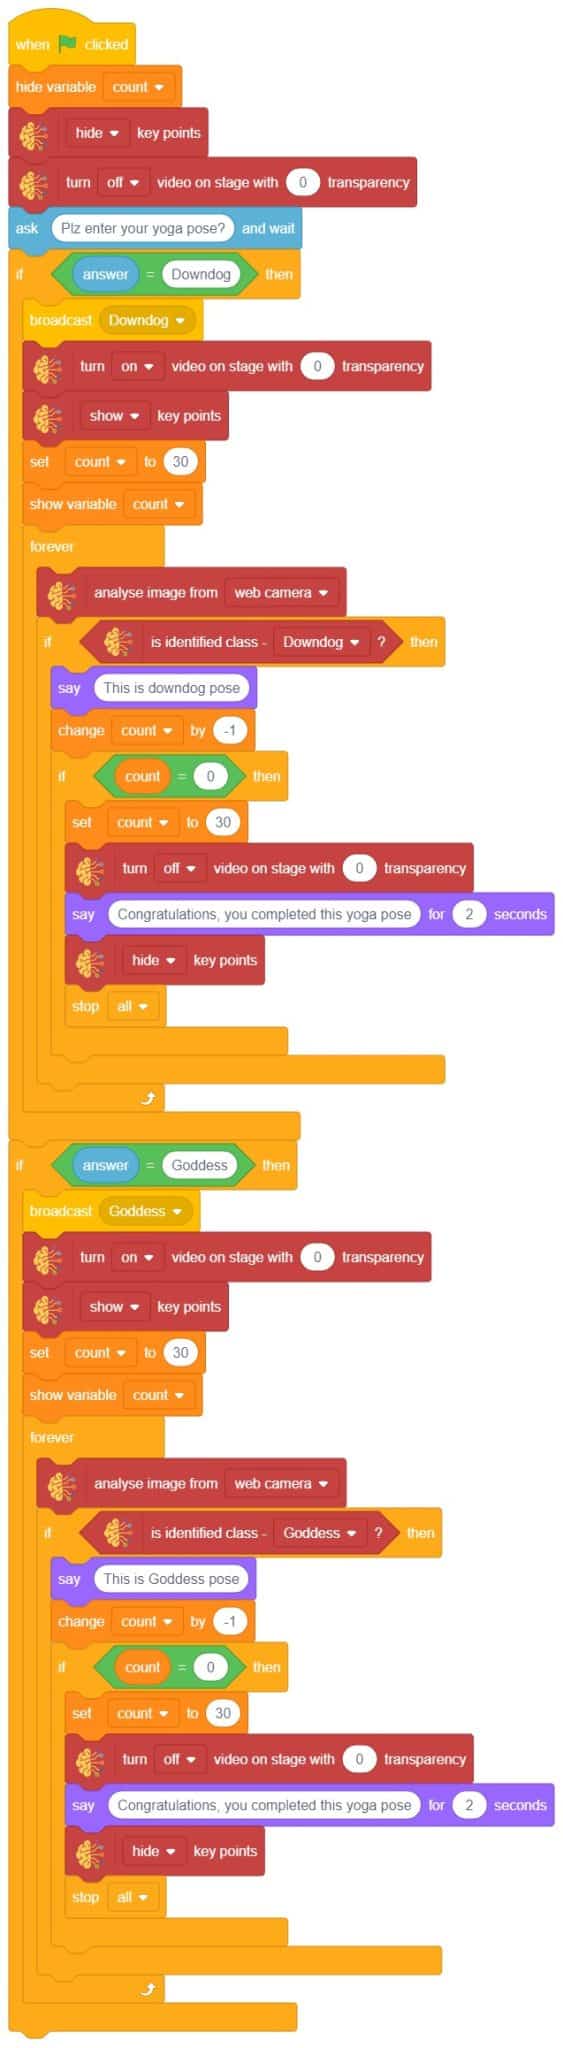
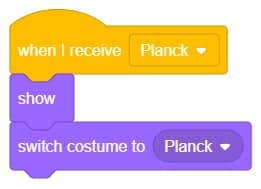
The idea is simple, we’ll add one image of each class in the “costume” column by making one new sprite which will we display on the stage according to input from user. we’ll also change name of the image according to pose.

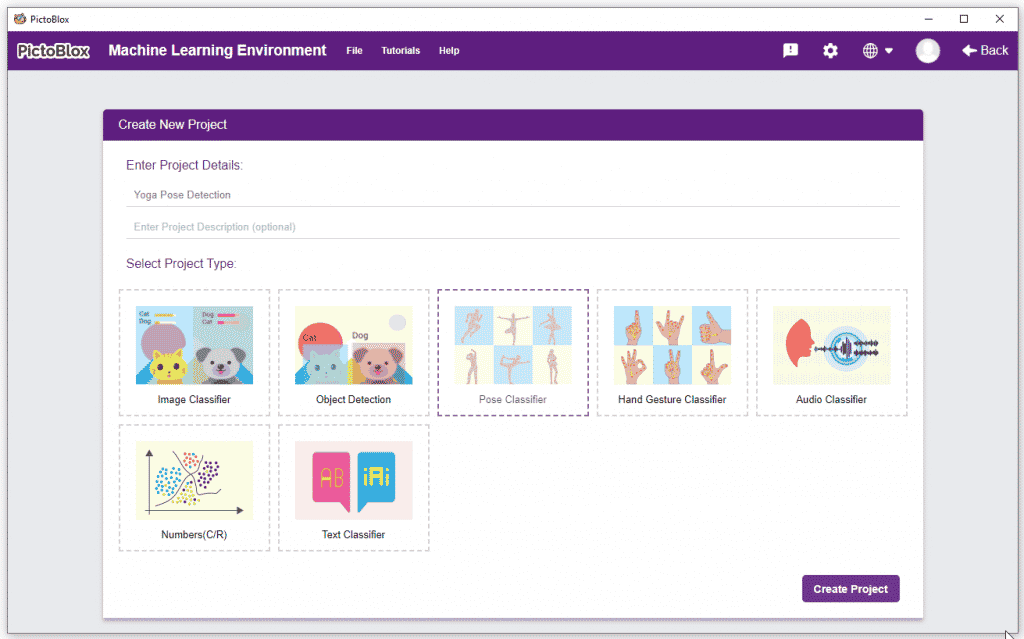
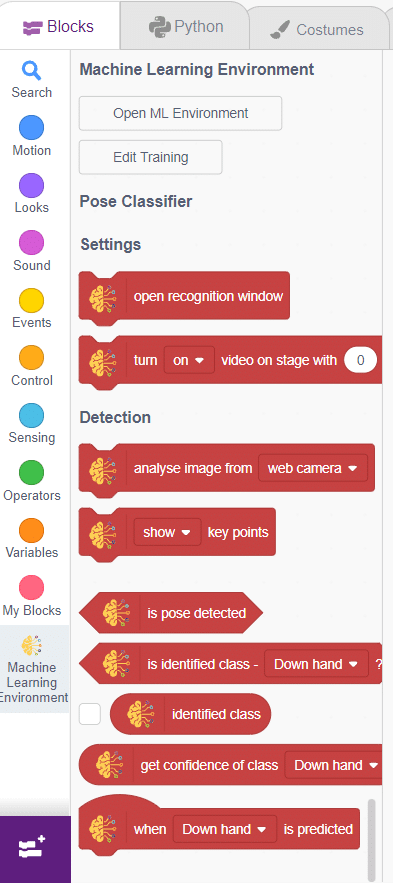
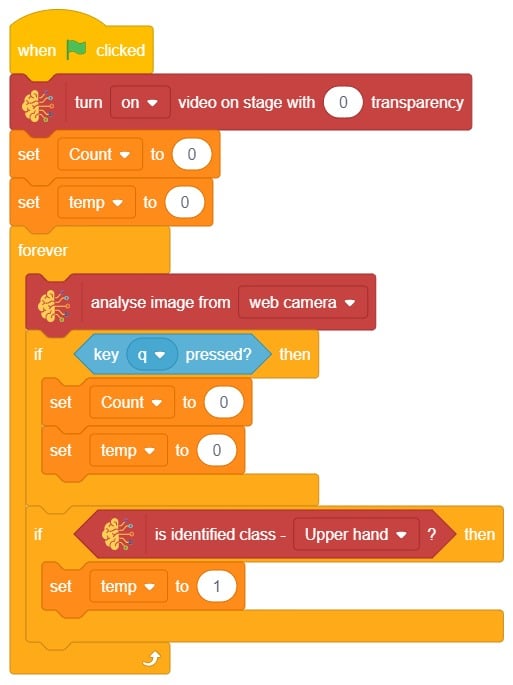
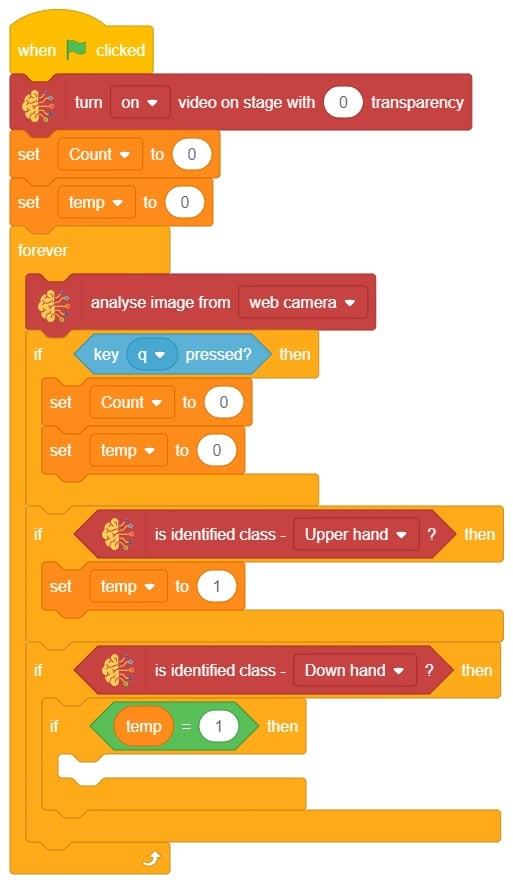
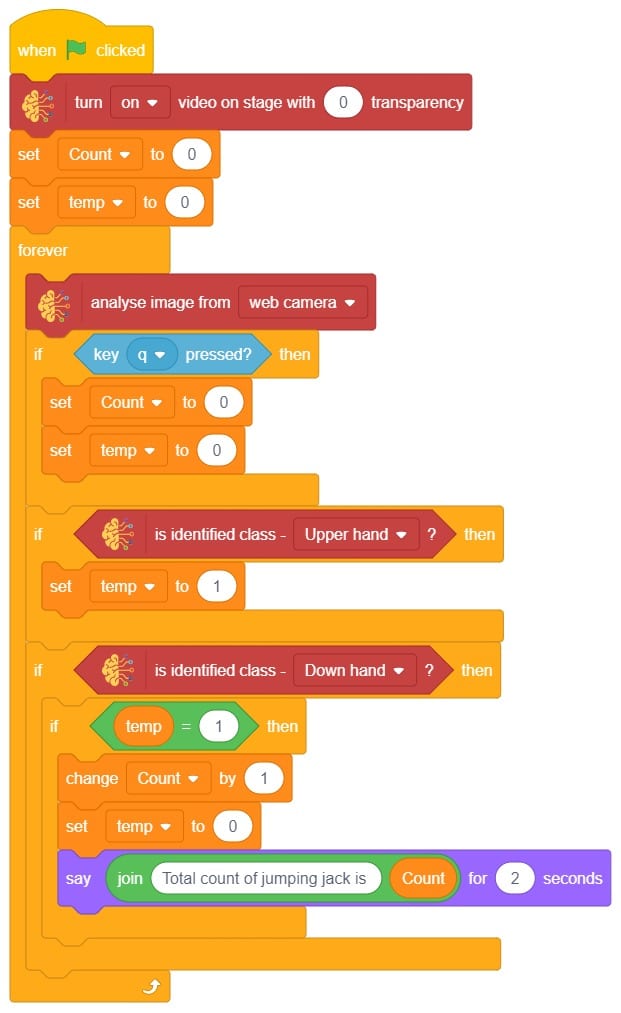
In this example project, we are going to create a machine learning model that can count the number of jumping jack activities from the camera feed.
The pose Classifier is the extension of the ML Environment used for classifying different body poses into different classes.
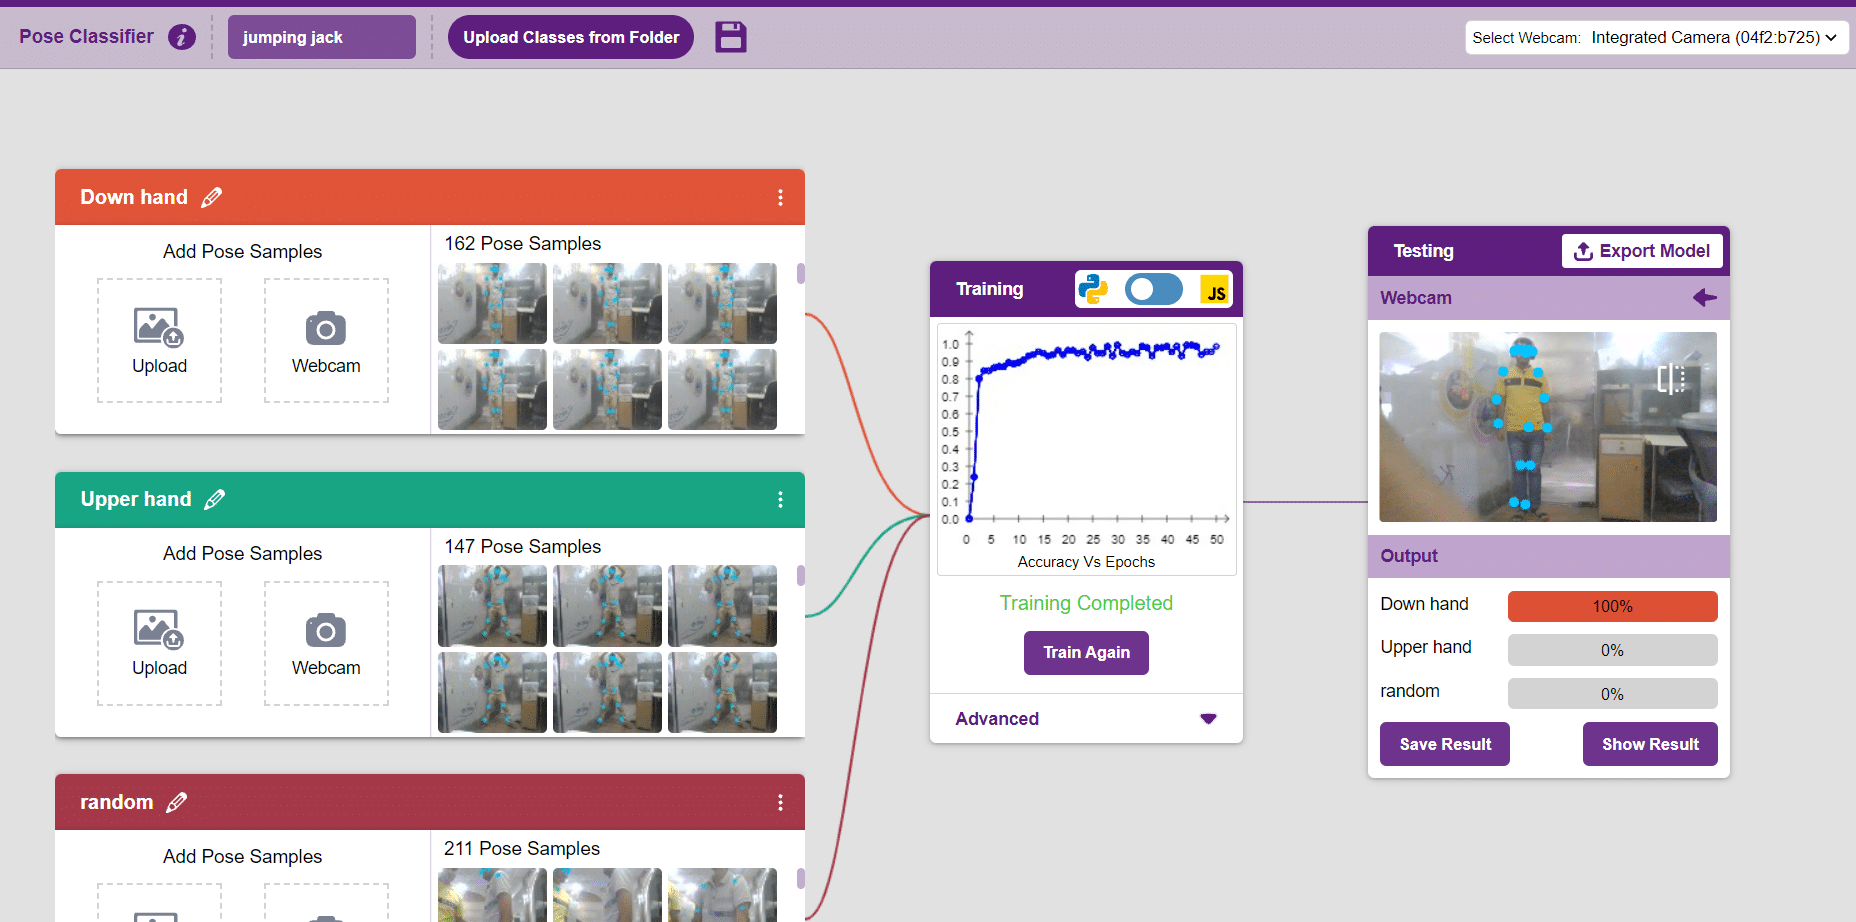 The model works by analyzing your body position with the help of 17 data points.
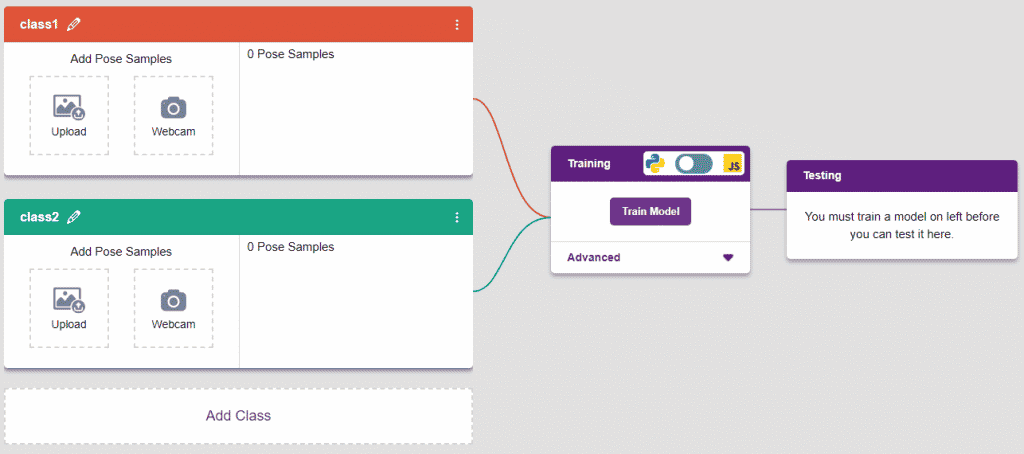
Class is the category in which the Machine Learning model classifies the poses. Similar posts are put in one class.
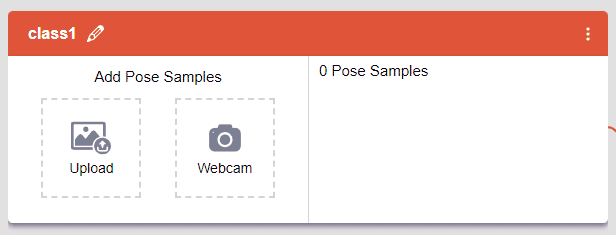
There are 2 things that you have to provide in a class:
You can perform the following operations to manipulate the data into a class.
After data is added, it’s fit to be used in model training. To do this, we have to train the model. By training the model, we extract meaningful information from the hand pose, and that in turn updates the weights. Once these weights are saved, we can use our model to predict previously unseen data.

The accuracy of the model should increase over time. The x-axis of the graph shows the epochs, and the y-axis represents the accuracy at the corresponding epoch. Remember, the higher the reading in the accuracy graph, the better the model. The range of accuracy is 0 to 1.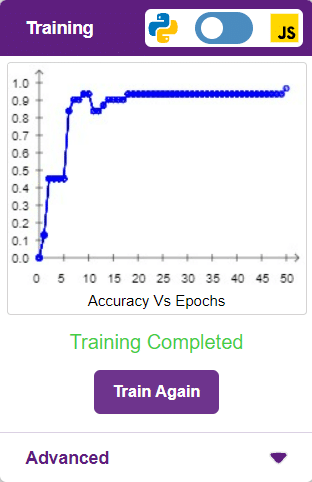
To test the model, simply enter the input values in the “Testing” panel and click on the “Predict” button.
The model will return the probability of the input belonging to the classes.
Click on the “Export Model” button on the top right of the Testing box, and PictoBlox will load your model into the Block Coding Environment if you have opened the ML Environment in the Block Coding.
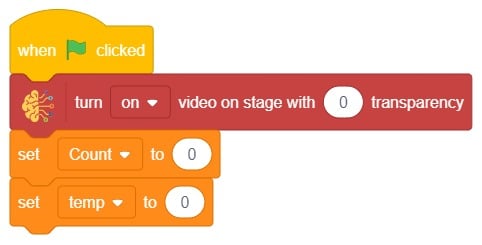
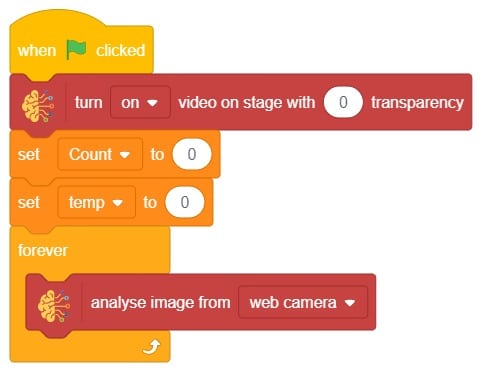
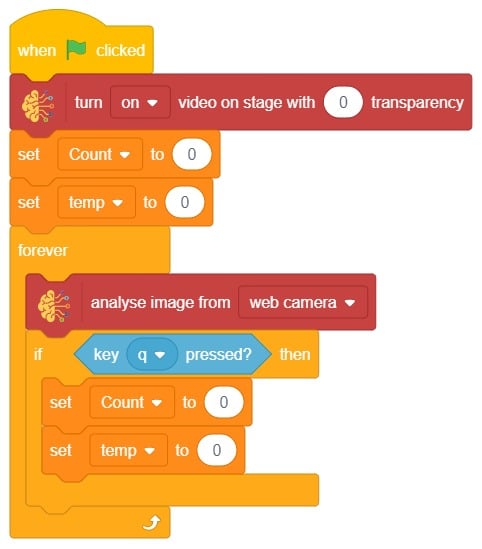
The idea is simple, after running code we will do jumping jack activity in front of camera and tobi sprite will say counting of jumping jack.
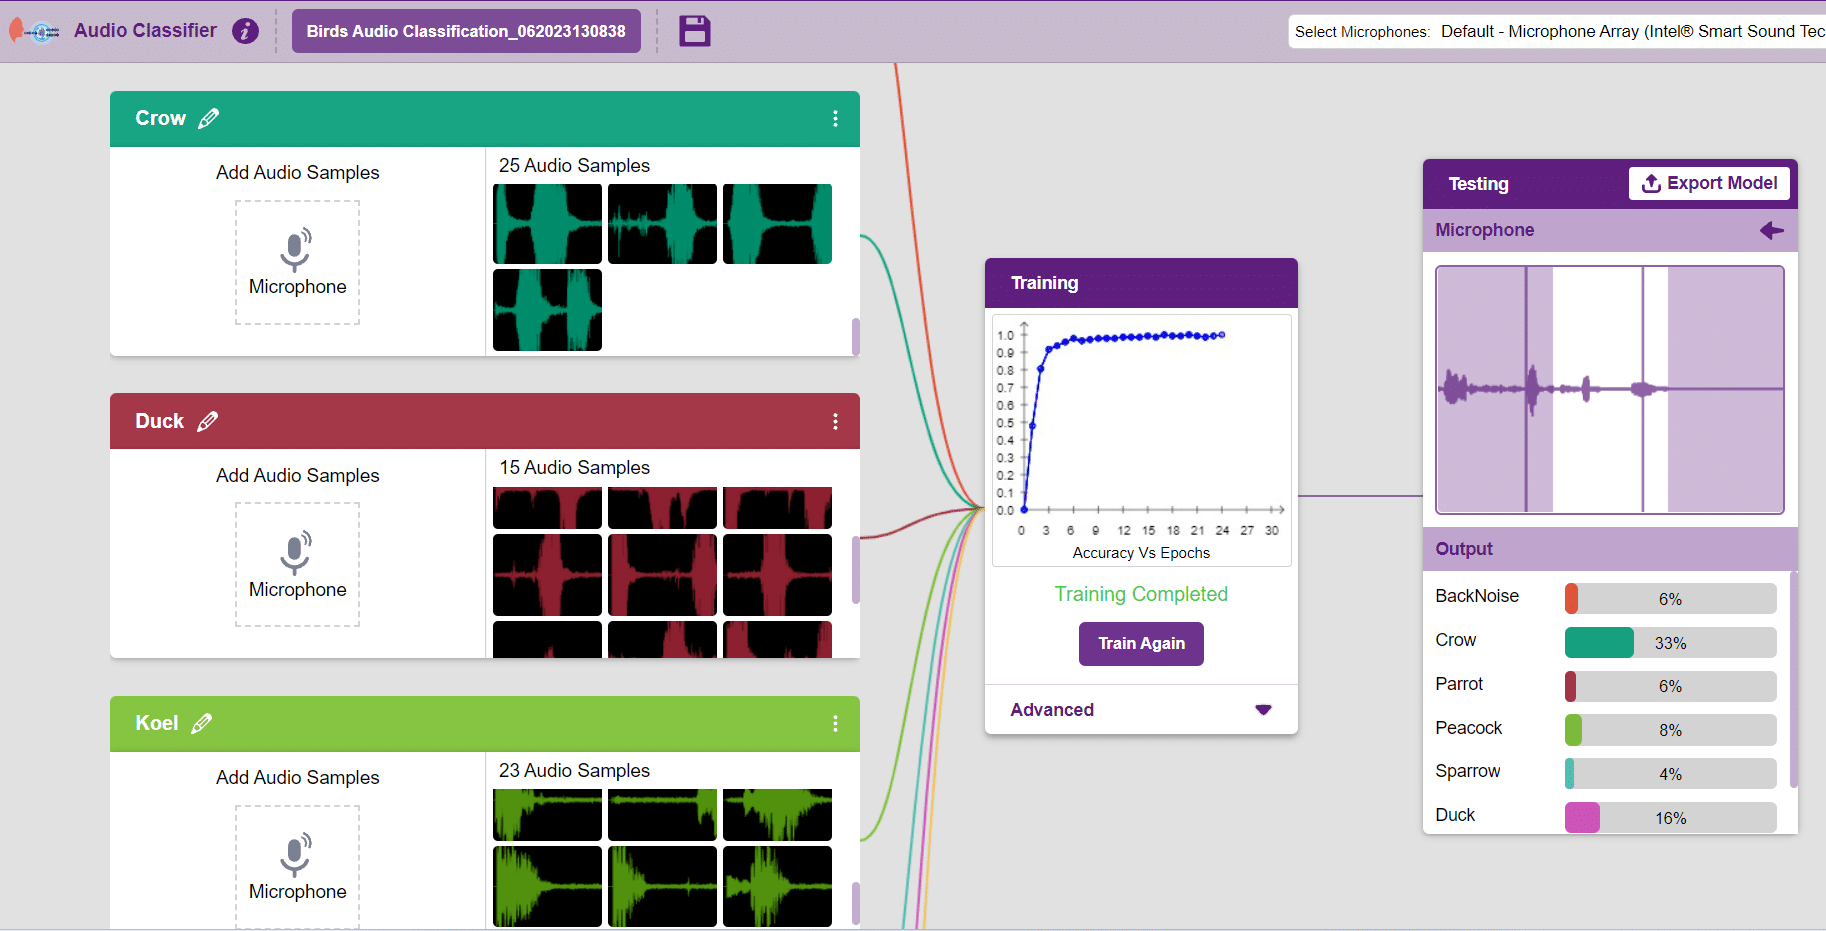
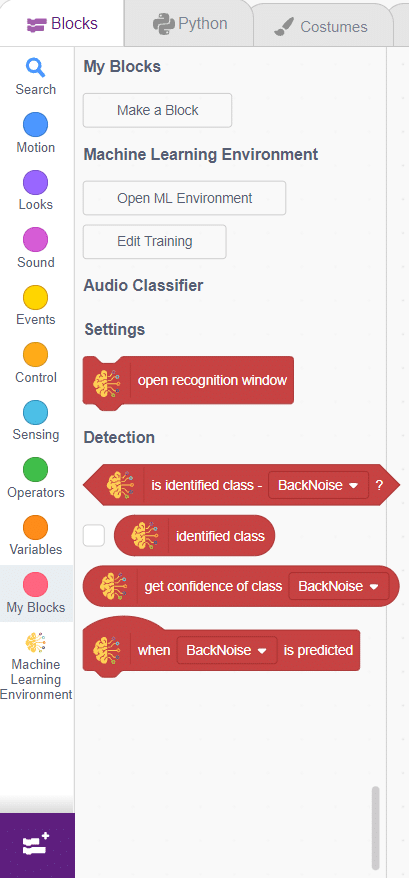
In this example project, we are going to create a machine learning model that can classify different audio messages of birds from the microphone feed of computer.
The Audio Classifier is the extension of the ML Environment used for classifying different birds voice.
Follow the steps below to create your own Audio Classifier Model:
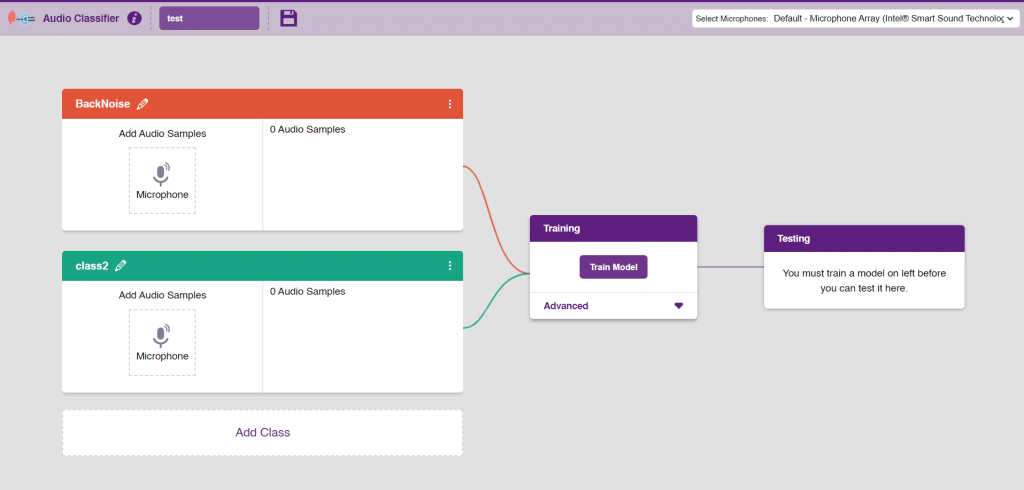
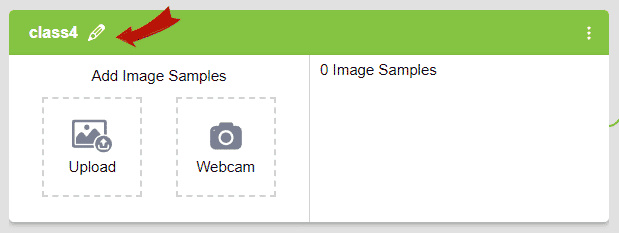
Note: You can add more classes to the projects using the Add Class button.
You can perform the following operations to manipulate the data into a class.
After data is added, it’s fit to be used in model training. To do this, we have to train the model. By training the model, we extract meaningful information from the hand pose, and that in turn updates the weights. Once these weights are saved, we can use our model to make predictions on data previously unseen.
The accuracy of the model should increase over time. The x-axis of the graph shows the epochs, and the y-axis represents the accuracy at the corresponding epoch. Remember, the higher the reading in the accuracy graph, the better the model. The range of accuracy is 0 to 1.
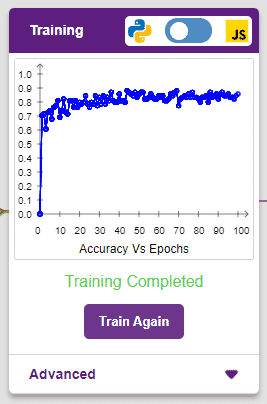
To test the model simply, use the microphone directly and check the classes as shown in the below image:
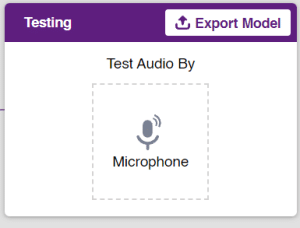
You will be able to test the difference in audio samples recorded from the microphone as shown below:
Click on the “Export Model” button on the top right of the Testing box, and PictoBlox will load your model into the Block Coding Environment if you have opened the ML Environment in the Block Coding.
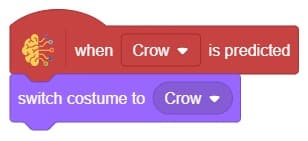
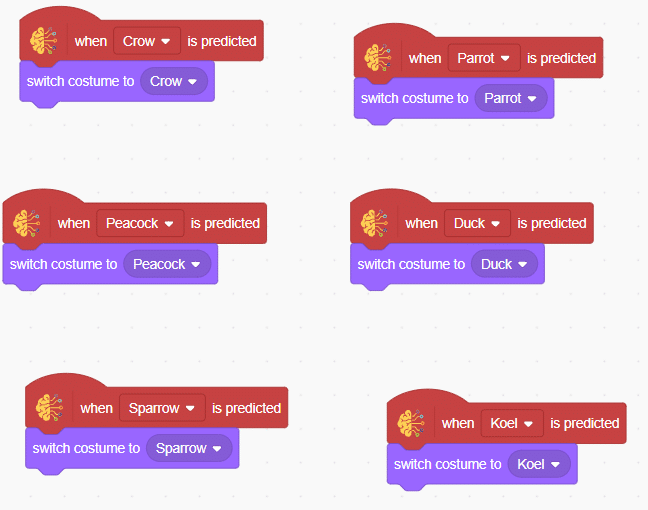
The idea is simple, we’ll add one image of each class in the “costume” column by making one new sprite which will we display on the stage according to input from user. we’ll also change name of the image according to bird class type.
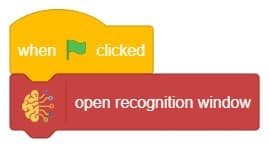
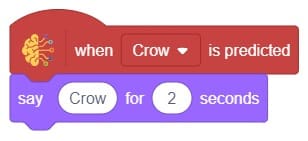
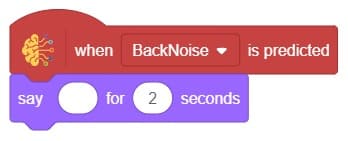
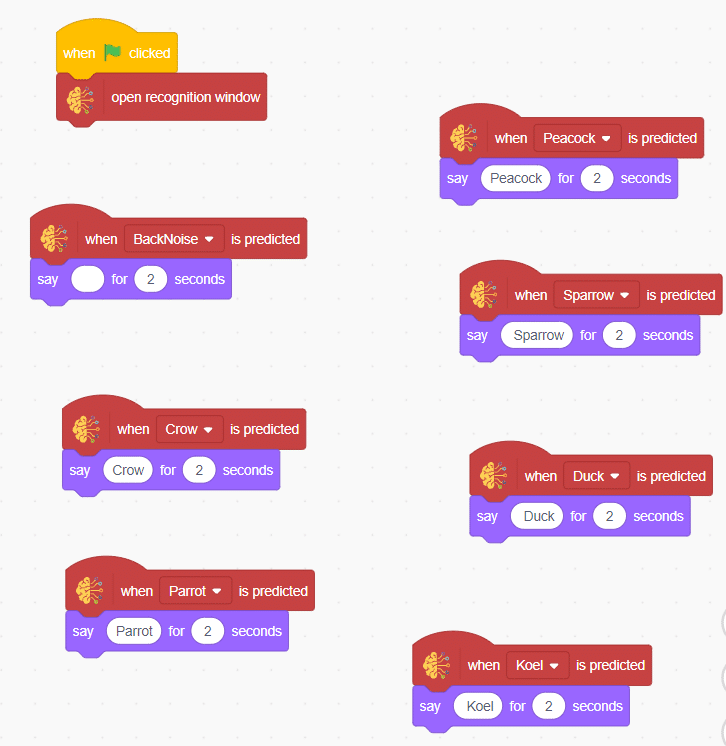
Final Output