
Quarky Robotic Arm - Documentation
Getting Started with Quarky Robotic Arm
Refer to the tutorials to learn about the Robotic Arm, and how to assemble and program it in Block coding or Python coding.

“Learn to control a Quarky robotic arm remotely using Bluetooth and PictoBlox. Perfect for tasks like picking and tool manipulation, this project boosts productivity and safety in hazardous environments. Step-by-step coding guides included for precise X, Y, Z-axis, and gripper control.”
“Learn to control a Quarky robotic arm remotely using Bluetooth and PictoBlox. Perfect for tasks like picking and tool manipulation, this project boosts productivity and safety in hazardous environments. Step-by-step coding guides included for precise X, Y, Z-axis, and gripper control.”
This activity focuses on programming a robotic arm using Python in PictoBlox, showcasing Python’s power in AI and ML. You’ll learn to initialize the arm, define movement functions for X, Y, and Z axes, control the gripper, and implement real-time control using a loop. This hands-on project sets the stage for embedding AI and ML into the robotic arm in future activities. Let’s get started!
This activity focuses on programming a robotic arm using Python in PictoBlox, showcasing Python’s power in AI and ML. You’ll learn to initialize the arm, define movement functions for X, Y, and Z axes, control the gripper, and implement real-time control using a loop. This hands-on project sets the stage for embedding AI and ML into the robotic arm in future activities. Let’s get started!
Learn how to make a robotic arm autonomous, moving beyond manual control to execute repetitive tasks efficiently. By following the coding steps in PictoBlox, you can program precise movements and actions, making it suitable for applications in industries like manufacturing and medical fields. With careful calibration and testing, you can successfully transform your robotic arm into an autonomous system, enhancing its functionality and versatility.
Learn how to make a robotic arm autonomous, moving beyond manual control to execute repetitive tasks efficiently. By following the coding steps in PictoBlox, you can program precise movements and actions, making it suitable for applications in industries like manufacturing and medical fields. With careful calibration and testing, you can successfully transform your robotic arm into an autonomous system, enhancing its functionality and versatility.
Learn how to program a robotic arm to operate autonomously using Python in Pictoblox. This activity guides you through initializing the robotic arm, writing movement and gripper actions, and using a continuous loop for independent operation. You’ll also explore the transition from stage mode to upload mode, allowing the robotic arm to function without an external system or Pictoblox connection. Ideal for robotics enthusiasts and learners, this guide will help you take full control of robotic arms in a simple, efficient way.
Learn how to program a robotic arm to operate autonomously using Python in Pictoblox. This activity guides you through initializing the robotic arm, writing movement and gripper actions, and using a continuous loop for independent operation. You’ll also explore the transition from stage mode to upload mode, allowing the robotic arm to function without an external system or Pictoblox connection. Ideal for robotics enthusiasts and learners, this guide will help you take full control of robotic arms in a simple, efficient way.
this activity introduces the integration of machine learning into robotics by developing a hand gesture recognition model in PictoBlox. Through systematic steps, you learn to train, test, and export the model to control a robotic arm using gestures. By combining gesture analysis with robotic arm settings, this project highlights the potential of machine learning in enabling intuitive and precise control in robotics, paving the way for innovative applications.
this activity introduces the integration of machine learning into robotics by developing a hand gesture recognition model in PictoBlox. Through systematic steps, you learn to train, test, and export the model to control a robotic arm using gestures. By combining gesture analysis with robotic arm settings, this project highlights the potential of machine learning in enabling intuitive and precise control in robotics, paving the way for innovative applications.
Quarky Robotic Arm Project - Block Coding
Refer to the tutorials to learn how to use PictoBlox Block Coding Environment to code Quarky Robotic Arm for different applications.
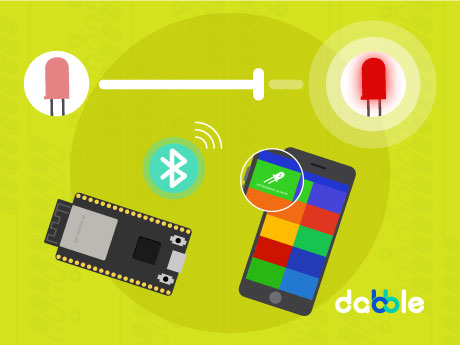
Learn how to create an ESP32 LED Wireless Control system using PictoBlox block coding. In this project, you will learn how to connect your ESP32 board through Bluetooth and control an LED wirelessly in real time. The program sets up a custom Bluetooth device name and continuously enables LED control, allowing users to operate the LED from a mobile device or compatible application. This project helps you understand the basics of wireless communication, Bluetooth connectivity, and smart device control using ESP32.
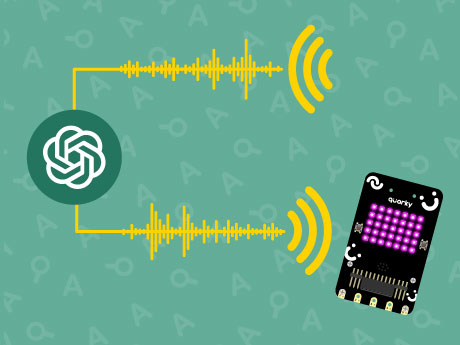
Learn how to create an interactive AI-powered voice assistant using Quarky and PictoBlox Py Editor. In this project, the user’s voice command is sent to ChatGPT, which generates intelligent responses and speaks them aloud using text-to-speech technology. The robot also displays expressive animations while processing and responding, making the interaction more engaging and human-like.
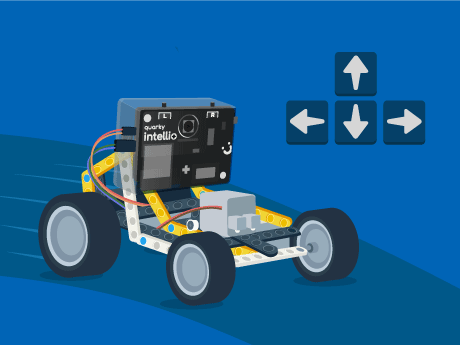
Learn how to create a real-time manual control system for the Intelio Rover using PictoBlox! In this tutorial, you will control the rover using keyboard directional keys and understand important concepts of Physical Computing and IoT. This project demonstrates how digital commands can interact with physical hardware for teleoperation and remote monitoring.
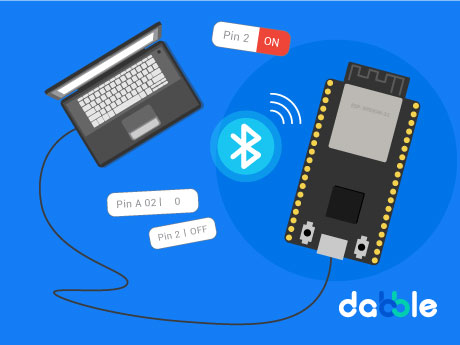
Learn how to create an ESP32 Pin State Monitor system using PictoBlox block coding. In this project, you will learn how to monitor and track the state of ESP32 GPIO pins in real time. The program continuously reads the pin values and displays whether each pin is in a HIGH or LOW state, helping users observe input and output changes instantly.
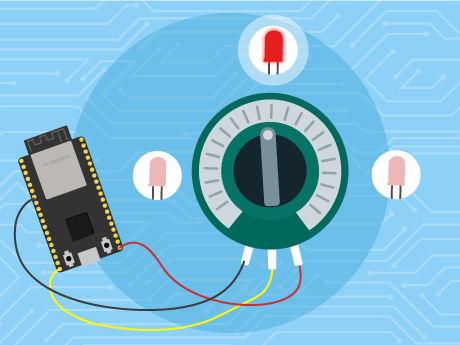
Learn how to create an ESP32 LED Brightness Control system using PictoBlox block coding. In this project, you will learn how to control the brightness of an LED using PWM (Pulse Width Modulation) with the ESP32 board. The program continuously reads analog values from a potentiometer connected to the ESP32 and adjusts the LED brightness in real time. By rotating the potentiometer, users can increase or decrease the intensity of the LED smoothly.
We will use the Adafruit IO cloud service to send data from a humidity and temperature sensor to the cloud.
Learn how to use PictoBlox to control the predefined motions of the Quadruped robot.

In this tutorial, you’ll discover how to use Python programming to control the Mars Rover. You’ll learn how to use different keys on your keyboard to move the rover forward, backward, turn left, and turn right.

Learn about humanoid robots, their form and functionality, and how the program uses arrow keys to control humanoid movement in different directions and speed.
Learn about humanoid robots, their form, functionality, and logic for movement. Explore the code that controls humanoid robots to move using arrow keys.
Learn to move your Quarky Mecanum Wheel Robot in a square and make an axe figure with PictoBlox. Use the arrow keys to activate the custom movements and watch your robot move in the desired direction!
Learn to move your Quarky Mecanum Wheel Robot in a square and make an axe figure with PictoBlox’s Python Interface. Use the arrow keys to activate the custom movements!
Learn how to create a crawling motion with a quadruped robot using individual servo control.
Learn how to use PictoBlox to control the predefined motions of the Quadruped robot.

The Language Translator with ChatGPT is a powerful system that enables real-time translation and conversation support, facilitating multilingual communication.
Discover the capabilities of pick-and-place robotic arms, mechanical systems designed to efficiently pick up objects from one location and precisely place them in another.

Learn how to control a gripper using two different methods: 2-keycontrol, which activates when either the ‘o’ or ‘c’ key is pressed, and 1-key control, which activates when the ‘space’ bar is pressed.
Explore the capabilities of a wirelessly controlled robotic arm, a mechanical system operated without physical connections.
Discover the fascinating world of LCD (Liquid Crystal Display) technology. Learn how liquid crystals monitor light to create flat panel electronic visual displays without emitting light directly
Learn how to use the Object Detection extension of PictoBlox’s Machine Learning Environment to count specific targets in images by writing Block code.

Learn about the fundamental working principle of a potentiometer and its versatile applications as a variable resistor or voltage divider

Discover the fundamentals of switches as electrical components that connect or disconnect conducting paths in circuits, enabling interruption or diversion of electric current.
Learn to Interface an ultrasonic sensor with Arduino, use ultrasonic sensor to measure distance and much more
Learn about soil moisture sensors and how they work to measure the moisture level in the soil.
Learn about the components of the sensor module, including the IR LED and photodiode, and understand the circuit connections.
Line-following with Quarky’s default IR sensors using PID control and adaptive feedback for smooth, precise path tracking. Ideal for advanced robotics learning!
In this example, we will retrieve the information from the cloud and make the Quarky lights ON and OFF.
In this tutorial, you will learn how to control a quadruped robot using the arrow key program.
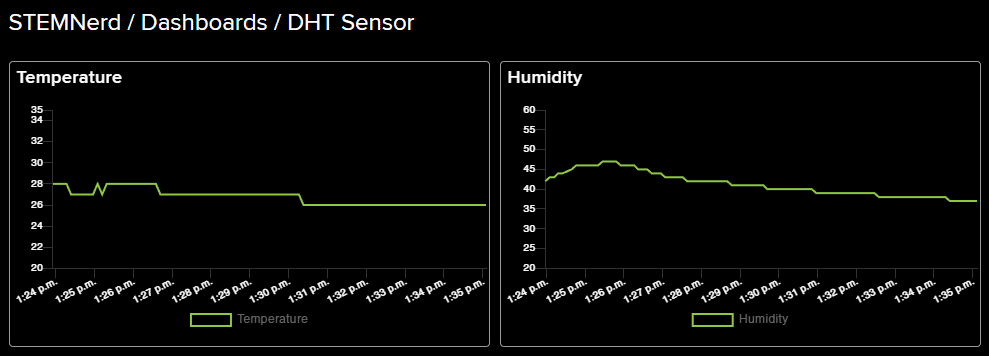
Learn how to connect a DHT sensor to PictoBlox and use the Adafruit IO cloud service to send temperature and humidity data to the cloud. Create a dashboard to visualize the temperature and humidity data with the help of line chart and gauge elements.
Learn how to control the Mars Rover using PictoBlox with motors and servo motors. Make the Mars Rover move forward, backward, turn left, and turn right.
All articles loaded
No more articles to load
PictoBlox Extension Documentation
Refer to the documentation of PictoBlox Extension to understand how to use the blocks and functions for the Robotic Arm.
