



Introduction
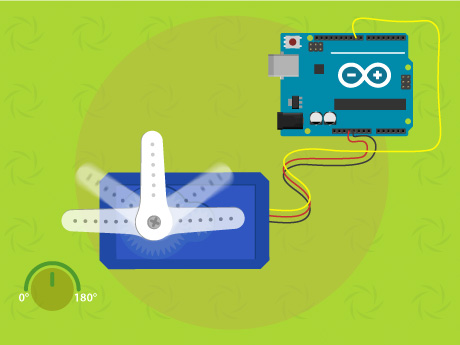
Servo motors are incredibly versatile electronic components used everywhere from automated robotic arms to the steering systems of radio-controlled cars! Learn what a servo motor is, how precise angular rotation works, how to interface a servo motor with Arduino, and program it with ease in PictoBlox – our Scratch blocks-based graphical programming platform with advanced hardware interaction abilities. Once you’re equipped with the basic knowledge of loops and automatic angle sweeping, we’ll show you how to continuously rotate your servo back and forth and build exciting DIY automated projects using the servo motor.
To work in PictoBlox, you’ll first need to download it from HERE.
Ready? Set. Go!
Prerequisites
- Arduino Uno R3 Board
- SG 90 Servo Motor
- Laptop or Computer
- PictoBlox installed on the system
- Breadboard
- Jumper Wires
How to Connect with Arduino Uno
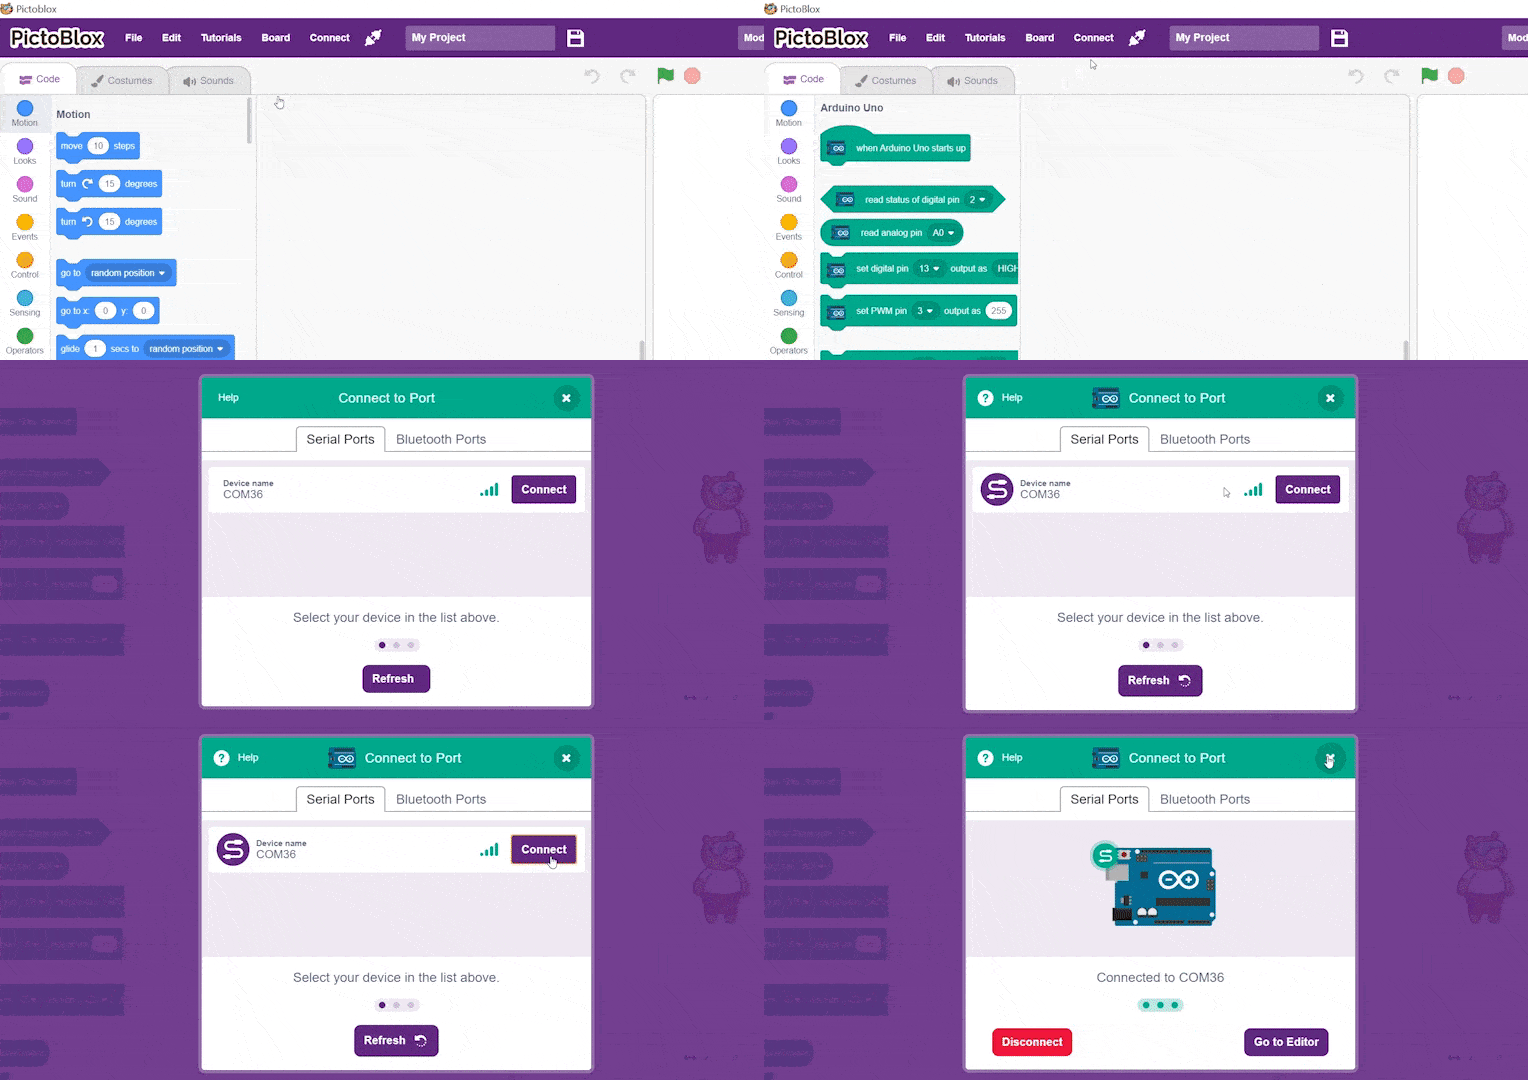
- Connect Uno to your computer and open PictoBlox.
- In PictoBlox, go to the toolbar and click on the Board menu. Select Arduino Uno.
- Next, click on the Connect menu , select the Port to which Arduino Uno is connected e.g. COMXX or ttyXX. Once you select the port, the icon beside the Connect tab will become connected.
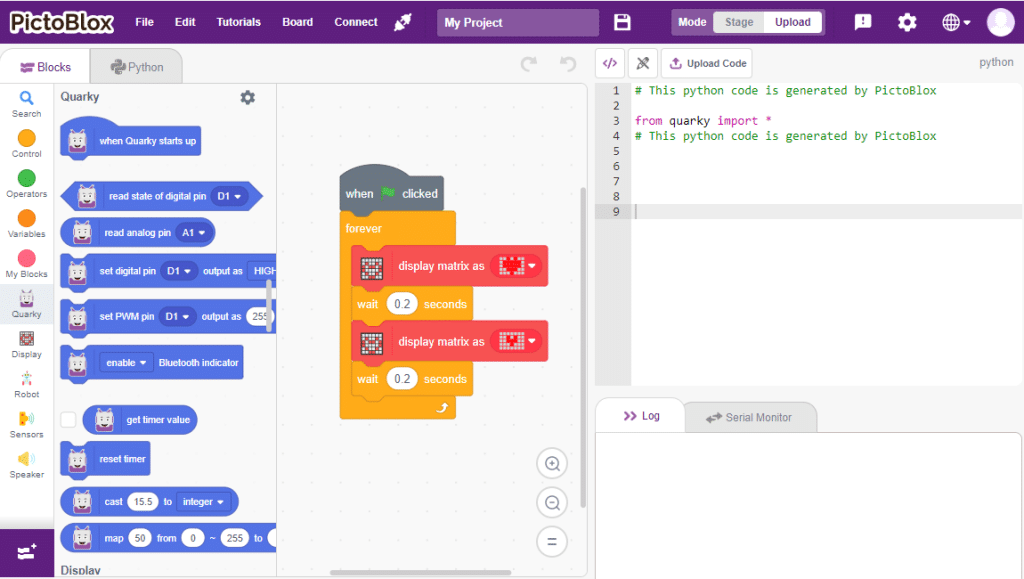
- On the top right corner, there is a toggle button named Mode. This button is used to switch between the two working modes of PictoBlox, namely the stage mode and the upload mode.
- Switch to Upload mode by toggling this button. You’ll observe some changes in the UI.
Connection
Servo Connection
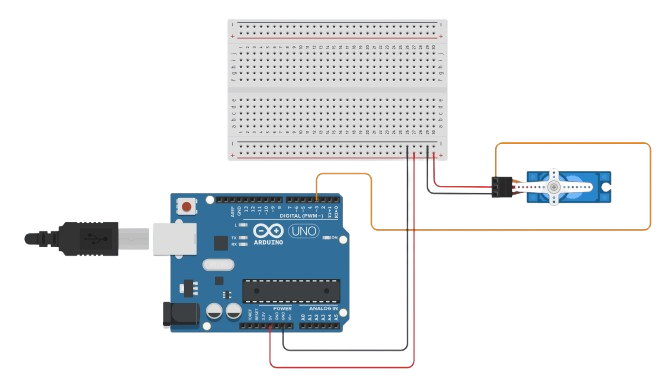
- Connect the Ground Pin (Orange) of the Servo to Digital PWM Pin 3.
- Connect the Voltage Pin (Red) of the Servo to 5V.
- Connect Ground Pin (Brown)to the GND on Arduino Uno.
Step-by-Step Block Coding Guide
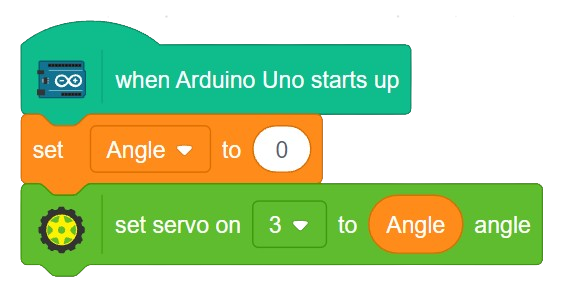
- Go to the Arduino Uno palette and drag the ‘when arduino starts up’ block into the scripting area.
- Create one Variable from the Variables palette. Label it as ‘Angle’. Make sure it is of type number.
- From the Actuators palette, add the ‘set servo on () to () angle’ block. Use Servo number 3 and drag the ‘Angle’ block from Variables palette to the output.
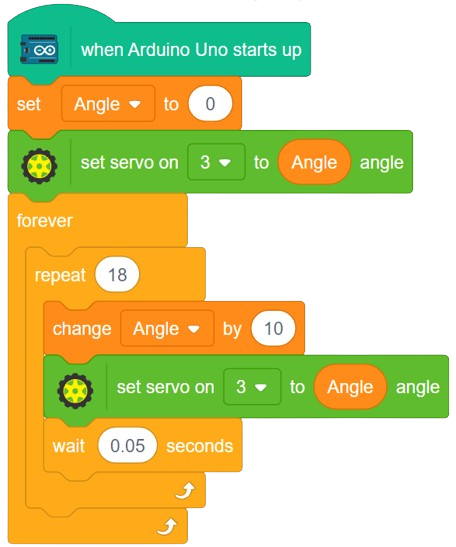
- From the Control palette, add the ‘forever’ block.
- Inside the forever block, add the ‘repeat ()’ block from the Control palette. Change its value to 18.
- From the Variables palette, add the ‘change () by ()’ block inside ‘repeat ()’ block. Use Angle as the variable and change its value by 10.
- From the Actuators palette, add the ‘set servo on () to () angle’ block. Use Servo Pin 3 and drag the ‘Angle’ block from the Variables palette to the output.
- From the Control palette, add the ‘wait () seconds’ block. Change its value to 0.05.
- Underneath the repeat () block, add another ‘repeat ()’ block from the Control palette. Change its value to 18.
- From the Variables palette, add the ‘change () by ()’ block inside ‘repeat ()’ block. Use Angle as the variable and change its value by –10.
- From the Actuators palette, add the ‘set servo on () to () angle’ block. Use Servo number 3 and drag the Angle block from Variables palette to the output.
- From the Control palette, add the ‘wait () seconds’ block. Change its value to 0.05.
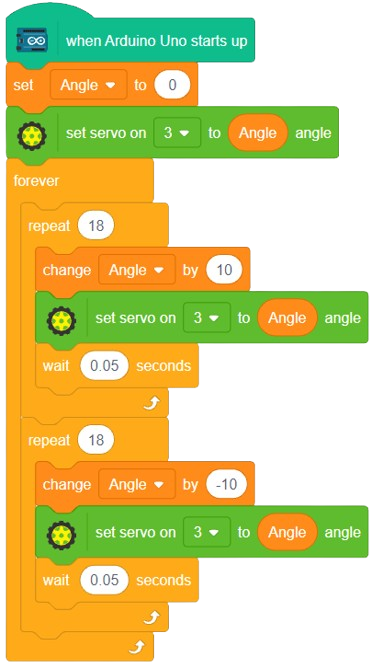
Now it’s time to upload the script to Arduino Uno! For that, click on the Upload Code button and voila!
Output
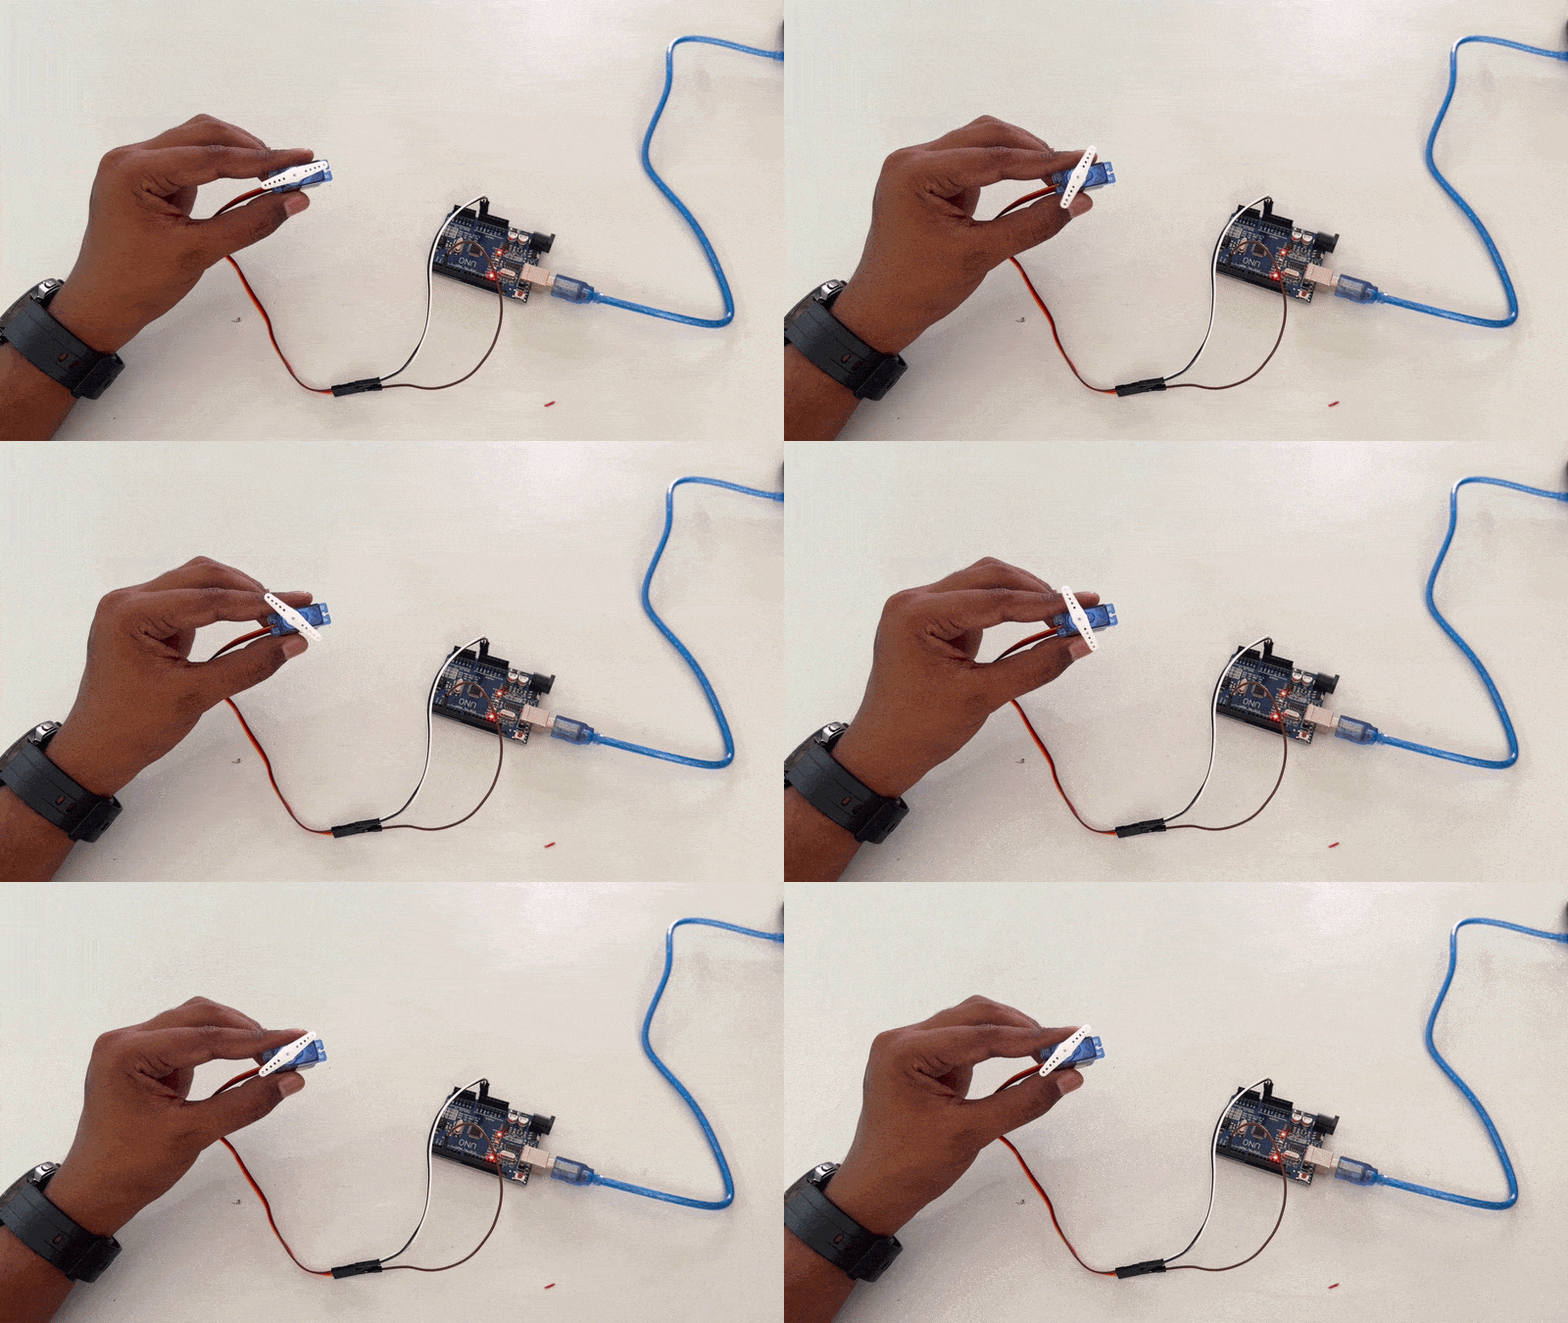
Conclusion
In this lesson, we explored how to create autonomous sweep actions using an Arduino Uno and a Geek Servo Motor. We learned how to programmatically update variables and use them to control the Angle on the Servo.