



Introduction
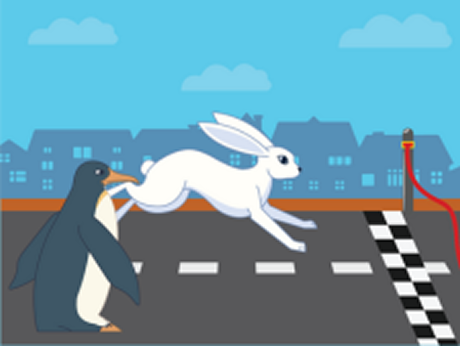
In this PictoBlox Junior Blocks project, students will create a fun race between a Hare and a Penguin. The Hare starts the race by saying “Let’s Race” and sends a message to the Penguin, making both sprites move toward the finish line.
This beginner-friendly activity teaches how to use events, messages, loops, movement, speed control, and costume animation to make sprites interact and move in a coordinated way.
Hardware and Software Requirements
Before starting the activity, make sure you have the following:
- Computer or laptop
- PictoBlox software installed
- Junior Blocks mode
- Street backdrop
- Hare sprite
- Penguin sprite
Note: No hardware product or PictoBlox extension is required for this activity.
Setting Up the Stage and Sprites
Before coding the race, you need to set up the stage and add the characters. In this section, you will add a racing backdrop and place the Hare and Penguin sprites at the starting position.
Step 1: Open PictoBlox
Open PictoBlox on your computer and select Junior Blocks Mode from the available programming modes.
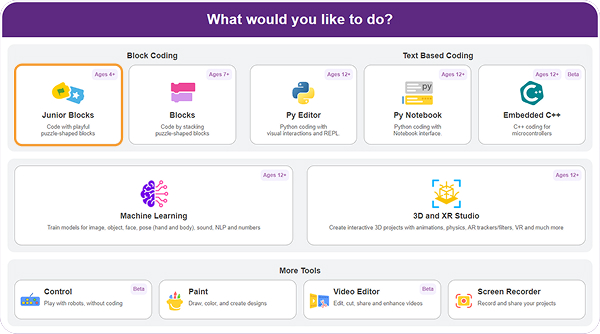
Once PictoBlox opens in Junior Blocks mode, you are ready to create.
Step 2: Add the Background
The backdrop creates the environment where the race will take place. In this activity, we will use a street backdrop to represent the racing track.
Follow these steps:
- Click on the Choose a Backdrop button located at the bottom-right corner of the stage.
- Search for the Street backdrop in the backdrop library.
- Select the backdrop to add it to the stage.
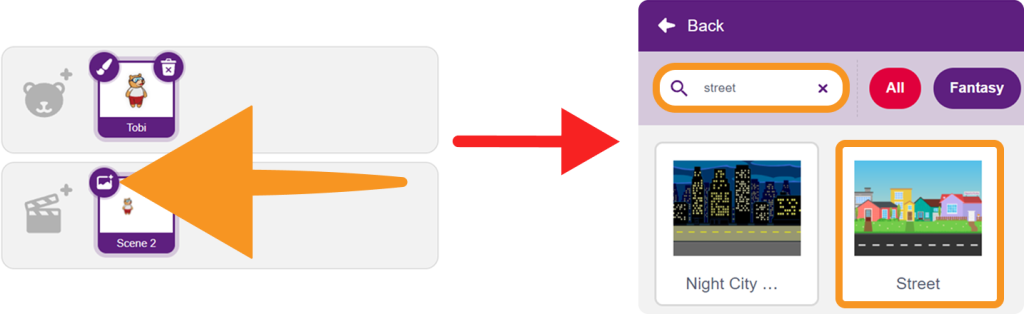
After adding the backdrop, your stage will look like a racing track where the Hare and Penguin can run.
Step 3: Add the Sprites
Now, add the characters that will participate in the race.
Follow these steps:
- Delete the default sprite if it is present on the stage.
- Click on the Choose a Sprite button.
- Search for and add the Hare sprite.
- Search for and add the Penguin sprite.
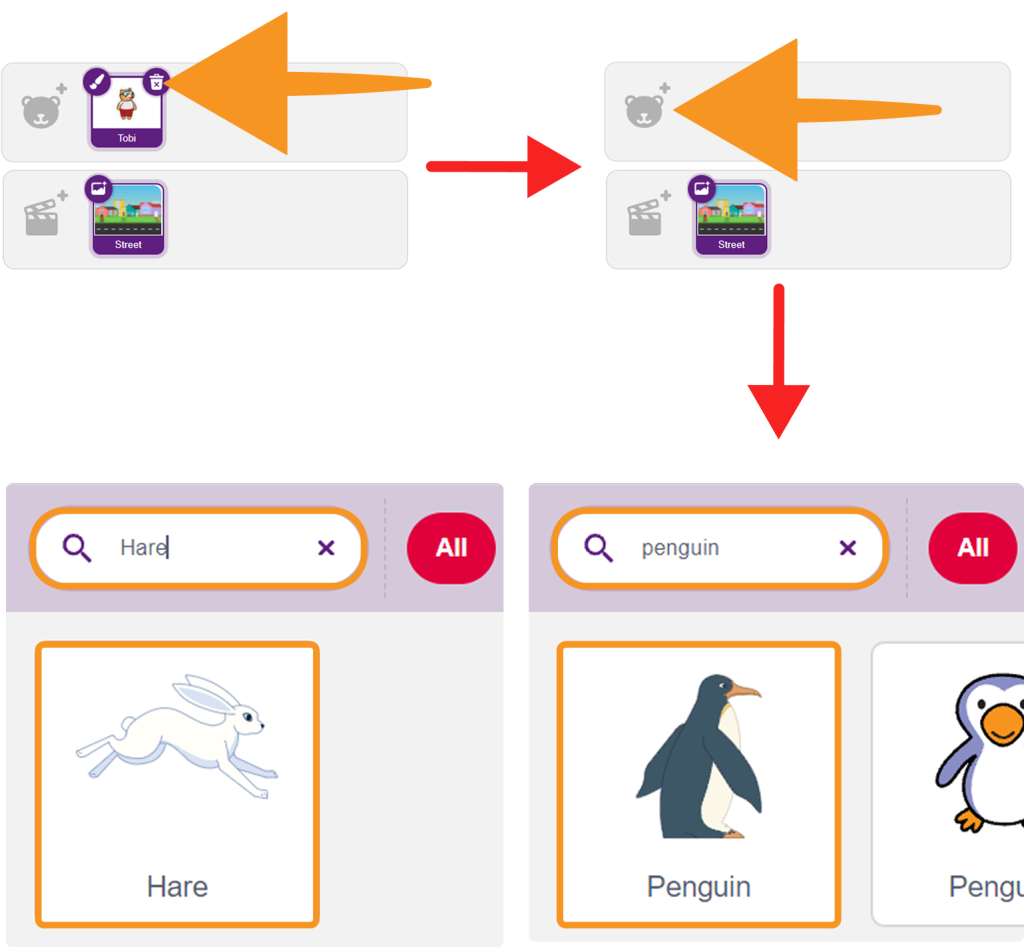
The Hare and Penguin will be the two racing characters in this project.
Step 4: Position the Sprites
Place both sprites near the starting line.
Follow these steps:
- Place the Hare near the starting position.
- Place the Penguin slightly below the Hare near the same starting position.
- Make sure both sprites are facing toward the right side of the stage.
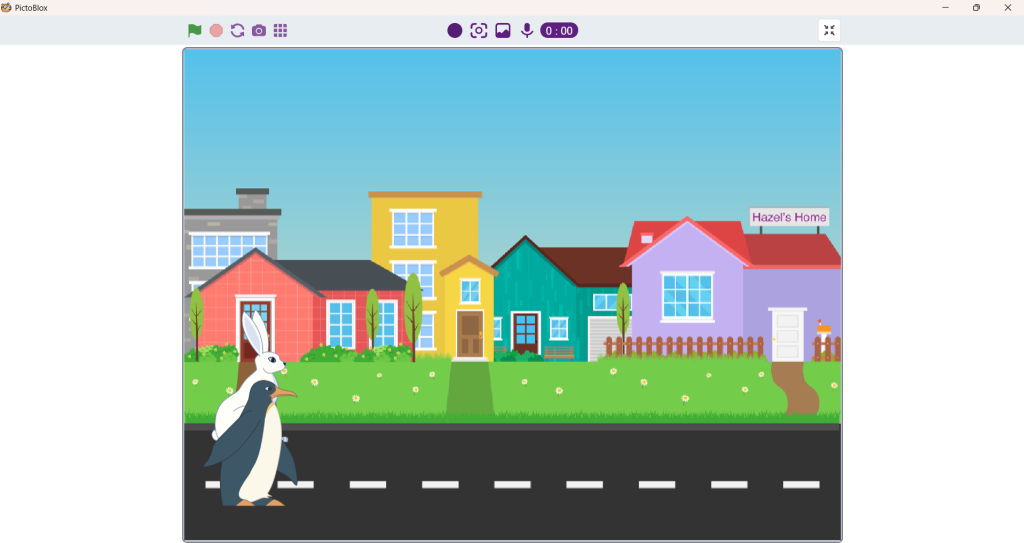
Your stage setup is now complete. You are ready to start coding the race.
Step-by-Step Block Coding Guide
Now that the stage and sprites are ready, you will create scripts for both the Hare and Penguin.
The Hare will start the race, display a message, send a signal to the Penguin, and move toward the finish line quickly. The Penguin will wait for the message and then begin moving at a slower speed.
Coding the Hare Sprite
Step 1: Start the Race
- Select the Hare sprite.
- Go to the Events category and drag the When Green Flag Clicked block into the workspace.
Step 2: Set Hare Speed
- Add the Set Speed block below the Green Flag block.
- Set the speed to Fast.
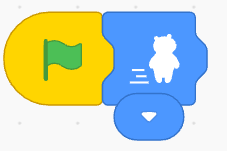
This makes the Hare move quickly during the race.
Step 3: Display a Message
- Add the Say block.
- Type: Let’s Race
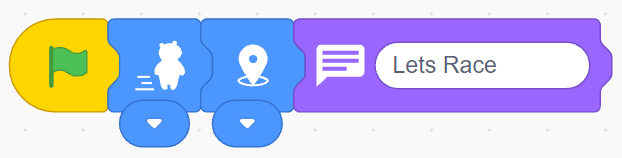
This makes the Hare announce the start of the race.
Step 4: Send Message to Penguin
- Add the Send Message block.
- Select the Blue Message option.
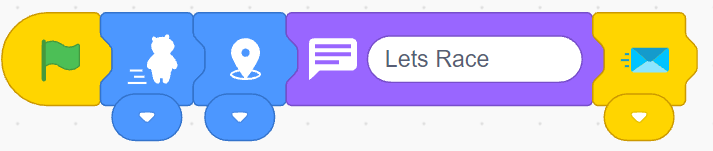
This sends a signal to the Penguin, telling it to start moving.
Step 5: Move the Hare
Add a Repeat 18 Times block and inside the Repeat block, add:
- Move Right 1 Step
- Next Costume

The Move Right block makes the Hare move toward the finish line. The Next Costume block changes the Hare’s costume, making it look like the Hare is running.
Step 6: Announce the Winner
After the Repeat block, add a Say block.
Type: I won!

This makes the Hare announce that it reached the finish line first.
Coding the Penguin Sprite
Step 1: Reset Penguin Position
- Select the Penguin sprite.
- Add the When Green Flag Clicked block.
- Add the Go To Position block to place the Penguin at the starting point.
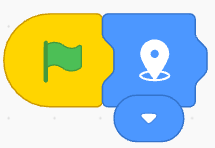
This ensures the Penguin starts from the correct position every time the program runs.
Step 2: Receive the Message
- Add the When Message Received block.
- Select the Blue Message option.
This script will start when the Penguin receives the message from the Hare.
Step 3: Set Penguin Speed
- Add the Set Speed block.
- Set the speed to Slow.
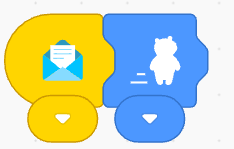
This makes the Penguin move slower than the Hare.
Step 4: Move the Penguin
Add a Repeat 18 Times block and inside the Repeat block, add:
- Move Right 1 Step
- Next Costume
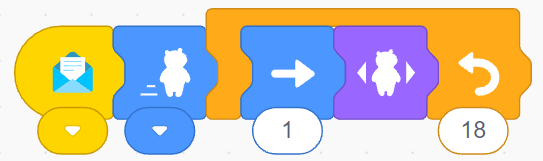
The Penguin will now move toward the finish line while changing costumes to create a running animation.
Output
When the Green Flag is clicked, you should observe the following:
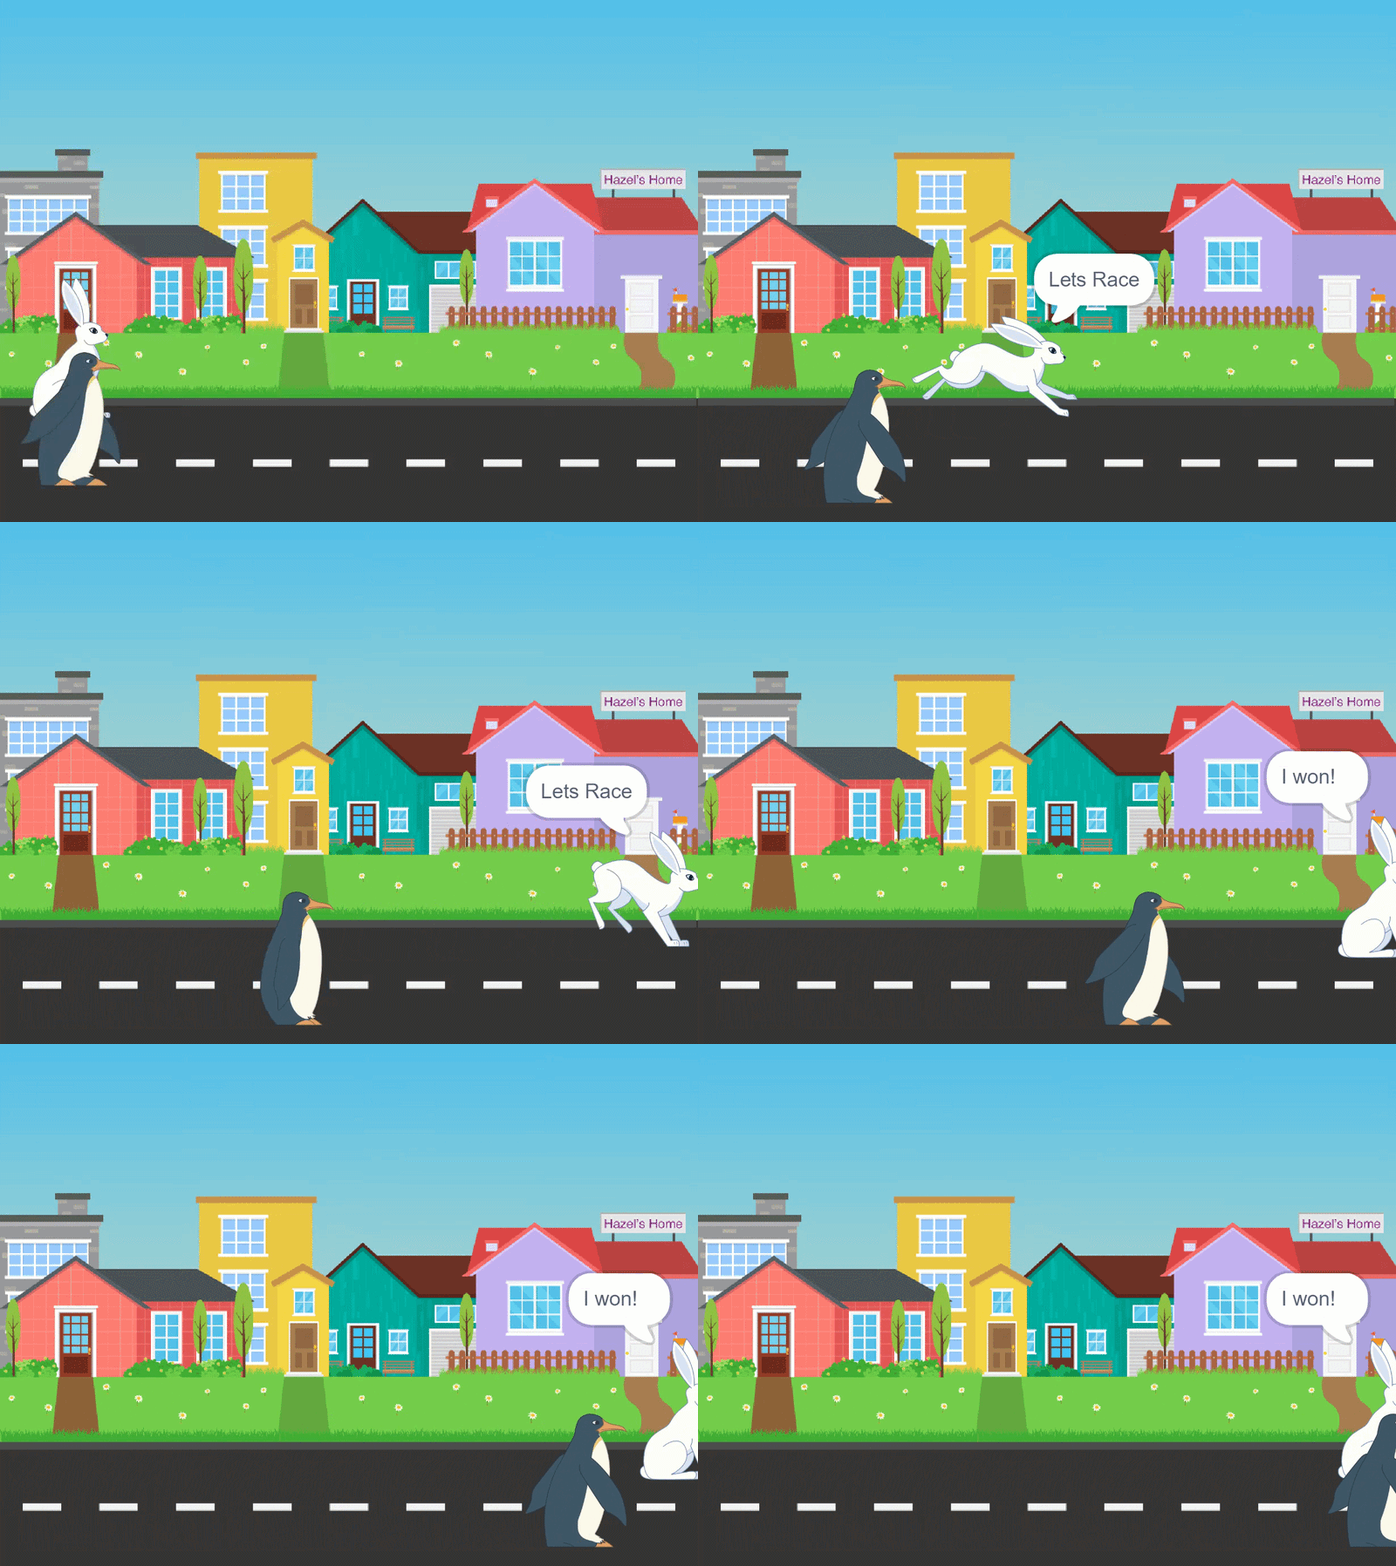
- The Hare says “Let’s Race”.
- The Hare sends a message to the Penguin.
- Both sprites begin moving toward the finish line.
- The Hare moves faster than the Penguin.
- The Hare reaches the finish line first.
- The Hare says “I won!”
- The Penguin continues moving at a slower speed.
If all these actions happen correctly, your Hare and Penguin Race animation is complete.
Conclusion
In this project, you created a simple racing animation using PictoBlox Junior Blocks. You learned how to add a backdrop, position sprites, start a program, send messages, control sprite speed, repeat movement, and animate sprites using costumes.
The Hare and Penguin Race activity is a great beginner project for understanding event-based programming, sprite communication, loops, movement, and animation. It also introduces students to basic game design concepts simply and engagingly.