



Introduction
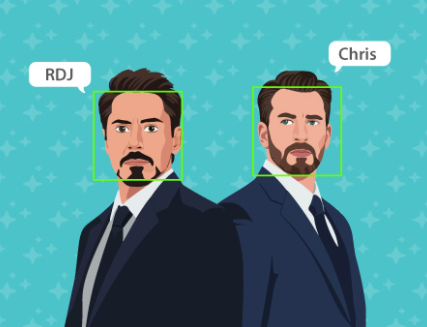
Artificial Intelligence has revolutionized the way computers interact with and understand visual information. One of the most popular applications of AI is Face Recognition, which enables a computer to identify individuals based on their facial features. The Face Detection Extension in PictoBlox allows users to train and create their own face recognition models without requiring advanced knowledge of machine learning.
In this project, the system is trained using images of specific individuals and learns to recognize their unique facial characteristics. Once the training is completed, the model can detect multiple faces present in an image and identify each person based on the trained data. Using face coordinates and face dimensions, labels are displayed accurately above the detected faces. This project demonstrates the practical application of AI and Computer Vision concepts and provides hands-on experience in building intelligent face recognition systems using PictoBlox.
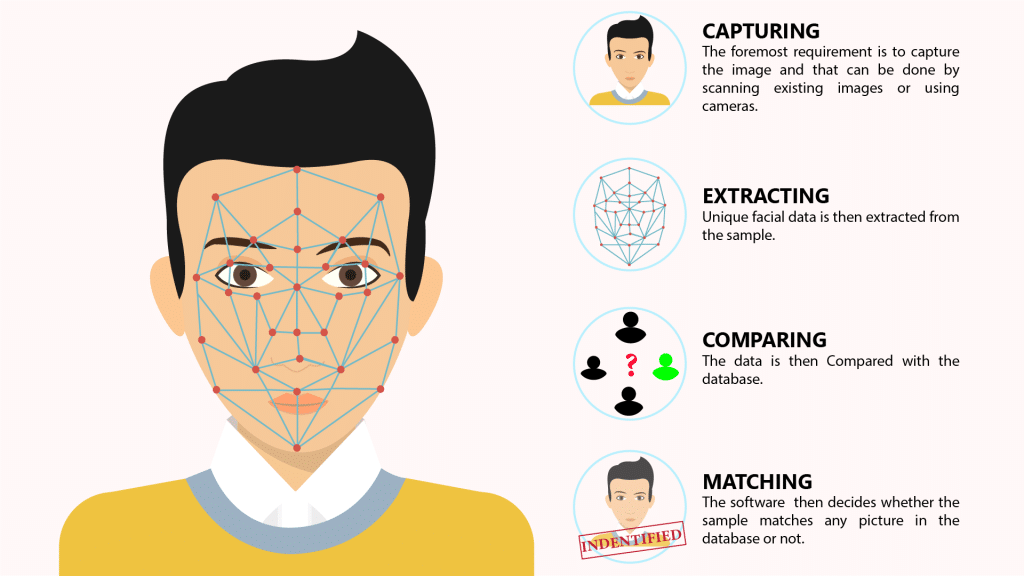
How Facial Recognition Works?
First, a face is analyzed from a captured image, its geometrical properties, size, and position are obtained. Then a structure is generated that forms a pattern that is later stored in a database. Once stored, the user’s facial record is compared with the biometric features of each face that is scanned and allows adding new templates to make the recognition more effective. If the image matches a search, the system will alert us that a match has been found.
Prerequisites
- A PC/Laptop with a working camera/webcam
- PictoBlox Software
- Internet Connectivity
Making Script in PictoBlox
Now that we understand what Face Detection and Face Recognition are and how they work, let’s create a project in PictoBlox that can detect and recognize faces from an image. The project will use the Face Detection Extension to identify faces, determine their position and size, and display the name of the detected person based on the training provided.
Before starting, make sure that PictoBlox is installed on your computer. This project uses the Face Detection Extension and AI-based face matching features available in PictoBlox.
Step-by-Step Block Coding Guide
Let’s begin!
- Create a new project in PictoBlox.
- Select Blocks from Block Coding.
- Next, click on the Add Extension button and add Face Detection extension.

Setting Up the Stage
- Add the Square Box sprite and delete the Tobi Sprite.
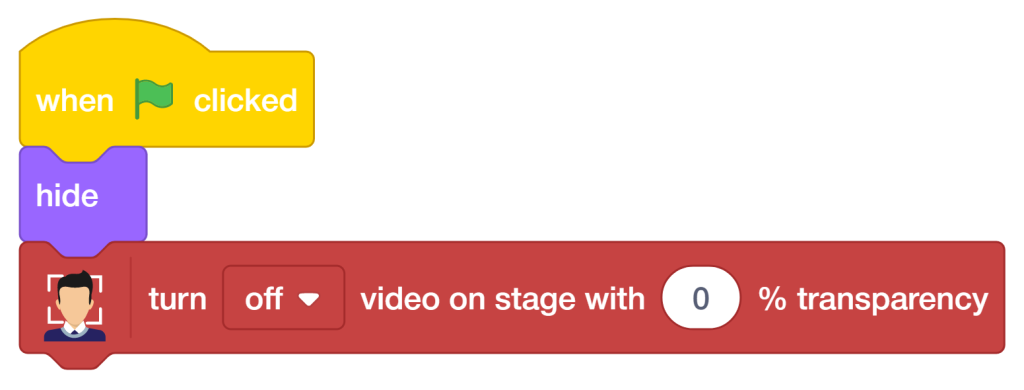
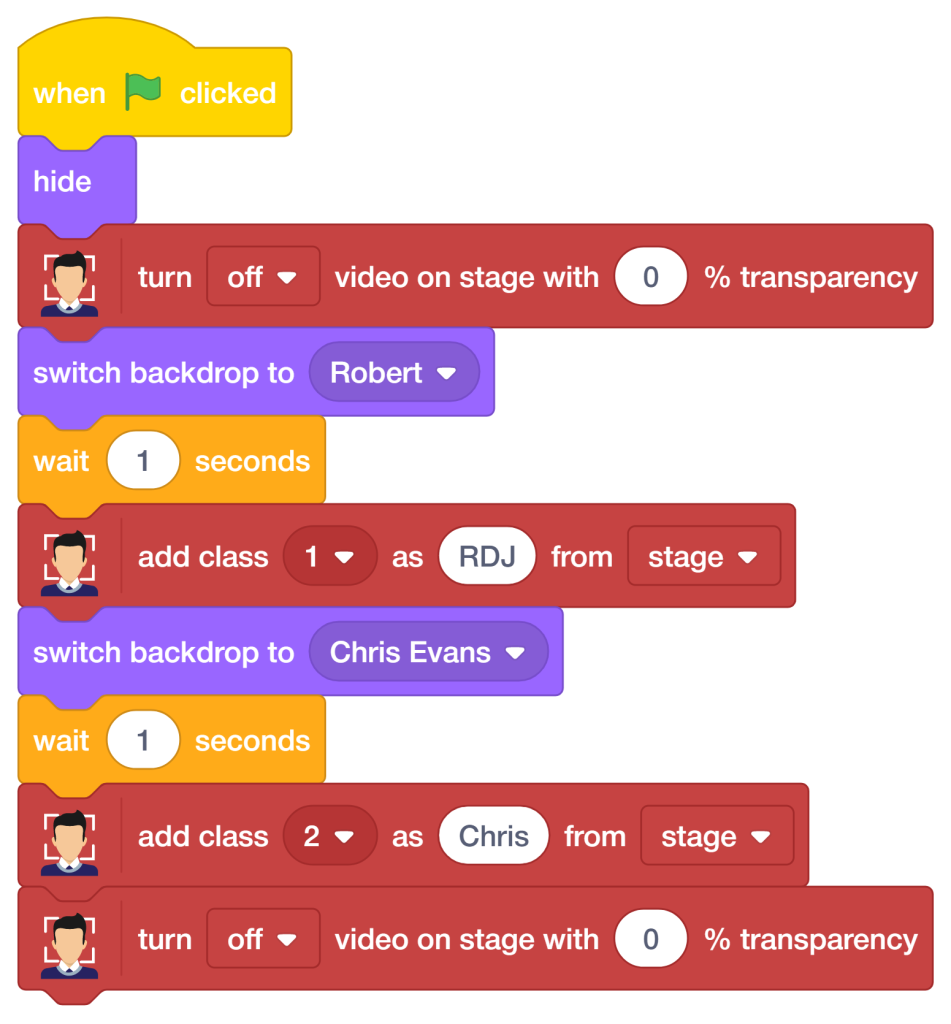
- Make the following script to hide the Square Box and turn on the camera feed.
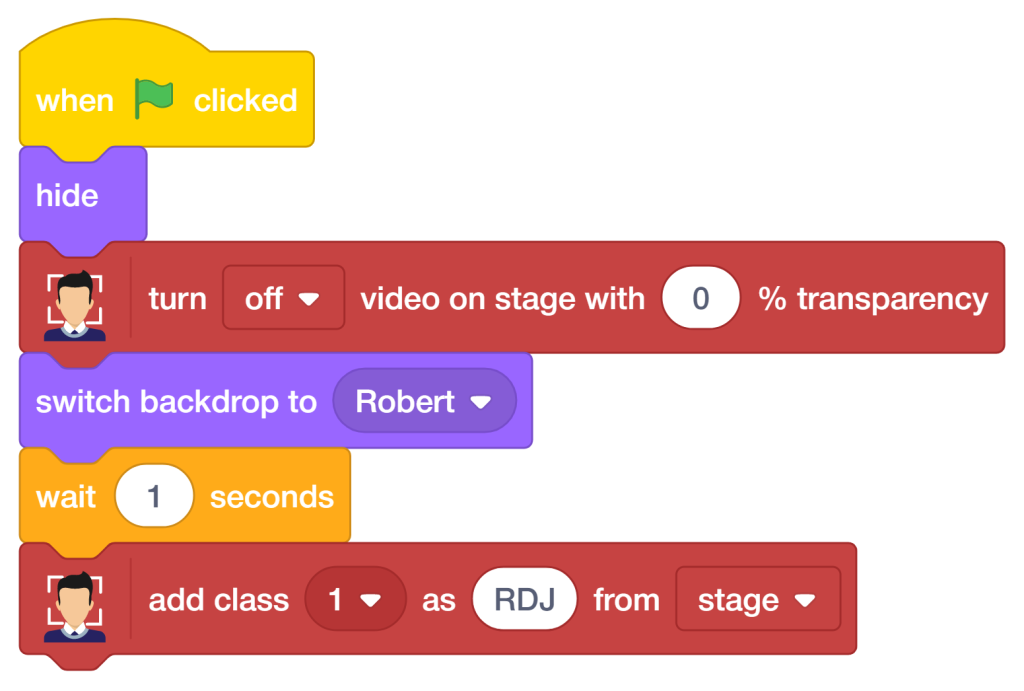
- The backdrop is changed to Robert, which contains the training image of Robert Downey Jr.
- A short delay is added to ensure the backdrop loads completely.
- The Add Class block is then used to train the model by assigning Class 1 the label “RDJ” using the face detected in the current backdrop.
- Next, the backdrop is changed to Chris Evans, and after a short delay, the Add Class block is used again to train the model with Class 2 labeled as Chris.
- By providing separate training images and labels, the model learns the facial features of both individuals and can distinguish between them during face matching.
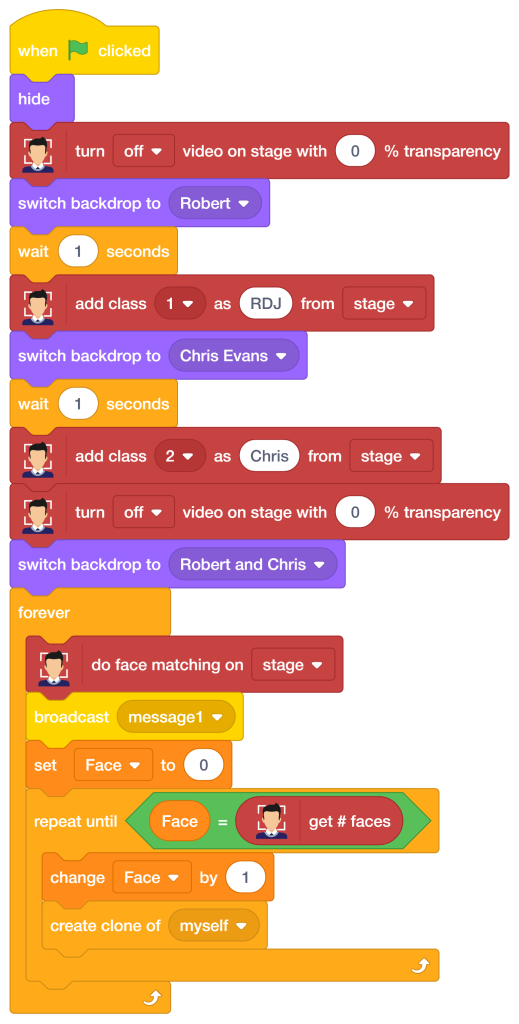
- The backdrop is changed to “Robert and Chris”, which contains both trained individuals in a single image.
- Inside the forever loop, the Do Face Matching on Stage block continuously scans the image and compares the detected faces with the previously trained classes.
- The variable Face is set to 0 and is used to keep track of the detected faces.
- The Repeat Until loop runs until all detected faces have been processed.
- During each iteration, the Face variable is increased by 1, and a clone is created for that face.
- Each clone will later position itself on the detected face and display the corresponding class name (RDJ or Chris) based on the face-matching result.
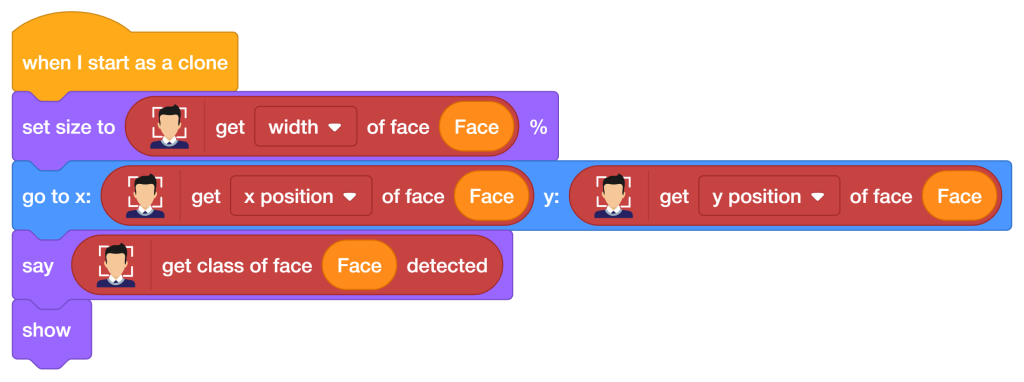
- The clone displays this name using the Say block and then becomes visible on the stage.When a clone starts, it sets its size according to the width of the detected face. This ensures that the label scales appropriately with the face size.
- The clone then moves to the X and Y coordinates of the corresponding face using the Get X Position of Face and Get Y Position of Face blocks.
- Next, the Get Class of Face Detected block retrieves the name of the person identified during face matching (such as RDJ or Chris).
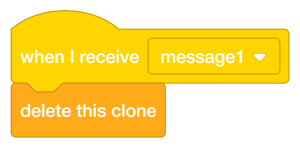
- The second script helps manage the clones: Whenever message1 is broadcast from the previous script, all existing clones are deleted. This prevents old labels from remaining on the screen before new face-matching results are displayed.
Output

Conclusion
In this project, we used the Face Detection Extension in PictoBlox to train a model to recognize multiple individuals. The system learned facial features from training images and successfully identified faces in a group image. Using clones, the detected faces were automatically labeled with the corresponding person’s name. This project demonstrates how AI and Computer Vision can be used to build intelligent face recognition applications in PictoBlox.