




Introduction
Wizbot Maxx Draws Heart is a beginner-friendly robotics activity that introduces students to robot movement and creative coding using PictoBlox Junior Blocks. In this project, Wizbot Maxx follows a sequence of movement, turning, and wait commands to draw a heart shape on the stage. As the robot executes each instruction one after another, students learn how simple movement commands can be combined to create patterns and designs. Through this activity, they explore key programming concepts such as sequential programming, movement control, turning angles, timing, and path planning while gaining hands-on experience in programming a robot to perform a creative task.
Hardware and Software Requirements
Before starting the activity, make sure you have the following:
- Wizbot Maxx
- Computer or laptop
- PictoBlox software installed
- PictoBlox Junior Blocks mode
- Bluetooth connection enabled
- Stripes backdrop
- Wizbot Maxx sprite
Note: Make sure Wizbot Maxx is charged before starting the activity.
How Does It Work?
Wizbot Maxx draws the heart by following a sequence of commands.
The robot:
- Moves forward for 2 steps
- Turns left by 75 degrees
- Waits for 1.5 seconds
- Moves forward again
- Repeats similar movement and turning actions
- Completes a heart-like pattern on the stage
This activity demonstrates how a complex-looking shape can be created using simple commands arranged in the correct order.
Setting Up the Stage and Sprite
Before coding the heart drawing activity, set up the stage and add the Wizbot Maxx sprite.
Step 1: Open PictoBlox
Open PictoBlox on your computer and select Junior Blocks Mode from the available programming modes.
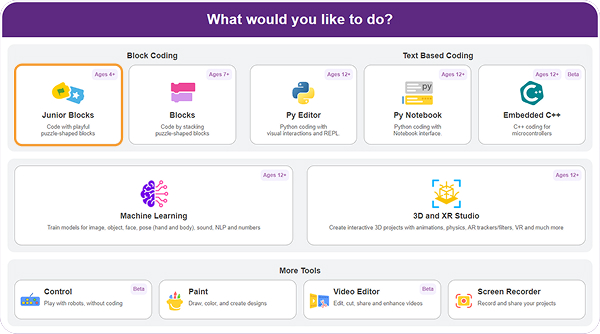
Once PictoBlox opens in Junior Blocks mode, you are ready to create.
Step 2: Add the Background
The backdrop helps make the drawing area clearer and visually engaging.
Follow these steps:
- Click on the Choose a Backdrop button.
- Search for the Stripes backdrop in the library.
- Select the backdrop and add it to the stage.
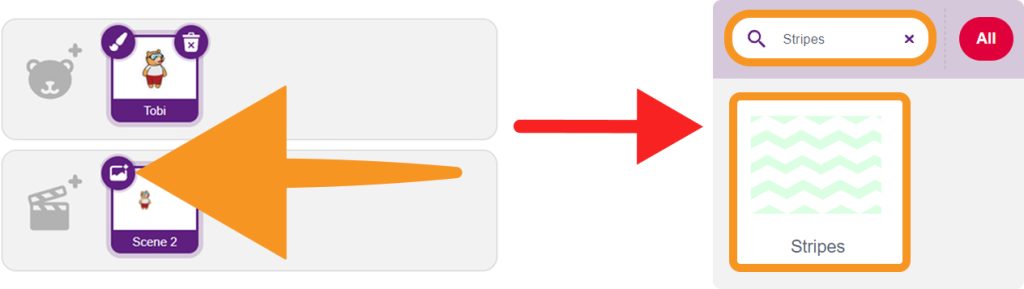
The Stripes backdrop will help you observe the movement path more clearly.
Step 3: Add the Wizbot Maxx Sprite
Now, add the Wizbot Maxx sprite to the stage.
Follow these steps:
- Delete the default sprite if required.
- Click on the Choose a Sprite button.
- Search for and add the Wizbot Maxx sprite.
- Place the sprite at the starting position on the stage.
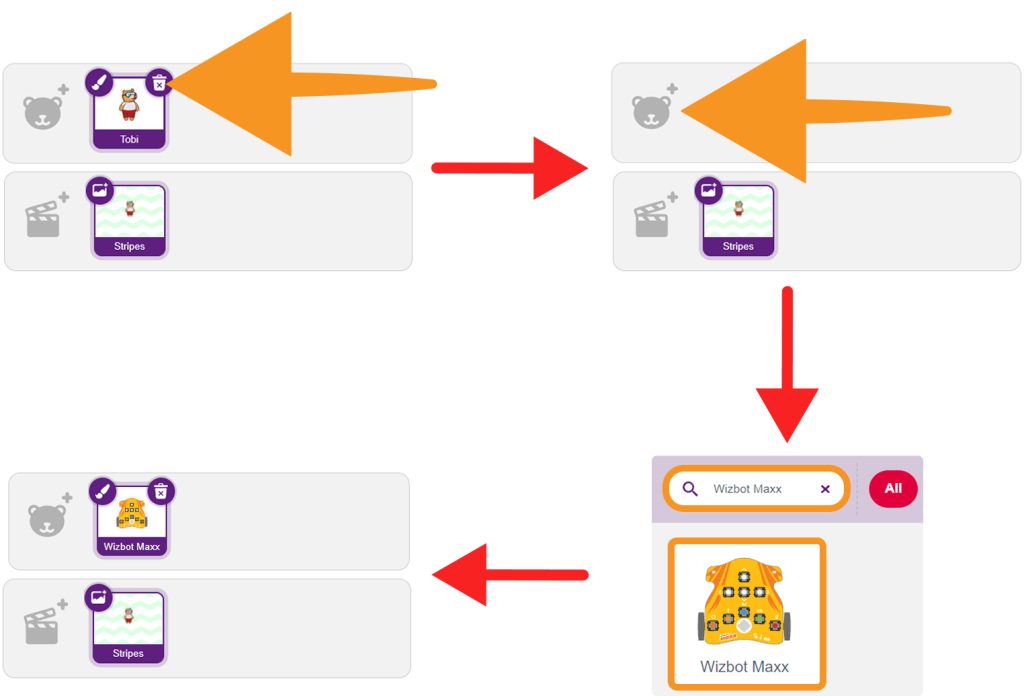
Your stage setup is now complete.
Step-by-Step Block Coding Guide
Now that the stage and sprite are ready, you will create the program that makes Wizbot Maxx draw a heart shape.
The program will use movement, turning, wait, and speed blocks in a sequence.
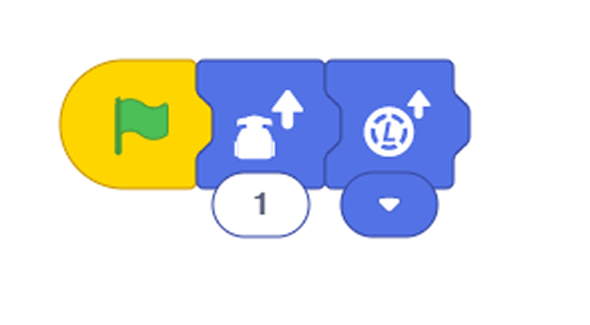
Step 1: Drag the When Green Flag Clicked block from the Events Palette. This block starts the program when the Green Flag is clicked.

This block starts the program when the Green Flag is clicked.
Step 2: Drag the Move Forward (2 Steps) block from the Motion Palette and attach it below the Green Flag block.
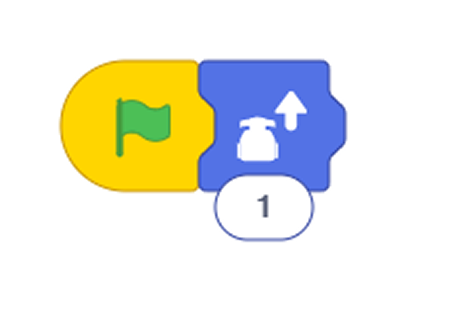
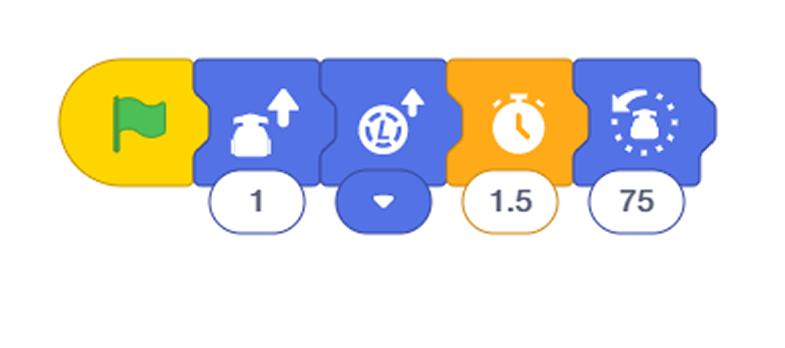
Step 3: Drag the Turn Left (75 Degrees) block from the Motion Palette and place it below the Move Forward block.
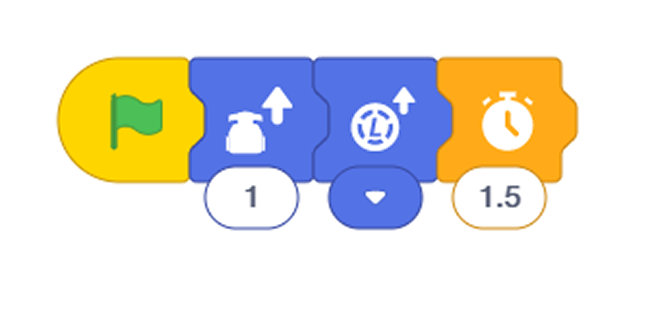
Step 4: Drag the Wait (1.5 Seconds) block from the Control Palette and attach it below the Turn Left block.
Step 5: Drag another Move Forward (2 Steps) block from the Motion Palette and place it below the Wait block.
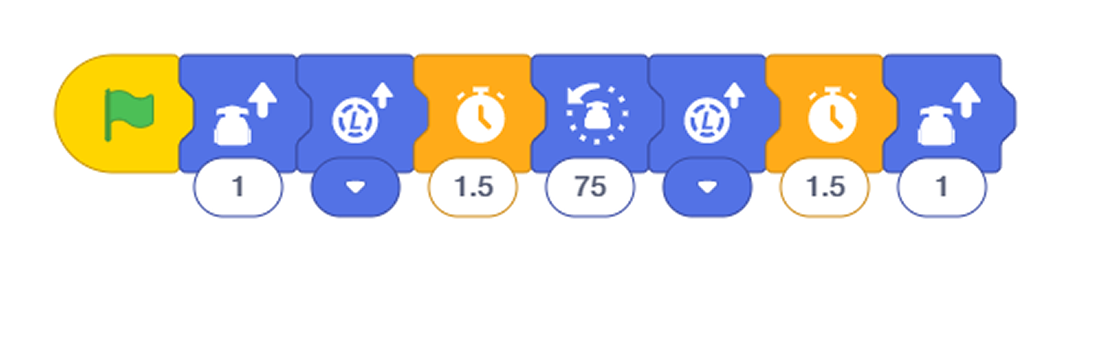
Step 6: Continue adding the Move Forward, Turn Left, and Wait blocks from the Motion and Control Palettes as shown in the project to complete the heart shape.
Step 7: Connect Wizbot Maxx via Bluetooth
Before running the program on Wizbot Maxx, connect it to PictoBlox.
Follow these steps:
- Turn on the Wizbot Maxx.
- Click the Connect button in PictoBlox.
- Select Bluetooth as the connection mode.
- Choose your Wizbot Maxx device from the list of available devices.
- Click Connect.
- Wait until the connection is established.
Once connected successfully, the device status will show as Connected in PictoBlox.
Output
Click the Green Flag in the stage area to run the program. After running the program, you should observe the following:
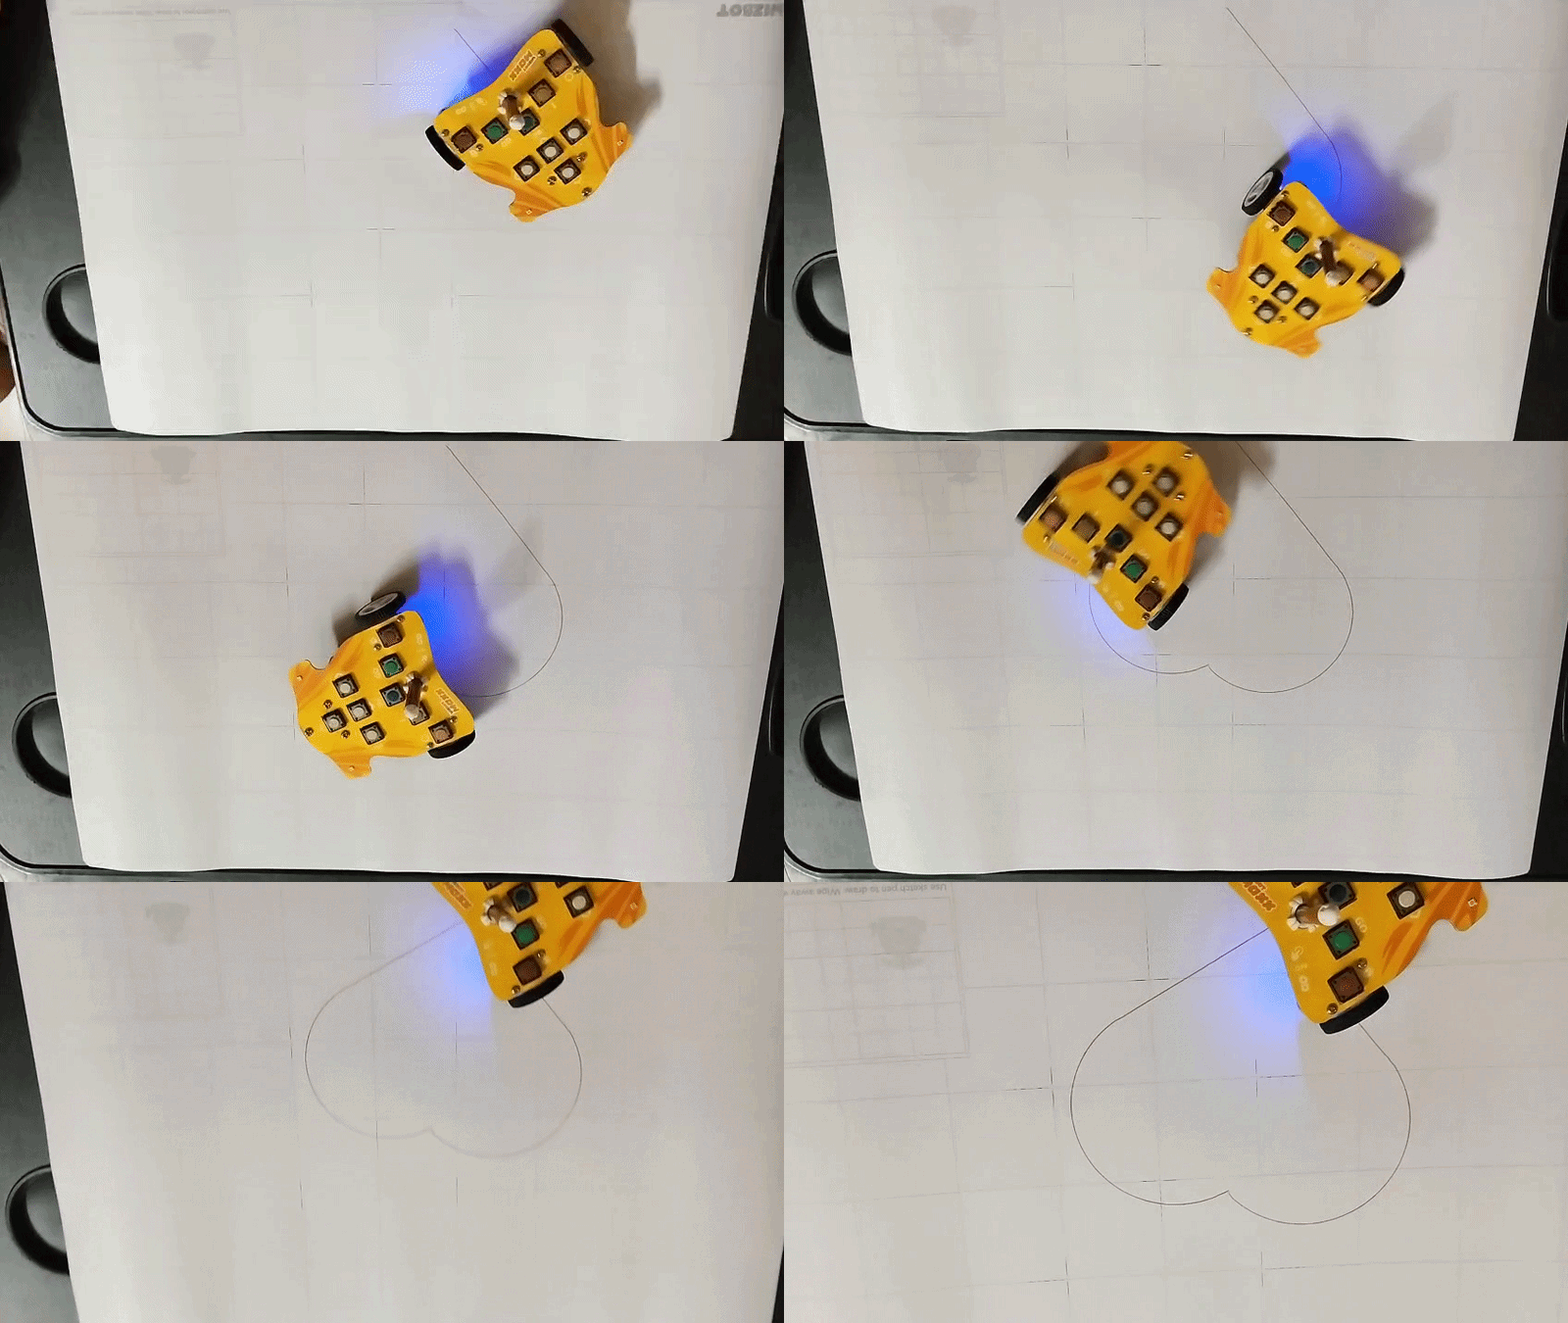
- Wizbot Maxx starts moving when the Green Flag is clicked.
- The robot moves forward in small steps.
- It turns at specific angles.
- It pauses briefly between movements.
- The repeated movement sequence creates a heart shape on the stage.
If the heart shape is visible on the stage, your project is complete.
Conclusion
In this project, you learned how to program Wizbot Maxx to draw a heart shape using PictoBlox Junior Blocks.
You explored how movement, turning, speed, and wait blocks work together to create patterns and designs. You also learned how robots follow instructions step by step and how changing movement values or angles can affect the final shape.
This activity is a great introduction to robot movement, path planning, creative coding, and sequential programming.