


Introduction
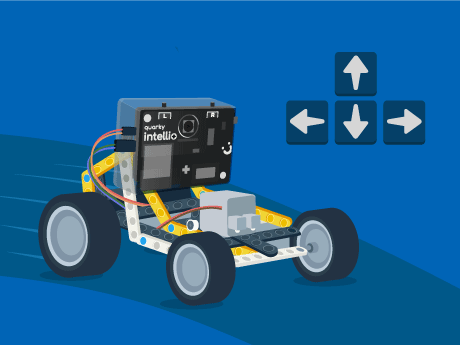
The Intelio steering robot project is designed to introduce users to robotics, physical computing, and IoT concepts through an interactive hands-on activity. In this project, the rover is controlled using keyboard inputs in PictoBlox, allowing it to move forward, backward, left, and right in real time.
This activity helps learners understand how software communicates with hardware devices and how real-time control systems work. It also builds a strong foundation for advanced robotics applications such as obstacle navigation, remote surveying, and autonomous systems.
Prerequisites
- Quarky Intellio device (charged and powered on)
- PictoBlox installed on a Wi-Fi connected device
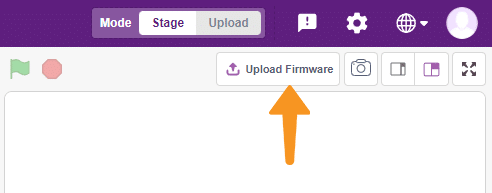
- Firmware uploaded to Quarky Intellio via the Upload Firmware button in PictoBlox
Building the Intellio Rover Script
The “brain” of this robot operates on a forever loop. Every millisecond, the robot sends a request to the Dabble app: “Is a button being pressed?” This is called Real-Time Polling. Based on the answer, the robot instantly adjusts the speed and direction of its motors, giving you fluid, responsive control.
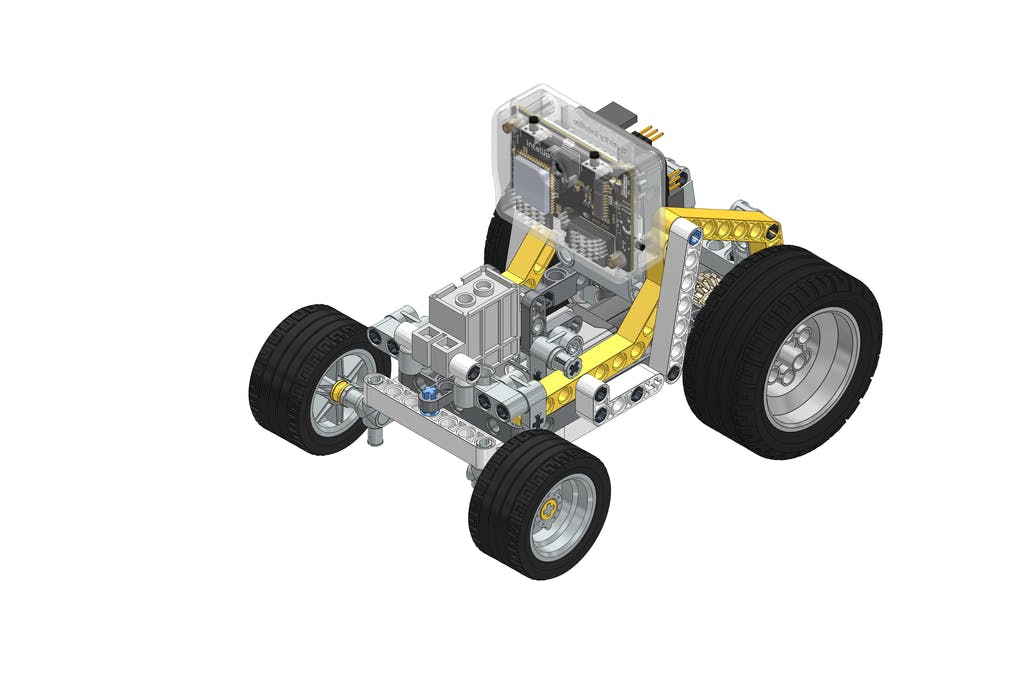
Follow the Link to Complete Rover Assembly:
Connecting your intellio to Pictoblox Blocks
- Delete the Tobi.
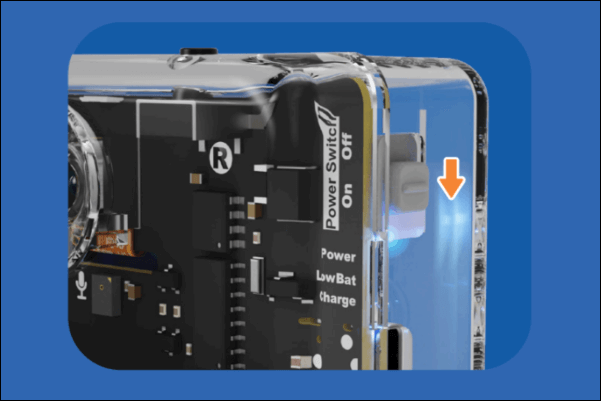
- Slide up the power switch to turn on Quarky Intellio.
- Blue light will turn on from Intellio; that means Intellio is ON.
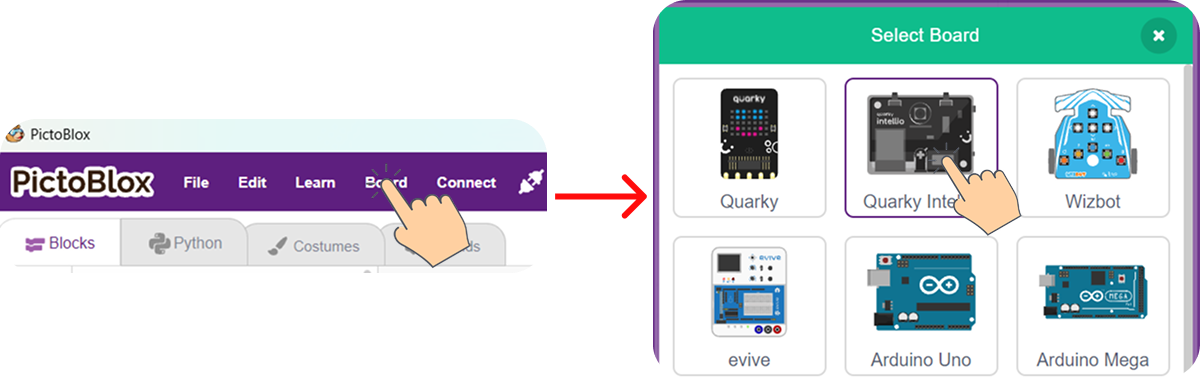
- Click on Board at the top of your screen. Select Quarky Intellio
- Click the Connect tab in the top menu to connect with the serial port (USB); be sure to Upload Firmware (top right corner) for Intellio.
- Once the Upload Firmware is done, then choose the Wi-Fi tab to connect Intellio with PictoBlox.
- Check out the Connection guide for Wi-Fi method – https://ai.thestempedia.com/docs/quarky-intellio/quarky-intellio-getting-started/quarky-intellio-connection-guide/#method2
Setup PictoBlox Environment
- Open PictoBlox, create a new project in block mode, click on Board, and select Quarky Intellio.
- If you face any issues while connecting Quarky Intellio, refer to the troubleshooting guide below: Quarky Intellio Connections Guide Troubleshooting.
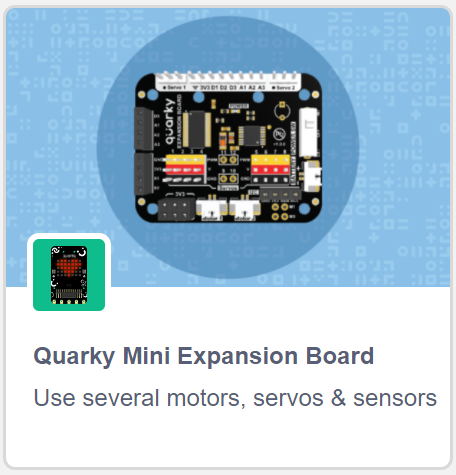
- Add the required extension: Quarky Mini Expansion Board.
Step 1: System Initialization
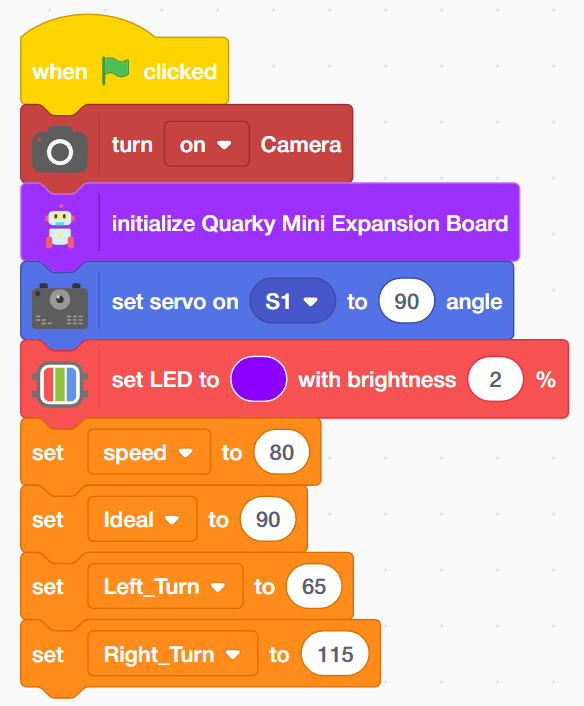
- Go to the Events palette and drag the “when green flag clicked” block into the scripting area. – This tells the robot to start the script when you press the Go button.
- Next from the Quarky palette, add the “turn on Camera” block – this activates the robot’s vision module for AI tasks.
- From the Expansion Board palette, add the “reverse motor [1] direction” block – this ensures both wheels move forward correctly during steering.
- In Expansion Board palette, add the “initialize Quarky Mini Expansion Board” block – this prepares the hardware ports to receive power and commands.
- From the Quarky palette, add the “set LED to [purple] with brightness [2]%” block. This provides a visual indicator that the initialisation is complete.
- From the Variables palette, create and drag four “set [ ] to [ ]” blocks.
- Set the variables to speed: 100, Ideal: 76, Left_Turn: 41, and Right_Turn: 100. This stores the specific movement values in the robot’s memory for precise steering logic later.
Step 2: Driving and Steering Logic
Add Keyboard Controls for Rover
This part maps your computer keyboard or gamepad keys to physical robot movements.
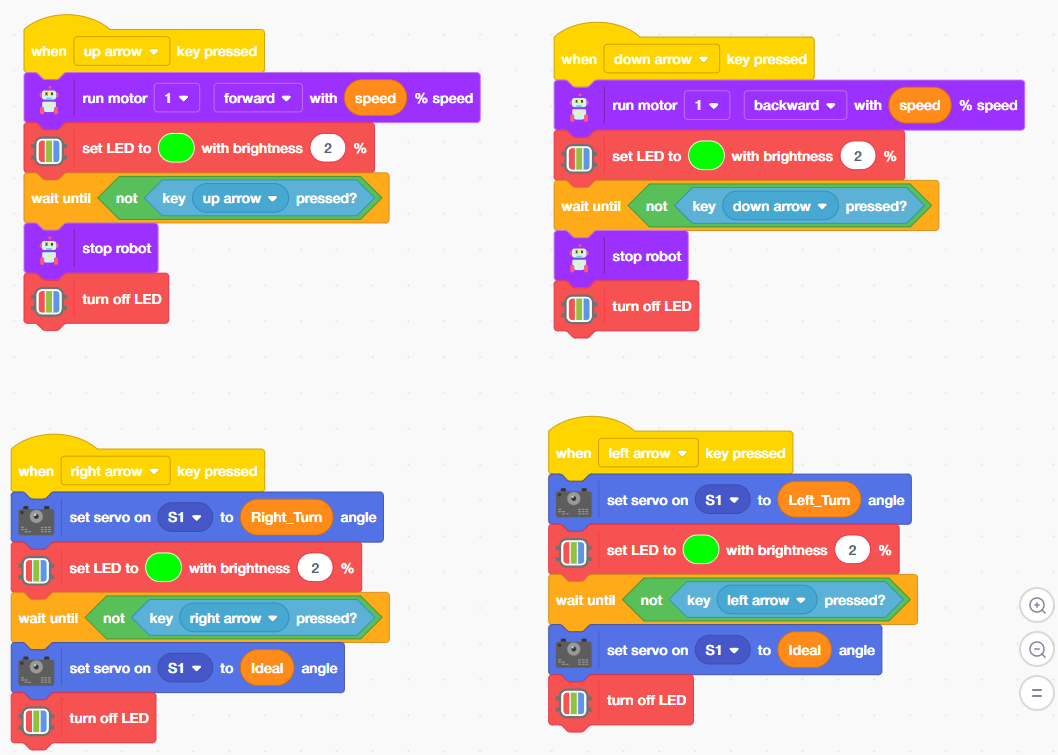
- Drag the “when [up arrow] key pressed” block from the Events palette
- Attach the “run motor [1] [forward] with [speed]% speed” block from the Quarky palette.
- From the Control palette, add a “wait until [ ]” block and insert a “not [key up arrow pressed?]” block from the Sensing palette.
- Add a “stop robot” block from the Quarky palette at the end
Repeat these steps for the Down, Left, and Right arrows, changing the direction and motor commands accordingly (e.g., use the “set servo on S1 to [Left_Turn] angle” block from the Quarky palette for steering).
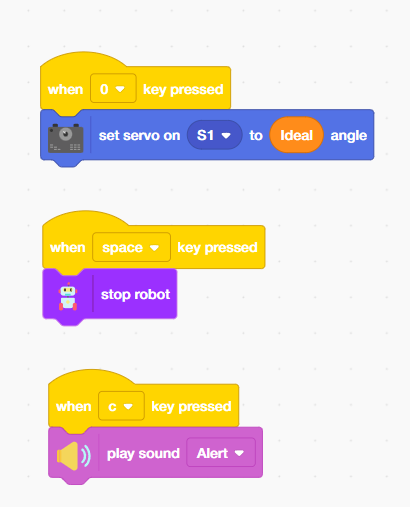
Step 3:
- These additional blocks handle the robot’s audio and emergency stop features.
- From the Events palette, drag the “when [0] key pressed” block.
- Add “set servo on S1 to [Ideal] angle” from the Quarky palette.
- This manually resets the steering to the centre position.
- From the Events palette, drag the “when [space] key pressed” block.
- Add “stop robot” from Quarky.
- From Sound, add “stop sound”. This acts as an emergency “All Stop” for both movement and audio.
- Drag the “when [e] key pressed” block from the Events palette.
- From Sound Palette, add “play sound from speaker [rider] mp3”. This triggers a sound effect from the Intellio’s onboard speaker.
Output
In block coding, click the green flag to execute the program.
Once you run the program, your robot will react instantly to your touch. You can now:
- Perform 360-degree spins.
- Navigate narrow corridors using single-motor control.
- Race against other Quarky rovers with zero-latency response.
Conclusion
The Intelio Rover manual control project effectively showcased how software and hardware can work together to achieve precise remote operation and monitoring. Through this demonstration, users gained practical exposure to robotics, IoT communication, and interactive programming using PictoBlox. The project not only strengthened understanding of real-time control systems but also highlighted the rover’s potential for applications such as remote surveying, navigation, and obstacle handling. Overall, this project serves as an important stepping stone toward developing more advanced autonomous and IoT-enabled robotic solutions.