
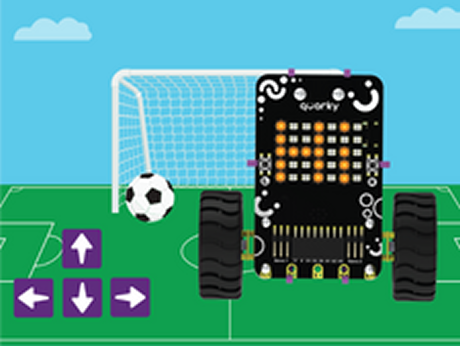



Football with Quarky is a robotics activity where students control Quarky like a football player on a football field. Using the arrow keys on the keyboard, learners can make Quarky move in different directions and stop when no key is pressed.
This project uses PictoBlox Junior Blocks, a simple visual programming environment designed for young learners. Instead of writing code, students use drag-and-drop blocks to create a program and control Quarky’s movement.
The activity is designed to demonstrate how robots can respond to user inputs in real time. Quarky continuously checks which key is pressed and performs the corresponding movement. This makes the project feel similar to controlling a player in a football game.
Through this project, students will understand how input devices, programming logic, and robot actions work together to create an interactive robotics experience.
Through this activity, you will explore important programming concepts such as:
- Event-Based Programming – triggering actions when specific keys are pressed.
- Continuous Monitoring with Loops – using a Forever block to constantly check for user inputs.
- Robot Motion Control – moving Quarky in different directions.
- Conditional Logic – performing different actions based on which key is pressed.
- Human-Robot Interaction – understanding how users can control robots using input devices like keyboards.
Hardware and Software Requirements
Before starting the activity, make sure you have the following:
- Quarky Robot
- USB cable or supported connection method
- Computer or laptop
- PictoBlox software installed
- Football field backdrop
- Quarky sprite
Note: Make sure your Quarky is charged before starting the activity.
Setting Up the Stage and Sprite
Before programming Quarky’s movements, set up the project environment. In this section, you will create a football field scene and add the Quarky sprite. This makes the activity more engaging and helps students visualize Quarky as a football player.
Step 1: Open PictoBlox
Open PictoBlox on your computer and select Junior Blocks Mode from the available programming modes.
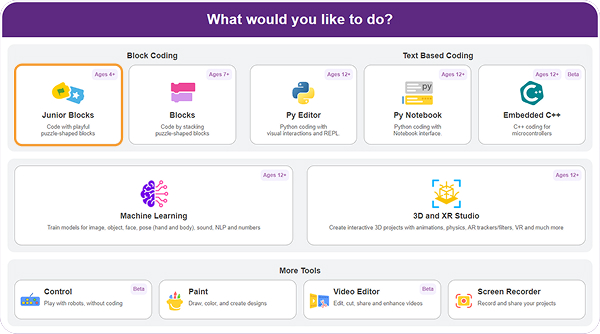
Before proceeding, please add the Quarky board.

Once PictoBlox opens in Junior Blocks mode, you are ready to create the football game scene.
Step 2: Add the Football Field Backdrop
The backdrop represents the environment where Quarky will move. For this activity, use a football field backdrop to create a football-playing experience.
Follow these steps:
- Click on the Choose a Backdrop button located at the bottom-right corner of the stage.
- Search for a Soccer backdrop in the backdrop library.
- Select the backdrop and add it to the stage.
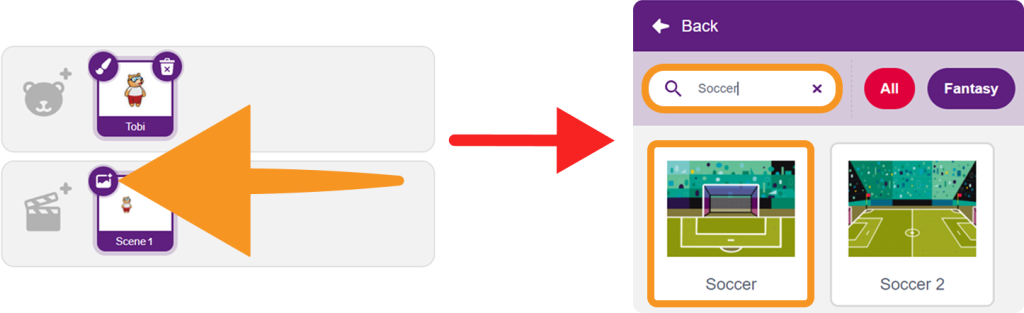
After adding the backdrop, the stage will look like a football ground where Quarky can move in different directions.
Step 3: Add the Quarky Sprite
Now, add Quarky to the stage. Quarky will act as the football player controlled by the keyboard arrow keys.
Follow these steps:
- Delete the default sprite if it is present on the stage.
- Click on the Choose a Sprite button.
- Search for and select the Quarky sprite from the sprite library.
- Place Quarky near the center of the football field.
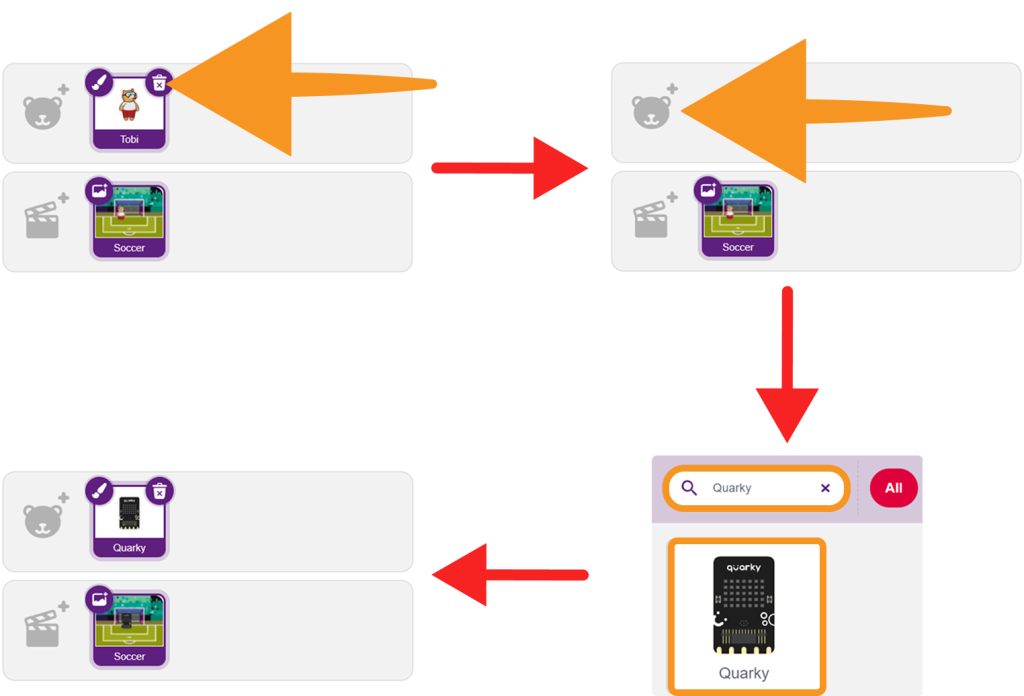
Your stage setup is now complete. You should see a football field backdrop with Quarky placed on it.
Step-by-Step Block Coding Guide
Now that the stage and sprite are ready, you will create the program to control Quarky using the arrow keys.
The program will continuously check which key is pressed. Based on the key input, Quarky will move forward, move backward, turn left, turn right, or stop.
Step 1: Start the Program
- Go to the Events category.
- Drag the When Green Flag Clicked block into the workspace.

This block starts the program when you click the green flag.
Step 2: Add the Forever Block
- Go to the Control category.
- Drag the Forever block and attach it below the When Green Flag Clicked block.

The Forever block keeps the program running continuously, allowing Quarky to keep checking for keyboard inputs.
Step 3: Move Quarky Forward
- Drag the If Up Key Pressed block.
- Place it inside the Forever block.
- Add the Move Forward block inside it.
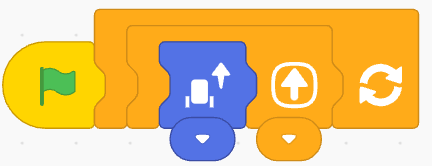
Now, Quarky will move forward whenever the Up Arrow key is pressed.
Step 4: Move Quarky Backward
- Drag the If Down Key Pressed block from the Events palette.
- Place it inside the Forever block after the previous condition.
- Add the Move Backward block inside it.
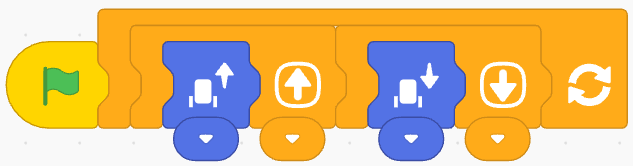
Now, Quarky will move backward whenever the Down Arrow key is pressed.
Step 5: Turn Quarky Left
- Drag the If Left Key Pressed block from the Events palette.
- Place it inside the Forever block.
- Add the Turn Left block inside it.
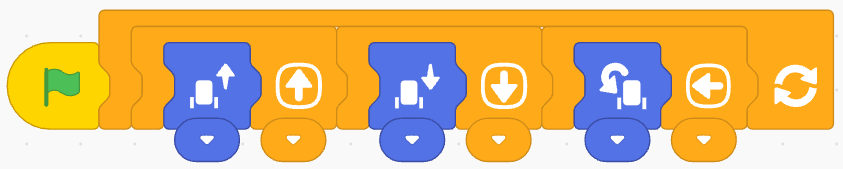
Now, Quarky will turn left whenever the Left Arrow key is pressed.
Step 6: Turn Quarky Right
- Drag the If Right Key Pressed block from the Events palette.
- Place it inside the Forever block.
- Add the Turn Right block inside it.

Now, Quarky will turn right whenever the Right Arrow key is pressed.
Step 7: Stop Quarky When No Key Is Pressed
- Drag the If No Key Pressed block from the Events palette.
- Place it inside the Forever block.
- Add the Stop block inside it.

This makes Quarky stop automatically whenever no arrow key is pressed.
Output
After completing the project and running the program, test the controls using the keyboard.
You should observe the following output:
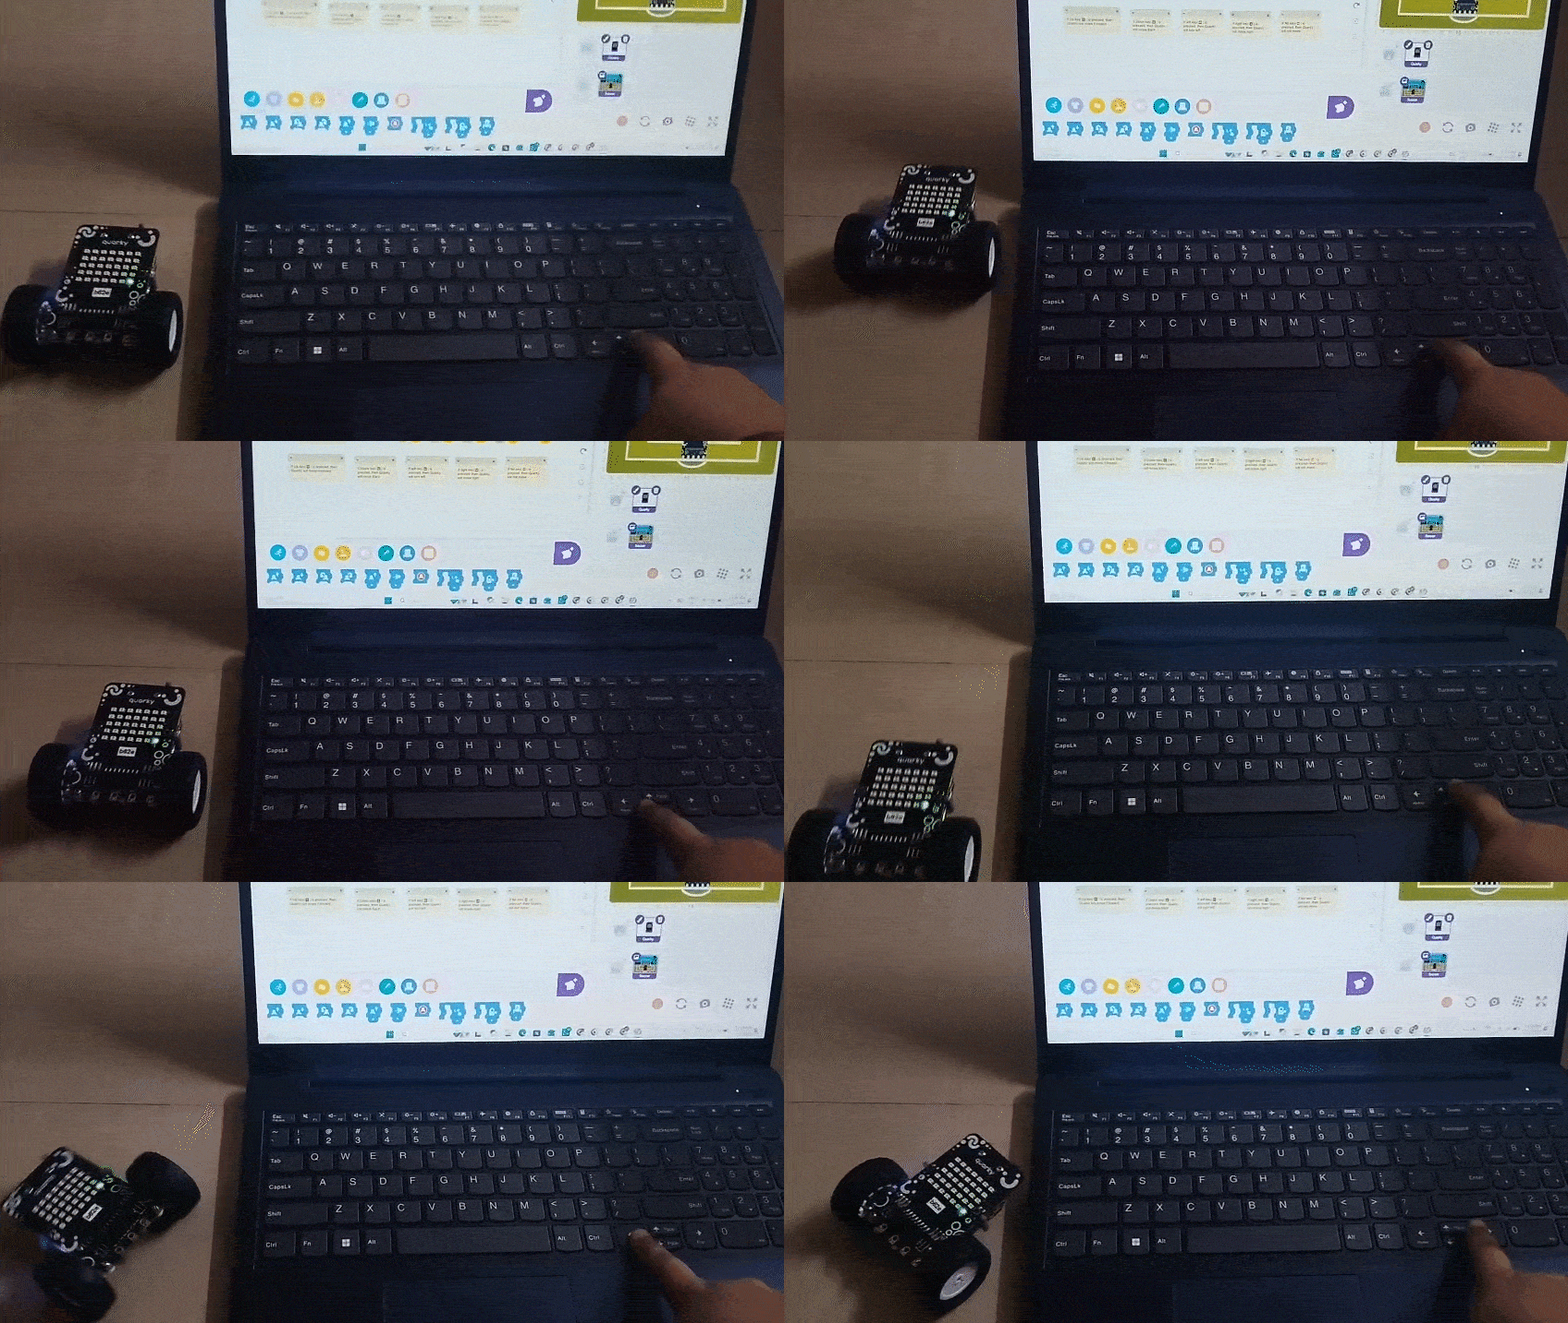
- Quarky moves forward when the Up Arrow key is pressed.
- Quarky moves backward when the Down Arrow key is pressed.
- Quarky turns left when the Left Arrow key is pressed.
- Quarky turns right when the Right Arrow key is pressed.
- Quarky stops automatically when no arrow key is pressed.
If all these actions work correctly, your Football with Quarky project is complete.
Conclusion
This project introduces students to the fundamentals of robot movement and keyboard-based control. By controlling Quarky on a football field, learners understand how robots respond to user inputs in real time.
The activity also helps students build logical thinking, sequencing, and conditional programming skills using simple Junior Blocks.
Football with Quarky is a great starting point for beginners who want to explore robotics, automation, games, and interactive robot-control projects.