



Introduction
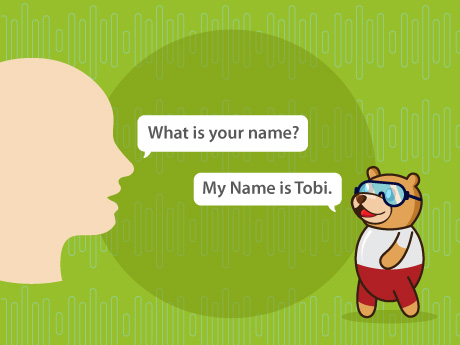
Speech recognition enables computers to understand and respond to spoken language, making interactions more natural and engaging. In this project, users can ask simple questions such as “What is your name?”, and the AI assistant replies with “My name is Tobi.” If the question is not recognised, it politely asks the user to try again. This project introduces voice-based interaction using PictoBlox and demonstrates two different methods for implementing speech recognition.
Setting Up the Stage
- Open PictoBlox and create a new project.
- Keep the default Tobi sprite or choose any sprite of your choice.
- Ensure that your computer’s microphone is enabled and accessible.
- Add the following extensions:
- Speech Recognition Extension (Method 1)
- Artificial Intelligence Extension (Method 2)
- Text-to-Speech Extension
Step-by-Step Block Coding Guide
Method 1: Using the Speech Recognition Extension
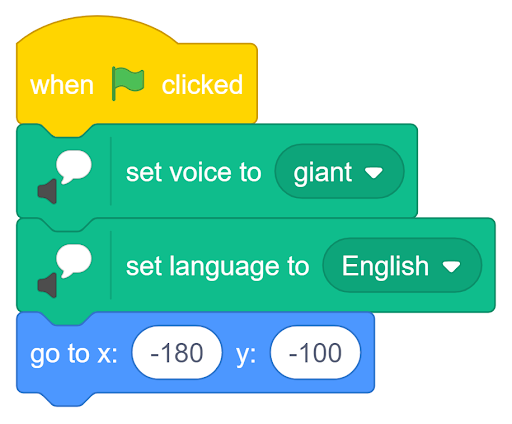
Step 1: Configure the Voice Assistant
- Add the When Green Flag Clicked block to start the program.
- Set the voice to Giant using the Text-to-Speech block.
- Set the language to English.
- Position the sprite at the desired location on the stage using the Go to x: y: block.
Step 2: Start Listening for Voice Commands
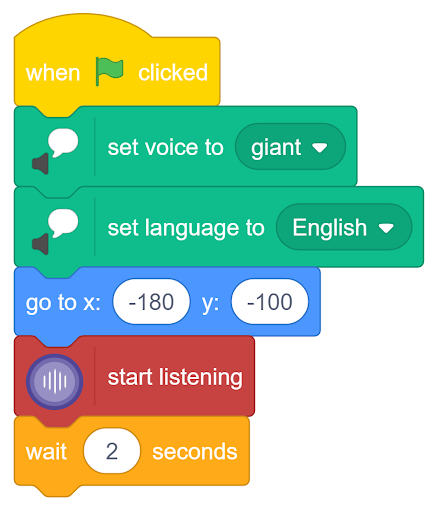
- Use the Start Listening block from the Speech Recognition extension.
- Wait for a short duration (for example, 2 seconds) to allow the extension to capture the user’s speech.
Step 3: Check the Recognised Speech
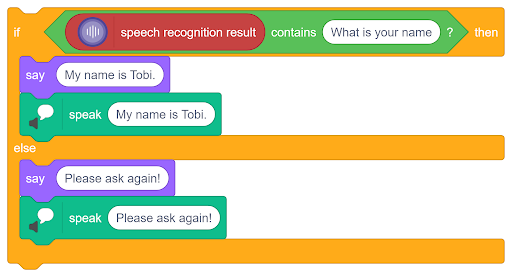
- Use an If-Else condition to verify whether the speech recognition result contains “What is your name?”.
- if the condition is true:
- Display the message “My name is Tobi.”
- Speak the same response using the Text-to-Speech extension.
- Otherwise:
- Display “Please ask again!”
- Speak “Please ask again!”
Final Code –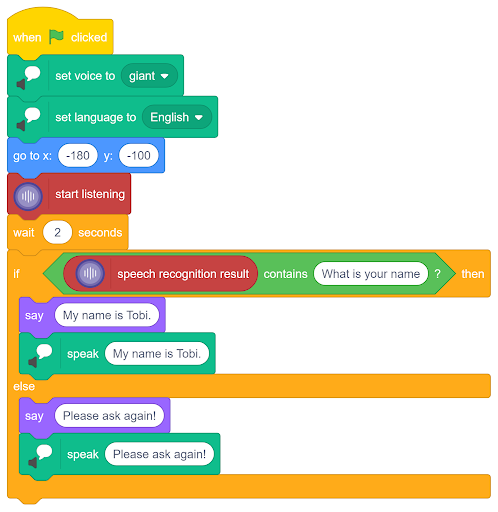
Method 2: Using the Artificial Intelligence Extension
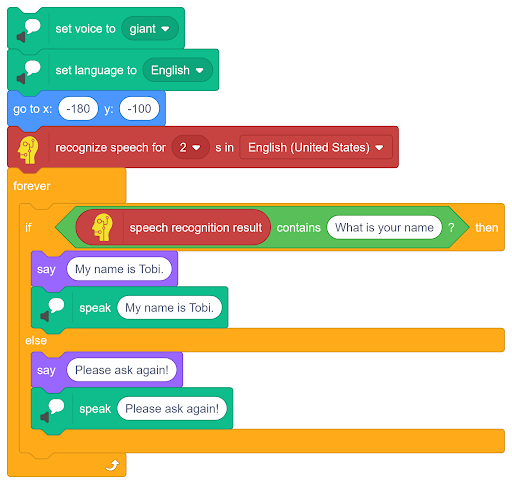
Step 1: Configure the Voice Assistant
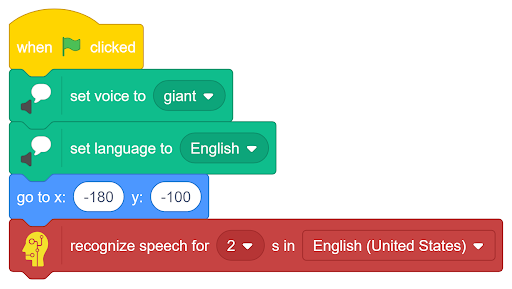
- Add the When Green Flag Clicked block.
- Set the voice to Giant.
- Set the language to English.
- Position the sprite using the Go to x: y: block.
- Use the Recognise Speech for a 2-second block from the Artificial Intelligence extension.
- Select English (United States) as the recognition language.
Step 2: Process the Voice Command
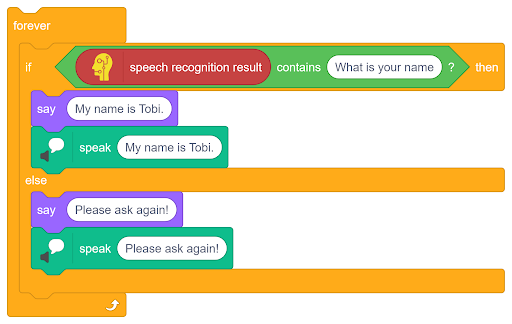
- Place the recognition process inside a Forever loop to continuously monitor speech.
- Check whether the speech recognition result contains “What is your name?”.
- If the command matches:
- Show the message “My name is Tobi.”
- Speak the response using Text-to-Speech.
- Otherwise:
- Show “Please ask again!”
- Speak “Please ask again!”
Conclusion
This project demonstrates two effective approaches to implementing speech recognition in PictoBlox using the Speech Recognition Extension and the Artificial Intelligence Extension. By combining voice input with Text-to-Speech responses, users can create interactive virtual assistants that understand and respond to spoken commands. It is an excellent beginner project for exploring AI, natural language interaction, and voice-enabled applications.