



Introduction
RGB LED strips are incredibly popular electronic components used everywhere from stunning gaming setups to vibrant architectural lighting designs! Learn what an RGB LED strip is, how individually addressable pixels work, how to interface them with evive, and program them with ease in PictoBlox – our block-based graphical programming platform with advanced hardware interaction abilities. Once you’re equipped with the basic knowledge of our specialized Lighting Extension, we’ll show you how to generate dynamic color gradients, animate custom light patterns, and build exciting DIY colorful lighting designs using the components available in the evive.
To work in PictoBlox, you’ll first need to download it from HERE.
Ready? Set. Go!
Prerequisites
- Evive Board
- RGB LED Strip
- Laptop or Computer
- PictoBlox installed on the system
- Jumper Wires
How to connect evive with PictoBlox
- First, open PictoBlox.
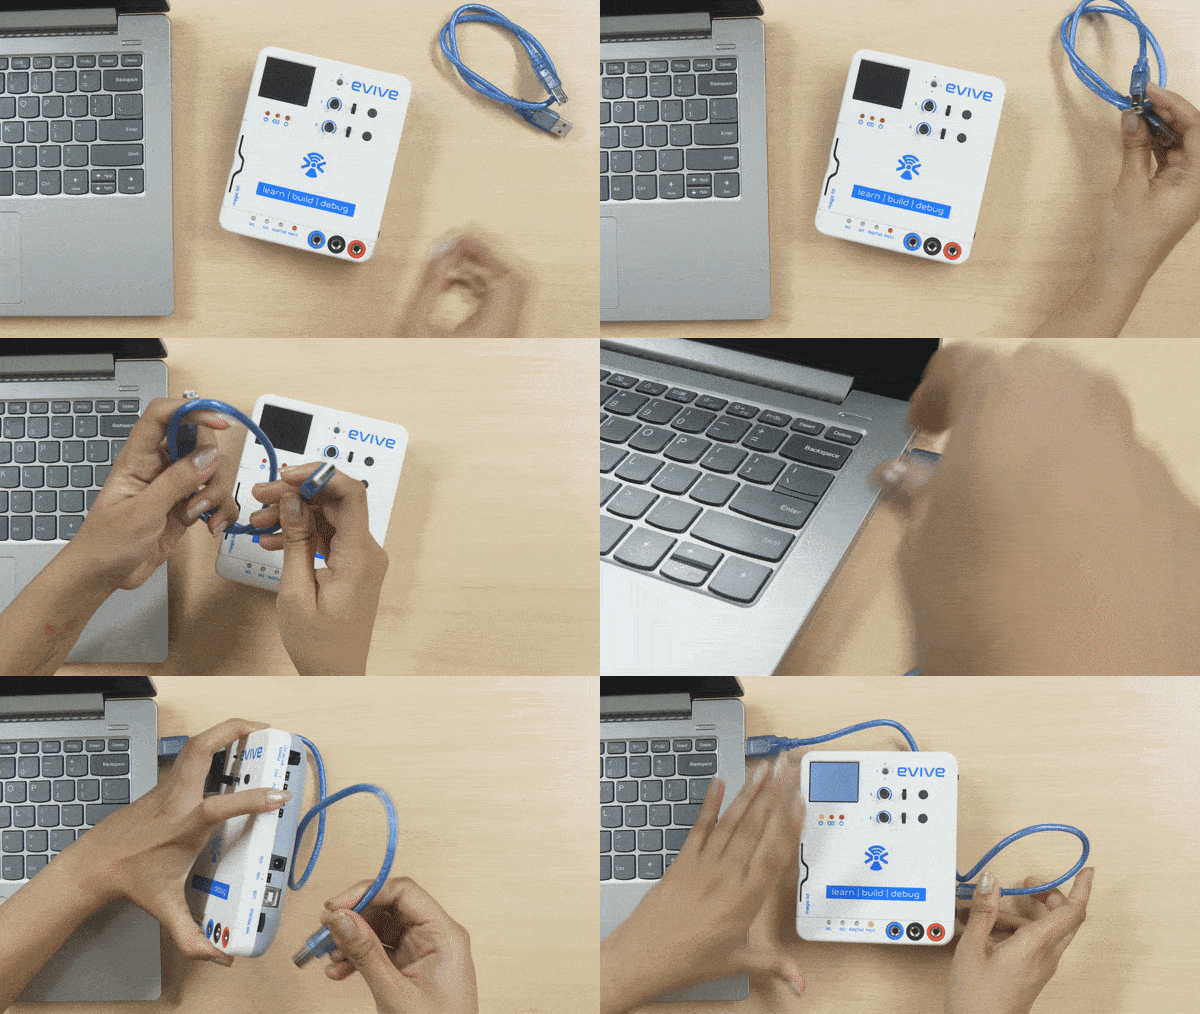
- Then, connect evive to your computer via a USB cable.
- Connect evive to your computer and open PictoBlox.
- In PictoBlox, go to the toolbar and click on the Board menu. Select Evive.
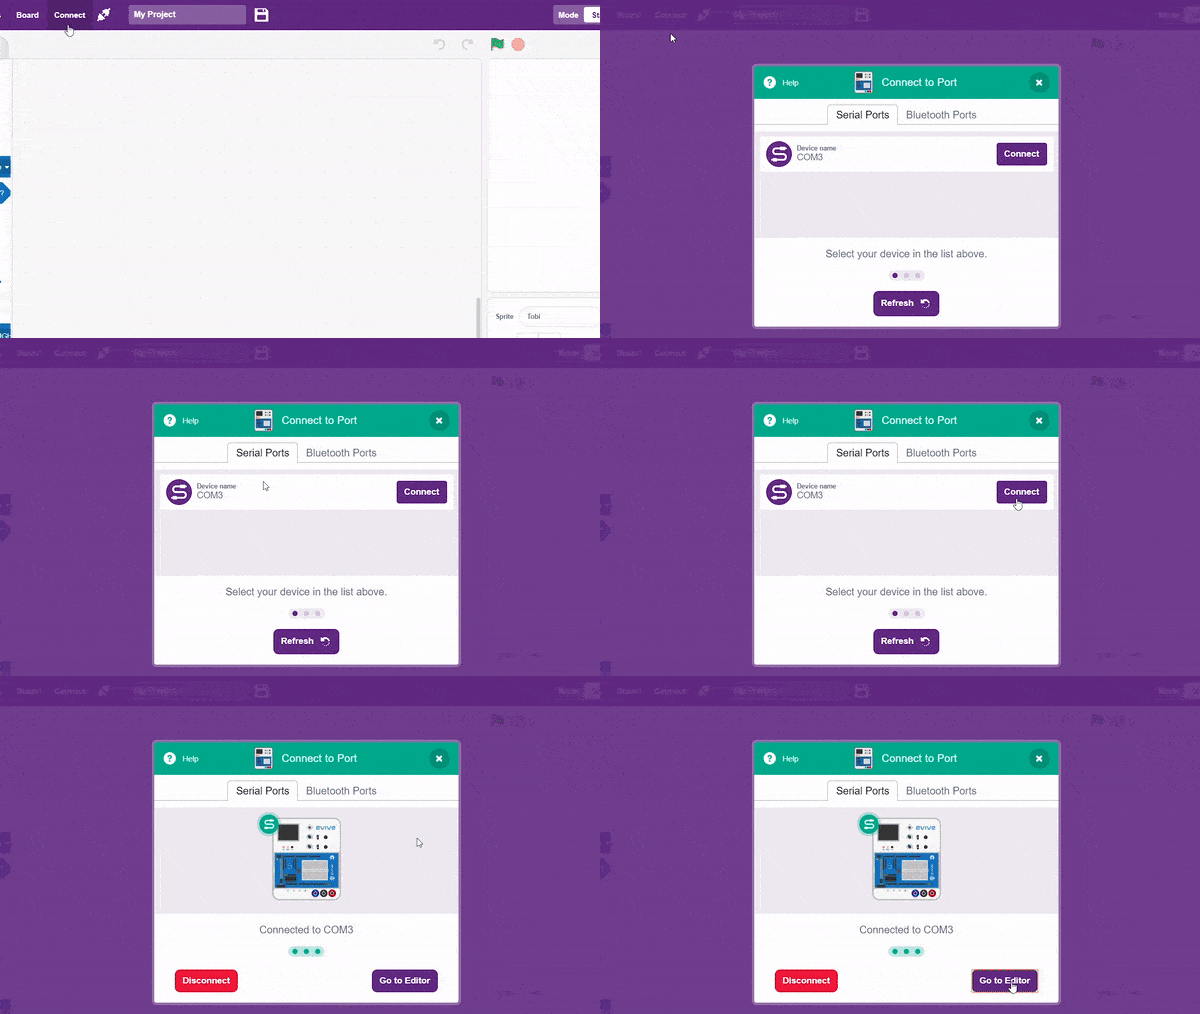
- Next, click on the Connect button, select the Port to which Evive is connected e.g. COMXX or ttyXX. Once you select the port, the icon beside the Connect tab will become connected.
- On the top right corner, there is a toggle button named Mode. This button is used to switch between the two working modes of PictoBlox, namely the stage mode and the upload mode.
- Switch to Upload mode by toggling this button. You’ll observe some changes in the UI.
How to interface LED strip
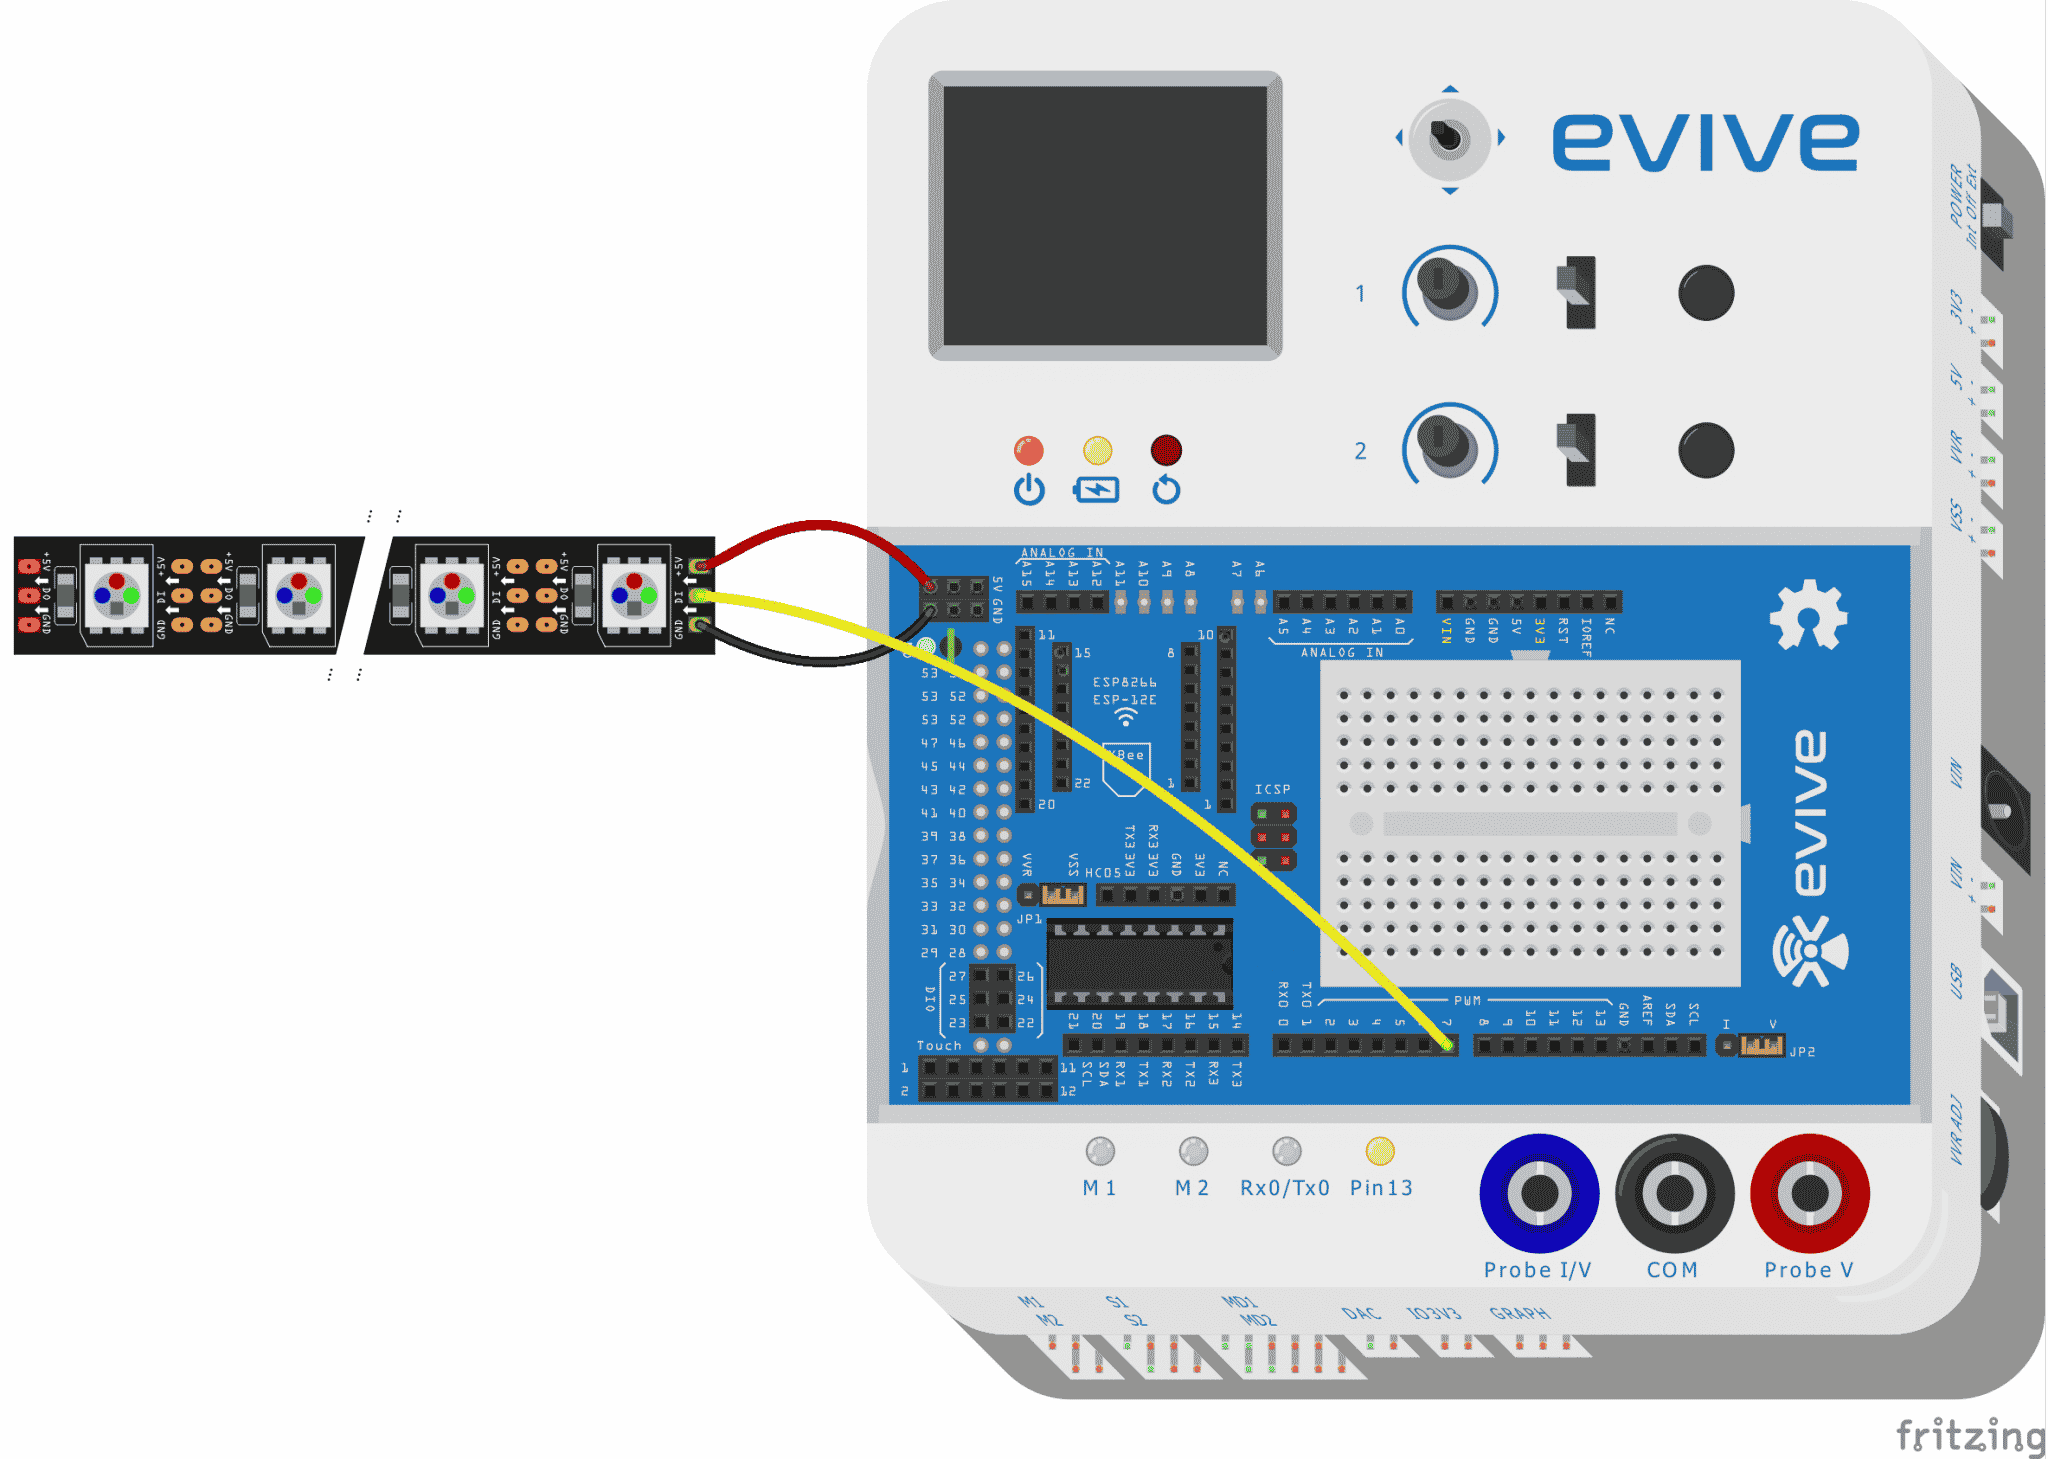
- Firstly, you have to solder three male jumpers on each pin.
- Connect the +5V jumper to the 5V power supply and the GND jumper to the ground pin.
- Connect Din jumper to digital pin no. 7 on evive as shown below.
Below is the complete circuit diagram:
Step-by-Step Block Coding Guide
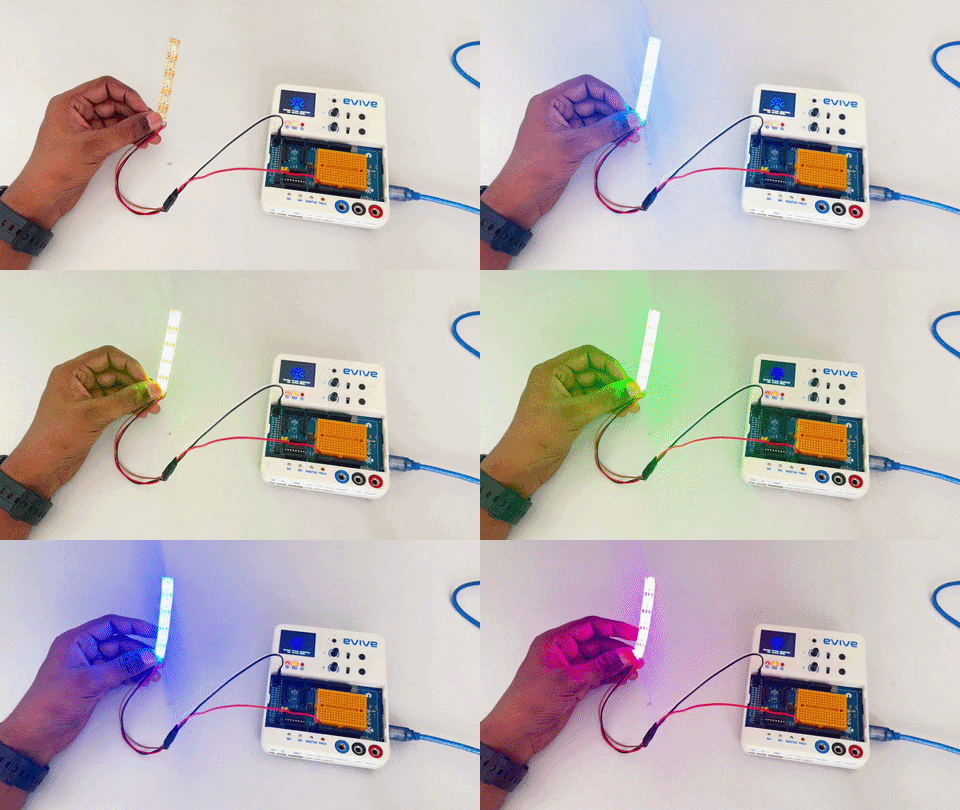
Let’s create a script that makes the RGB LED strip continuously show patterns.
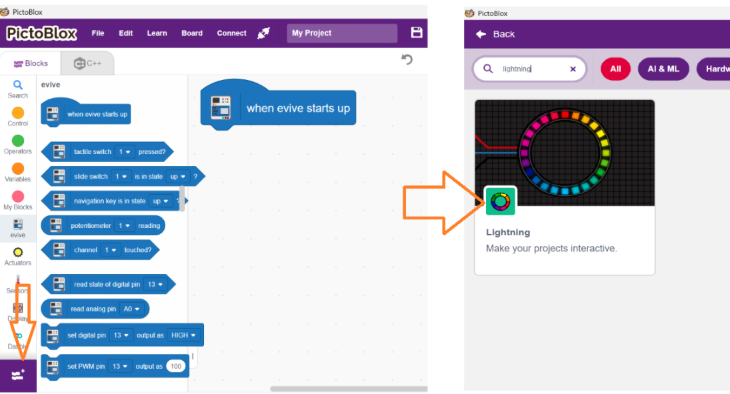
- Go to the Evive palette and drag the ‘when Evive starts up’ block into the scripting area.
- Click the Add Extension button (the purple icon at the bottom left of the screen). Search for Lightning and add it to your project.
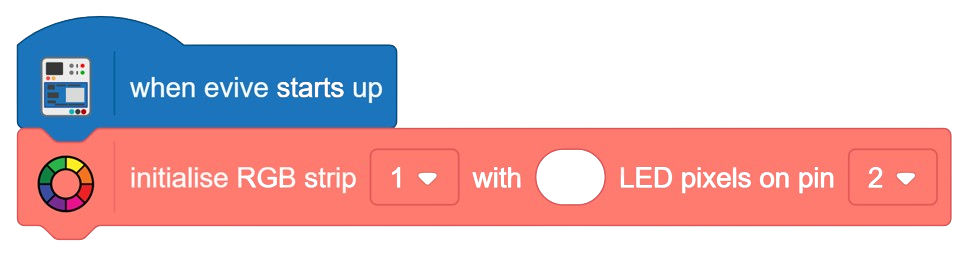
- Add the ‘initialise RGB strip () with () LED pixels on pin ()‘ from the Lighting Extension.
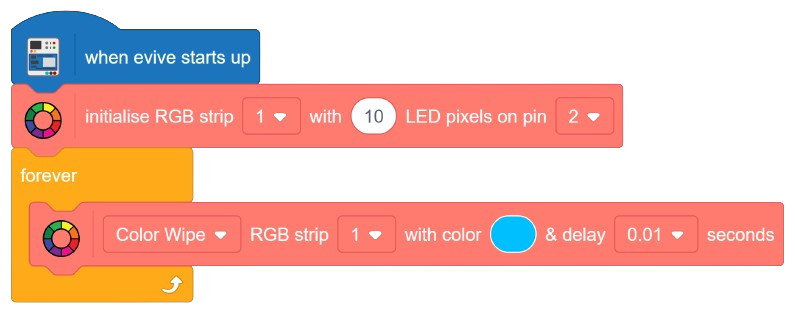
- From the Control palette, add the ‘forever‘ block.
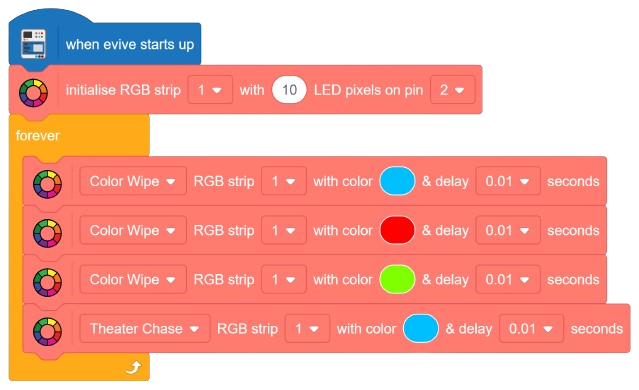
- Inside the ‘() RGB strip () with color () & delay () seconds‘ from the Lighting palette inside the ‘forever‘ block. Set ‘Color Wipe‘ animation with RGB Strip at ‘1‘. Set the color to ‘Blue‘ and delay at ‘0.01‘ seconds.
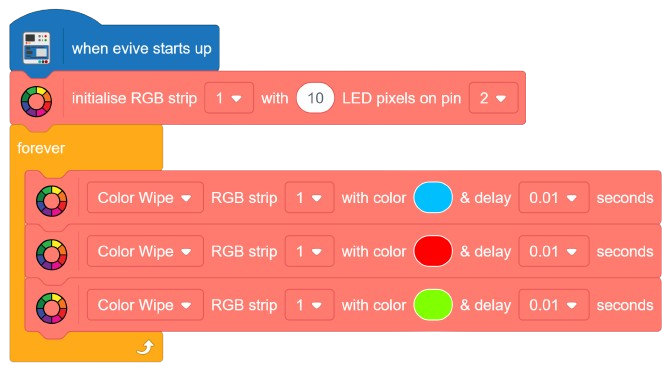
- Perform Step 5 two more times with changing colors to ‘Red‘ and ‘Green‘.
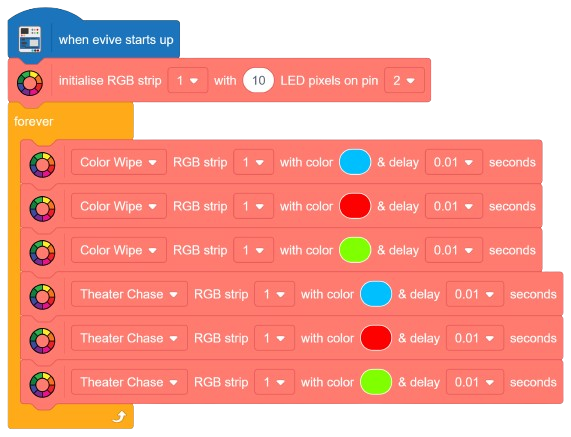
- Add another ‘() RGB strip () with color () & delay () seconds‘ but use ‘Theater Chase‘ with ‘Blue‘ color. Keep the remaining values as it is.
- Perform Step 7 two more times with changing colors to ‘Red‘ and ‘Green‘.
- From the Lightning palette, add ‘() RGB strip () with delay () seconds‘. Use ‘Rainbow‘ for the animation with RGB Strip at ‘1‘. Set the delay at ‘0.01‘ seconds.
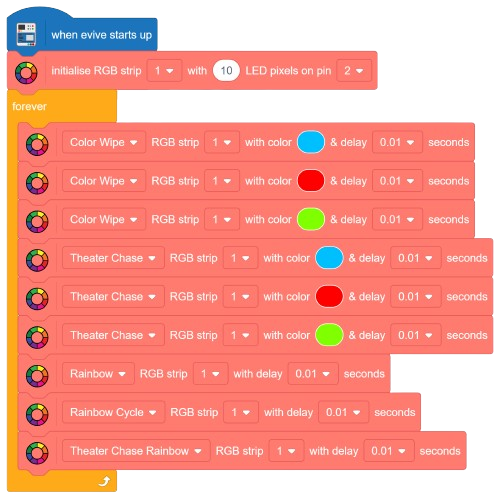
Now it’s time to upload the script to the Evive! For that, click on the Upload Code button, and voila!
Output
Conclusion
The RGB LED strip is a versatile and powerful way to create colorful, exciting lighting designs. With the RGB LED strip, you can create a variety of lighting effects, from single colors to complex animations. By using PictoBlox, controlling the LED strip is easy and straightforward. With this tutorial, you can now apply the RGB LED strip to create beautiful lighting designs.