



Introduction
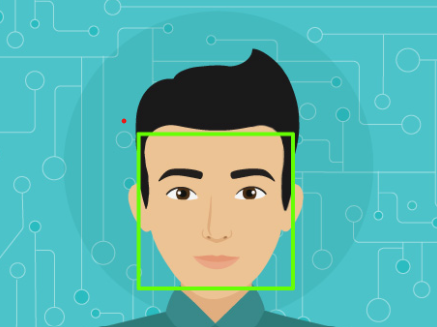
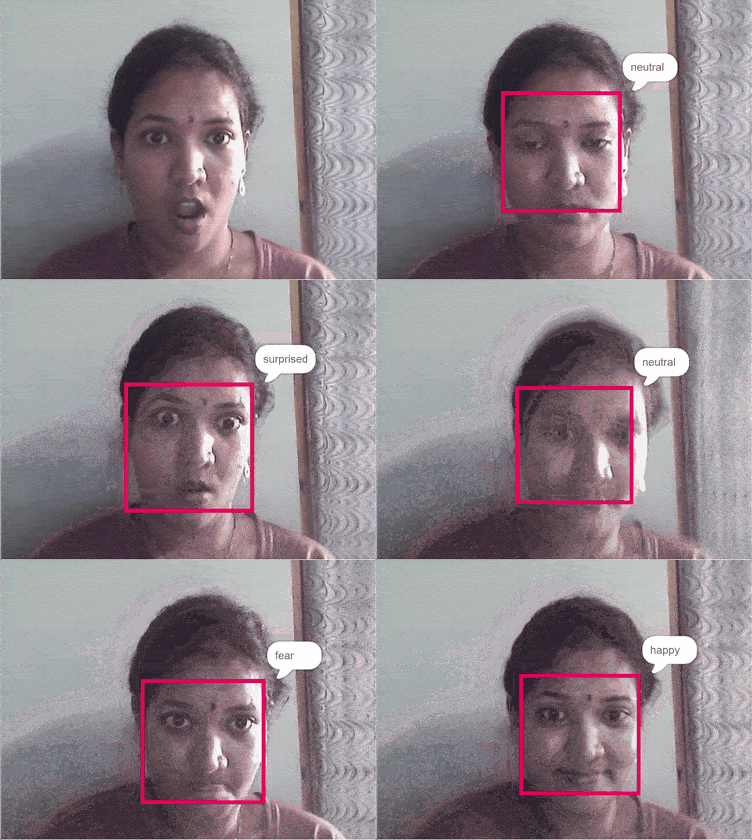
AI Emotion Detection is a smart computer vision project that uses Artificial Intelligence (AI) to recognize human emotions from facial expressions. Using a camera, the system detects a person’s face and analyzes facial features to identify emotions such as happy, sad, angry, surprised, or neutral. This project demonstrates how AI can understand human feelings and interact more intelligently with users in real time.
Face Detection Blocks in PictoBlox
The Face Detection extension in PictoBlox has blocks dedicated to face detection.
Let’s first add the extension to our project:
- Create a new project in PictoBlox.
- Next, click on the Add Extension button and add the Face Detection extension.
- The face detection models will be downloaded, which may take a few seconds to load.
- Once downloaded you will get a message saying “Model loaded successfully”.
Step-by-Step Block Coding Guide
- Add a new Square Box sprite and delete the Tobi Sprite.
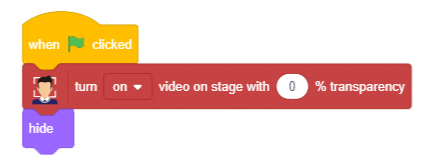
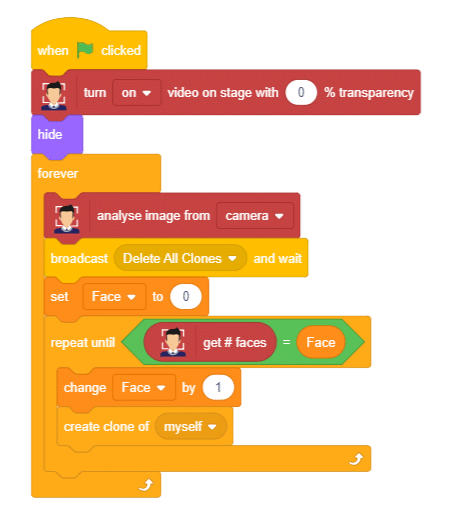
- Drag and drop a when flag clicked block into the scripting area.
- drag hide block below the when flag clicked block.
- turn () video on stage with () transparency block from the Face Detection palette below the hide block. Change the camera option to on and transparency to 0%.
- The stage is set. Click the green flag to get the camera feed on the stage.
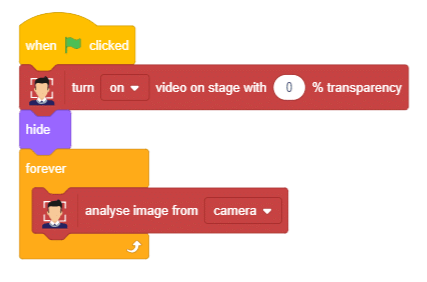
- Add a forever block from Control palette.
- analyse image from () block. Select the feed as the camera.
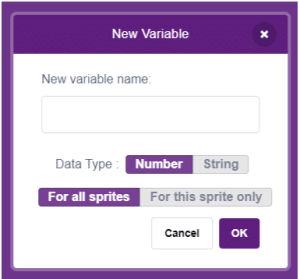
- Make a new variable called Face.
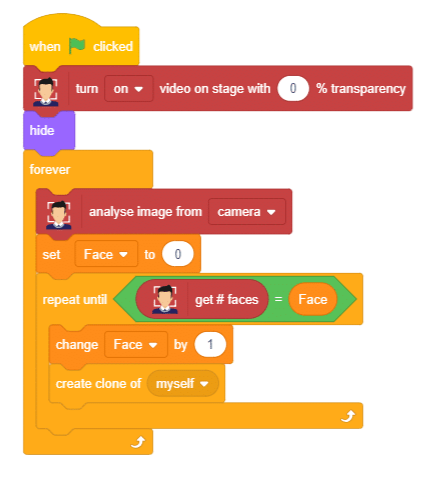
- set () to () block below the analyse image from () block. Select the variable as Face and set the value as 0.
- Add a repeat until () block below the set () to () block. Add an () = () block from the Operators palette in the condition of the repeat until () block. In the first input, add a recognized face count block and in the second add the Face reporter block from the Variables palette.
- Add a repeat until () block below the set () to () block. Add an () = () block from the Operators palette in the condition of the repeat until () block. In the first input, add a recognized face count block and in the second add the Face reporter block from the Variables palette.
Repeat for every face
- Add a create clone of () block below the change () by () block. This will create a clone for every face.
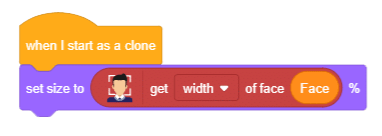
- Drag when I start as a clone block in the scripting area.
- set size to () % block from the looks palette.
- Add get () of face () block from the face detection palette. Select the parameter as width and add Face reporter block in the face number input.
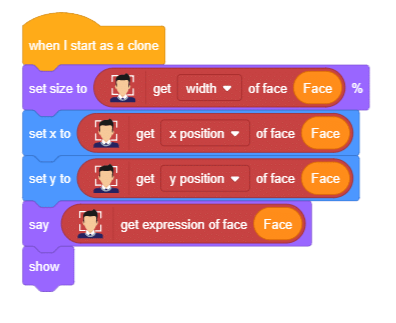
- Add a set x to () block. Add a get () of face () block in the input. Change the parameter to the x position and add the Face reporter block in the face number input.
- Add a set y to () block. Add a get () of face () block in the input. Change the parameter to the y position and add the Face reporter block in the face number input.
- Add a say () block. Add a get expression of face () block in the input. Add the Face reporter block in the face number input.
- show block. Your script for the clone is ready:
- Add a broadcast () and wait block from the event palette in the main script below analyse image from () block. Edit the message as “Delete All Clones“.
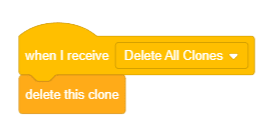
- Add when I receive () block into the scripting area from event palette and select Delete All Clones message.
- Add delete this clone block from the control palette below the when I receive () block. This will delete all clone.
- Your script is now complete. Click the green flag to start the script.
Output
Conclusion
The AI Emotion Detection project demonstrates how Artificial Intelligence and Computer Vision can be used to recognize human emotions from facial expressions in real time. By analyzing facial features through a webcam, the system can identify emotions such as happy, sad, angry, surprised, and neutral. This project provides a practical understanding of AI-based image processing and highlights the importance of emotion recognition in creating smart and interactive applications. It is an excellent project for learning how AI can enhance human-computer interaction.