Table of Contents

iskeypressed()

Function Definition: iskeypressed(key = "space")

Parameters

NameTypeDescriptionExpected ValuesDefault Value
keystringThe key which needs to be tested."space", "up arrow", "down arrow", "right arrow", "left arrow", any key in character form - a to z, 0 to9"space"

Description

The function checks if the specified key is pressed. If the key is being pressed, the block returns “true”; if it is not, it returns “false”.

Example

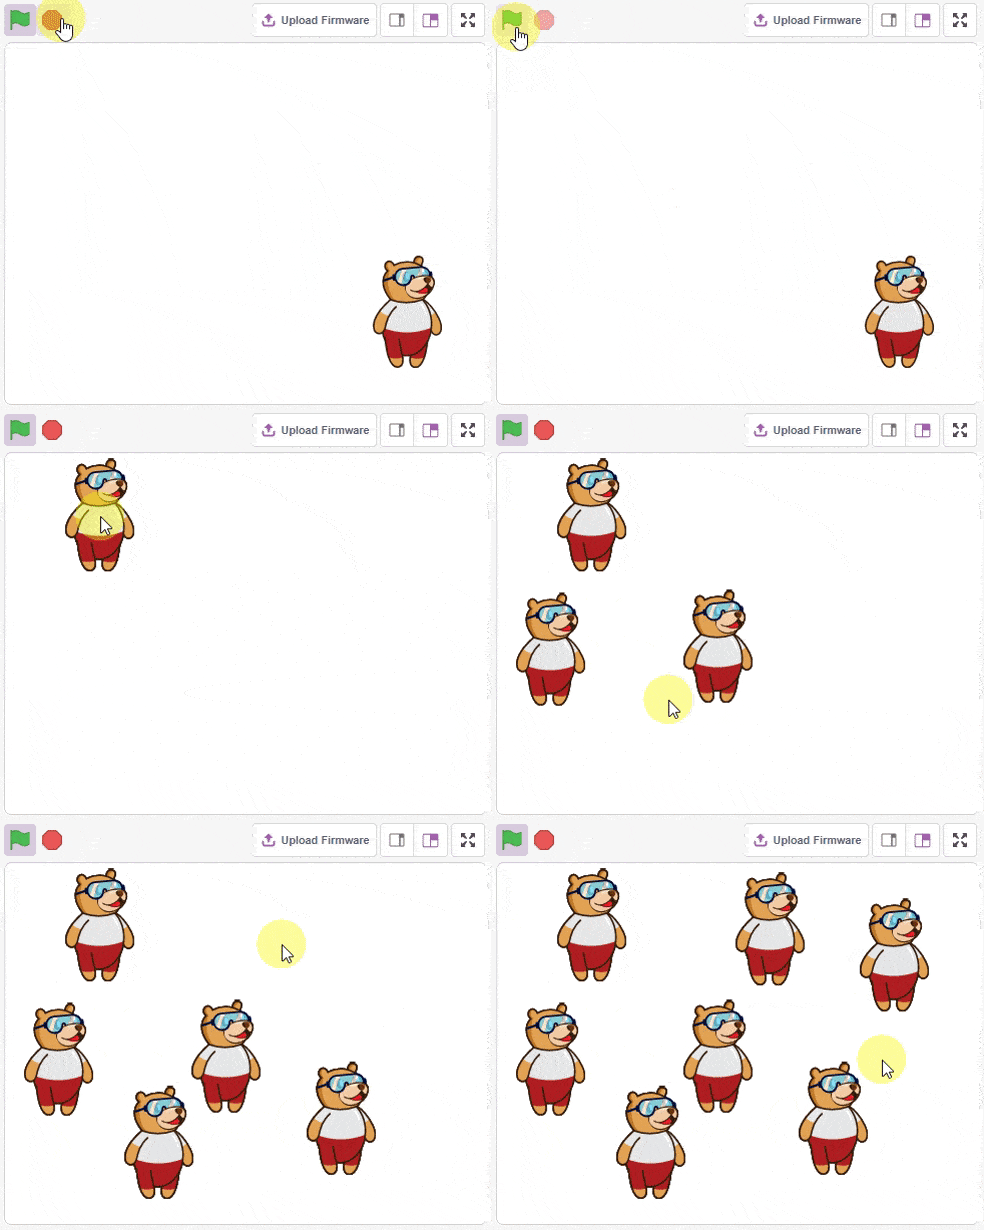
The example demonstrates how to make the sprite track and stamp its image on the mouse when the space key is pressed in Python.

Code

sprite = Sprite('Tobi')
pen = Pen()

pen.clear()

while True:
  if (sprite.iskeypressed("space")):
    sprite.setx(sprite.mousex())
    sprite.sety(sprite.mousey())
    pen.stamp()

Output

Read More
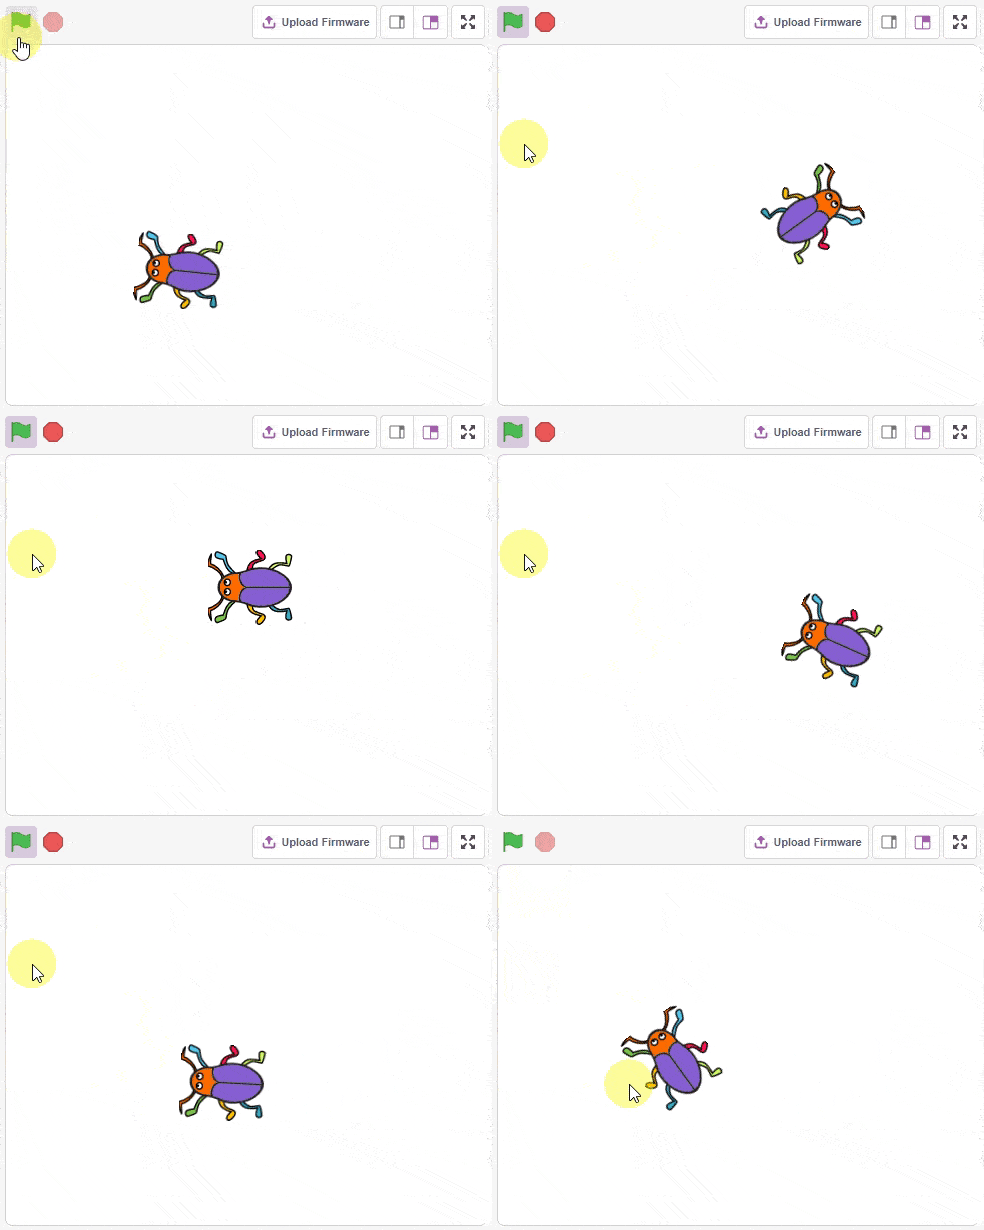
The example demonstrates using key sensing to control the sprite's movement in Python.

Code

sprite = Sprite('Beetle')

sprite.setdirection(90)
sprite.gotoxy(0, 0)

while True:
  if sprite.iskeypressed('up arrow'):
    sprite.move(3)
  if sprite.iskeypressed('down arrow'):
    sprite.move(-3)
  if sprite.iskeypressed('left arrow'):
    sprite.left(3)
  if sprite.iskeypressed('right arrow'):
    sprite.right(3)

Output

Read More
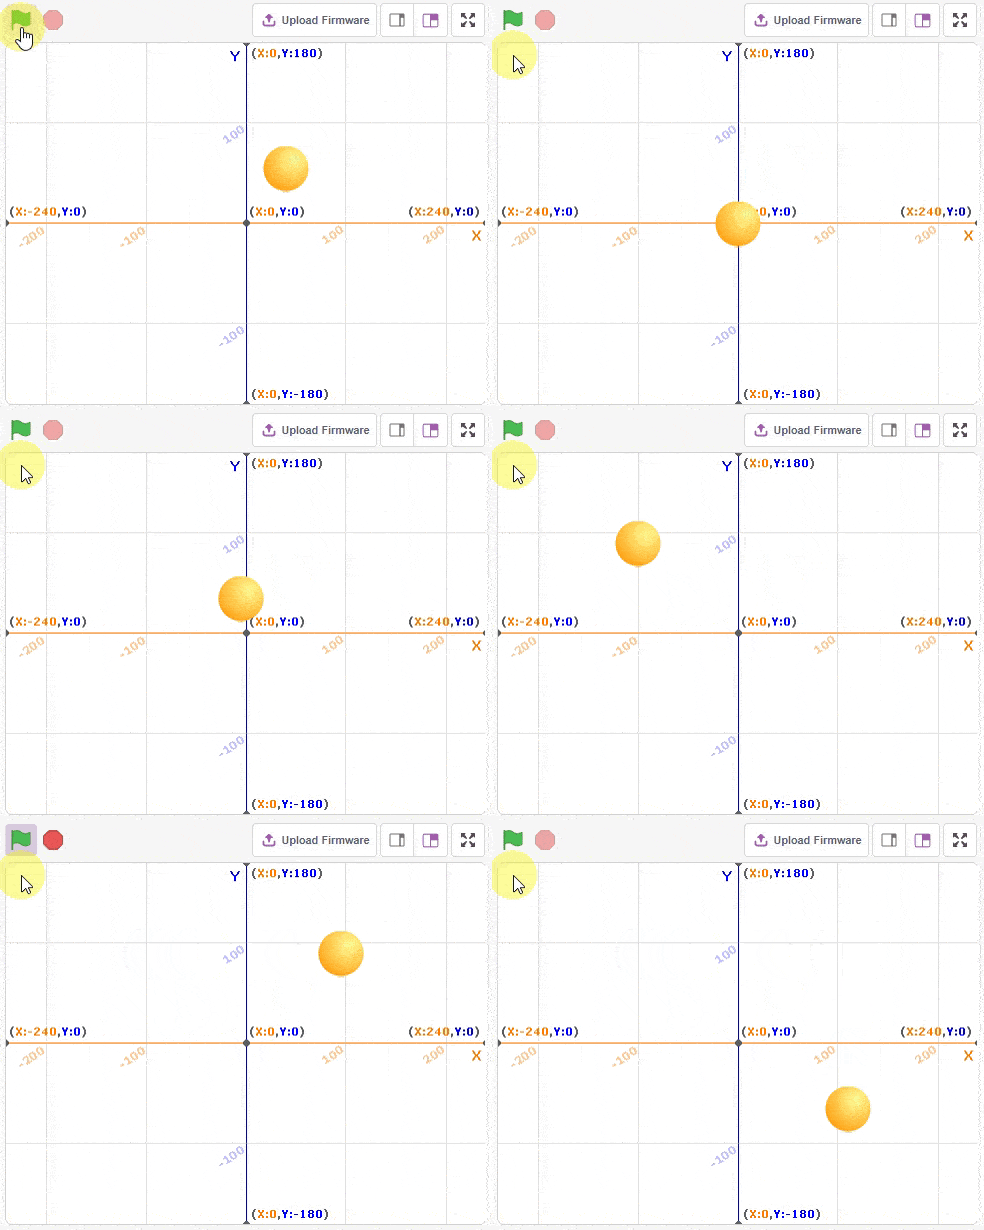
The example demonstrates how to add movement to a sprite.

Code

sprite = Sprite('Ball')

while True:
  if sprite.iskeypressed('up arrow'):
    sprite.changey(3)
  if sprite.iskeypressed('down arrow'):
    sprite.changey(-3)
  if sprite.iskeypressed('left arrow'):
    sprite.changex(-3)
  if sprite.iskeypressed('right arrow'):
    sprite.changex(3)
Read More
The example demonstrates the sprite direction in Python.

Code

sprite = Sprite('Arrow1')

sprite.gotoxy(0, 0)
sprite.setsize(300)

while True:
  if sprite.iskeypressed("left arrow"):
    sprite.left(3)
  if sprite.iskeypressed("right arrow"):
    sprite.right(3)
  sprite.say("Direction is " + str(sprite.direction()))

Output

Read More
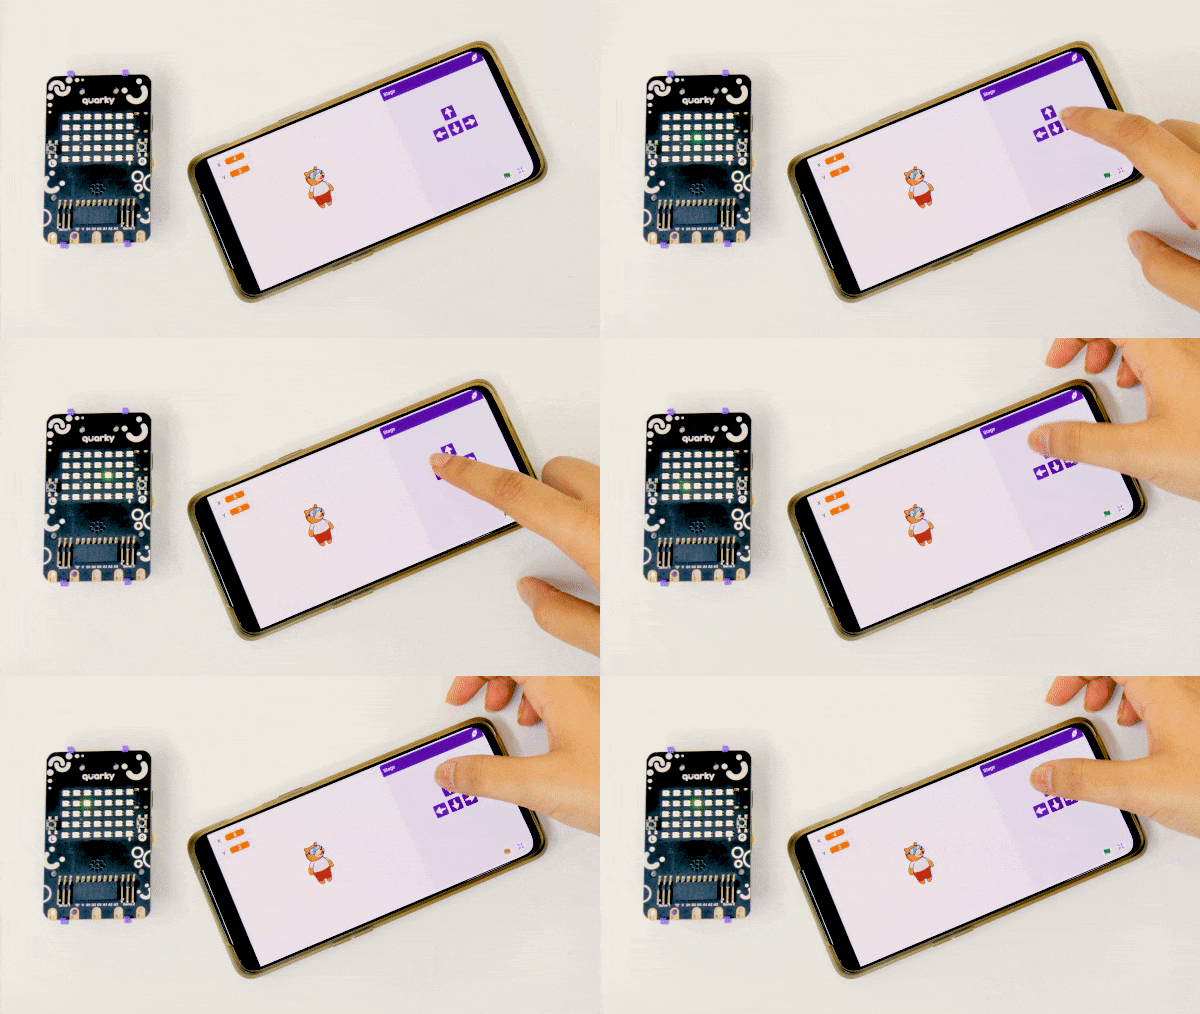
The example demonstrates how to control the glowing LED using the keyboard keys in the Python Coding Environment.

Code

sprite = Sprite('Tobi')
quarky = Quarky()
import time

curr_x = 4
curr_y = 3
brightness = 50

quarky.cleardisplay()
quarky.setled(curr_x, curr_y, (0, 255, 0), brightness)

while True:
  
  if sprite.iskeypressed("up arrow"):
    curr_y = curr_y - 1
    quarky.setled(curr_x, curr_y + 1, (0, 0, 0), brightness)
    time.sleep(0.2)
    quarky.setled(curr_x, curr_y, (0, 255, 0), brightness)

  if sprite.iskeypressed("down arrow"):
    curr_y = curr_y + 1
    quarky.setled(curr_x, curr_y - 1, (0, 0, 0), brightness)
    time.sleep(0.2)
    quarky.setled(curr_x, curr_y, (0, 255, 0), brightness)
    
  if sprite.iskeypressed("left arrow"):
    curr_x = curr_x - 1
    quarky.setled(curr_x + 1, curr_y, (0, 0, 0), brightness)
    time.sleep(0.2)
    quarky.setled(curr_x, curr_y, (0, 255, 0), brightness)
    
  if sprite.iskeypressed("right arrow"):
    curr_x = curr_x + 1
    quarky.setled(curr_x - 1, curr_y, (0, 0, 0), brightness)
    time.sleep(0.2)
    quarky.setled(curr_x, curr_y, (0, 255, 0), brightness)
  
  time.sleep(0.2)
Read More
Learn how to control the Mecanum using PictoBlox with keyboard inputs using Python. Make the Mecanum move forward, backward, turn left, and turn right along with unique lateral motions!

In this activity, we will make the computer program that controls the Mecanum Robot. It’s like a remote-control car. You can press different keys on the keyboard to make the Mecanum move forward, backward, left, and right.

The Quarky Mecanum Wheel Robot is a type of robot that uses a special type of wheel to move. The wheel is made of four rollers mounted at 45- degree angles to the wheel‘s hub. Each roller has its own motor and can spin in either direction. This allows the wheel to move in any direction, making it an ideal choice for navigating around obstacles and tight spaces. The Mecanum wheel robot can also turn on the spot, allowing it to make sharp turns without having to reverse direction.

Coding Steps

Follow the steps:

  1. Open a new project in PictoBlox.
  2. Connect Quarky to PictoBlox.
  3. Click on the Add Extension button and add the Quarky Mecanum extension.
  4. Now we will first initialize the Mecanum robots and the servos before starting the main code.
  5. The main code will consist of nested if-else conditions that will check specific conditions on which key is pressed and will react accordingly. We will use the arrow keys for basic movements (Forward, Backward, Left Right) and the keys “a” for lateral left movement and “d” for lateral right movement.

Code

sprite=Sprite('Tobi')
import time
quarky = Quarky()
robot = Mecanum(1, 2, 7, 8)
while True:
  if sprite.iskeypressed("up arrow"):
	  robot.runtimedrobot("forward",100,2)
	
  if sprite.iskeypressed("down arrow"):
    robot.runtimedrobot("backward",100,1)
  
  if sprite.iskeypressed("right arrow"):
    robot.runtimedrobot("circular right",70,1)
  
  if sprite.iskeypressed("left arrow"):
    robot.runtimedrobot("circular left",70,1)
  
  if sprite.iskeypressed("a"):
    robot.runtimedrobot("lateral left",100,1)
  if sprite.iskeypressed("d"):
    robot.runtimedrobot("lateral right",100,1)

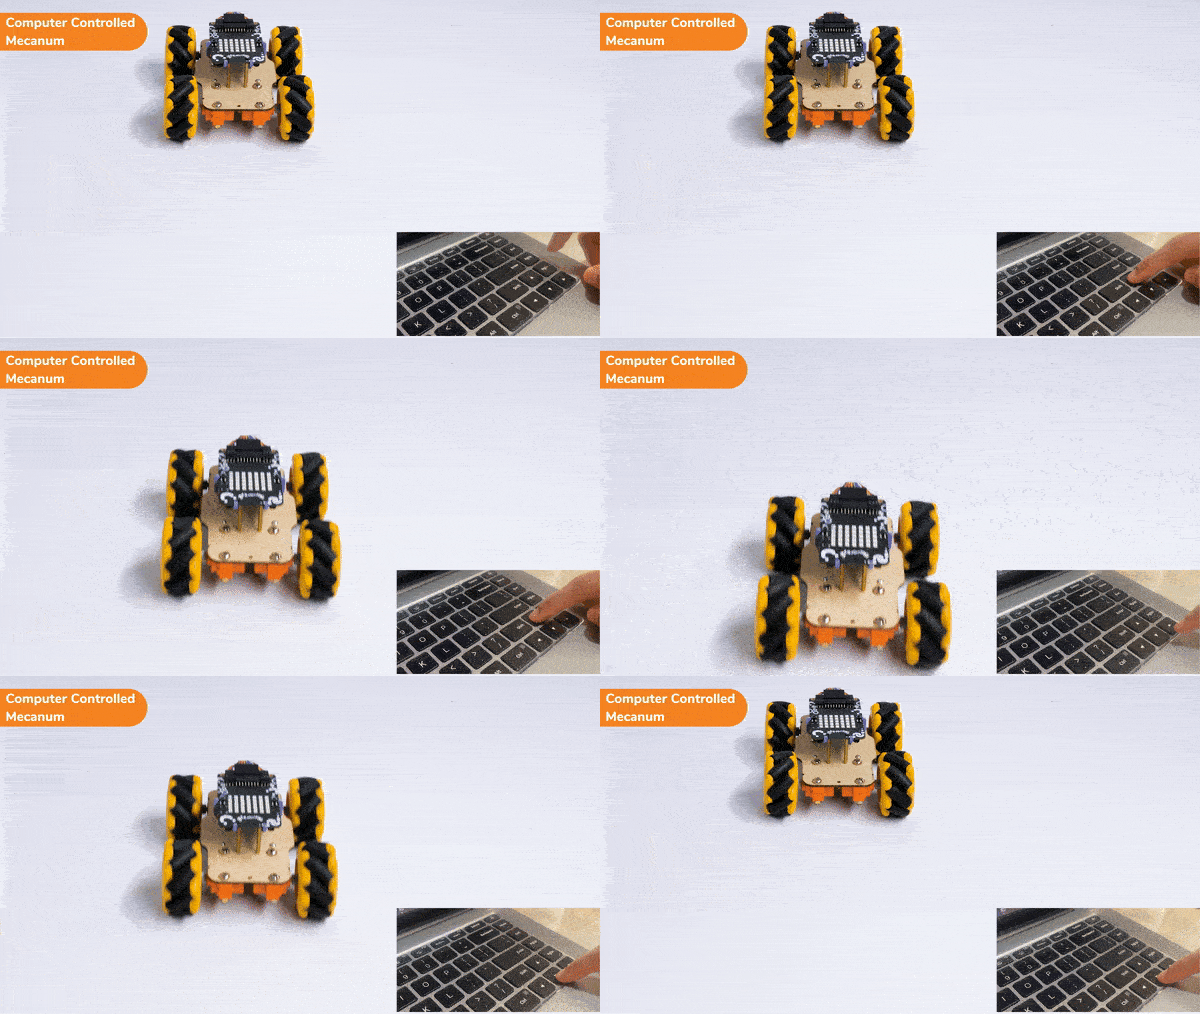
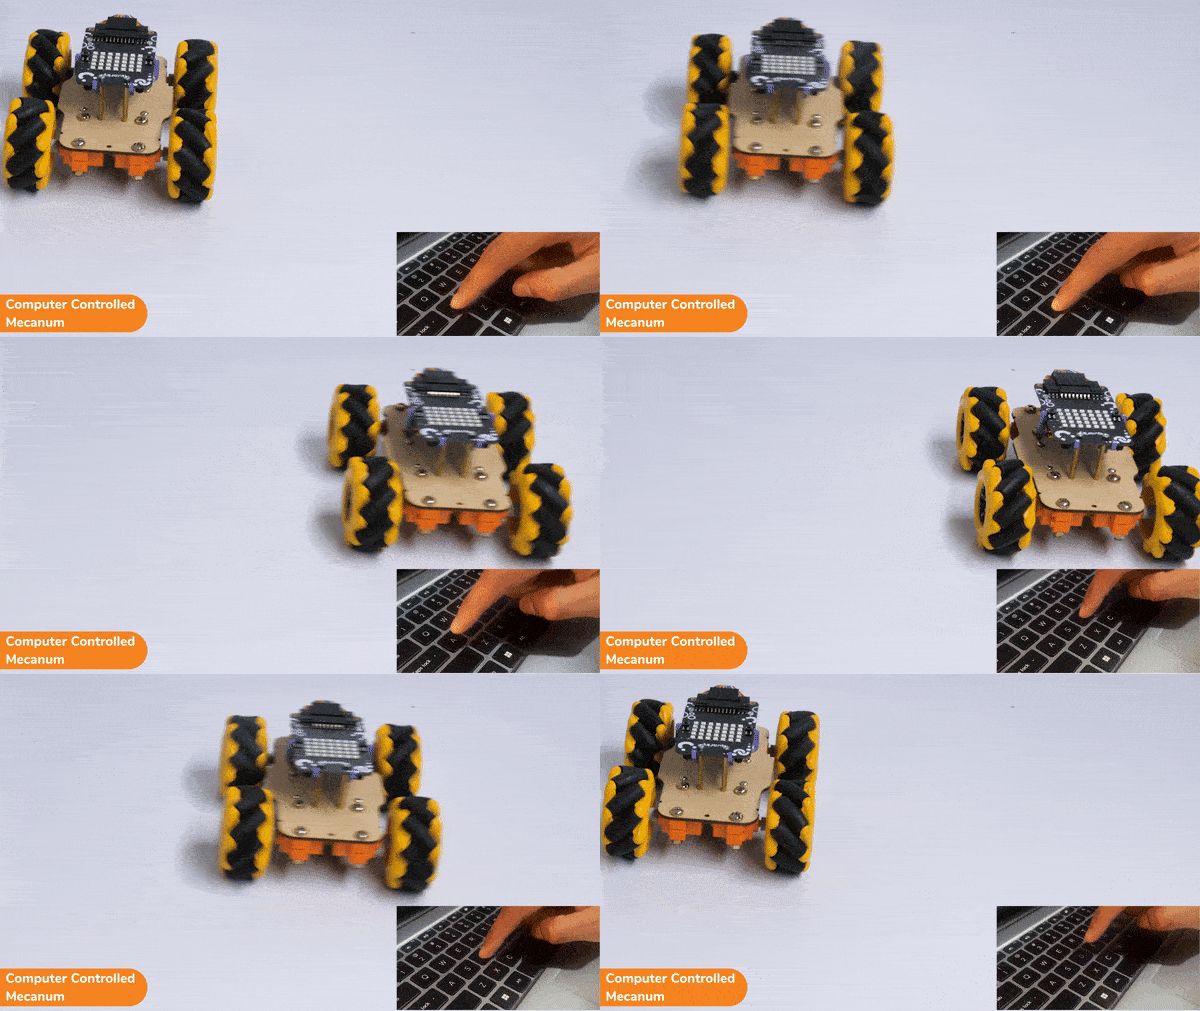
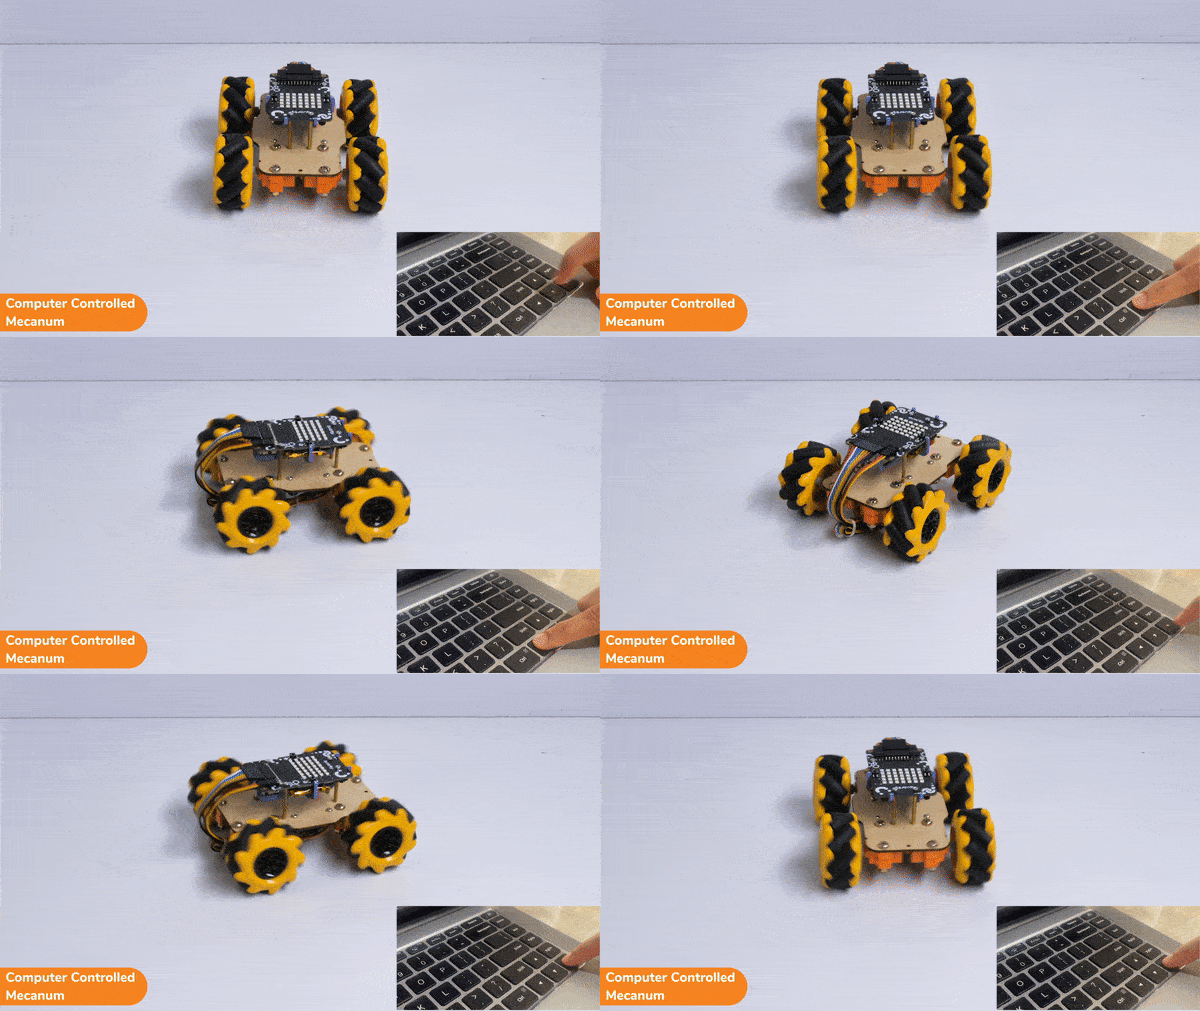
Output

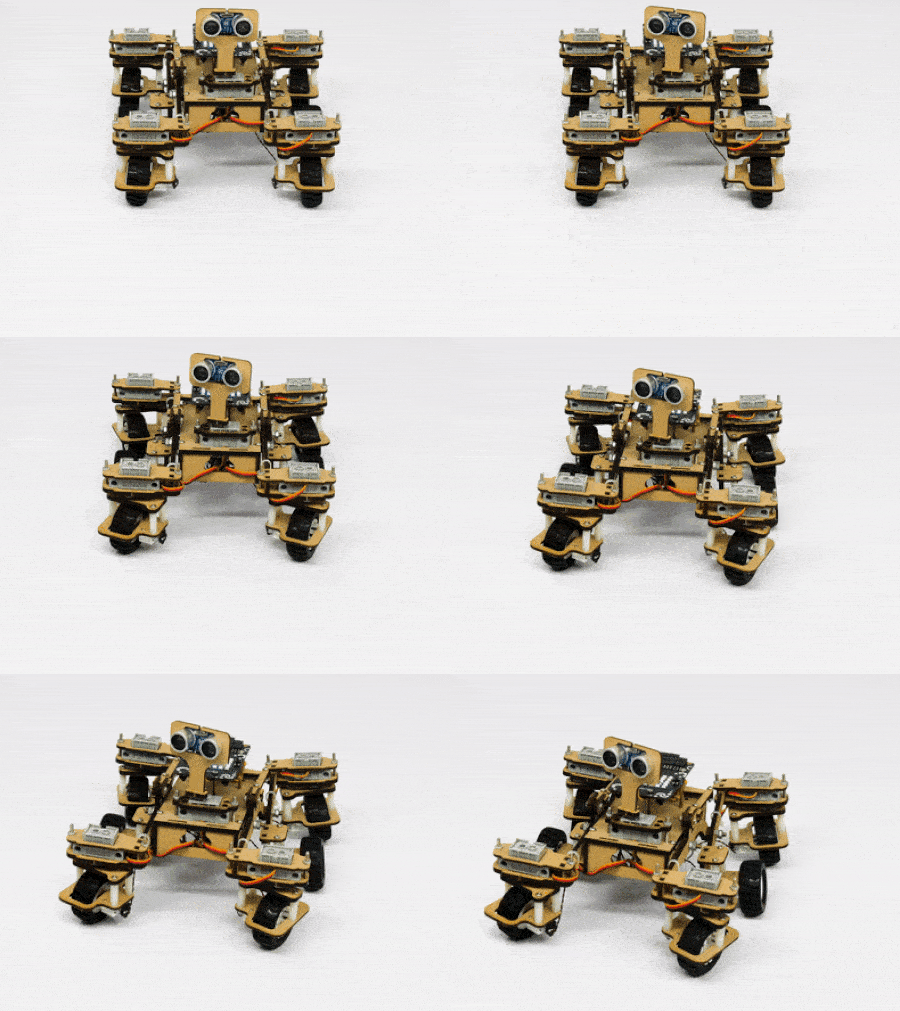
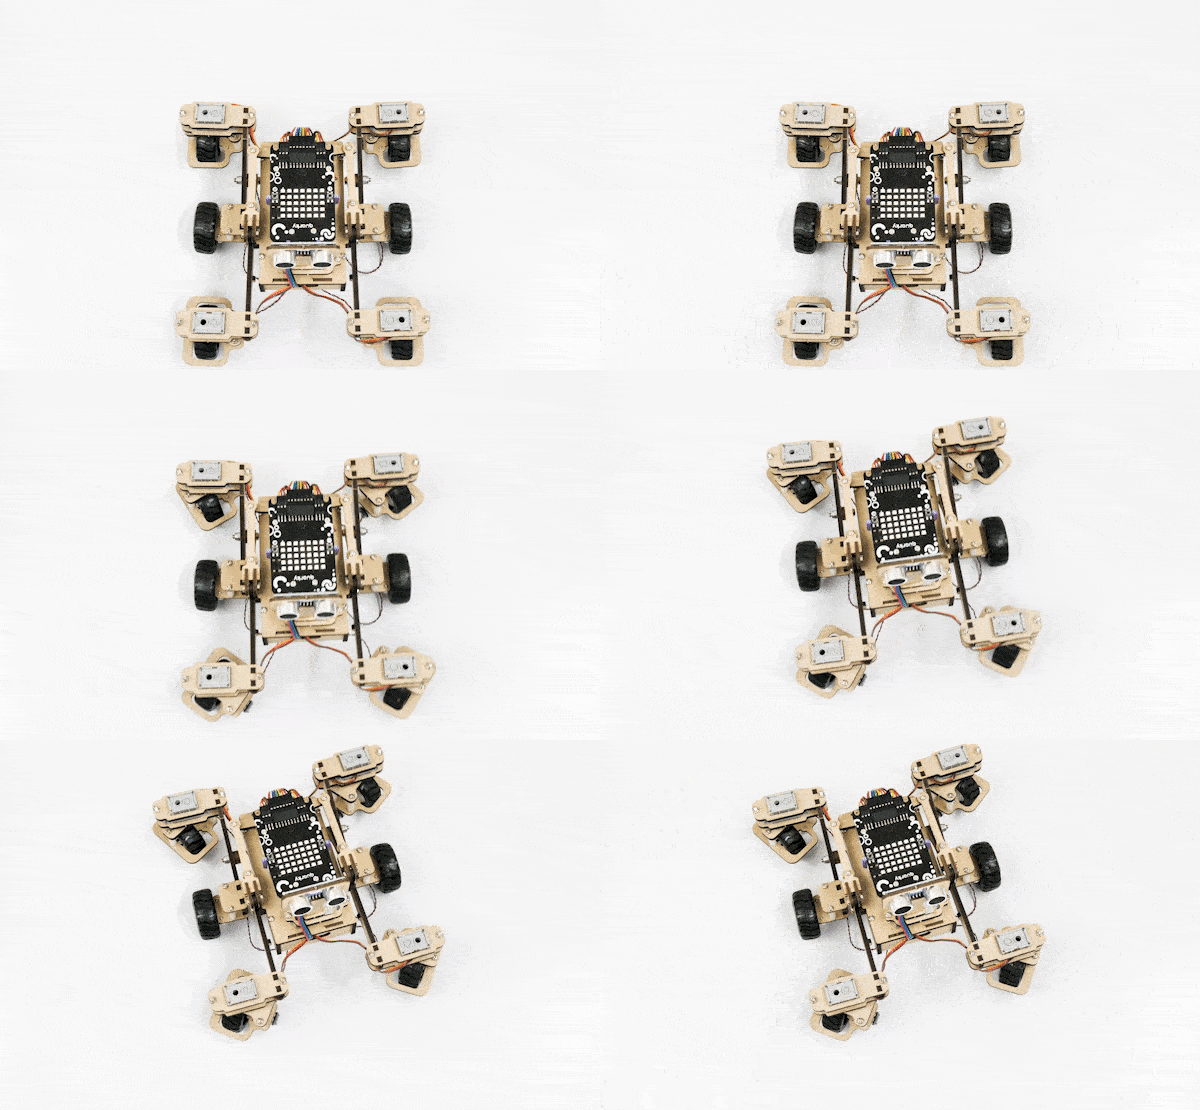
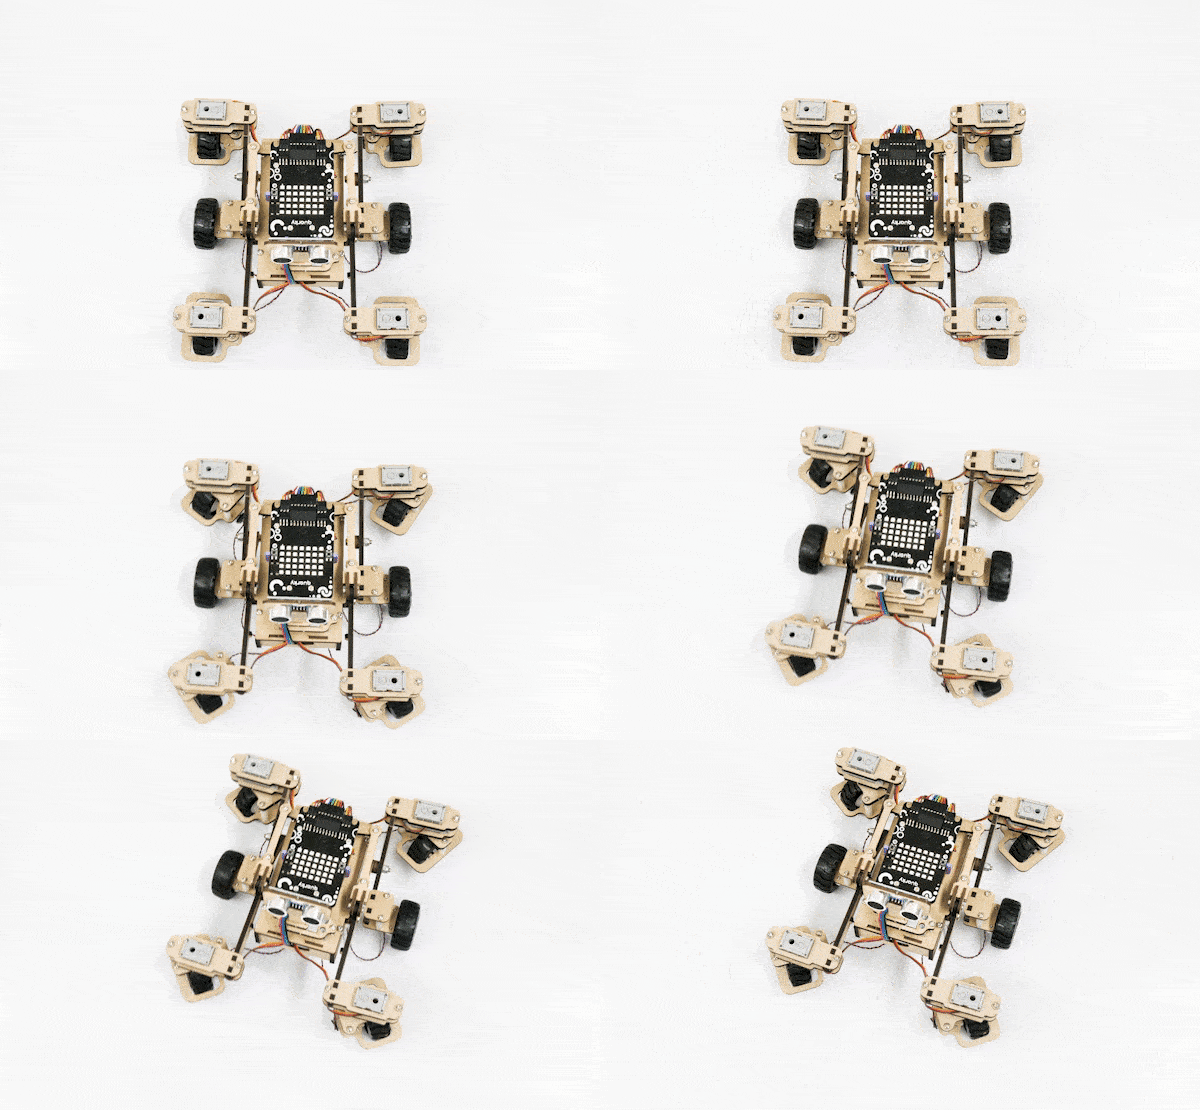
Forward-Backward Motion:

Lateral Right-Left Motion:

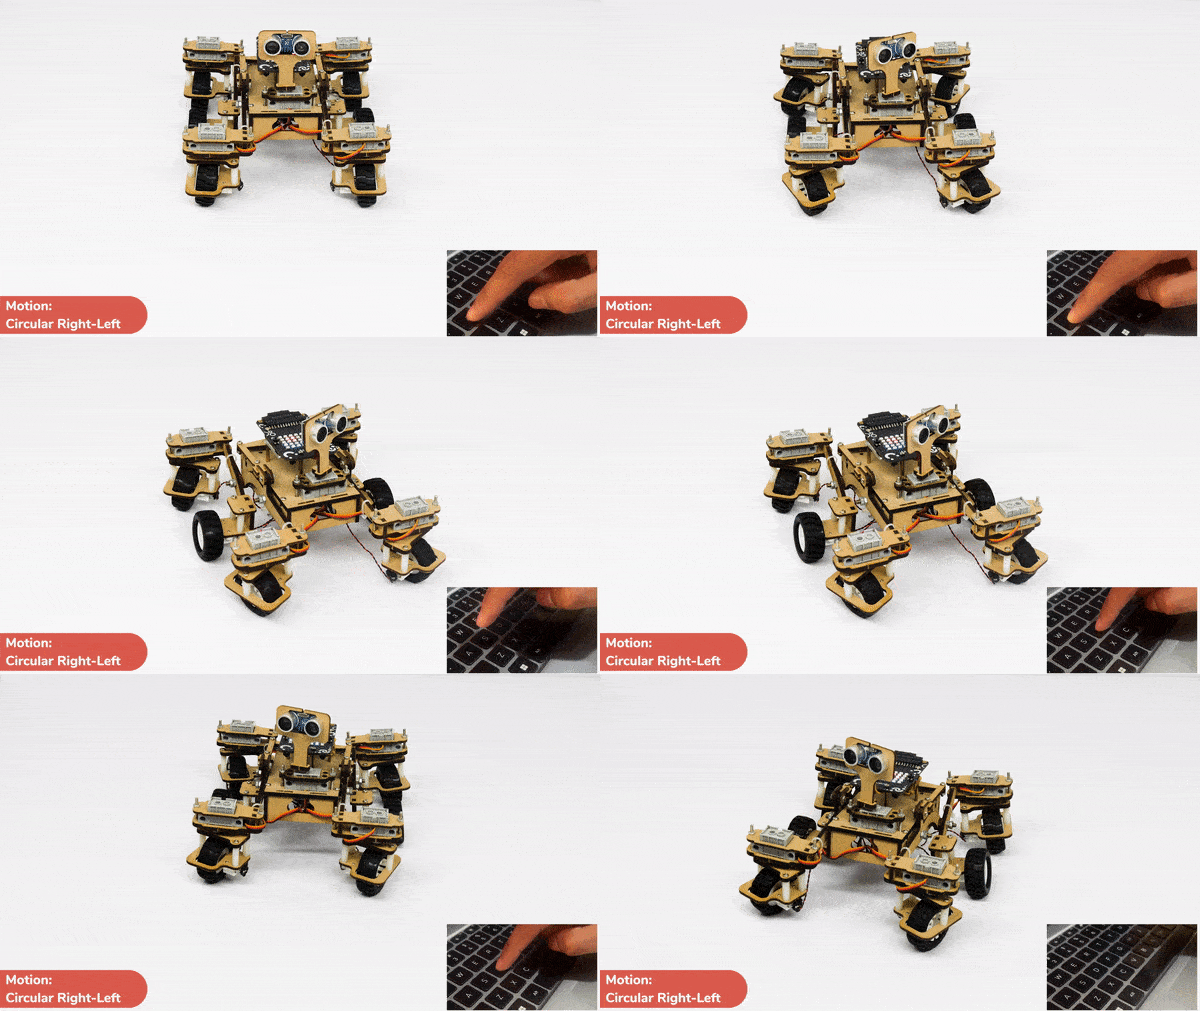
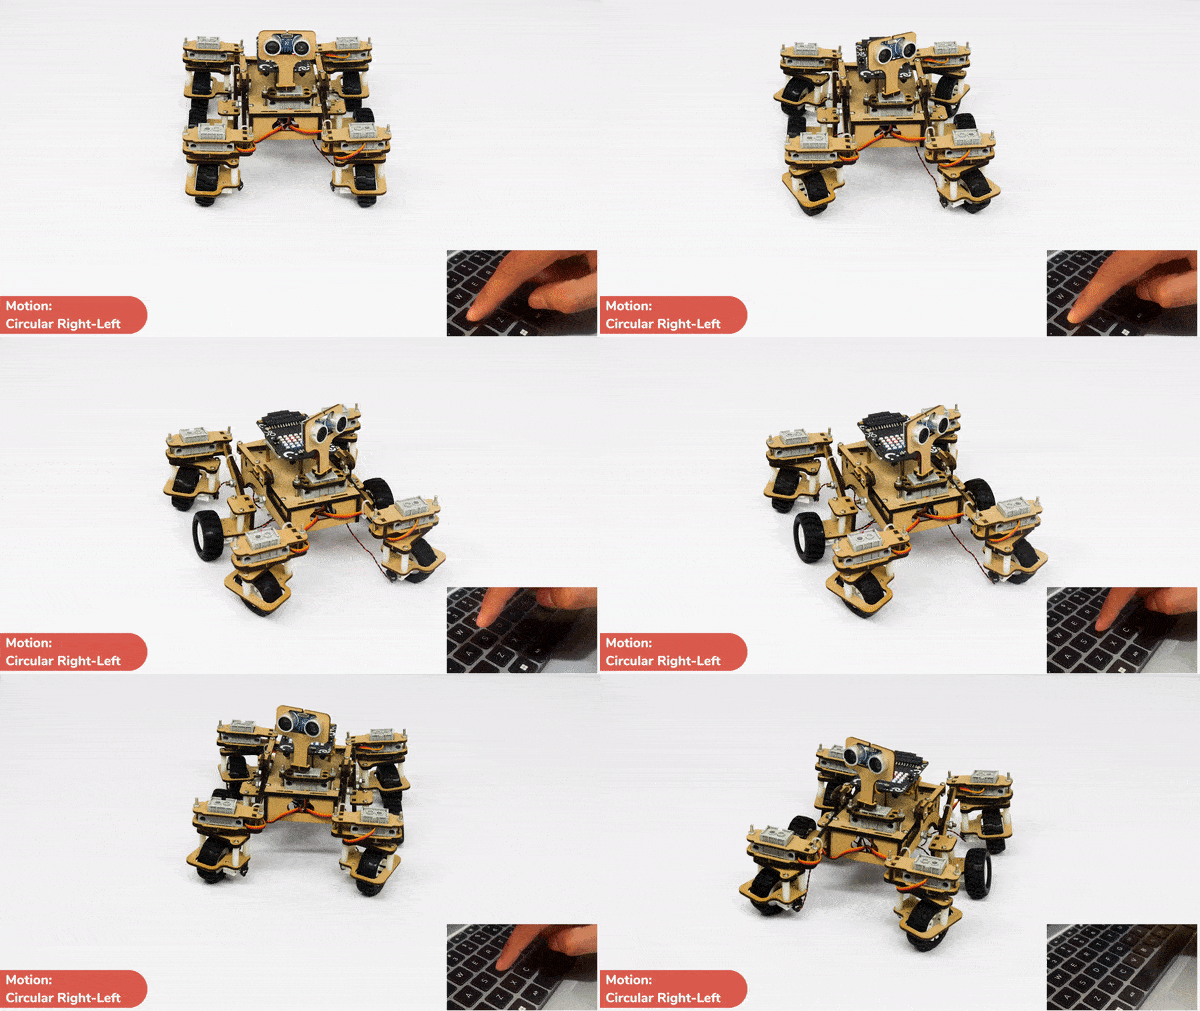
Circular Right-Left Motion:

Read More
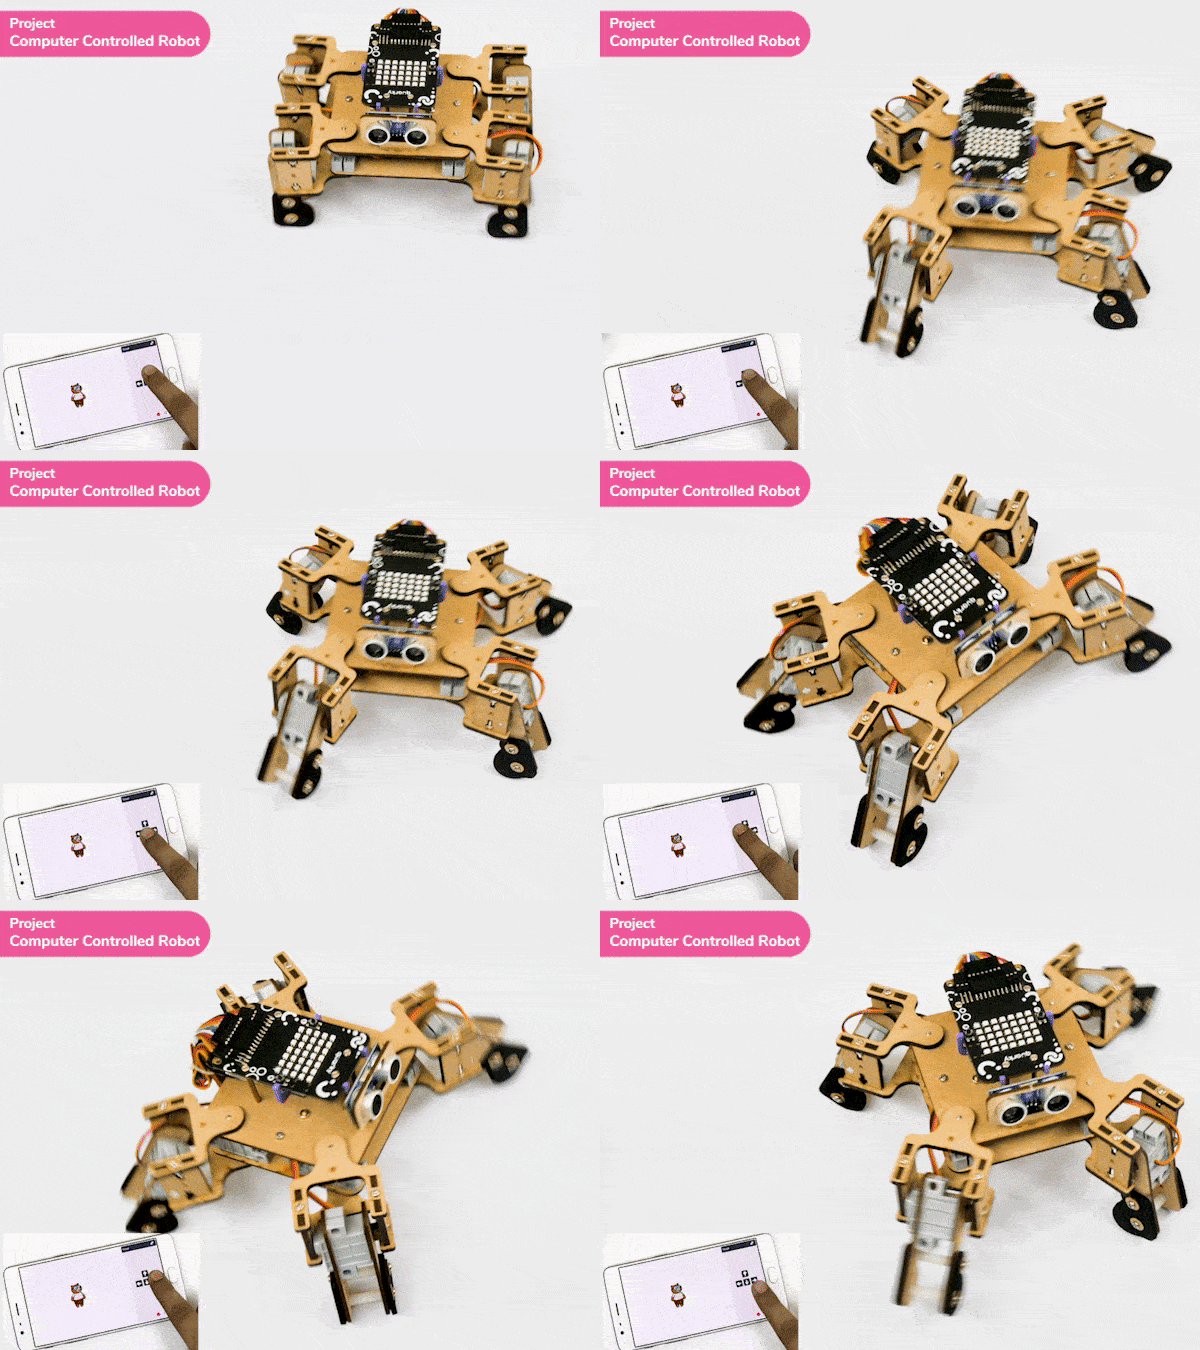
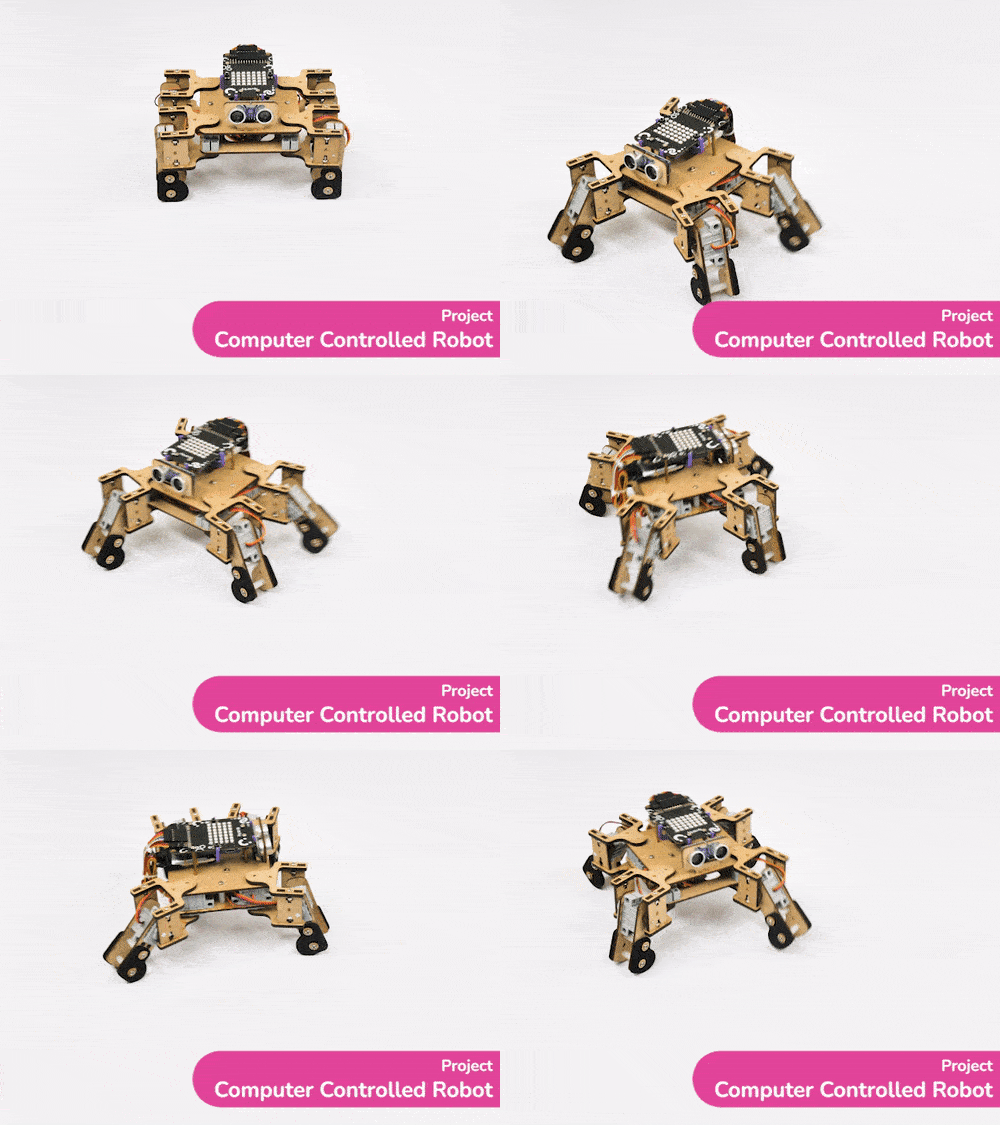
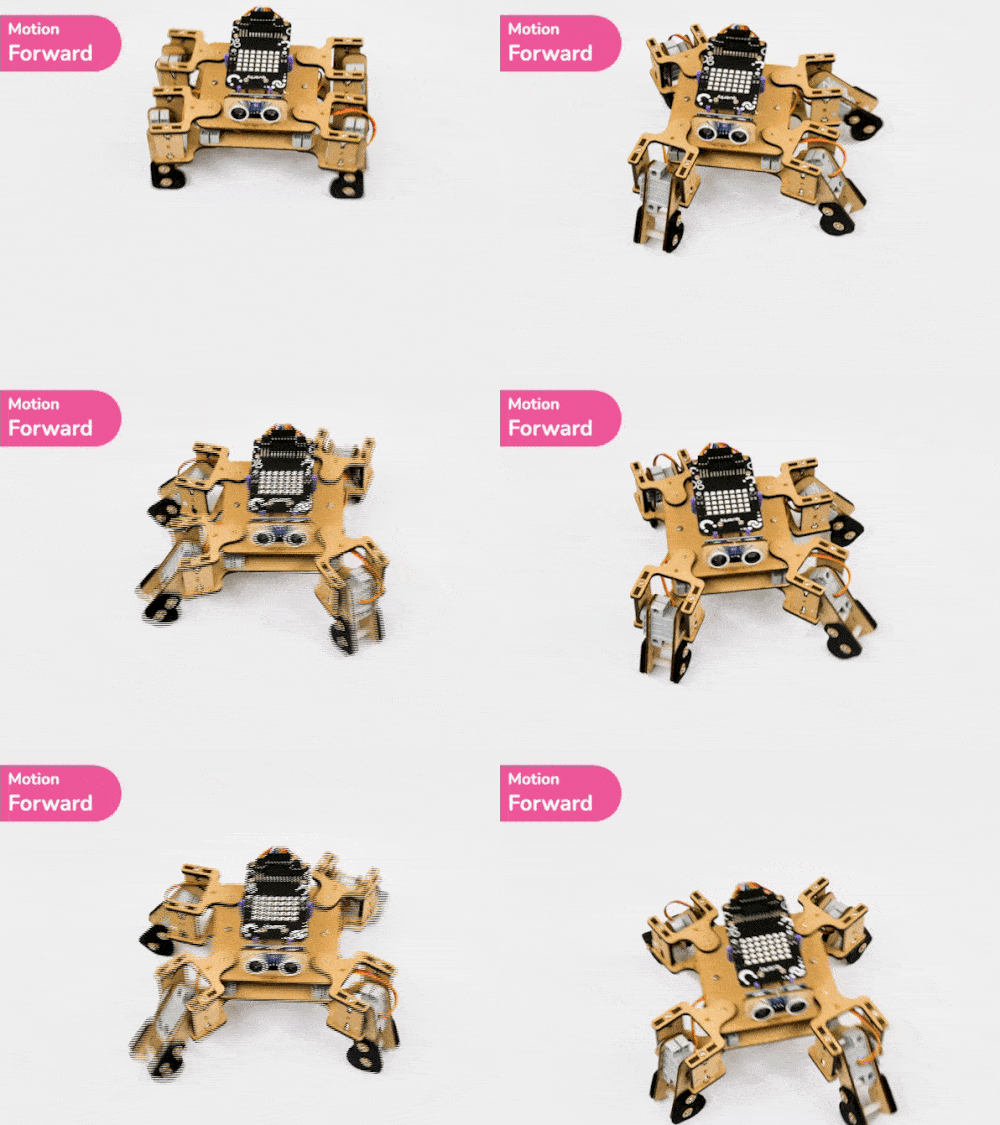
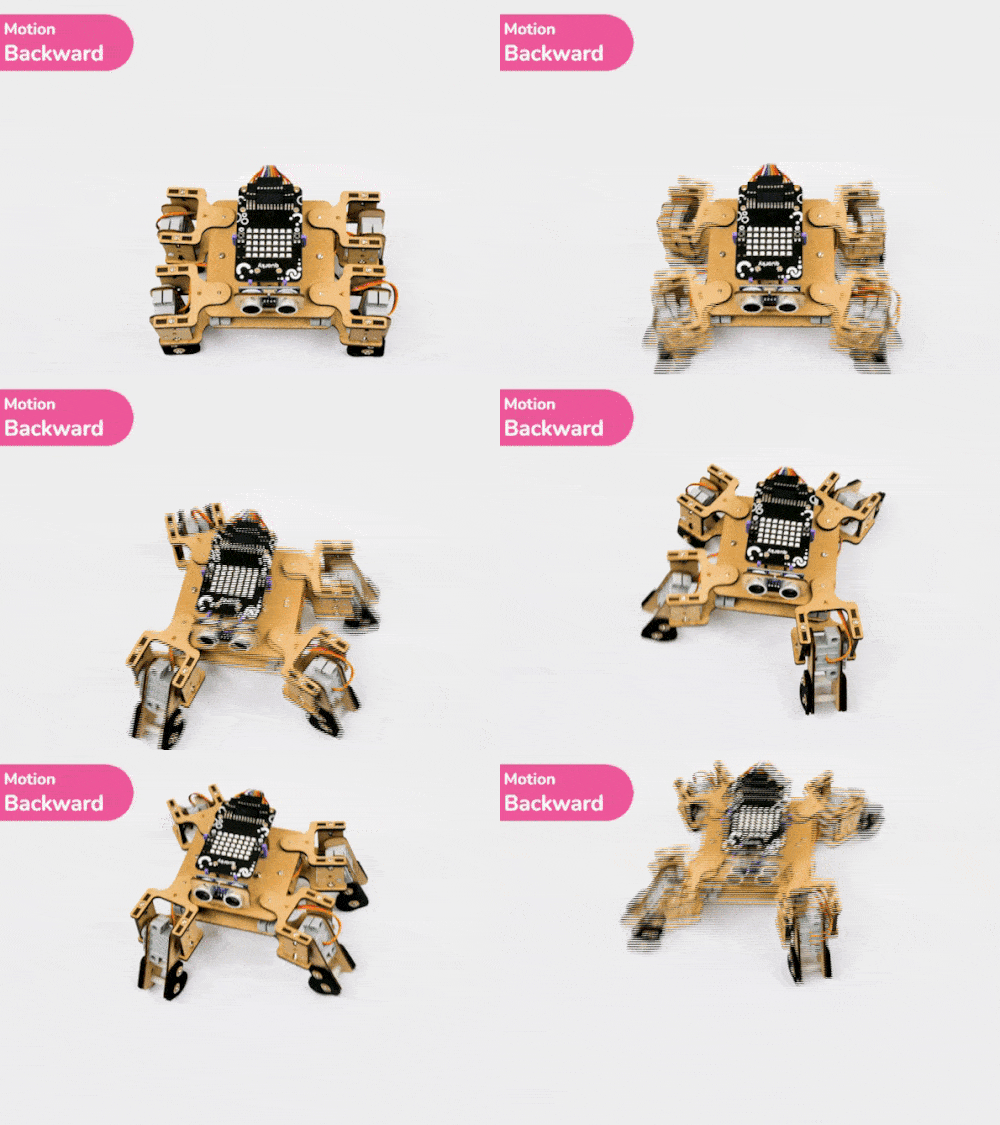
In this tutorial, you will learn how to control a quadruped robot using arrow keys.

Introduction

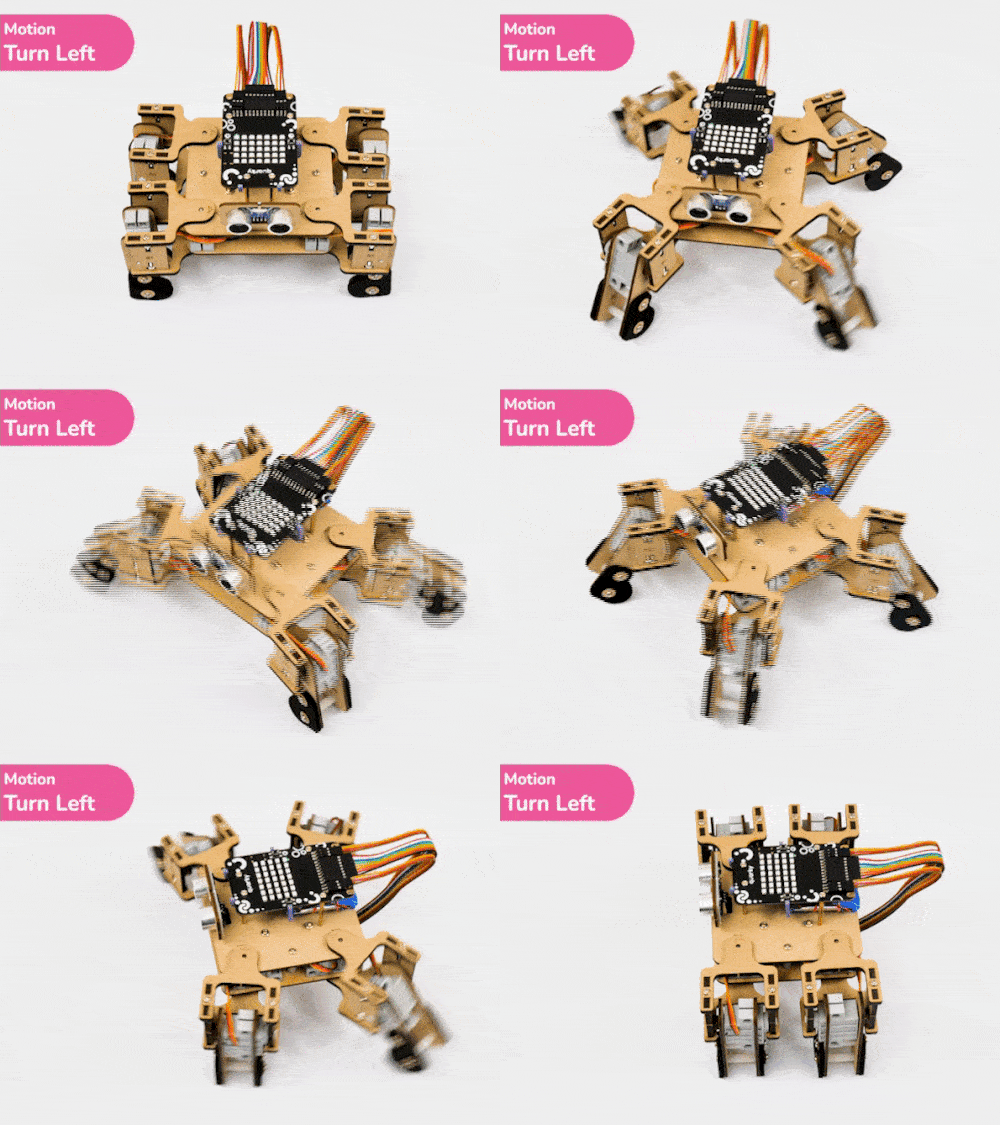
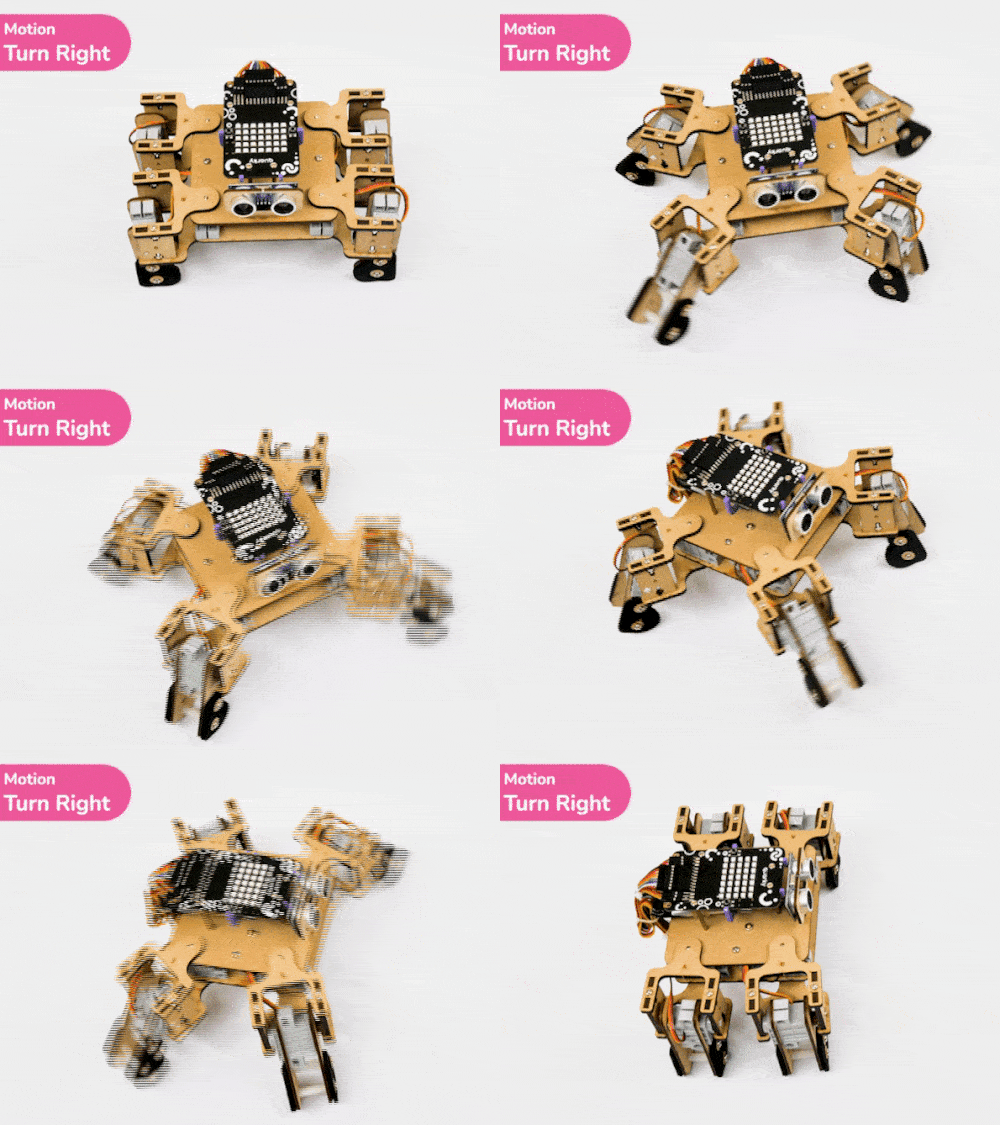
In this example, we will make the computer program that controls a “quadruped” (a four-legged robot). It’s like a remote control car, except with four legs instead of four wheels. You can press different keys on the keyboard to make the quadruped move forward, backward, turn left and turn right.

Logic

The Quadruped will move according to the following logic:

  1. Quadruped will move forward When the “UP” key is pressed.
  2. Quadruped will move backward When the “DOWN” key is pressed.
  3. Quadruped will turn left When the “LEFT” key is pressed.
  4. When the “RIGHT” key is pressed – Quadruped will turn right.

Code

The program uses the up, down, left, and right arrows to control the robot and make it move forward, backward, left, and right. Every time you press one of the arrows, Quadruped will move in the direction you choose for specific steps.

sprite = Sprite('Tobi')
quarky = Quarky()
import time

quad=Quadruped(4,1,8,5,3,2,7,6)
quad.home()

while True:
  if sprite.iskeypressed("up arrow"):
    quad.move("forward",1000,1)
    time.sleep(1)
    
  if sprite.iskeypressed("down arrow"):
    quad.move("backward",1000,1)
    
  if sprite.iskeypressed("left arrow"):
    quad.move("turn left",1000,1)
    
  if sprite.iskeypressed("right arrow"):
    quad.move("turn right",1000,1)

Output

Read More
Experience interactive control of a robotic arm through arrow keys. Open and close the gripper with ease

Introduction

A robotic arm controlled by arrow keys allows users to manipulate its movements, specifically opening and closing the arm. This type of robotic arm is designed to respond to directional inputs from arrow keys, enabling users to control the arm’s gripping or releasing action. Users can activate the corresponding motors or actuators within the robotic arm by pressing the arrow keys, causing it to perform the desired action. This interactive control mechanism provides a user-friendly interface for operating the robotic arm, offering a hands-on experience in manipulating objects and exploring the capabilities of robotics technology.

Code

sprite = Sprite('Tobi')

roboticArm=RoboticArm(1,2,3,4)
import time
quarky = Quarky()
while True:
  if sprite.iskeypressed("up arrow"):
    roboticArm.gripperaction("open")
    
  if sprite.iskeypressed("down arrow"):
    roboticArm.gripperaction("close")
    

Logic

  1. Open the Pictoblox application.
  2. Select the Python-based environment.
  3. Click on the robotic arm extension available in the left corner.
  4. First initialize the robotic arm‘s pin with pictoblox.
  5. We create a roboticArm object named roboticArm with four parameters. These parameters represent the pins or connections used to communicate with the robotic arm.
  6. We import the time module, which provides functions for working with time-related tasks.
  7. Then creates an infinite loop that will continue running until the program is manually stopped. Everything inside this loop will be repeated indefinitely.
  8. Pressing the up arrow key opens the gripper.
  9. Pressing the down arrow key closes the gripper.
  10. Press Run to run the code.

Output

Read More
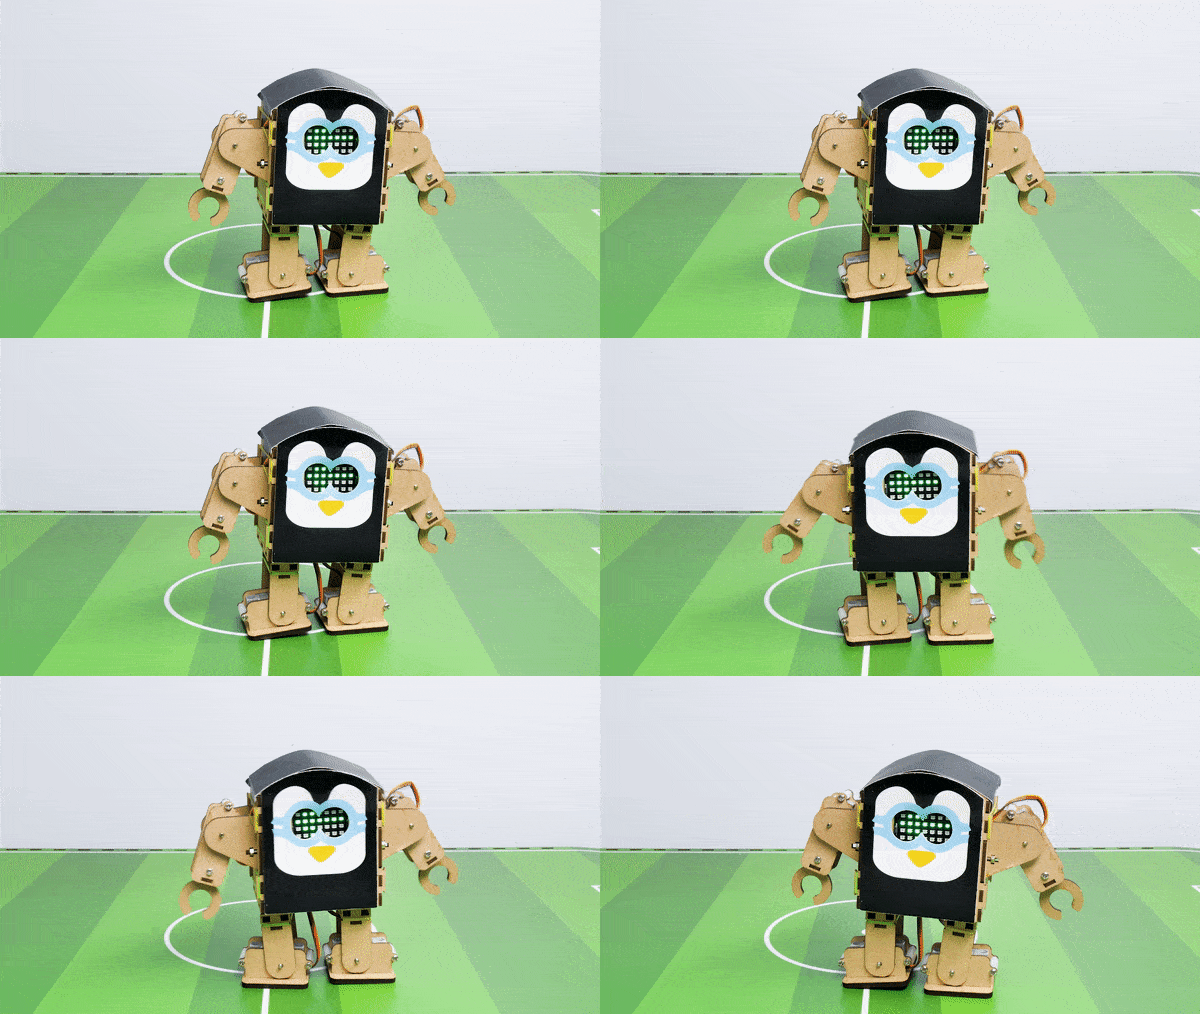
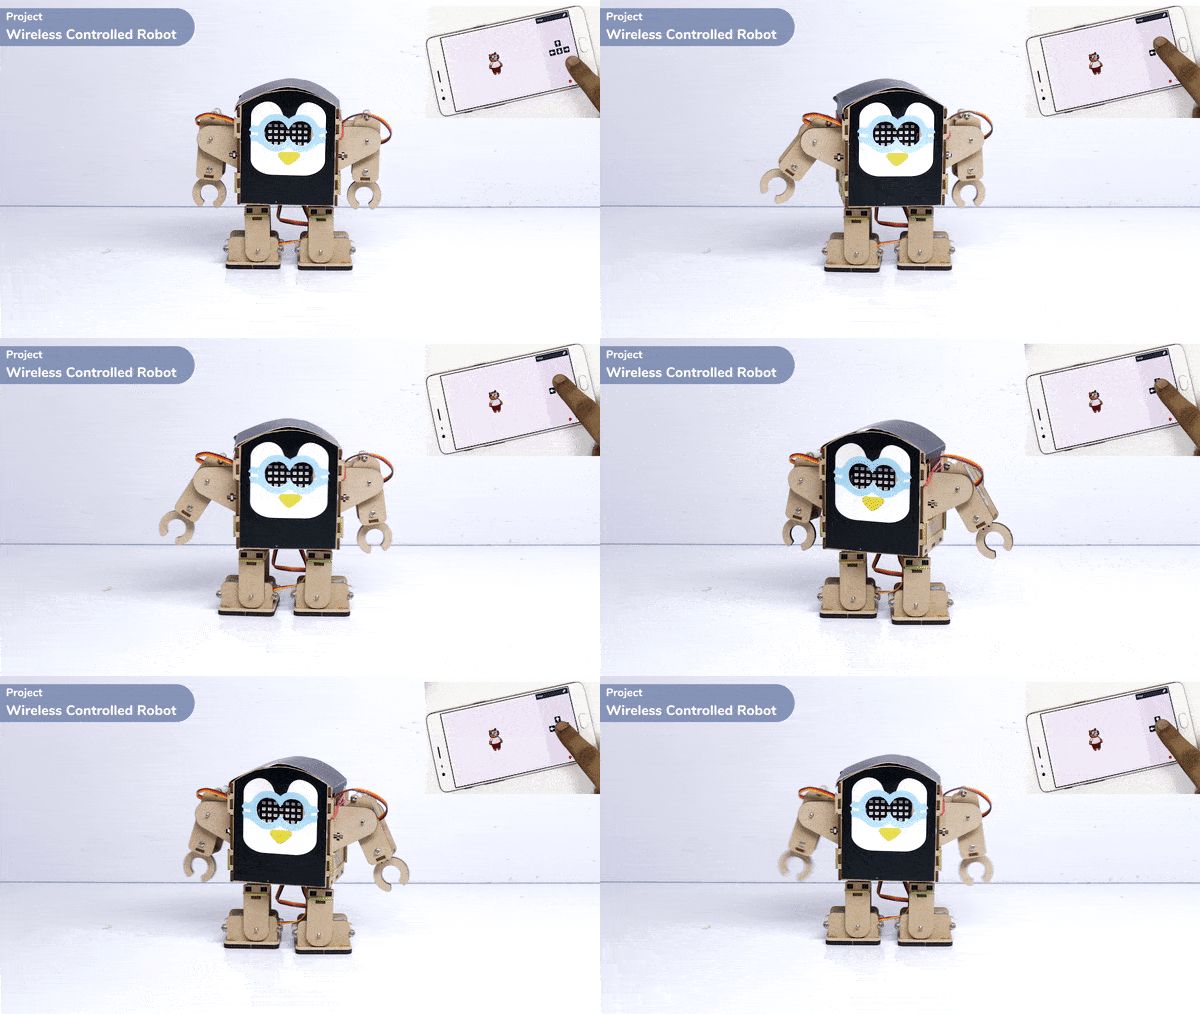
Learn about humanoid robots, their form, functionality, and logic for movement. Explore the code that controls humanoid robots to move using arrow keys.

Introduction

A humanoid is a type of robot or artificial system that is designed to resemble a human being in its form and functionality. Humanoid robots are typically equipped with sensors, actuators, and artificial intelligence capabilities that enable them to interact with their environment and perform tasks that are similar to those of a human being. Humanoid robots are used in various fields, including robotics research, entertainment, healthcare, education, and customer service.

Logic

The Humanoid will move according to the following logic:

  1. When the “UP” key is pressed – Humanoid will move forward.
  2. When the “Down” key is pressed – Humanoid will move Backward.
  3. When the “Left” key is pressed – Humanoid will turn left.
  4. When the “Right” key is pressed – Humanoid will turn Right.

Code

The program uses the up, down, left, and right arrows to control the robot and make it move forward, backward, left, and right. Every time you press one of the arrows, Humanoid will move in the direction you choose.

sprite = Sprite('Tobi')
quarky = Quarky()
import time
humanoid = Humanoid(7, 2, 6, 3, 8, 1)
while True:
  if sprite.iskeypressed("up arrow"):
    humanoid.move("forward", 1000, 1)
    time.sleep(1)
    
  if sprite.iskeypressed("down arrow"):
    humanoid.move("backward", 1000, 1)
    
  if sprite.iskeypressed("left arrow"):
    humanoid.move("left", 1000, 1)
    
  if sprite.iskeypressed("right arrow"):
    humanoid.move("right", 1000, 1)

Explain the code

  1. The code defines a sprite named “Tobi” and creates an instance of a humanoid character named “quarky” using a Humanoid class.
  2. It then enters into an infinite loop that continuously checks if certain arrow keys are pressed using the sprite.iskeypressed() method.
  3. If the “up arrow” key is pressed, it calls the humanoid.move() method with parameters “forward”, 1000, and 1, which indicates that the humanoid should move forward at a speed of 1000 units with a duration of 1 second.
  4. If the “down arrow” key is pressed, it calls the humanoid.move() method with parameters “backward”, 1000, and 1, which indicates that the humanoid should move backward at a speed of 1000 units with a duration of 1 second.
  5. If the “left arrow” key is pressed, it calls the humanoid.move() method with parameters “left”, 1000, and 1, which indicates that the humanoid should move to the left at a speed of 1000 units with a duration of 1 second.
  6. If the “right arrow” key is pressed, it calls the humanoid.move() method with parameters “right”, 1000, and 1, which indicates that the humanoid should move to the right at a speed of 1000 units with a duration of 1 second.
  7. The code uses the time.sleep() function to pause for 1 second in each iteration of the loop, allowing for smoother movement of the humanoid.

Output

Read More
Learn to move your Quarky Mecanum Wheel Robot in a square and make an axe figure with PictoBlox's Python Interface. Use the arrow keys to activate the custom movements!

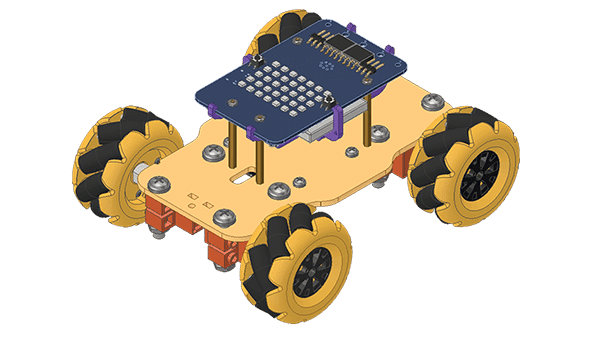
In this activity, we will create a custom activity where you will be able to move the Mecanum robot in a square effortlessly along with making an Axe type figure.

The Quarky Mecanum Wheel Robot is a type of robot that uses a special type of wheel to move. The wheel is made of four rollers mounted at 45- degree angles to the wheel’s hub. Each roller has its own motor and can spin in either direction. This allows the wheel to move in any direction, making it an ideal choice for navigating around obstacles.
Coding Steps

Follow the steps:

  1. Open a new project in PictoBlox and select Python Coding Environment.
  2. Connect Quarky to PictoBlox.
  3. Click on the Add Extension button and add the Quarky Mecanum extension.
  4. Now we will first initialize the Mecanum robots and the servos before starting the main code.
  5. Here there are two parts specifically : To make a Square and To make an Axe

To make a Square (Logic):

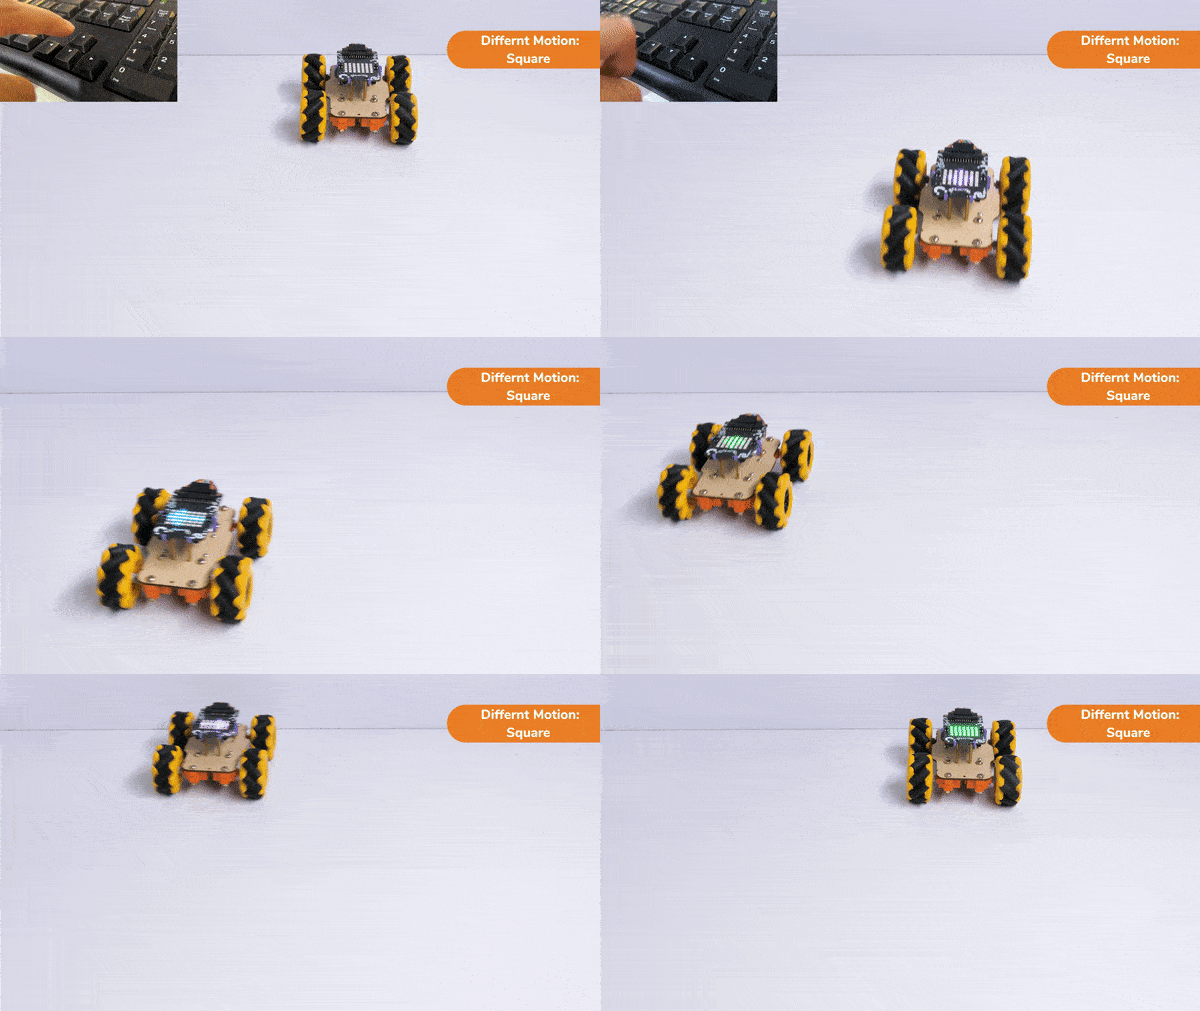
The main steps would include to display the lights in arrow forms before implementing the specific move. The moves would be implemented in the following order:

Forward -> Lateral Right -> Backward -> Lateral Left.

Code for Square Motion:

def Square():
    quarky.drawpattern("jjjgjjjjjgggjjjgggggjjjjgjjjjjjgjjj")
    meca.runtimedrobot("forward",Speed,1)
    quarky.drawpattern("jjjjfjjjjjjffjfffffffjjjjffjjjjjfjj")
    meca.runtimedrobot("lateral right",Speed,1)
    quarky.drawpattern("jjjcjjjjjjcjjjjcccccjjjcccjjjjjcjjj")
    meca.runtimedrobot("backward",Speed,1)
    quarky.drawpattern("jjgjjjjjggjjjjgggggggjggjjjjjjgjjjj")
    meca.runtimedrobot("lateral left",Speed,1)
    quarky.drawpattern("ccccccccccccccccccccccccccccccccccc")
    time.sleep(1)
    quarky.cleardisplay()

To make an Axe (Logic):

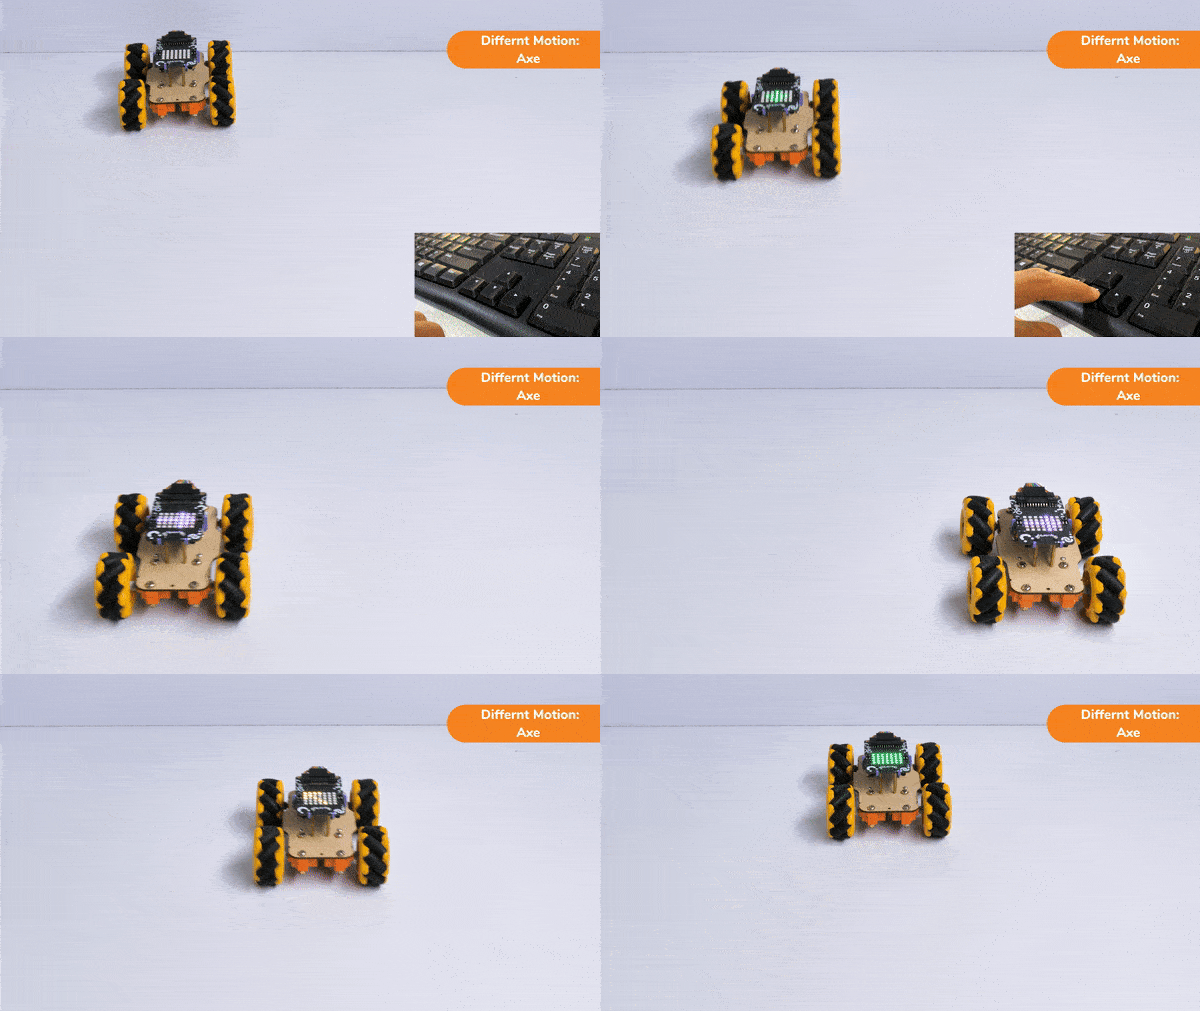
The main steps would include to display the lights in arrow forms before implementing the specific move. The moves would be implemented in the following order:

Forward ( 2 steps ) -> Lateral Left ( 1 step ) -> Backward Right ( 1 step ) -> Backward ( 1 step )

We will display the arrows with the help of Quarky LED’s and implement the code.

Code for Axe Motion:

def Axe():
    quarky.drawpattern("jjjcjjjjjcccjjjcccccjjjjcjjjjjjcjjj")
    meca.runtimedrobot("forward",Speed,2)
    quarky.drawpattern("jjgjjjjjggjjjjgggggggjggjjjjjjgjjjj")
    meca.runtimedrobot("lateral left",Speed,1)
    quarky.drawpattern("jjhjjjjjjjhjjjjjjjhjhjjjjjhhjjjhhhh")
    meca.runtimedrobot("backward right",Speed,1)
    quarky.drawpattern("jjjdjjjjjjdjjjjdddddjjjdddjjjjjdjjj")
    meca.runtimedrobot("backward",Speed,1)
    quarky.drawpattern("ccccccccccccccccccccccccccccccccccc")
    time.sleep(1)
    quarky.cleardisplay()

Main Code

Now we will keep a specific condition on when to activate the Square Motion and when to activate the Axe Motion.

We will use the if-else conditions where on pressing the “up” arrow key, we will initiate the Square Motion and on pressing the “down” arrow key, we will initiate the Axe Motion with the help of Mecanum Robot.

sprite = Sprite('Tobi')
quarky=Quarky()
import time

def Square():
    quarky.drawpattern("jjjgjjjjjgggjjjgggggjjjjgjjjjjjgjjj")
    meca.runtimedrobot("forward",Speed,1)
    quarky.drawpattern("jjjjfjjjjjjffjfffffffjjjjffjjjjjfjj")
    meca.runtimedrobot("lateral right",Speed,1)
    quarky.drawpattern("jjjcjjjjjjcjjjjcccccjjjcccjjjjjcjjj")
    meca.runtimedrobot("backward",Speed,1)
    quarky.drawpattern("jjgjjjjjggjjjjgggggggjggjjjjjjgjjjj")
    meca.runtimedrobot("lateral left",Speed,1)
    quarky.drawpattern("ccccccccccccccccccccccccccccccccccc")
    time.sleep(1)
    quarky.cleardisplay()

def Axe():
    quarky.drawpattern("jjjcjjjjjcccjjjcccccjjjjcjjjjjjcjjj")
    meca.runtimedrobot("forward",Speed,2)
    quarky.drawpattern("jjgjjjjjggjjjjgggggggjggjjjjjjgjjjj")
    meca.runtimedrobot("lateral left",Speed,1)
    quarky.drawpattern("jjhjjjjjjjhjjjjjjjhjhjjjjjhhjjjhhhh")
    meca.runtimedrobot("backward right",Speed,1)
    quarky.drawpattern("jjjdjjjjjjdjjjjdddddjjjdddjjjjjdjjj")
    meca.runtimedrobot("backward",Speed,1)
    quarky.drawpattern("ccccccccccccccccccccccccccccccccccc")
    time.sleep(1)
    quarky.cleardisplay()


meca=Mecanum(1,2,7,8)


Speed = 100
quarky.drawpattern("jjjjjjjjjjjjjjjjjjjjjjjjjjjjjjjjjjj")
while True:
  if sprite.iskeypressed("up arrow"):
    Square()
  else:
    if sprite.iskeypressed("down arrow"):
      Axe()

Final Output

Square Motion:
Axe Motion:
Read More
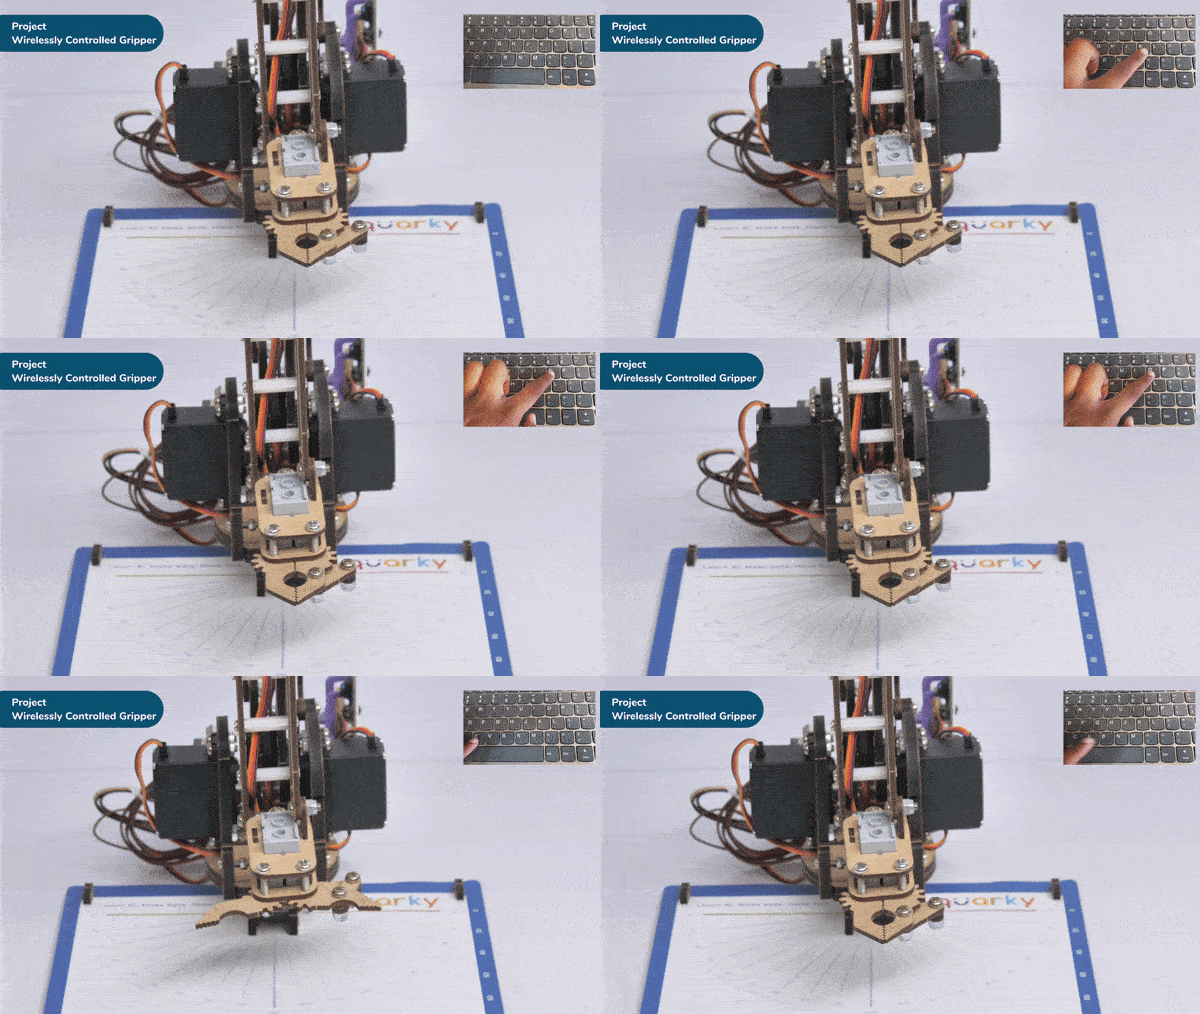
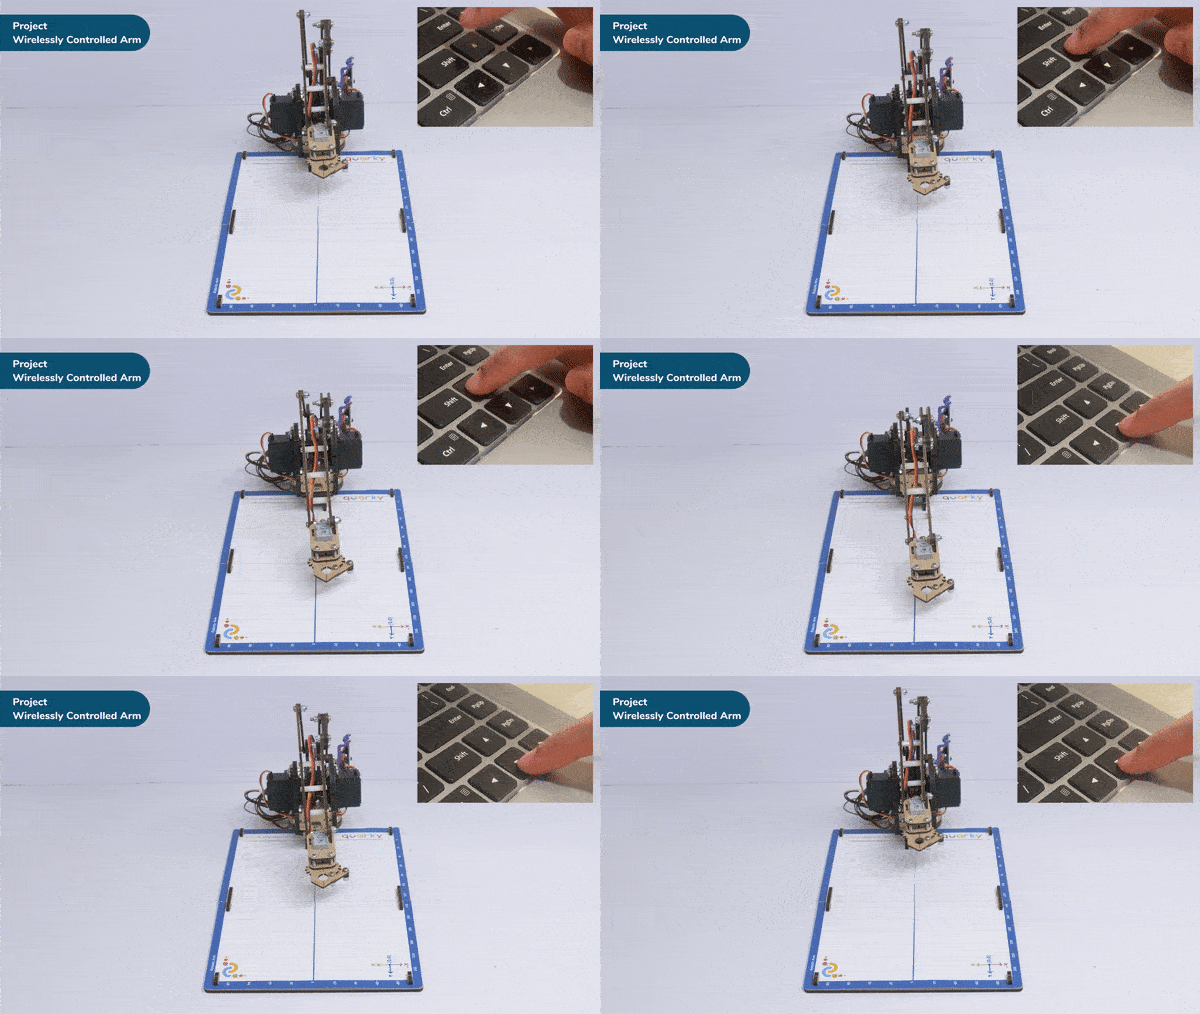
Explore the capabilities of a wirelessly controlled robotic arm, a mechanical system operated without physical connections.

Introduction

A wireless controlled robotic arm revolutionizes how we interact with robots by eliminating the need for physical connections. Users can remotely manipulate the arm’s movements without being tied to it, offering flexibility and convenience.

Wireless control allows operating the robotic arm from a distance, ensuring safety and versatility. It can be controlled through a smartphone app, remote control, or computer software. Wireless communication protocols like Bluetooth or Wi-Fi enable seamless transmission of commands.

These robotic arms have applications in industrial automation, healthcare, research, and education. They provide precise movements for delicate tasks and complex maneuvers, such as object manipulation, surgeries, or hazardous environment exploration.

Wireless control enables automation, remote operation, and collaboration. Multiple arms can be controlled simultaneously, enhancing productivity and enabling cooperative tasks. Integration with smart systems and the Internet of Things (IoT) ecosystem is facilitated.

Code

sprite = Sprite('Tobi')

import time

roboticArm = RoboticArm(1,2,3,4)


roboticArm.sethome()
roboticArm.setgripperangle(90,148)
while True:
	if sprite.iskeypressed("up arrow"):
		roboticArm.movebyinoneaxis(10,"X",10)
	
	if sprite.iskeypressed("down arrow"):
			roboticArm.movebyinoneaxis(-10,"X",1000)
			
	if sprite.iskeypressed("left arrow"):
	 roboticArm.movebyinoneaxis(10,"Y",1000)
			
	if sprite.iskeypressed("right arrow"):
		roboticArm.movebyinoneaxis(-10,"Y",1000)
		
	if sprite.iskeypressed("o"):
	 roboticArm.movebyinoneaxis(10,"Z",1000)
			
	if sprite.iskeypressed("c"):
		roboticArm.movebyinoneaxis(-10,"Z",1000)

Logic

User  control the robotic arm’s movements using arrow keys for X and Y axes and the ‘o‘ and ‘c‘ keys for the Z-axis. The specific movements and functions may vary depending on the implementation of the Roboti Arm class.

  1. Open the Pictoblox application.
  2. Select the Python-based environment.
  3. Click on the robotic arm extension available in the left corner.
  4. First initialize the robotic arm‘s pin with pictoblox.
  5. Imports the time module, which provides functions for time-related operations.
  6. Initializes a robotic arm object named ‘roboticArm‘ with four parameters.
  7. Sets the home position for the robotic arm. This is usually a predefined position that serves as a reference point.
  8. Sets the angle of the gripper of the robotic arm. This function likely controls the opening and closing of the gripper.
  9. Everything inside this loop will repeat indefinitely until the program is manually stopped.
  10. If the up arrow key is pressed, it moves the robotic arm by 10 units in the positive X-axis direction.
  11. If the down arrow key is pressed, it moves the robotic arm by 10 units in the negative X-axis direction.
  12. If the left arrow key is pressed, it moves the robotic arm by 10 units in the positive Y-axis direction.
  13. If the Right Arow key is pressed, it moves the robotic arm by 10 units in the negative Y-axis direction.
  14. The code repeats the same pattern for the other arrow keys (down, left, and right) and performs movements in the corresponding axis directions.
  15. If the ‘o‘ key is pressed, it moves the robotic arm by 10 units in the positive Z-axis direction.
  16. If the ‘c‘ key is pressed, it moves the robotic arm by 10 units in the negative Z-axis direction.
  17. Press Run to run the code.

Output

Read More
Learn how to code the Mars Rover to turn left and right on a circle with the set () to () block. Try different left and right orientations and move the Mars Rover with the up and down keys.

Introduction

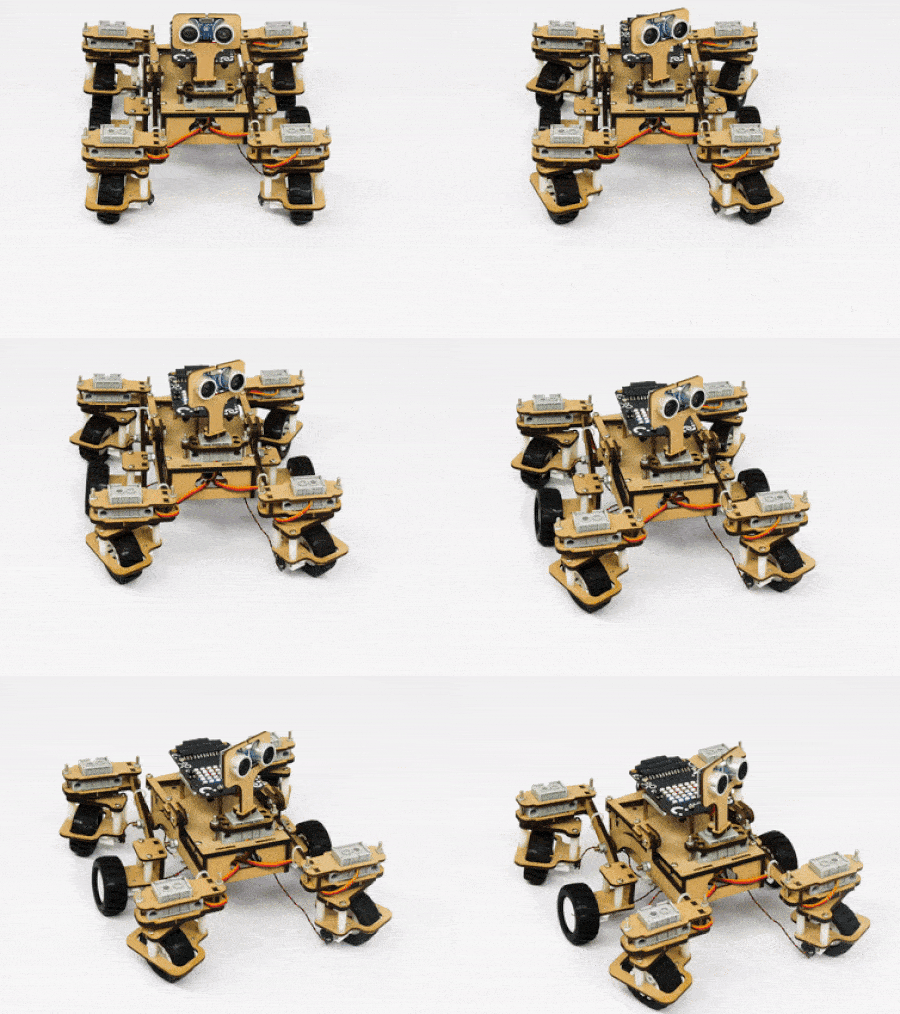
Instead of rotating the Mars Rover at a place to turn left or right, you can alternatives make the Mars Rover move in a circle.

  1. Turning left on a circle:
  2. Turning right on a circle:
  3. Turning right backwards in a circle:
  4. Turning left backwards in a circle:

Coding Steps

The following code uses the four arrow keys to travel forward (up arrow key), backwards (down arrow key) , forward right in a circle( right arrow key) and forward left in a circle. (left arrow key)

We will also use the keys specially for backward left and right motion. We will use the “a”  key for backward left motion and “d” key for backward right motion.

Make the code and play with the Mars Rover. Try to use different keys and combine different motions.

Code

sprite=Sprite('Tobi')
import time
quarky = Quarky()
rover = MarsRover(4, 1, 7, 2, 6)
# setwheelsangle(Front Left = 40, Front Right = 40, Back Left = 90, Back Right = 90)
while True:
  if sprite.iskeypressed("up arrow"):
	  rover.home()
	  rover.setinangle(0)
	  quarky.runtimedrobot("F",100,2)
	
  if sprite.iskeypressed("down arrow"):
    rover.home()
    rover.setinangle(0)
    quarky.runtimedrobot("B",100,2)
  
  if sprite.iskeypressed("right arrow"):
    rover.home()
    rover.setrightturnangle(40)
    # rover.setwheelsangle(180,180,180,180)
    # rover.setheadangle(0)
    quarky.runtimedrobot("F",100,2)
  
  if sprite.iskeypressed("left arrow"):
    rover.home()
    rover.setleftturnangle(40)
    # rover.setwheelsangle(0,0,0,0)
    quarky.runtimedrobot("F",100,2)
  
  if sprite.iskeypressed("A"):
    rover.home()
    rover.setleftturnangle(40)
    quarky.runtimedrobot("B",100,2)
  
  if sprite.iskeypressed("D"):
    rover.home()
    rover.setrightturnangle(40)
    quarky.runtimedrobot("B",100,2)

Output

Circular Right-Left Motion:
Read More
Learn how to create a dataset and Machine Learning Model for an automated shark attack game from the user's input. See how to open the ML environment, upload data, label images, train the model, and export the Python script.

Introduction

In this example project, we are going to create a Machine Learning Model where shark run by the user and fish automatically feed on randomly generated food while escaping from sharks.

Data Collection

  • Now, we are going to collect the data of “Shark Attack: Hungry for Fish” game .
  • This data will contain the actions that we have taken to accomplish the game successfully.
  • We will use the data we collect here, to teach our device how to play the “Shark Attack: Hungry for Fish” game , i.e. to perform machine learning.
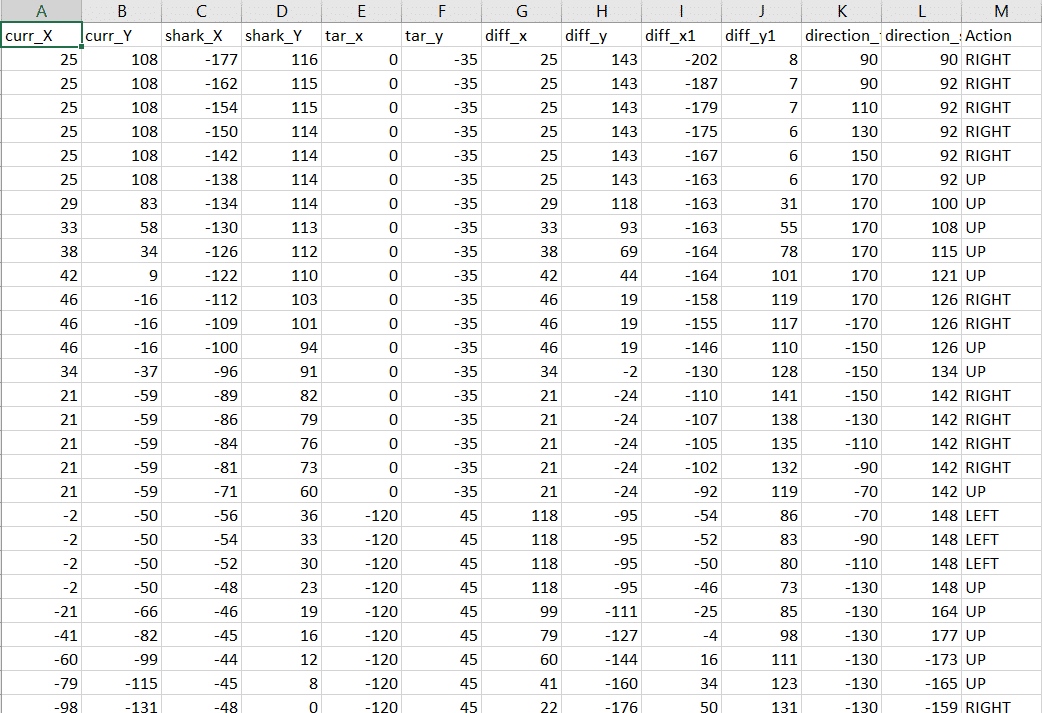
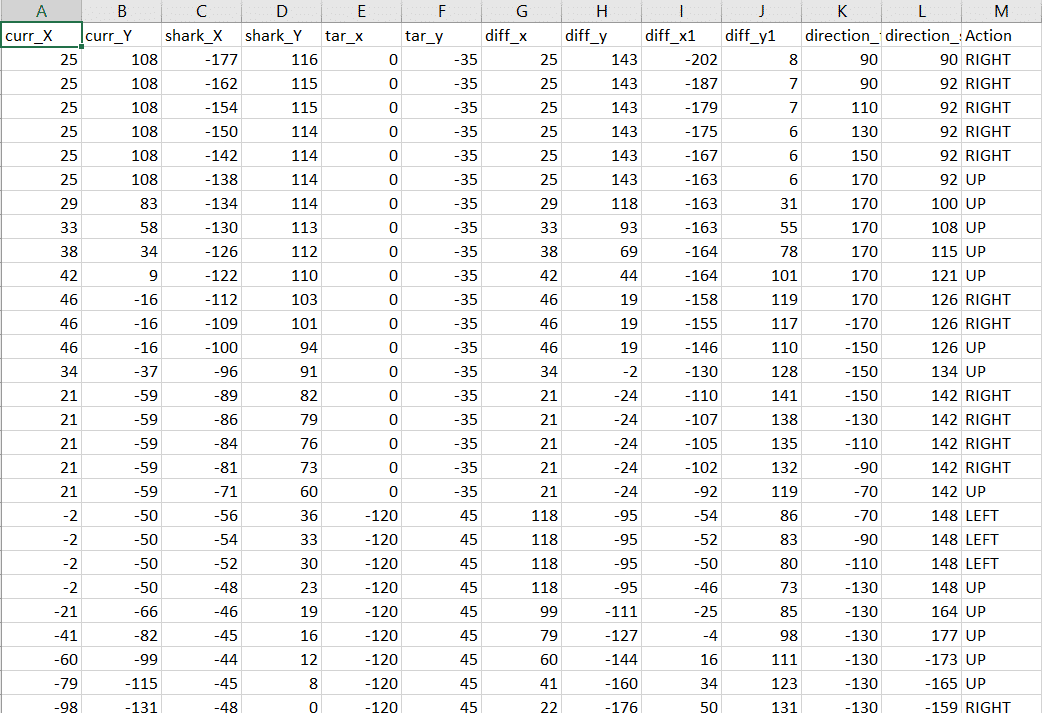
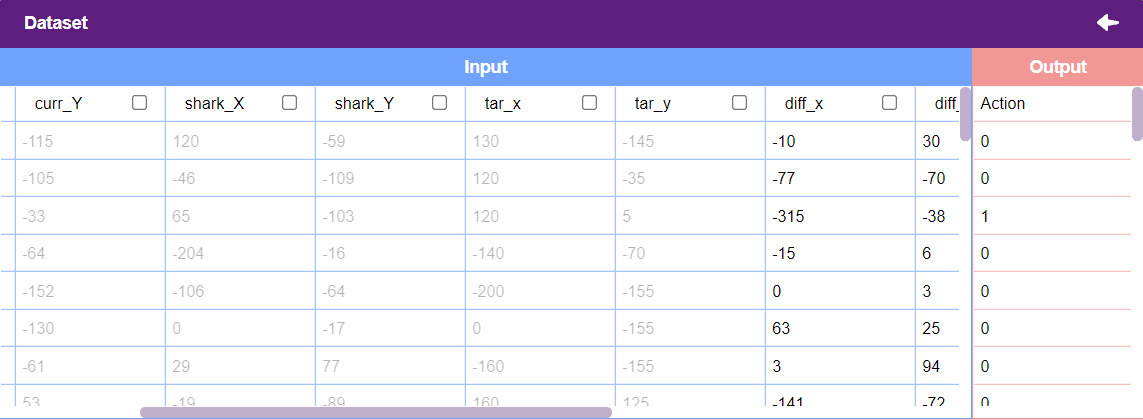
  • The data that you collect will get saved in your device as a csv (comma separated values) file. If you open this file in Microsoft Excel, it will look as shown below:

Follow the steps below

  1. Open PictoBlox and create a new file.
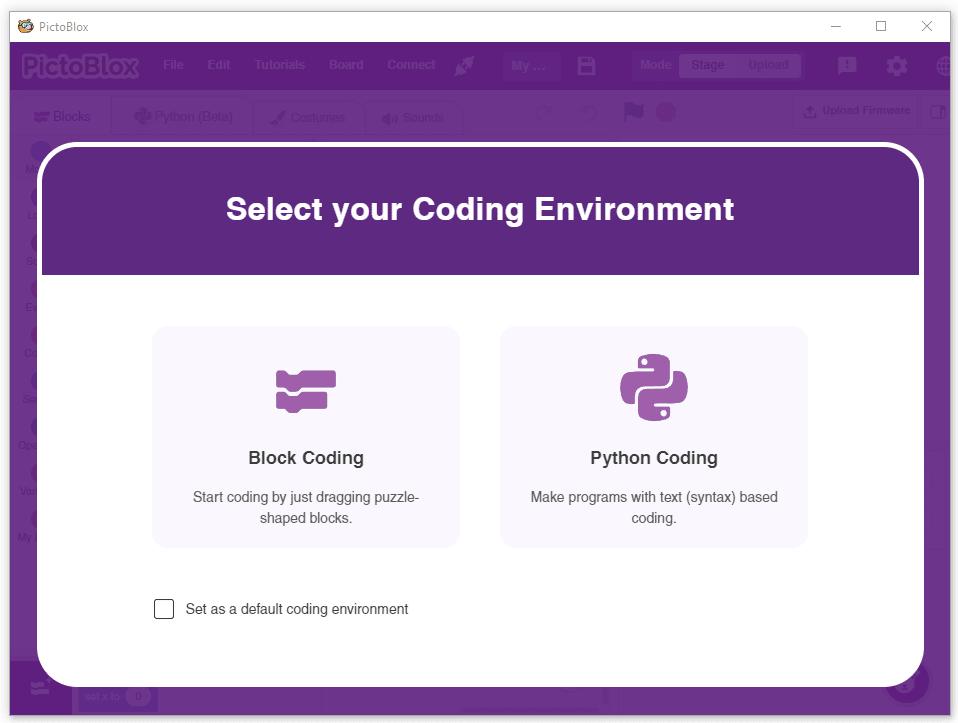
  2. Select the coding environment as Python Coding Environment.
  3. Now write code in python.

Code for making dataset

  1. Creates a sprite object named “Fish”. A sprite is typically a graphical element that can be animated or displayed on a screen.
  2. Creates three sprites object named “Orange” , “Shark2” and “Button3” and also upload backdrop of “Underwater2” .
  3. Click on the Fish.py file from the Project files section.
    sprite = Sprite('Fish')
  4. Similarly, declare new sprites on the Fish.py file.
    sprite1 = Sprite('Orange')
    sprite2 = Sprite('Shark 2')
    sprite3 = Sprite('Button3')
  5. Then we will import the time, random, os, math, TensorFlow as tf  and Pandas as pd modules using the import keyword for using delay in the program later.
    1. Time – For using delay in the program.
    2. Random – For using random position.
    3. Pandas as pd – For using Data Frame.
    4. Math– For using math functions in code.
    5. Os– For reading files from Program files.
      import random
      import time
      import tensorflow as tf
      import pandas as pd
      import os
      import math
  6. Now, make 3 variables curr_x, curr_y, shark_x, shark_y, score, chance, fish_d, fish_m, shark_m, angle_f and angle_s with initial values 25, 108, -177, 116, 0, 5, 20, 35, 25, 90 and 90 respectively.
    1.  curr_x – To store the initial x – position of fish.
    2. curr_y – To store the initial y – position of fish.
    3. shark_x – To store the initial x – position of shark.
    4. shark_y – To store the initial y – position of shark.
    5. score – To store the score while playing the game.
    6. chance– To store the chance of fish while playing the game.
    7. fish_d– To store increment value in direction of fish on pressing specific key.
    8. fish_m – To store increment value in movement of fish on pressing specific key.
    9. shark_m – To store increment value in movement of shark on pressing specific key.
    10. shark_d – To store increment value in direction of shark on pressing specific key.
    11. angle_f – To store increment value in angle of fish on pressing specific key.
    12. angle_s – To store increment value in angle of shark on pressing specific key.
      curr_x = 25 
      curr_y = 108 
      shark_x=-177 
      shark_y=116 
      score=0 
      chance=5 
      fish_d=20 
      fish_m=25 
      shark_m=4 
      angle_f=90 
      angle_s=90
  7. Now set initial position and angle of fish and shark both.
    sprite.setx(curr_x)
    sprite.sety(curr_y)
    sprite2.setx(shark_x)
    sprite2.sety(shark_y)
    sprite.setdirection(DIRECTION=angle_f)
    sprite2.setdirection(DIRECTION=angle_s)
  8. Now, make a function settarget1() in which we are generating food at a random position. We pass one argument “m” in the function for generating target food in the greed position of the t gap.
    1. x and y – To generate the fish at random position on stage.
    2. x1 and y1 – To generate the food at random position on stage.
    3. x2 and y2 – To generate the shark at random position on stage.
    4. time.sleep – For giving the time delay.
    5. sprite.set()– To Set the position of fish at random position on stage.
    6. sprite1.set()– To Set the position of food at random position on stage.
    7. sprite2.set()– To Set the position of shark at random position on stage.
      def settarget(t):
        x = random.randrange(-200, 200, t)
        y = random.randrange(-155, 155, t)
        x1 = random.randrange(-200, 200, t)
        y1 = random.randrange(-155, 155, t)
        x2 = random.randrange(-200, 200, t)
        y2 = random.randrange(-155, 155, t)
        time.sleep(0.1)
        sprite1.setx(x1)
        sprite1.sety(y1)
        sprite.setx(x)
        sprite.sety(y)
        sprite2.setx(x2)
        sprite2.sety(y2)
        return x, y, x1, y1, x2, y2
  9. Now, make a function settarget1() in which we are generating food at a random position. We pass one argument “m” in the function for generating target food in the greed position of the t gap.
    1. x and y – To generate the food at random position on stage.
    2. time.sleep – For giving the time delay.
    3. sprite1.set()– To Set the position of food at random position on stage.
      def settarget1(m):
      x = random.randrange(-200, 200, m)
      y = random.randrange(-155, 155, m)
      time.sleep(0.1)
      sprite1.setx(x)
      sprite1.sety(y)
      return x, y 
  10. Now set the target (food). In this, fish are chasing the food, and target_x  and  target_y should be equal to the x and y positions of the food.
    target_x, target_y = settarget(40) 
  11. Now create a data frame of name “Chase_Data.csv” to collect the data for machine learning and if this name csv exist then directly add data in it.
    target_x, target_y = settarget1(40)
    if(os.path.isfile('Chase_Data.csv')):
      data=pd.read_csv('Chase_Data.csv')
    else:
      data = pd.DataFrame({"curr_X": curr_x, "curr_Y": curr_y,"shark_X": shark_x, "shark_Y": shark_y, "tar_x": target_x, "tar_y": target_y, "diff_x":curr_x-target_x, "diff_y":curr_y-target_y, "diff_x1":shark_x-curr_x, "diff_y1":shark_y-curr_y, "direction_f": angle_f, "direction_s": angle_s, "Action": "RIGHT"}, index=[0])
  12. After that, we will use the while True loop to run the code indefinitely. Don’t forget to add a colon ‘:’ just after the loop to avoid errors.
    while True:
  13. In a while loop, write code by which sharks follow fish by ‘shark_m’ steps.
    sprite2.spriteRequest.requestCommand("motion_pointtowards", {"TOWARDS": "Fish"})
     sprite2.move(shark_m)
  14. Find the direction of shark and fish using the Python pictoblox function and take the floor value of angle.
    angle_f=sprite.direction()
    angle_s=sprite2.direction()
    anglef=math.floor(angle_f)
    angles=math.floor(angle_s)
  15. Now write the script for moving the Fish in forward direction and change clockwise or anticlockwise direction by fix value with the help of a conditional statement.
    1. If the up arrow key is pressed then fish will move fish_m position in same direction.
    2. After pressing the up arrow key action taken should be stored in the Data frame with data.append command.
      if sprite.iskeypressed("up arrow"):
          data = data.append({"curr_X": curr_x, "curr_Y": curr_y,"shark_X": shark_x, "shark_Y": shark_y, "tar_x": target_x, "tar_y": target_y, "diff_x":curr_x-target_x, "diff_y":curr_y-target_y, "diff_x1":shark_x-curr_x, "diff_y1":shark_y-curr_y, "direction_f": anglef, "direction_s": angles, "Action": "UP"}, ignore_index=True)
          sprite.move(fish_m)
  16. Repeat the process for the set direction in clockwise or anticlockwise.
    if sprite.iskeypressed("left arrow"):
        data = data.append({"curr_X": curr_x, "curr_Y": curr_y,"shark_X": shark_x, "shark_Y": shark_y, "tar_x": target_x, "tar_y": target_y, "diff_x":curr_x-target_x, "diff_y":curr_y-target_y, "diff_x1":shark_x-curr_x, "diff_y1":shark_y-curr_y, "direction_f": anglef, "direction_s": angles, "Action": "LEFT"}, ignore_index=True)
        angle = anglef - fish_d
        sprite.setdirection(DIRECTION=angle)
    if sprite.iskeypressed("right arrow"):
        data = data.append({"curr_X": curr_x, "curr_Y": curr_y,"shark_X": shark_x, "shark_Y": shark_y, "tar_x": target_x, "tar_y": target_y, "diff_x":curr_x-target_x, "diff_y":curr_y-target_y, "diff_x1":shark_x-curr_x, "diff_y1":shark_y-curr_y, "direction_f": anglef, "direction_s": angles, "Action": "RIGHT"}, ignore_index=True)
        angle = anglef + fish_d
        sprite.setdirection(DIRECTION=angle)
  17. Write the conditional statement for the storing data in csv file after few score.
    if(score>0 and score%2==0):
        data.to_csv('Chase_Data.csv',index=False)
  18. Write the conditional statement for the chance variable. If the fish and shark position difference is less than 20, then the chance should be decreased by one.
     if abs(shark_x-curr_x)<20 and abs(shark_y-curr_y)<20:
        chance= chance-1
  19. Update the position of all three sprites, and if chance becomes 0, then data should be printed on Chase Data. csv file, and the positions of all three sprites change randomly by the functions settarget() and update chance value.
      if abs(shark_x-curr_x)<20 and abs(shark_y-curr_y)<20:
        chance= chance-1
        curr_x, curr_y, target_x, target_y, shark_x, shark_y = settarget(40)
        sprite3.say(("score: ",score ," and chance:  ",chance,""))
        if (chance == 0):
          data.to_csv('Chase_Data.csv',index=False)
          curr_x, curr_y, target_x, target_y, shark_x, shark_y = settarget(40)
          chance=5
  20. Again write the conditional statement for the score variable if the fish and food position difference is less then 20 then the score should be increased by one.
    if abs(curr_x-target_x)<20 and abs(curr_y-target_y)<20: 
        score = score + 1 
        sprite.say(("your score is: {}".format(score)))
  21. If the score is equal to or greater than 50 then data should be printed on Chase Data.csv file and food positions change randomly by the function settarget1().
    if (score >= 40):
          print(data)
          data.to_csv('Chase Data.csv')
          break
     target_x, target_y = settarget1()
  22. Now update the curr_x, curr_y, shark_x and shark_y variables by storing the current position of the fish and shark and delaying movement by 0.02 seconds.
      curr_x=math.floor(sprite.x())
      curr_y=math.floor(sprite.y())
      shark_x=math.floor(sprite2.x())
      shark_y=math.floor(sprite2.y())
      time.sleep(0.02)
  23. The final code is as follows:
    sprite = Sprite('Fish')
    sprite1 = Sprite('Orange')
    sprite2 = Sprite('Shark 2')
    sprite3 = Sprite('Button3')
    import random
    import time
    import numpy as np
    import tensorflow as tf
    import pandas as pd
    import os
    import math
    		
    curr_x = 25
    curr_y = 108
    shark_x=-177
    shark_y=116
    score=0
    chance=5
    fish_d=20
    fish_m=25
    shark_m=4
    angle_f=90
    angle_s=90
    sprite3.say(("score: ",score ," and chance:  ",chance,""))
    sprite.setx(curr_x)
    sprite.sety(curr_y)
    sprite2.setx(shark_x)
    sprite2.sety(shark_y)
    sprite.setdirection(DIRECTION=angle_f)
    sprite2.setdirection(DIRECTION=angle_s)
    def settarget(t):
      x = random.randrange(-200, 200, t)
      y = random.randrange(-155, 155, t)
      x1 = random.randrange(-200, 200, t)
      y1 = random.randrange(-155, 155, t)
      x2 = random.randrange(-200, 200, t)
      y2 = random.randrange(-155, 155, t)
      time.sleep(0.1)
      sprite1.setx(x1)
      sprite1.sety(y1)
      sprite.setx(x)
      sprite.sety(y)
      sprite2.setx(x2)
      sprite2.sety(y2)
      return x, y, x1, y1, x2, y2
    def settarget1(m):
      x = random.randrange(-200, 200, m)
      y = random.randrange(-155, 155, m)
      time.sleep(0.1)
      sprite1.setx(x)
      sprite1.sety(y)
      return x, y
    target_x, target_y = settarget1(40)
    if(os.path.isfile('Chase_Data.csv')):
      data=pd.read_csv('Chase_Data.csv')
    else:
      data = pd.DataFrame({"curr_X": curr_x, "curr_Y": curr_y,"shark_X": shark_x, "shark_Y": shark_y, "tar_x": target_x, "tar_y": target_y, "diff_x":curr_x-target_x, "diff_y":curr_y-target_y, "diff_x1":shark_x-curr_x, "diff_y1":shark_y-curr_y, "direction_f": angle_f, "direction_s": angle_s, "Action": "RIGHT"}, index=[0])
    while True:
      # sprite2.pointto()
      sprite2.spriteRequest.requestCommand("motion_pointtowards", {"TOWARDS": "Fish"})
      sprite2.move(shark_m)
      angle_f=sprite.direction()
      angle_s=sprite2.direction()
      anglef=math.floor(angle_f)
      angles=math.floor(angle_s)
      if sprite.iskeypressed("up arrow"):
        data = data.append({"curr_X": curr_x, "curr_Y": curr_y,"shark_X": shark_x, "shark_Y": shark_y, "tar_x": target_x, "tar_y": target_y, "diff_x":curr_x-target_x, "diff_y":curr_y-target_y, "diff_x1":shark_x-curr_x, "diff_y1":shark_y-curr_y, "direction_f": anglef, "direction_s": angles, "Action": "UP"}, ignore_index=True)
        sprite.move(fish_m)
      if sprite.iskeypressed("left arrow"):
        data = data.append({"curr_X": curr_x, "curr_Y": curr_y,"shark_X": shark_x, "shark_Y": shark_y, "tar_x": target_x, "tar_y": target_y, "diff_x":curr_x-target_x, "diff_y":curr_y-target_y, "diff_x1":shark_x-curr_x, "diff_y1":shark_y-curr_y, "direction_f": anglef, "direction_s": angles, "Action": "LEFT"}, ignore_index=True)
        angle = anglef - fish_d
        sprite.setdirection(DIRECTION=angle)
        
         
      if sprite.iskeypressed("right arrow"):
        data = data.append({"curr_X": curr_x, "curr_Y": curr_y,"shark_X": shark_x, "shark_Y": shark_y, "tar_x": target_x, "tar_y": target_y, "diff_x":curr_x-target_x, "diff_y":curr_y-target_y, "diff_x1":shark_x-curr_x, "diff_y1":shark_y-curr_y, "direction_f": anglef, "direction_s": angles, "Action": "RIGHT"}, ignore_index=True)
        angle = anglef + fish_d
        sprite.setdirection(DIRECTION=angle)
        
      if(score>0 and score%2==0):
        data.to_csv('Chase_Data.csv',index=False)
      
      if abs(shark_x-curr_x)<20 and abs(shark_y-curr_y)<20:
        chance= chance-1
        curr_x, curr_y, target_x, target_y, shark_x, shark_y = settarget(40)
        sprite3.say(("score: ",score ," and chance:  ",chance,""))
        if (chance == 0):
          data.to_csv('Chase_Data.csv',index=False)
          curr_x, curr_y, target_x, target_y, shark_x, shark_y = settarget(40)
          chance=5
      if abs(curr_x-target_x)<20 and abs(curr_y-target_y)<20:
        score = score + 1
        sprite3.say(("score: ",score ," and chance:  ",chance,""))
        if (score >= 50):
          data.to_csv('Chase_Data.csv',index=False)
          break
        target_x, target_y = settarget1(40)
      curr_x=math.floor(sprite.x())
      curr_y=math.floor(sprite.y())
      shark_x=math.floor(sprite2.x())
      shark_y=math.floor(sprite2.y())
      time.sleep(0.02)
    
  24. Press the Run button and play fish feast game to collect data.
  25. Store this dataset on your local computer.

    Numbers(C/R) in Machine Learning Environment

    Datasets on the internet are hardly ever fit to directly train on. Programmers often have to take care of unnecessary columns, text data, target columns, correlations, etc. Thankfully, PictoBlox’s ML Environment is packed with features to help us pre-process the data as per our liking.

    Let’s create the ML model.

    Opening Image Classifier Workflow

    Alert: The Machine Learning Environment for model creation is available in the only desktop version of PictoBlox for Windows, macOS, or Linux. It is not available in Web, Android, and iOS versions.

    Follow the steps below:

    1. Open PictoBlox and create a new file.
    2. Select the coding environment as Block Coding Environment.
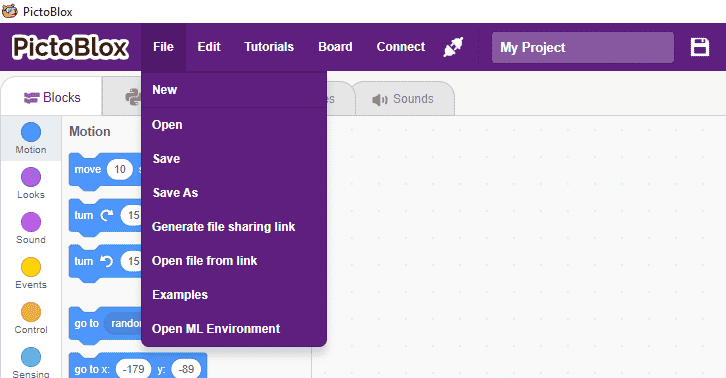
    3. Select the “Open ML Environment” option under the “Files” tab to access the ML Environment.
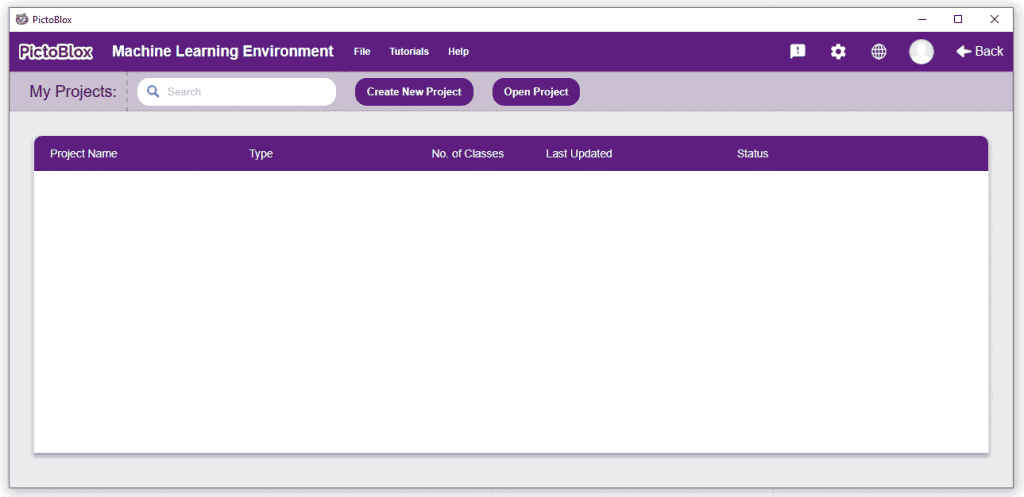
    4. You’ll be greeted with the following screen.
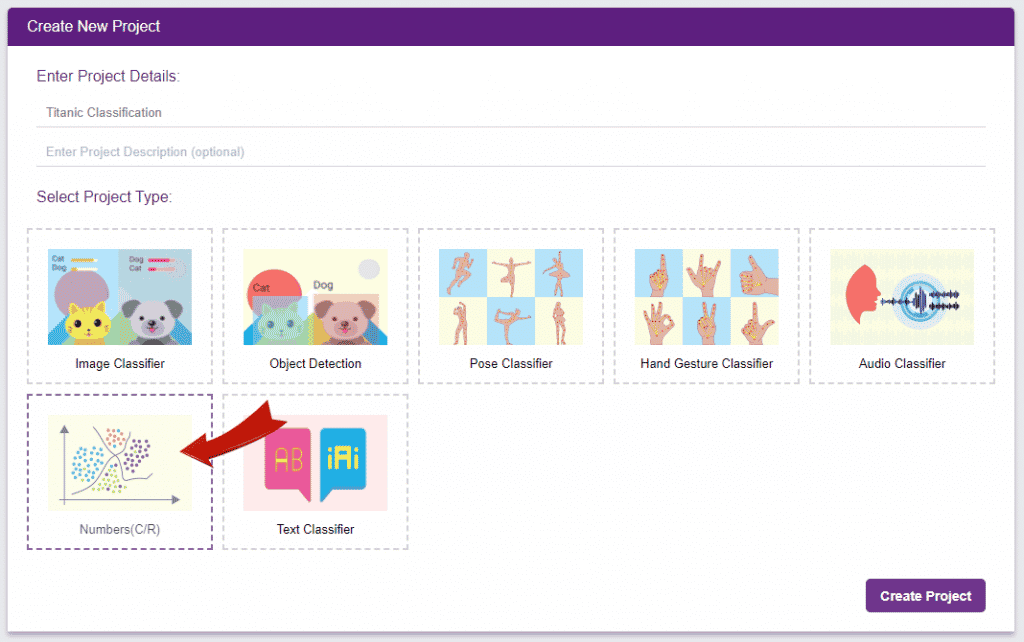
      Click on “Create New Project“.
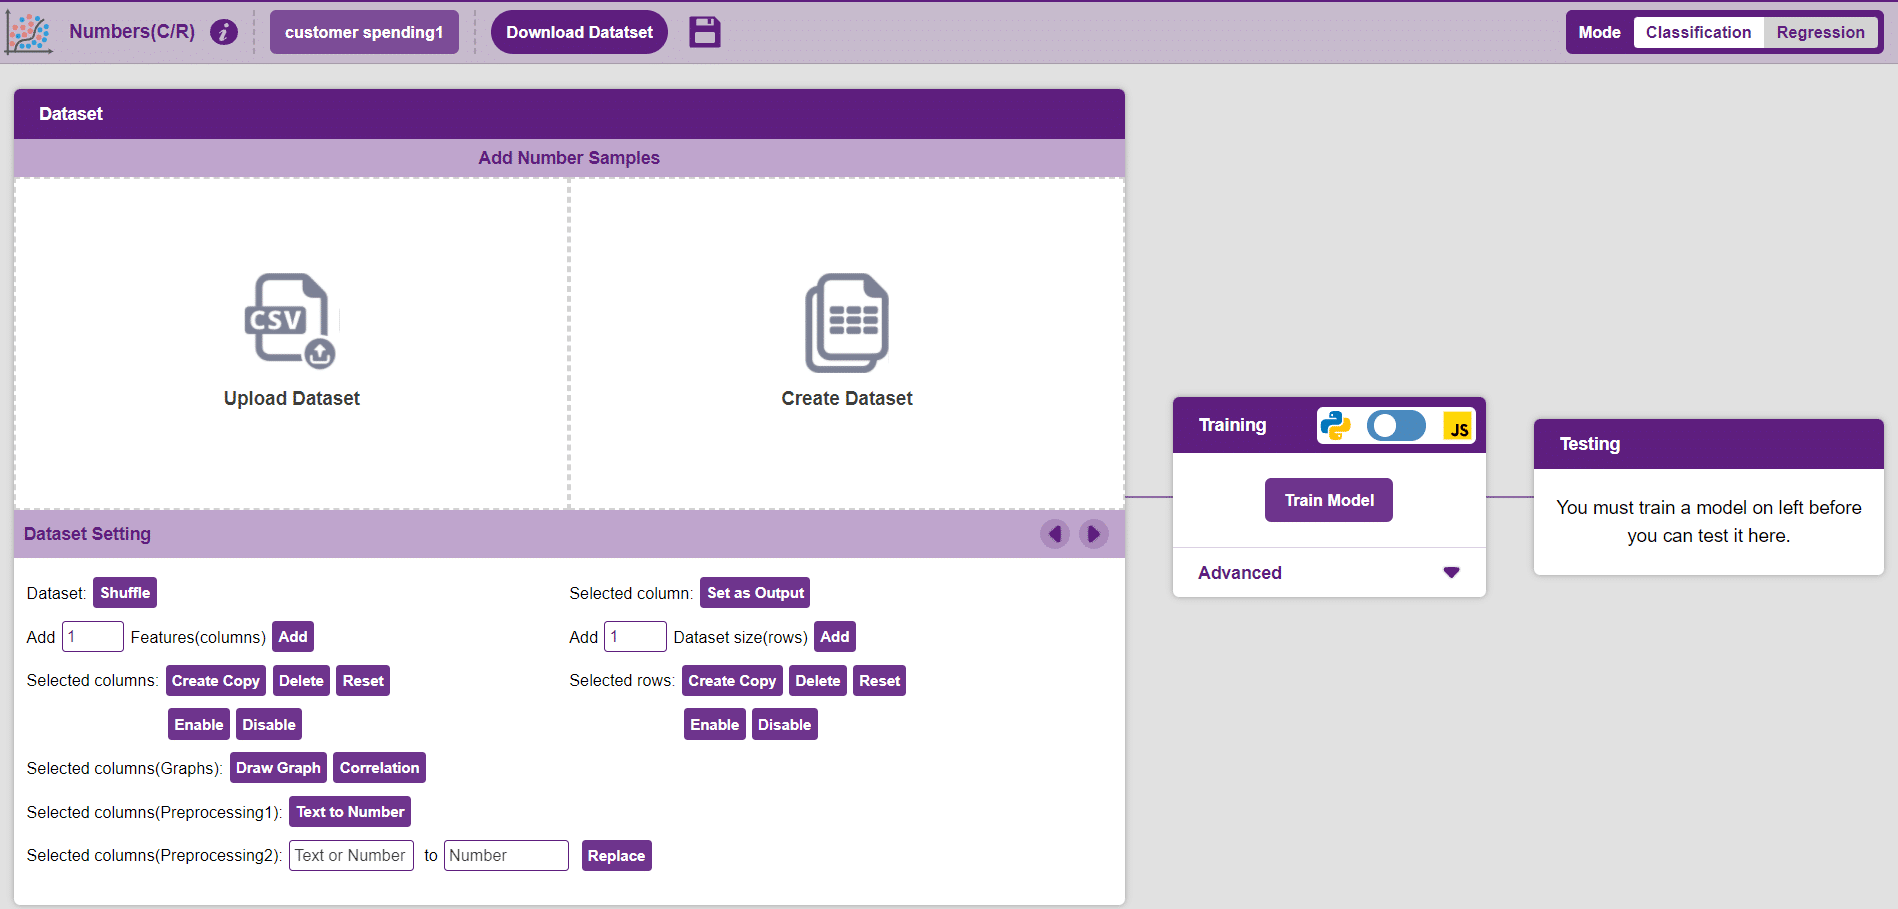
    5. You shall see the Numbers C/R workflow with an option to either “Upload Dataset” or “Create Dataset”.

      Uploading/Creating Dataset

      Datasets can either be uploaded or created on the ML Environment. Lets see how it is done.

      Uploading a dataset
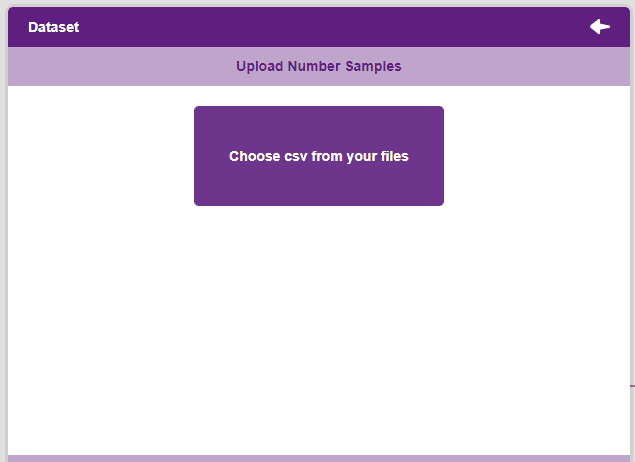
      1. To upload a dataset, click on the Upload Dataset button and the Choose CSV from your files button.
        Note: An uploaded dataset must be a “.csv” file.
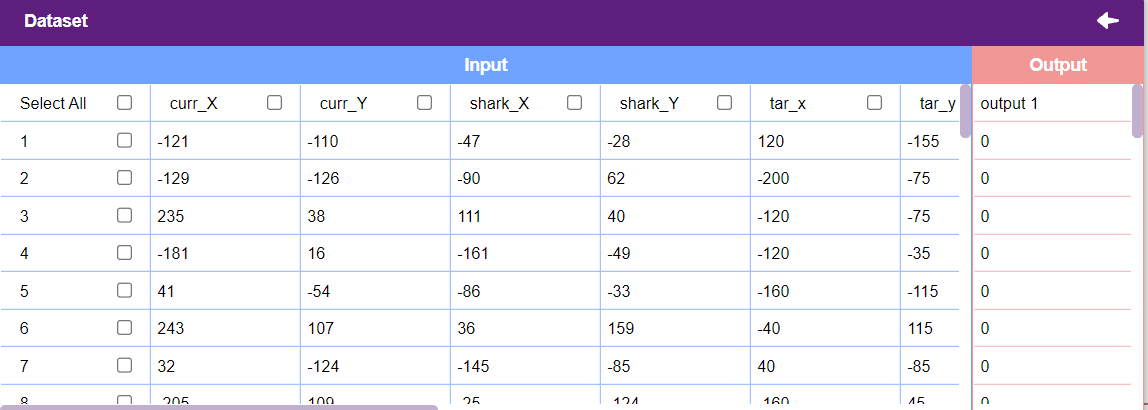
      2. Once uploaded the first 50 rows of the uploaded CSV document will show up in the window.

      3. If you look at the output column, all the values are currently “0”. Hence, first we need to create an output column.
        1. In the Dataset table, click on the tick near Select All to de-select all the columns.
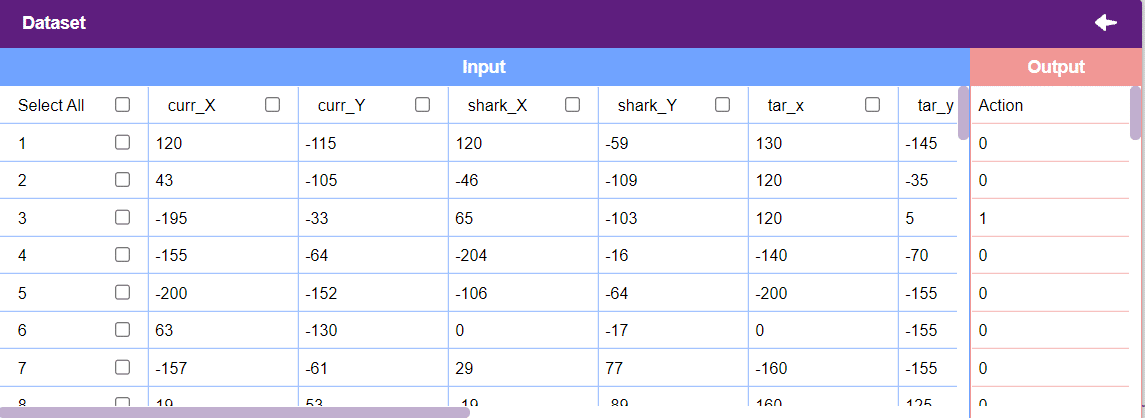
        2. click on the tick of Action column to select it. We will make this column the output.
        3. The output column must always be numerical. Hence click on the button Text to Number to convert the data within this column to numerical type.
        4. Now select it again and press the Set as Output button to set this column as Output.
        5. There is also many which is not useful in training our model and needs to be disable. So select it and click the Disable button in the Selected columns section.

          Creating a Dataset
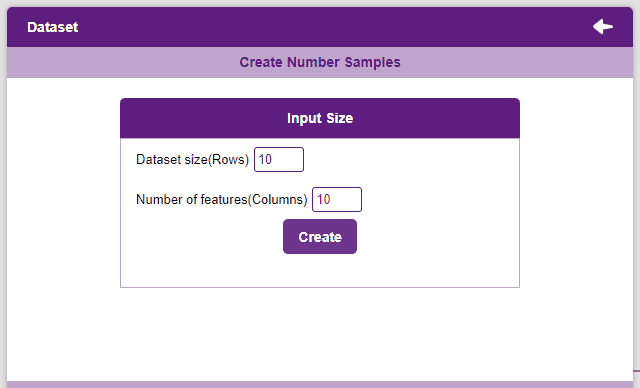
          1. To create a dataset, click on the Create Dataset button.
          2. Select the number of rows and columns that are to be added and click on the Create button. More rows and columns can be added as and when needed.

          Notes:

          1. Each column represents a feature. These are the values used by the model to train itself.
          2. The “Output” column contains the target values. These are the values that we expect the model to return when features are passed.
          3. The window only shows the first 50 rows of the dataset.
          4. Un-check the “Select All” checkbox to un-select all the columns.

          Training the Model

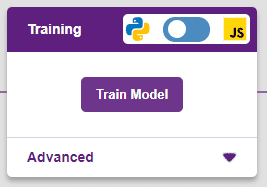
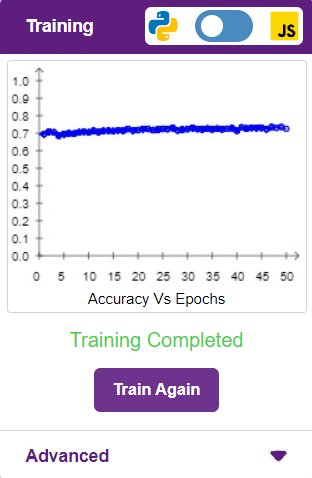
          After data is pre-processed and optimized, it’s fit to be used in model training. To train the model, simply click the “Train Model” button found in the “Training” panel.

          By training the model, meaningful information is extracted from the numbers, and that in turn updates the weights. Once these weights are saved, the model can be used to make predictions on data previously unseen.

          The model’s function is to use the input data and predict the output. The target column must always contain numbers.

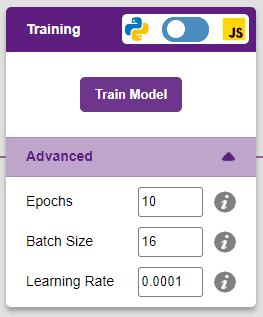
          However, before training the model, there are a few hyperparameters that need to be understood. Click on the “Advanced” tab to view them.

          There are three hyperparameters that can be altered in the Numbers(C/R) Extension:
          1. Epochs– The total number of times the data will be fed through the training model. Therefore, in 10 epochs, the dataset will be fed through the training model 10 times. Increasing the number of epochs can often lead to better performance.
          2. Batch Size– The size of the set of samples that will be used in one step. For example, if there are 160 data samples in the dataset, and the batch size is set to 16, each epoch will be completed in 160/16=10 steps. This hyperparameter rarely needs any altering.
          3. Learning Rate– It dictates the speed at which the model updates the weights after iterating through a step. Even small changes in this parameter can have a huge impact on the model performance. The usual range lies between 0.001 and 0.0001.
          Note: Hover the mouse pointer over the question mark next to the hyperparameters to see their description.
          It’s a good idea to train a numeric classification model for a high number of epochs. The model can be trained in both JavaScript and Python. In order to choose between the two, click on the switch on top of the Training panel.

          Alert: Dependencies must be downloaded to train the model in Python, JavaScript will be chosen by default.

          The accuracy of the model should increase over time. The x-axis of the graph shows the epochs, and the y-axis represents the accuracy at the corresponding epoch.

          A window will open. Type in a project name of your choice and select the “Numbers(C/R)” extension. Click the “Create Project” button to open the Numbers(C/R) window.

          Testing the Model

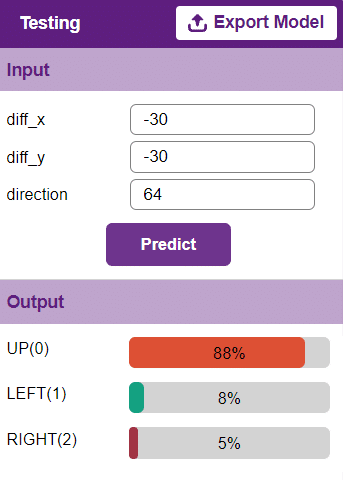
          To test the model, simply enter the input values in the “Testing” panel and click on the “Predict” button.

          The model will return the probability of the input belonging to the classes.

      Export in Python Coding

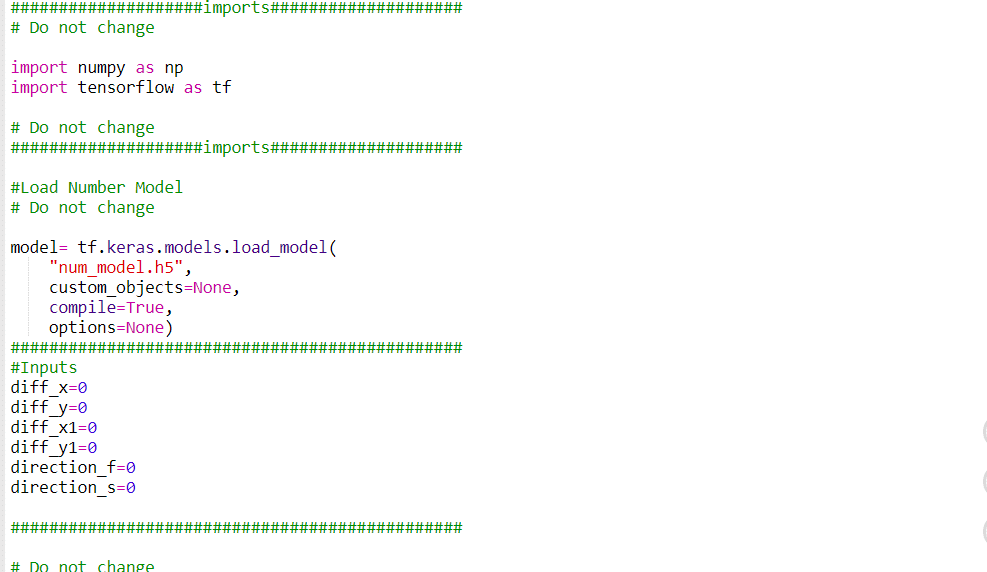
      Click on the “PictoBlox” button, and PictoBlox will load your model into the Python Coding Environment if you have opened the ML Environment in Python Coding.

    Code

    1. Creates a sprite object named “Fish”. A sprite is typically a graphical element that can be animated or displayed on a screen.
    2. Creates three sprites object named “Orange” , “Shark2” and “Button3” and also upload backdrop of “Underwater2” .
    3. Click on the Fish.py file from the Project files section.
      sprite = Sprite('Fish')
    4. Similarly, declare new sprites on the Fish.py file.
      sprite1 = Sprite('Orange')
      sprite2 = Sprite('Shark 2')
      sprite3 = Sprite('Button3')
    5. Then we will import the time, random, os, math, TensorFlow as tf  and Pandas as pd modules using the import keyword for using delay in the program later.
      1. Time – For using delay in the program.
      2. Random – For using random position.
      3. Pandas as pd – For using Data Frame.
      4. Math– For using math functions in code.
      5. Os– For reading files from Program files.
        import random
        import time
        import tensorflow as tf
        import pandas as pd
        import os
        import math
    6. Now, make 3 variables curr_x, curr_y, ang_f, mov_f and score with initial values 4, 3, 50, and 0 respectively.
      1. curr_x – To store the initial x – position of fish.
      2. curr_y – To store the initial y – position of fish.
      3. shark_x – To store the initial x – position of shark.
      4. shark_y – To store the initial y – position of shark.
      5. score – To store the score while playing the game.
      6. chance– To store the chance of fish while playing the game.
      7. fish_d– To store increment value in direction of fish on pressing specific key.
      8. fish_m – To store increment value in movement of fish on pressing specific key.
      9. shark_m – To store increment value in movement of shark on pressing specific key.
      10. shark_d – To store increment value in direction of shark on pressing specific key.
      11. angle_f – To store increment value in angle of fish on pressing specific key.
      12. angle_s – To store increment value in angle of shark on pressing specific key.
        curr_x = 25 
        curr_y = 108 
        shark_x=-177 
        shark_y=116 
        score=0 
        chance=5 
        fish_d=20 
        fish_m=35 
        shark_m=25 
        shark_d= 20 
        angle_f=90 
        angle_s=90
    7. Now set initial position and angle of fish and shark both.
      sprite.setx(curr_x) 
      sprite.sety(curr_y) 
      sprite2.setx(shark_x) 
      sprite2.sety(shark_y) 
      sprite.setdirection(DIRECTION=angle_f) sprite2.setdirection(DIRECTION=angle_s)
    8. Now, make a function settarget1() in which we are generating food at a random position. We pass one argument “t” in the function for generating target food in the greed position of the t gap.
      1. x and y – To generate the fish at random position on stage.
      2. x1 and y1 – To generate the food at random position on stage.
      3. x2 and y2 – To generate the shark at random position on stage.
      4. time.sleep – For giving the time delay.
      5. sprite.set()– To Set the position of fish at random position on stage.
      6. sprite1.set()– To Set the position of food at random position on stage.
      7. sprite2.set()– To Set the position of shark at random position on stage.
        def settarget1(t):
          x = random.randrange(-200, 200, t)
          y = random.randrange(-155, 155, t)
          x1 = random.randrange(-200, 200, t)
          y1 = random.randrange(-155, 155, t)
          x2 = random.randrange(-200, 200, t)
          y2 = random.randrange(-155, 155, t)
          time.sleep(0.1)
          sprite1.setx(x1)
          sprite1.sety(y1)
          sprite.setx(x)
          sprite.sety(y)
          sprite2.setx(x2)
          sprite2.sety(y2)
          return x, y, x1, y1, x2, y2
    9. Now, make a function settarget() in which we are generating food at a random position. We pass one argument “m” in the function for generating target food in the greed position of the t gap.
      1. x and y – To generate the food at random position on stage.
      2. time.sleep – For giving the time delay.
      3. sprite1.set()– To Set the position of food at random position on stage.
        def settarget(m):
        x = random.randrange(-200, 200, m)
        y = random.randrange(-155, 155, m)
        time.sleep(0.1)
        sprite1.setx(x)
        sprite1.sety(y)
        return x, y 
    10. Now set the target (food). In this, fish are chasing the food, and target_x  and  target_y should be equal to the x and y positions of the food.
      target_x, target_y = settarget(40)
    11. Now, make a function runprediction() in which we are predicting class (Left, Up, right) by taking argument from user . We pass three arguments “diff_x”, “diff-y”, “diff_x1”, “diff_y1”, “ang1”, “ang2” in the function.
      1. inputvalue – To store input parameters of function in array.
      2. model.predict() – For predicting output from trained model.
      3. np.argmax(,)– To find the most probable prediction output.
        def runprediction(diff_x, diff_y, diff_x1, diff_y1, ang1, ang2):
          inputValue=[diff_x, diff_y, diff_x1, diff_y1, ang1, ang2]
          #Input Tensor
          inputTensor = tf.expand_dims(inputValue, 0)
          #Predict
          predict = model.predict(inputTensor)
          predict_index = np.argmax(predict[0], axis=0)
          #Output
          predicted_class = class_list[predict_index]
          return predicted_class
    12. After that, we will use the while True loop to run the code indefinitely. Don’t forget to add a colon ‘:’ just after the loop to avoid errors.
      While True :
    13. Now write the script for moving the Shark in forward direction and change clockwise or anticlockwise direction by fix value with the help of a conditional statement.
      1. If the up arrow key is pressed then fish will move fish_m position in same direction.
      2. After pressing the up arrow key, the shark_x and shark_y variables update by storing the current position of the shark.
        if sprite.iskeypressed("up arrow"):
            sprite2.move(shark_m)
            shark_x=sprite2.x()
            shark_y=sprite2.y() 
    14. Repeat the process for the set direction in clockwise or anticlockwise.
        if sprite.iskeypressed("left arrow"):
          angles = angle_s - shark_d
          sprite2.setdirection(DIRECTION=angles)
          
        if sprite.iskeypressed("right arrow"):
          angles = angle_s + shark_d
          sprite2.setdirection(DIRECTION=angles)
    15. Find the direction of shark and fish using the Python pictoblox function and store prediction value in ‘move’ variable.
      angle_f=sprite.direction()
      angle_s=sprite2.direction()
      move = runprediction(curr_x- target_x, curr_y-target_y, shark_x-curr_x, shark_y-curr_y, angle_f, angle_s)
    16. Now write the script for moving the Fish in forward direction and change clockwise or anticlockwise direction by fix value with the help of a conditional statement.
      1. If the predicted value is “UP” then fish will move fish_m position in same direction.
      2. If the predicted value is “LEFT” then fish will change direction by some constant value in anticlockwise direction.
      3. If the predicted value is “RIGHT” then fish will change direction by some constant value in clockwise direction.
        if move == "UP":
            sprite.move(fish_m)
            curr_x=sprite.x()
            curr_y=sprite.y()
        
        if move == "LEFT":
            angle = angle_f - fish_d
            sprite.setdirection(DIRECTION=angle)
        
        if move == "RIGHT":
            angle = angle_f + fish_d
            sprite.setdirection(DIRECTION=angle)
    17. Write the conditional statement for the chance variable. If the fish and shark position difference is less than 20, then the chance should be decreased by one.
       if abs(shark_x-curr_x)<20 and abs(shark_y-curr_y)<20:
          chance= chance-1
    18. Update the position of all three sprites, and if chance becomes 0, then the positions of all three sprites change randomly by the functions settarget1() and update chance value.
        if abs(shark_x-curr_x)<20 and abs(shark_y-curr_y)<20:
          chance= chance-1
          curr_x, curr_y, target_x, target_y, shark_x, shark_y = settarget1(40)
          sprite3.say(("score: ",score ," and chance:  ",chance,""))
          if (chance == 0):
            chance=5
    19. Again write the conditional statement for the score variable if the fish and food position difference is less then 20 then the score should be increased by one and food positions change randomly by the function settarget().
      if abs(curr_x-target_x)<20 and abs(curr_y-target_y)<20: 
          score = score + 1 
          sprite.say(("your score is: {}".format(score)))
          target_x, target_y = settarget(4)
    20. The final code is as follows:
      sprite = Sprite('Fish')
      sprite1 = Sprite('Orange')
      sprite2 = Sprite('Shark 2')
      sprite3 = Sprite('Button3')
       
      import random
      import time
      import numpy as np
      import tensorflow as tf
      import pandas as pd
      import os
      import math
      #Load Number Model
      model= tf.keras.models.load_model(
      		"num_model.h5", 
      		custom_objects=None, 
      		compile=True, 
      		options=None)
      		
      #List of classes
      class_list = ['UP','RIGHT','LEFT',]  
      		
      curr_x = 25
      curr_y = 108
      shark_x=-177
      shark_y=116
      score=0
      chance=5
      fish_d=20
      fish_m=35
      shark_m=25
      shark_d=20
      angle_f=90
      angle_s=90
      
      sprite3.say(("score: ",score ," and chance:  ",chance,""))
       
      sprite.setx(curr_x) 
      sprite.sety(curr_y) 
      sprite2.setx(shark_x) 
      sprite2.sety(shark_y) 
      sprite.setdirection(DIRECTION=angle_f) 
      sprite2.setdirection(DIRECTION=angle_s)
      
      def settarget1(t):
        x = random.randrange(-200, 200, t)
        y = random.randrange(-155, 155, t)
        x1 = random.randrange(-200, 200, t)
        y1 = random.randrange(-155, 155, t)
        x2 = random.randrange(-200, 200, t)
        y2 = random.randrange(-155, 155, t)
        time.sleep(0.1)
        sprite1.setx(x1)
        sprite1.sety(y1)
        sprite.setx(x)
        sprite.sety(y)
        sprite2.setx(x2)
        sprite2.sety(y2)
        return x, y, x1, y1, x2, y2
        
      def settarget(m):
        x = random.randrange(-200, 200, m)
        y = random.randrange(-155, 155, m)
        time.sleep(0.1)
        sprite1.setx(x)
        sprite1.sety(y)
        return x, y
        
      target_x, target_y = settarget(40)
      def runprediction(diff_x, diff_y, diff_x1, diff_y1, ang1, ang2):
        inputValue=[diff_x, diff_y, diff_x1, diff_y1, ang1, ang2]
        #Input Tensor
        inputTensor = tf.expand_dims(inputValue, 0)
        #Predict
        predict = model.predict(inputTensor)
        predict_index = np.argmax(predict[0], axis=0)
        #Output
        predicted_class = class_list[predict_index]
        return predicted_class
      while True:
        if sprite.iskeypressed("up arrow"):
          sprite2.move(shark_m)
          shark_x=sprite2.x()
          shark_y=sprite2.y()
          
        if sprite.iskeypressed("left arrow"):
          angles = angle_s - shark_d
          sprite2.setdirection(DIRECTION=angles)
        if sprite.iskeypressed("right arrow"):
          angles = angle_s + shark_d
          sprite2.setdirection(DIRECTION=angles)
       
        angle_f=sprite.direction()
        angle_s=sprite2.direction()
        move = runprediction(curr_x- target_x, curr_y-target_y, shark_x-curr_x, shark_y-curr_y, angle_f, angle_s)
        
        if move == "UP":
          sprite.move(fish_m)
          curr_x=sprite.x()
          curr_y=sprite.y()
      
        if move == "LEFT":
          angle = angle_f - fish_d
          sprite.setdirection(DIRECTION=angle)
      
        if move == "RIGHT":
          angle = angle_f + fish_d
          sprite.setdirection(DIRECTION=angle)
       
        if abs(shark_x-curr_x)<20 and abs(shark_y-curr_y)<20:
          chance= chance-1
          curr_x, curr_y, target_x, target_y, shark_x, shark_y = settarget1(40)
          sprite3.say(("score: ",score ," and chance:  ",chance,""))
          if (chance == 0):
            chance=5
        if abs(curr_x-target_x)<35 and abs(curr_y-target_y)<35:
          score = score + 1
          sprite3.say(("score: ",score ," and chance:  ",chance,""))
          target_x, target_y = settarget(4)
      
        time.sleep(0.2) 
      

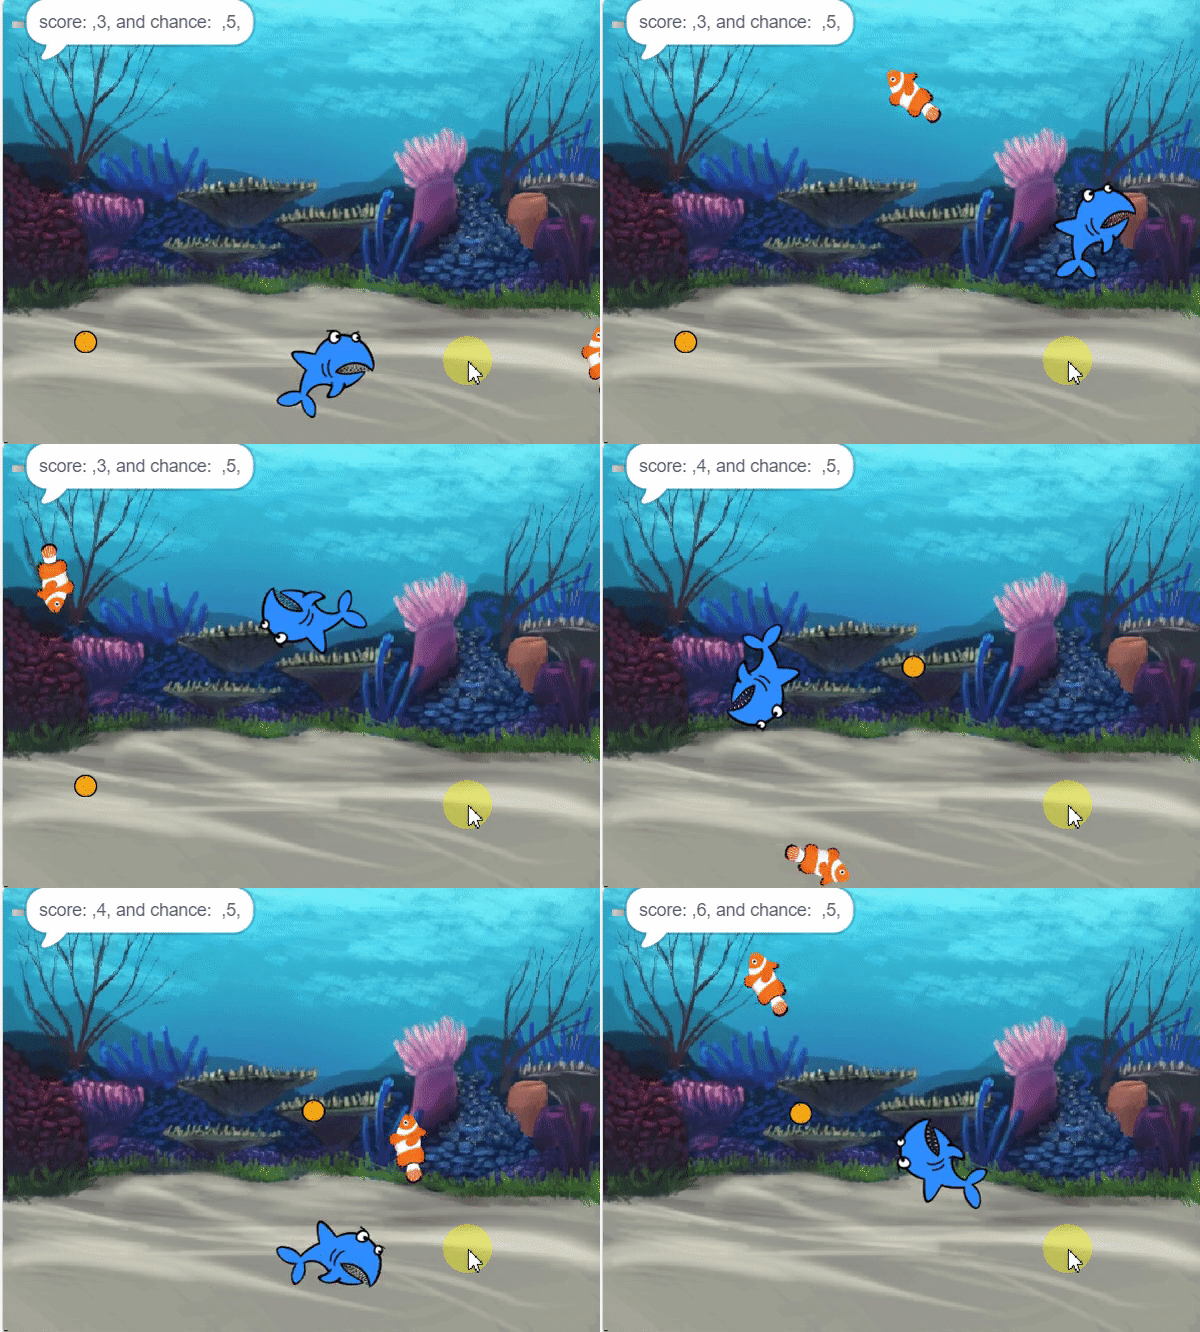
      Final Result

      Conclusion

      Creating a Machine Learning Model of “Shark Attack: Hungry for Fish” game can be both complex and time-consuming. Through the steps demonstrated in this project, you can create your own Machine Learning Model of automated game. Once trained, you can export the model into the Python Coding Environment, where you can tweak it further to give you the desired output. Try creating a Machine Learning Model of your own today and explore the possibilities of Number Classifier in PictoBlox!

Read More
All articles loaded
No more articles to load