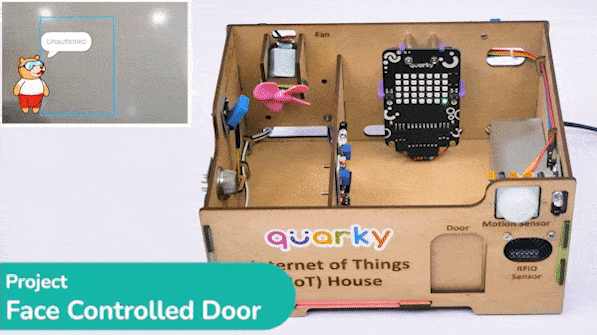
The project uses face recognition to identify authorized people and opens the door accordingly.
Circuit
We are using 2 devices in this project:
- IR Sensor: The IR sensor provides information if there is an obstacle in front or not. The IR sensor connections are as follows:
- GND Pin connected to GND of the Quarky Expansion Board.
- VCC Pin connected to VCC of the Quarky Expansion Board.
- Signal Pin connected to D3 of the Quarky Expansion Board.
- Servo Motor: The servo motor controls the Door of the IoT house which is connected to the servo port of 5 of the Quarky Expansion Board.
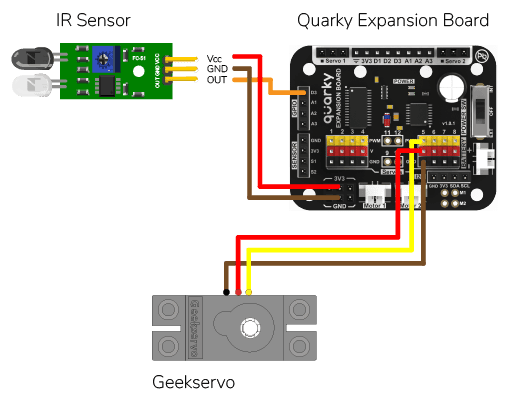
Alert: Make sure you have the Door Servo Motor calibrated.
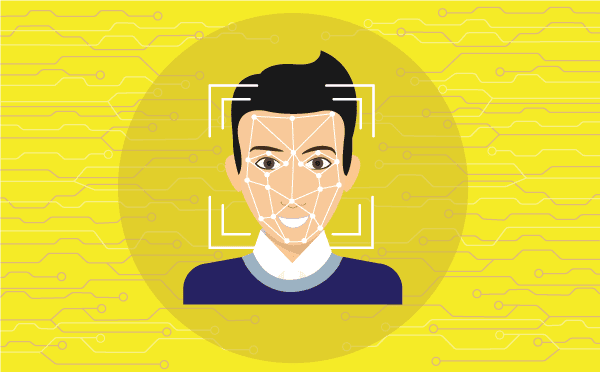
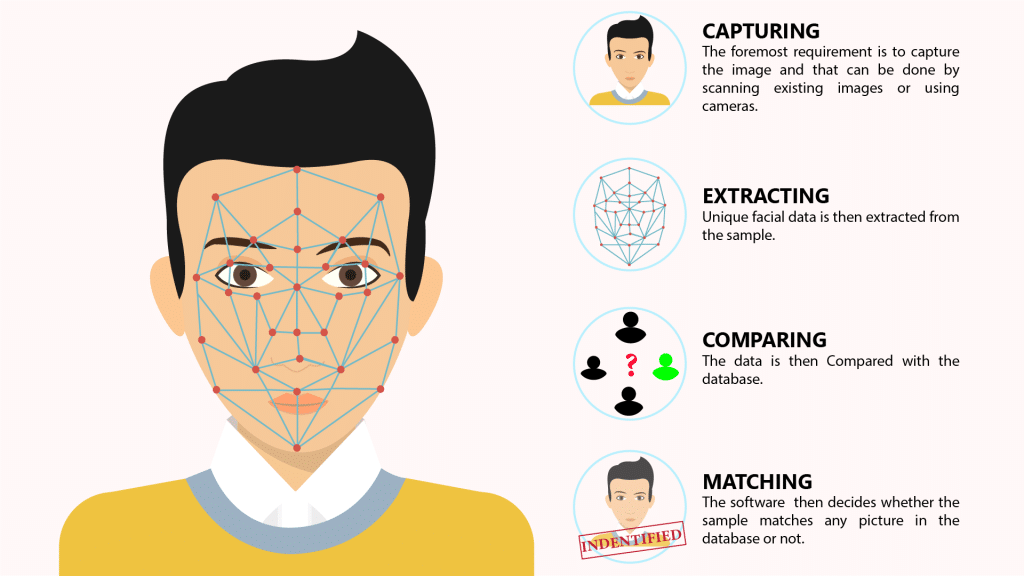
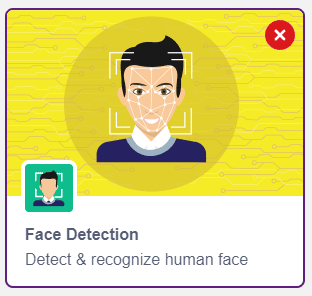
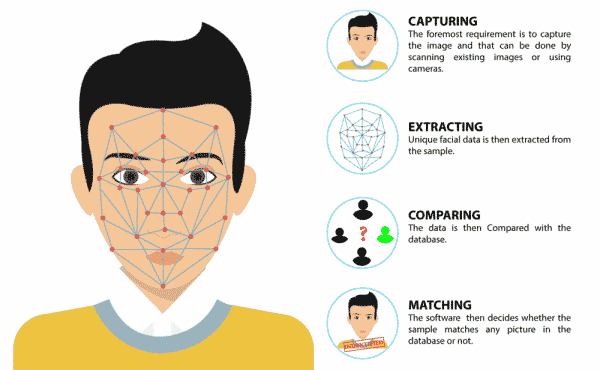
Face Recognition
We will be using Face Detection extension for making the face recognition application.
Storing the Face Authorised for IoT House
This code is used to add a new face to a system:
- The first step is to create a Sprite object with the name ‘Tobi‘. Then, a Face Detection object is created. The time library is imported.
- Then, a function called addFace() is defined. This function allows us to add a new face to the system. First, the video feed from the camera is turned on. Then, the camera is analyzed for a face. If one face has been detected, the user is asked to select a slot (1 to 10) and enter a name for the new face which is then added to the system. Finally, the video feed from the camera is turned off.
- The code runs a loop, which checks if the ‘a‘ key has been pressed. If it is, the addFace() function is called.
#Create a new Sprite object with the name 'Tobi'
sprite = Sprite('Tobi')

#Create a new Face Detection object
fd = FaceDetection()

#Import the time library
import time

#Set the threshold for face detection to 0.5
fd.setthreshold(0.5)
#Turn off the video feed from the camera
fd.video("off", 0)
#Enable the box to be drawn around the detected face
fd.enablebox()

#Define a function that adds a new face to the system
def addFace():
  #Create a flag to keep track if a new face has been added
  faceFlag = 0

  #Turn on the video feed from the camera
  fd.video("on", 0)
  time.sleep(1)

  #Keep looping until a new face has been added
  while faceFlag == 0:
    #Analyse the camera for a face
    fd.analysecamera()

    #Check if one face has been detected
    if fd.count() == 1:
      #Ask the user which slot the face should be added to
      sprite.input("Select the slot (1 to 10)?")
      #Store the slot number the user provided
      faceSlot = sprite.answer()

      #Ask the user to enter a name for the new face
      sprite.input("Enter the name of the face")
      #Store the name the user provided
      faceName = sprite.answer()

      #Add the face to the system with the provided slot number and name
      fd.addclassfromcamera(faceSlot, faceName)

      #Set the faceFlag to 1 to stop the loop
      faceFlag = 1

  #Turn off the video feed from the camera
  fd.video("off", 0)

#Keep running the loop forever
while True:
  #Check if the 'a' key has been pressed
  if sprite.iskeypressed("a"):
    #If yes, call the addFace() function
    addFace()
Working of an IR Sensor
An Infrared sensor is a type of sensor that senses if something is close to it or not. The IR stands for Infrared sensor. Infrared is the light out of our visible spectrum.

An IR sensor has a white LED (transmitter) and a photodiode (receiver). The transmitter emits IR light, and the receiver detects reflected light from objects within the sensor’s range, which can be adjusted with a potentiometer. The sensor is indicated by two LED indicators, a power LED which is always on, and a signal LED which is on when an object is detected and off when nothing is detected.
The signal LED has two states or situations:
- ON (Active) when it detects an object
- OFF (Inactive) when it doesn’t detect any object
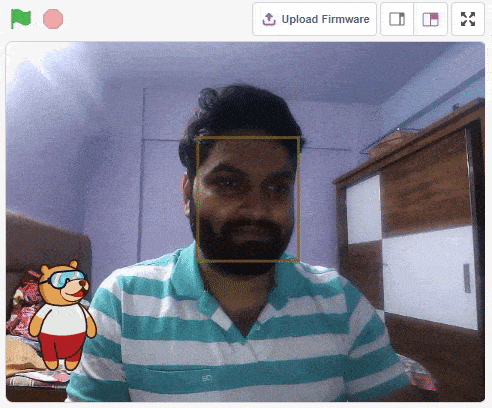
Python Code for IR & Face Recognition-Based Smart Door Opening System
This code creates a program that can add a new face to the system, and then recognize and authenticate the user:
- It libraries of Sprite, FaceDetection, Quarky, Expansion, and IoTHouse to perform these tasks. It also imports the time library for timing purposes.
- The program sets the threshold for face detection to 0.5, turns off the video feed from the camera, and enables the box to be drawn around the detected face.
- It also moves a servo on the expansion board to position 5 and moves it to 100 degrees to close the door.
- It defines two functions called addFace() and authenticate().
- The authenticate() function turns on the video feed from the camera, recognizes the face in the camera, and speaks out the name of the recognized user if the face has been recognized. It then returns 1 to indicate the user has been authenticated.
- The program then keeps running the loop forever. It checks if the ‘a‘ key has been pressed and if yes, calls the addFace() function.
- It also checks if the IR sensor is active and if yes, calls the authenticate() function. If the user has been authenticated, it moves the servo to 0 degrees to open the door and then back to 100 degrees to close the door after some time.
#Create a new Sprite object with the name 'Tobi'
sprite = Sprite('Tobi')

#Create a new Face Detection object
fd = FaceDetection()

#Import the time library
import time

#Create a new Quarky object
quarky = Quarky()

#Create a new Expansion object
expansion = Expansion()
house = IoTHouse()

#Set the threshold for face detection to 0.5
fd.setthreshold(0.5)
#Turn off the video feed from the camera
fd.video("off", 0)
#Enable the box to be drawn around the detected face
fd.enablebox()

#Move a servo on the expansion board to position 5 and move it to 100 degrees
expansion.moveservo(5, 100);

#Define a function that adds a new face to the system
def addFace():
  #Create a flag to keep track if a new face has been added
  faceFlag = 0

  #Turn on the video feed from the camera
  fd.video("on", 0)
  time.sleep(1)

  #Keep looping until a new face has been added
  while faceFlag == 0:
    #Analyse the camera for a face
    fd.analysecamera()

    #Check if one face has been detected
    if fd.count() == 1:
      #Ask the user which slot the face should be added to
      sprite.input("Select the slot (1 to 10)?")
      #Store the slot number the user provided
      faceSlot = sprite.answer()

      #Ask the user to enter a name for the new face
      sprite.input("Enter the name of the face")
      #Store the name the user provided
      faceName = sprite.answer()

      #Add the face to the system with the provided slot number and name
      fd.addclassfromcamera(faceSlot, faceName)

      #Set the faceFlag to 1 to stop the loop
      faceFlag = 1

  #Turn off the video feed from the camera
  fd.video("off", 0)


#Define a function that authenticates the user
def authenticate():
  #Turn on the video feed from the camera
  fd.video("on", 0)
  time.sleep(1)

  #Recognise the face in the camera
  fd.recognisefromstage()

  #Check if one or more face has been detected
  if fd.count() > 0:
    #Loop through all the detected faces
    for i in range(1, fd.count() + 1):
      #Check if the face has been recognised
      if fd.getclassname(i) != "unknown":
        #Speak out the name of the recognised user
        sprite.say("Authorised - " + fd.getclassname(i), 2)

        #Turn off the video feed from the camera
        fd.video("off", 0)

        #Return 1 to indicate the user has been authenticated
        return 1

  #Turn off the video feed from the camera
  fd.video("off", 0)
  #Return 0 to indicate the user has not been authenticated
  return 0

#Keep running the loop forever
while True:
  #Check if the 'a' key has been pressed
  if sprite.iskeypressed("a"):
    #If yes, call the addFace() function
    addFace()

  #Check if the space key has been pressed
  if house.irstatus("D3"):
    #If yes, call the authenticate() function
    if authenticate() == 1:
      #Move the servo to 0 degrees
      expansion.moveservo(5, 0)
      time.sleep(2)
      #Move the servo back to 100 degrees
      expansion.moveservo(5, 100)
Output