Introduction
This project of obstacle avoidance is for a robot that will move around and look for obstacles. It uses an ultrasonic sensor to measure the distance. If the distance is less than 20 cm, it will stop and look in both directions to see if it can move forward. If it can, it will turn left or right. If not, it will make a U-turn. The robot will also light up an LED display to show where it is going.

Logic
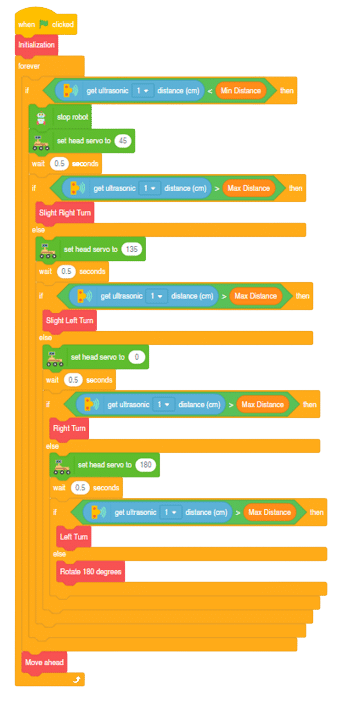
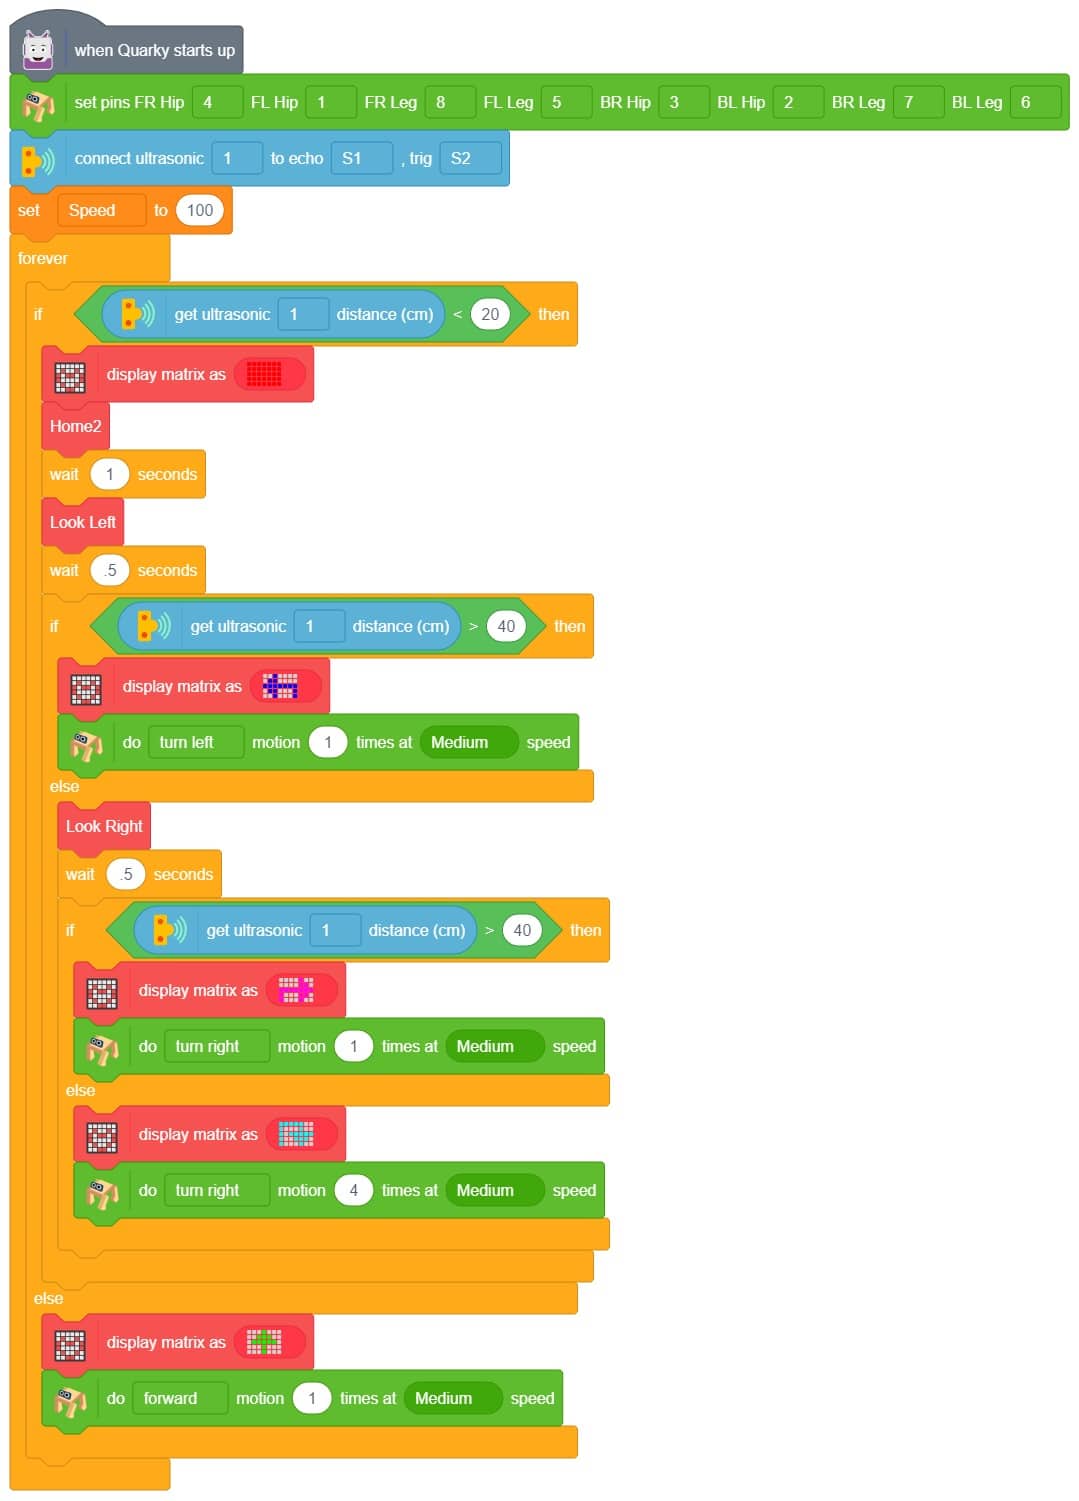
This code is making a robot move around and explore its surroundings. It has an ultrasonic sensor that can measure the distance between objects.
- First, it checks if the distance measured by the sensor is less than 20 cm.
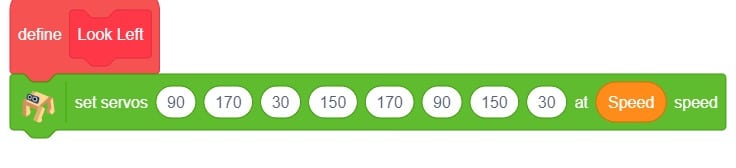
- If it is, it draws a stop sign pattern on the LED display and makes the robot stop and look straight. Then it looks left and checks if the distance is greater than 40 cm. If it is, it draws a left arrow pattern on the LED display and makes the robot turn left.
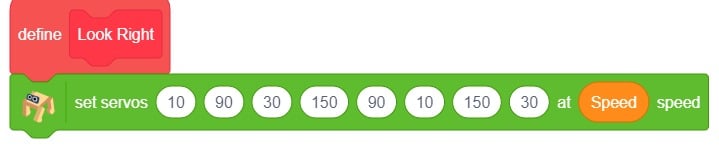
- If not, it looks right and checks if the distance is greater than 40 cm. If it is, it draws a right arrow pattern on the LED display and makes the robot turn right.
- If not, it draws a U arrow pattern on the LED display and makes the robot make a U-turn.
- If the distance measured by the ultrasonic sensor is not less than 20 cm, the code will make the robot move forward.
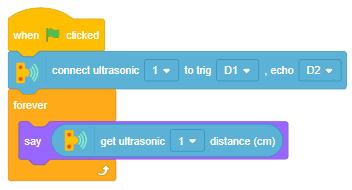
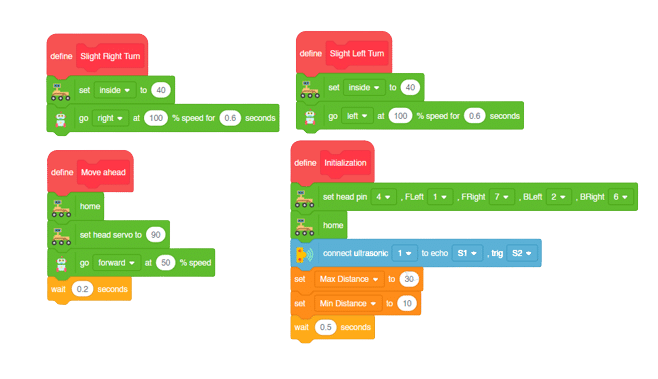
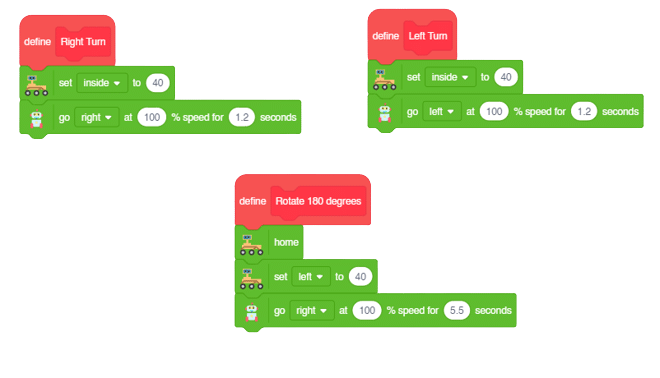
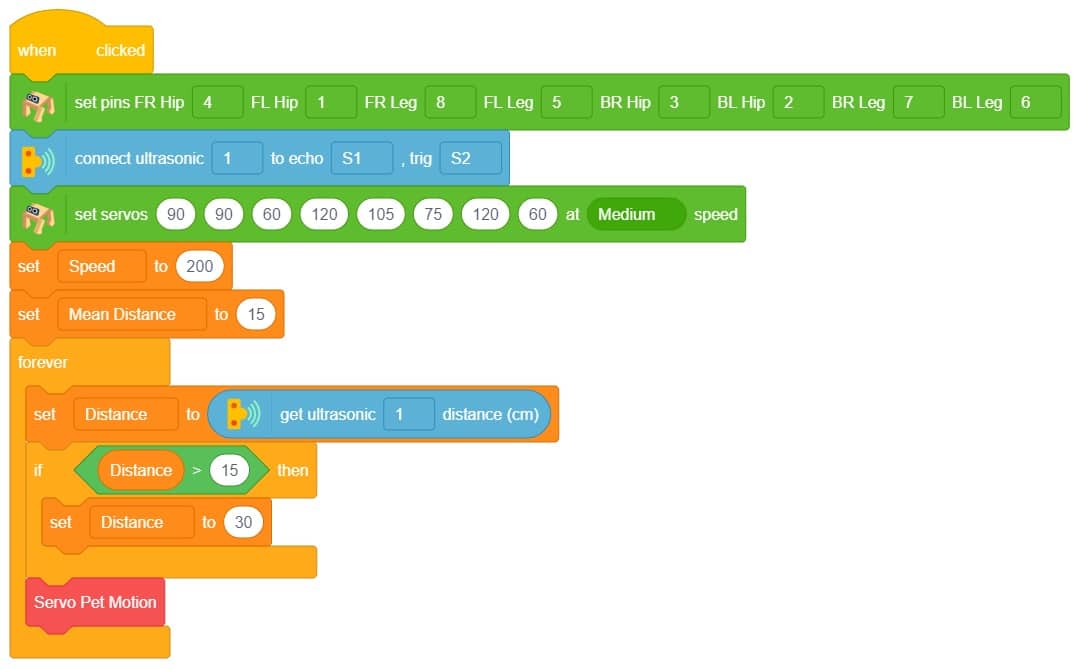
Code

Upload the code to Quarky and test it.
Output