


The block checks if the first value is equal to the other value. If the values are equal, the block returns true; if not, false. This block is not case-sensitive.
Script
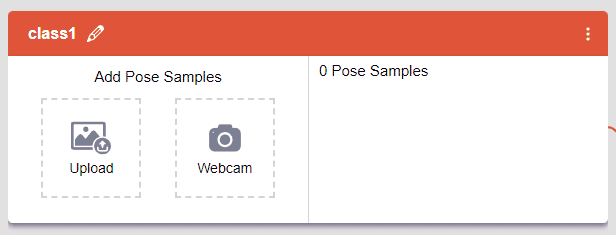
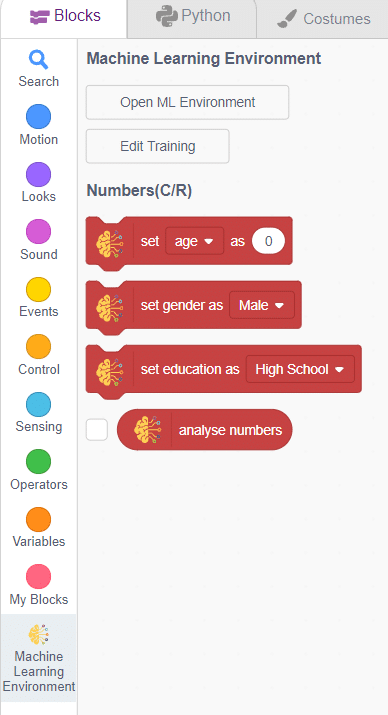
The idea is simple, we’ll add one image of each class in the “costume” column by making one new sprite which will we display on the stage according to input from user. we’ll also change name of the image according to pose.
- Add testing images to the backdrop and delete the default backdrop.
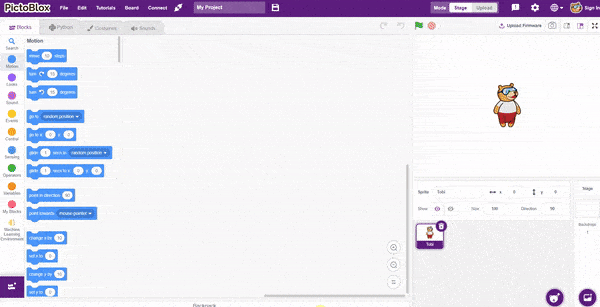
- Now, come back to the coding tab and select the Tobi sprite.
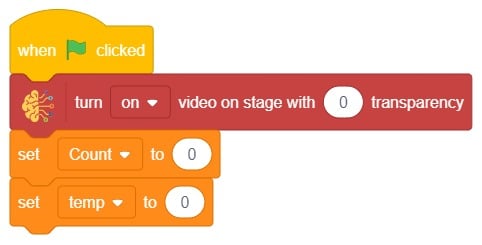
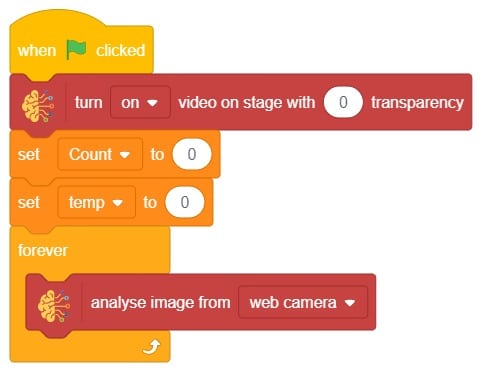
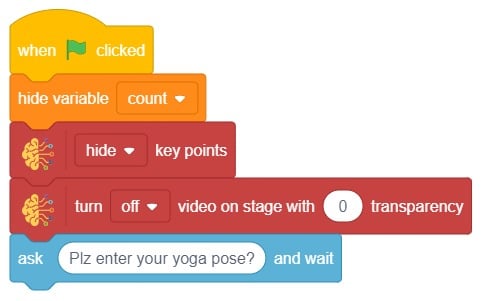
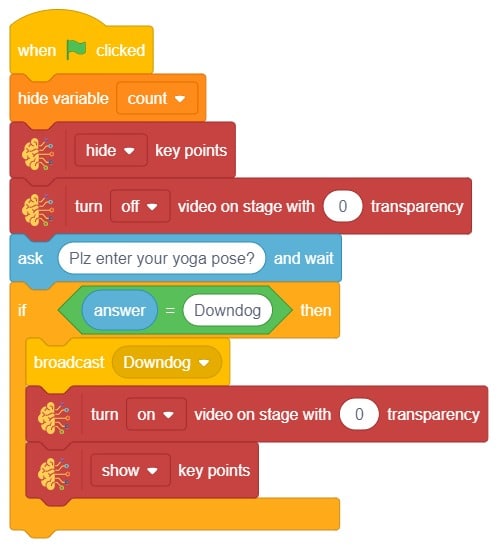
- We’ll start by adding a when flag clicked block from the Events palette.
- We made the new variable “count” by choosing the “Make a Variable” option from the Variables palette.
- Add the “hide variable () block from the Variables palette. Select count.
- Add the “turn () video on stage with () transparency” block from the Machine Learning palette. Select the off option at the first empty place, and for the second, write a 0 value.
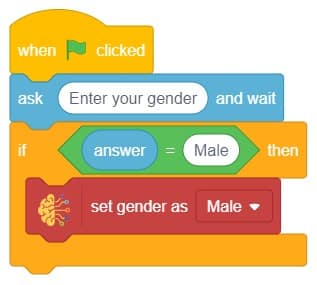
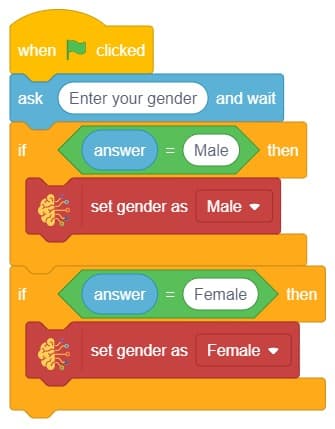
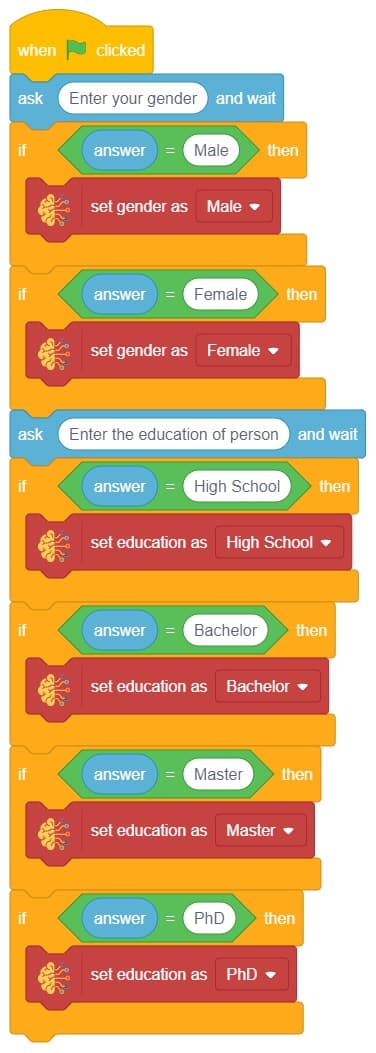
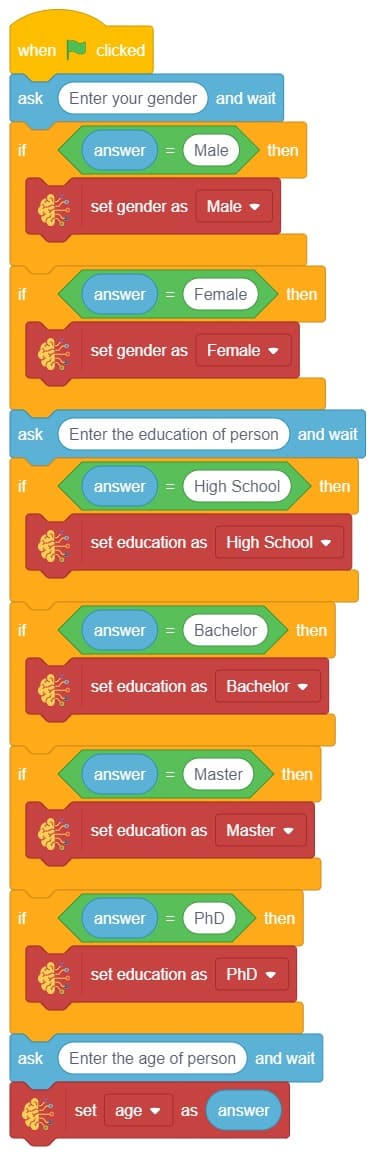
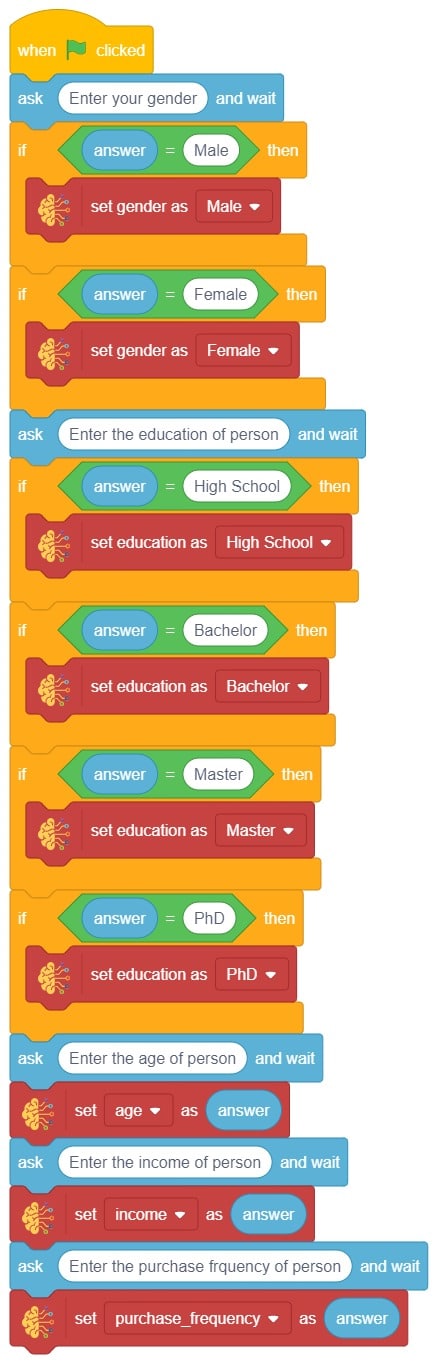
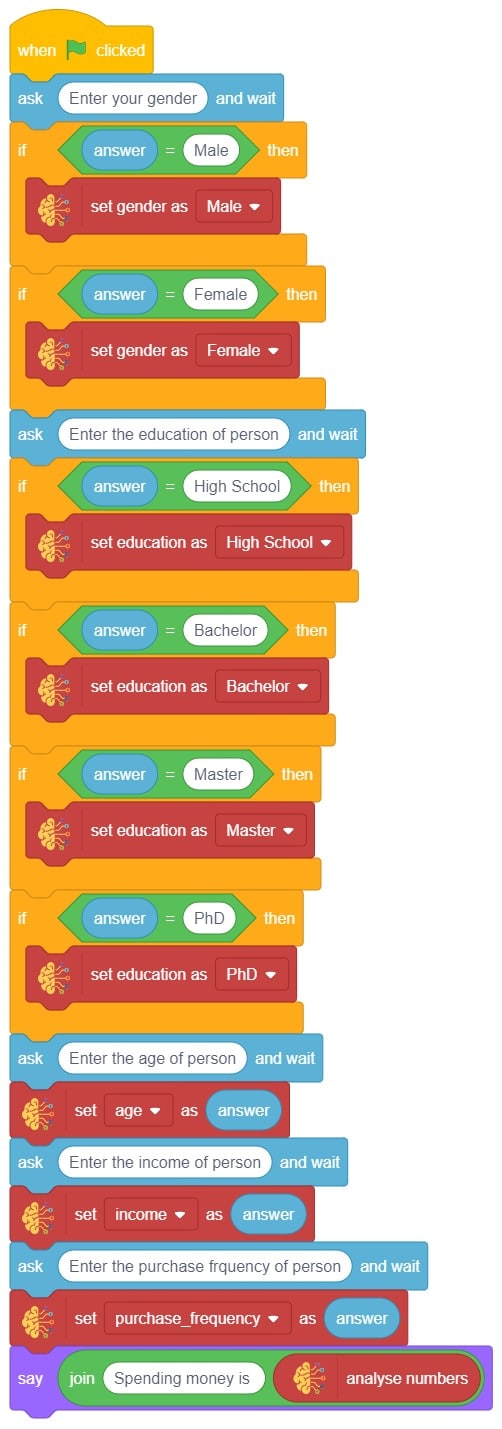
- Add an “ask () and wait” block from the Sensing palette. Write an appropriate statement in an empty place.
- Add the “if () then” block from the control palette for checking the user’s input.
- In the empty place of the “if () then” block, add a condition checking block from the operators palette block. At the first empty place, put the answer block from the sensing palette, and at the second place, write an appropriate statement.
- Inside the “if () then” block, add a “broadcast ()” block from the Events palette block. Select the “New message” option and write an appropriate statement for broadcasting a message to another sprite.
- Add the “turn () video on stage with () transparency” block from the Machine Learning palette. Select the option at the first empty place, and for the second, write a 0 value.
- Add the “() key points” block from the Machine Learning palette. Select the show option.
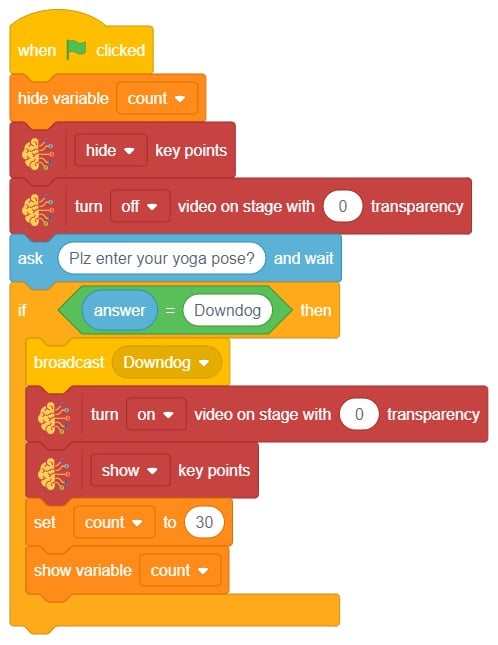
- Add the “Set () to ()” block from the Variables palette. Select the count option at the first empty place, and for the second, write a 30 value.
- Add the Show variable () block from the Variables palette. Select count.
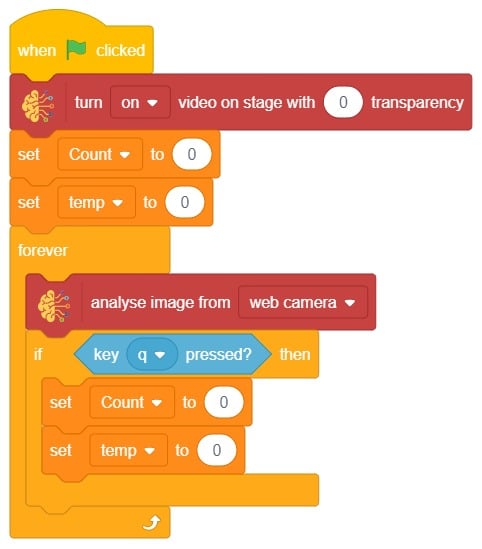
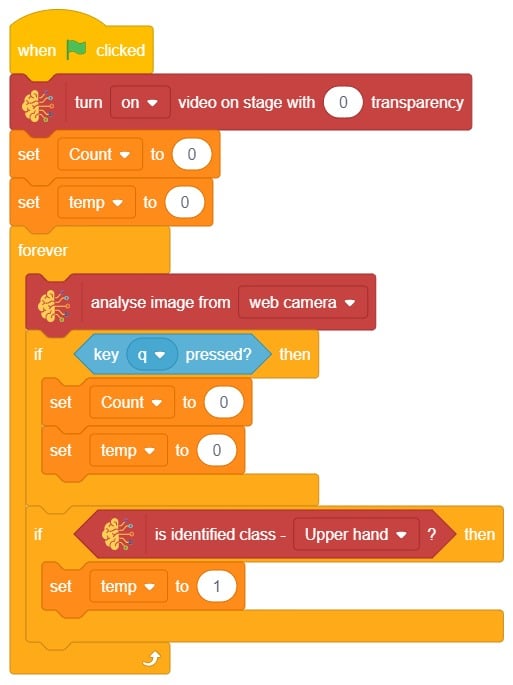
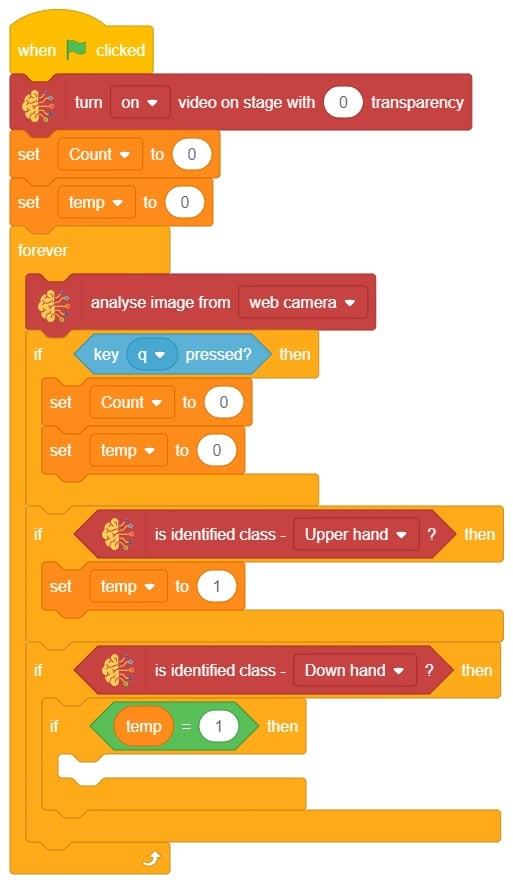
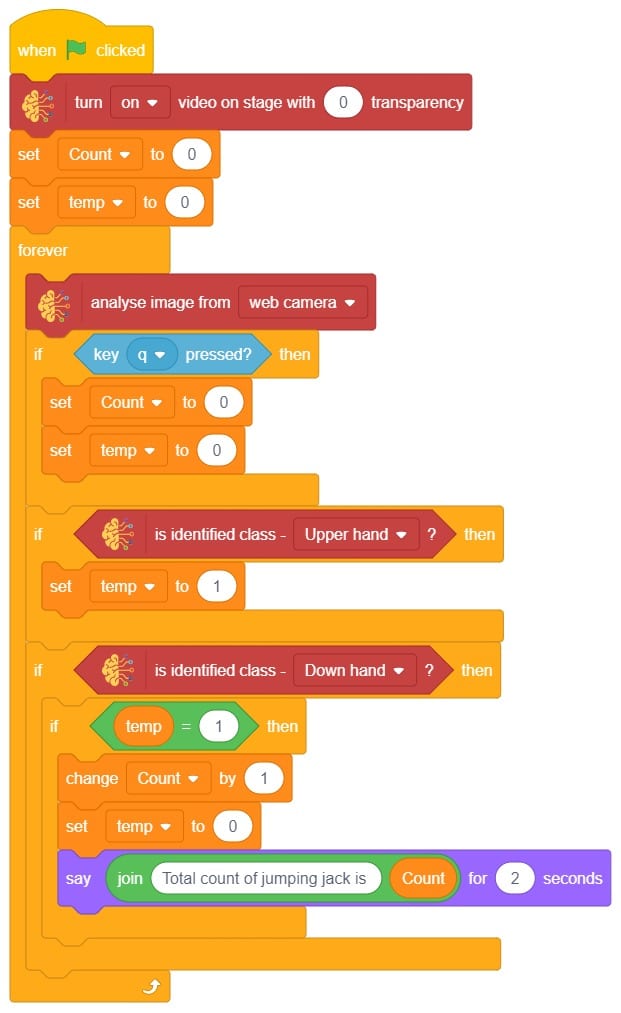
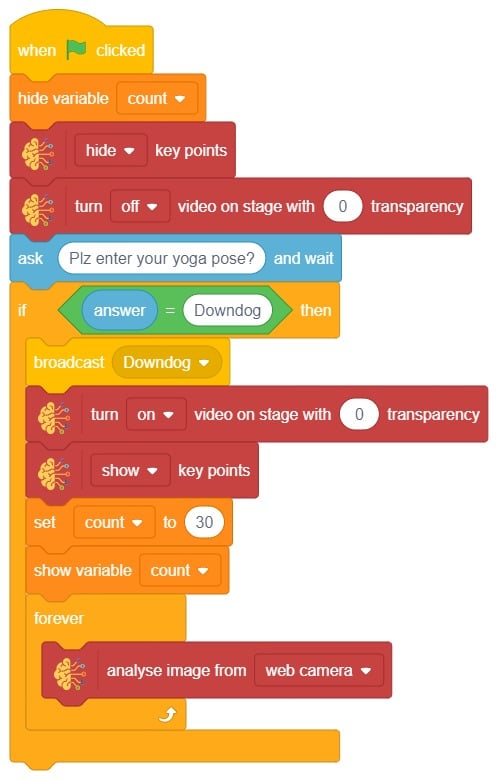
- Add “forever” from the Control palette.
- Inside the “forever” block, add an “analysis image from ()” block from the Machine Learning palette. Select the Web camera option.
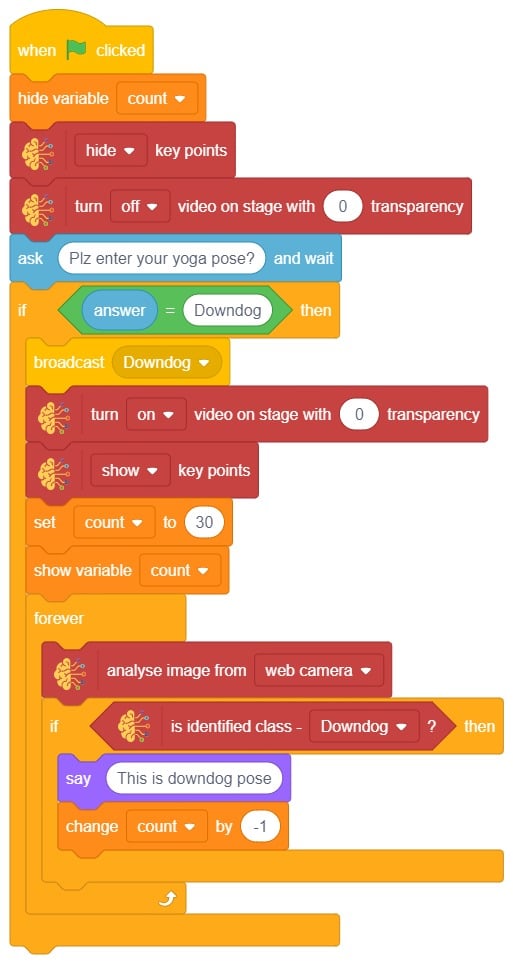
- Inside the “forever” block, add an “if () then” block from the Control palette.
- In the empty place of the “if () then” block, add an “is identified class ()” block from the Machine Learning palette. Select the appropriate class from the options.
- Inside the “if () then” block, add an “say ()” block from the Looks palette block. Write an appropriate statement in an empty place.
- Add “change () by ()” from the Variables palette. Select the count option in the first empty place, and for the second, write a -1 value.
- Add the “if () then” block from the control palette for checking the user’s input.
- In the empty place of the “if () then” block, add a condition checking block from the operators palette block. In the first empty place, put the “count” block from the sensing palette, and in the second place, write 0.
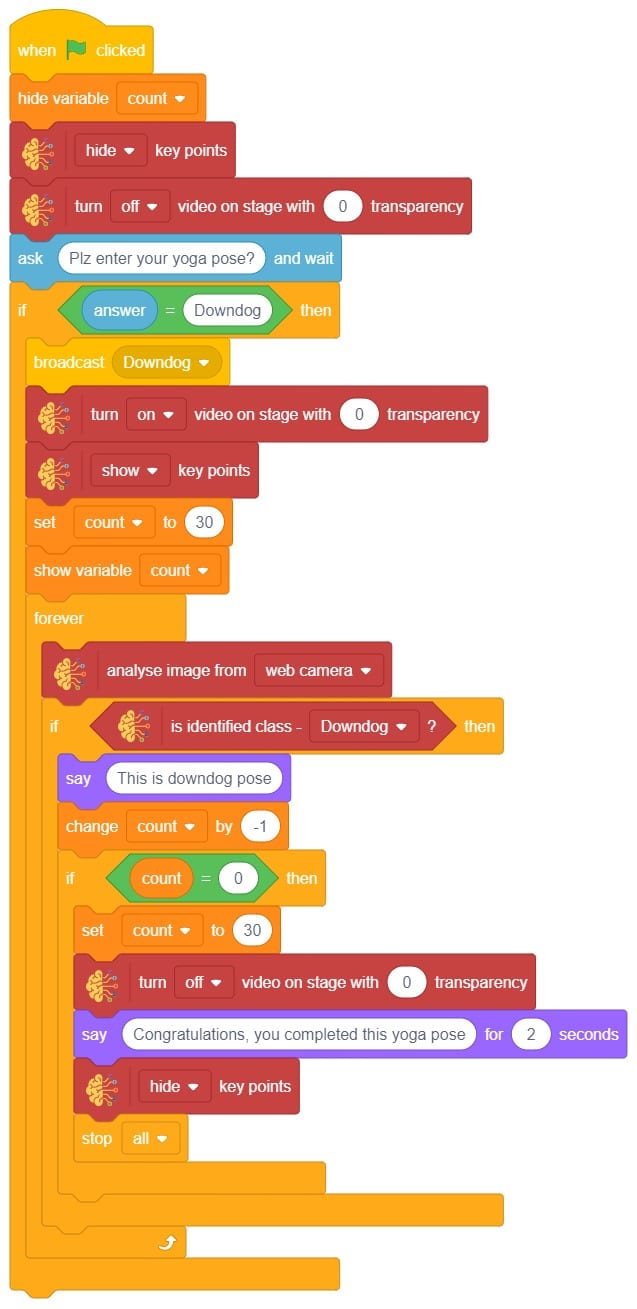
- Add the “Set () to ()” block from the Variables palette. Select the count option at the first empty place, and for the second, write a 30 value.
- Add the “turn () video on stage with () transparency” block from the Machine Learning palette. Select the off option at the first empty place, and for the second, write a 0 value.
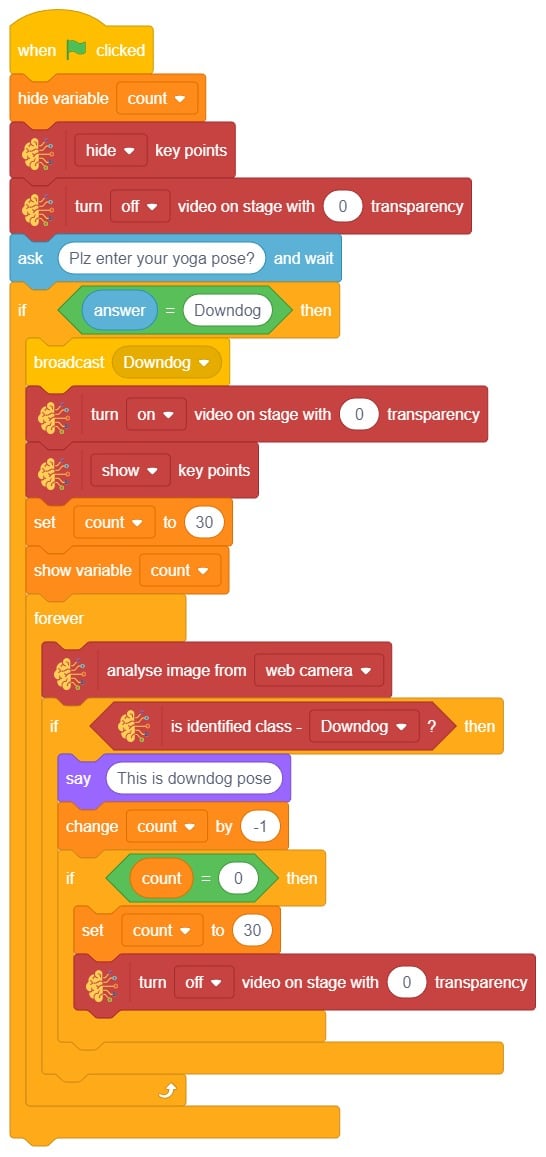
- Inside the “if () then” block, add an “say ()” block from the Looks palette block. Write an appropriate statement in an empty place.
- Add the “() key points” block from the Machine Learning palette. Select the hide option
- Add the “stop ()” block to the control pallet. Select all options.
- Repeat “if () then” block code for other classes, make appropriate changes in copying block code according to other classes, and add code just below it.
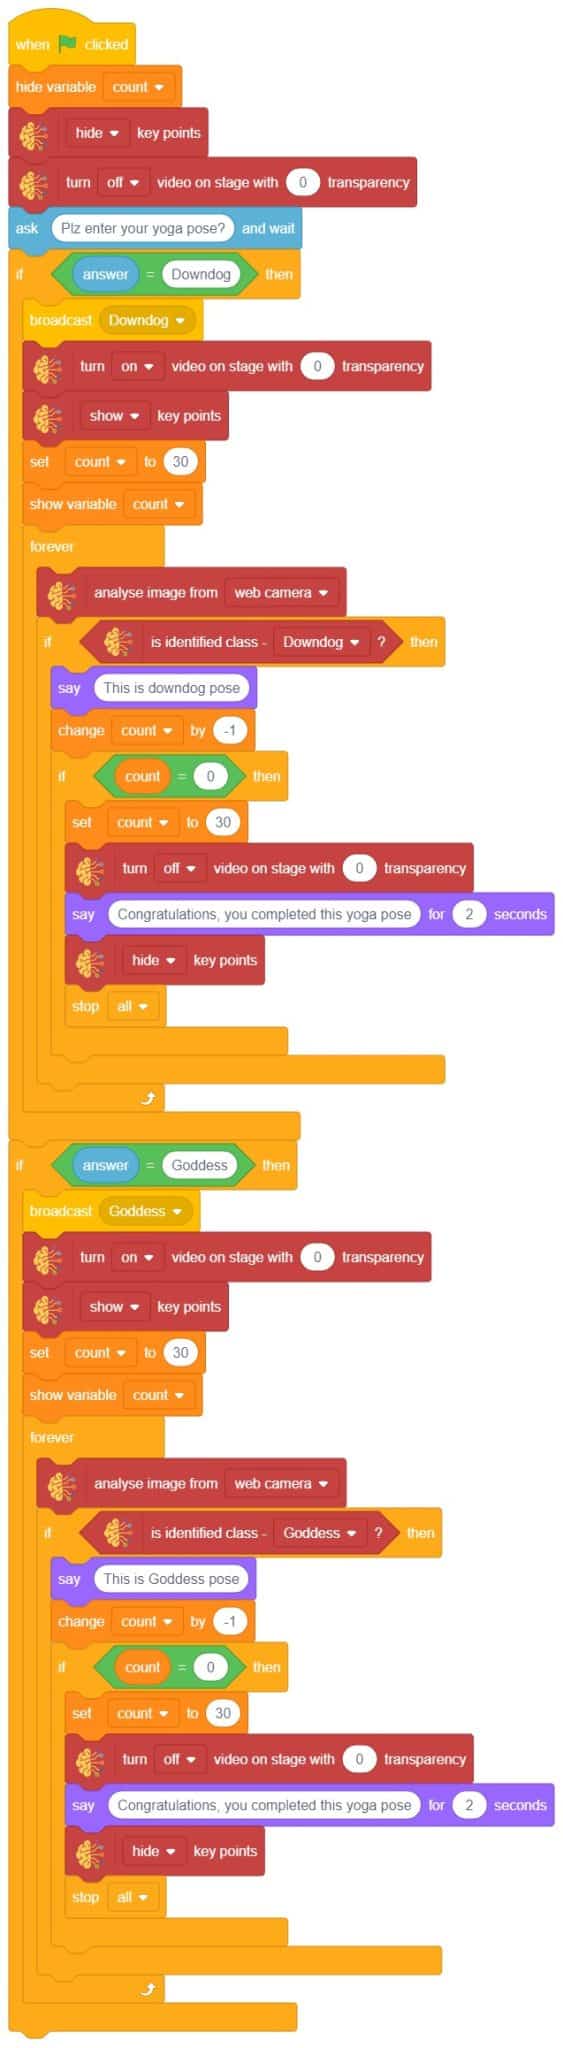
- The final block code looks like

- Now click on another sprite and write code.
- We’ll start writing code for this sprite by adding a when flag is clicked block from the Events palette.
- Add the “hide” block from the Looks pallet.
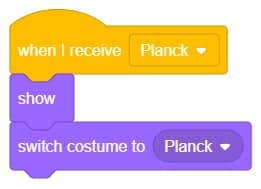
- Write a new code in the same sprite according to class and add the “when I receive ()” block from the Events palette. Select the appropriate class from the options.
- Add the “show” block from the Looks pallet.
- Add the “switch costume to ()” block from the Looks palette. Select the appropriate class from the options.
- Repeat the same code for other classes and make changes according to the class.
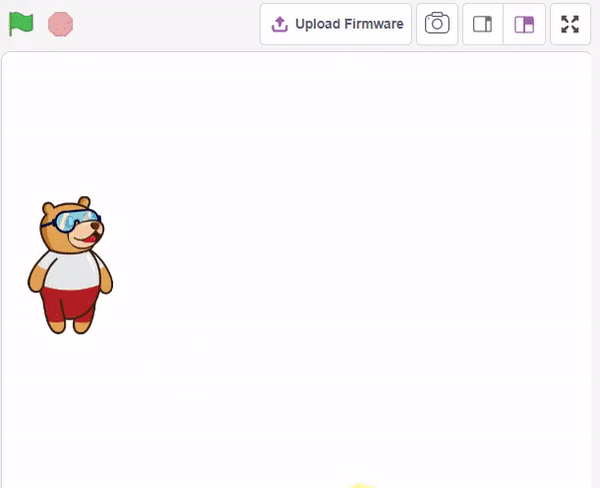
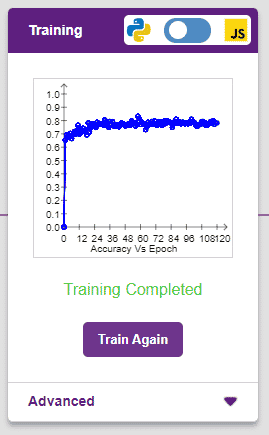
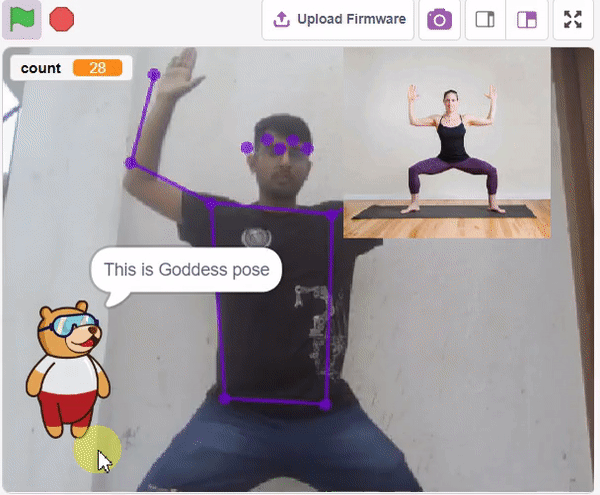
Final Result
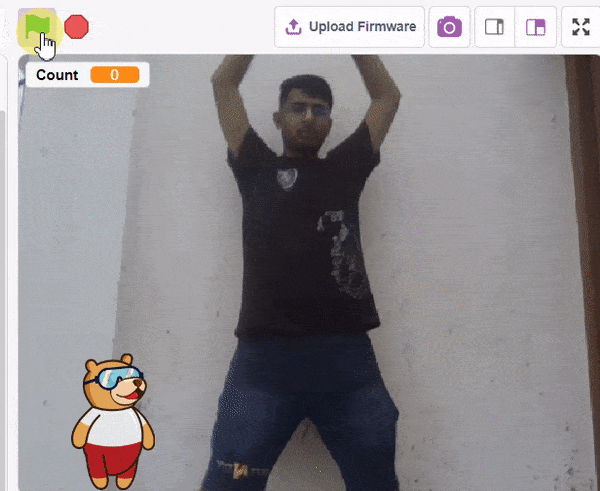
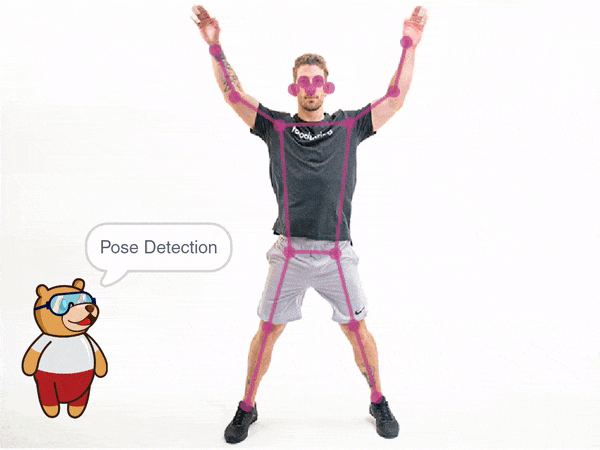
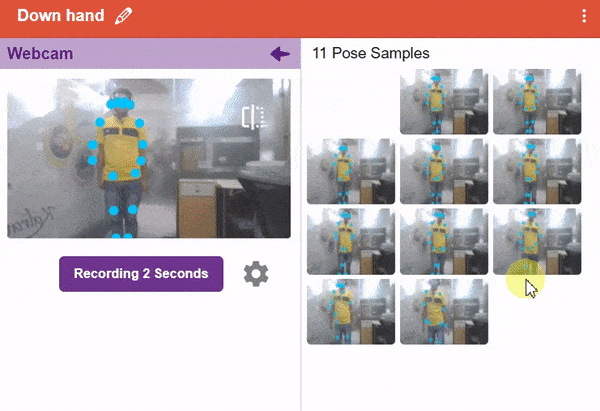
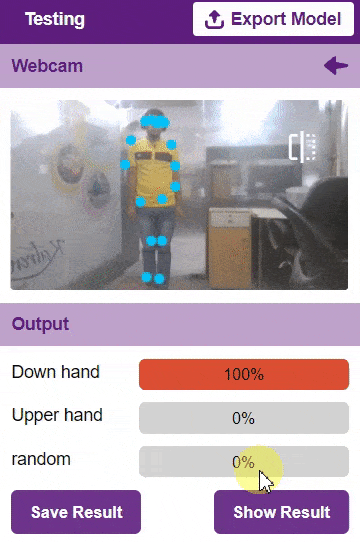
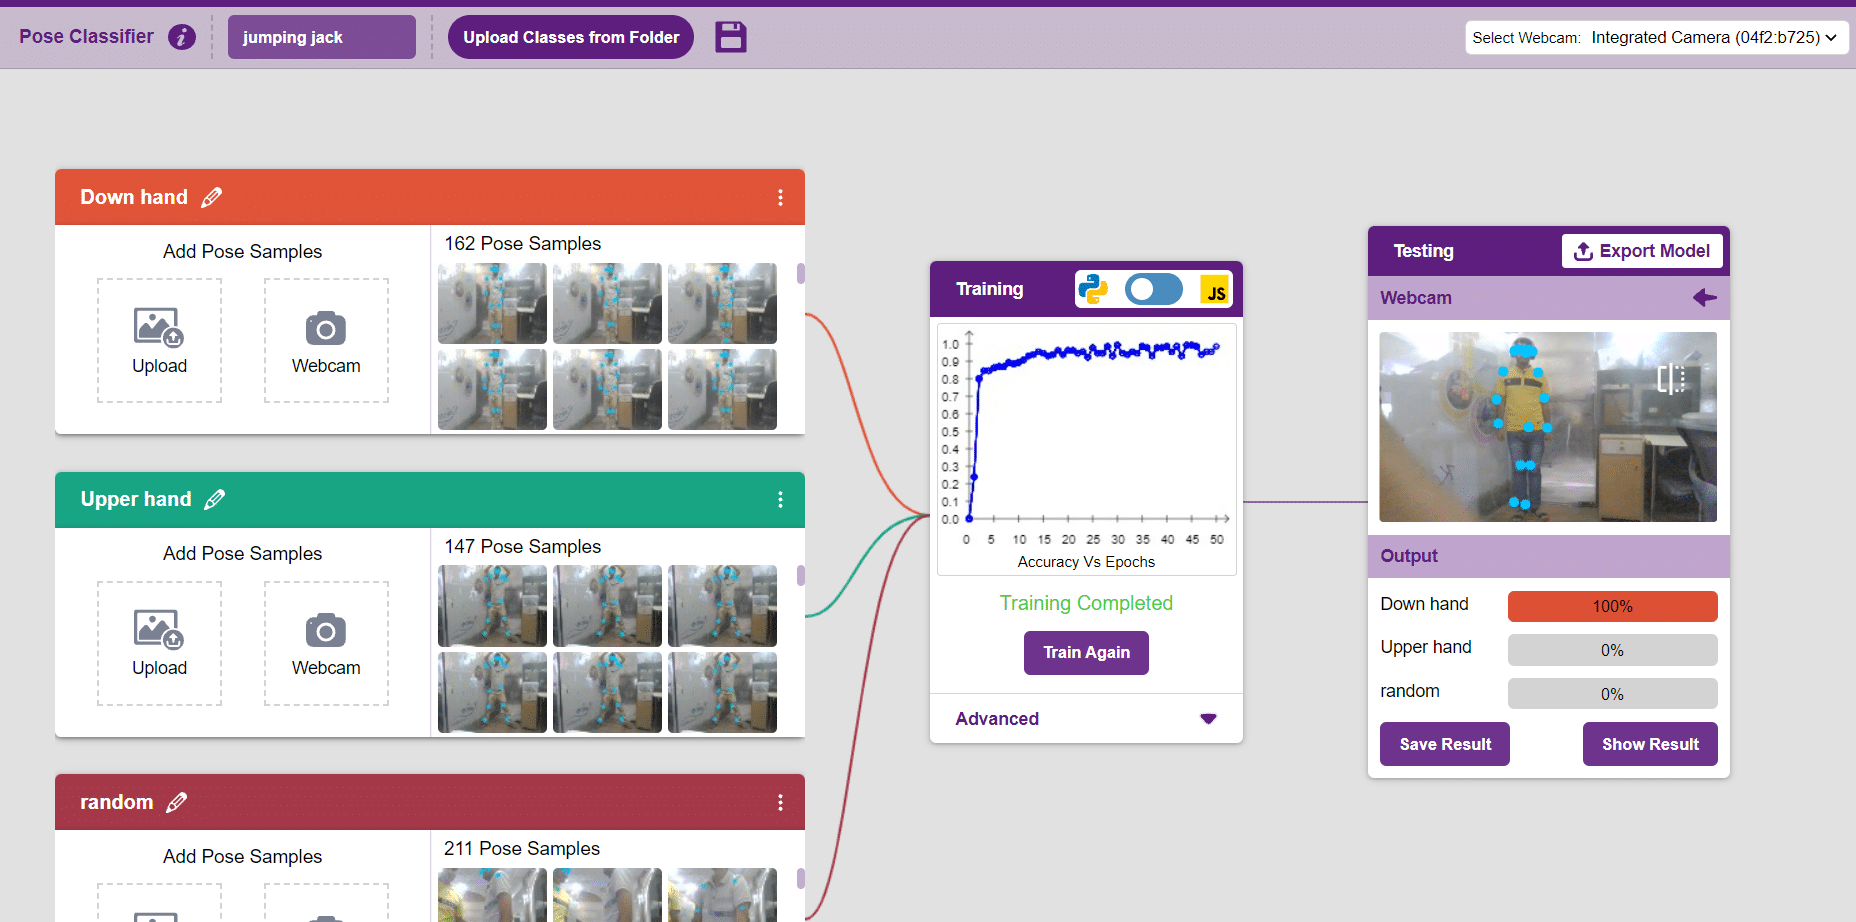 The model works by analyzing your body position with the help of 17 data points.