
Quarky Firmware for PictoBlox is required for having appropriate communication between PictoBlox and Quarky. It is required for working in Block Coding and Python Coding. The firmware is also required to have working in stage mode and upload mode for Quarky.
Checking Firmware
You can check the Quarky firmware in PictoBlox. Follow the process to check the firmware version:
- Make sure you have PictoBlox installed in Windows, macOS, or Linux.
- Open the PictoBlox software by clicking on the PictoBlox icon.
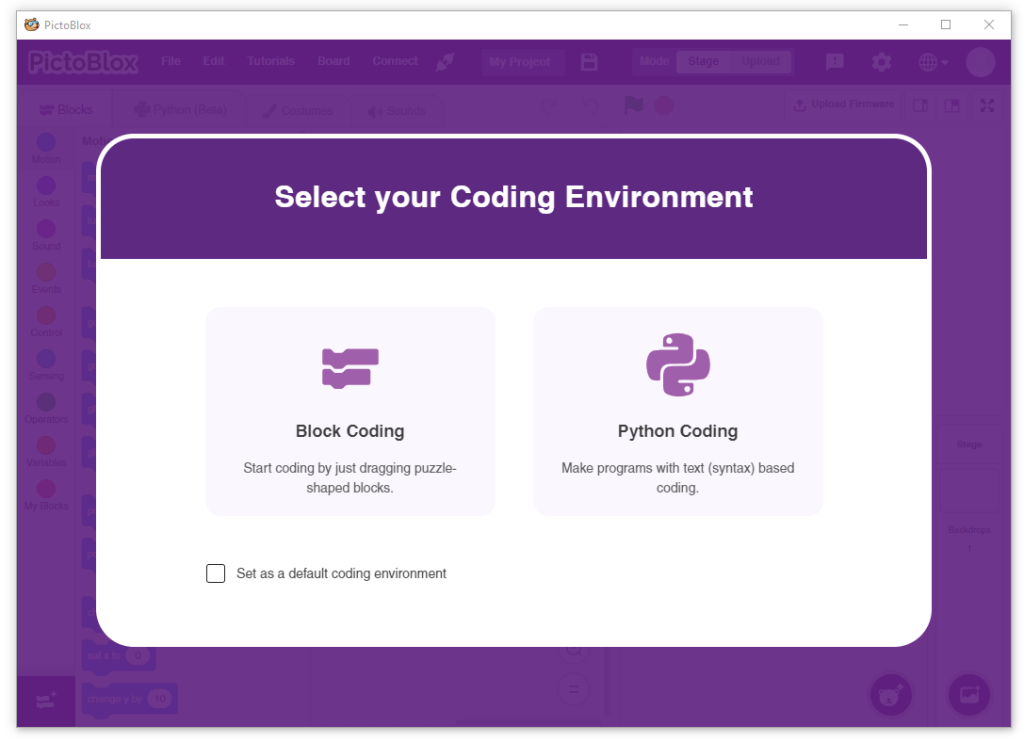
- Select the coding environment as Block Coding.
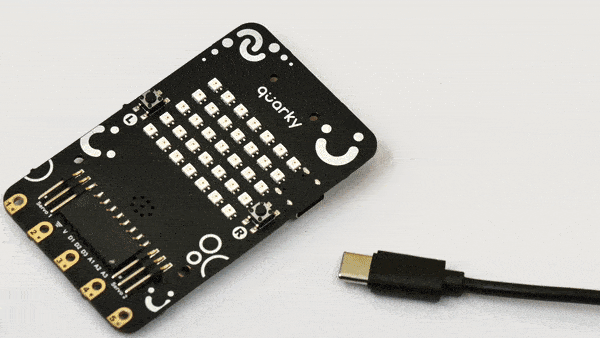
- connect your Quarky to your computer using a USB cable.
- Then, click the Board button from the toolbar, and select board: Quarky.
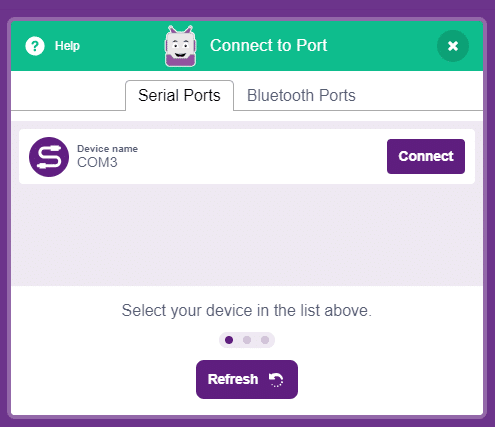
- Select the appropriate serial port from Serial Ports and click connect. Quarky is now connected to PictoBlox.
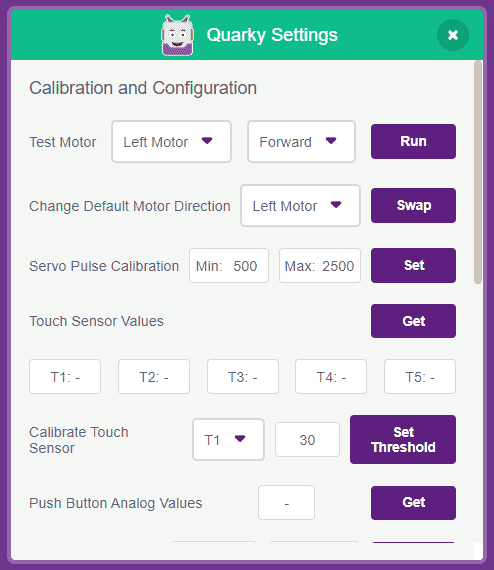
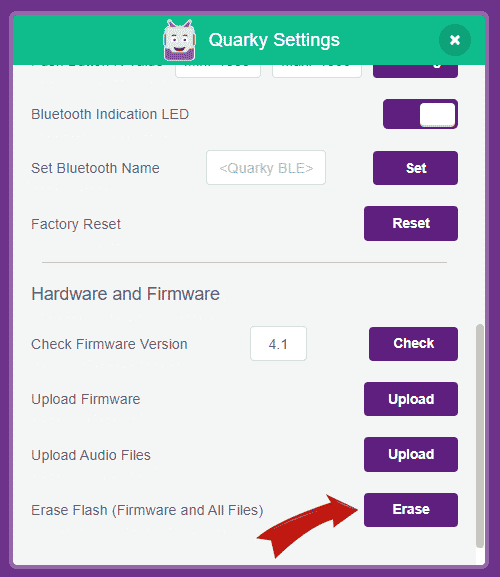
- Click on the setting button available on the Quarky Extension.

- A pop up will open with the heading – Quarky Settings.
- Scroll to the bottom of the Hardware and Firmware and click on Check Firmware Version. It will show the current firmware version.
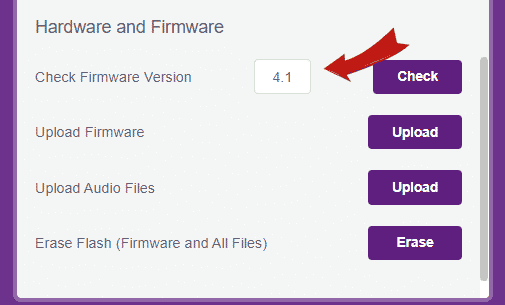
Updating the Firmware
If you have any doubts about the current version of firmware, then you should update the firmware.
Click on the Upload Firmware.
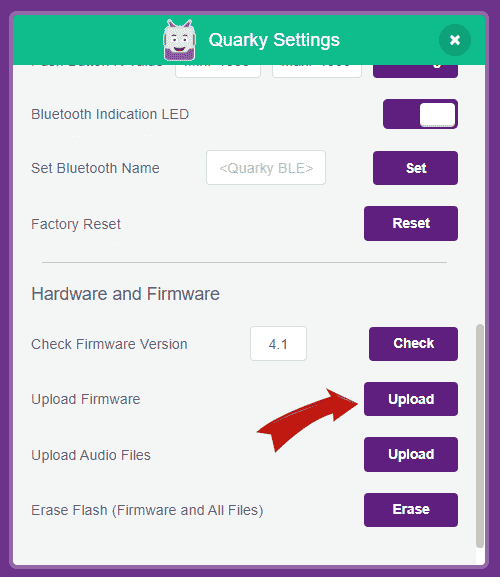
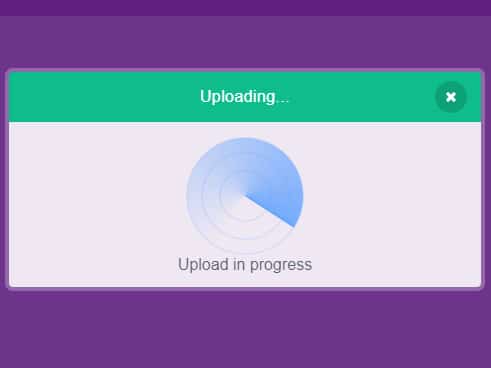
The code will get uploaded automatically.
Note: If your device already has the latest firmware, then PictoBlox will show the message – Firmware is already updated.
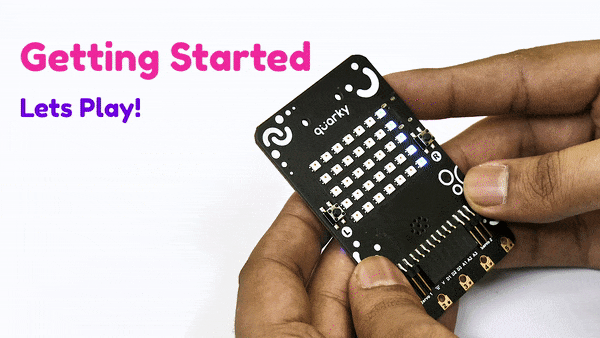
Once the firmware is uploaded, Quarky starts the Getting Started program. This runs only for the first time. At the start you will see:
- A Rainbow animation starts on the RGB LED Display.
- Quarky greets you!
- Quarky shows a smiley face on the Display.
- Exploring the Tactile Switches: Quarky has 2 tactile switches labeled L and R. The program continues and you will play a catch-the-fruit game using the tactile switches.
 During this you will do the following:
- Explore the tactile switch L and R.
- Play a small game where the fruits come from the top of the LED and you are at the last row of the Display. You have to move left and right using the L and R switches respectively and try to catch the fruits. You have to catch 5 fruits to proceed further.
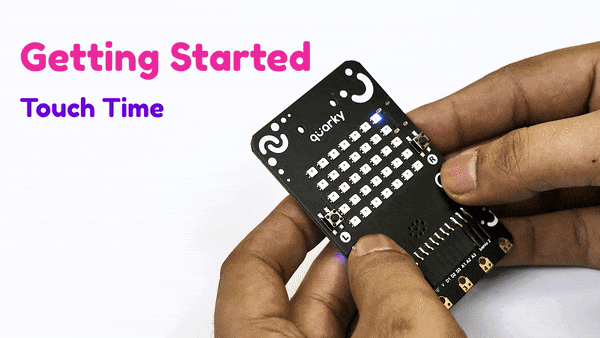
- Explore Touch Pins: Quarky has 5 touch pins at the bottom labeled 1, 2, 3, 4, and 5. During this part, you have to touch the pins and Quarky will make a sound and display lines. You have to touch the pins 5 times to proceed further.
Once you are done with Getting Started code you can work all modes.
Updating the Audio Files
Quarky has some default audio files stored which can be used in code.
These sounds are only available if the Audio files are uploaded to Quarky. To upload the audio files you can click on Upload Audio Files.
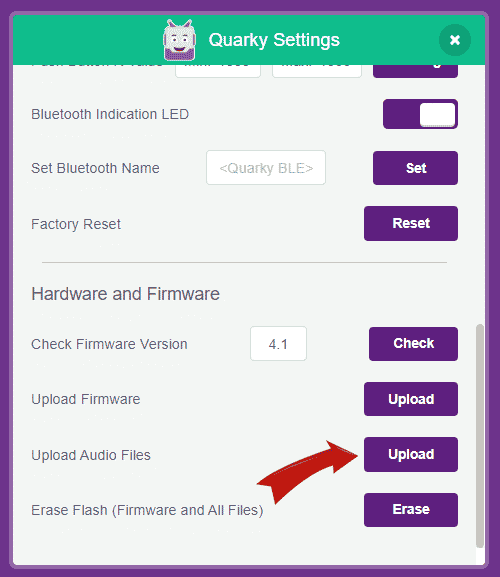
Erasing Firmware and Flash
If there is some problem in the firmware upload you can try to erase all the files in Quarky. Click on the Erase button to execute.
You will need to upload the Firmware and the Audio Files after this operation. Once done, you are all set to work in PictoBlox with Quarky.
Conclusion
In conclusion, we have learned that Quarky Firmware is essential for having successful communication between PictoBlox and Quarky. We also learned how to check the firmware version, update the firmware and audio files, and erase the firmware and flash. With this knowledge, we are now ready to use Quarky with PictoBlox.