
Introduction
An ultrasonic sensor is an electrical device that uses ultrasonic sound waves to determine the distance to a target item. It is a demanding instrument in robotics as well as for industrial purposes.
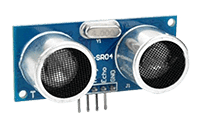
It is one of the most reliable ways to sense proximity and detect a target.
How do Ultrasonic Sensors Work?
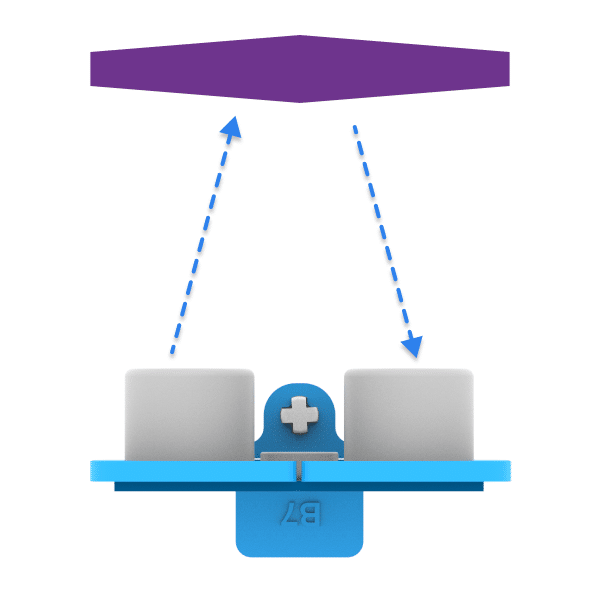
It works by emitting a sound wave that travels through the air and bounces back to the sensor if it encounters an obstacle or object and thus calculates the distance by measuring time lapses between the sending and receiving of the ultrasonic pulse. This sound wave is higher in frequency than the normal human hearing range. Ultrasonic sensors have now found their way into a wide range of applications and industries.
Connecting Ultrasonic Sensor to Quarky
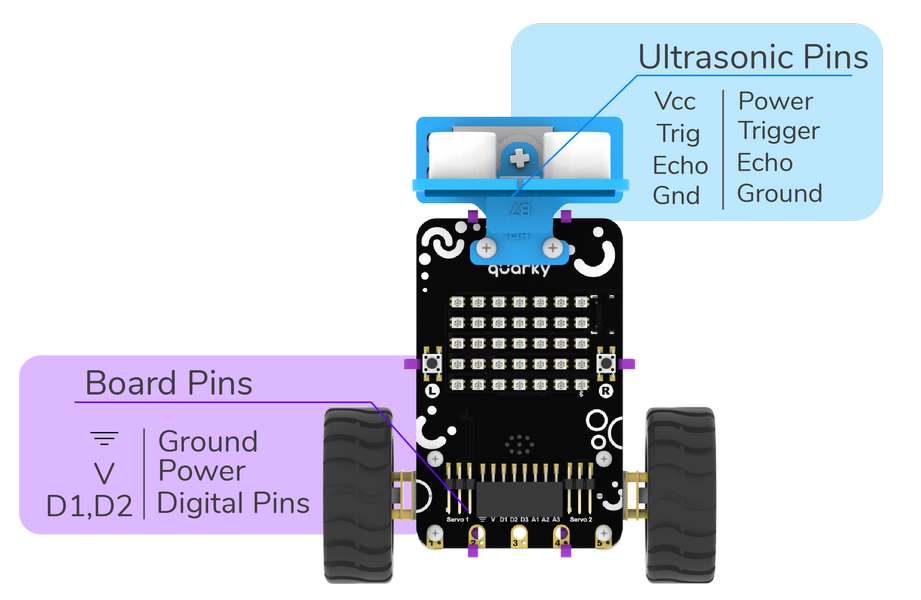
The sensor and the Quarky have the following pins:
- Ultrasonic Sensor Pins:
- VCC
- GND
- Trig
- Echo
- Quarky Pins:
- GND
- V
- D1
- D2
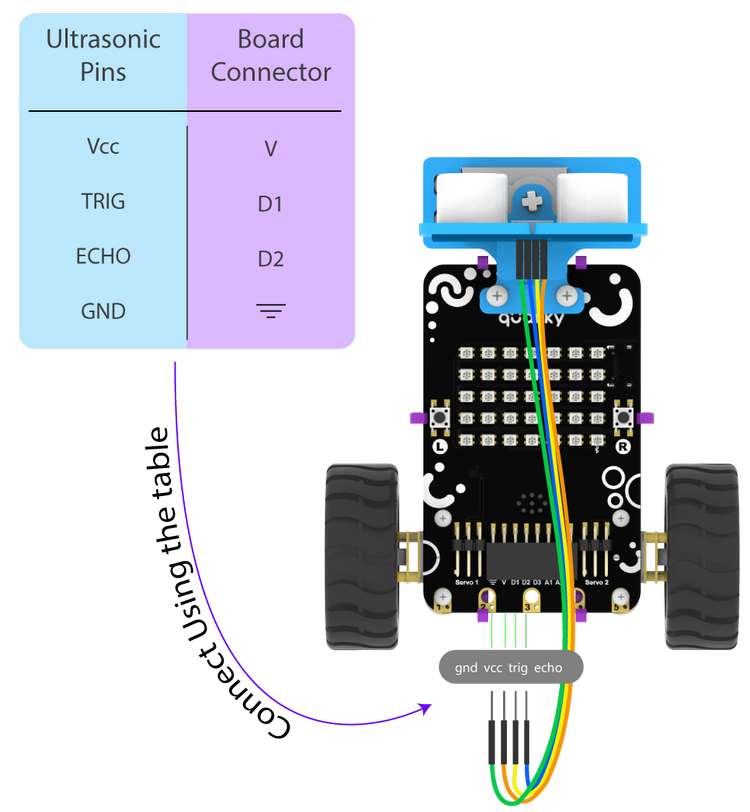
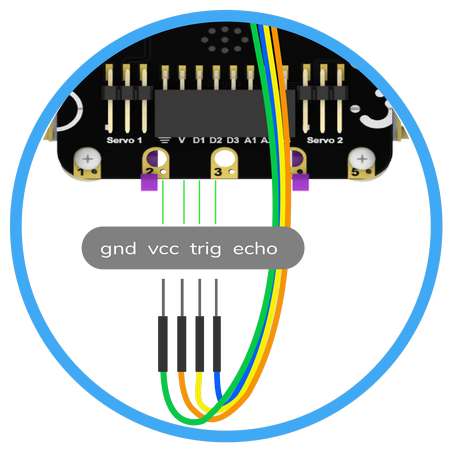
We will start with connecting the ultrasonic sensor with Quarky using the 4 set wires provided in the kit. But, first, make the connection in the following way:
- First, connect the VCC of the ultrasonic sensor with the V pin on the Quarky.
- Connect the GND of the ultrasonic sensor with the Ground pin on the Quarky.
- Connect the Trig of the ultrasonic sensor with the D1 pin on the Quarky.
- Finally, connect the Echo of the ultrasonic sensor with the D2 pin on the Quarky.
Block Coding
In PictoBlox, you have the following blocks available for the ultrasonic sensor:
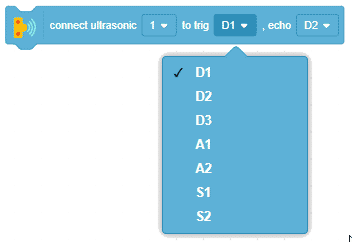
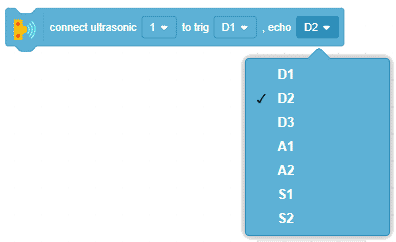
- connect ultrasonic () to trig () echo (): The block initializes the ultrasonic sensor with specified echo and trig pins. The block has three inputs:
- The sensor number. You can define 2 sensors at a time.
- The specific GPIO pin where the trig pin of the ultrasonic sensor is connected.
- The specific GPIO pin where the echo pin of the ultrasonic sensor is connected.
- get ultrasonic () distance (cm): The block returns the distance reading from the specified ultrasonic sensor.


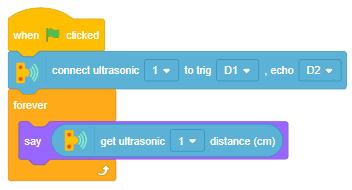
Example 1: Reading distance from (Stage Mode)
The example demonstrates how to use an ultrasonic sensor to detect the distance with Quarky in Stage Mode.
Script:
Output:
To begin with, bring an object in front of the sensor and measure the distance.
Toby will say the distance value. The value will decrease as the hand approaches the sensor and increase as it moves away.
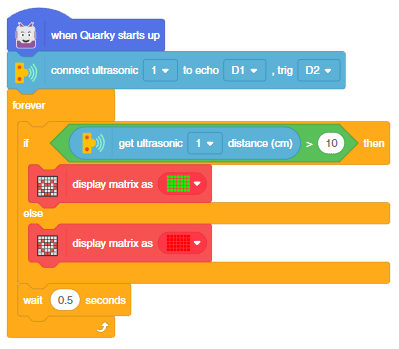
Example 2: Detect Obstacle from Ultrasonic Sensor (Upload Mode)
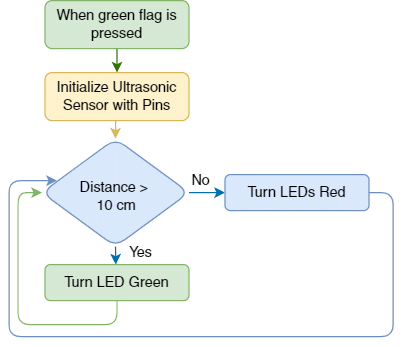
In this example, Quarky’s LED should change from green to red whenever an obstacle comes closer than 10cm.
Logic:
The logic is simple. The robot will keep on checking the distance. If the distance is less than 10cm, the LEDs will glow RED; otherwise, they will glow GREEN. You can follow this logic in the flowchart below:
Script:
Python Coding
In PictoBlox, you have the following Python function available for the touch sensors:
- setultrasonicpins(sensor_number = 1, trig_pin = “D1”, echo_pin = “D2”): The function initializes the ultrasonic sensor with specified echo and trig pins.
- getdistance(sensor_number = 1): The function returns the distance reading from the specified ultrasonic sensor.
Example 1: Reading distance from (Stage Mode)
The example demonstrates how to use an ultrasonic sensor with Quarky.
Code:
sprite = Sprite('Tobi')
quarky = Quarky()

quarky.setultrasonicpins(1, 18, 19)
while True:
  sprite.say(quarky.getdistance(1))
Example 2: Detect Obstacle from Ultrasonic Sensor (Upload Mode)
In this example, Quarky’s LED should change from green to red whenever an obstacle comes closer than 10cm in Python Coding Environment.
Code:
from quarky import *

# imported modules
import time

quarky.setultrasonicpins(1, 19, 18)
while True:
  if (quarky.getdistance(1) > 10):
    quarky.drawpattern("ccccccccccccccccccccccccccccccccccc")

  else:
    pass
    quarky.drawpattern("bbbbbbbbbbbbbbbbbbbbbbbbbbbbbbbbbbb")

  time.sleep(0.5)
Conclusion
In this lesson, we learned about ultrasonic sensors and how to use them with Quarky. We saw two examples of how to use them in both Stage and Upload modes with PictoBlox. We also saw two different coding languages to program the Quarky with the ultrasonic sensor. In conclusion, the ultrasonic sensor is a reliable and efficient way to detect a target and measure distances accurately.