Introduction
As the name suggests, an Edge Detection Robot is an intelligent device that detects the edge or absence of a surface and avoids it by turning in different directions to prevent itself from falling off. For instance, an autonomous robot car uses edge detection technology to avoid falling off cliffs.
 Edge Detection Robot detects the edge and proceeds along a path where the distance between the sensor and the surface is less than 10cm.
Assembly
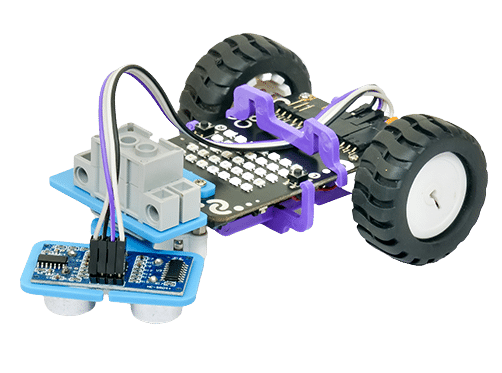
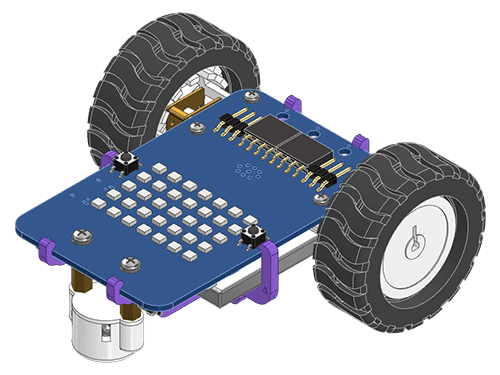
The final structure of the robot will look like this:
Let’s build the robot. We are taking the Horizontal Robot for reference to the start of the assembly.
- First, detach the Castor Wheel from the Quarky Robot by removing the Bolt.
- Then, attach both the B4 Plate and the Castor Wheel using the same Bolt.
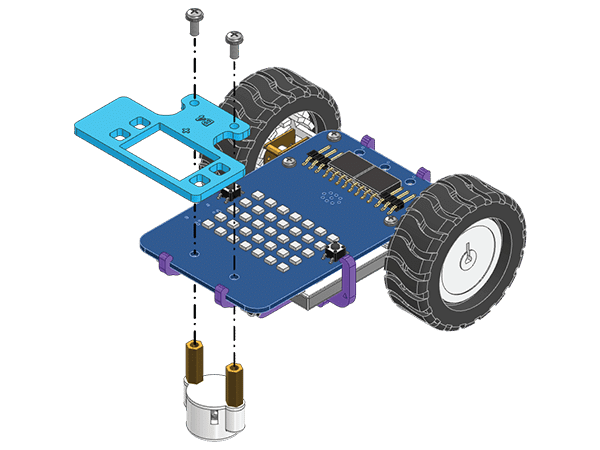
- Push-fit servo motor into the B4 Plate such that the shaft is facing downwards and the ‘+’ mark is aligned with it.
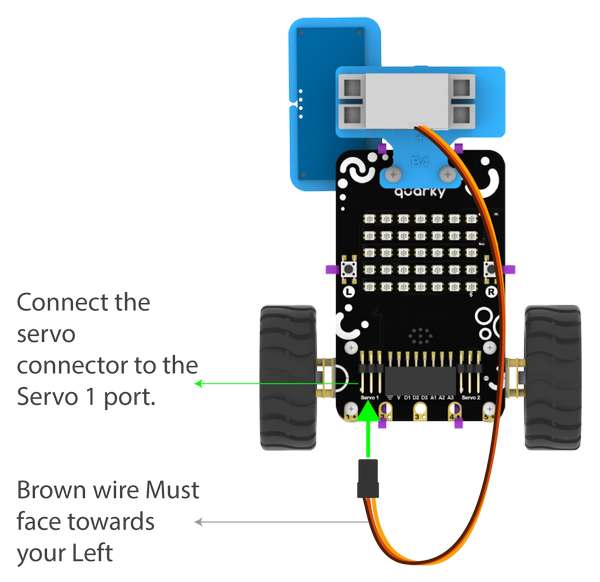
- Connect the Servo Motor to the Quarky.
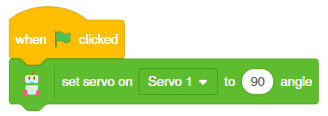
- Open PictoBlox and set the Servo Motor angle to 90 degrees. The servo head should get aligned properly.
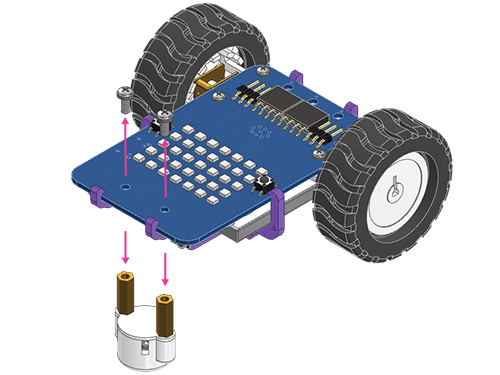
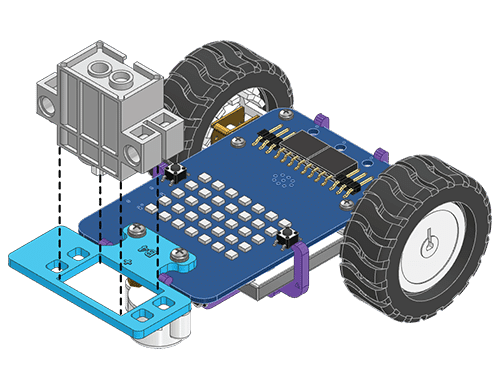
- Push-fit the Ultrasonic Sensor into the B3 Plate.
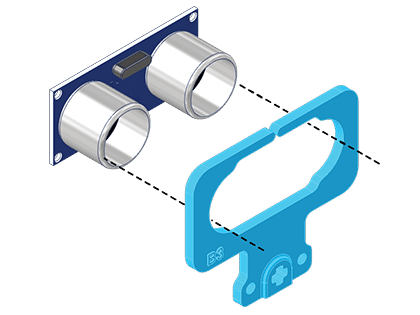
- Push-fit the B3 Plate into the Servo Motor Shaft while keeping the Ultrasonic Sensor facing down.
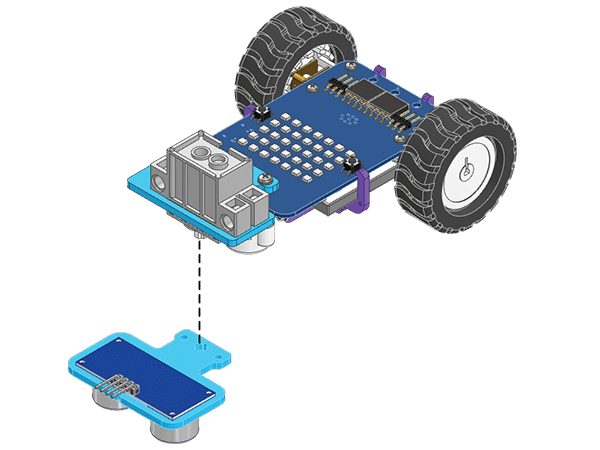
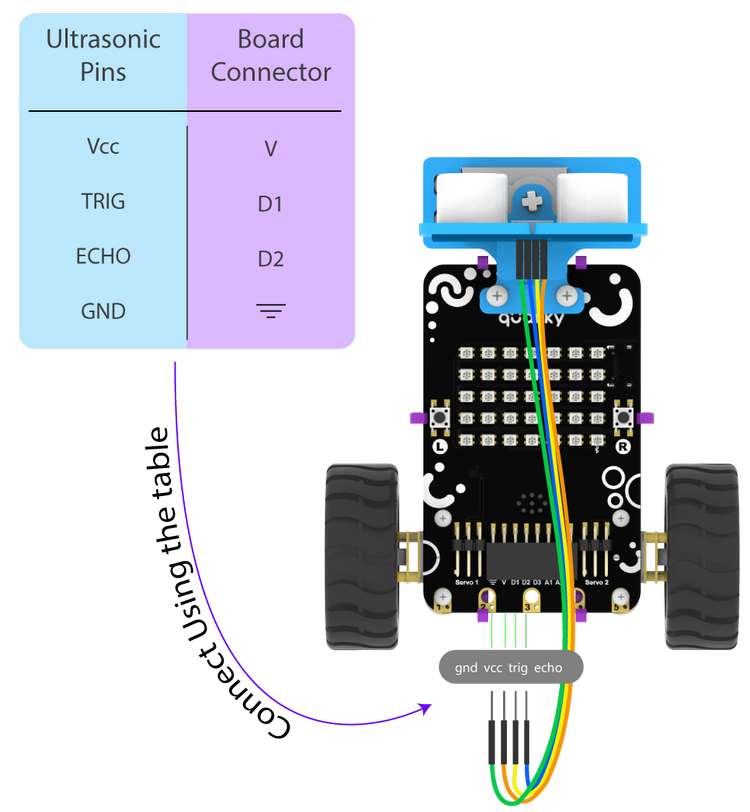
- Connect the Ultrasonic Sensors to the Quarky Robot.
- Snap the A4 Plate to secure the wires.

The assembly is complete.
The Logic of the Robot
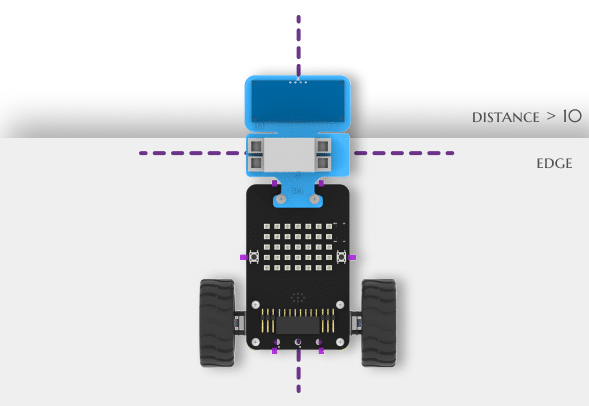
To avoid falling, our robot will change its path whenever it detects an edge by calculating the distance between the sensor and the surface. If the distance is more than 10 cm, that means an edge has been detected, and the robot will move in a different direction as a result.
Let’s look at the logic in detail:
- Our edge detector will move forward whenever the distance between the ultrasonic sensor and the surface is less than 10cm.

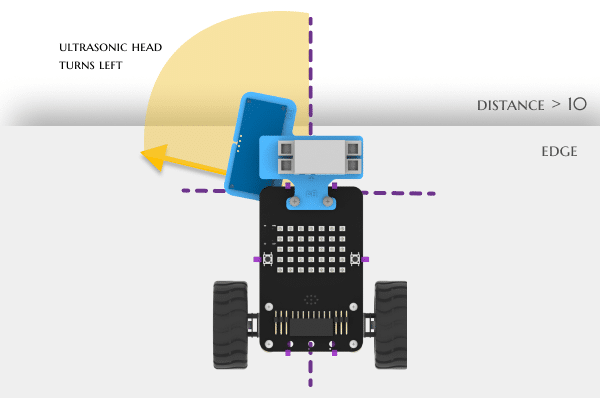
- Edge is detected when the distance between the ultrasonic sensor and the surface is more than 10cm. The robot stops detecting an edge.
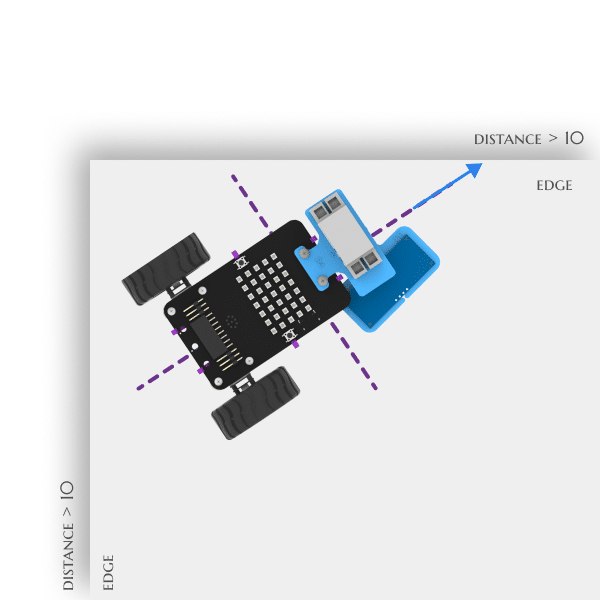
- The ultrasonic head turns to the left to check whether there is an edge on the left or not.
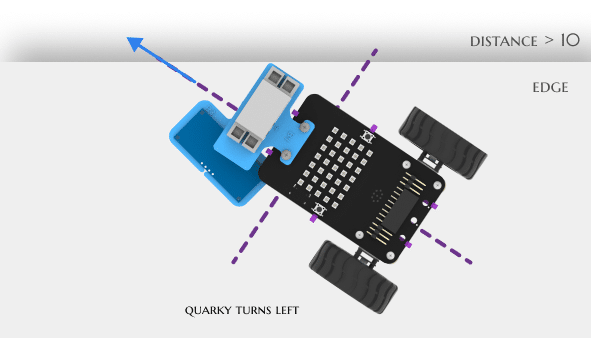
- If there is no edge on the left, Quarky will change its direction to the left by turning left by 90 degrees. The ultrasonic head will get straight. And the robot moves ahead.
- If there is an edge detected on the left side, the ultrasonic head turns to the right.
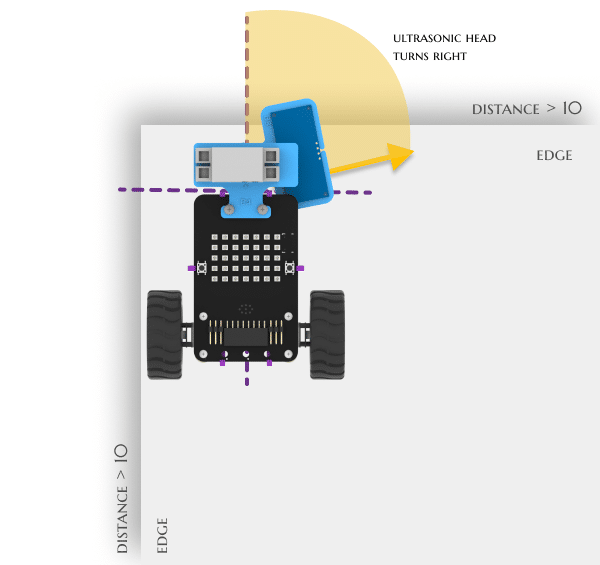
- If no edge is detected, Quarky changes its direction to the right by turning right. The ultrasonic head will get straight. And moves ahead.
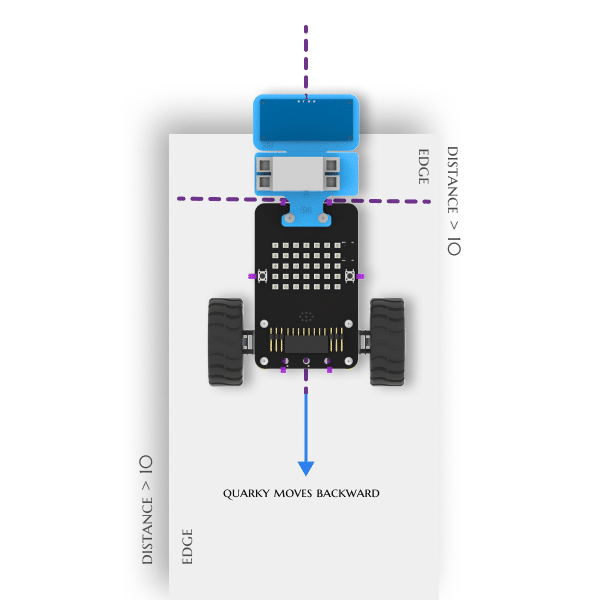
- If it detects edges in all directions. Quarky will move backward.
Flowchart
Below is the flowchart representation of our logic. 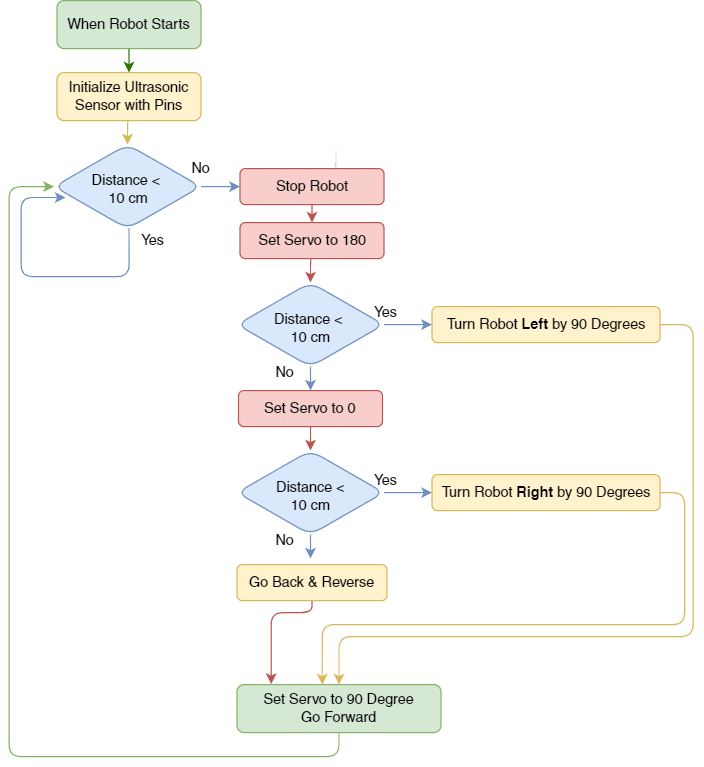
Coding Steps
Now it’s time to program our Edge Detector Robot! Follow the steps given below to make a script.
Initialize Robot
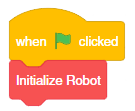
- Drag and drop the when flag clicked block from the Events palette.
- Create a block named – Initialize Robot. Place the block.
- Now, to initialize the pins go to the Sensors palette and add connect Ultrasonic () to echo(), trig() below the Initialize Robot hat block.
- The next step would be to set the initial servo angle as 90 degrees, for this drag and drop the set servo on() to () angle from the Robot palette.
- Add go () at ()% speed block. This time set the direction as forward, and speed as 50%. This will make the robot go forward.
- Add wait () second below-go () at ()% speed.

Detecting Edge
- Now, go to the Control palette and add a forever block below the Initialize Robot.
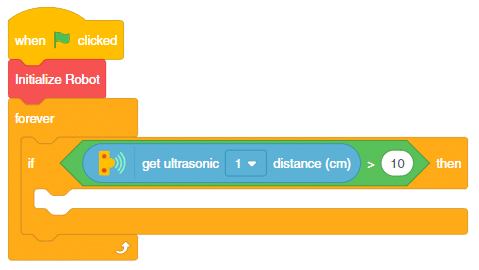
- After that, place the if () then block from the Control palette inside the forever block.
- Next, go to the Operators palette and put the ()>() block inside the space of the if () then block.
- Drag and drop the get ultrasonic () distance block from the Sensors palette within the first space of the ()>() block and 10 in the second space. This block will help compare the sensor value and detect edges.
Checking for Free Area
- Next, create a block custom block named Set Servo Angle with Delay () with Angle as the parameter.

- Put a set servo () to () angle block with the angle as Angle.
- After that add a delay of 0.5 seconds by introducing wait () seconds.
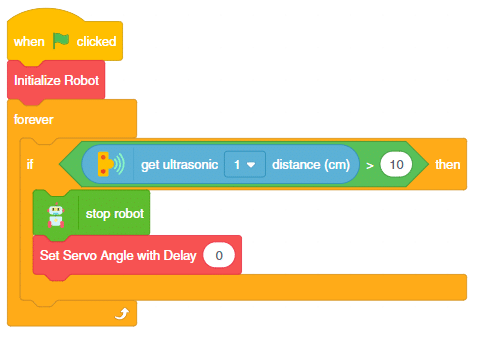
- Come back to the main script. Add the stop robot from the Robot palette. Add Set Servo Angle with Delay () block with angle set as 0 degrees. This condition will stop the robot and turn the servo’s angle to 0 degrees whenever an edge is detected.
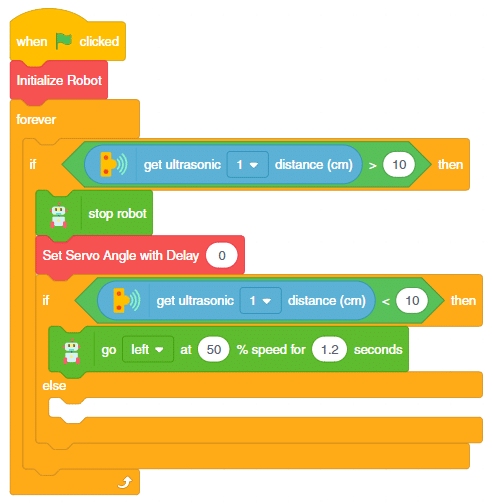
- Now, we will check the maximum distance by adding if () then else block from the Control palette.
- Next, go to the Operators palette and put the ()<() block inside the if () then else block.
- Drag and drop the get ultrasonic () distance block from the Sensors palette within the first space of the ()<() block and 10 in the second.
- If the condition is satisfied, the robot should turn left. This can be done by adding go () at () % speed for () seconds inside the if statement. Set the direction as left, speed as 50%, and the time as 1.2 seconds.
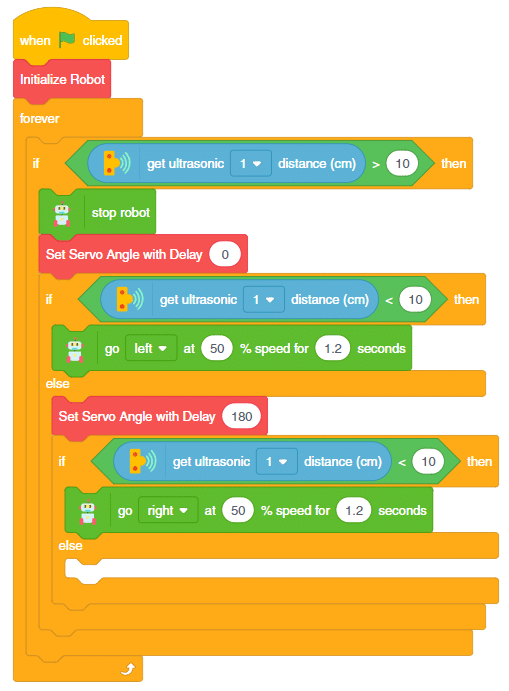
- After that, duplicate the block from Set Servo Angle with Delay () block and place it in the else branch. Change the angle to 180 degrees and the robot direction to right.
- Within the else-branch, add go () at ()% speed for () seconds block. This time set the direction as backward, speed as 50%, and time as 0.5 seconds.
- Add another go () at ()% speed for () seconds block. This time set the direction as left, speed as 80%, and time as 1.4 seconds. This will make the robot go reverse.
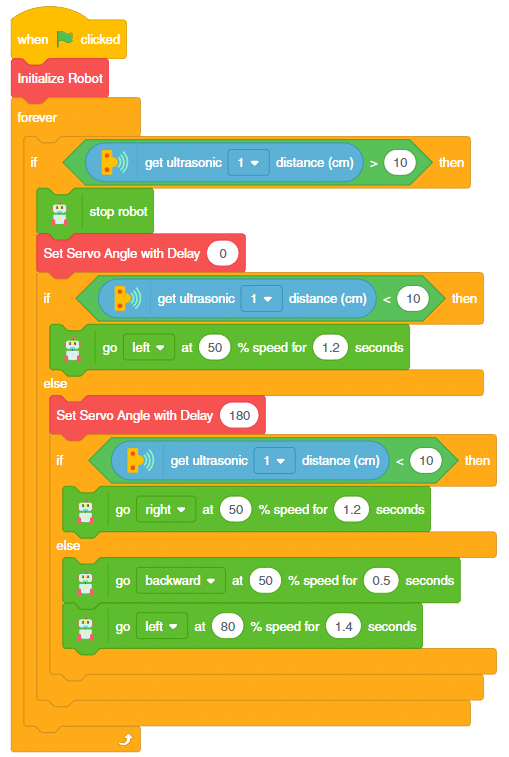
- Next, if our robot doesn’t get any edge, it should go forward. So, put the servo () to the () angle at the end of the first if branch. Set the angle as 90 degrees.
- Lastly, place the go () at () speed block. From the dropdown, select the direction as forward, speed as 50%.

Finally, our robot is ready to run!
Testing
Run the robot and check if it is working properly.
Uploading the Code to Quarky
We can also upload the code to Quarky to make the robot run independently of PictoBlox. This we can do only on Laptop. Follow the steps:
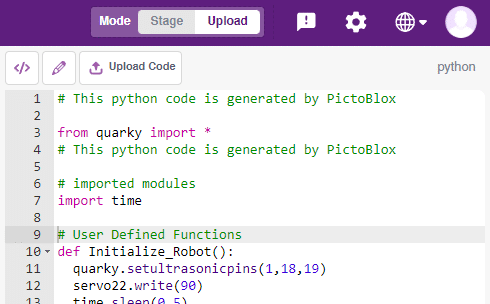
- Switch to Upload Mode.
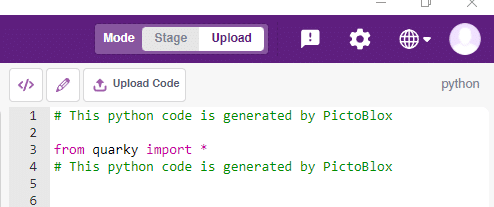
- Replace the when flag clicked block with when Quarky starts up block.

- Upload the Code with the Upload Code button.
That’s it. Now your robot can work independently.
Conclusion
In conclusion, this lesson has shown us how to build, code, and test an Edge Detection Robot. We have learned how to set up the robot using PictoBlox and upload the code to Quarky. This robot can detect the edge and proceed along a path where the distance between the sensor and the surface is less than 10cm.