


The block checks if the specified key is pressed. If the key is being pressed, the block returns “true”; if it is not, it returns “false”.
Script
Output
The block checks if the specified key is pressed. If the key is being pressed, the block returns “true”; if it is not, it returns “false”.
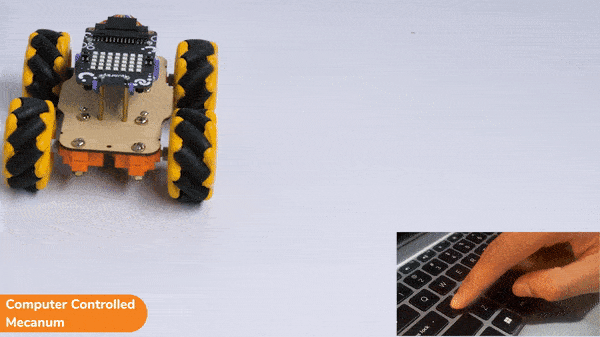
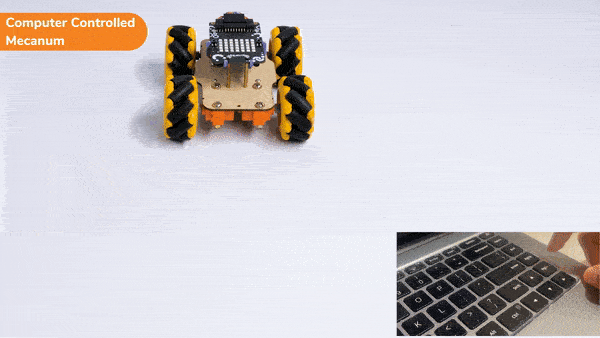
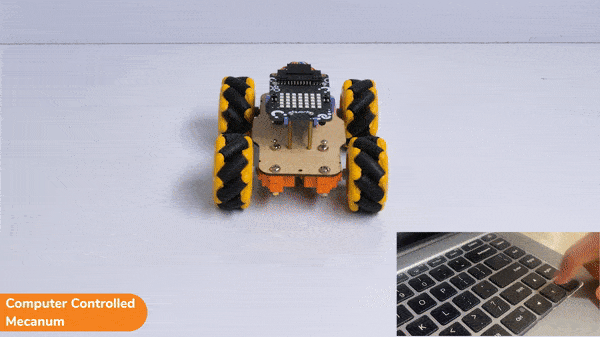
In this activity, we will make the computer program that controls the Mecanum Robot. It’s like a remote-control car. You can press different keys on the keyboard to make the Mecanum move forward, backward, left and right.
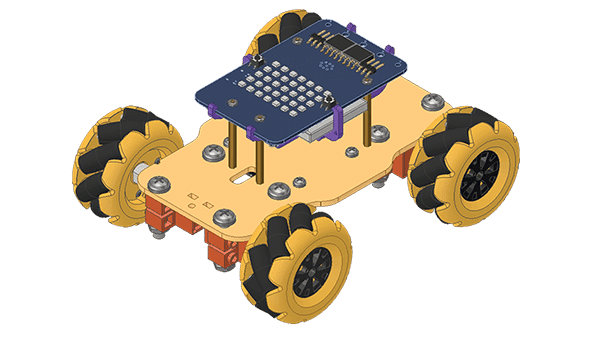
The Quarky Mecanum Wheel Robot is a type of robot that uses a special type of wheel to move. The wheel is made of four rollers mounted at 45-degree angles to the wheel‘s hub. Each roller has its own motor and can spin in either direction. This allows the wheel to move in any direction, making it an ideal choice for navigating around obstacles and tight spaces. The mecanum wheel robot can also turn on the spot, allowing it to make sharp turns without having to reverse direction.
Follow the steps:
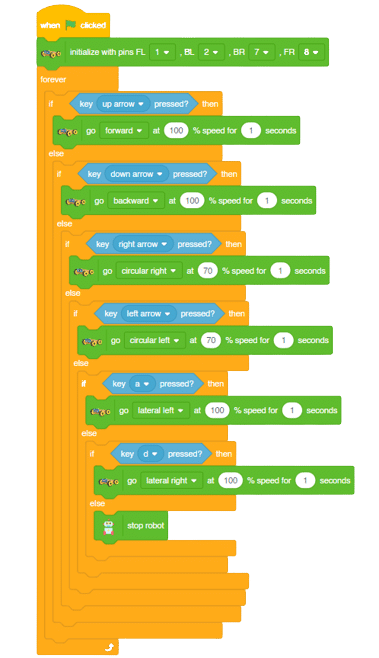
Forward-Backward Motion:
Lateral Right-Left Motion:
Circular Right-Left Motion:

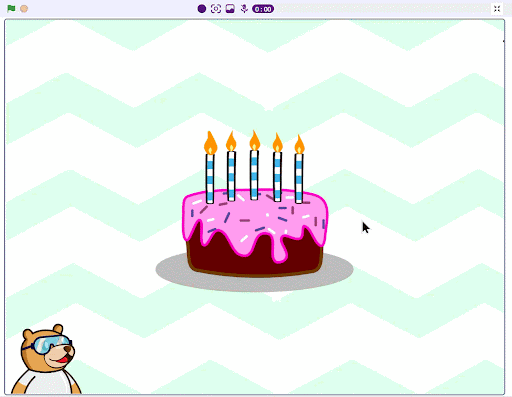
The time has come to create something fun and heartwarming! We are going to design an animated birthday card in PictoBlox! In this activity, your character will celebrate with a cheerful animation, play a birthday song, and display a special message on the screen. We will use simple blocks to control the character, switch costumes for animation, and add sound effects to make the celebration lively.
Let’s begin and bring your birthday card to life!
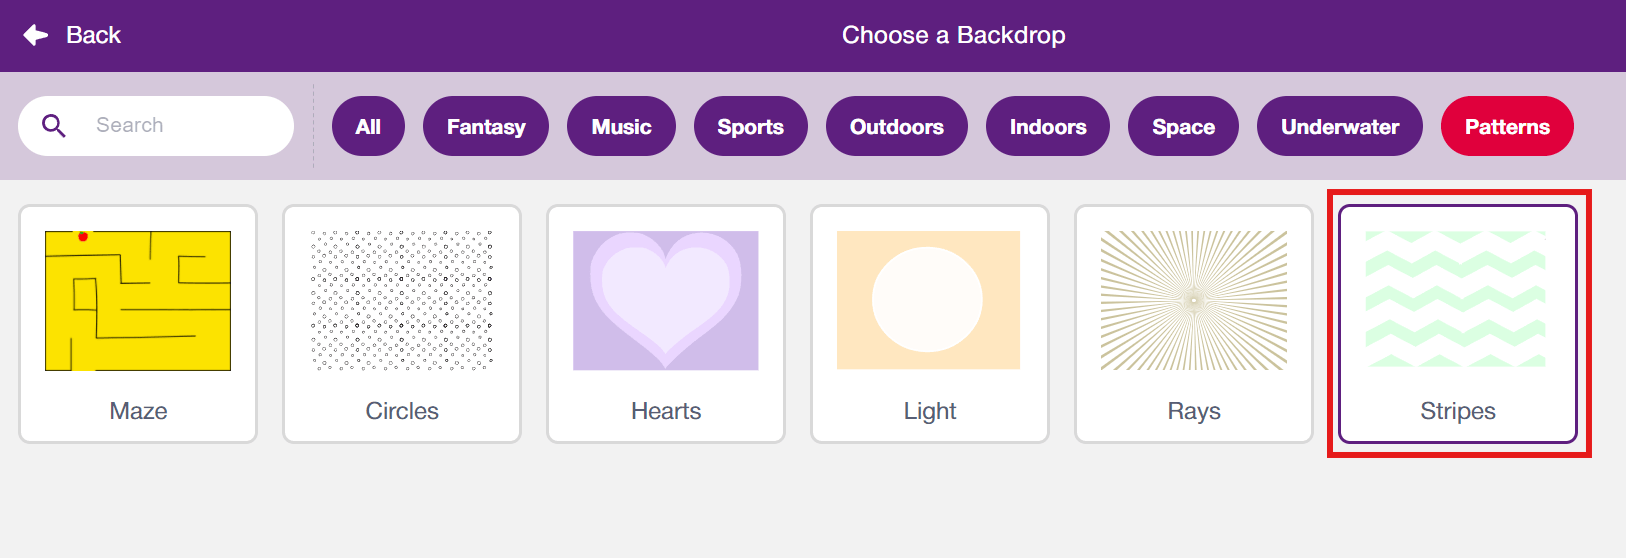
Since this card will have some pattern, we need a backdrop that looks like a patterned background. Click on ‘Choose a Backdrop‘ and select the ‘Pattern’ tag in the menu. Choose the Stripes backdrop from the library.
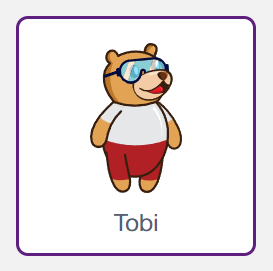
For this animation, we need three sprites: our Tobi, Cake and balloon, and make something celebration mode. Click on the Choose a Sprite button and add the three sprites one by one from the library.
![]()
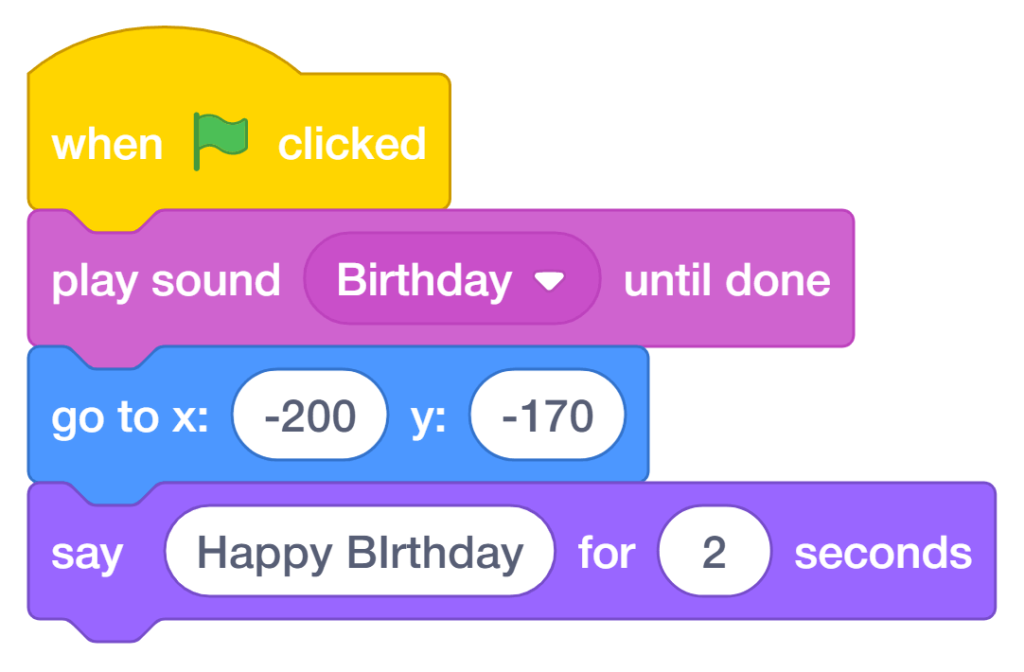
Let’s create the script for Tobi (greeting/character sprite). This script handles both the birthday audio and the on-screen messages.
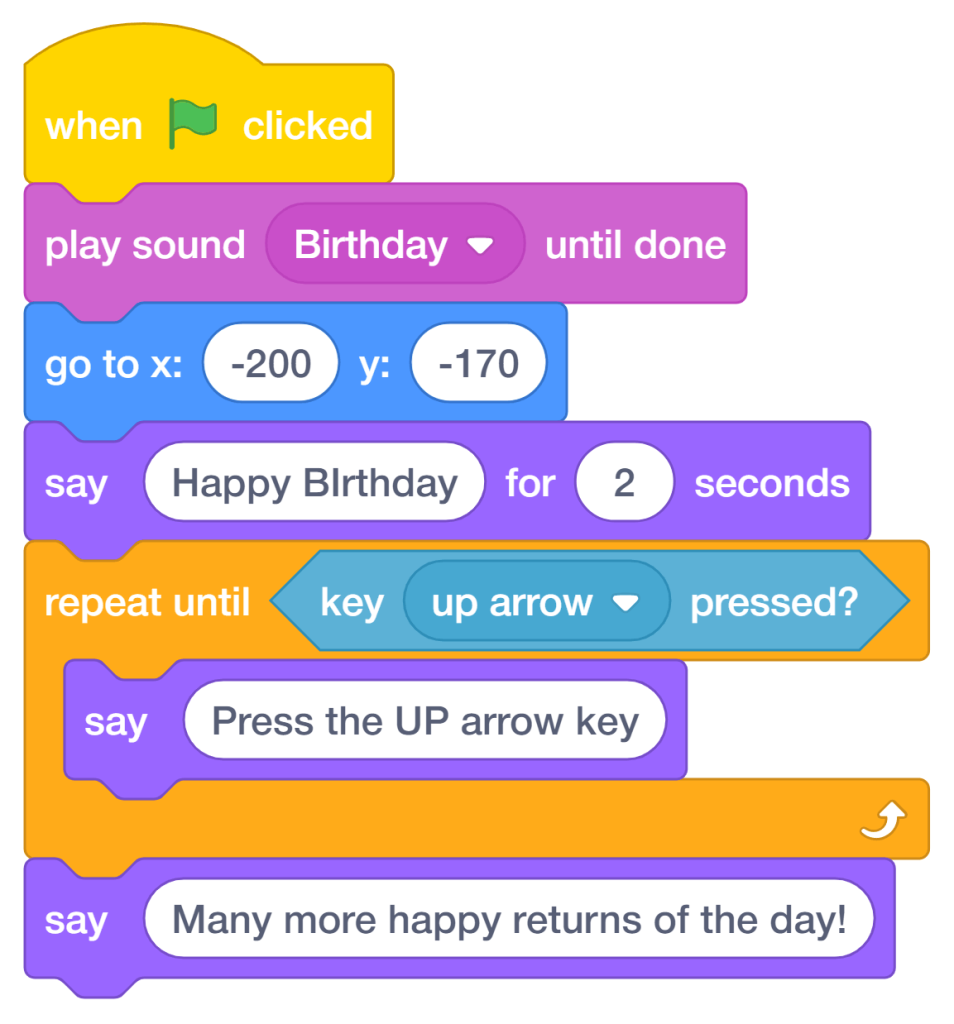
![]()
Let’s create the script for the cake:
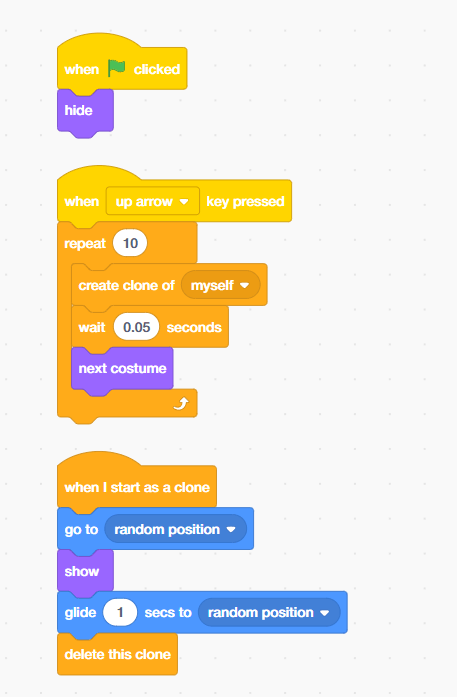
The balloon sprite uses clone feature to create a burst of multiple balloon pieces flying across the screen when the Up Arrow key is pressed. There are two separate scripts on this sprite.
In this project, we learned how to create an animated birthday card in PictoBlox using Blocks. We required a computer with PictoBlox installed and the sprite library to add Tobi, Cake, and Balloon1. We used costume switching and sound blocks to animate the cake, repeat-until loops to display interactive messages, and the clone feature to create a balloon confetti burst. In the end, we wrote three sets of scripts — for Tobi’s greeting, the cake animation, and the flying balloons. With this project, kids and learners will have a better understanding of sprite animation, event-driven programming, and how to build interactive scenes in PictoBlox Blocks.
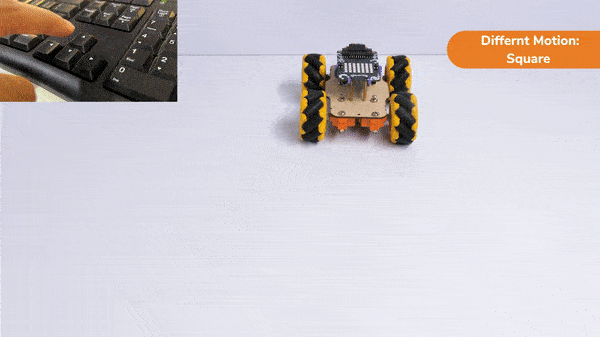
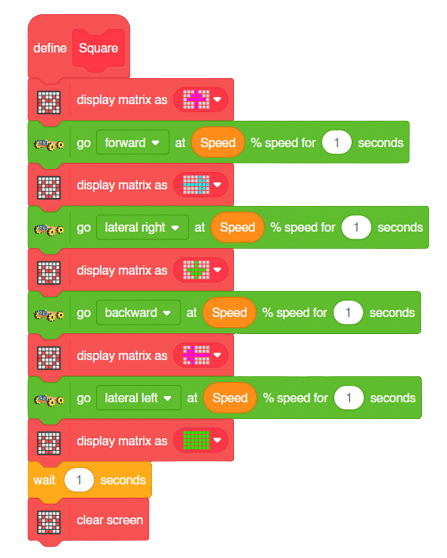
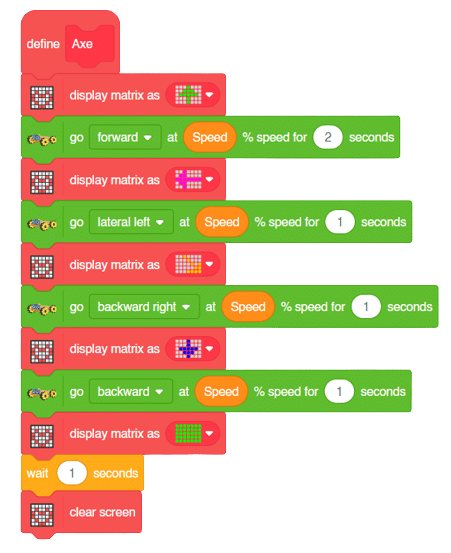
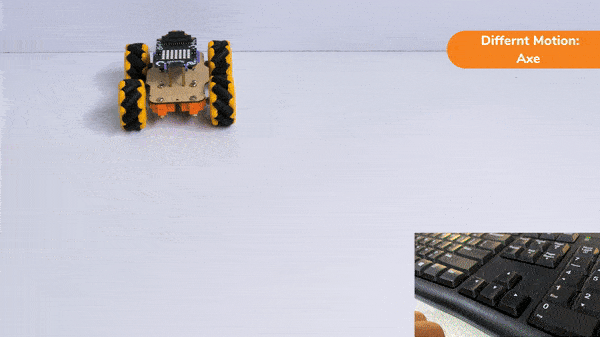
In this activity, we will create a custom activity where you will be able to move the Mecanum robot in a square effortlessly along with making an Axe type figure.
The Quarky Mecanum Wheel Robot is a type of robot that uses a special type of wheel to move. The wheel is made of four rollers mounted at 45- degree angles to the wheel’s hub. Each roller has its own motor and can spin in either direction. This allows the wheel to move in any direction, making it an ideal choice for navigating around obstacles.
Follow the steps:
The main steps would include to display the lights in arrow forms before implementing the specific move. The moves would be implemented in the following order:
Forward -> Lateral Right -> Backward -> Lateral Left.
We will display the arrows with the help of Quarky LED’s and implement the code.
Example of arrow:
The main steps would include to display the lights in arrow forms before implementing the specific move. The moves would be implemented in the following order:
Forward ( 2 steps ) -> Lateral Left ( 1 step ) -> Backward Right ( 1 step ) -> Backward ( 1 step )
We will display the arrows with the help of Quarky LED’s and implement the code.
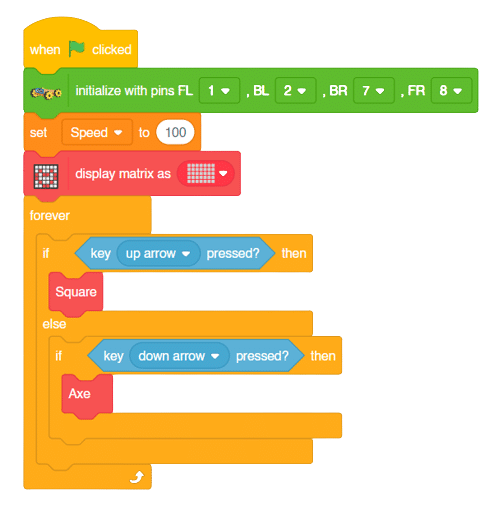
Now we will keep a specific condition on when to activate the Square Motion and when to activate the Axe Motion.
We will use the if-else conditions where on pressing the “up” arrow key, we will initiate the Square Motion and on pressing the “down” arrow key, we will initiate the Axe Motion with the help of Mecanum Robot.
Square Motion:
Axe Motion:
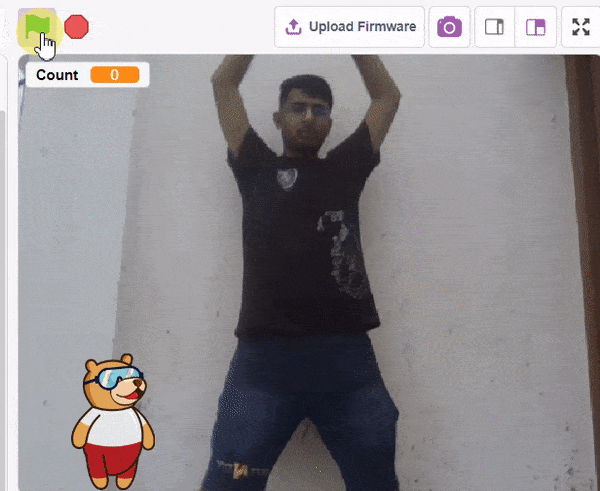
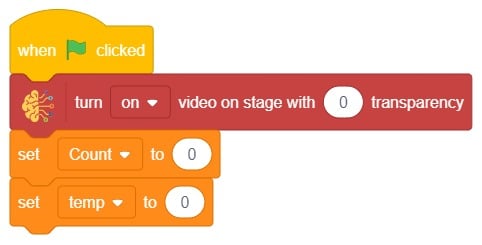
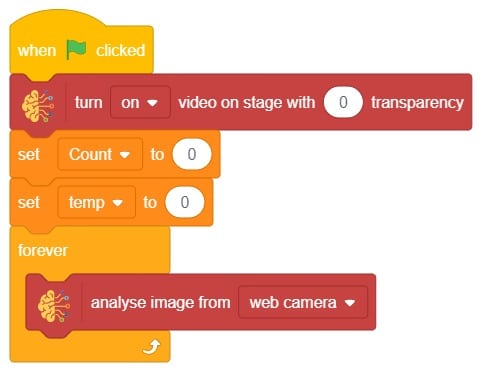
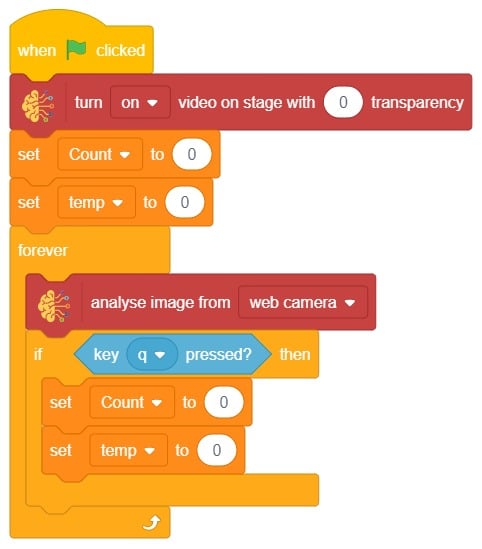
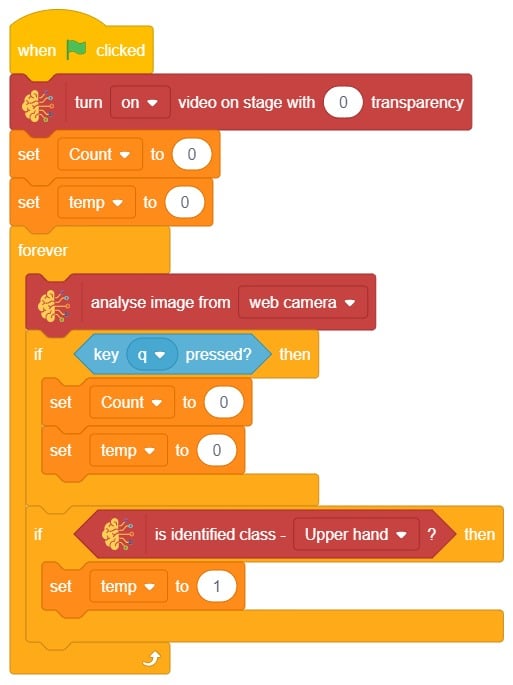
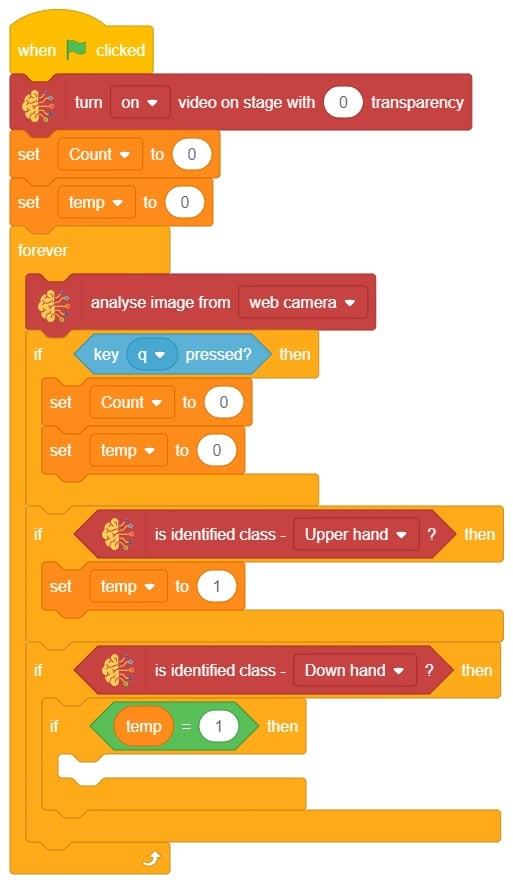
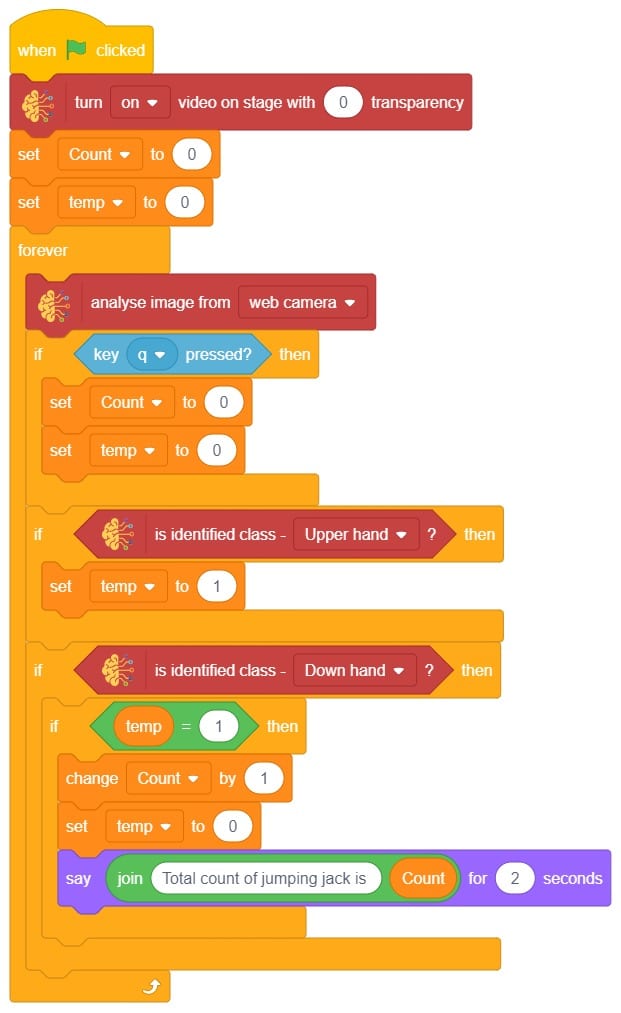
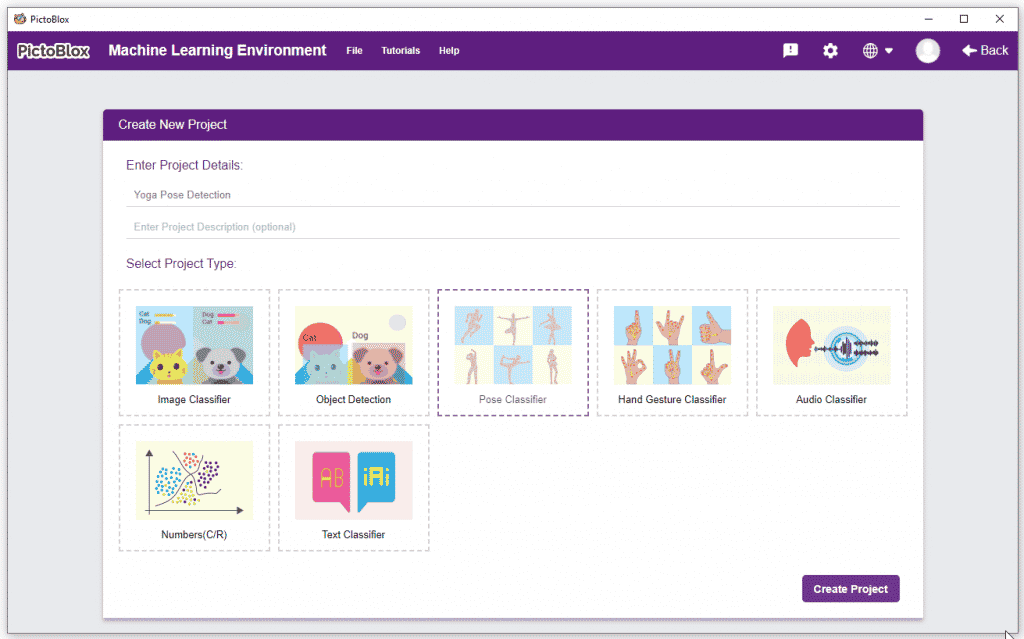
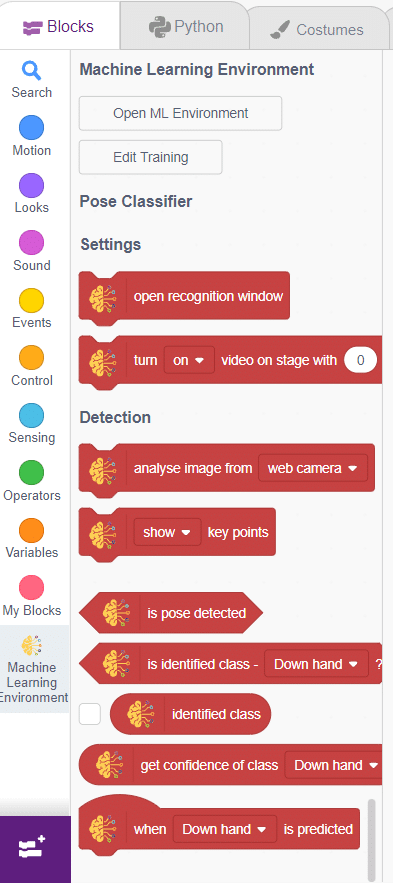
In this example project, we are going to create a machine learning model that can count the number of jumping jack activities from the camera feed.
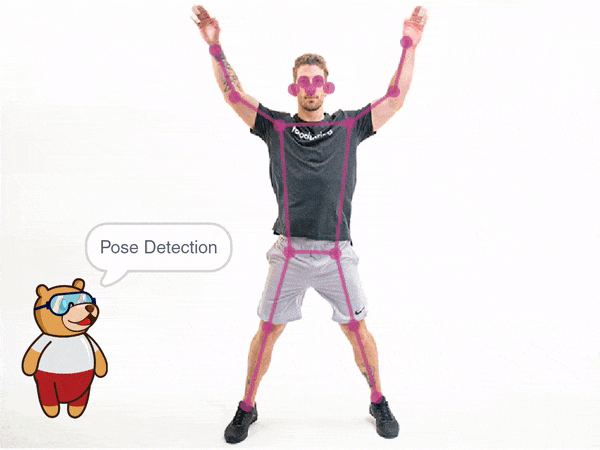
The pose Classifier is the extension of the ML Environment used for classifying different body poses into different classes.
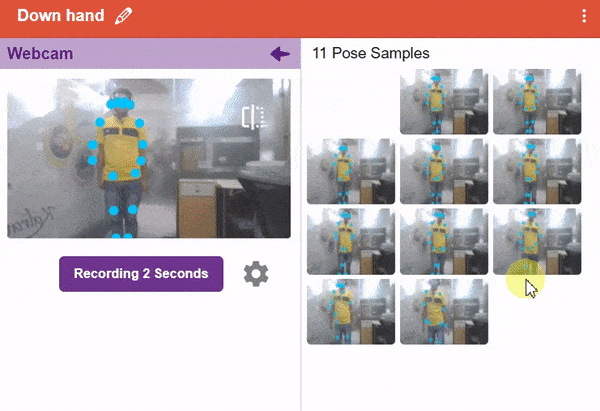
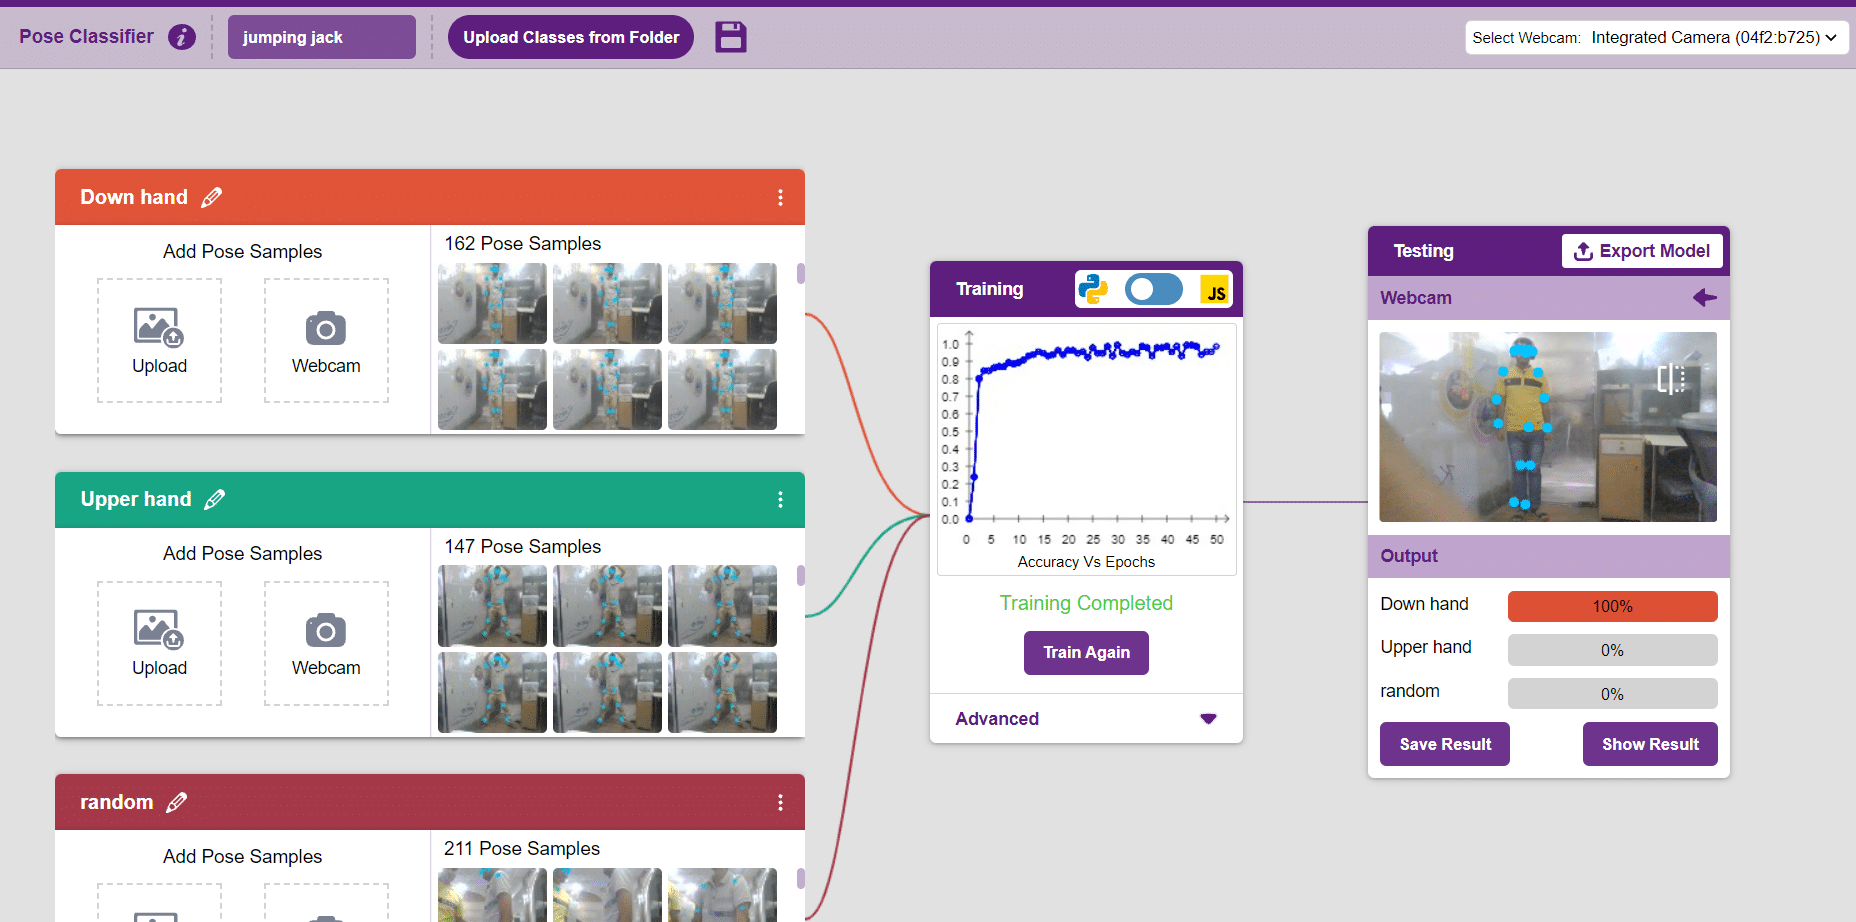 The model works by analyzing your body position with the help of 17 data points.

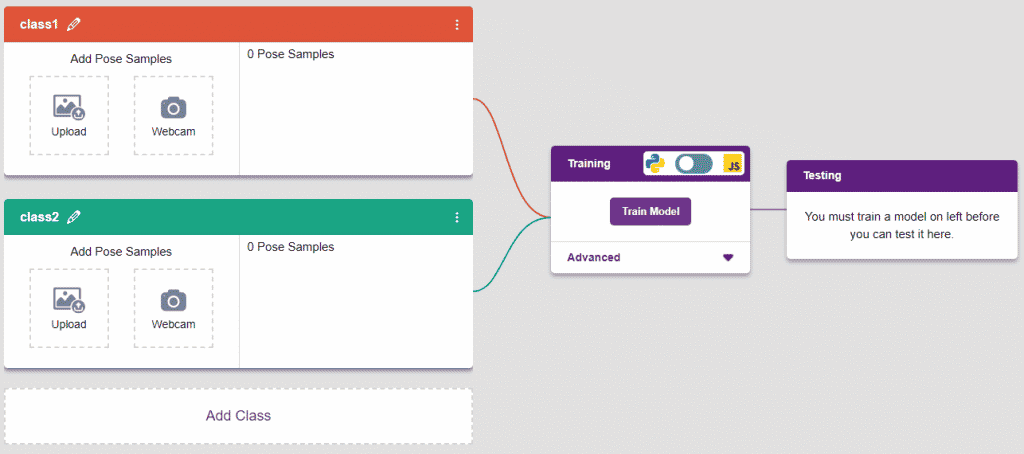
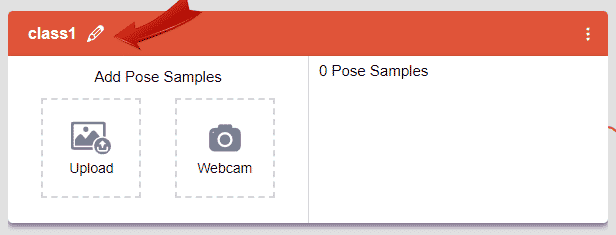
Class is the category in which the Machine Learning model classifies the poses. Similar posts are put in one class.
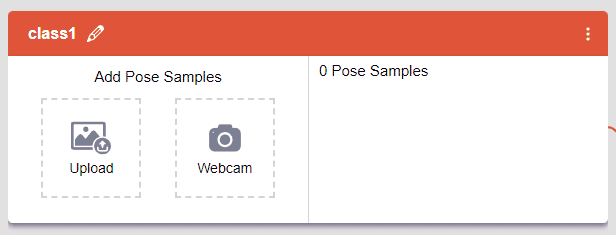
There are 2 things that you have to provide in a class:
You can perform the following operations to manipulate the data into a class.
After data is added, it’s fit to be used in model training. To do this, we have to train the model. By training the model, we extract meaningful information from the hand pose, and that in turn updates the weights. Once these weights are saved, we can use our model to predict previously unseen data.

The accuracy of the model should increase over time. The x-axis of the graph shows the epochs, and the y-axis represents the accuracy at the corresponding epoch. Remember, the higher the reading in the accuracy graph, the better the model. The range of accuracy is 0 to 1.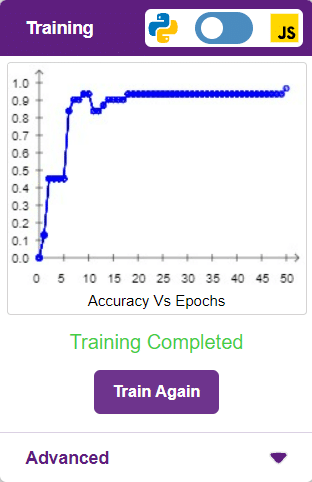
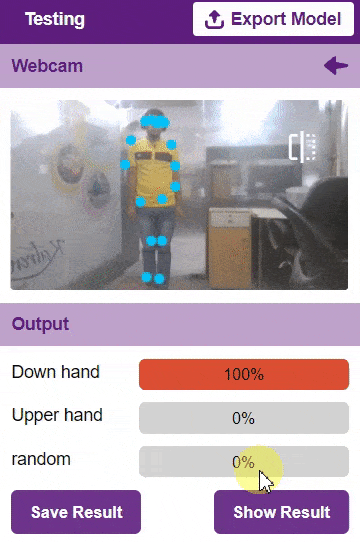
To test the model, simply enter the input values in the “Testing” panel and click on the “Predict” button.
The model will return the probability of the input belonging to the classes.
Click on the “Export Model” button on the top right of the Testing box, and PictoBlox will load your model into the Block Coding Environment if you have opened the ML Environment in the Block Coding.
The idea is simple, after running code we will do jumping jack activity in front of camera and tobi sprite will say counting of jumping jack.