



Introduction
Sprites are graphic characters that can be programmed to move, speak, change costumes, and perform different actions in PictoBlox.
In this activity, we will use Python code to control multiple sprites together. We will create separate sprite objects for Tobi, Devin, and Giga Walking, show them on the stage, and move them repeatedly using a loop.
Each sprite will move with a different step value. This helps students understand how the same command can create different results when different values are used.
By completing this activity, students will learn how multiple objects can be controlled through Python code in an interactive stage environment.
Setting Up the Stage and Sprites
Before writing the Python code, set up the project by adding all required sprites to the stage.
Step 1: Open PictoBlox
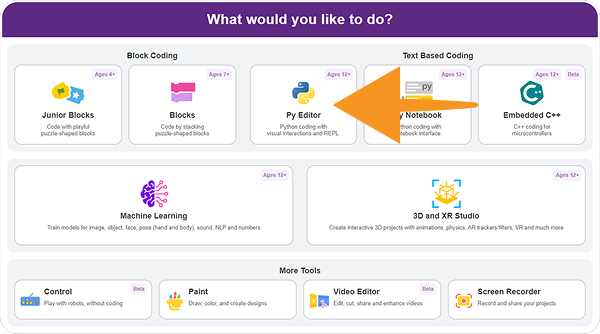
Open PictoBlox on your computer and select the Py Editor environment.
Step 2: Add the Giga Walking Sprite
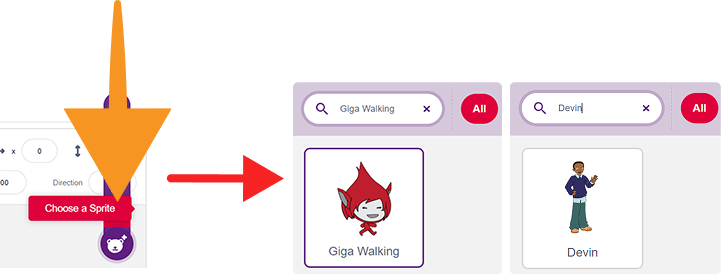
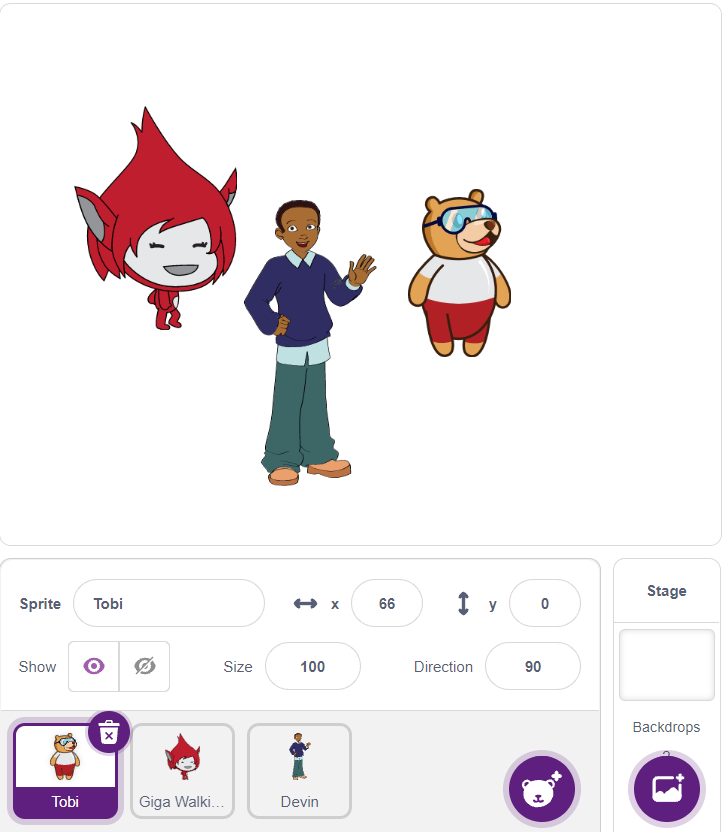
Click on Choose Sprite. Search for and add the Giga Walking and add the Devin sprites. Place it clearly on the stage. Make sure Tobi, Devin, and Giga Walking are all visible on the stage.
Step 4: Set the Backdrop to Empty
Set the stage backdrop to empty so that no background image appears on the stage. This makes it easier to observe the movement of all three sprites.
Python Coding Guide
Now, write the Python code to move all three sprites together.
Step 1: Create Sprite Objects
Create separate sprite objects for Tobi, Devin, Giga Walking, and Stage.
# Initiate class objects
# Create separate sprite objects for each character

tobi = Sprite('Tobi')
devin = Sprite('Devin')
gigaWalking = Sprite('Giga Walking')
stage = Sprite('Stage') This code tells PictoBlox which sprites we want to control using Python.
Step 2: Change the Backdrop and Show All Sprites
Use the switchbackdrop() function to set the stage backdrop to empty. Use the show() function to make all sprites visible.
# Change the background to empty and show all sprites

stage.switchbackdrop('empty')
tobi.show()
devin.show()
gigaWalking.show() This ensures that all three sprites are visible before the movement starts.
Step 3: Create a Loop for Repeated Movement
Create a for loop to repeat the movement 10 times.
# Make Tobi, Devin, and Giga Walking move according to step values, 10 times in a loop

for i in range(0, 10):
    tobi.move(5)
    devin.move(-10)
    gigaWalking.move(-i)
    print(i)
This loop runs from 0 to 9, which means the movement commands are repeated 10 times.
Step 3: Please check the overall code.
# Initiate class objects
# Create separate sprite objects for each character

tobi = Sprite('Tobi')
devin = Sprite('Devin')
gigaWalking = Sprite('Giga Walking')
stage = Sprite('Stage')

# Change the background to empty and show all sprites

stage.switchbackdrop('empty')
tobi.show()
devin.show()
gigaWalking.show()

# Make Tobi, Devin, and Giga Walking move according to step values, 10 times in a loop

for i in range(0, 10):
    tobi.move(5)
    devin.move(-10)
    gigaWalking.move(-i)
    print(i)
Output
When the program is executed:
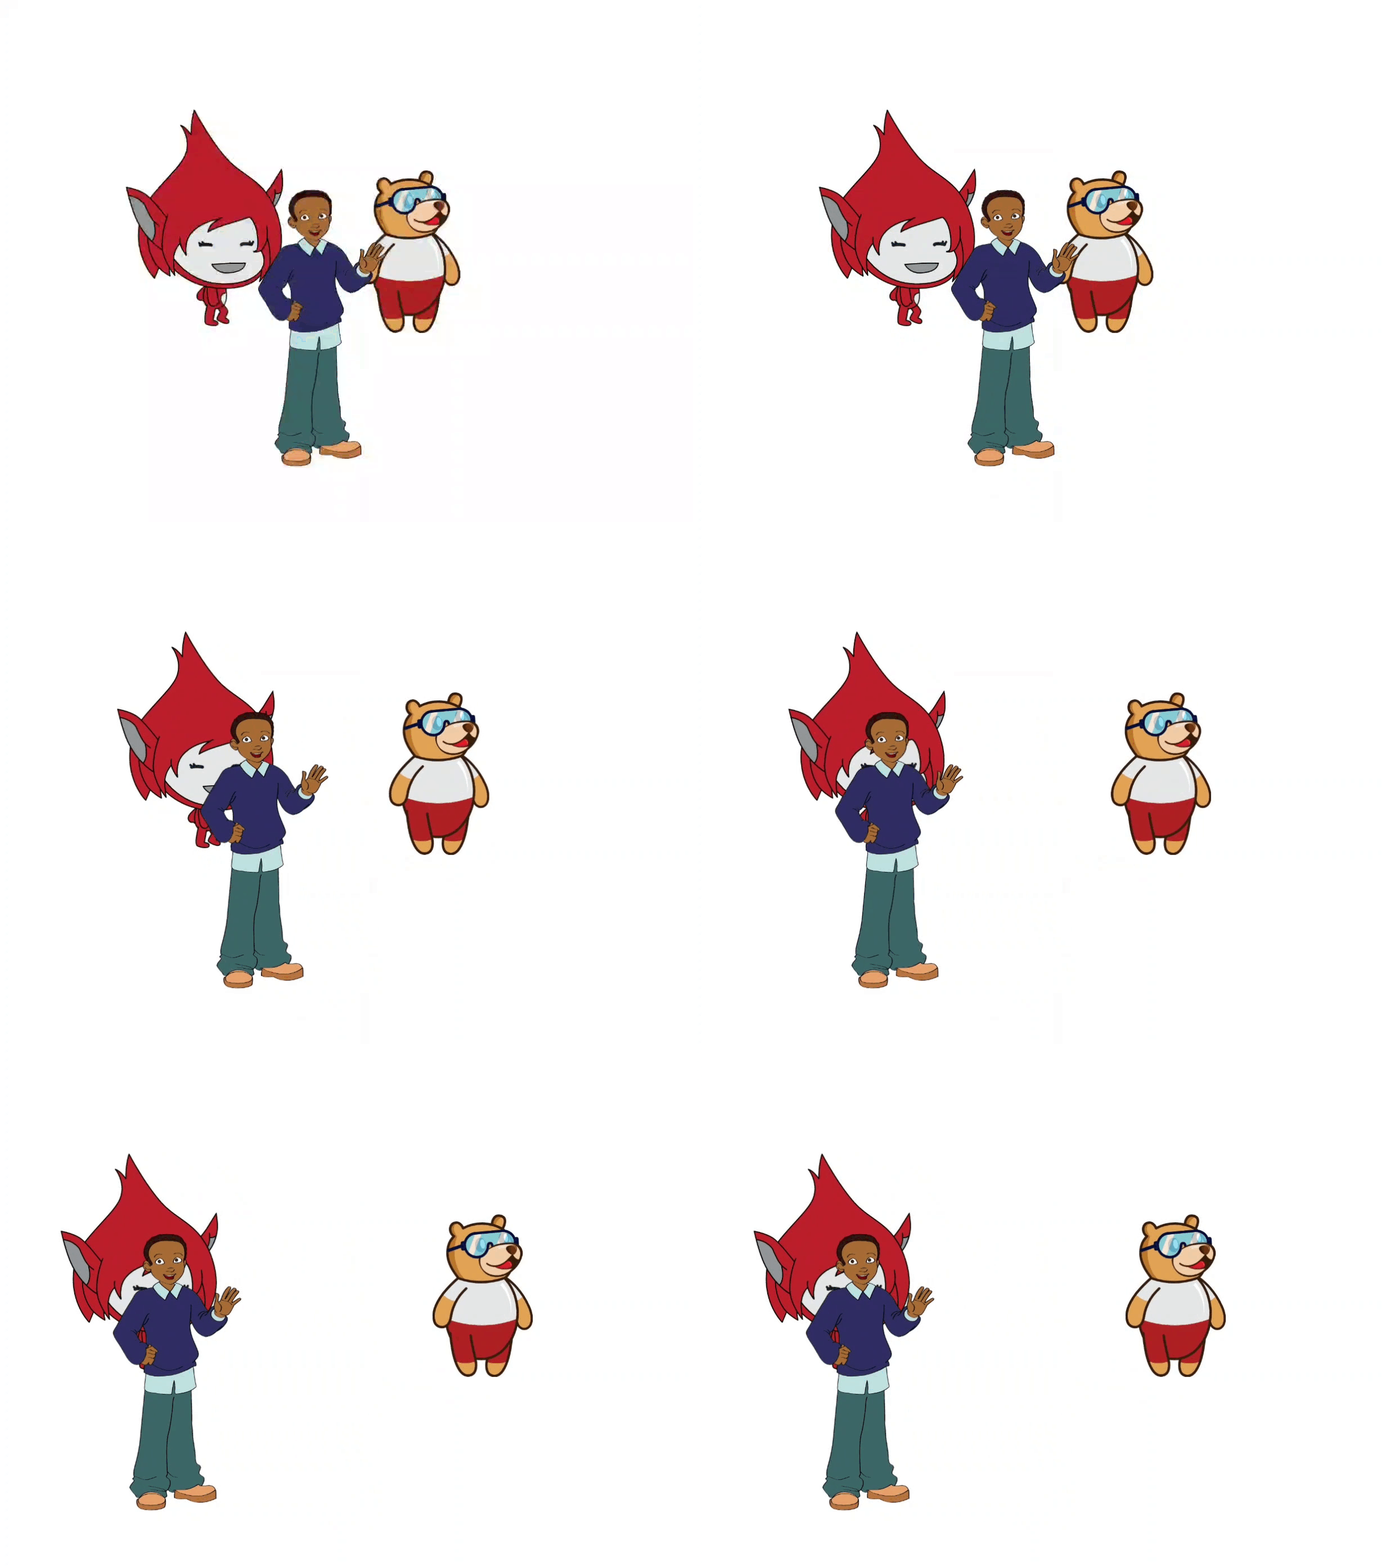
- Tobi moves slowly in the forward direction.
- Devin moves faster in the opposite direction.
- Giga Walking moves with a changing step value.
- All three sprites move together on the stage.
- The numbers from
0to9are printed in the output.
This shows how multiple sprites can be controlled together using a loop in Python.
Conclusion
In this activity, we learned how to control multiple sprites using Python in PictoBlox.
By creating sprite objects, changing the backdrop, showing sprites, and using a loop, we animated Tobi, Devin, and Giga Walking together on the stage.
This project helps students build a strong foundation in Python concepts such as objects, loops, variables, function calls, and sprite control. It is a simple and effective beginner activity for understanding animation and movement in PictoBlox.