




Introduction
The evive Gamepad Module allows users to read joystick movements and button presses using the Dabble app. The joystick gives movement data in the form of X and Y values, while the gamepad buttons provide digital input signals.
In this project, evive continuously displays the joystick values on its TFT screen. These values include the joystick’s X-axis value, Y-axis value, movement angle, and radial distance from the center.
The program also checks which gamepad button is pressed and displays the corresponding message on the TFT screen. This activity helps students understand how input devices are used to control machines, robots, games, and interactive systems.
By completing this project, students will learn how to use the Dabble extension, create custom blocks, apply conditional logic, and display real-time gamepad data on evive.
Setting Up the Project
Before coding, connect evive to PictoBlox and set up the Bluetooth connection for the Dabble app.
Step 1: Connect evive to the Computer
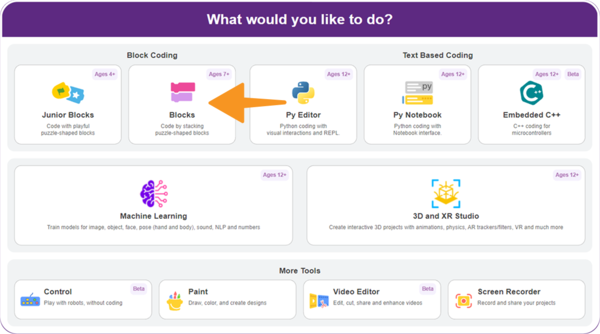
Connect evive to your computer using a USB cable. Open PictoBlox and select the Block Coding environment.
Step 2: Select evive Board
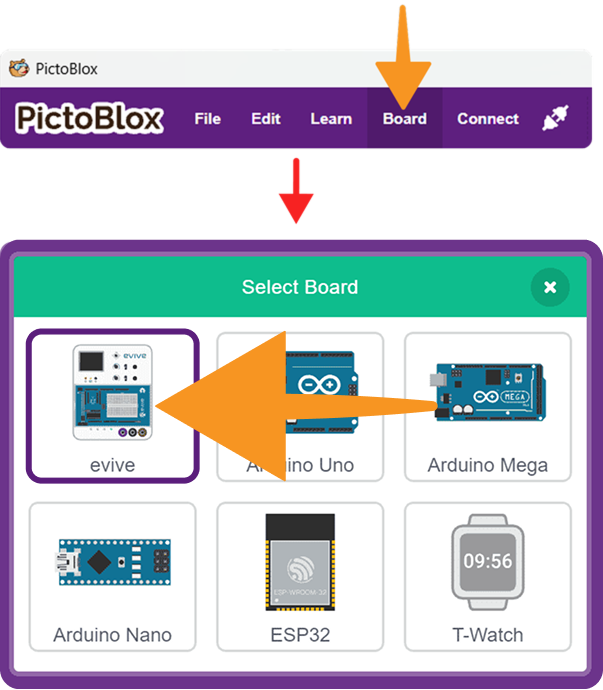
Click on Board from the menu bar. Select evive from the board list.
Step 3: Connect the Bluetooth Module
Connect the HC-05 Bluetooth module to evive by placing it in the provided headers. Make sure the RX pin of the Bluetooth module is connected to the TX3V3 pin on evive.
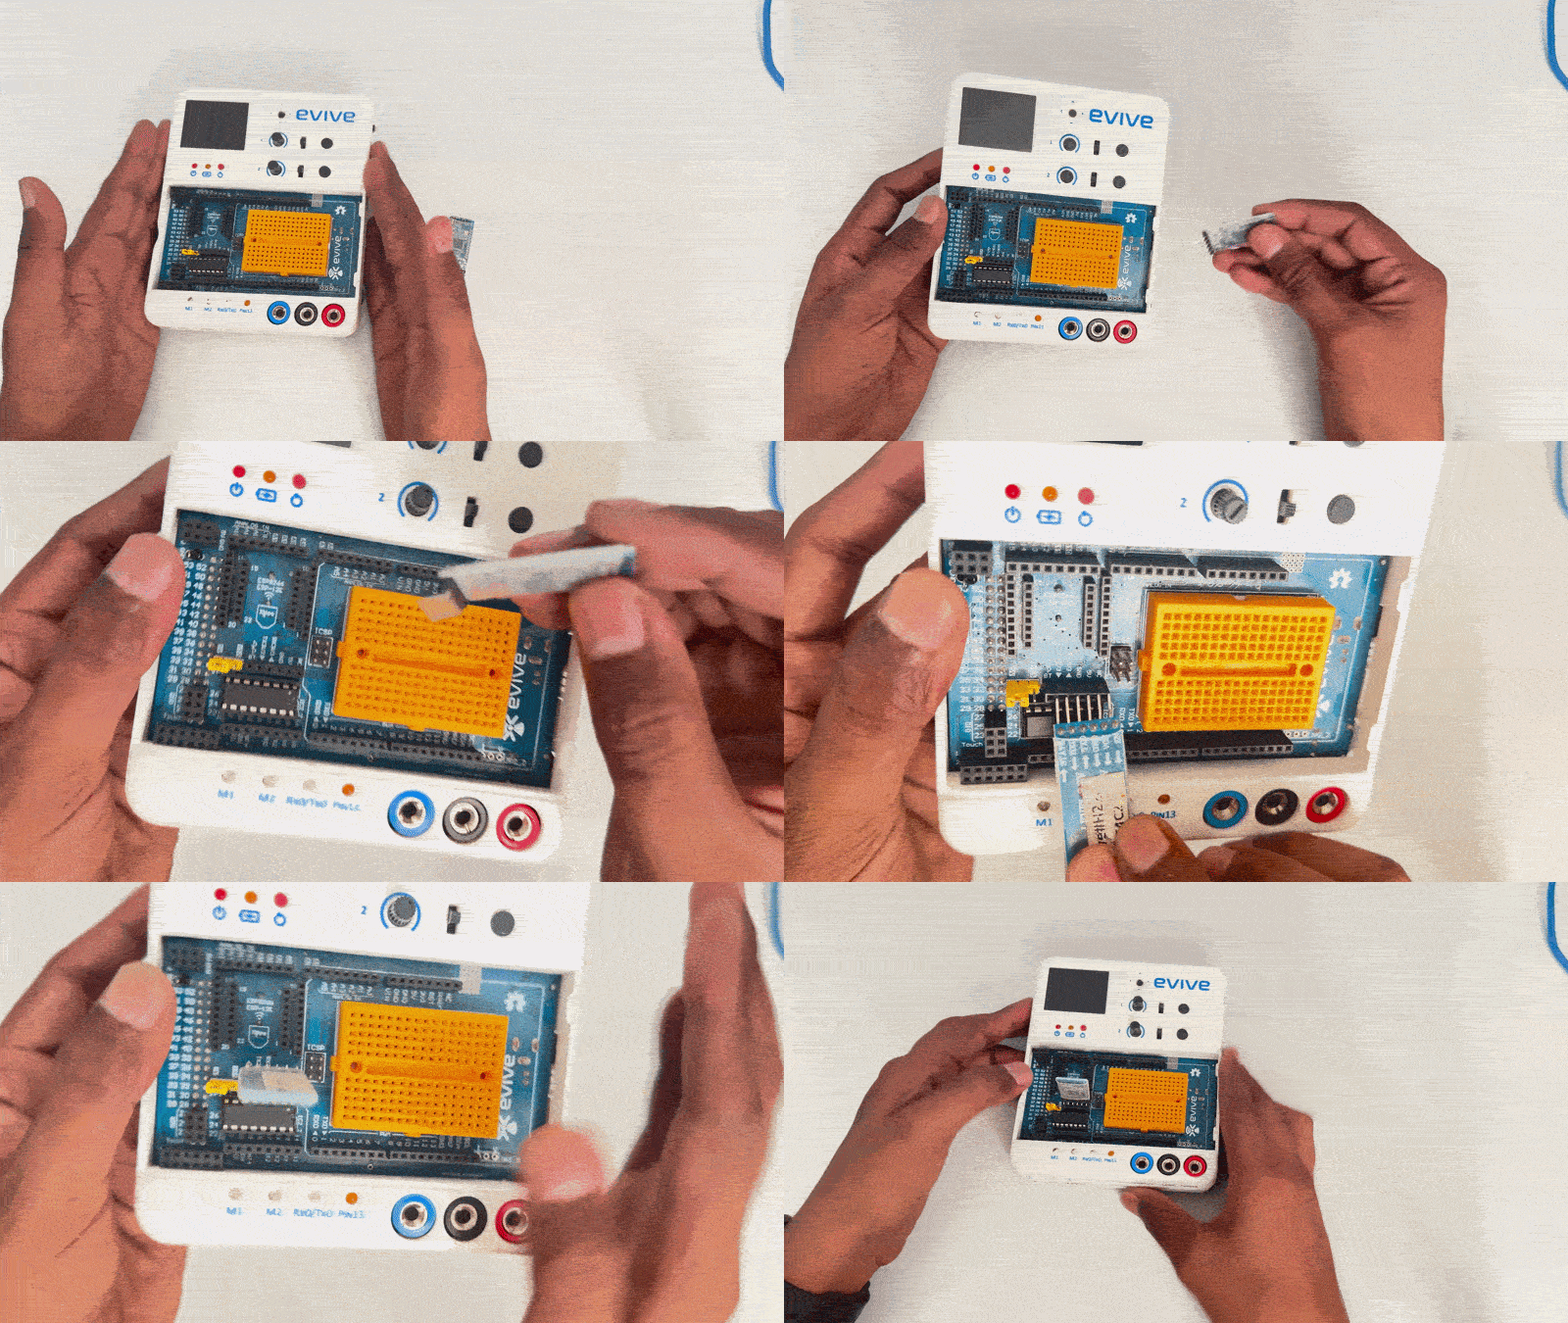
Once connected, the red LED on the Bluetooth module will start blinking.
Step-by-Step Coding Guide
In this project, we will create two custom blocks:
- Display Joystick Value
- Check Digital Pins
These blocks will help keep the program organized and easy to understand.
Step 1: Create the Display Joystick Value Block and Check Digital Pins Block
Go to My Blocks. Click on Make a Block.
Name the block:
- Display Joystick Value
- Check Digital Pins Block
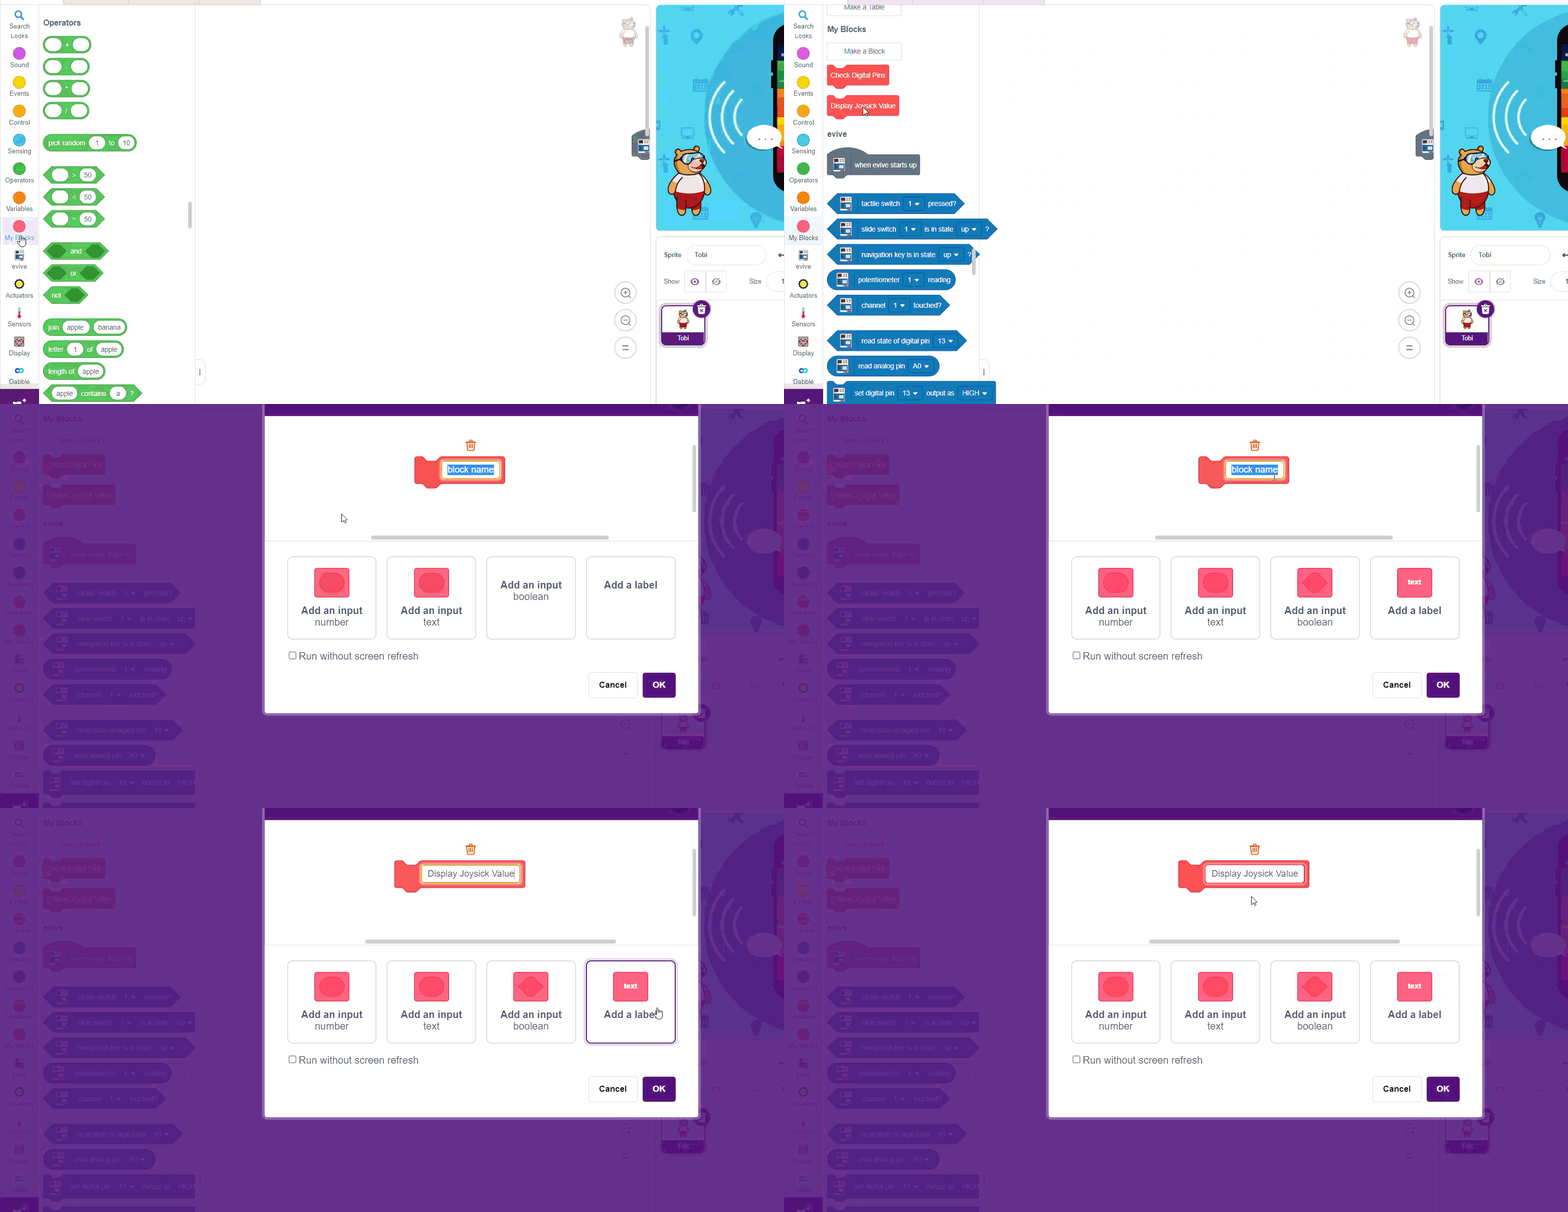
This Display Joystick Value block will display joystick X value, Y value, angle, and radial distance on the evive TFT screen. This Check Digital Pins Block block will check which gamepad button is pressed and display the related message on the TFT screen.
Step 2: Set Cursor Position for Joystick Values
Go to the Display block palette. Drag the set cursor at x: () y: () block.
Place it below the define Display Joystick Value block.
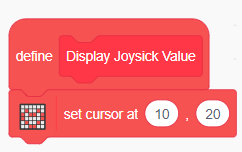
This sets the position on the TFT screen where the joystick values will be displayed.
Step 3: Display the X Value
From the Display palette, add the write() block.
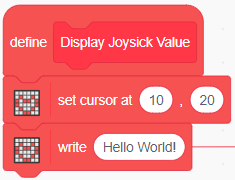
From the Operators palette, add the join() () block.
In the first part of the join block, write:
X Value:
In the second part, add the get X value from gamepad block from the Dabble palette.

Place the complete join block inside the write block.
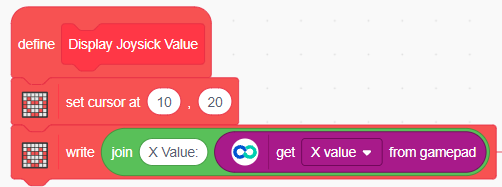
This displays the joystick X-axis value on the TFT screen.
Step 5: Display Other Joystick Values
Similarly, complete the Display Joystick Value block to display:
- X Value
- Y Value
- Angle
- Radial Distance
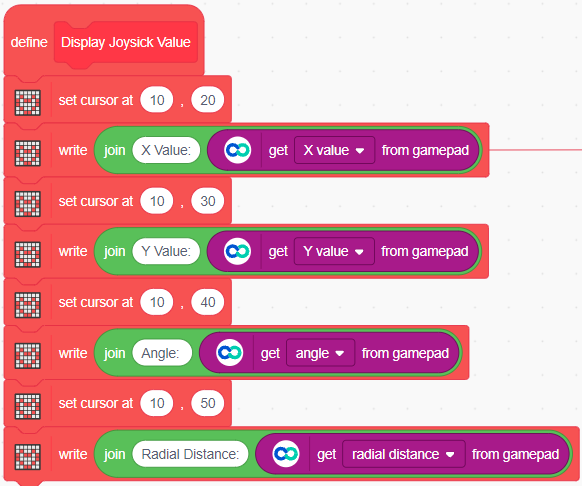
Use separate cursor positions for each value so that the text appears clearly on the TFT screen.
Step 6: Add Button Detection Logic
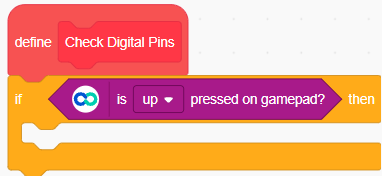
Below the define Check Digital Pins block, add an if then block from the Control palette.
From the Dabble palette, add: is up pressed on gamepad? and Place it inside the condition space of the if block.
Inside the if block, add a write() block from the Display palette.
Write the message: Up Pressed
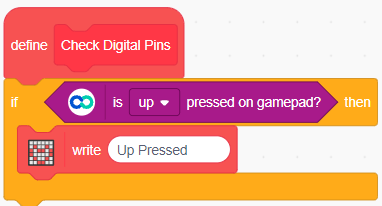
This will display the message when the Up button is pressed on the gamepad.
Step 7: Detect Other Gamepad Buttons
Repeat the same logic for other gamepad buttons.
Create conditions to detect:
- Up
- Down
- Left
- Right
- Triangle
- Circle
- Cross
- Square
- Start
- Select
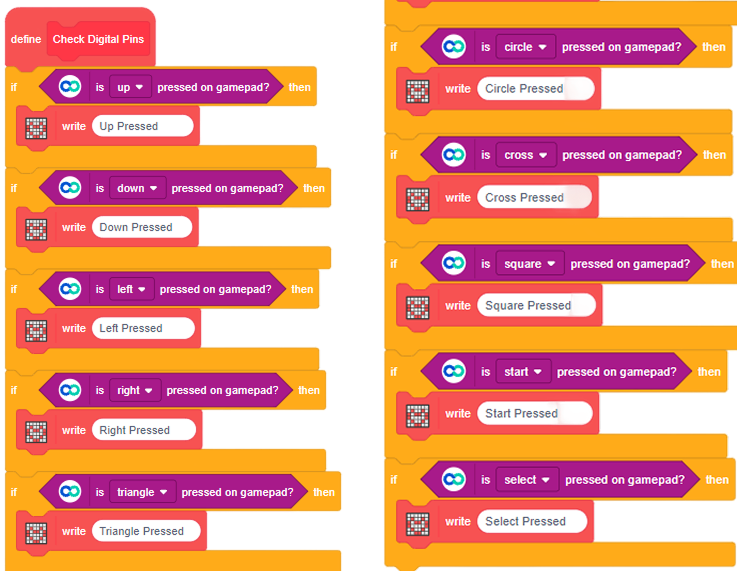
Each button should display its corresponding message on the evive TFT screen.
Step 8: Switch to Upload Mode
After creating the custom blocks, switch the mode from Stage to Upload.
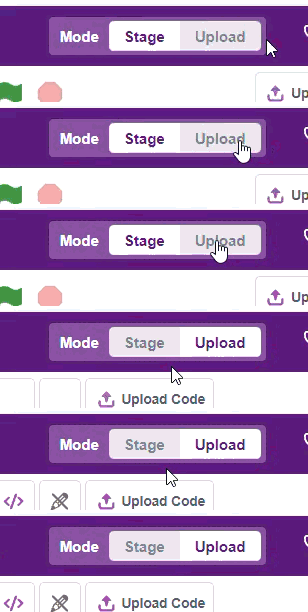
This is required because the final program must be uploaded to evive.
Step 9: Start the Program on evive
From the evive palette, drag the When evive starts up block.
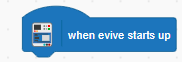
This block starts the program when evive powers on.
Step 10: Clear the TFT Screen
From the Display palette, add the fill screen with color block below the startup block.
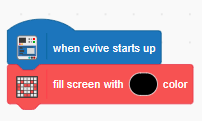
This clears the screen and prepares it to display joystick values and button messages.
Step 11: Add a Forever Loop
From the Control palette, add a forever block.
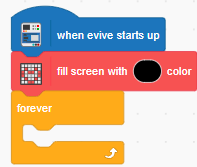
This keeps the program running continuously.
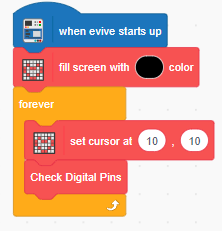
Step 12: Set Cursor and Run Custom Blocks
Inside the forever loop:
- Add the set cursor at x: () y: () block.
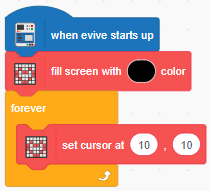
- Add the Check Digital Pins custom block.
- Add the Display Joystick Value custom block.
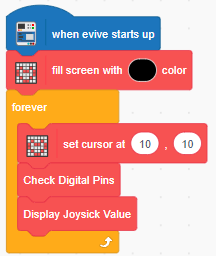
This continuously checks button inputs and updates joystick values on the TFT display.
Step 13: Upload the Code to evive
Click on Upload Code.
Wait until the upload process is complete.
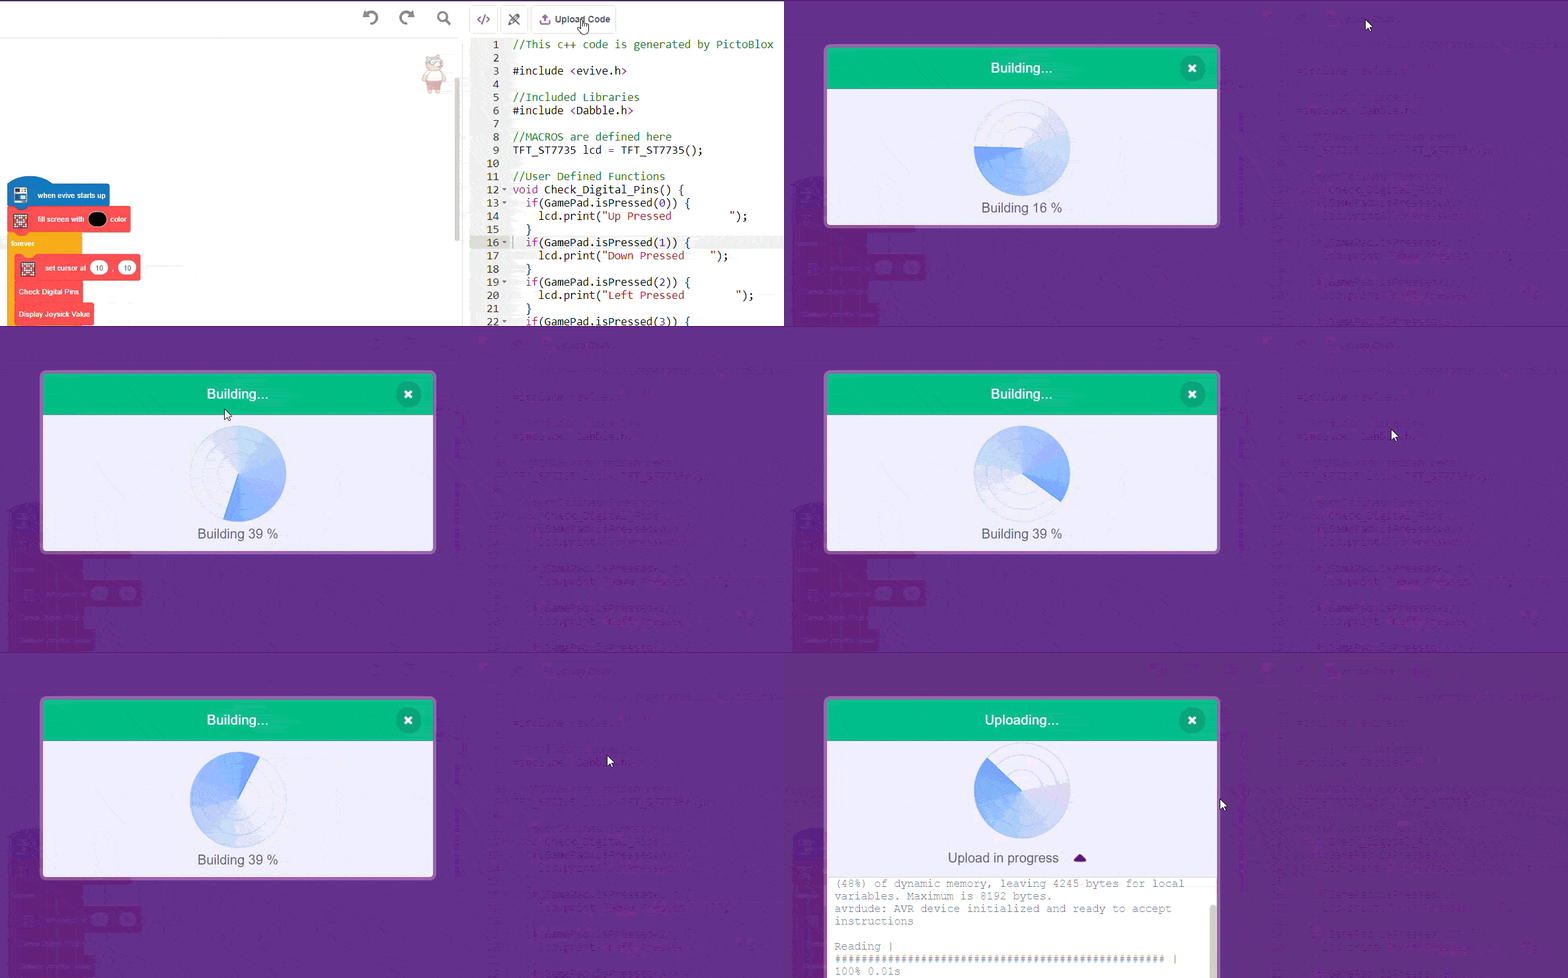
After uploading, connect evive with the Dabble app using the HC-05 Bluetooth module.
Output
After uploading the code and connecting evive with the Dabble app:
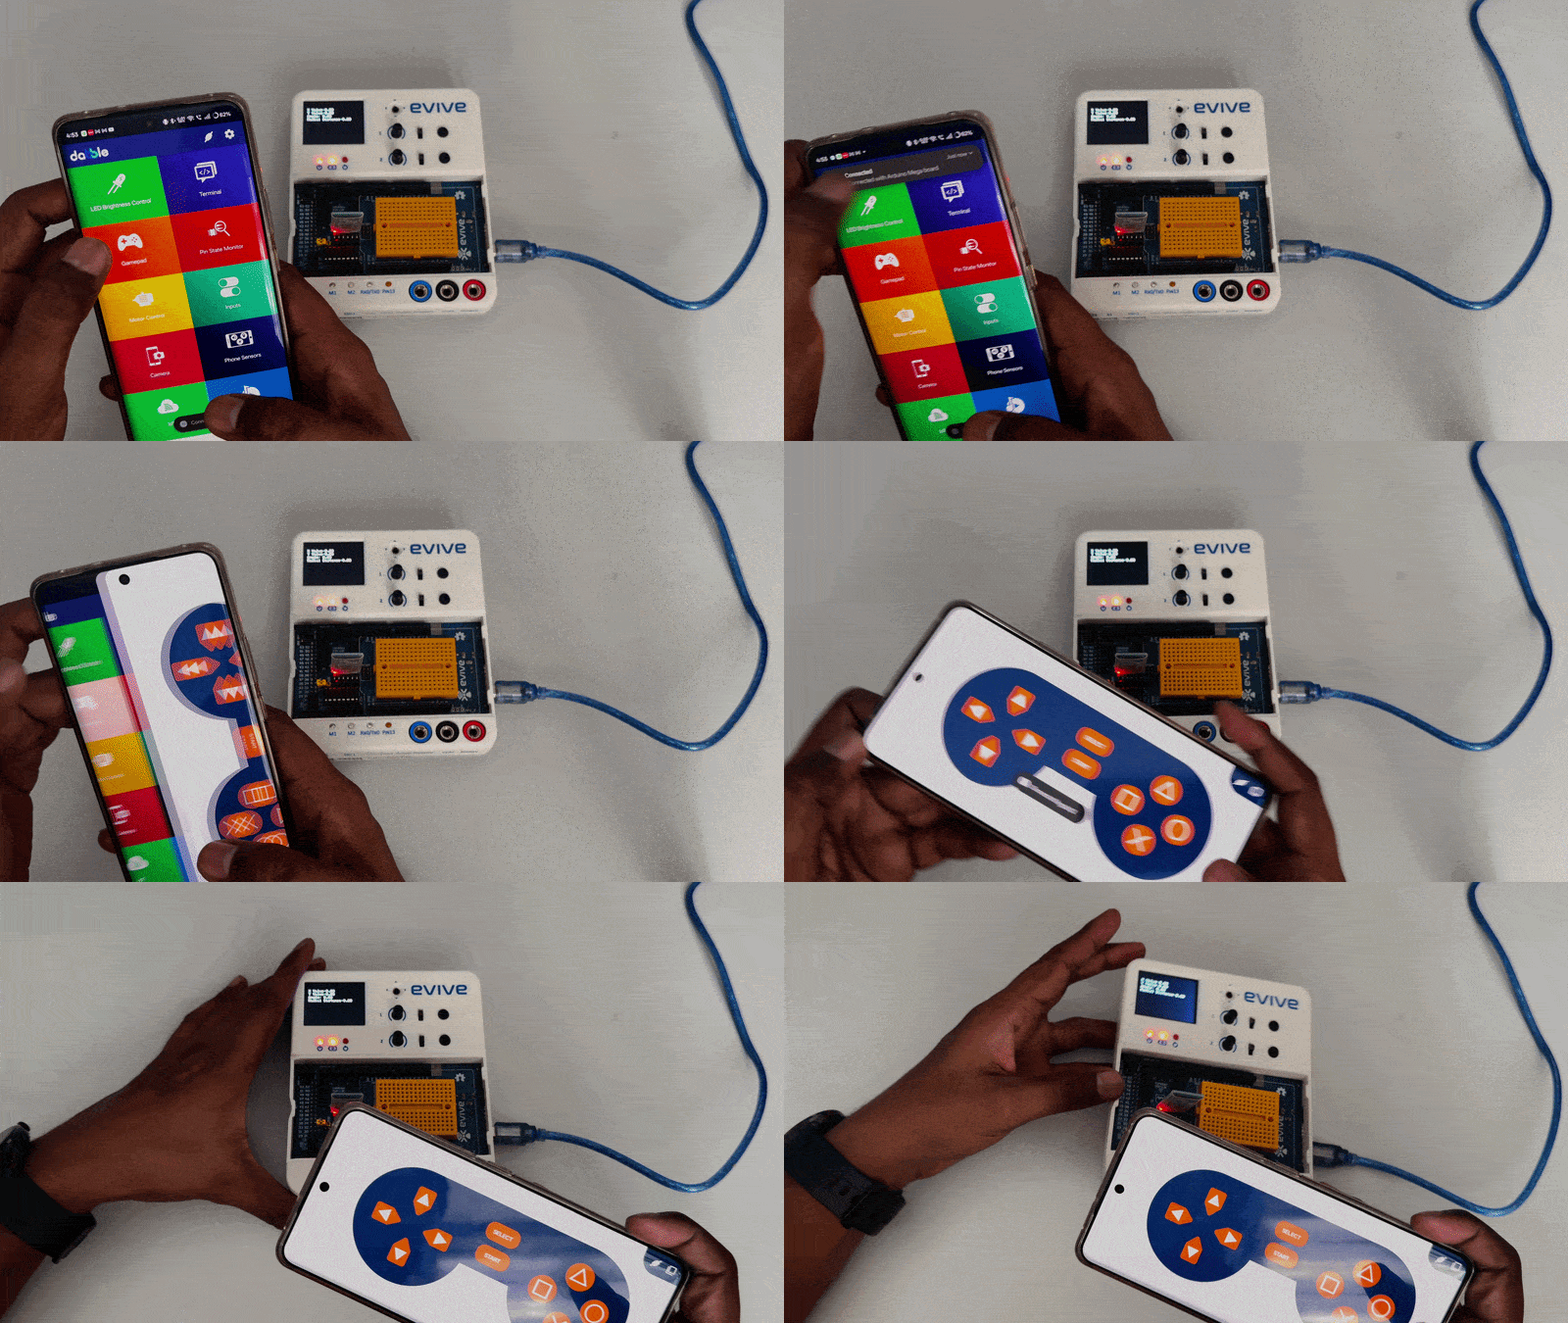
- The TFT screen displays the joystick X-axis value.
- The TFT screen displays the joystick Y-axis value.
- The TFT screen displays the joystick angle.
- The TFT screen displays the radial distance.
- When a gamepad button is pressed, the corresponding message appears on the TFT screen.
- The display updates continuously while the program is running.
Conclusion
In this project, we used the evive Gamepad Module with PictoBlox and the Dabble extension to read joystick and button inputs.
Students learned how to display joystick X value, Y value, angle, and radial distance on the evive TFT screen. They also learned how to detect different gamepad button presses using conditional statements.
This project builds a strong foundation for creating interactive control systems, robot controllers, game-based interfaces, and wireless input-based projects using evive and Dabble.