



Introduction
In this project, we will create an Advanced Line Follower Robot using Quarky and PictoBlox. The robot will use the Quarky Advanced Line Follower extension to detect and follow a black line on a white surface.
The Advanced Line Follower sensor uses IR sensors to identify the difference between the black line and the background. Based on the sensor readings, Quarky makes real-time decisions to move forward, turn left, or turn right so that it stays on the track.
This project also introduces students to PID control, which helps the robot follow the line more smoothly and accurately. By adjusting PID values, threshold values, and speed parameters, students can understand how autonomous robots correct their path while moving.
By completing this activity, students will learn how sensors, logic, calibration, and control algorithms work together in real-world robotic navigation.
Prerequisites
Before starting the activity, make sure you have:
- Quarky device, charged and powered on
- PictoBlox installed on your computer
- USB cable
- Latest Quarky firmware uploaded through PictoBlox
Note: Use PictoBlox version 9.1.0 or later for better support with the Quarky Advanced Line Follower extension.
Connecting Quarky with PictoBlox and Updating Firmware
Before creating the line follower program, connect Quarky to PictoBlox and update the firmware. If Quarky is running on older firmware, the Advanced Line Follower extension may not work properly.
Updating Quarky Firmware
Before using the Quarky Connect extension, ensure that your Quarky is updated to the latest firmware version 6.0 If you are using an older Quarky firmware, this feature may not work, as Quarky Connect is supported only in the latest firmware.
Follow the steps below to upload the latest firmware:
Step 1: Make sure PictoBlox is installed on your device.
Please make sure to use PictoBlox version 9.1.0 or later for Quarky Connect Extension support. Click Download PictoBlox to visit the download page, select your operating system, and follow the on-screen instructions to install the latest version.
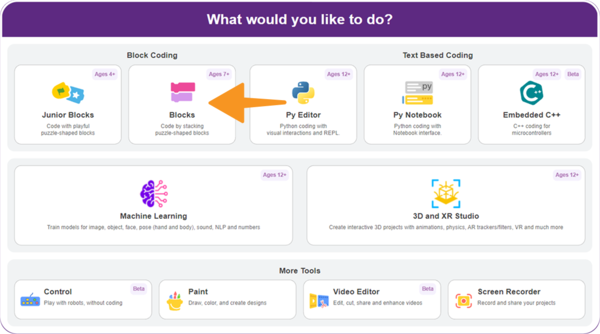
Step 2: Open PictoBlox and select the Block Coding environment.
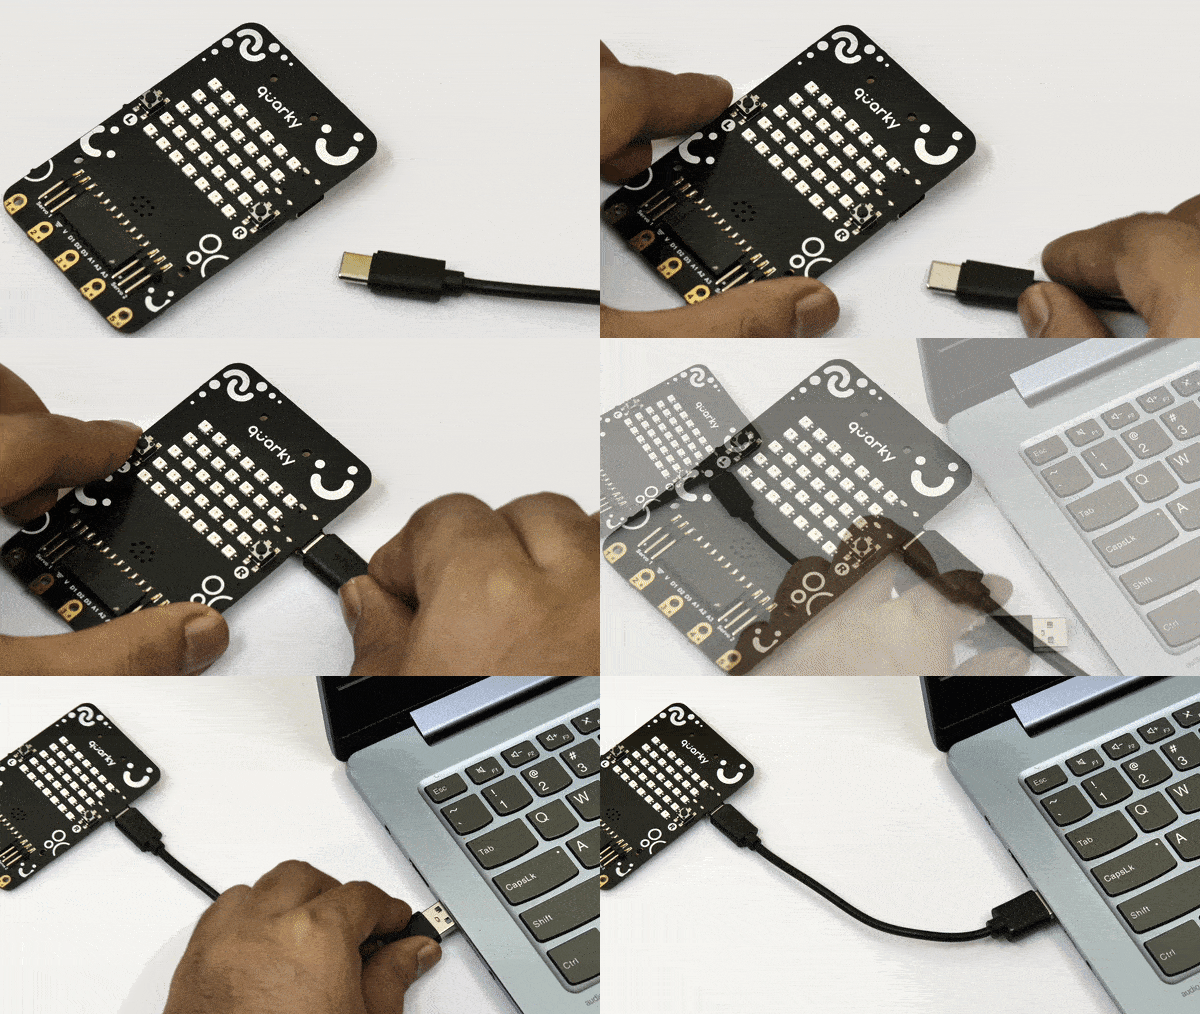
Step 3: Connect your Quarky to your computer using a USB cable.
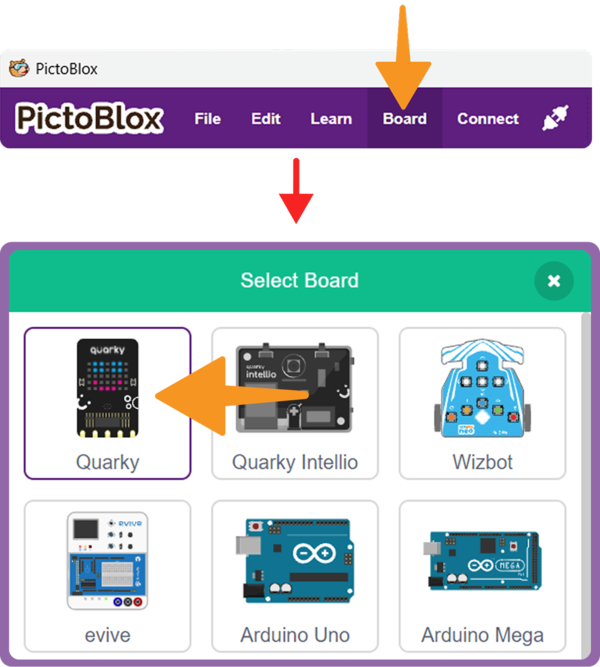
Step 4: Click on the Board button from the toolbar and select Quarky.
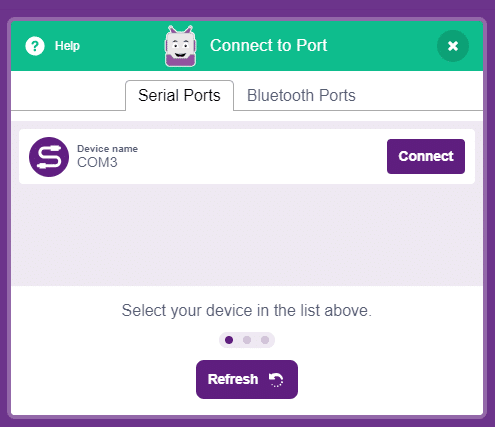
Step 5: Select the appropriate Serial Port and click Connect.
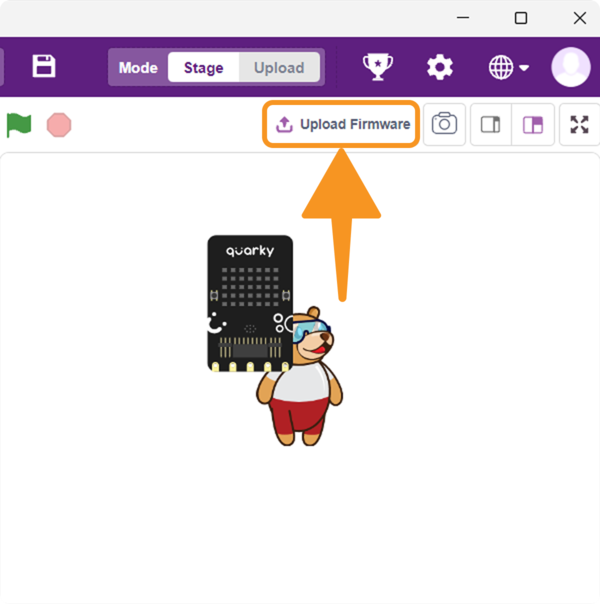
Step 6: In the upper right corner of the PictoBlox window, you will see the Upload Firmware button. Click, and a status window will open.
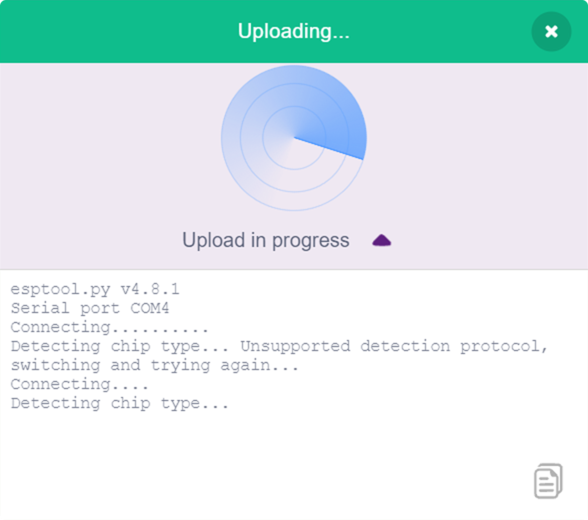
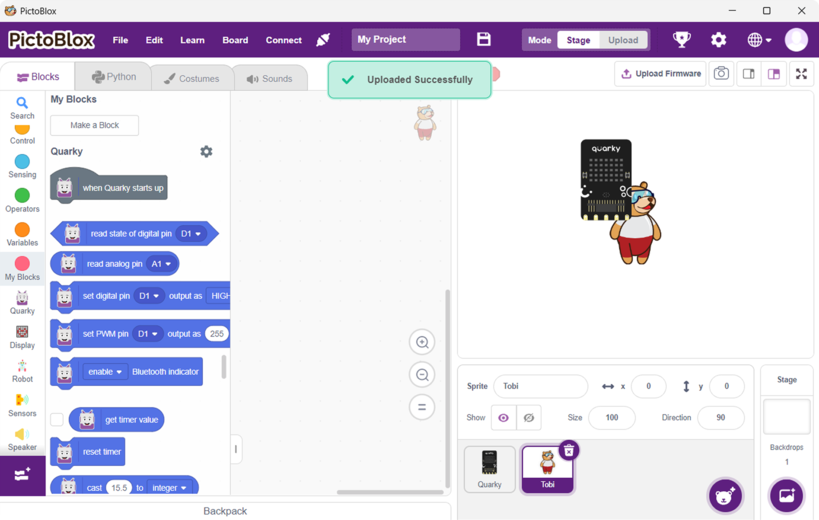
Step 7: Wait for the confirmation message on the screen.
Connect Quarky Using USB or Bluetooth
Step 1: To connect your Quarky board, select the appropriate Serial Port (USB) or Bluetooth port from the list, find your device, and click on Connect.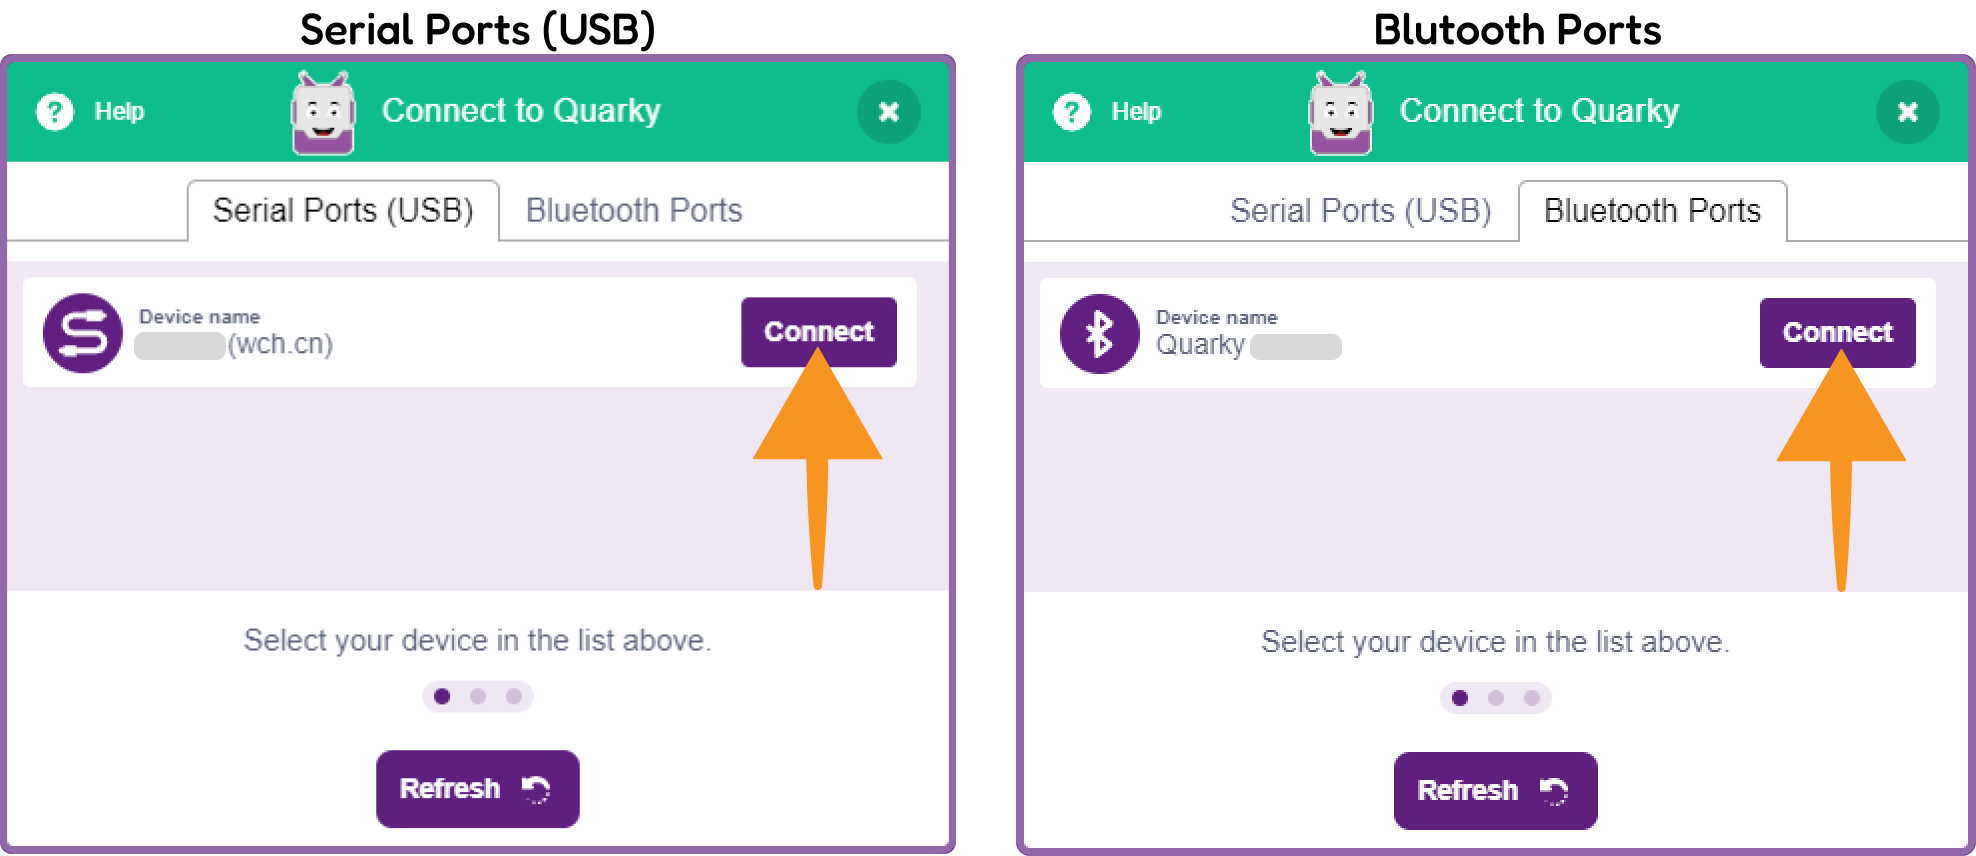
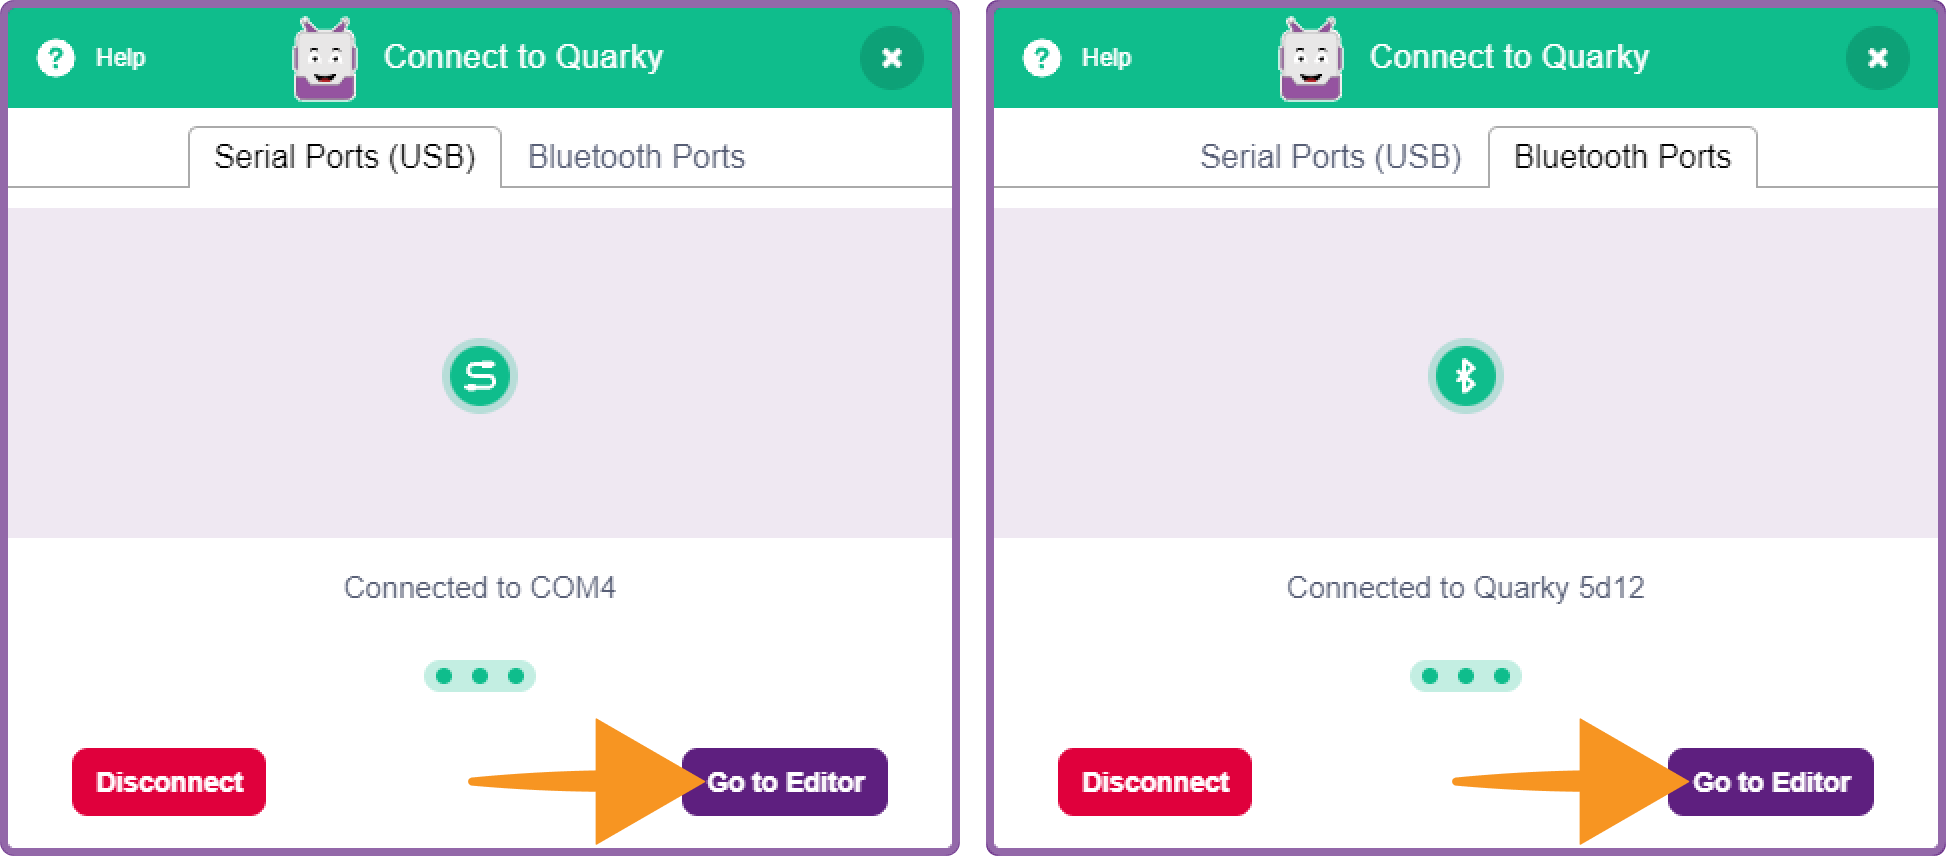
Step 2: Quarky is now successfully connected to PictoBlox. The status will change to Connected.
Step 3: Click on Go Editor to launch the coding environment and start programming with your Quarky board.
Adding the Quarky Advanced Line Follower Extension
After Quarky is connected successfully, add the required extension.
Follow these steps:
- Click on the Add Extension button and search for Quarky Advanced Line Follower.
- Select and add the extension.
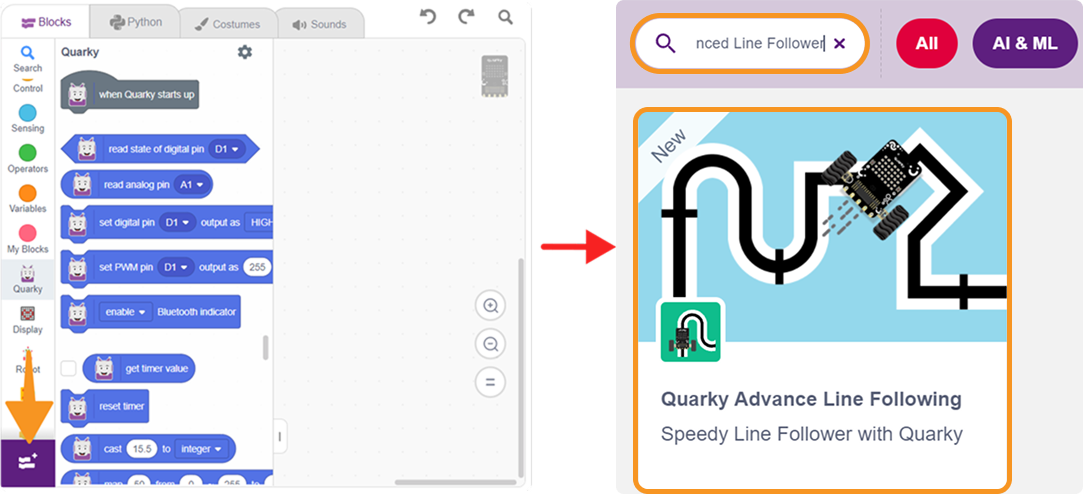
- The Advanced Line Follower blocks will now appear in the blocks palette.
You are now ready to create the line follower program.
Step-by-Step Block Coding Guide
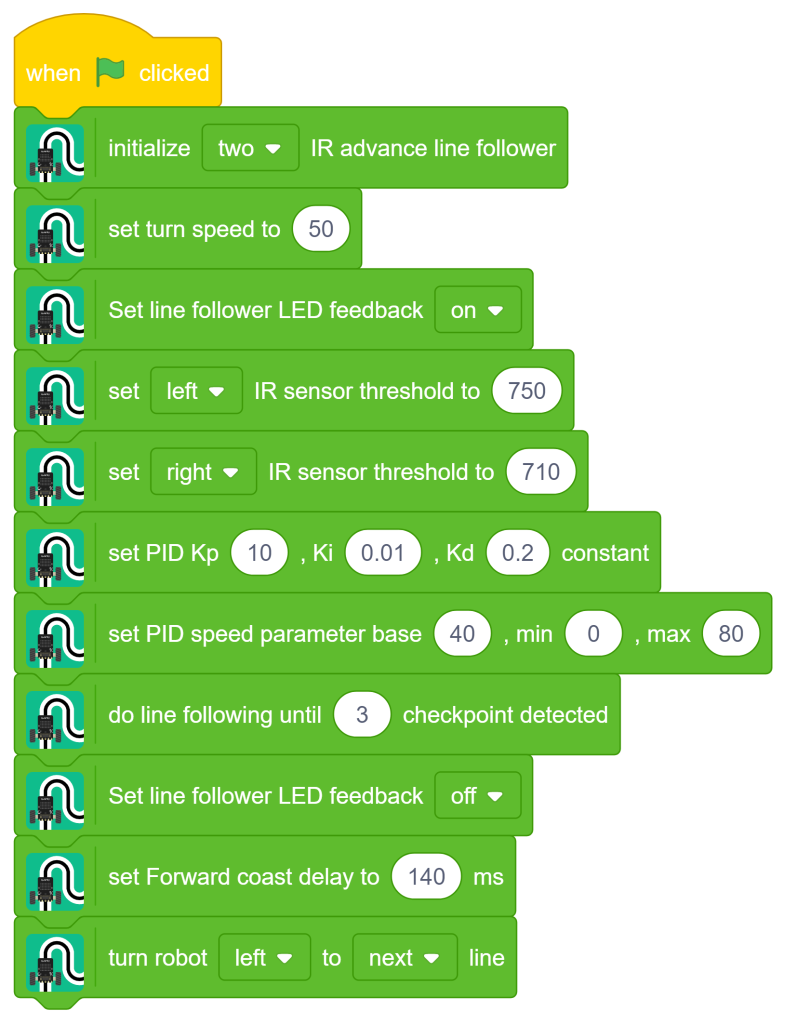
Now, create the program to make Quarky follow the black line, detect checkpoints, and turn left after reaching the third checkpoint.
Start the Program
- Add the ‘when green flag clicked’ block from the Events palette. This block starts the program when the Green Flag is clicked.
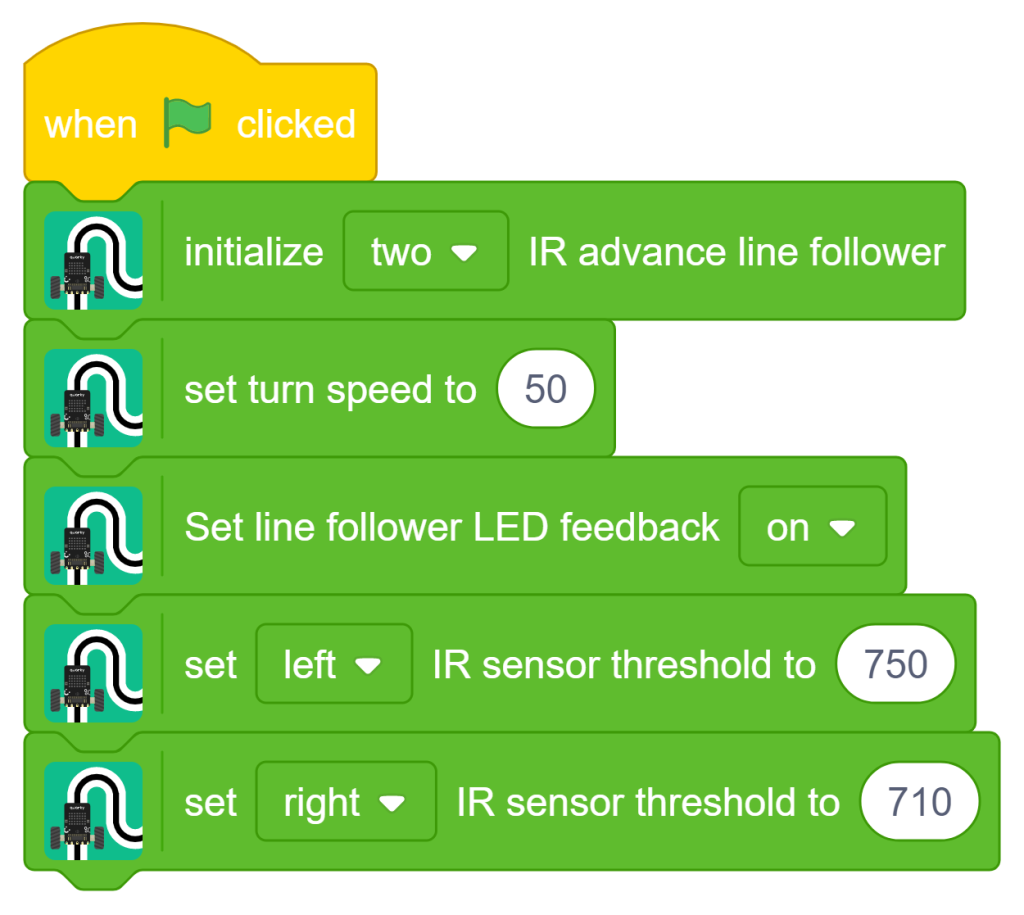
- From the Quarky Advanced Line Follower palette, add the ‘initialize two iR advanced line follower’ block. This block activates and prepares both IR sensors for line detection.
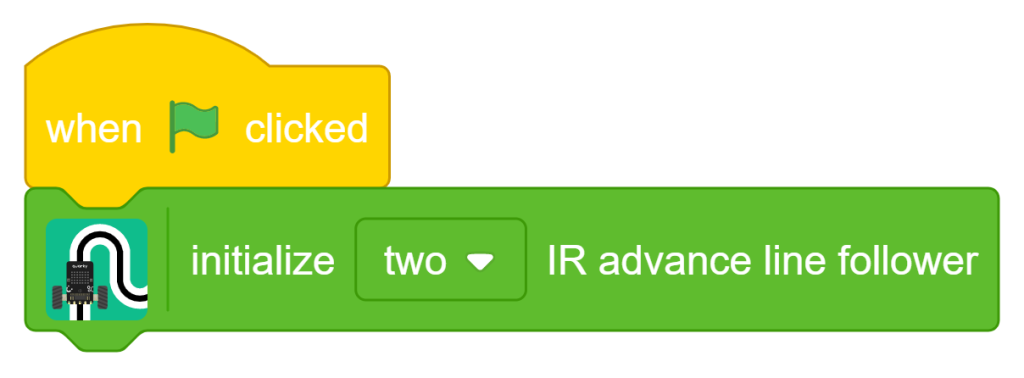
Note: Always use this block before using any other Advanced Line Follower blocks.
Set the Turn Speed
- Add the ‘set turn speed to 50’ block from the Advanced Line Follower palette.
- This controls how strongly the robot turns while correcting its path.
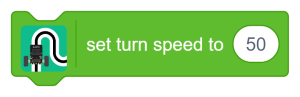
This value helps the robot make smooth and stable turns.
Enable LED Feedback
- Add the ‘set line follower LED feedback ON’ block.
- When LED feedback is ON, the sensor LEDs turn on when the line follower detects the line. This helps during testing and calibration.
- When LED feedback is OFF, the LEDs remain off, which can help save power or reduce light interference in some situations.
Set the Left IR Sensor Threshold
- Add the ‘set Left IR sensor threshold to 750’ block. This threshold helps the left sensor identify the difference between the black line and the white background.
Value Used:
Left IR Sensor Threshold = 750
Set the Right IR Sensor Threshold
- Add the ‘set right IR sensor threshold to 710′ block. This threshold helps the right sensor detect the line accurately.
Configure PID Constants
Add the ‘set PID Kp 10, Ki 0.01, Kd 0.2′ block. PID control helps the robot adjust its motor speeds continuously so that it remains centered on the line.
| Parameter | Value | Function |
|---|---|---|
| Kp | 10 | Corrects the present error |
| Ki | 0.01 | Corrects accumulated error |
| Kd | 0.2 | Reduces oscillations and predicts future error |
These values help Quarky follow the line smoothly and avoid unstable movement.
Configure PID Speed Parameters
- Add the ‘set PID speed parameter base 40, min 0, max 80’ block. This block sets the speed range for the robot while it follows the line.
Values Used:
| Parameter | Value |
|---|---|
| Base Speed | 40 |
| Minimum Speed | 0 |
| Maximum Speed | 80 |
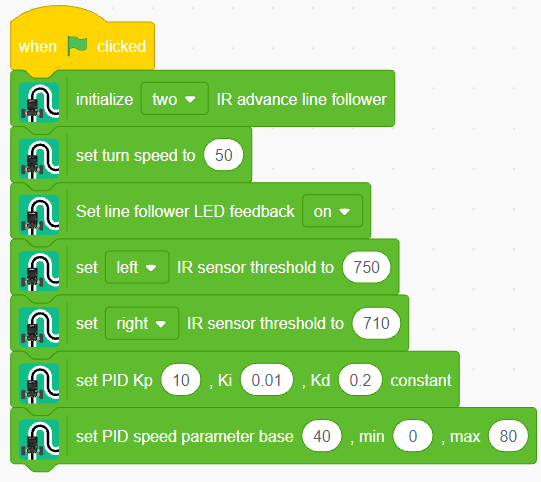
The robot automatically adjusts motor speeds within this range while following the line.
Start Line Following Until Checkpoints Are Detected
- Add the ‘do line following until 3 checkpoint detected’ block. The robot will start following the black line and continue until it detects three checkpoints on the track.
Turn Off LED Feedback
- After the robot reaches the third checkpoint, add the ‘set line follower LED feedback off’ block. This turns off the sensor LEDs after checkpoint detection is complete.
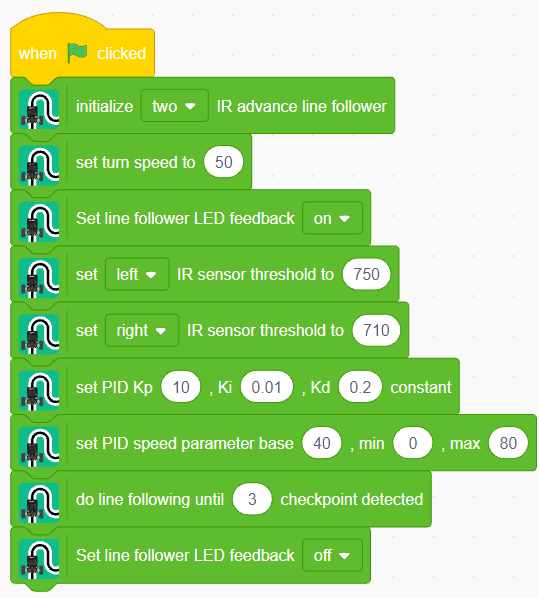
- Add the ‘set forward coast delay to 140 ms’ block. This makes the robot move forward for a short duration before turning. This helps the robot position itself properly at the intersection before making the turn.
- Add the ‘turn robot left to next line’ block. The robot will turn left and align itself with the next available line.
Output
After running the program, Quarky should follow the black line smoothly and accurately.
You should observe the following:
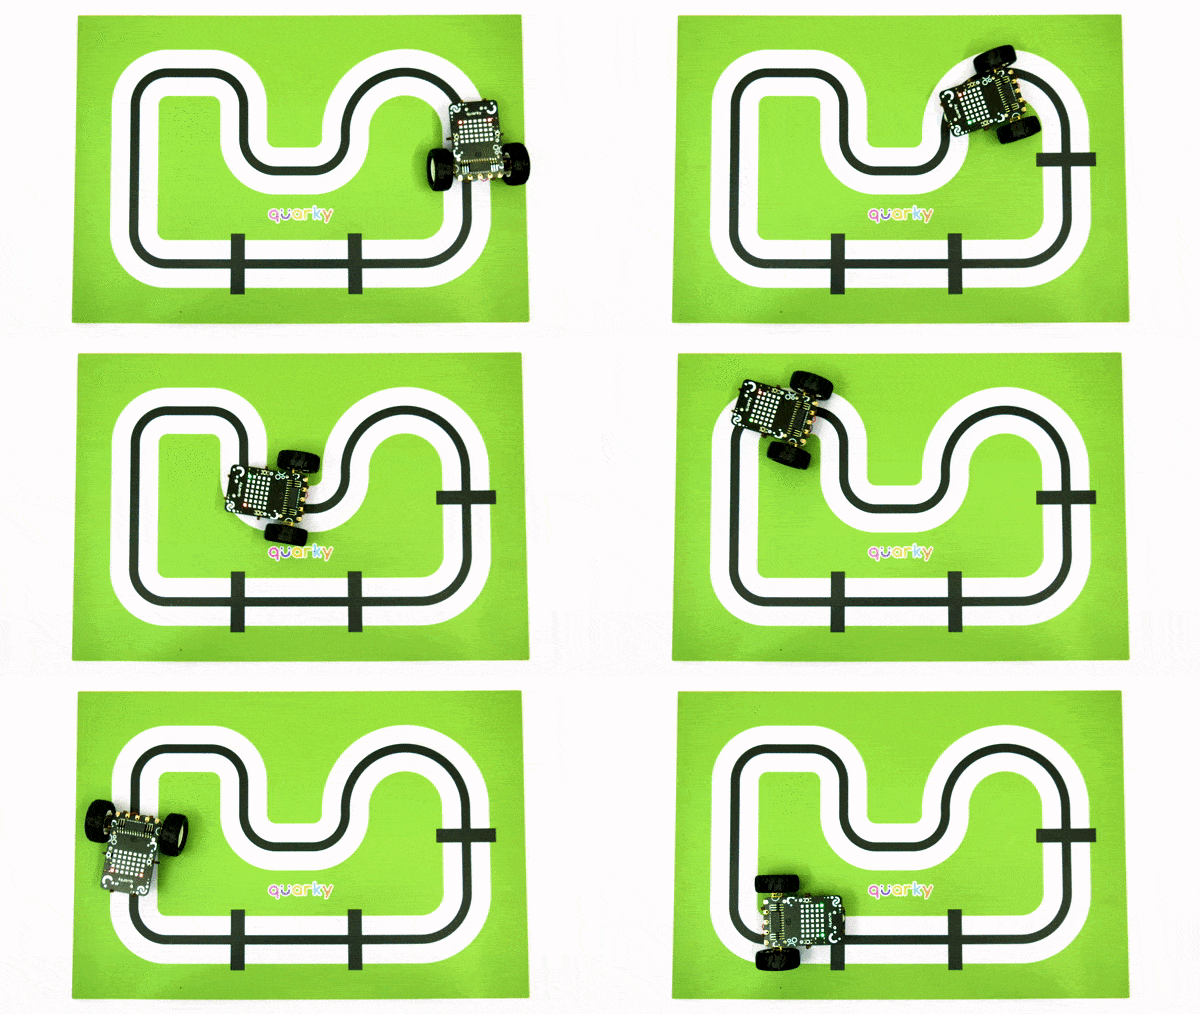
- Quarky detects the black line using the Advanced Line Follower sensor.
- The robot follows the line automatically.
- It adjusts movement using PID control.
- It detects checkpoints on the track.
- After detecting the third checkpoint, it moves forward briefly.
- Quarky turns left and aligns with the next line.
If Quarky follows the black line properly and turns left after the third checkpoint, your project is complete.