



Introduction
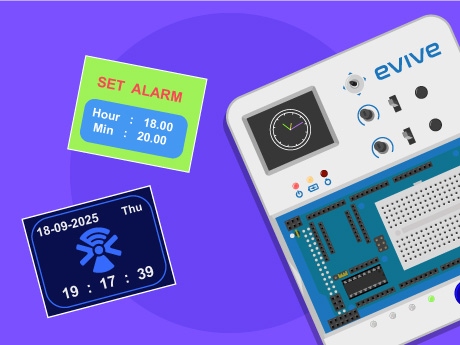
Real Time Clock (RTC) modules are incredibly important components found in everything from your digital wristwatches to advanced automated data loggers, ensuring they never lose track of time even when turned off! Learn what an RTC is, how it keeps accurate time and date independently of the main processor, how to interface an RTC module with evive, and program it with ease in PictoBlox – our Scratch blocks-based graphical programming platform with advanced hardware interaction abilities. Once you’re equipped with the basic knowledge of timekeeping, calendars, and I2C communication, we’ll show you how to build a smart alarm clock, an automated attendance logger, and other exciting DIY time-based projects using the components available in the evive Starter Kit.
To work in PictoBlox, you’ll first need to download it from HERE.
Ready? Set. Go!
Prerequisites
- Evive Board (charged and powered on)
- PictoBlox installed on a Wi-Fi connected device
- Firmware uploaded to Evive via the Upload Firmware button in PictoBlox
Connecting Evive to PictoBlox
- First, open PictoBlox.
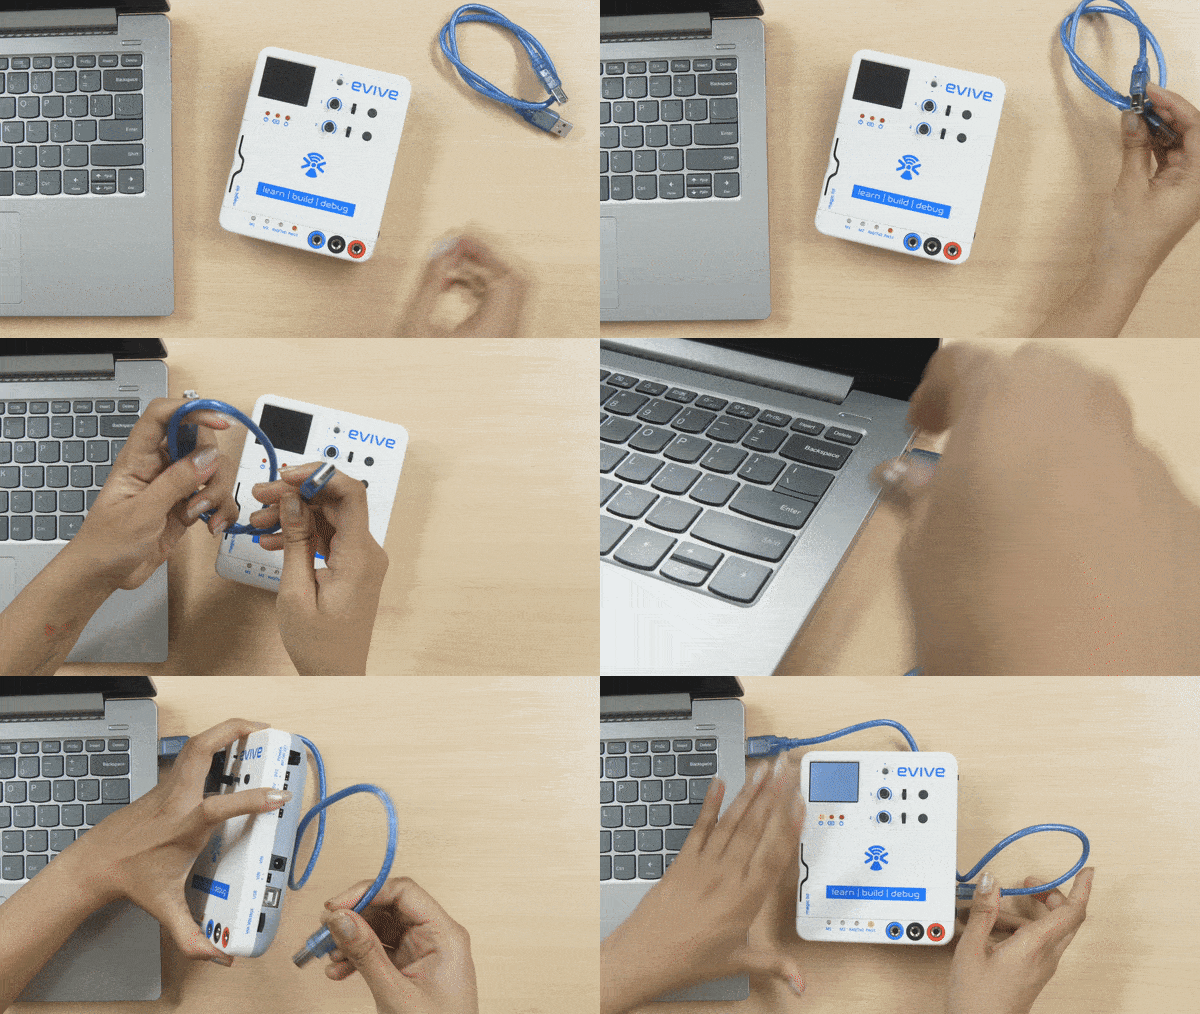
- Then, connect Evive to your computer via a USB cable.
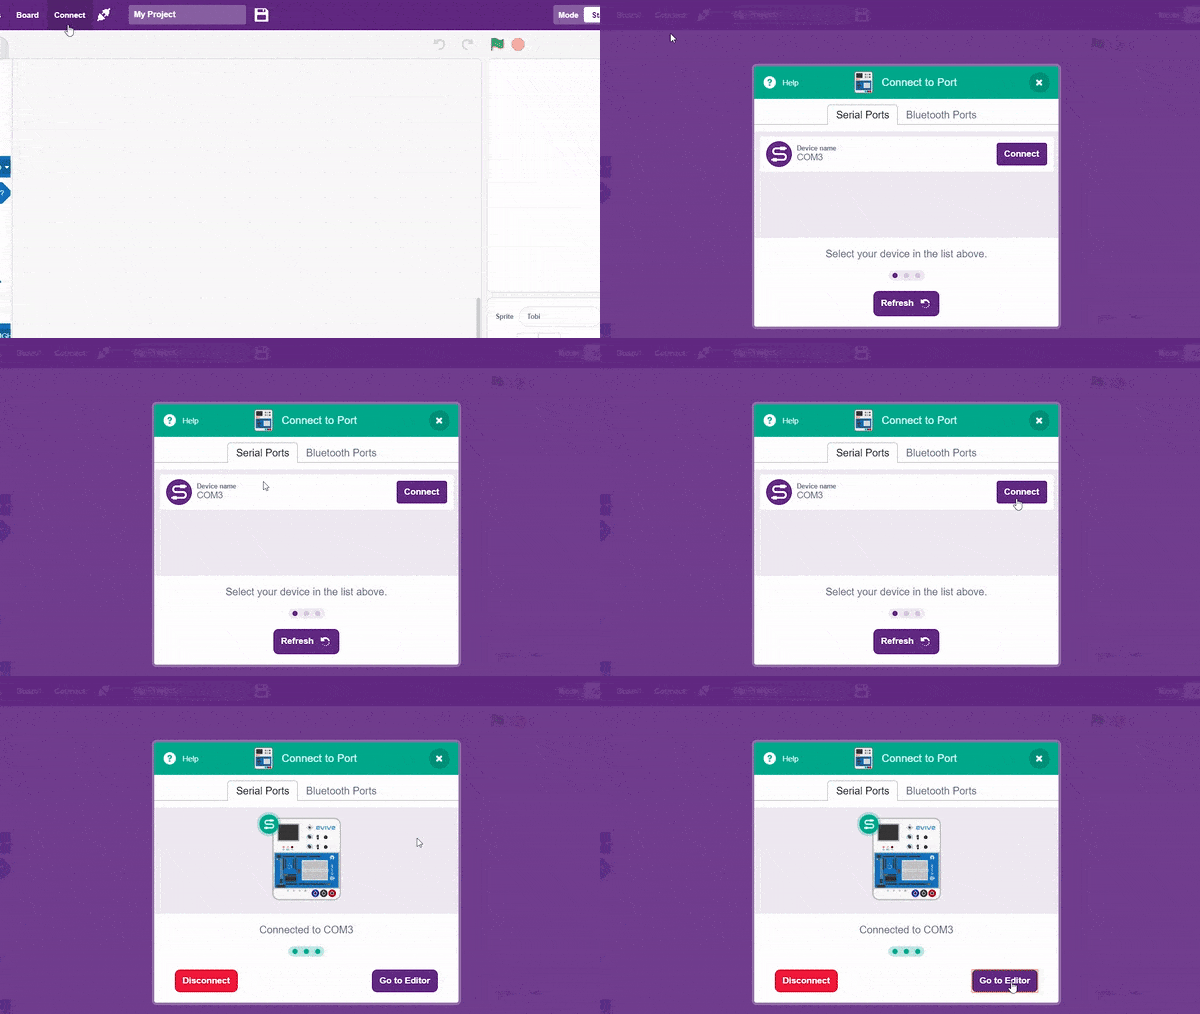
- Click on the Board button in the toolbar. A list of the boards that are compatible with PictoBlox will appear in the drop-down. Select evive from the option.
- Select evive from the drop-down. Next, click on the connect button and select the appropriate serial port.
- On the top right corner, there is a toggle button named Mode. This button is used to switch between the two working modes of PictoBlox, namely the stage mode and the upload mode.
- Switch to Upload mode by toggling this button. You’ll observe some changes in the UI.
Step-by-Step Block Coding Guide
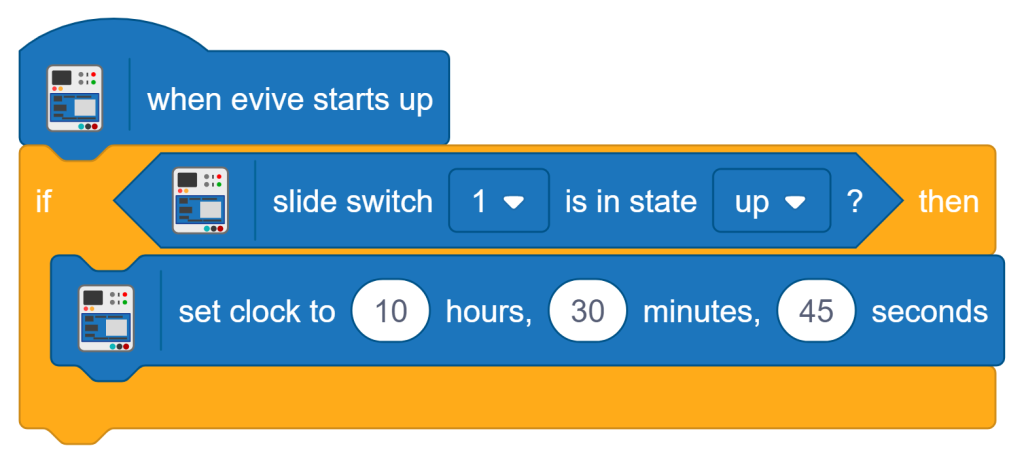
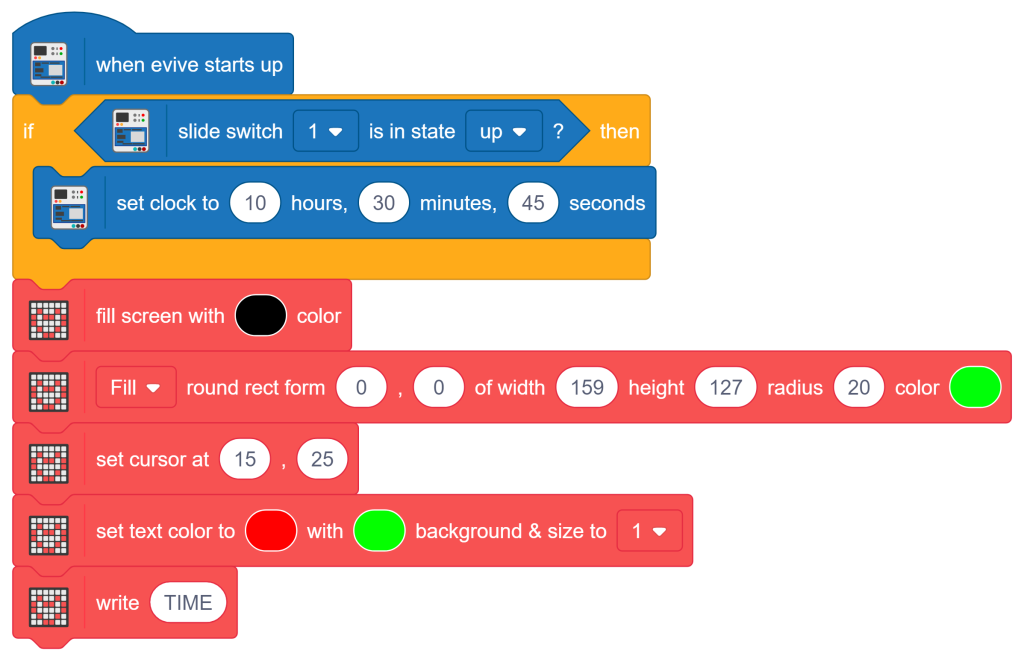
- Go to the Evive palette and drag the “when evive starts up” block into the scripting area.
- From the Control palette , Drag an if-then block below the “when evive starts up” block.
- For the if condition, add a “slide switch () is in state ()” block from the Evive palette. For the switch number, select “1” and for the state select “up“.
- Inside the if-then block add a “set clock to () hours ,() minutes, ()” seconds block from the Evive palette. Set hours to “10“, minutes to “30” and seconds to “45“.
- From the Display palette, add the “fill screen with ( ) color” block and set the color to “black” by clicking on color button and dragging Brightness to “0“.
- Next add the “() round rect form () , () of width () height () radius () color ()” block from the Display palette. Select “Fill” for the form with (0,0) cordinates. Enter “159” for the width, “127” for height, “20” for radius and “Green” for the color.
- From the Display palette, add the “set cursor at () , ()” block and set the cordinates to “(15, 25)“.
- From the Display palette, add the “set text color to () with () background & size to ()” block. Select “Red” for the text color with “Green” for the background color. Set the size to “1“.
- From the Display palette, add the “write ()” block and enter “TIME” for the text.
- From the Control Palette, add the “forever” block.
- Next add the “() round rect form () , () of width () height () radius () color ()” block from the Display palette. Select “Fill” for the form with “(10,60)” cordinates. Enter “140” for the width, “30” for height, “5” for radius and “Blue” for the color.
- From the Display palette, add the “set cursor at () , ()” block and set the cordinates to “(33, 68)“.
- From the Display palette, add the “set text color to () with () background & size to ()” block. Select “White” for the text color with “Blue” for the background color. Set the size to “1“.
- From the Display palette, add the “write ()” block.
- Inside the “write ()” block, merge four “join () ()” blocks from the Operator Palette.

- Inside first “join () ()” block, add the “get () from clock” block from the Evive palette. Select “Hour” inside the “get () from clock” block.
- Next enter “:” in the second “join () ()” block.
- Inside third “join () ()” block, add the “get () from clock” block from the Evive palette. Select “Minute” inside the “get () from clock” block.
- Next enter “:” in the fourth “join () ()” block.
- Inside fourth “join () ()” block, add the “get () from clock” block from the Evive palette. Select “Second” inside the “get () from clock” block
- From the Control Palette, add the “wait () seconds” block. Enter the value as “1“.
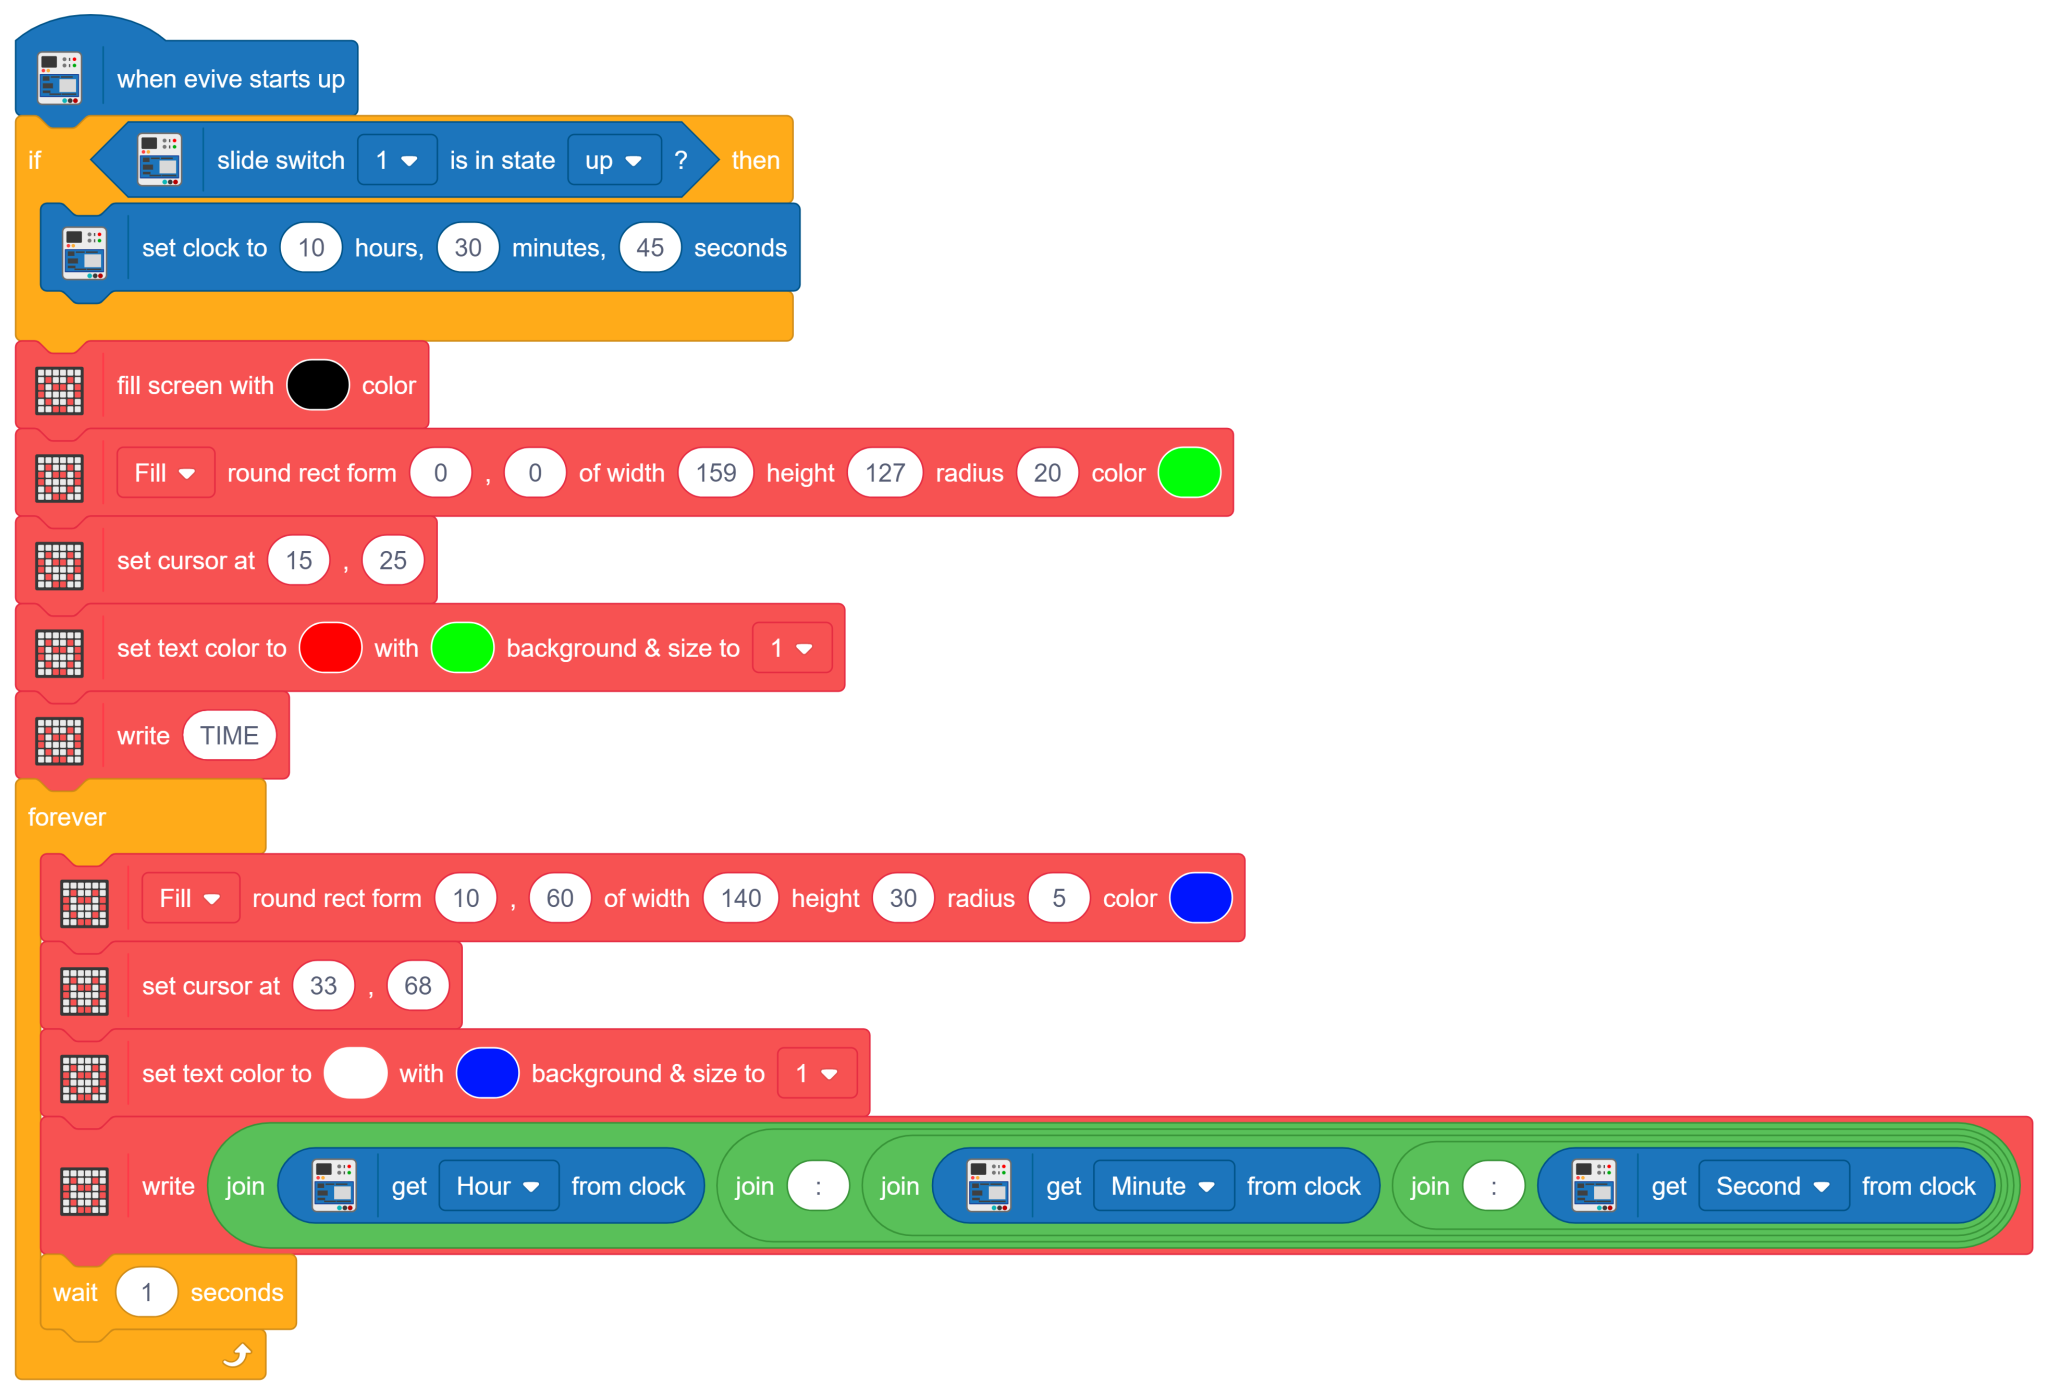
Now it’s time to upload the script to the Evive! For that, click on the Upload Code button, and voila!
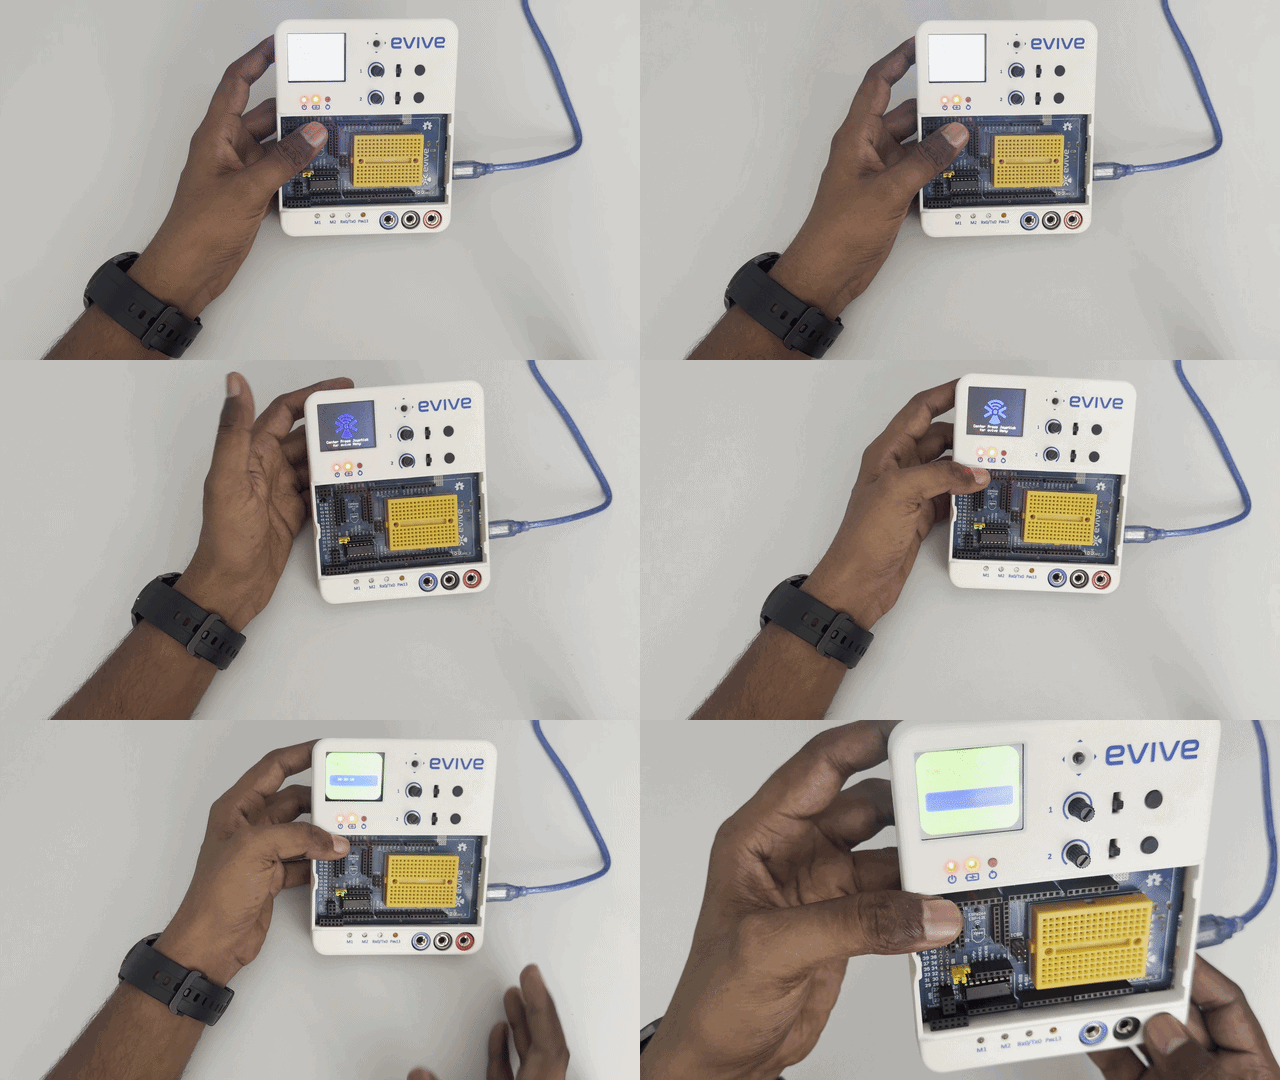
Output
Conclusion
In this lesson, we learned how a Real Time Clock (RTC) can be implemented on an Evive Board, keeping track of dates, hours, minutes, and seconds. We explored how to Program Evive using Block Coding with PictoBlox in Upload Mode. By reading real-time temporal data and managing calendar variables, we gained a clear understanding of how microcontrollers log time-stamped information and execute schedule-based commands.