


The function reports the last text detected from the speech.
The function reports the last text detected from the speech.
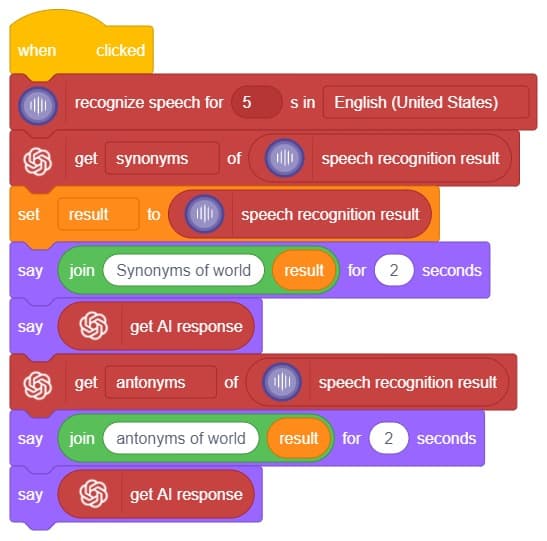
Hey! Welcome to the fascinating realm of “Synonym/Antonym World,” where the powers of Speech Recognition and ChatGPT converge. Immerse yourself in an innovative platform that not only recognizes your speech but also provides an extensive collection of synonyms and antonyms for any given word. With this powerful combination, you can effortlessly expand your vocabulary, explore alternative expressions, and delve into the nuances of language. Unleash the potential of speech recognition and ChatGPT as you navigate through a world where words find their perfect counterparts. Get ready to unlock new dimensions of linguistic exploration in the captivating Synonym/Antonym World!

In this interactive chatbox experience, the user has the freedom to specify the tone in which they would like the AI to respond. The tone can be anything they prefer: Normal, sarcastic, Friend that suits their preference.
Once the user has selected a particular tone, they can provide their input or ask a question. Based on their input, the AI will generate a response that aligns with the chosen tone. This allows for the creation of a conversational atmosphere similar to real-life interactions.
Users are encouraged to ask any question or share their thoughts on various topics. They can also engage in discussions or seek assistance with the information they need. The AI is there to facilitate a meaningful conversation and provide helpful responses based on the tone chosen by the user.
So, the user is requested to let the AI know the specific tone they would like it to adopt, and then they are free to ask any question they have in mind. The AI is here to provide a personalized and engaging chat experience!
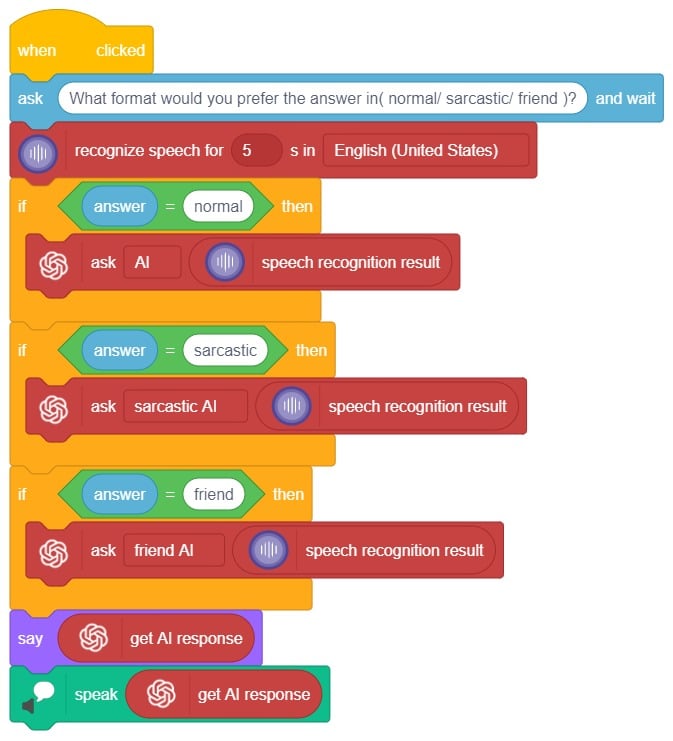

In summary, we can describe it as a chatbox that provides answers in three different ways based on the user’s mood and entertainment preferences. When a question is asked, it will respond accordingly.
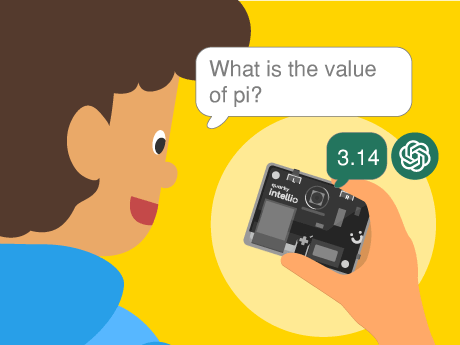
Every time you talk to a virtual assistant, whether it is Google Assistant, Amazon Alexa, or Apple Siri a chain of AI processes springs into action in milliseconds. Your voice is captured and converted to text by a speech recognition model; that text is understood and processed by a language model, and a spoken response is delivered back to you. This entire pipeline is called a voice AI system.
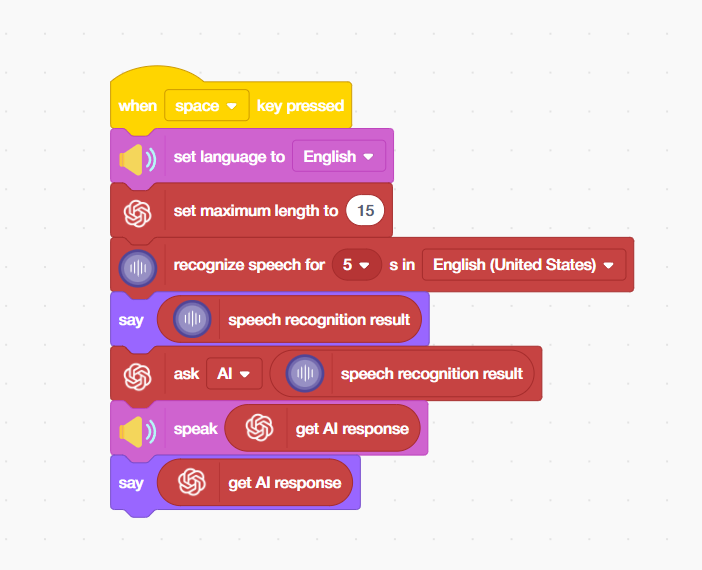
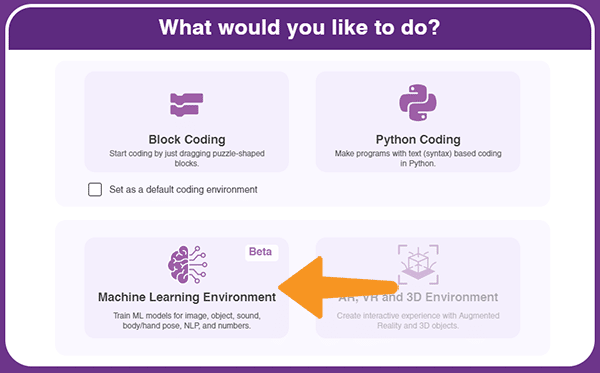
In this project, we are going to build our very own simplified version of this pipeline inside PictoBlox — the Scratch-based AI and robotics programming platform by STEMpedia. Using just a few powerful block-coding extensions, students will experience firsthand how the same core AI technologies that Power the world’s most advanced voice assistants can be assembled, understood, and personalised in a visual programming environment. By the end of this project, you will have a working voice-activated AI chatbot that listens to you, thinks, and talks back — and you will understand exactly why it does so at each step of the AI pipeline.
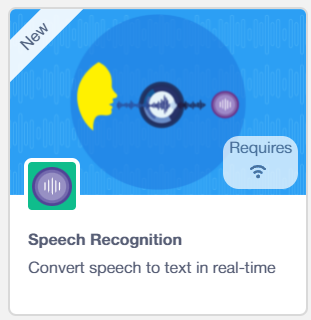
Click the Add Extension button (the purple icon at the bottom left). Add the following three extensions:

You can use any sprite for this project — Tobi is a great choice, as it provides a friendly visual face for your AI assistant. Click on your chosen sprite before adding the blocks below.
Step 4:
In this AI and STEM project, we built a complete voice AI assistant pipeline in PictoBlox – integrating Automatic Speech Recognition (ASR), a Generative AI Large Language Model (LLM), and Text-to-Speech (TTS) synthesis into a seamless voice-in, voice-out AI system using simple block coding.
We learnt how each AI technology in the pipeline works — from how deep learning ASR models transcribe speech, to how LLMs like ChatGPT generate intelligent text responses, to how neural TTS engines convert that text back into spoken language. We also explored important AI engineering concepts like token limits, language model configuration, event-driven activation, and multi-modal output design.
This project is an outstanding hands-on AI literacy activity for students in schools, Atal Tinkering Labs (ATLs), STEM coding labs, and home learning environments. The same technologies you have worked with today — ASR, LLMs, and TTS — are the building blocks of some of the most transformative AI applications in the world. Now you know exactly how they work and how to use them.
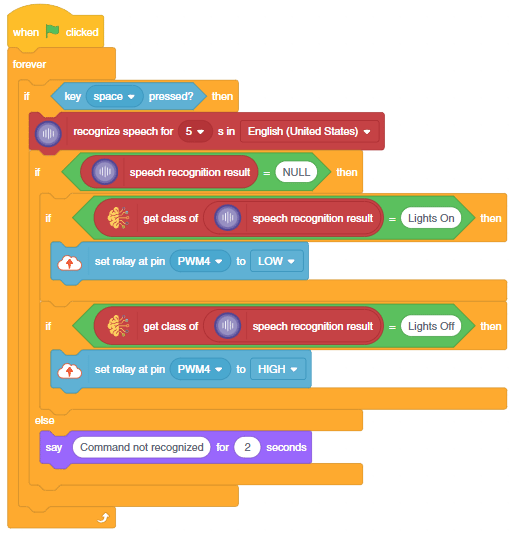
This project demonstrates how to create a voice–controlled smart plug using natural language processing (NLP), speech recognition, and a relay.

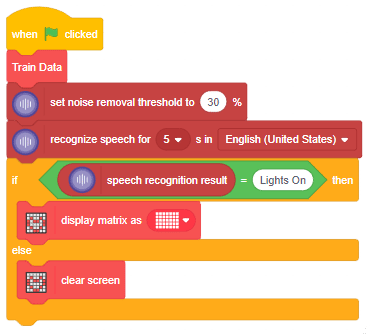
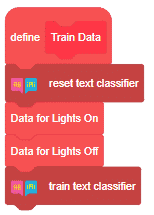
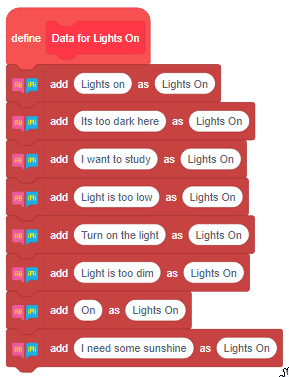
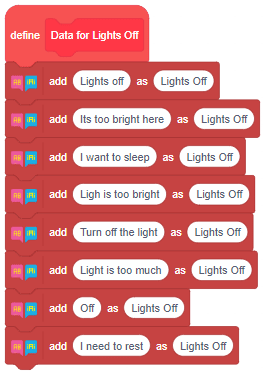
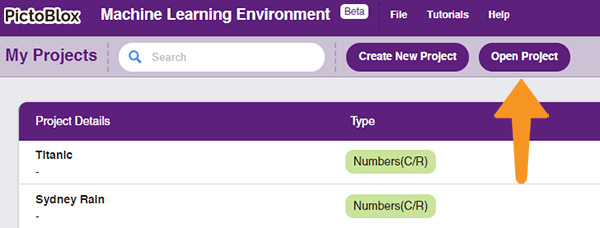
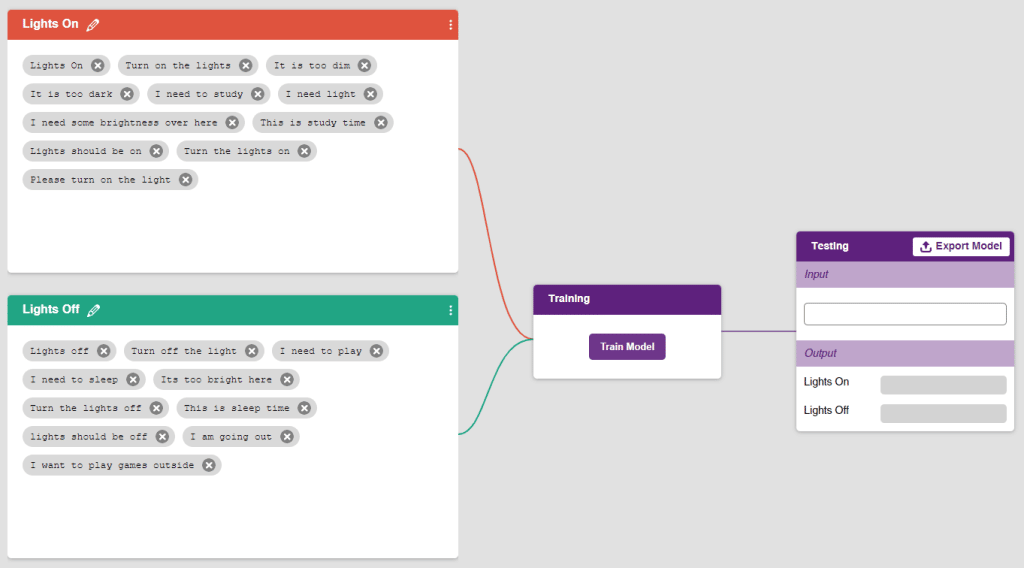
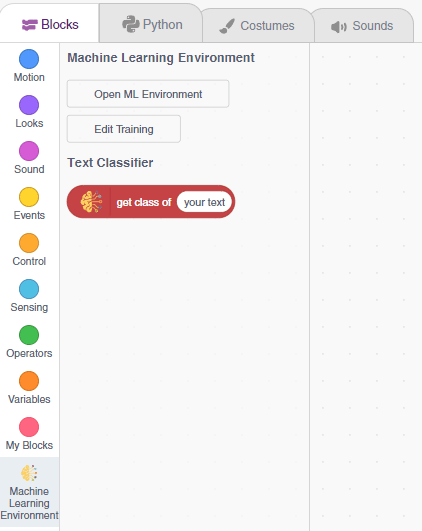
We will use the PictoBlox Machine Learning environment for creating the text classifier.
![]()
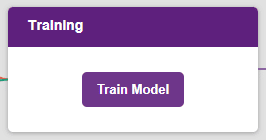
Follow the steps to create the model:


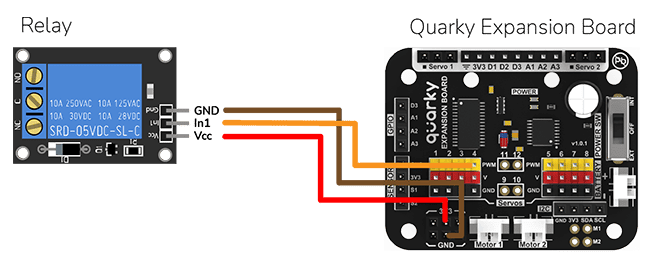
The bulb is connected to the smart plug which is controlled with a relay.
If the relay is ON, the smart switch gets ON, turning on the light. The relay has the following connections:
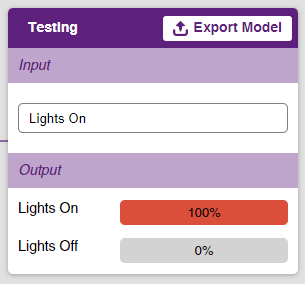
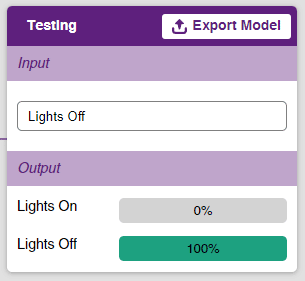
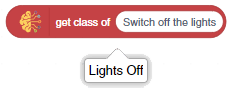
The logic is the following – The Speech Recognition extension converts speech to text, which is then fed into the text classifier block. The text classifier block provides sentiment information, which is used to control the light via the relay.