Table of Contents

set gripper open angle to () and close angle to ()

Description

This block defines the angles at which the gripper of the robotic arm will open and close. The block ensures that the robotic arm will open and close the gripper at the specified angles.

Input Parameters

  1. The opening angle of the gripper.
  2. The closing angle of the gripper.

Example

Learn how to control a gripper using two different methods: 2-keycontrol, which activates when either the 'o' or 'c' key is pressed, and 1-key control, which activates when the 'space' bar is pressed.

Introduction

The gripper is used to pick and place any object. We are going to learn how to control it in this example.

The gripper has 2 states:

  1. Open – When the gripper servo motor angle is 0
  2. Close – When the gripper servo motor angle is 50

Control Logic

Now there are many methods to control the gripper. We will discuss 2 methods:

  1. 2 Key Control: In this method, the gripper will open when the “o” key is pressed and close when the “c” key is pressed.
  2. 1 Key Control: In this method, the gripper will open and close with only 1 key – “space”.

Let’s see how they work.

Setup PictoBlox

  1. Open the Pictoblox application.
  2. Select the Block Coding Environment.
  3. Click on the Robotic Arm extension available in the left corner.

2 Key Control

Logic

  1. The code checks if the “o” or “c” buttons are pressed with an if statement.
    1. If the “o” button is pressed, it will open the gripper.
    2. If the “c” button is pressed, it will close the gripper.
  2. The forever loop allows for the if statement to evaluate continuously.

Run the code to check the working of the gripper:

1 Key Control

Logic

  1. The code first sets the gripper to the “open” position.
  2. The code then enters an infinite loop, where it checks if the “space” button is pressed. If it is, it checks the current state of the gripper.
    1. If the gripper is in the “Open” state, it executes the “close” command and changes the state to “Close”. It then waits 0.2 seconds.
    2. If the gripper is in the “Close” state, it executes the “open” command and changes its state to “Open”. It also waits 0.2 seconds.

Conclusion

In this project, we learned how to control the gripper using two different methods. The first was 2-key control, which activated when either the ‘o’ or ‘c’ key was pressed. The second was 1-key control, which activated when the ‘space’ bar was pressed. Both were able to accurately open and close the gripper and can be used in robotics applications.

Read More
Learn how to use PictoBlox to control a Quarky robotic arm wirelessly using keyboard keys.

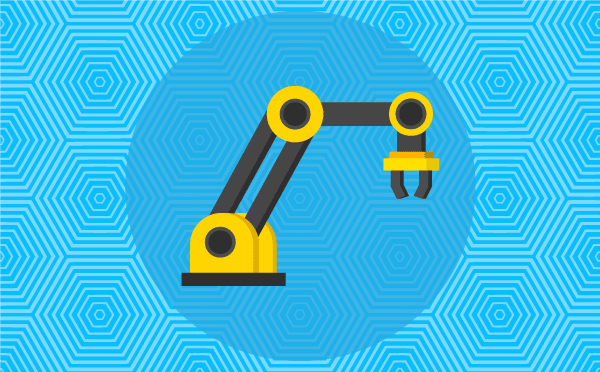
Learn How to Control a Quarky Robotic Arm Wirelessly

Are you looking for a way to make a robotic arm that can be controlled wirelessly? If so, you’ve come to the right place! This tutorial will teach you how to control a Quarky robotic arm using the Bluetooth communication extensions of Quarky and PictoBlox. With this technique, you’ll be able to provide precise control over its movement and actions from a remote location.

The robotic arm can be used for various tasks, such as picking up objects or manipulating tools. It can also be used for applications like manufacturing, medical, research, and exploration. This type of robotic arm will increase the productivity and safety of operations that would otherwise be too hazardous or inaccessible for humans.

Let’s get started learning how to create a wirelessly controlled robotic arm.


Project

In this project, we are making Quarky Robotic Arm to be controlled wirelessly using keyboard inputs. Following are the controls we will program:

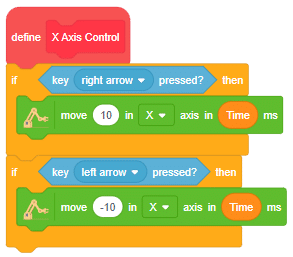
  1. Right Arrow – Move 10mm in X axis
  2. Left Arrow – Move -10mm in X axis
  3. Up Arrow – Move 10mm in Z axis
  4. Down Arrow – Move -10mm in Z axis
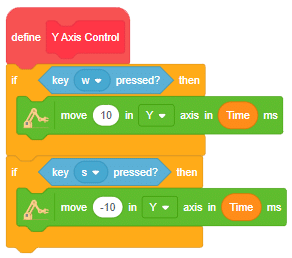
  5. w Key – Move 10mm in Y axis
  6. s Key – Move -10mm in Y axis
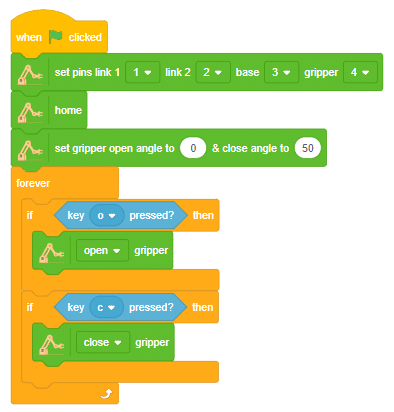
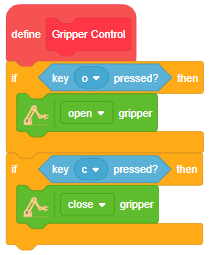
  7. o Key – Open gripper
  8. c Key – Close gripper

Code

  1. Open the Pictoblox application.
  2. Select the Block Coding Environment.
  3. Click on the Robotic Arm extension available in the left corner.

Following is the code to implement the project:

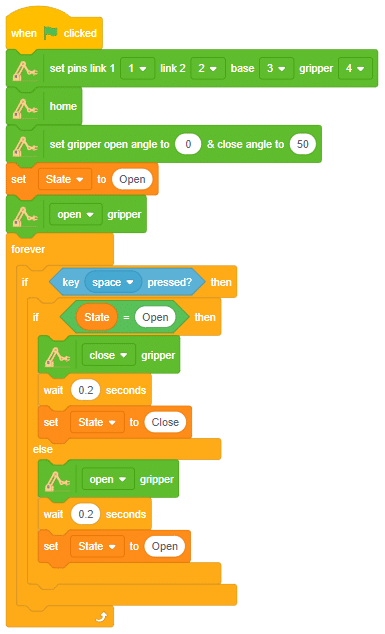
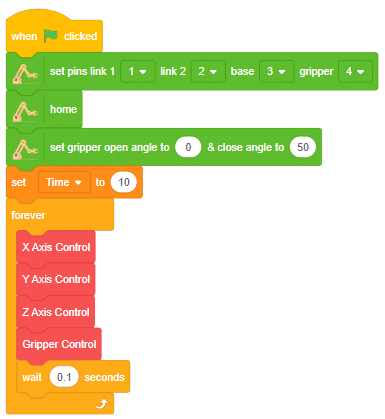
  1. When the green flag is clicked the Robotic Arm initializes and goes to the home position. Then we set the gripper open and close angle for the project. A variable named time is created to control the speed of the gripper. Finally, a loop is implemented calling custom blocks for controlling the X axis, Y axis, Z axis, and gripper controls.
  2. X Axis Control block moves the gripper in the X-axis.
  3. Y Axis Control block moves the gripper in the Y-axis.
  4. Z Axis Control block moves the gripper in the Z-axis.
  5. Gripper Control block open or close the gripper on command.

Run the program to test the code.
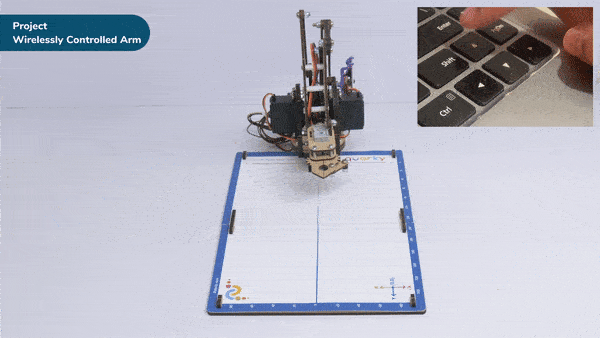
Output


You can explore doing pick and place using the robotic arm.

Read More
All articles loaded
No more articles to load