


The block sets the digital state of the specified pin to HIGH or LOW / 0V or 3.3V. The block have two inputs:
- Quarky Pin:
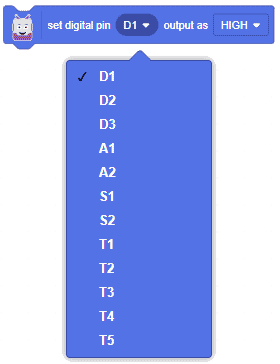
- State of the Pin:
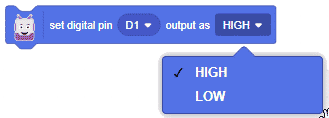
- HIGH – 3.3 V
- LOW – 0V

The block sets the digital state of the specified pin to HIGH or LOW / 0V or 3.3V. The block have two inputs:
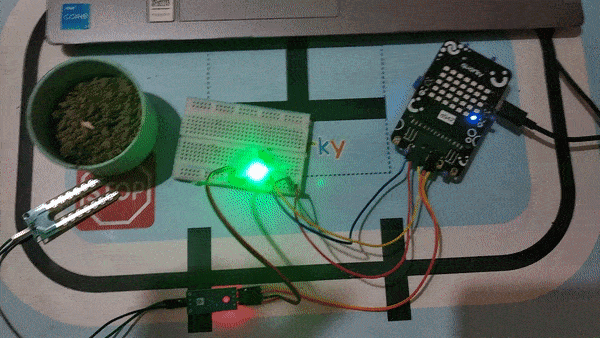
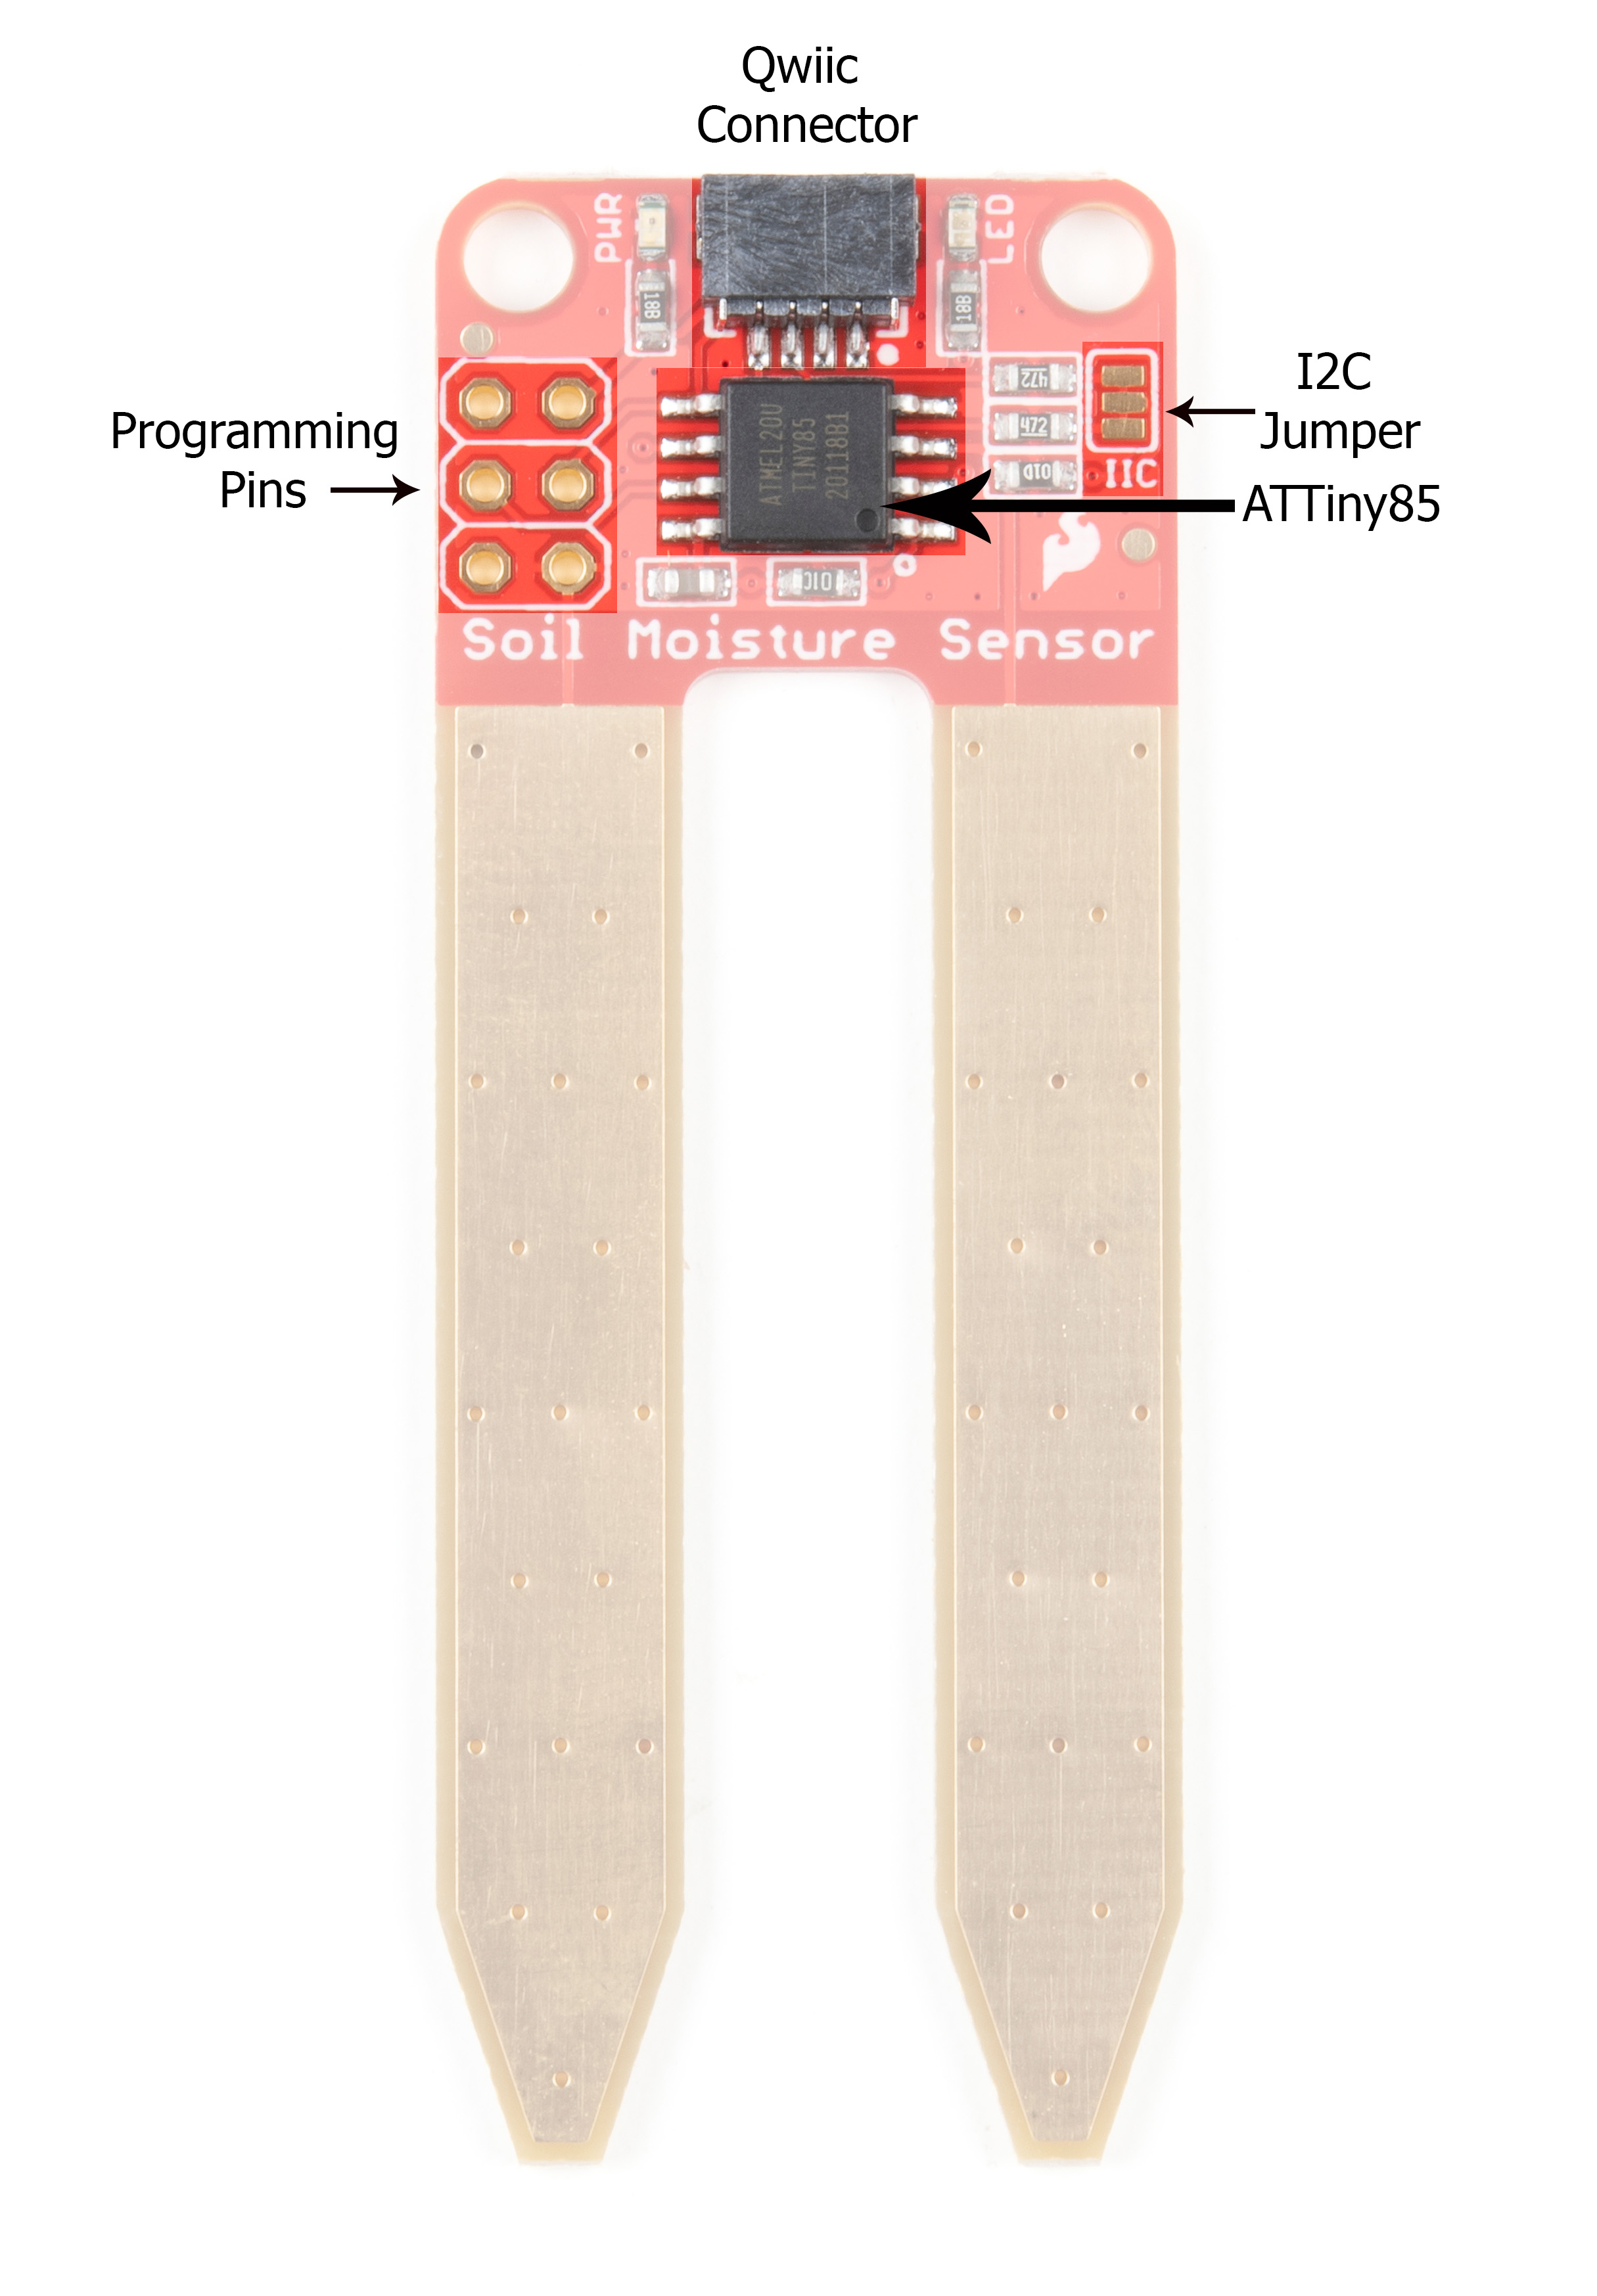
A soil moisture sensor is a valuable tool used to determine the moisture content in the soil, crucial for efficient gardening, farming, and agricultural practices. This analog sensor generates varying output values depending on the moisture level present in the soil. Typically, it operates as a two-pin circuit, with these pins responsible for powering up the sensor module. To obtain soil moisture readings, a voltage divider circuit is employed on the negative pin of the sensor, resulting in a signal pin that provides the moisture level data. Alternatively, some sensor modules come with a controller circuit that automatically converts the 2-pin connection into a 3-pin output, simplifying the process of accessing moisture values.
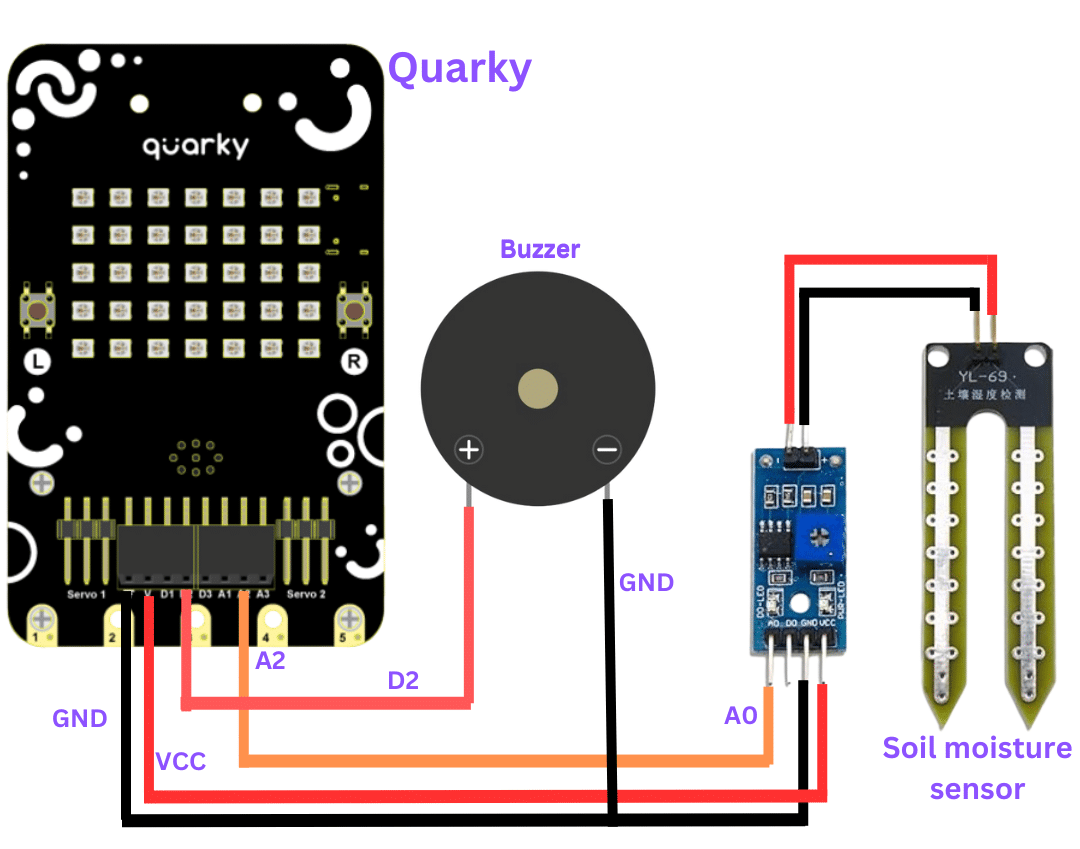
Below is a simple circuit diagram and code to get you started with monitoring soil moisture using an Arduino board. By following these steps, you can create your own moisture monitoring system with ease. Let’s begin!


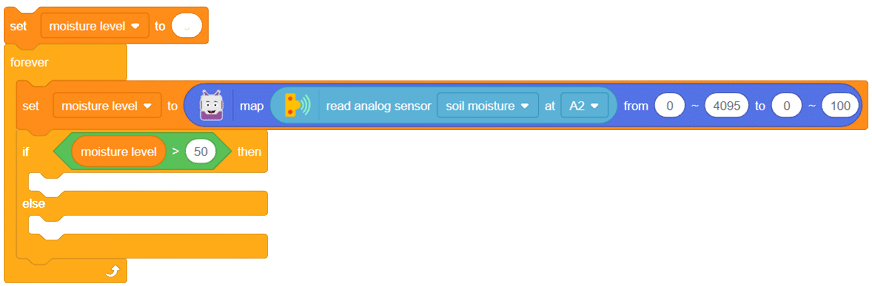

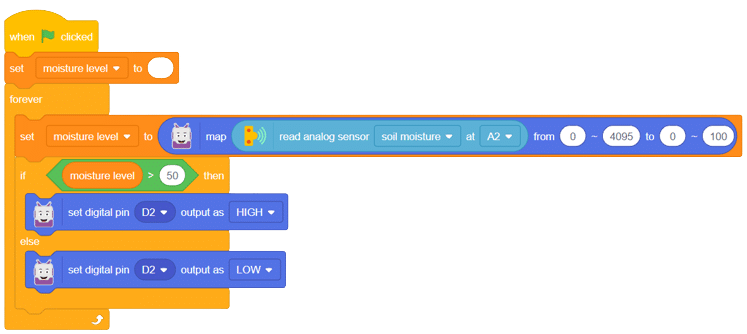
With these steps, your script is complete, and you can now monitor the soil moisture effectively using the soil moisture sensor and Arduino board. Happy gardening and farming!
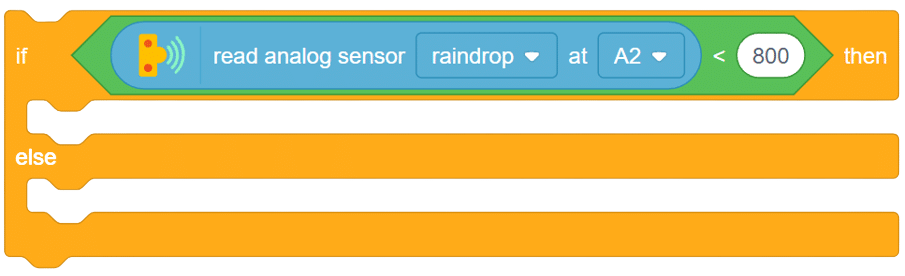
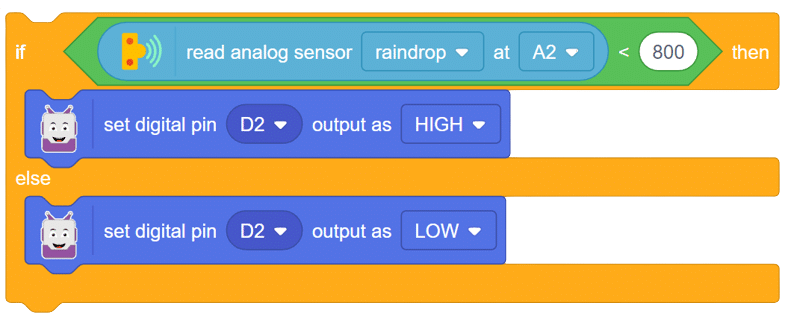
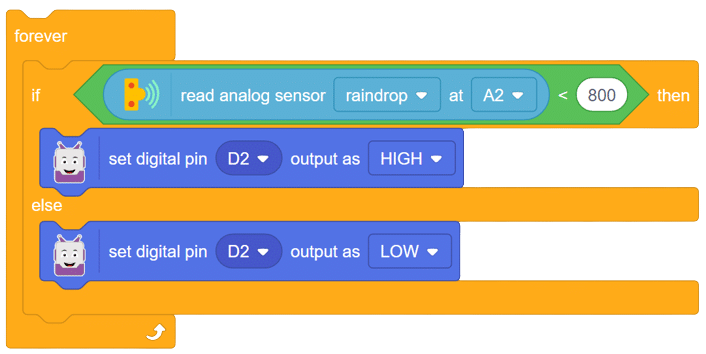
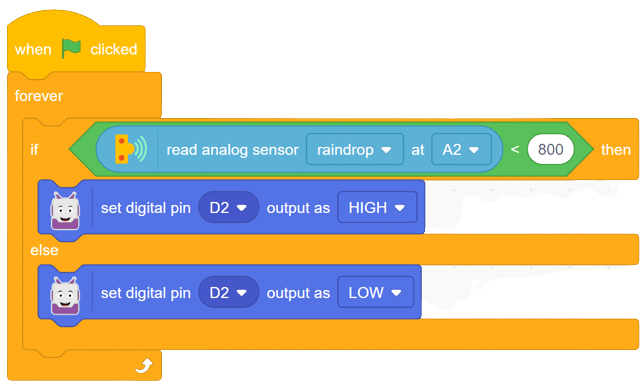
The raindrop sensor is an analog-type sensor that effectively measures changes in resistance when it encounters water. This property makes it an ideal choice for detecting rain and water presence in various applications. While typically designed with two pins, there are also versions available with a controller module, effectively converting it into a three-pin sensor for enhanced functionality.
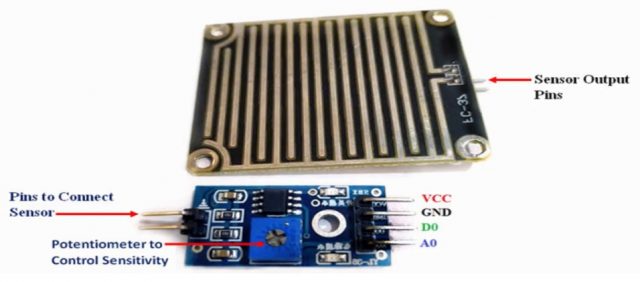
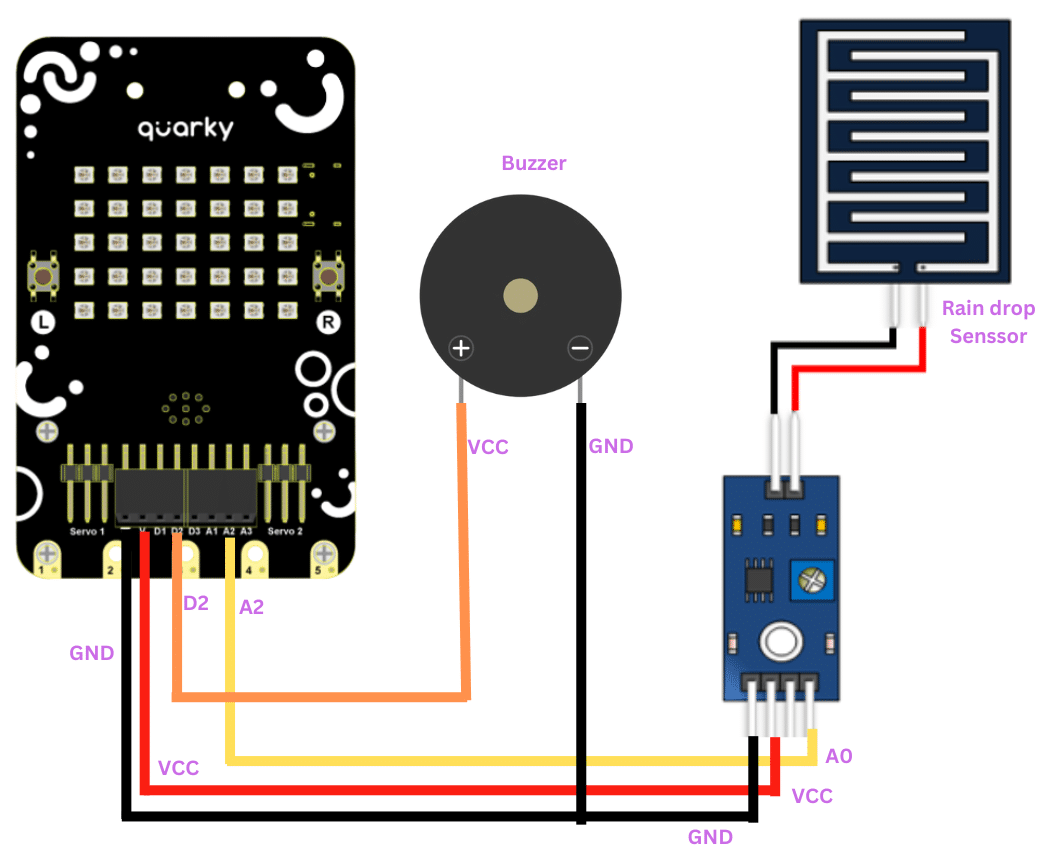
To set up the raindrop sensor circuit, make the following connections: