


Quarky Connect allows multiple Quarky devices to communicate wirelessly using ESP-NOW, enabling them to send and receive data directly without a Wi-Fi router or internet connection. In this example, one Quarky acts as a Master (controller) and another as a Peer (receiver). The master sends commands, and the peer listens and performs actions accordingly.
By following this guide, you will update the Quarky firmware, set up both the Peer and Master Quarky, and test the wireless remote control connection between the two devices.
Create Exciting Projects with Quarky Connect!
With Quarky Connect, you can create innovative and exciting projects like:
- Go Kart: Control multiple Quarky robots in a race to the finish line, where each robot needs to avoid obstacles and follow specific paths.
- Pac-Man: Create a multiplayer version of Pac-Man where Quarky robots can act as the ghosts, chasing the main character in a dynamic maze.
- Fruit Chase: Program Quarky robots to chase and collect virtual fruits on a grid, with each robot moving based on the commands sent by the master robot.
- Rangoli: Use a fleet of Quarky robots to collaborate on creating intricate Rangoli patterns, where each robot fills in a section of the design simultaneously.
How does Quarky Connect work?
- One Quarky acts as a Master (controller).
- Another Quarky acts as a Peer (receiver).
- The master sends messages.
- The peer listens and performs actions.
Hardware and Software Requirement
- 2 Quarky Robots(Please charge your Quarky Robot before use)
Peer and Master sb3 Files
Updating Quarky Firmware
Before using the Quarky Connect extension, ensure that your Quarky is updated to the latest firmware version 6.0. If you are using an older Quarky firmware, this feature may not work, as Quarky Connect is supported only in the latest firmware.
Follow the steps below to upload the latest firmware:
Step 1: Make sure PictoBlox is installed on your device.
Please make sure to use PictoBlox version 9.1.0 or later for Quarky Connect Extension support. Click Download PictoBlox to visit the download page, select your operating system, and follow the on-screen instructions to install the latest version.
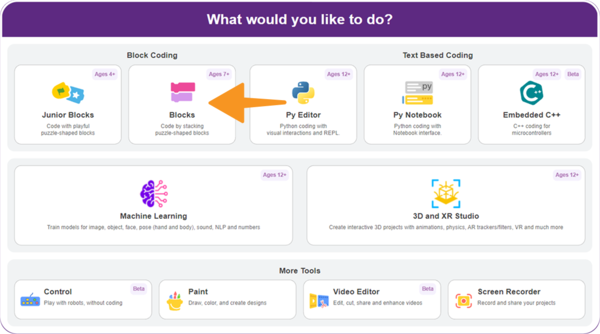
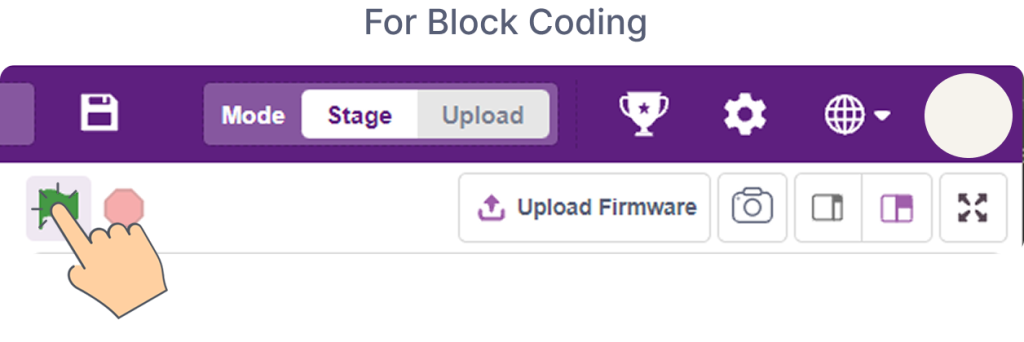
Step 2: Open PictoBlox and select the Block Coding environment.
Step 3: Connect your Quarky to your computer using a USB cable.
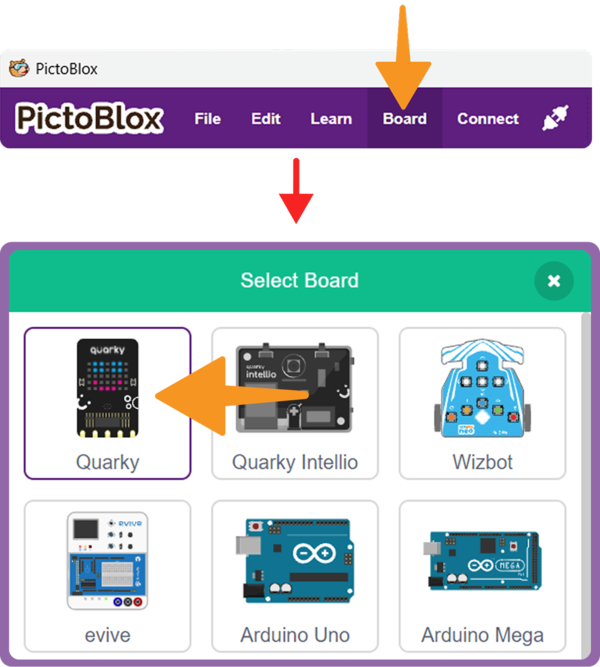
Step 4: Click on the Board button from the toolbar and select Quarky.
Step 5: Select the appropriate Serial Port and click Connect.
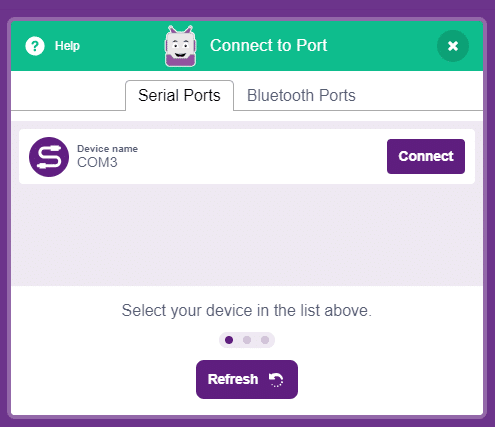
Step 6: In the upper right corner of the PictoBlox window, you will see the Upload Firmware button. Click, and a status window will open.

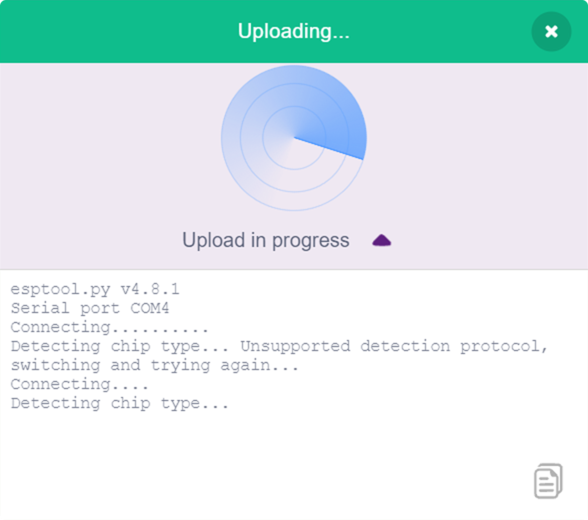
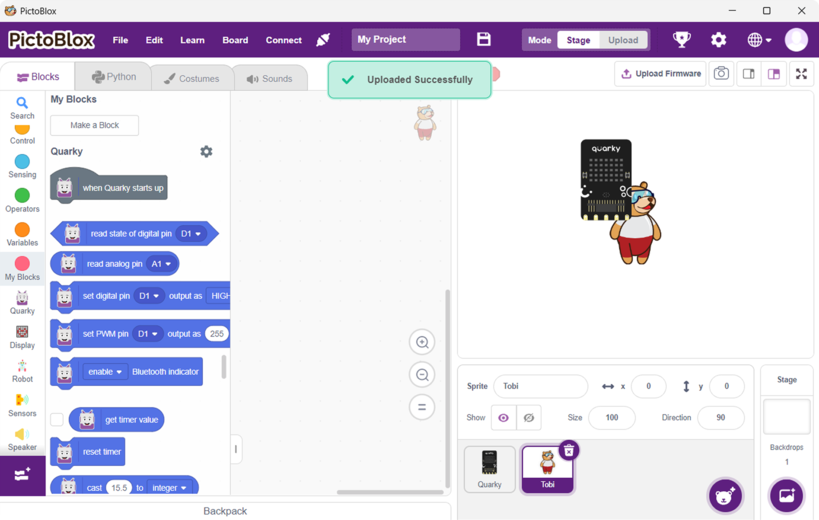
Step 7: Wait for the confirmation message on the screen.
Peer Receiver Quarky Setup
The Peer Quarky listens for commands sent from the Master Quarky and executes actions accordingly.
Note: The Peer Quarky operates only in Upload Mode and needs to be uploaded with specific code before it can perform tasks.
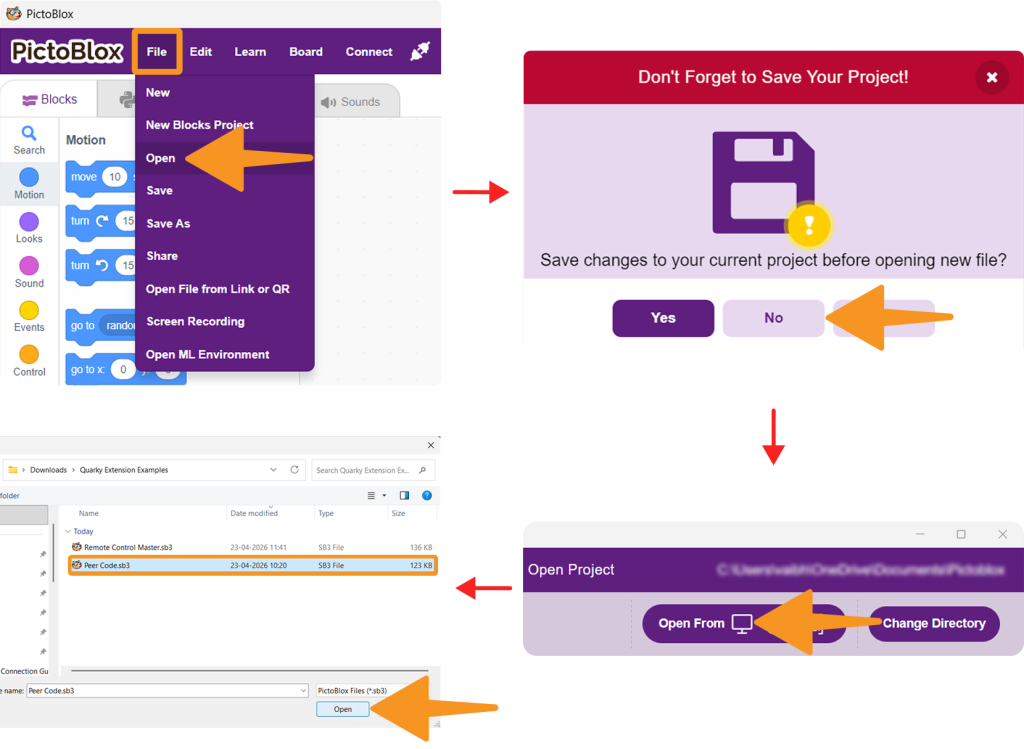
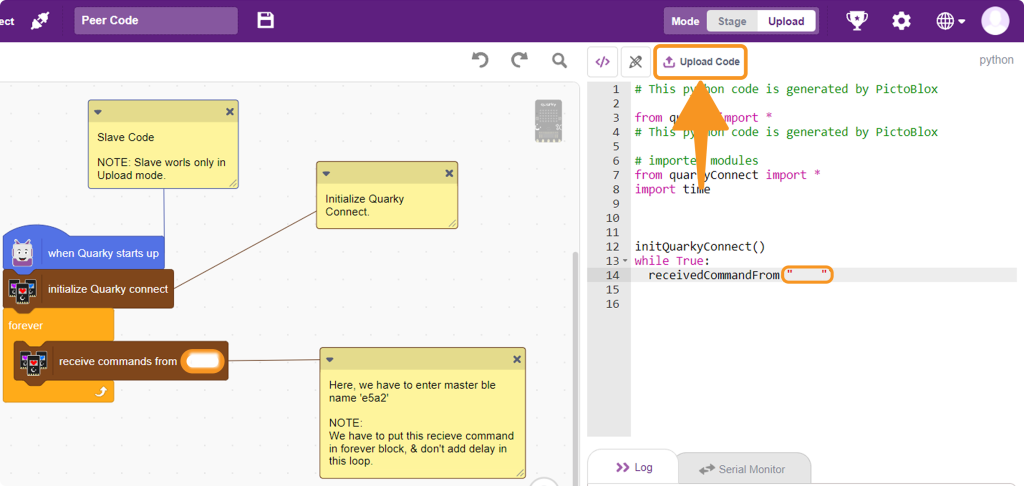
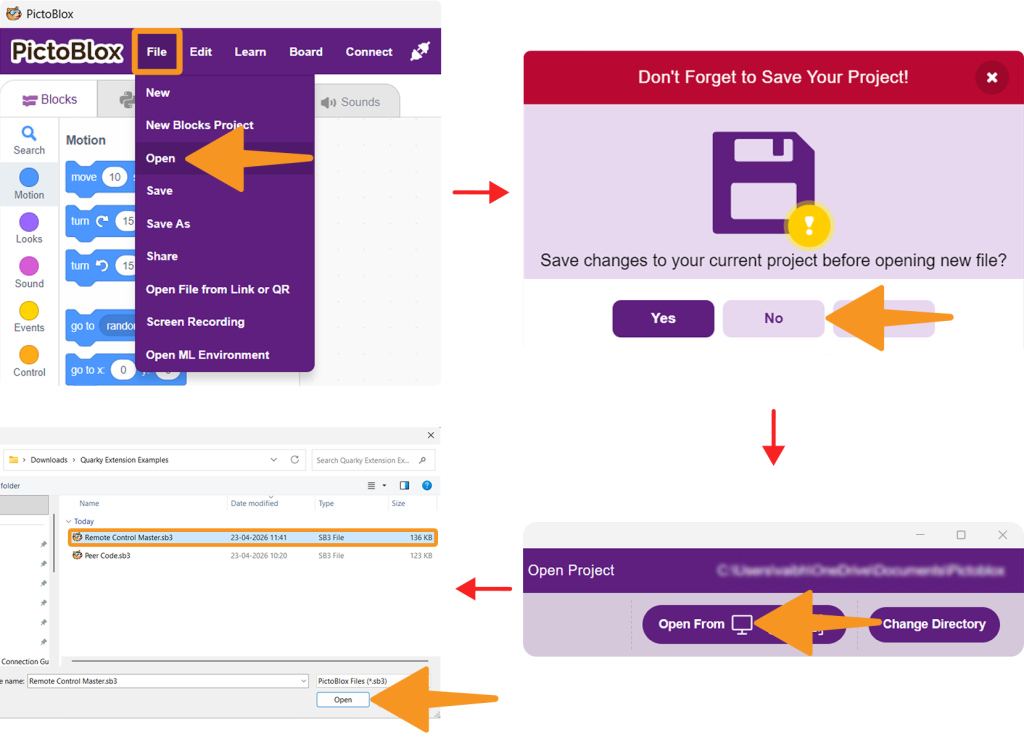
Step 1: Open the Peer Code (.sb3) file in PictoBlox. This code will allow the Peer Quarky to listen for commands.
Step 2: Connect your Quarky to your computer using a USB cable.
Step 3: Update the Master Quarky name in the Peer Code.
Step 4: Upload the updated code to the Peer Quarky. This step ensures that the Peer Quarky is ready to receive commands from the Master Quarky.
Master Controller Quarky Setup
Step 1: Open the Remote Control Master (SB3) file in PictoBlox. This code allows the Master Quarky to control the Peer Quarky.
Connect your Master Quarky to PictoBlox. You can either use the Serial Port Connection method to connect Quarky to PictoBlox, or alternatively, you can use the Bluetooth connection method.
Step 3: In the Master Quarky code, update the Peer Quarky Name to match the Peer Quarky you want to control.
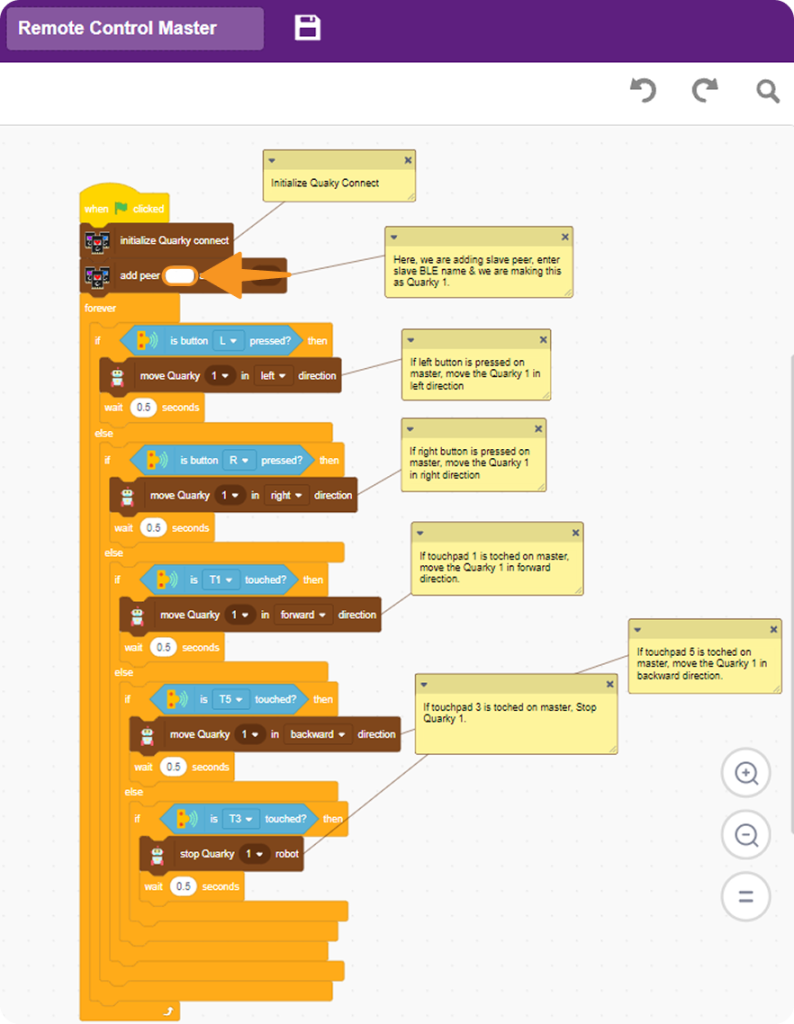
Step 4: Once the code is updated, click on the Green Flag to start the program in Block Coding. The Master Quarky will now be able to control the Peer Quarky.
Testing the Connection
- Press buttons and pins to interact with the controls on the Master Quarky and observe the actions of the Peer Quarky.
- The Peer Quarky should move or perform actions based on the commands sent by the Master Quarky.
Key Notes
- Works only in Upload Mode for peer
- A maximum of 20 Quarky Robots can be connected
- No internet or Wi-Fi required
- Ensure the correct BLE name (ID) is used
Quarky Connect enables simple and fast wireless communication between Quarky Robots. By using one Quarky as a controller and another as a receiver, you can build interactive remote-controlled robotics projects without needing complex network setups.
You can refer to the video tutorial How to Connect Multiple Quarky Robots using PictoBlox | Quarky Connect Tutorial for more information.