



Introduction
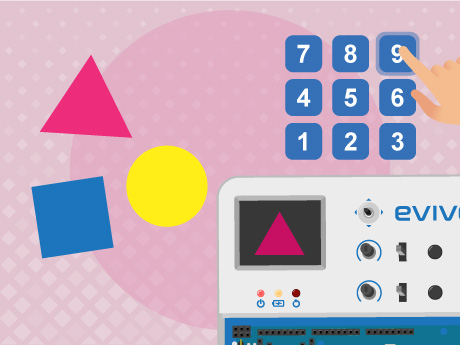
The evive TFT display can be used to draw different graphical objects such as rectangles, circles, ellipses, triangles, and rounded rectangles.
In this project, different keyboard keys are assigned to different shapes. When a key is pressed, the corresponding shape is drawn on the evive TFT screen along with its label. This makes the project interactive and helps learners understand how keyboard input can control graphical output.
Students will create multiple custom blocks for different shapes and use conditional statements to decide which shape should be displayed. This project is a good introduction to graphics programming, event handling, and display-based interaction using PictoBlox and evive.
Setting Up the Project
Before creating the shape-drawing program, connect evive with PictoBlox and select the correct board.
Step 1: Connect evive to the Computer
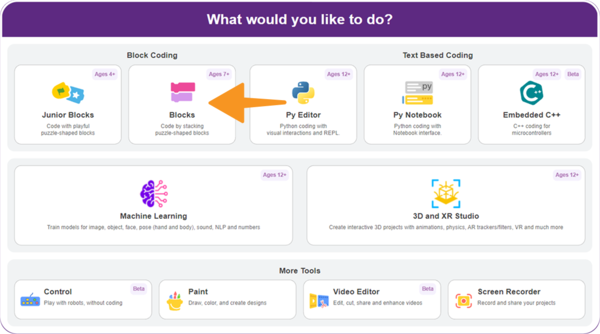
Connect evive to your computer using a USB cable. Open PictoBlox and select the Block Coding environment.
Step 2: Select the evive Board
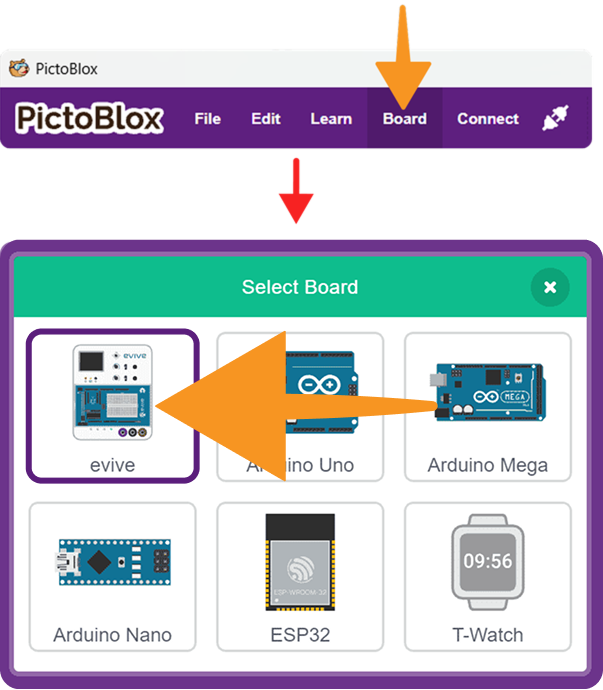
Click on Board from the menu bar. Select evive from the board list.
Once evive is connected, you are ready to create the display graphics program.
Step-by-Step Coding Guide
In this project, we will create multiple custom blocks for drawing different shapes on the evive TFT display.
Step 1: Create the Delay Variable
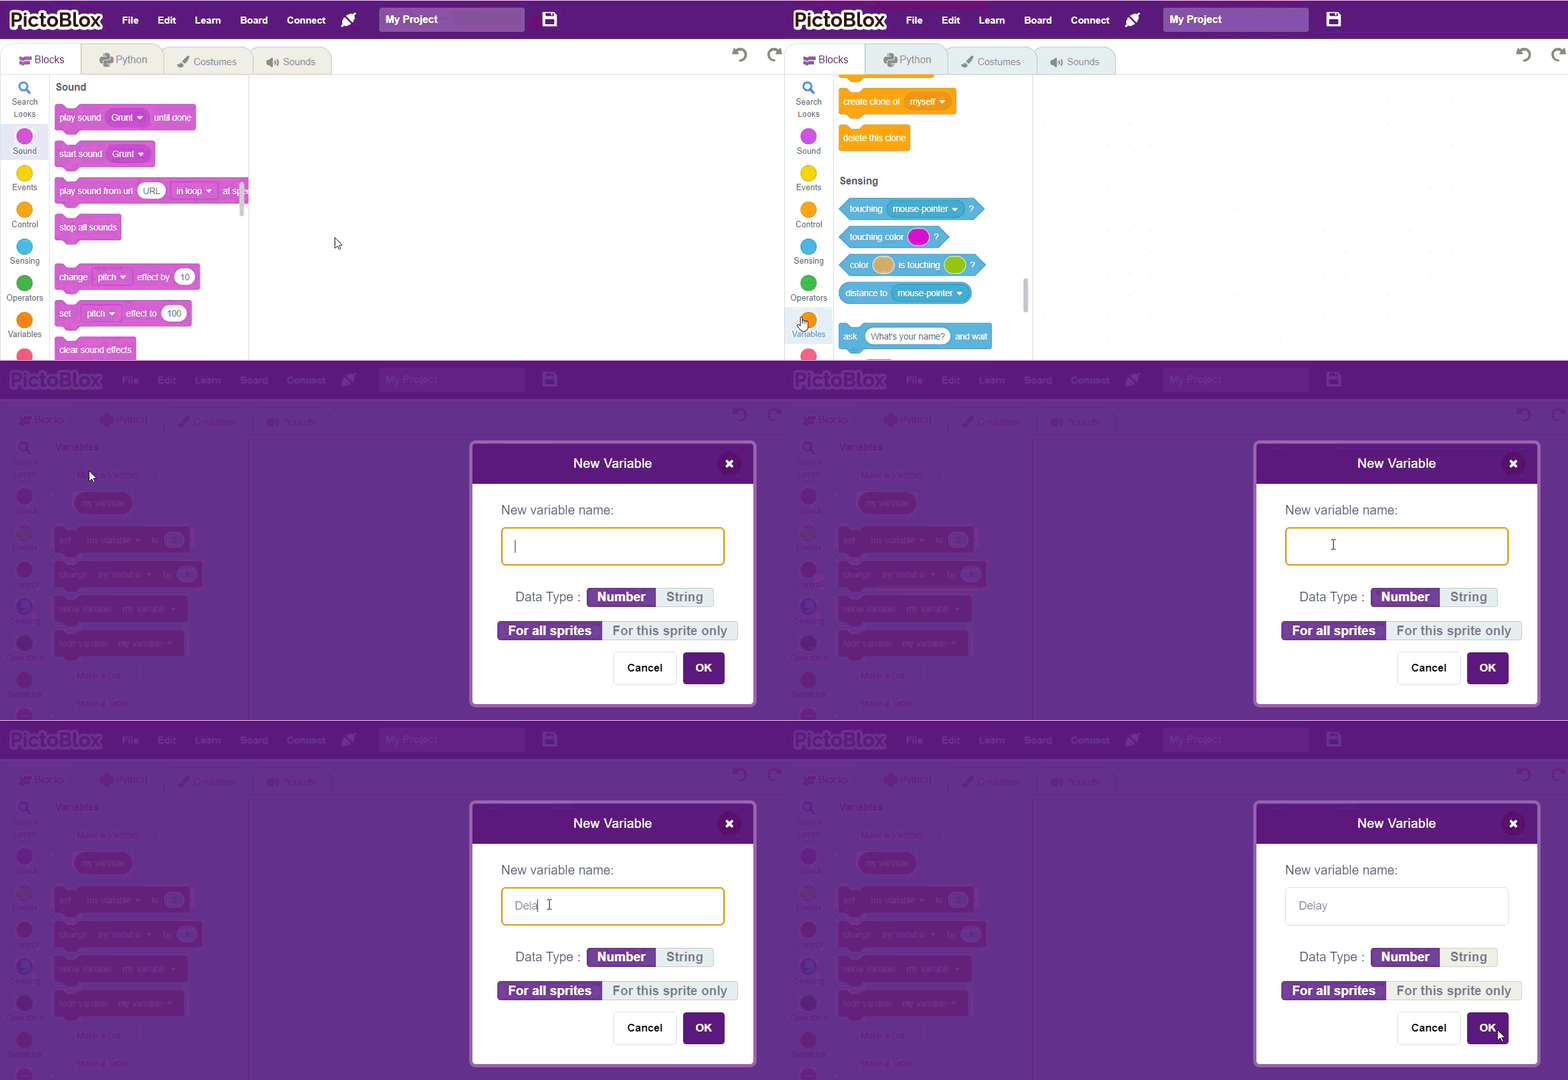
Go to the Variables block palette.
Click on Make a Variable.
Name the variable:
- Delay
- Draw Rectangle Outline
Step 3: Create More Shape Blocks
Using the same method, create the following custom blocks:
- Draw Rectangle Outline
- Filled Rectangle
- Rounded Rectangle Outline
- Filled Rounded Rectangle
- Circle Outline
- Filled Circle
- Ellipse Outline
- Filled Ellipse
- Triangle Outline
- Filled Triangle
Each custom block will be used to draw one specific shape on the TFT screen.
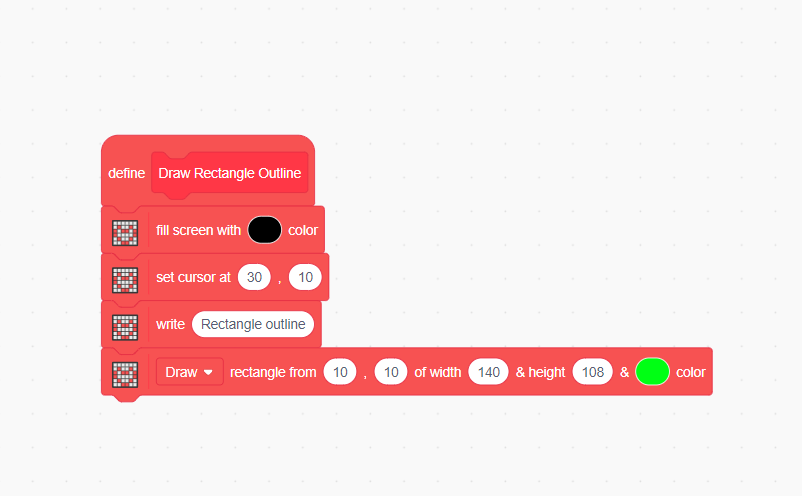
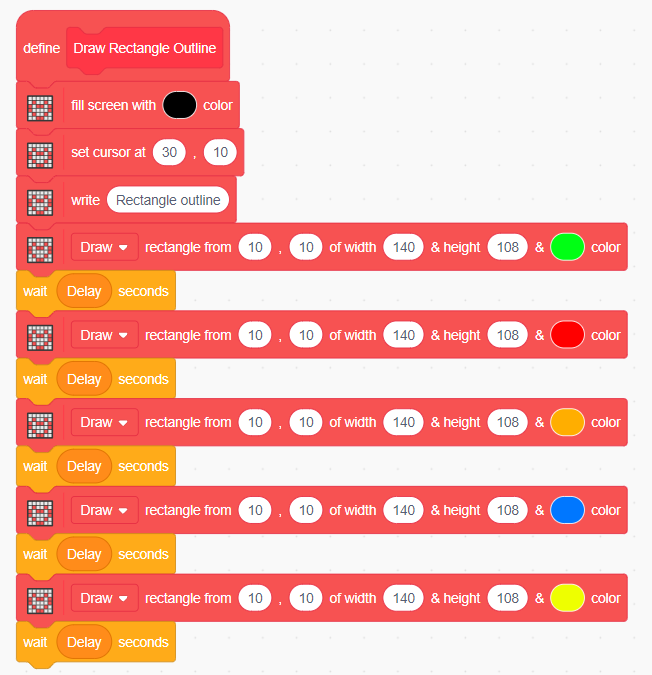
Step 4: Define Draw Rectangle Outline
Below the define Draw Rectangle Outline block:
- Add the fill screen with color block from the Display palette.
- Add the set cursor at x: () y: () block.
- Add the write() block.
- Write the label Rectangle Outline.
- Add the draw rectangle from x: () y: () of width () and height () with color () block.
- Add the wait () seconds block from the Control palette.
- Place the Delay variable inside the wait block.

This block will clear the screen, display the label, and draw a rectangle outline on the TFT screen.
Step 5: Define Filled Rectangle
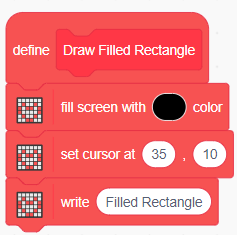
Below the define Filled Rectangle block:
- Add the fill screen with color block.
- Add the set cursor at x: () y: () block.
- Add the write() block.
- Write the label Filled Rectangle.
- Add the filled rectangle from x: () y: () of width () and height () with color () block.

- Add the wait () seconds block.
- Place the Delay variable inside the wait block.
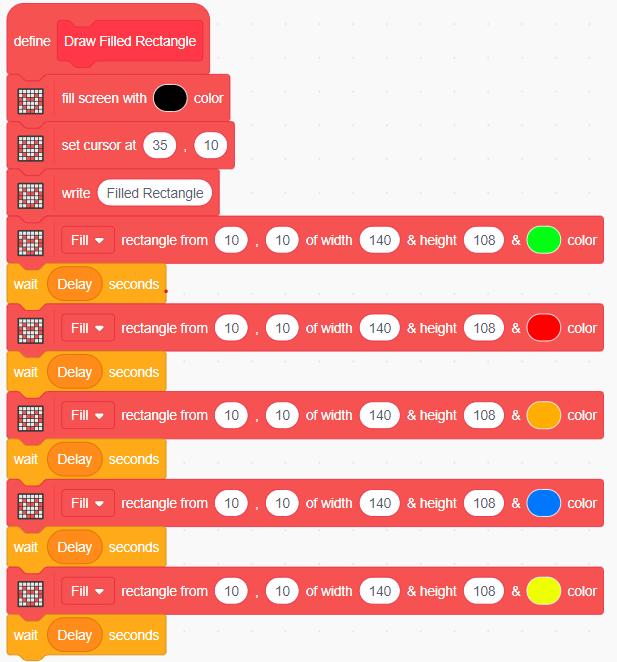
This block will draw a filled rectangle on the evive TFT display.
Step 6: Define the Remaining Shape Blocks
Similarly, define all the remaining custom blocks using the related Display blocks.
Create shape-drawing scripts for:
- Rounded Rectangle Outline
- Filled Rounded Rectangle
- Circle Outline
- Filled Circle
- Ellipse Outline
- Filled Ellipse
- Triangle Outline
- Filled Triangle
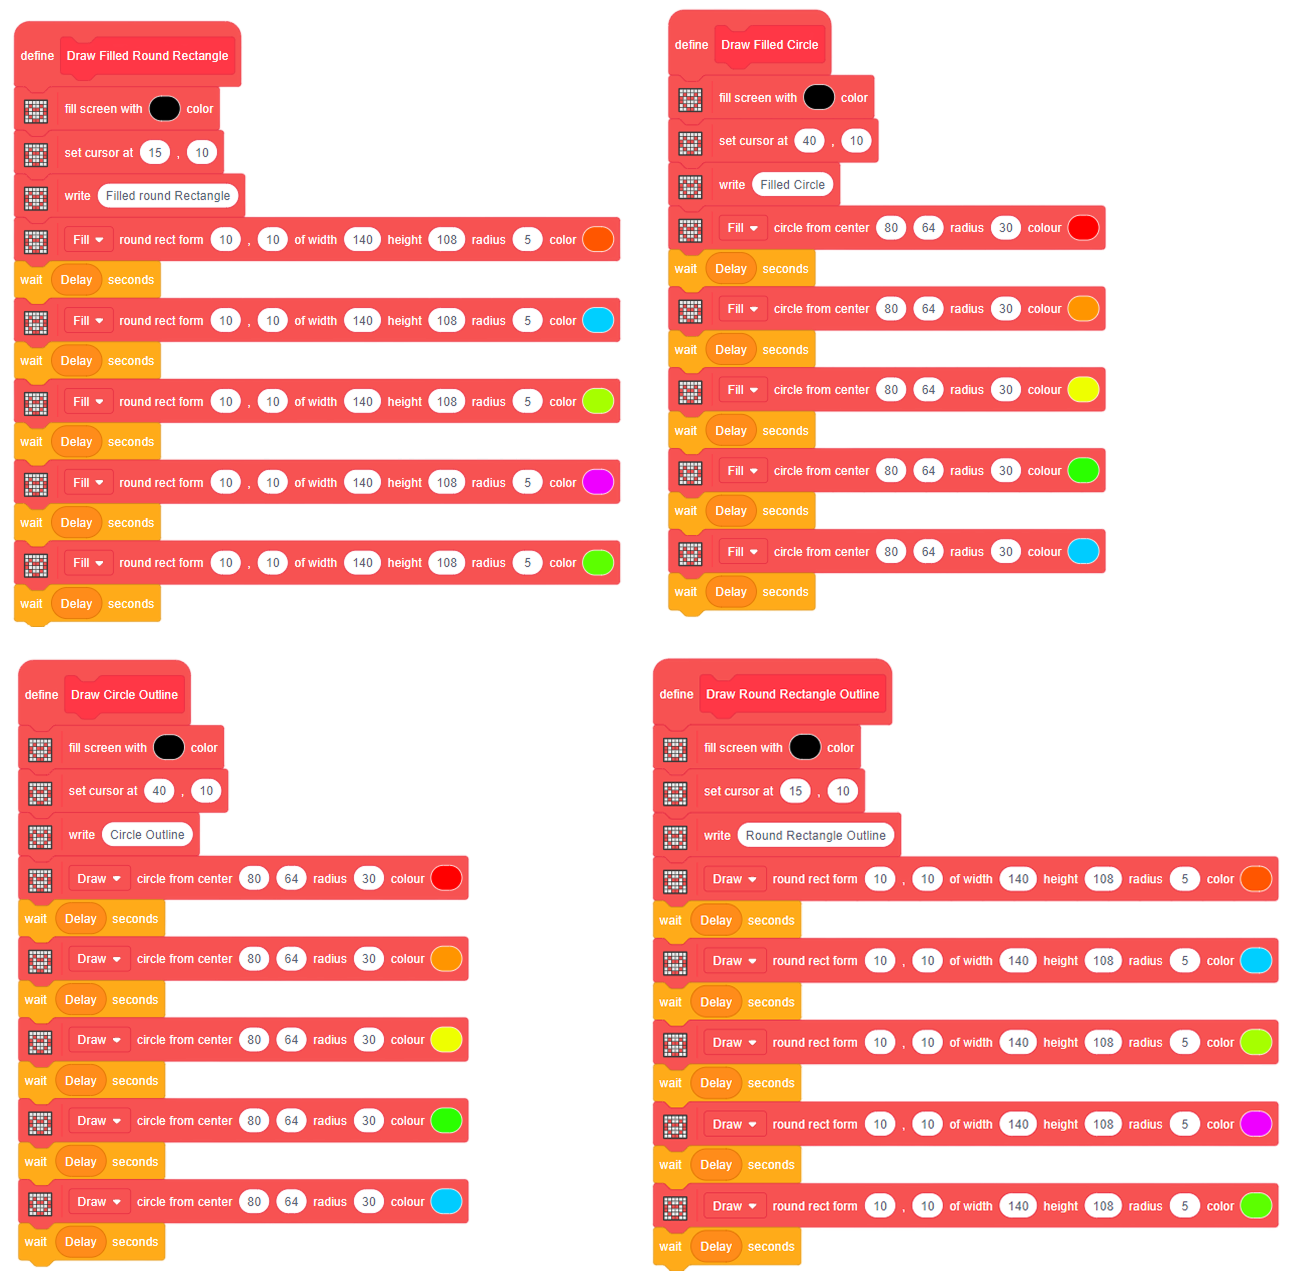
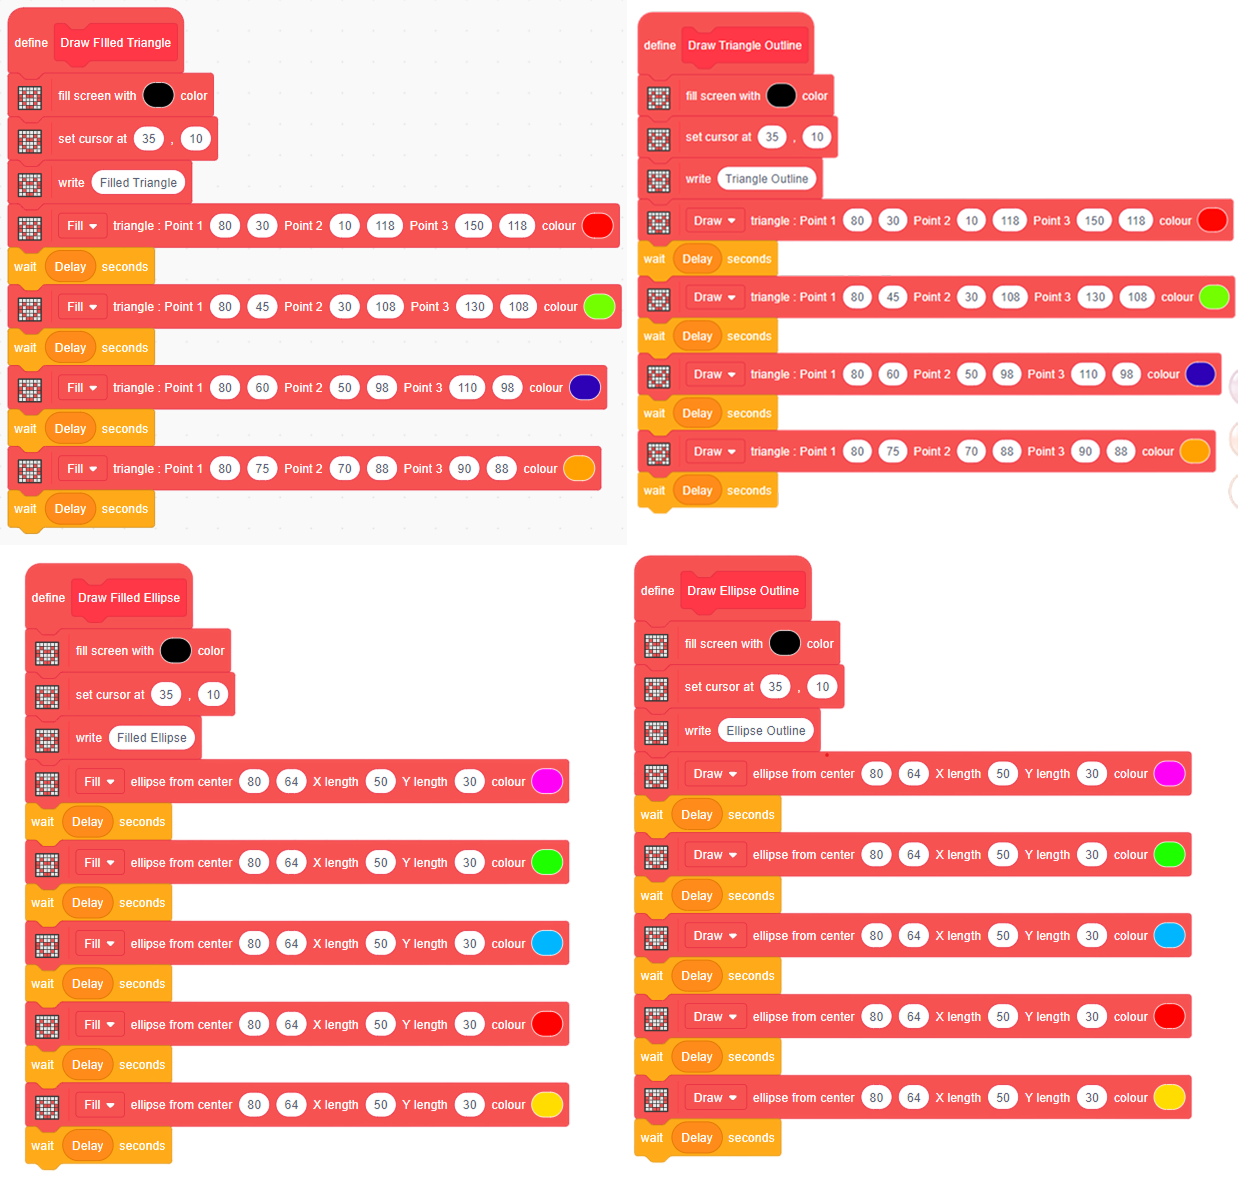
Each block should clear the screen, write the shape name, draw the selected shape, and wait for the value stored in the Delay variable.
Creating the Main Script
Now, create the main script that checks keyboard input and displays the selected shape on the evive TFT screen.
Step 7: Start the Program
Go to the Events palette. Drag the When Green Flag Clicked block.
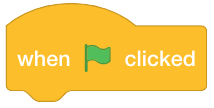
This block starts the program when the Green Flag is clicked.
Step 8: Set the Delay Value
Go to the Variables palette.
Add the set Delay to () block below the Green Flag block.
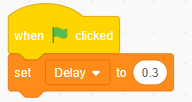
Set the delay value based on how long you want each shape to remain visible.
Example:
Set Delay to 1
Step 9: Add the Forever Block
Go to the Control palette. Add the Forever block below the set Delay block.
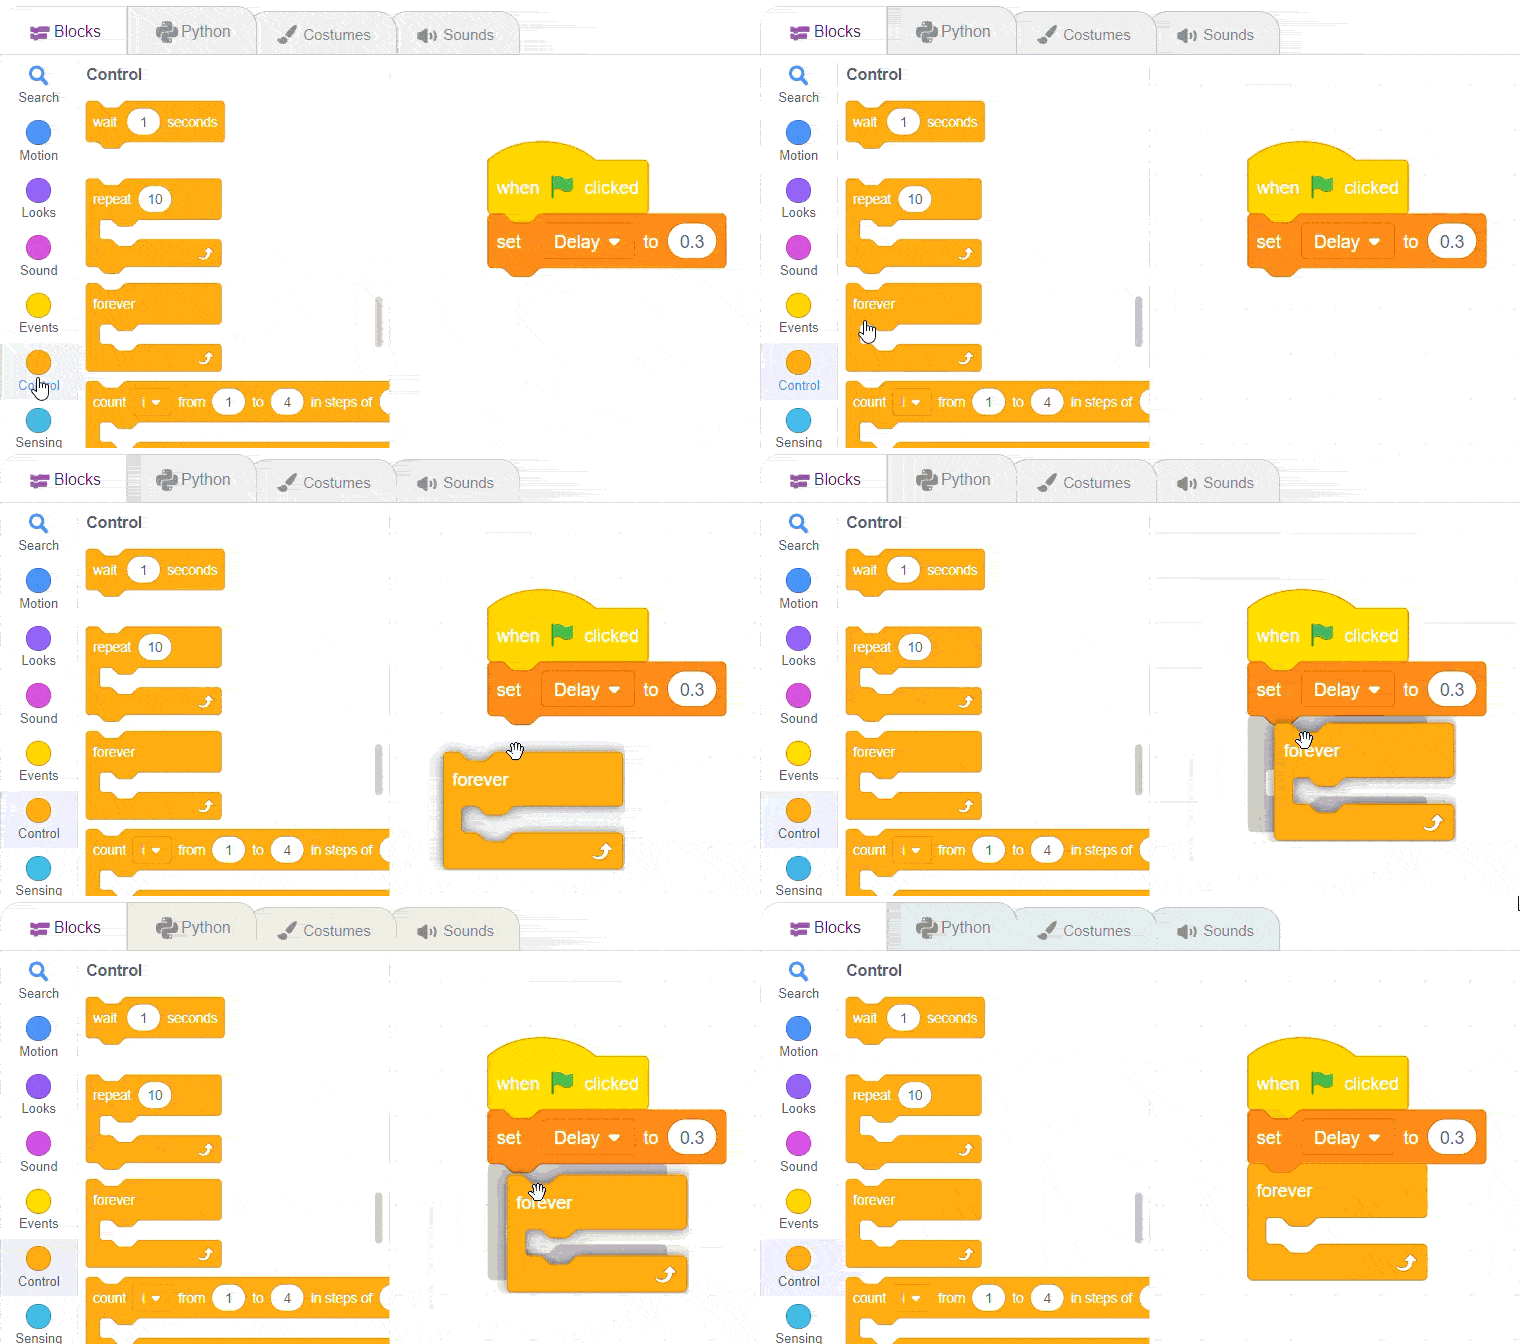
This keeps checking keyboard input continuously.
Step 10: Add Key Press Conditions
Inside the Forever block, add an if then block.
From the Sensing palette, add the key 0 pressed? block inside the condition. Place the Draw Rectangle Outline block inside the if block.
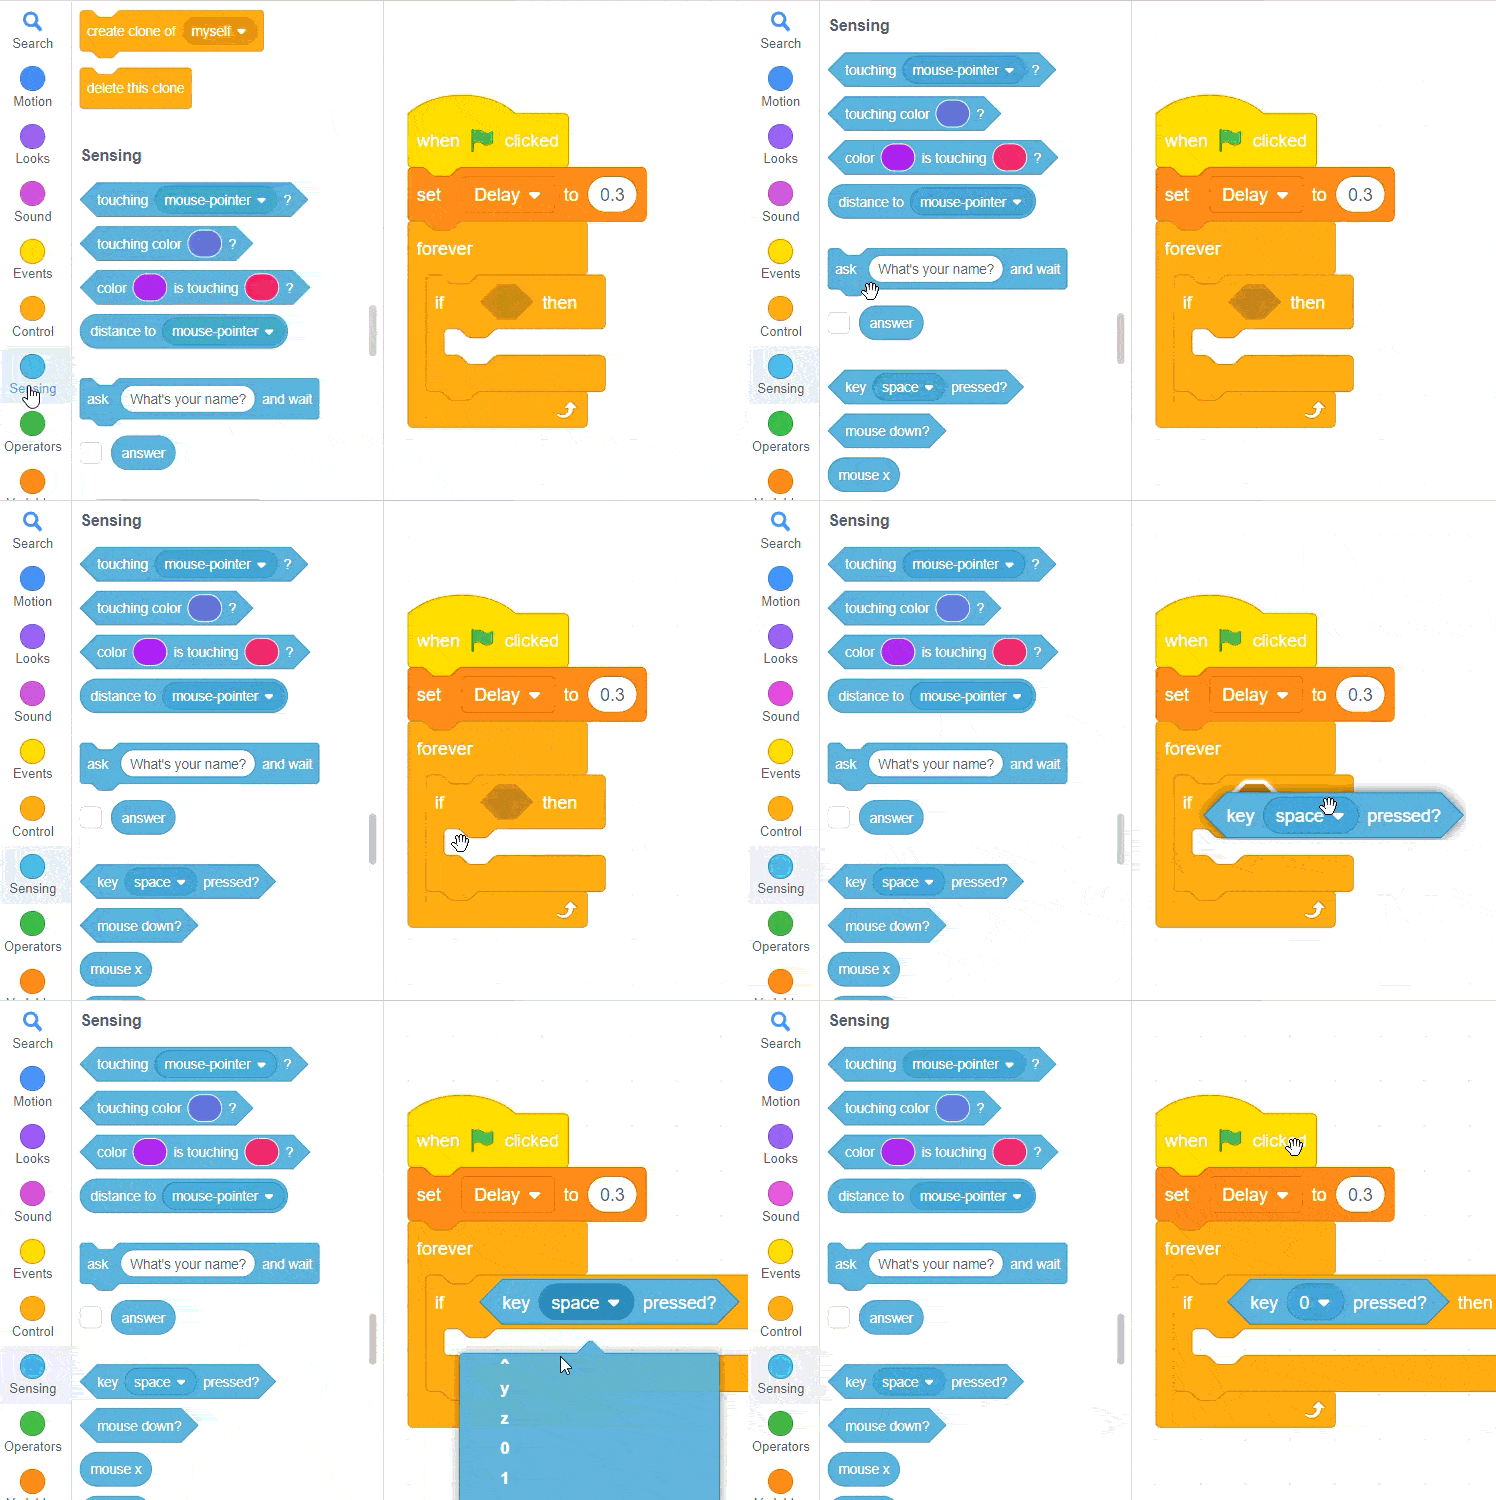
This means when the 0 key is pressed, the rectangle outline will be drawn on the evive TFT screen.
Step 11: Add Conditions for All Shapes
Create similar conditions for the remaining keys.
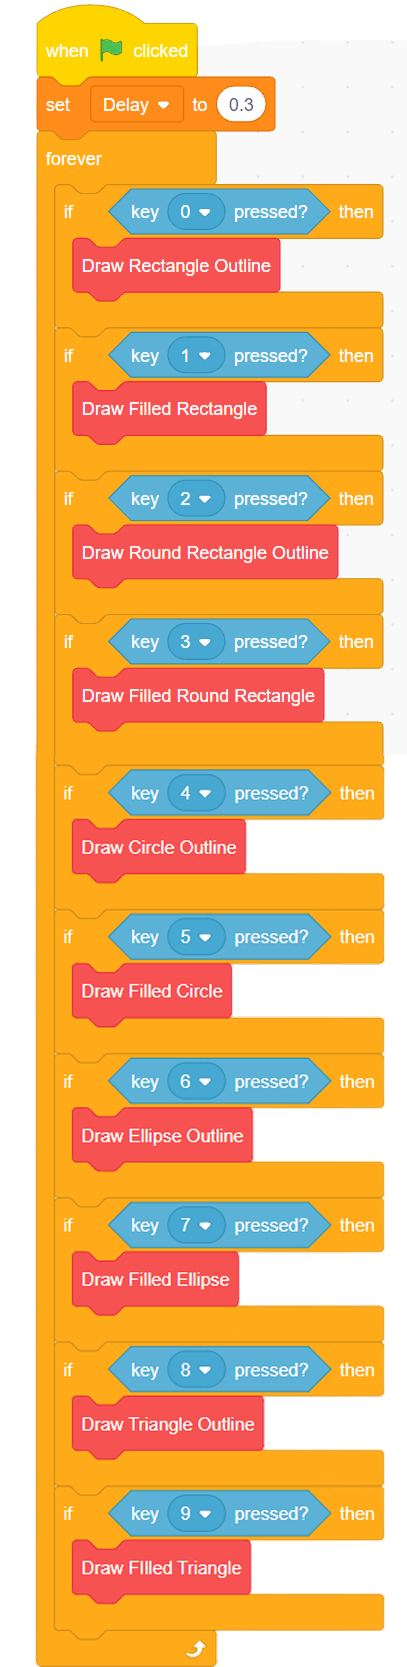
Suggested key mapping:
| Key | Shape Displayed |
| 0 | Rectangle Outline |
| 1 | Filled Rectangle |
| 2 | Rounded Rectangle Outline |
| 3 | Filled Rounded Rectangle |
| 4 | Circle Outline |
| 5 | Filled Circle |
| 6 | Ellipse Outline |
| 7 | Filled Ellipse |
| 8 | Triangle Outline |
| 9 | Filled Triangle |
Each key should call its matching custom block.
Output
After running the program:
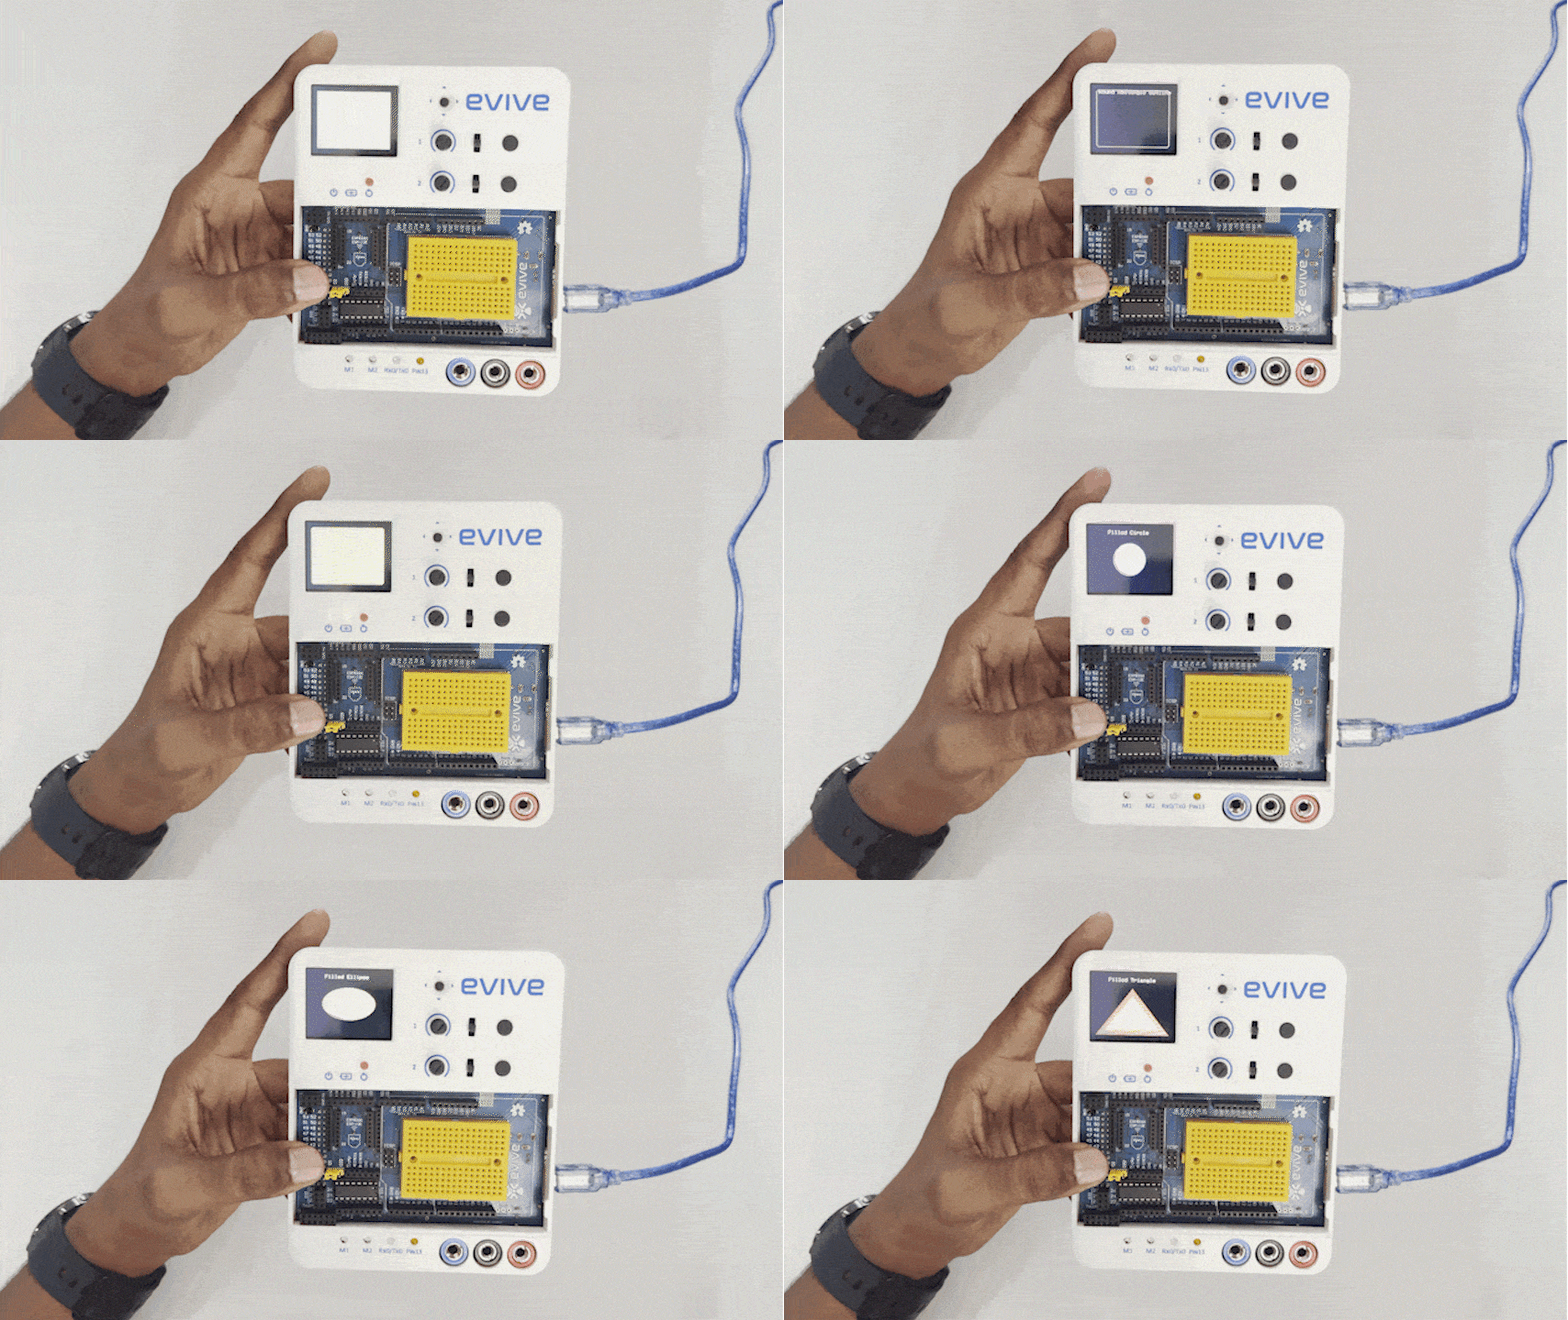
- Pressing different number keys displays different shapes on the evive TFT screen.
- The TFT screen shows the name of the selected shape.
- The corresponding shape is drawn on the display.
- Shapes such as rectangles, circles, ellipses, triangles, and rounded rectangles appear based on the key pressed.
- The project works like an interactive graphics display controlled through the keyboard.
Conclusion
In this project, we learned how to draw different shapes on the evive TFT display using PictoBlox.
Students created custom blocks for different shapes and used keyboard input to control which shape appears on the screen. The project introduced important programming concepts such as conditional statements, loops, variables, custom blocks, and display functions.
This activity helps Grade 8 students understand how interactive graphics applications can be created using simple block coding and the evive TFT display.