



Introduction
LEDs are everywhere, but did you know you can control their brightness to create stunning smooth glowing effects? Pulse Width Modulation (PWM) is an incredibly powerful technique used to fade LEDs, control motor speeds, and much more by rapidly switching digital signals ON and OFF! Learn what PWM is, how duty cycles control power, how to interface an LED with Arduino, and program it with ease in PictoBlox – our Scratch blocks-based graphical programming platform with advanced hardware interaction abilities. Once you’re equipped with the basic knowledge of variables, loops, and hardware repetition, we’ll show you how to generate a smooth fade-in and fade-out effect and build exciting DIY lighting projects.
To work in PictoBlox, you’ll first need to download it from HERE.
Ready? Set. Go!
Prerequisites
- Arduino Uno R3 Board
- 220Ω Resistor
- Breadboard
- LED
- Laptop or Computer
- PictoBlox installed on the system
- Jumper Wires
How to Connect with Arduino Uno
- Connect Uno to your computer and open PictoBlox.
- In PictoBlox, go to the toolbar and click on the Board menu. Select Arduino Uno.
- Next, click on the Connect button, select the Port to which Arduino Uno is connected e.g. COMXX or ttyXX. Once you select the port, the icon beside the Connect tab will become connected.
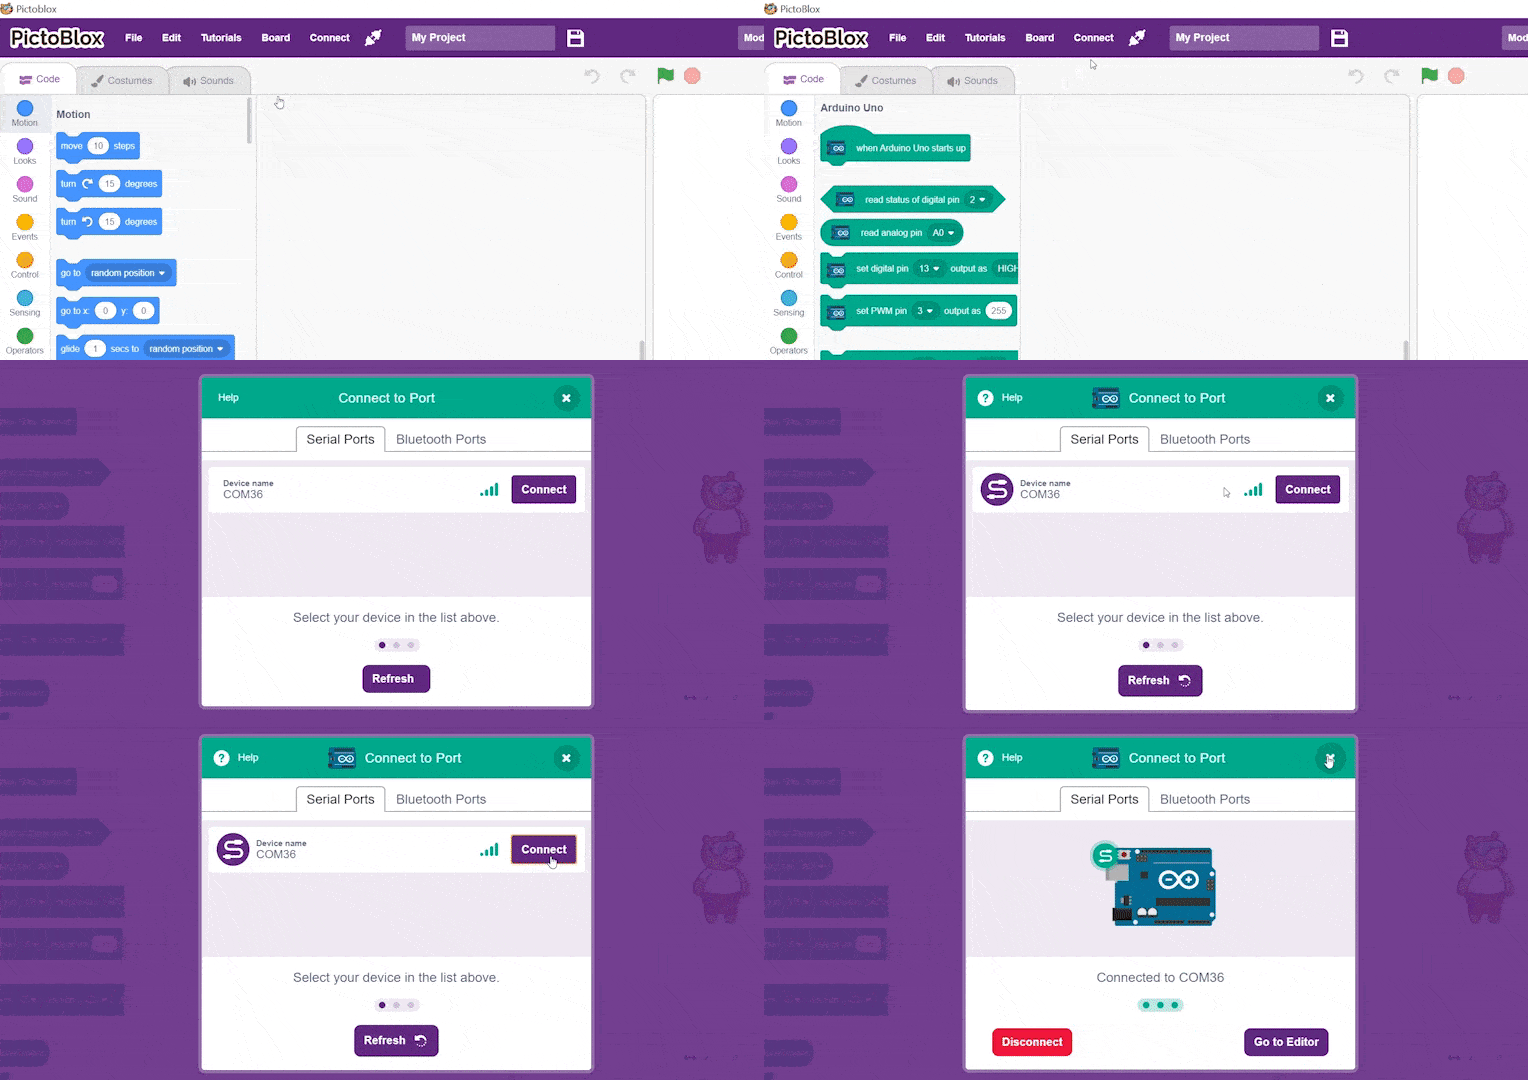
- On the top right corner, there is a toggle button named Mode. This button is used to switch between the two working modes of PictoBlox, namely the stage mode and the upload mode.
- Switch to Upload mode by toggling this button. You’ll observe some changes in the UI.
Circuit Connections
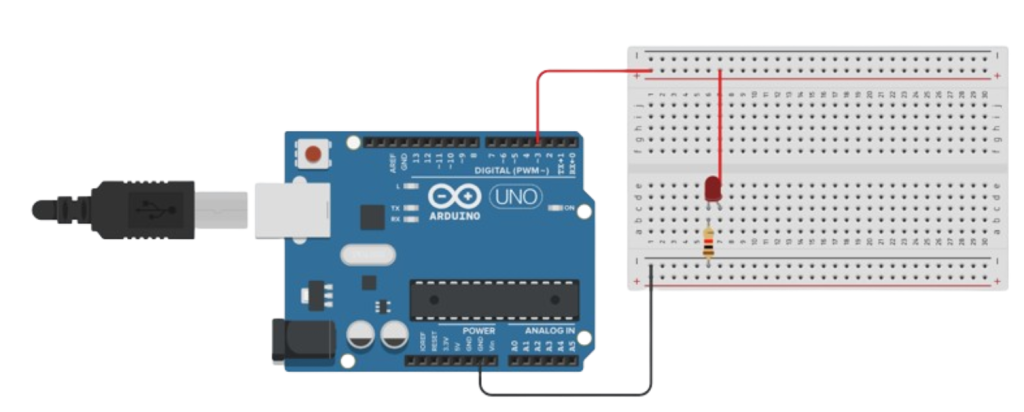
LED Connection
- Connect the longer leg (Anode) of the LED to Digital PWM Pin 3 through a 220Ω resistor.
- Connect the shorter leg (Cathode) of the LED to GND.
- Connect Arduino GND to the breadboard’s negative rail.
Step-by-Step Block Coding Guide
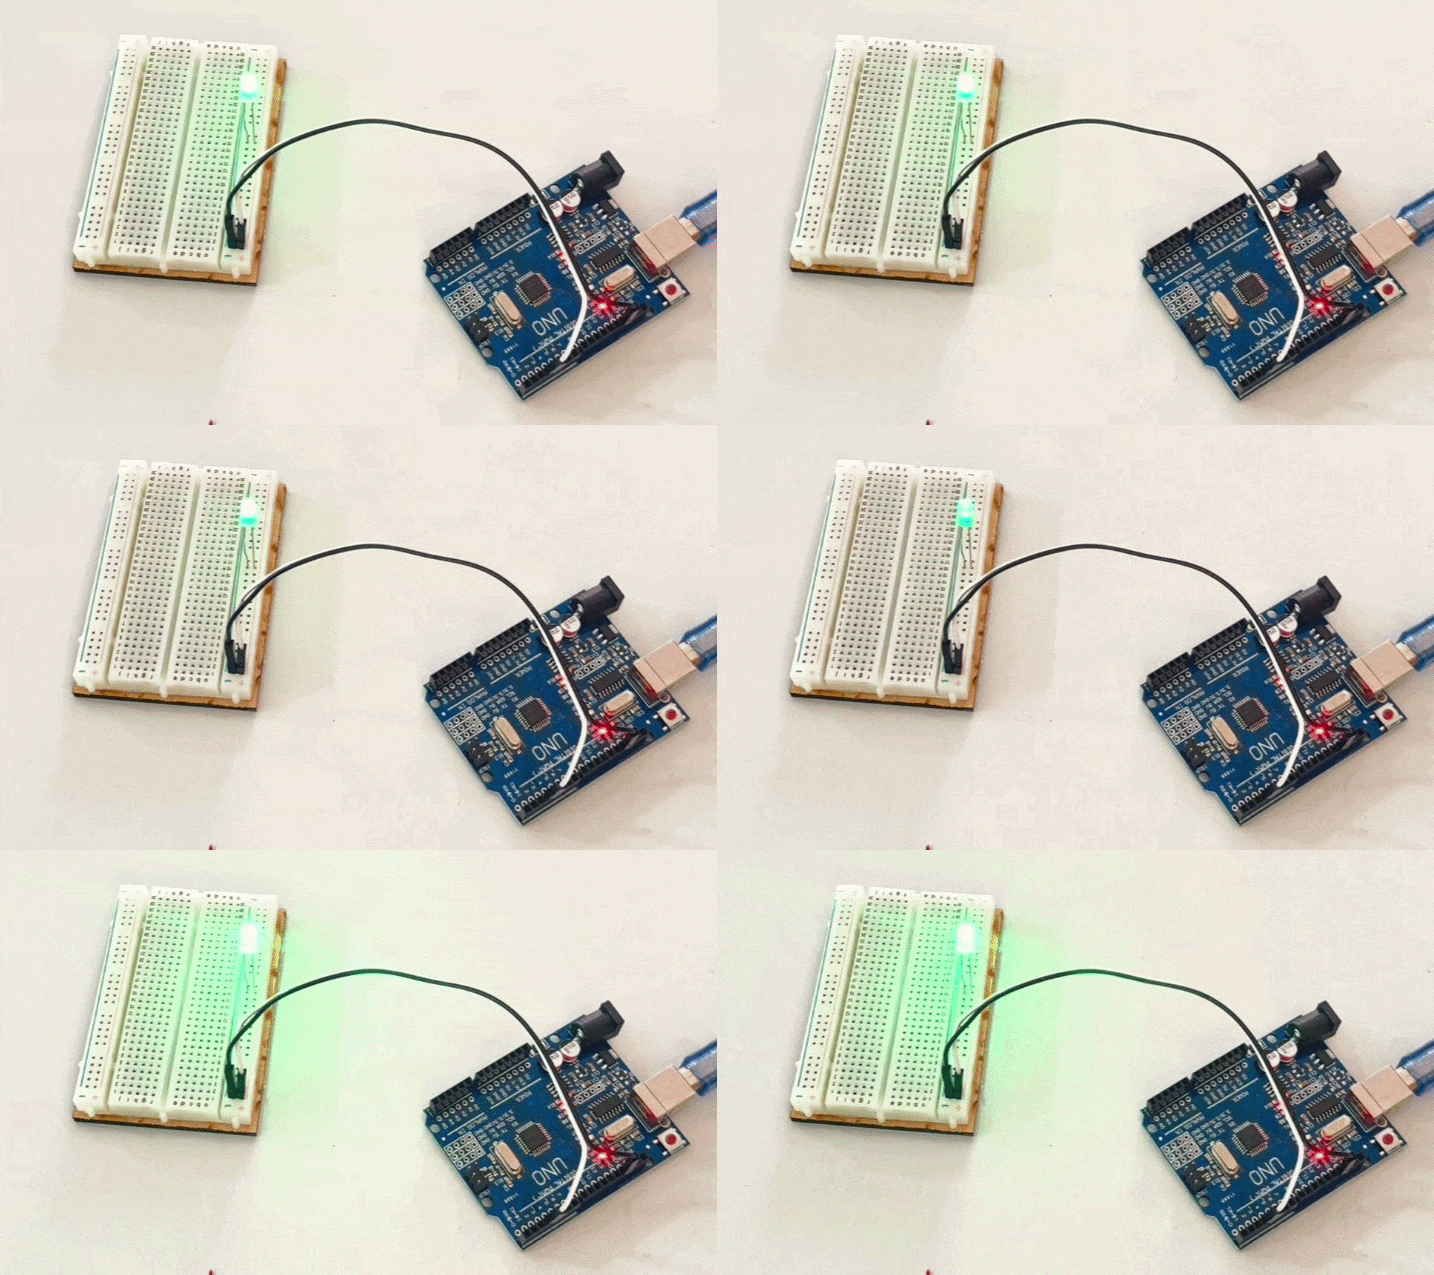
Let’s create a script that makes the LED glow brighter and dimmer continuously.
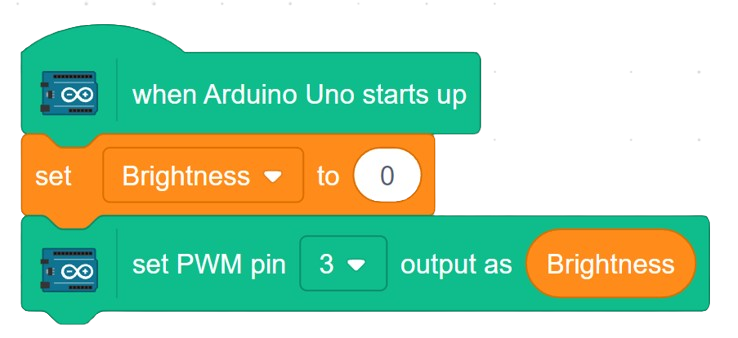
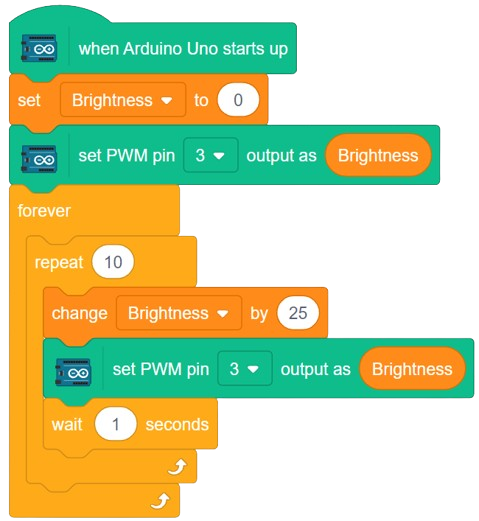
- Go to the Arduino Uno palette and drag the ‘when Arduino Uno starts up’ block into the scripting area.
- Create a variable from the Variables palette named ‘Brightness’ as a Number. This variable will be used to determine the Brightness of the LED.
- From the Variables palette, add the ‘set ( ) to ( )’ block. Use the “Brightness” variable and set its value to “0”.
- From the Arduino Uno palette, add the ‘set PWM pin () output as ()’ block. Use Pin 3 and add the Brightness variable from Variables palette for the Output.
- From the Control palette, add the ‘forever’ block.
- From the Control palette, add the ‘repeat ()’ block inside the forever block. Set its value to 10.
- From the Variables palette, add the ‘change () by ()’ block inside the ‘repeat ()’ block. Use the ‘Brightness’ variable and change its value by 25.
- From the Arduino Uno palette, add the ‘set PWM pin () output as ()’ block. Use Pin 3 and add the Brightness variable from Variables palette for the Output.
- From the Control palette, add the ‘wait () seconds’ block. Set its value to 1.
- Inside the forever block and after the repeat () block. Add another ‘repeat ()’ block from the Variables palette. Use the ‘Brightness’ variable and change its value by -25.
- From the Arduino Uno palette, add the ‘set PWM pin () output as ()’ block. Use Pin 3 and add the Brightness variable from the Variables palette for the output.
- From the Control palette, add the ‘wait () seconds’ block. Set its value to 1.
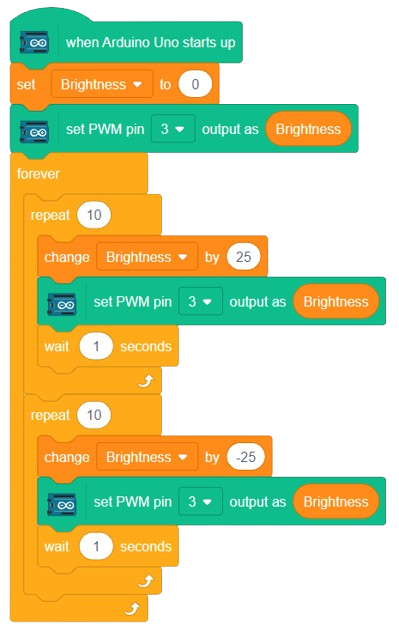
Now it’s time to upload the script to the Arduino Uno! For that, click on the Upload Code button, and voila!
Output
Conclusion
This project demonstrates how PWM can be used to control LED brightness using Arduino and PictoBlox. Students learn how variables, loops, and PWM outputs work together to create smooth lighting effects. The LED Fade Effect is an excellent beginner project for understanding real-world hardware control. It also serves as a foundation for advanced projects involving lighting systems, automation, and interactive electronics.