Introduction
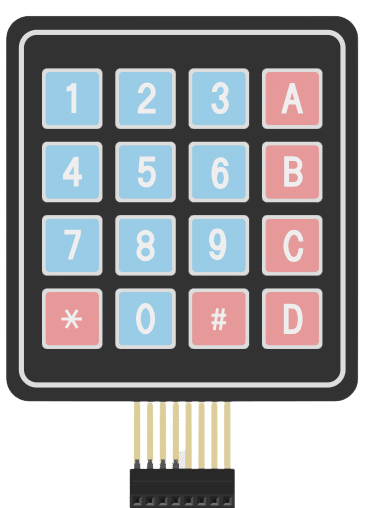
A 4×4 keypad module is an electronic input device commonly used in various applications for interfacing with microcontrollers and other digital systems. It consists of a grid of buttons arranged in a 4×4 matrix, resulting in a total of 16 buttons. Each button corresponds to a specific alphanumeric character, symbol, or command.
Working Principle: A technique called “keypad scanning” is used to read input from the keypad. The microcontroller scans the rows and columns one by one. It sets one row to HIGH and reads the column pins to detect if any button in that row is pressed. If a button is pressed, the corresponding row and column will intersect, allowing the microcontroller to determine the button that was pressed.
Applications: 4×4 keypad modules are widely used in various applications that require user input, such as security systems, door locks, industrial control panels, calculators, home automation, and more.
In this example, we will be interfacing the keypad module with Arduino and try to read the button value from the keypad module. let’s begin!!
This is sequential example of keypad in which we are going to make a password-based door lock system. In part 1 we learned how to interface keypad with Arduino. click here to access part 1
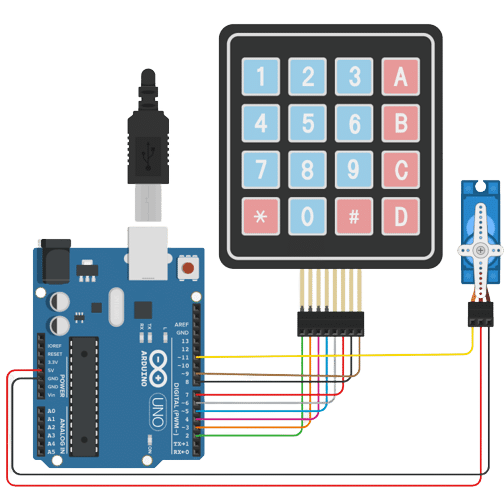
Circuit diagram
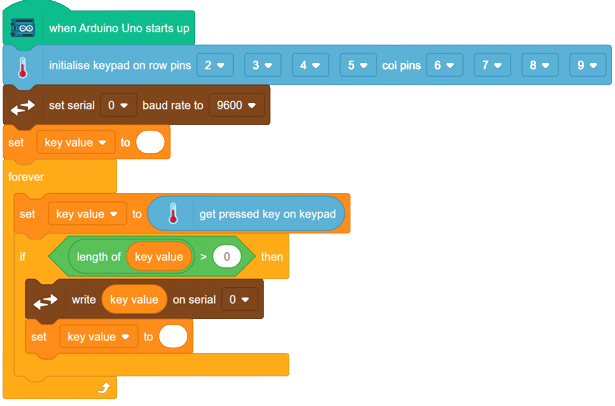
Code
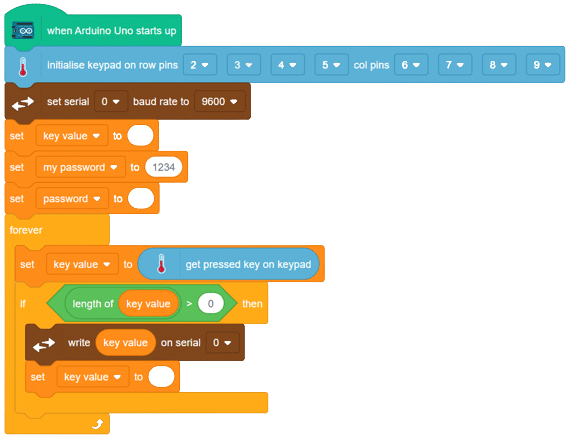
Here we will continue updating th script that we created in part 1. Click here to access previous script.
- Open the script from part 1.
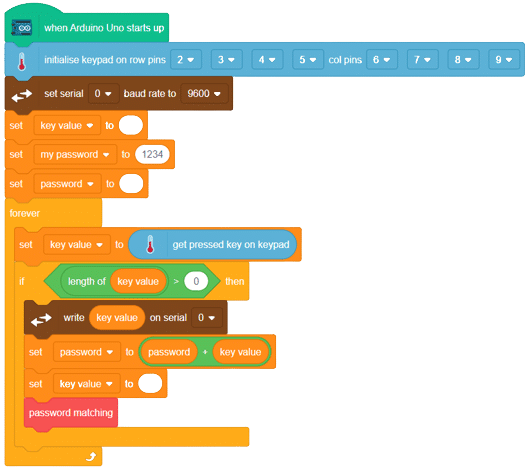
- Create 2 String type variables as “my password” and “password”. Store your password in “my password variable” and make password as empty variable as shown
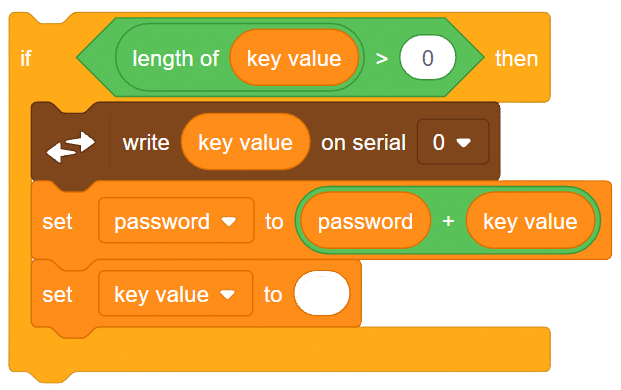
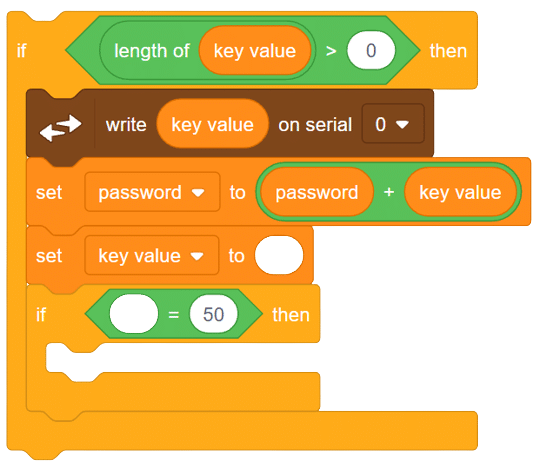
- From variables add block “set () to ()” in if block. Choose “password ” from the list and add an addition operator in the space provided.
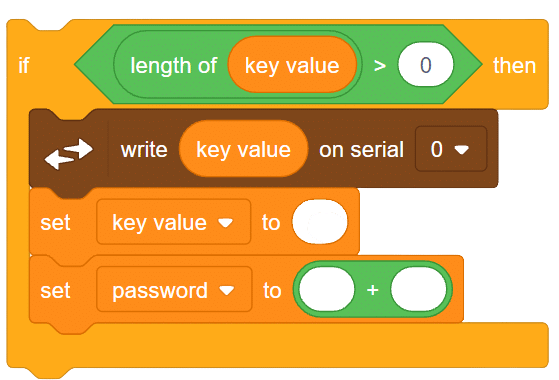
- Inside the addition operator, place password in the first space and key value in second space. as shown.
- Add another if block after “set key value to ()” block.
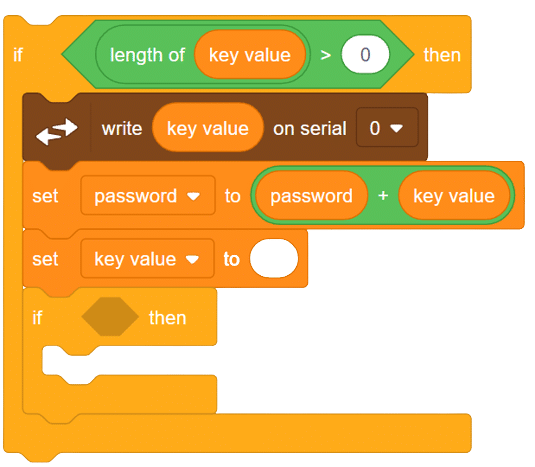
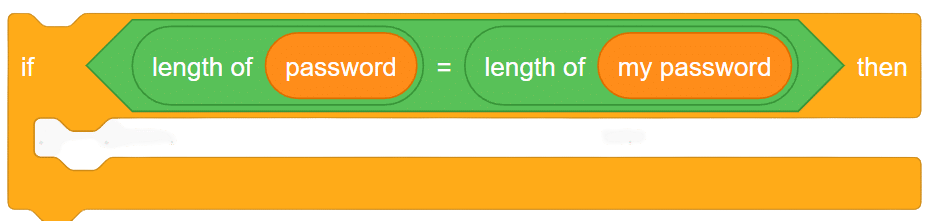
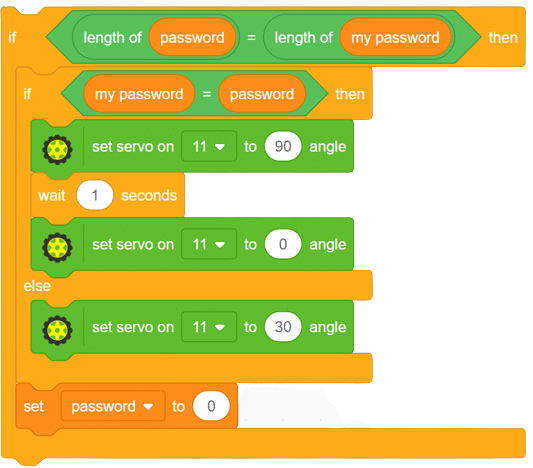
- Since password is a combination of multiple characters, so here we have to check for the length of our password whether it is equally to the length of our password that we have set in “my password” variable or not. If yes, then we will be comparing “password” with “my password”. for this use equality operator from operators.
- Now from operators use the ‘Length if ()” block for finding thee length of both the passwords and do the comparison. as shown.
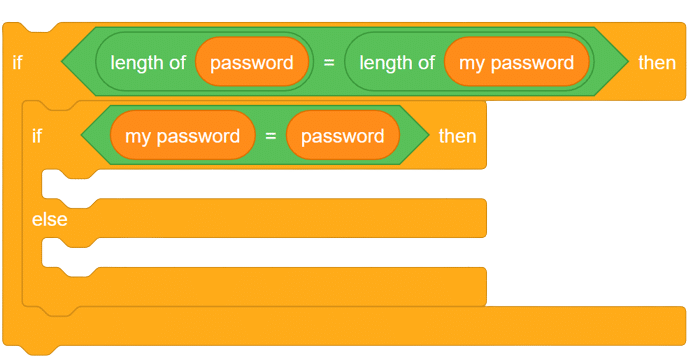
- If the length of both the variables is equal then we have to check for the password matching.For this add if-then-else block inside this if block. as shown.

- Here use the equality operator for password matching.
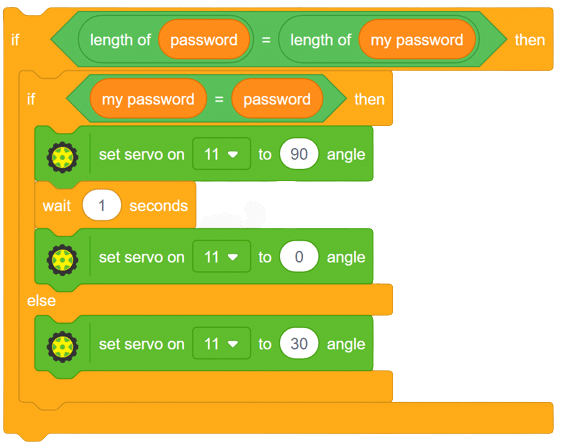
- If the user has entered the correct password then the servo motor must move from 0 to 90 degrees for 3 seconds. Otherwise, the servo must be at 0 degrees.
- AFter the password compression, delete the data of the “password” variable.
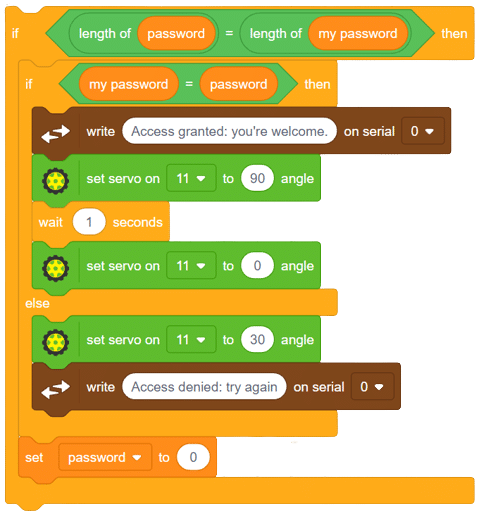
- You can also add the messages for the user as ‘access granted” or access denied” as per the result of password comparison.
- Create a block and name it as “password matching”. add the above blocks of code under this block.
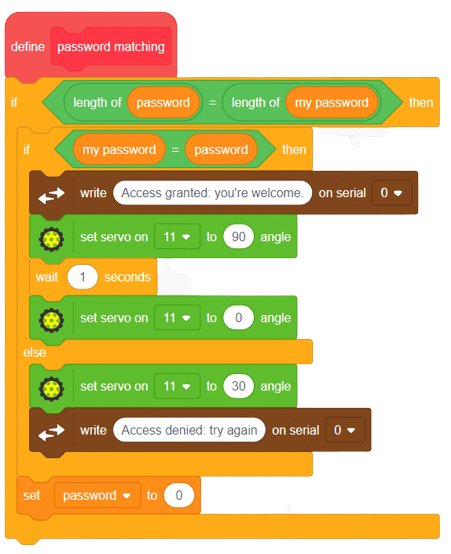
- Use this block in our main script.
In this way, we can set any security password in our script and then can easily make a password-based security system.
Output