


Introduction
Have you ever wondered how virtual assistants like Siri or Alexa talk to you? Behind every talking AI, there’s a combination of text-to-speech technology, data variables, and smart programming logic. Today, we’re going to build our very own version, right inside PictoBlox!
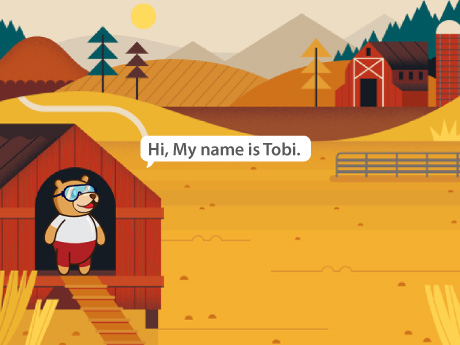
In this STEM project, students will program Tobi, PictoBlox’s built-in sprite character, to greet users, ask for their name, and respond with a personalised welcome message. Along the way, learners will discover how AI-powered chatbots use variables, conditions, and speech synthesis to hold a natural conversation.
How the AI Talking Character Works
This project consists of two main scripts running in parallel — a classic pattern in AI-driven applications:
- Script 1 — Mouth Animation: Continuously checks if Tobi is “Talking” (using a variable) and alternates between mouth-open and mouth-closed costumes to simulate realistic speech animation.
- Script 2 — Dialogue & AI Response: Controls the full conversation flow — from greeting the user to asking for their name to generating a personalised spoken response using the TTS extension.
Together, these two scripts mirror how modern AI assistants work: one process handles the voice output (TTS), while another handles the animated visual feedback (avatar lip-sync). This is a simplified but accurate representation of how virtual AI operate!
Setting Up Your PictoBlox AI Project
Prerequisites
You’ll need the following things to make the tobi talking animation:
- A laptop or a computer with a camera.
- The latest version of PictoBlox, which you can download from here.
- A good Internet connection.
Setting Up the Project
Let’s begin by setting up the project.
Step 1: Open PictoBlox
Step 2: Add the Text-to-Speech Extension
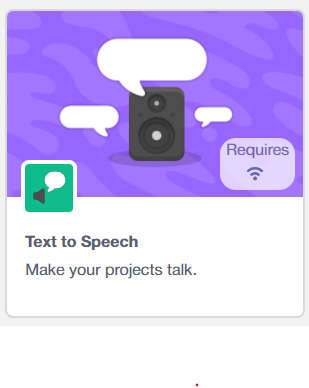
Click the Add Extension button (the blue puzzle icon at the bottom left of the screen). Search for “Text to Speech” and add it to your project. This extension gives you access to AI-powered voice blocks including speak, set voice to, and more.
Step 3: Select the Tobi Sprite
Make sure you are working on the Tobi sprite. Tobi comes with two costumes pre-loaded in PictoBlox:
- Tobi’s mouth is open (for when Tobi is speaking)
- Tobi’s mouth closed (the default resting state)
This two-costume setup is the foundation of the AI lip-sync animation in Script 1.
Script 1: Building the AI Lip-Sync Animation
This script is what makes Tobi’s mouth move in sync with speech – a technique called lip-sync animation, commonly used in AI avatars, animated characters, and virtual assistants.
Understanding the Talking Variable (AI State Flag)
At the heart of this animation is a variable called Talking. Think of it as an “AI state flag” – a signal that tells the program whether the AI is currently speaking (value = 1) or silent (value = 0). This is a real concept used in AI systems to manage state and trigger actions.
Script 1 (Step-by-Step):
- Place a ‘when Green Flag clicked’ block from the Events palette — this starts the animation when the project runs.
- Add a ‘forever loop’ block from the Control palette. This loop keeps checking the Talking variable continuously, just like how a real AI system constantly monitors its state.
- Inside the forever loop, place an ‘if-then’ block. Make a variable talking. Set the condition to: Talking = 1 from Operatiors Palatte .
- When ‘Talking’ equals 1, the AI is speaking. Add a ‘switch costume to Tobi block’ (Tobi) from the Looks palette. So Tobi’s mouth opens.
- Add a ‘wait 0.15 seconds’ block from the Control palette to make the animation visible.
- Then add the ‘switch costume to Tobi, mouth closed’ block to close the mouth.
- Add another ‘wait 0.15 seconds’ block. This 0.15-second toggle creates the appearance of natural lip movement — a simplified version of the phoneme-based lip-sync used in professional AI avatars.
Script 2: Coding the AI Dialogue & Personalized Response Flow
This is the main conversation script – the brain of our AI talking character. It controls what Tobi says, when it listens, and how it personalises its response using the user’s input.
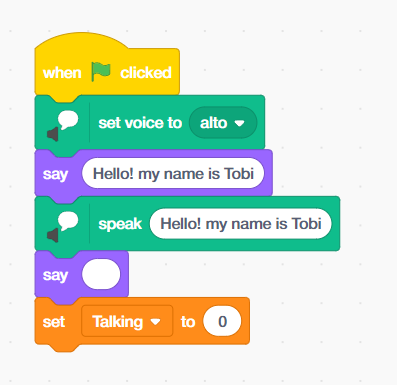
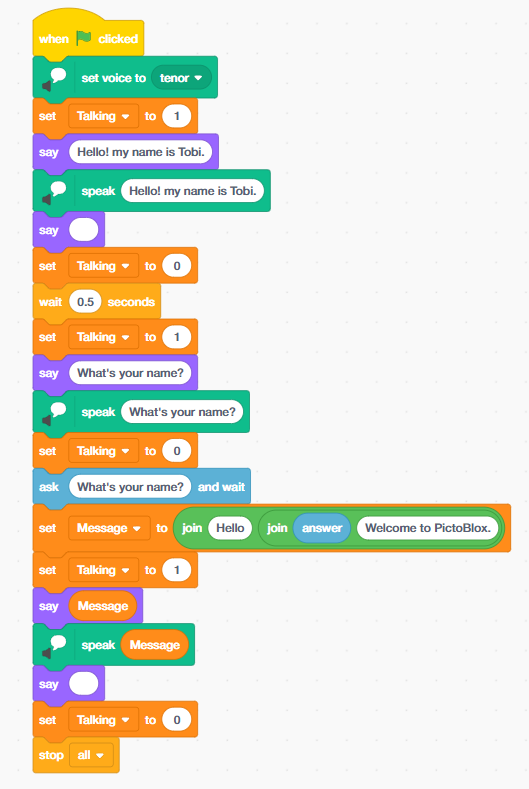
Part A – Setting Up the Voice and Greeting
- Place a ‘when Green Flag clicked’ block from the Event palette.
- Add ‘set voice to tenor’ from the Text-to-Speech palette. The voice type (alto, tenor, squeak, etc.) is an AI model setting – it selects a different neural speech synthesis voice for Tobi.
- ‘Set Talking to 1’ block from the variable palette – this activates the mouth animation from Script 1.
- Add a ‘say’ block with: Hello! My name is Tobi.
- Add a ‘speak’ block from the Text to Speech palette with the same text – this triggers the AI Text-to-Speech engine to vocalise the words.
- Add a ‘say’ block with an empty space to clear the speech bubble after talking.
- ‘Set Talking to 0’ to stop the mouth animation between sentences.
![]()
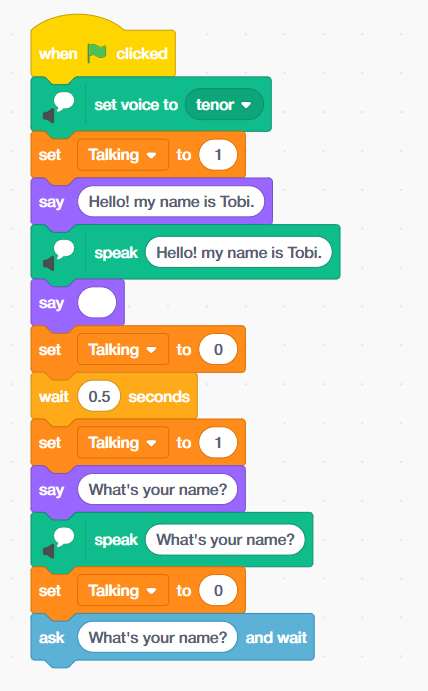
Part B – Asking a Question and Collecting User Input
- Add ‘wait 0.5 seconds’ – a natural conversational pause, like how AI assistants pause briefly between sentences for a more human-like rhythm.
- ‘Set Talking to 1’ from the variable palette again – Tobi is about to speak again.
- Add a ‘say’ block with ‘What’s your name?’
- Add a ‘speak’ block with ‘What’s your name?’
- ‘Set Talking to 0’ from the variable palette.
- Add an ‘ask [What’s your name?] and wait’ block from the Sensing palette. This pauses the program and waits for the user to type their response. The user’s input is stored in the built-in answer variable — this is how AI systems collect and store user data.
Part C — Generating a Personalized AI Response
- This is where the magic of AI-driven personalisation happens. We’ll use the join operator to dynamically build a custom response string using the user’s name:
- Add a ‘set message to’ block. In the value field, use ‘join’ [Hello] ‘join’ [answer] variable [Welcome to PictoBlox!]
- This creates a dynamic sentence like “Hello, Arjun! Welcome to PictoBlox” — personalised based on whatever name the user entered. This is the same concept behind AI personalisation used in apps and chatbots!
- Add Set Talking to 1.
- Create the new variable as ‘Message’
- Add the ‘say’ block and add the ‘Message‘ block from the Variable palette inside the say block – Tobi displays the personalised message.
- Add ‘speak’ and add the ‘Message‘ block from the Variable palette inside the speak block—Tobi speaks the personalised message aloud using the AI TTS.
- Add a ‘say’ block with an empty value to clear the bubble.
- Add ‘Set Talking to 0’.
- Add the ‘stop all’ block from the control palette to cleanly end the program.
Output
Click the Green Flag and watch Tobi speak with you.
Conclusion
In this AI and STEM project, we built a fully functional talking character in PictoBlox using the Text-to-Speech extension, variable-based state management, and block-based event-driven programming. We learnt how AI systems use speech synthesis to produce natural-sounding voices, how variables act as state flags to coordinate multiple processes, and how dynamic text generation creates personalised responses — the same principles that power real-world AI chatbots and virtual assistants.
This project is a perfect entry point for young learners exploring AI literacy, computational thinking, and human-computer interaction through hands-on STEM education. Whether you are building in a school coding lab, an Atal Tinkering Lab, or at home — the skills you have practiced here form the foundation of modern AI application development.