In the Vertical Pick and Place Robot, we can explore the fascinating process of designing and programming a vertical pick-and-place robot. This advanced assembly introduces learners to the unique mechanics and challenges of vertical motion systems, emphasizing precision, stability, and control.
Let’s look into the detailed assembly of the vertical pick-and-place mechanism.
Assembly
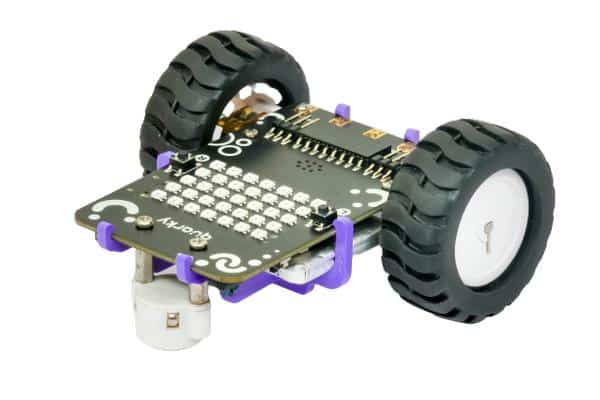
Follow the steps to assemble the Vertical pick and place robot from the standard horizontal robot. The horizontal robot looks like this:
- First, detach the Castor Wheel from the Quarky Robot by removing the Bolt.
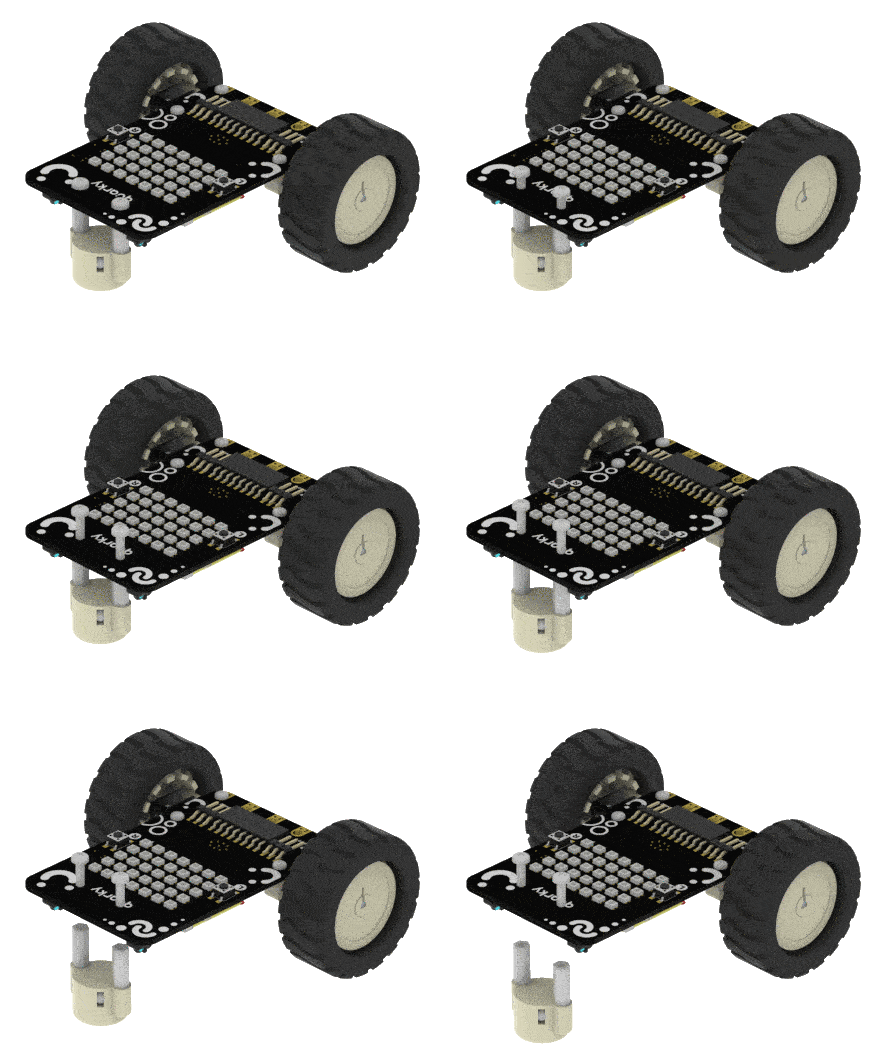
- Detach A2 from the Quarky Robot.

- Detach A1 from the Quarky Robot.
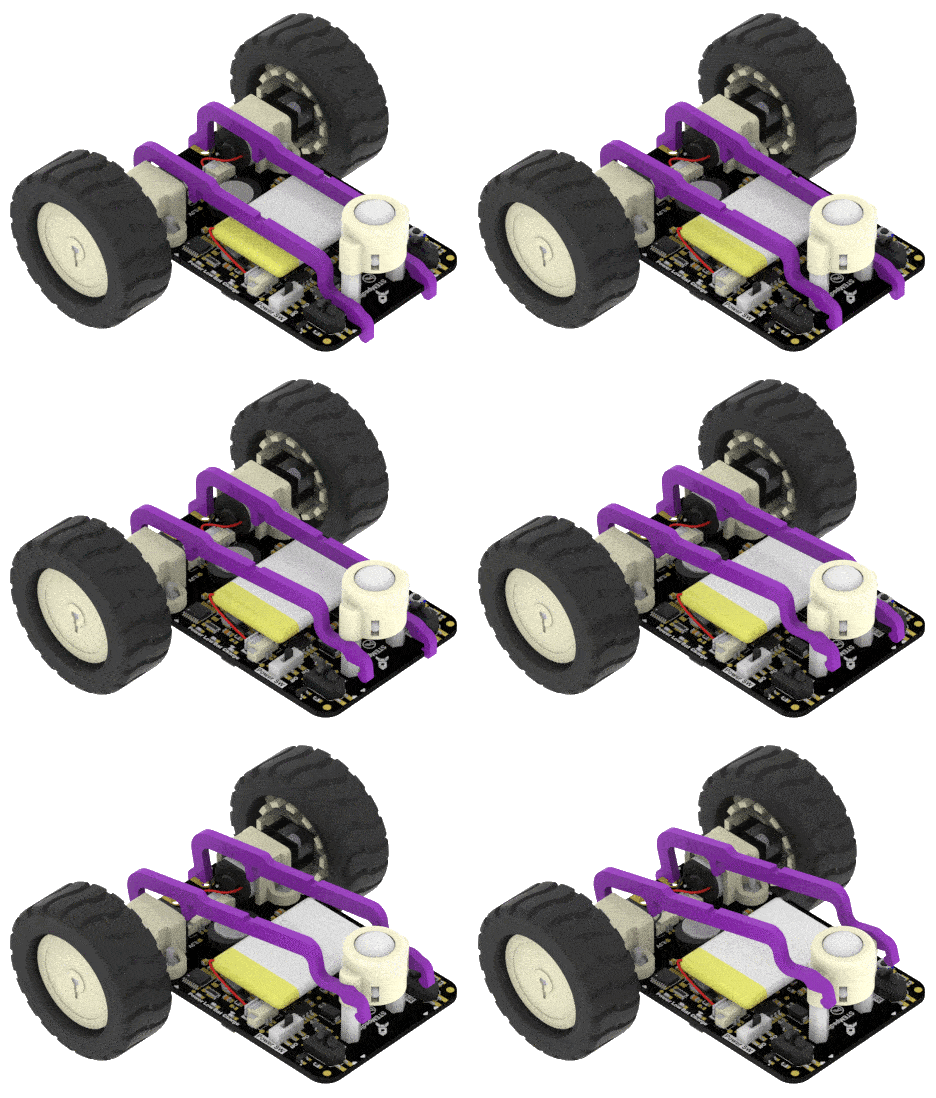
- Remove the wheels from the motors to ensure the robot is easily assembled. We will put them back at the end.
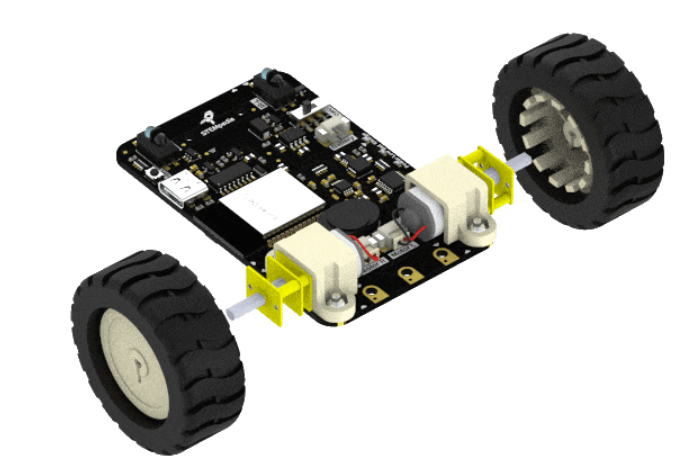 Now, attach the Ultrasonic plate B3 to the top of the robot and push-fit the Ultrasonic sensor to B3.
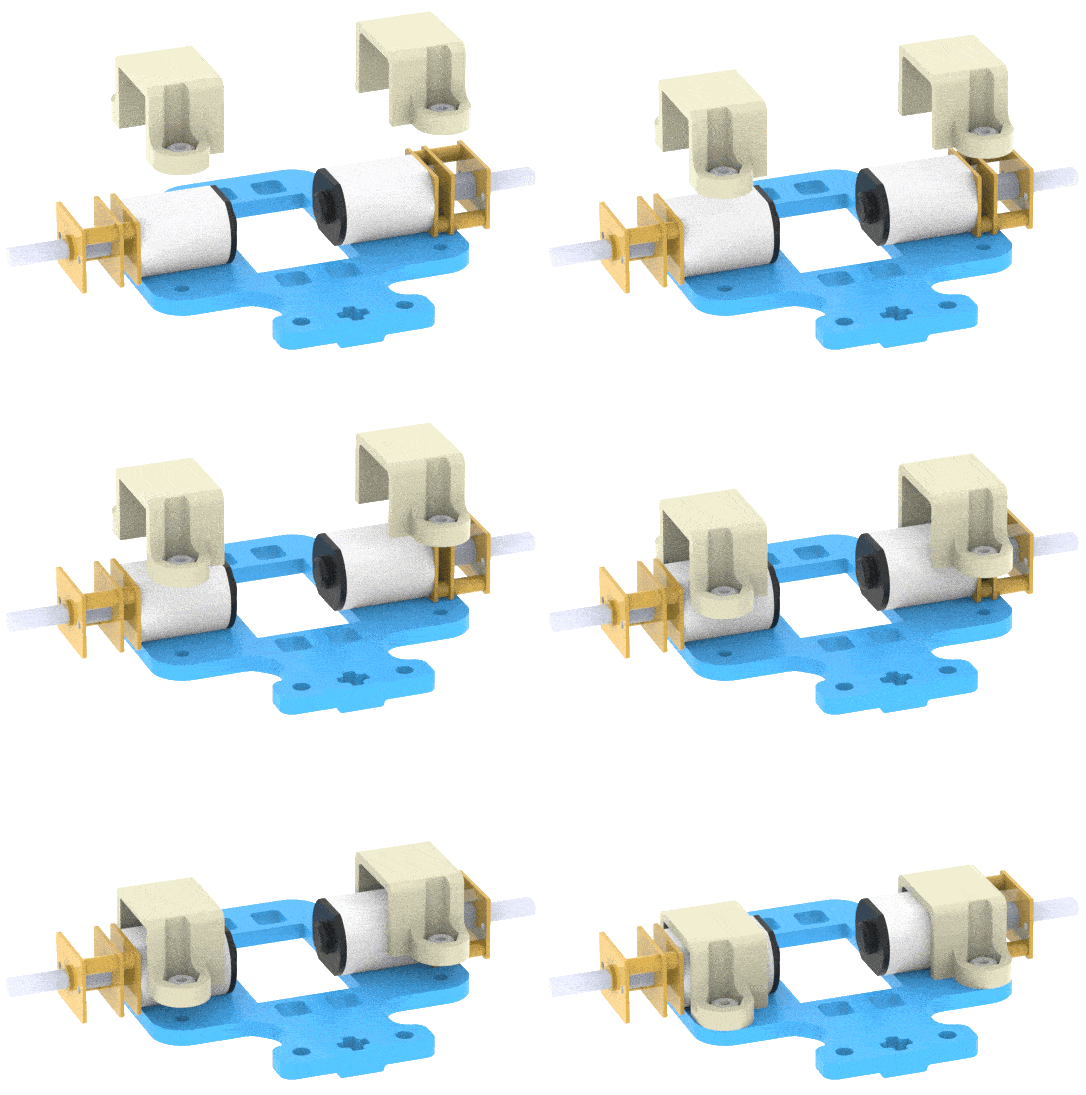
- Next, we will make a wheel sub-assembly. Place the Motors on the top of the B1 Plate using the Motor Mount Bracket. Fasten it using M2 Bolt and M2 Nut that you get with Motors. Ensure the Motor is appropriately mounted. We will call this the vertical robot extension.
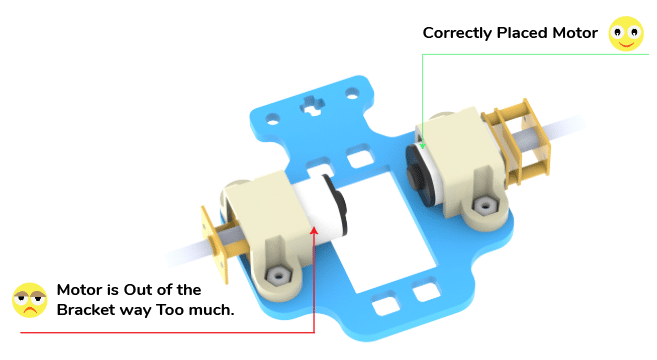 Note: Make sure the B1 is written on the opposite side of the Motor.
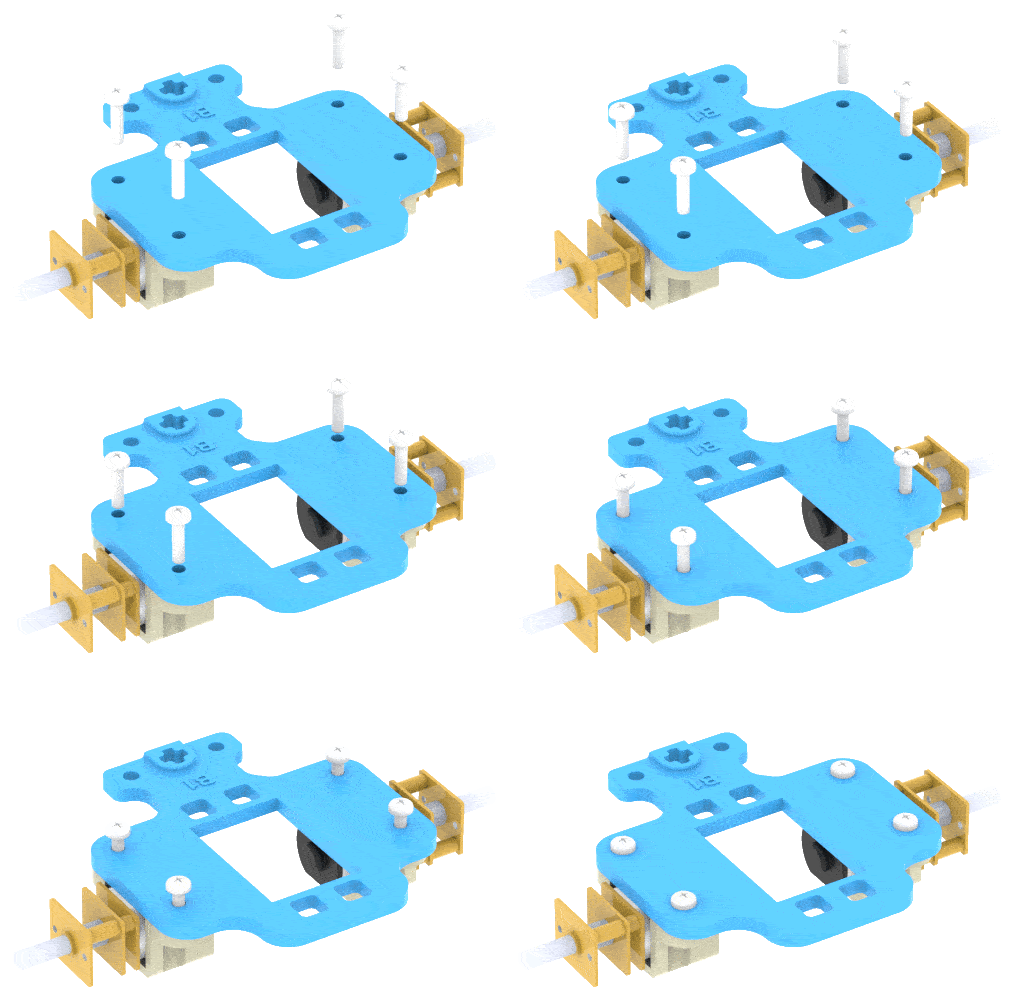
- Take the wheel sub-assembly and attach it to the A5 plate.

- Snap the above assembly to the Quarky board.

- Let us create the Servo holder sub-assembly now.
- First, fasten spacers on (B5)pick and place the servo holder using nuts or bolts.


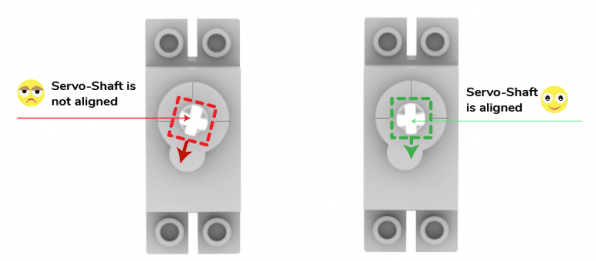
- Push-fit the Servo motor onto the servo holder (B5) in such a way that the ‘+’ mark and the Servo shaft are aligned. Additionally, make sure the shaft is parallel to the spacer and facing outside.

- Fasten two more spacers on the same B5 plate on the opposite side.

- Take another servo holder(B5)and fasten the top spacer using bolts such that its holes align with the other servo holder(B5).
- Make sure that the top spacers of both the servo holders( B5) face opposite to each other.
- Snap both the B5 plates on the left and right sides of the Quarky board.


- Lock the sub-assemblies with the top lock(B6).
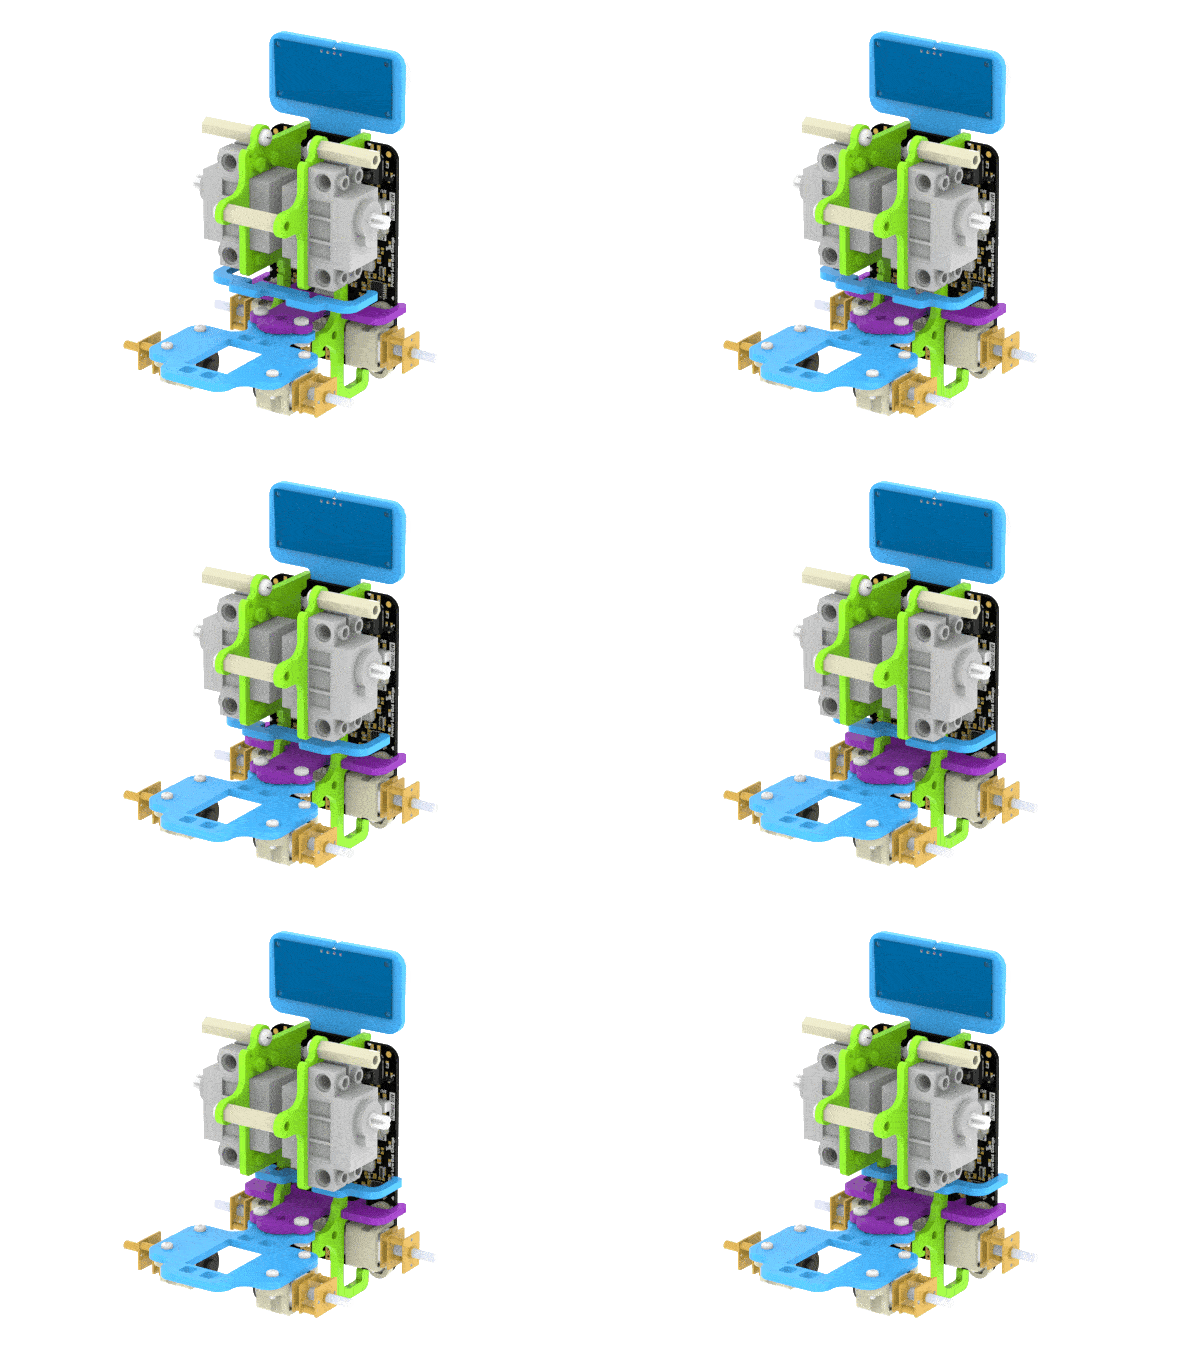
- Now, fasten the two servo holder assemblies using bolts on the spacers as shown below.
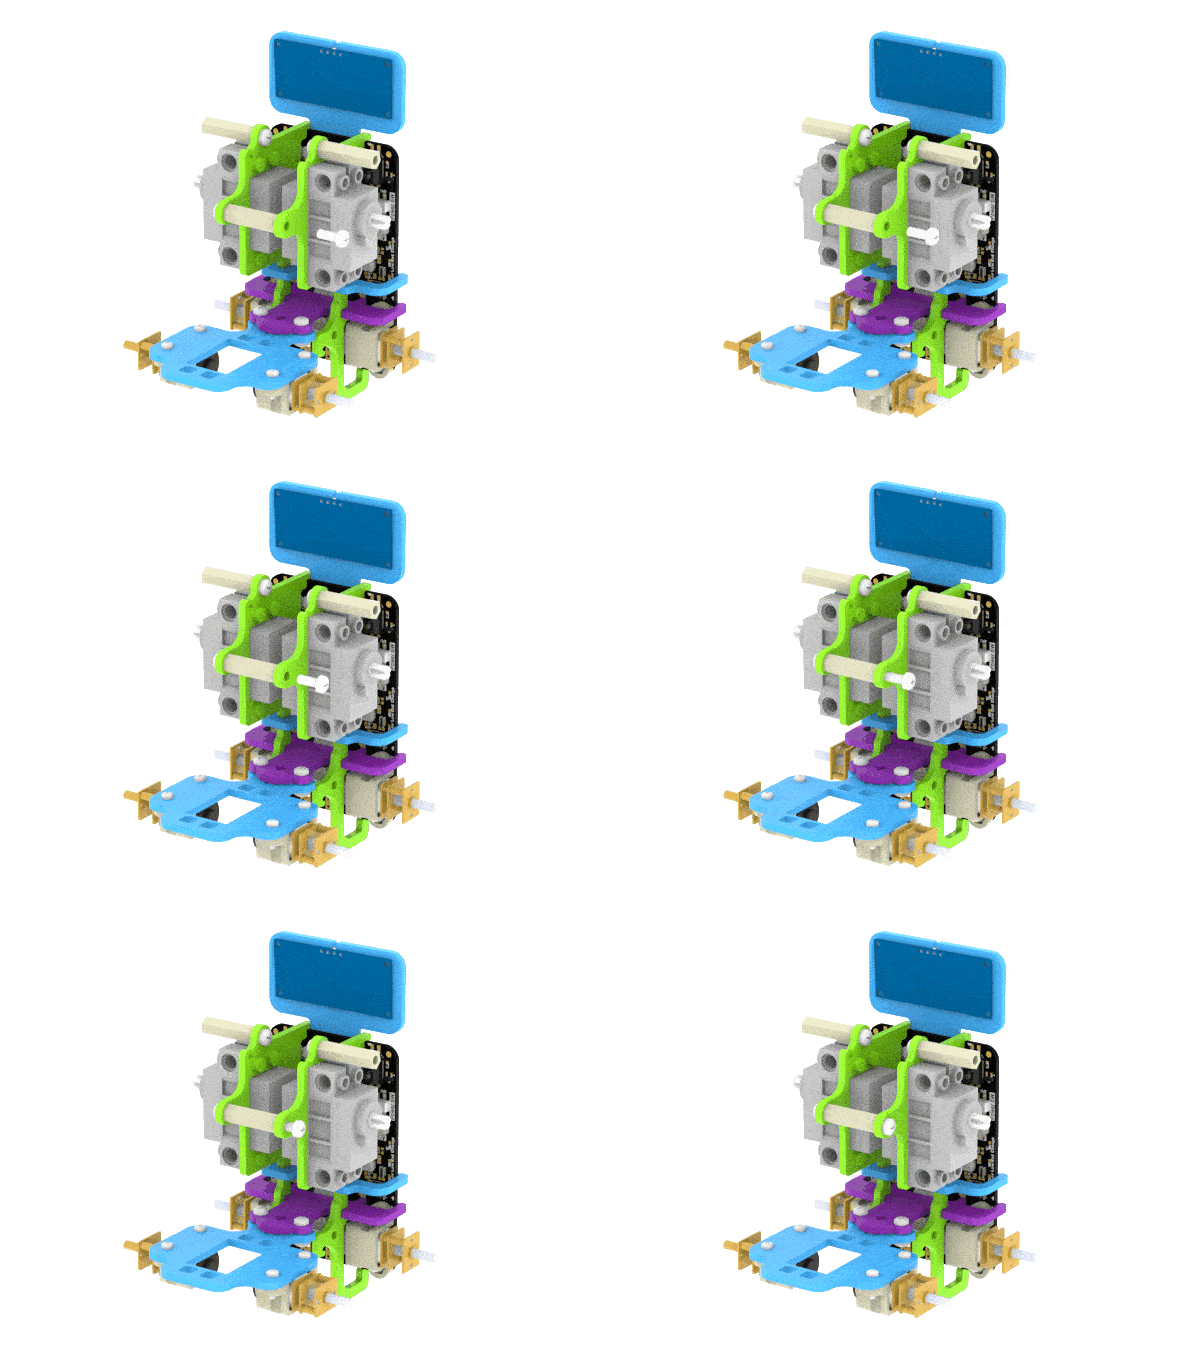
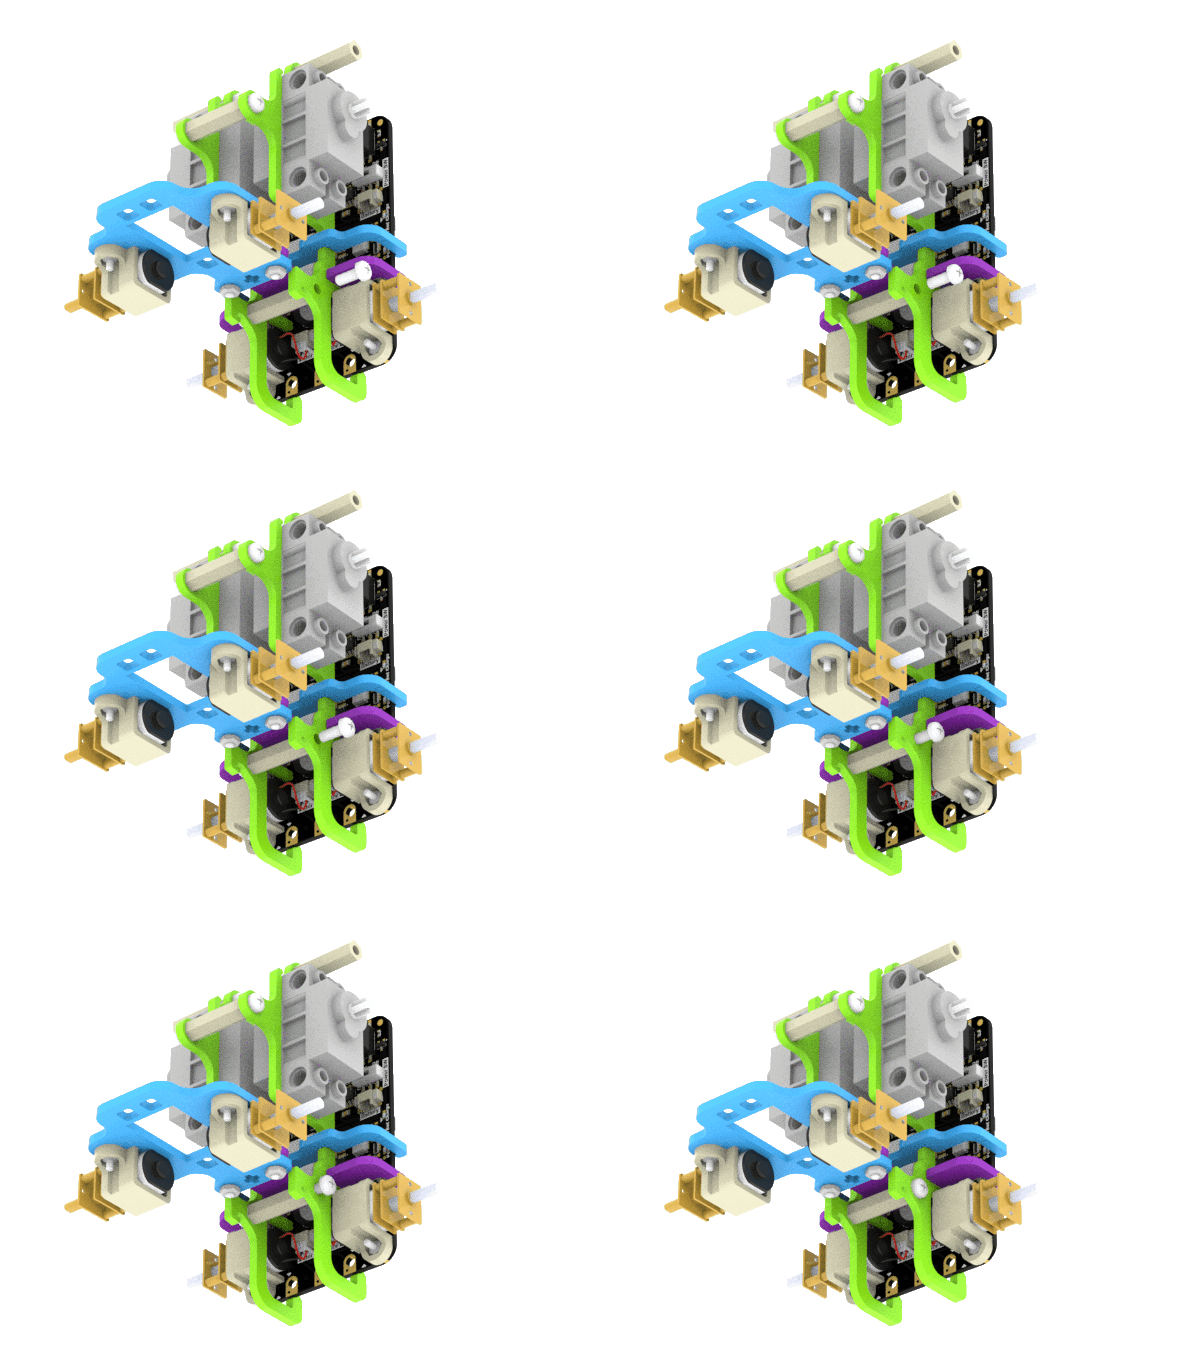
- After that, reattach the wheels to the four motor shafts.
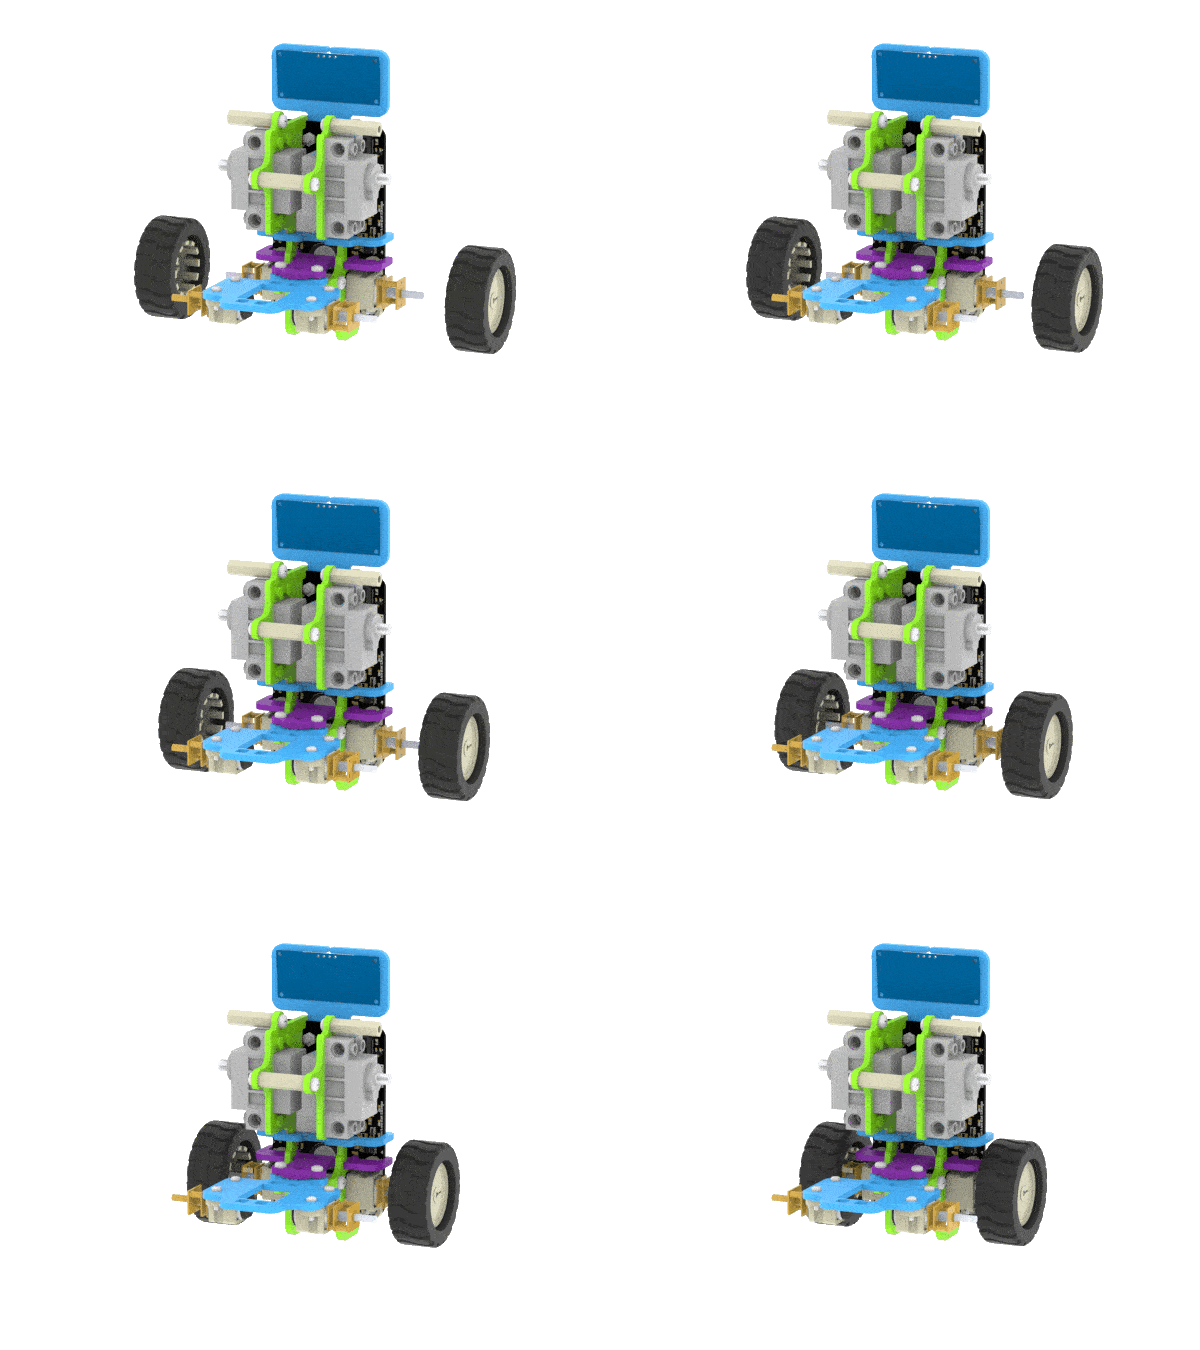
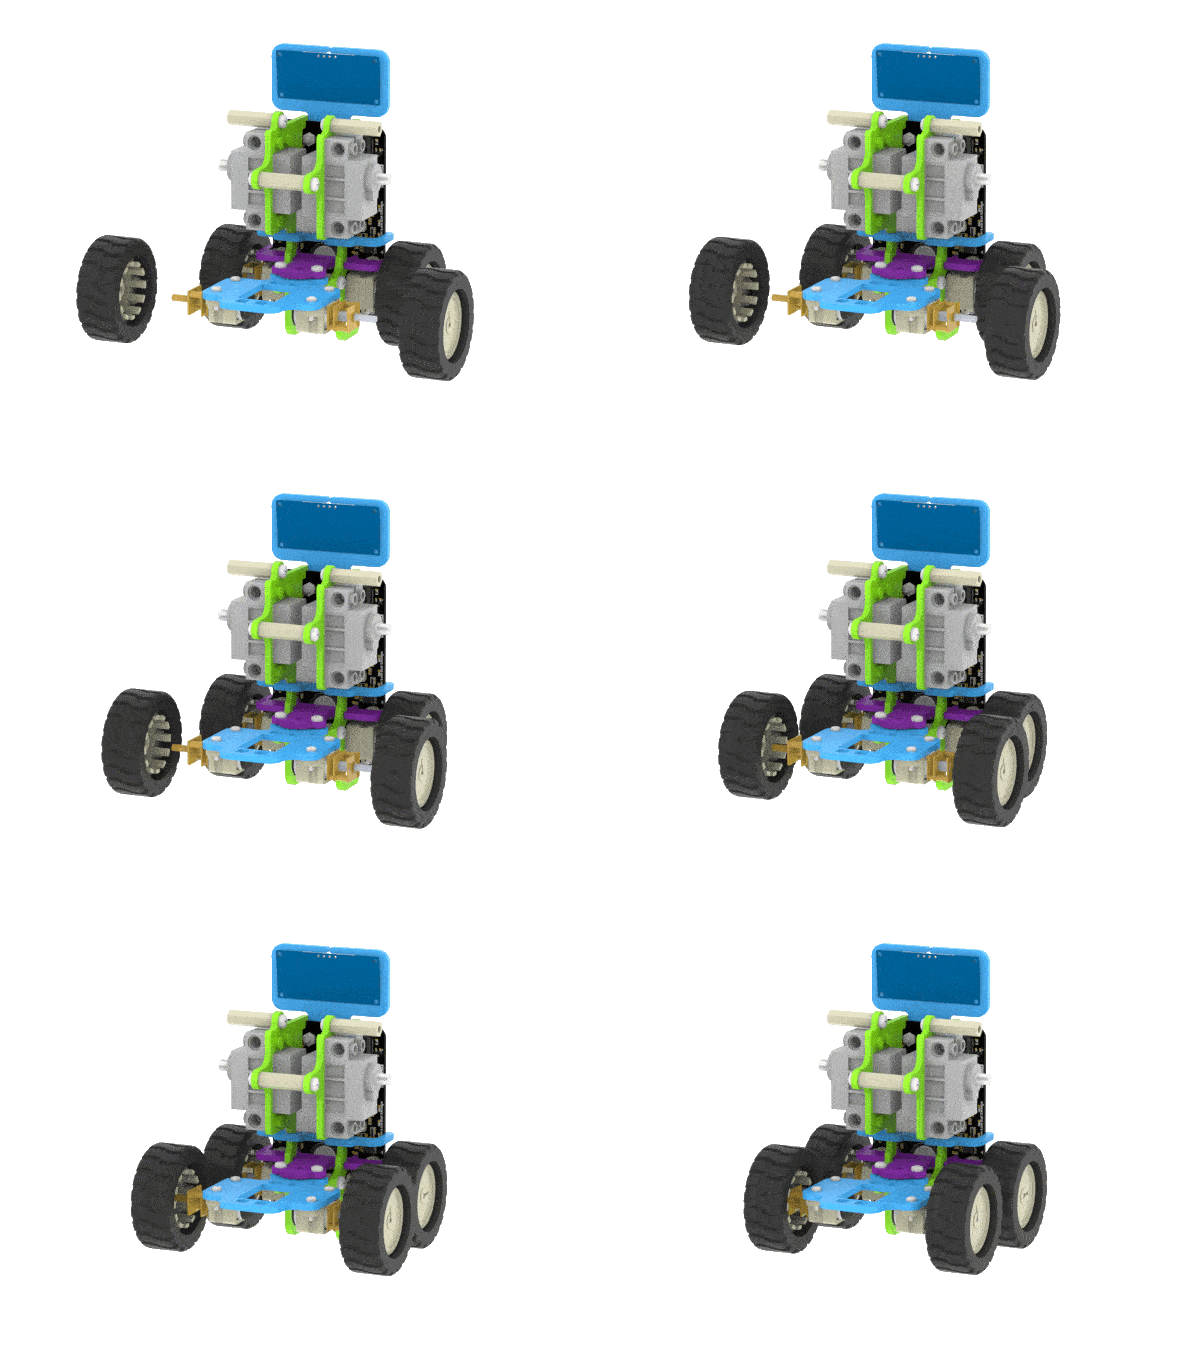
- For the next sub-assembly, attach the 2 Spacers to the B12 Link with the M3 Bolt of 8mm Length.
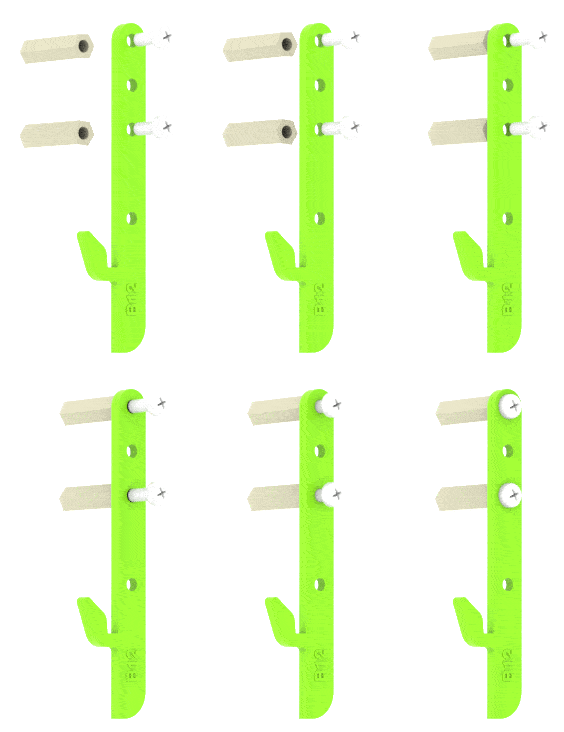
- Now attach 2 more Spacers to the same B12 Link with the M3 Bolt of 8mm Length.
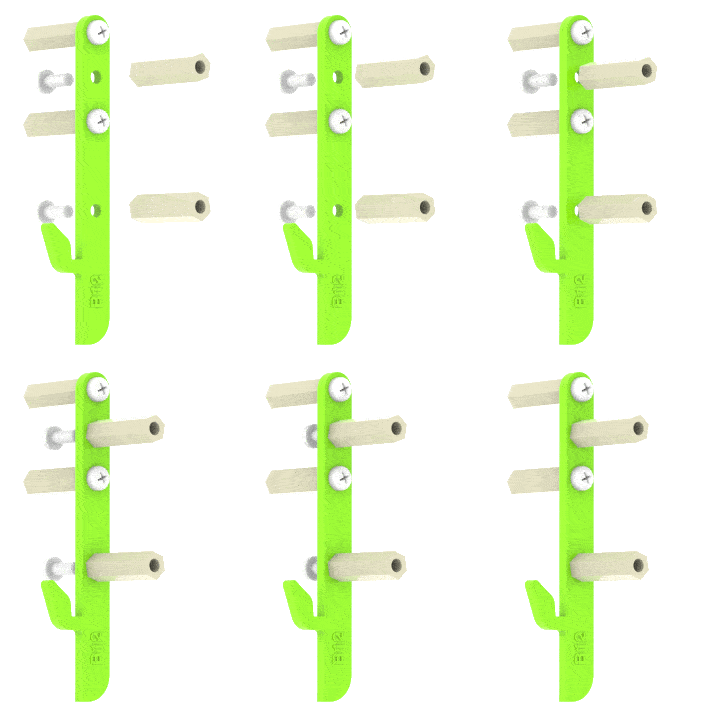
- Now attach 2 more Spacers to the other B12 Link with the M3 Bolt of 8mm Length on the opposite side.
- Align two B12 Links and fasten with the M3 Bolt of 8mm Length. We will call this subassembly – Hook Assembly.
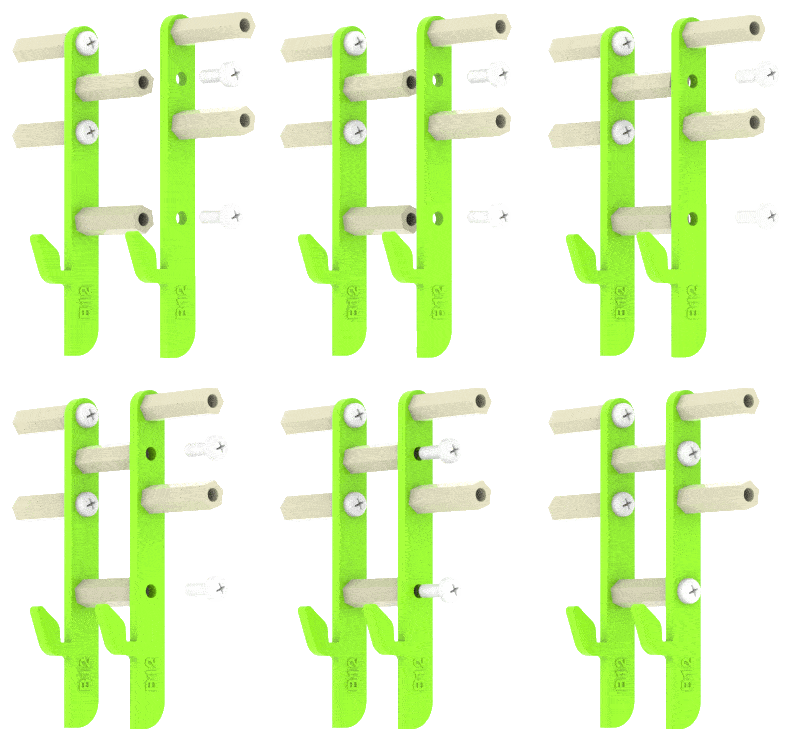
- Align & attach the B10 Link to the Spacers of the Hook Assembly with the M3 Bolt of 12mm Length and on the Spacer of the B5 Plate with the M3 Bolt of 12mm Length.
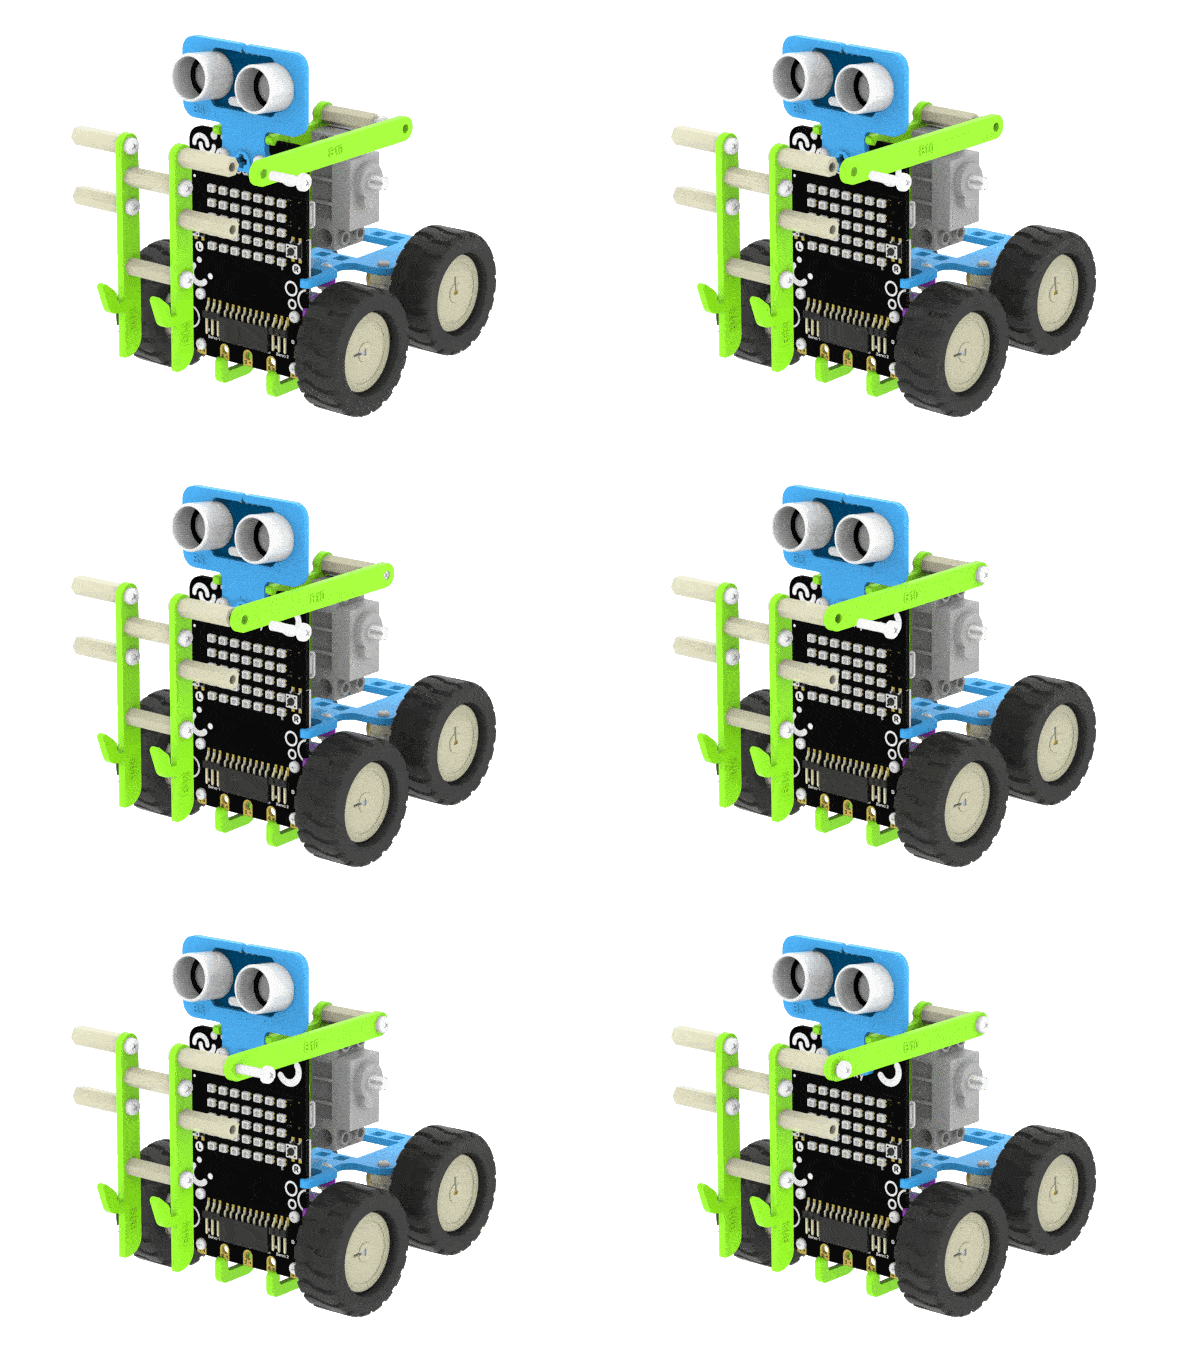
- Snap the B11 Link on the Servo Motor Shaft. On the other side of the B11 Link attach it to Hook Assembly with the M3 Bolt of 12mm Length.
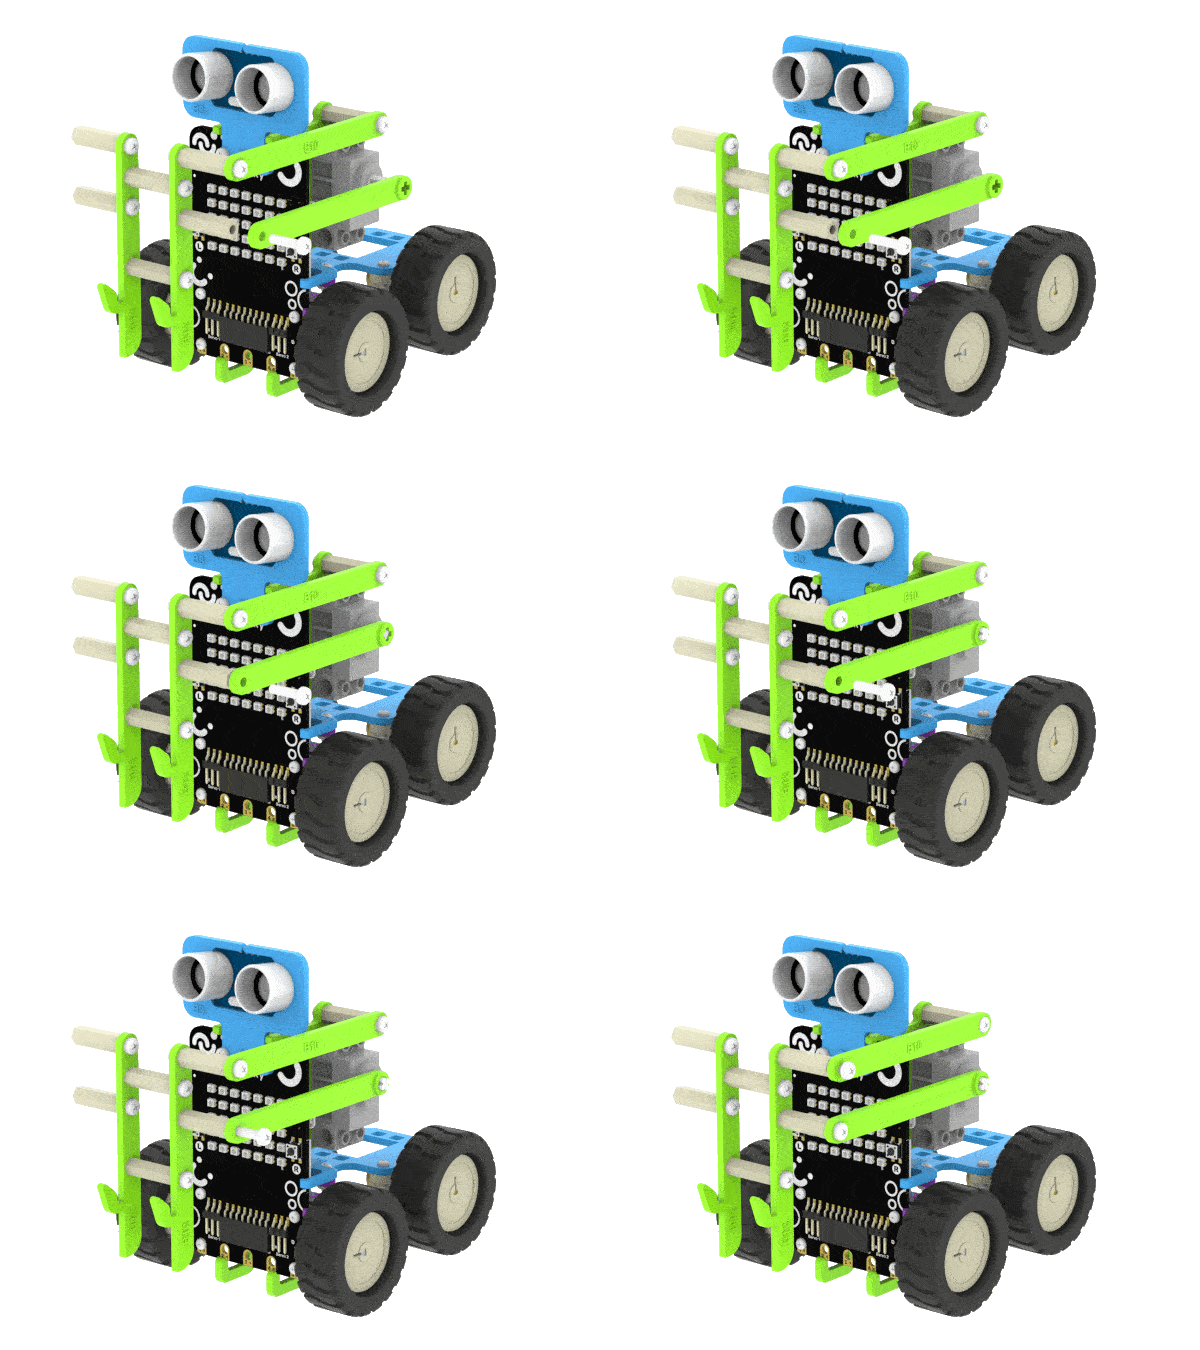
- Align & attach the other B10 Link to the Spacers of the Hook Assembly with the M3 Bolt of 12mm Length and on the Spacer of the B5 Plate with the M3 Bolt of 12mm Length on the other side.
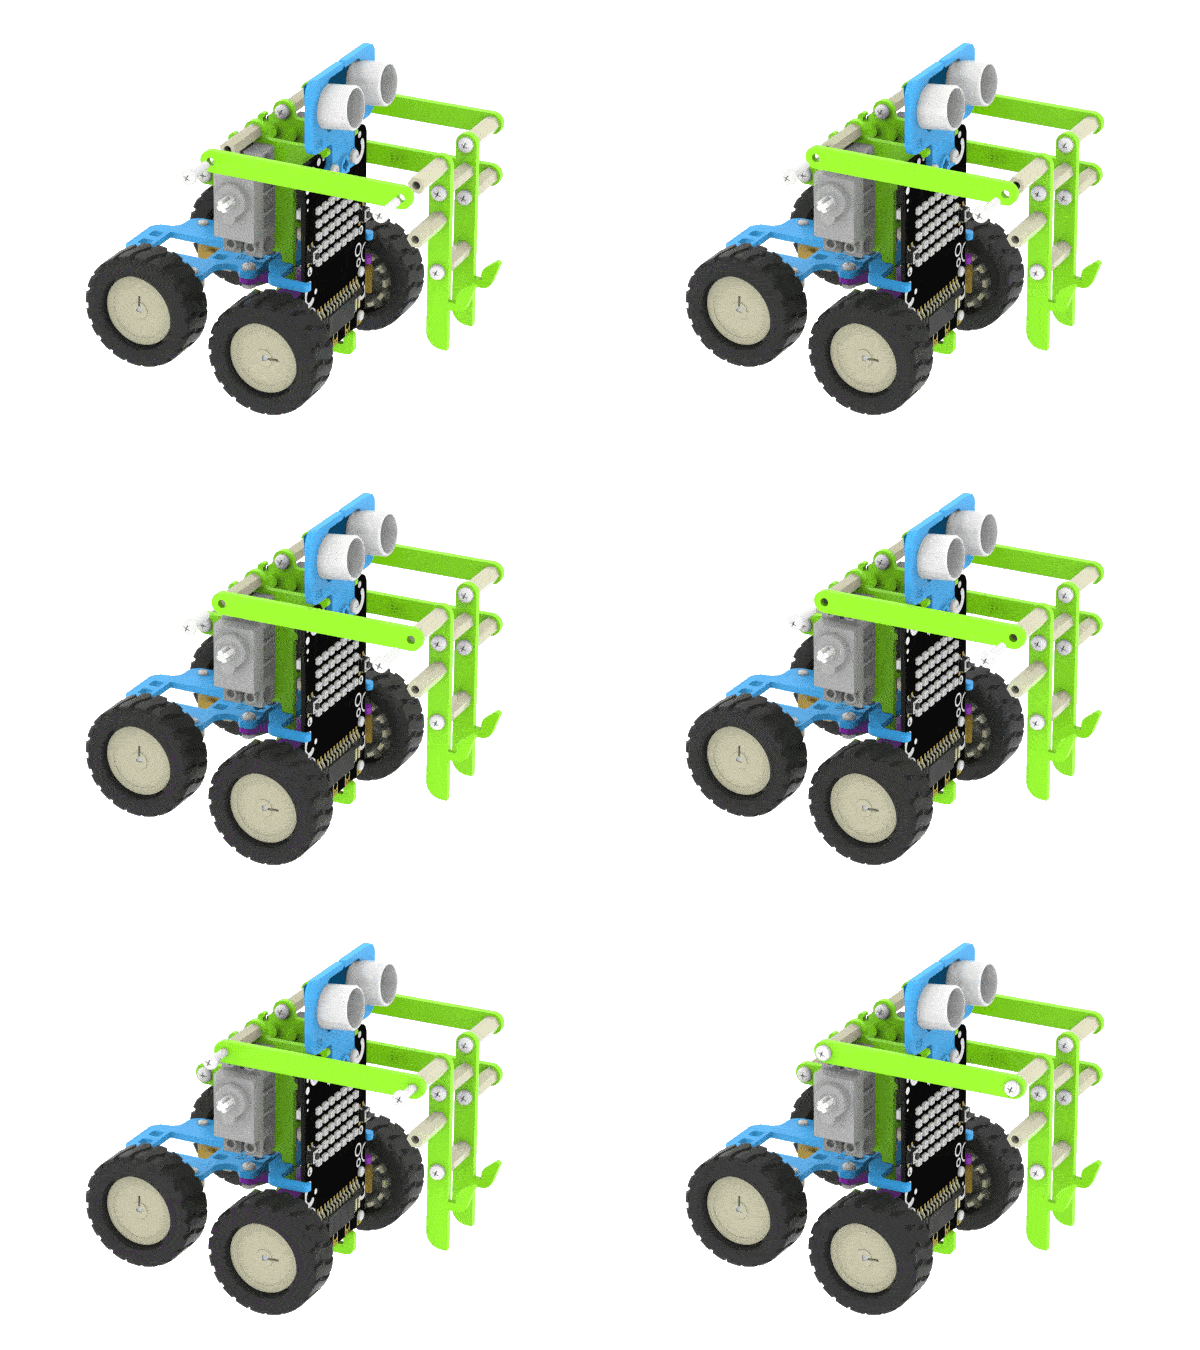
- Snap the other B11 Link on the Servo Motor Shaft. On the other side of the B11 Link attach it to Hook Assembly with the M3 Bolt of 12mm Length.
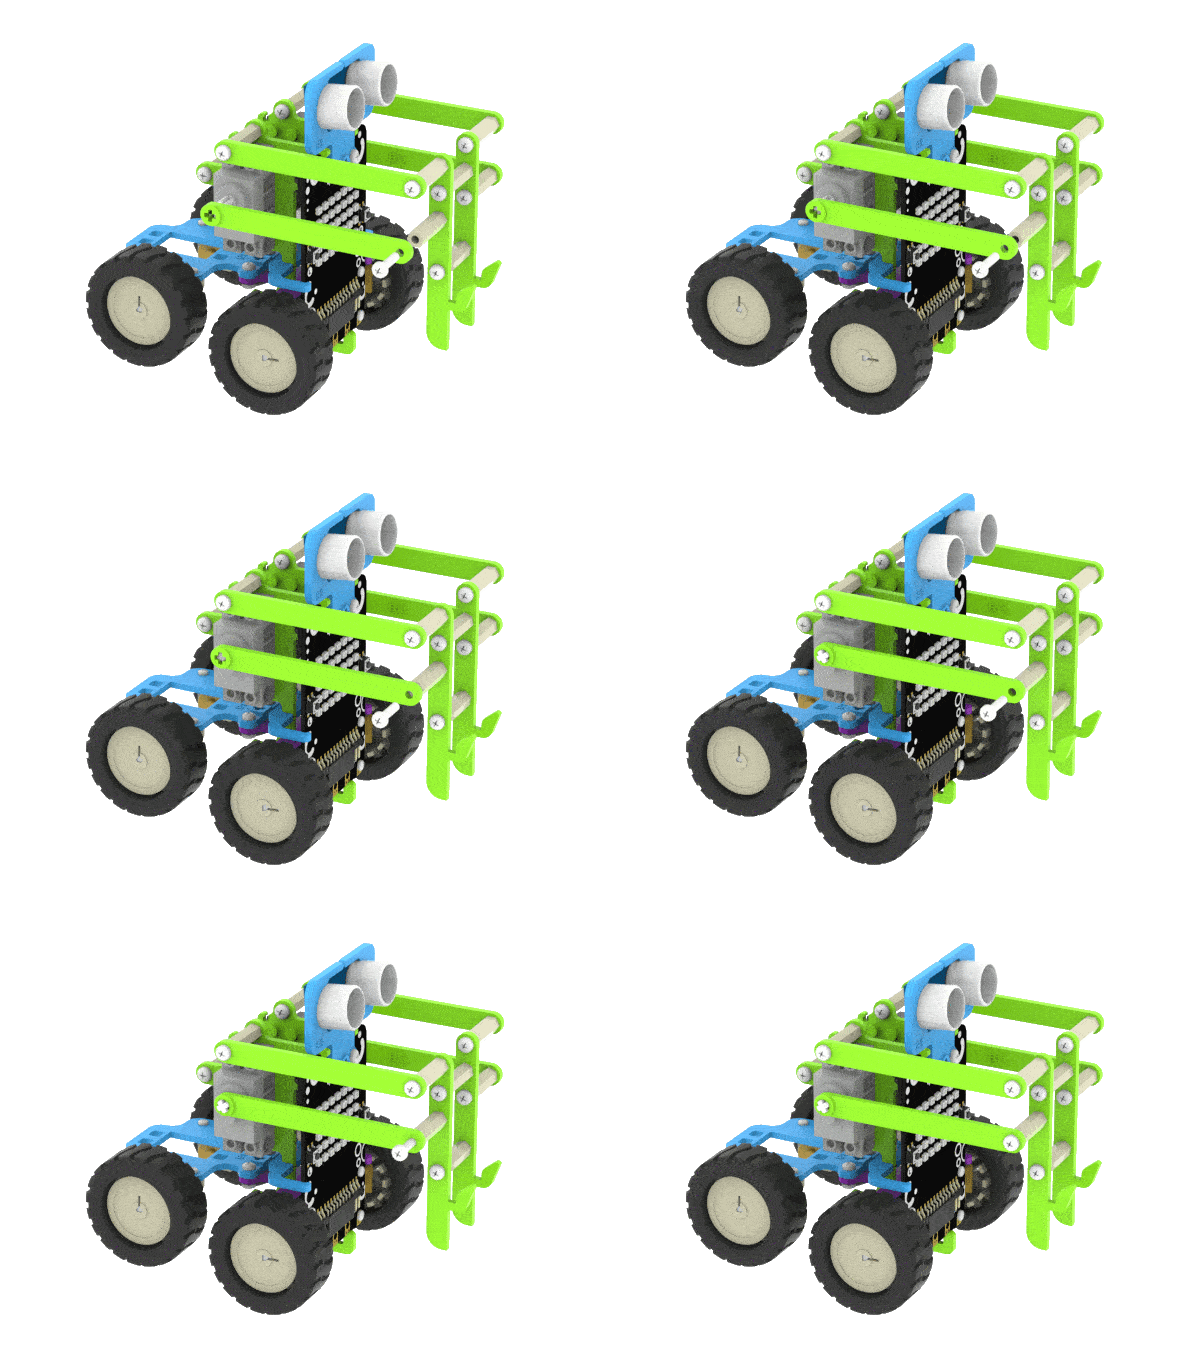
- Our vertical pick and place robot is finally complete!
Motor Connection
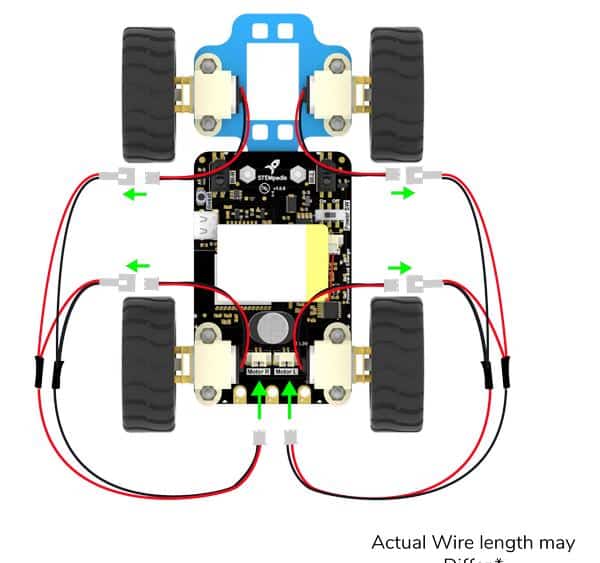
The motor connection is similar to the Steering Robot.

Connect the two left motors and then connect the wire to the Board. Do the same for the right motors. Connections are shown in the figure.
Servo Connection
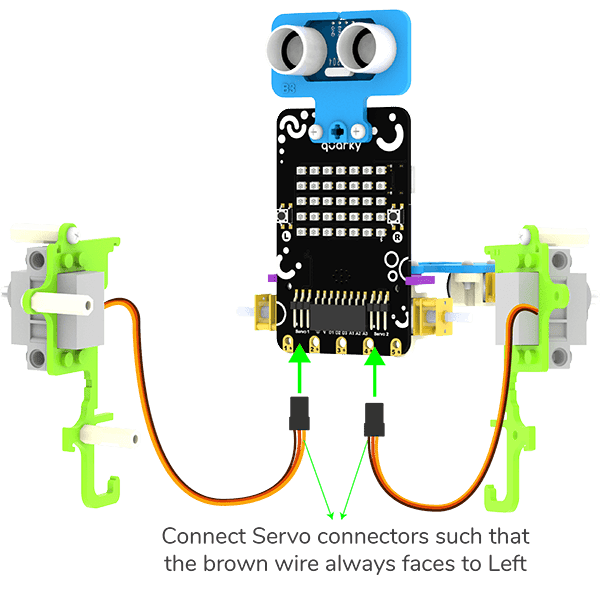
- Connect the Left Servo Motor to the Servo 1 and the Right Servo Motor to the Servo 2. Note: The position of the ultrasonic head is only for illustration purposes here. The below image only shows how to connect servo motor pins, the positioning of the ultrasonic head is optional.
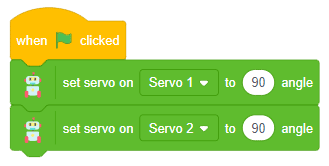
- Open PictoBlox and set the Servo Motor angle to 90 degrees. The servo head should get aligned properly.
Activity
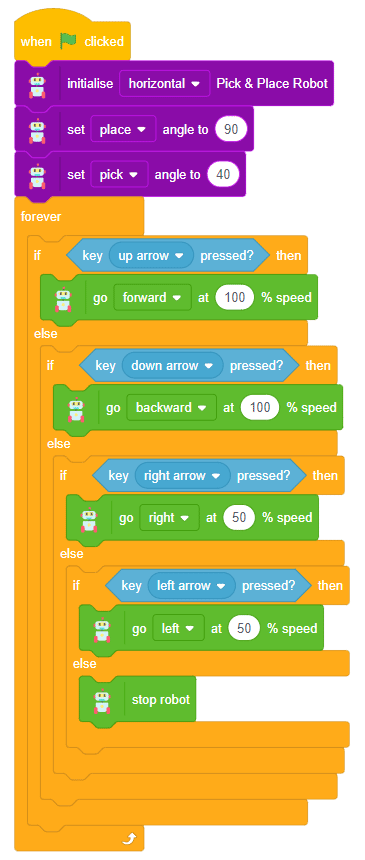
The activity is same as the horizontal pick and place robot. Add three sprites Tobi and 2 arrow sprites and write the below scripts.
Script for Tobi – Robot movement
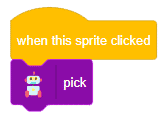
Script for up arrow – Pick Action
Script for down arrow – Place Action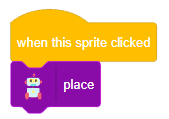
Conclusion
In conclusion, we have successfully assembled and programmed the Quarky Vertical Pick and Place Robot. We gained practical experience in building and programming a functional pick-and-place robot, enhancing their understanding of robotics and artificial intelligence applications. This knowledge equips us with the skills to tackle more complex robotic challenges and fosters a deeper appreciation for the intricacies of autonomous systems.


