Introduction
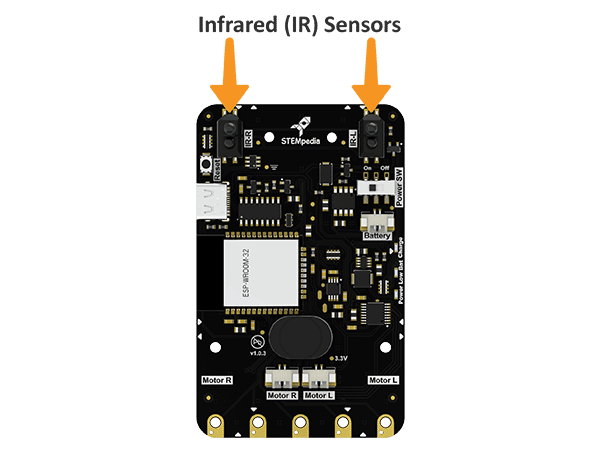
Quakry has 2 Infrared (IR) sensors on the back side of the Quarky.
How does IR Sensor work?
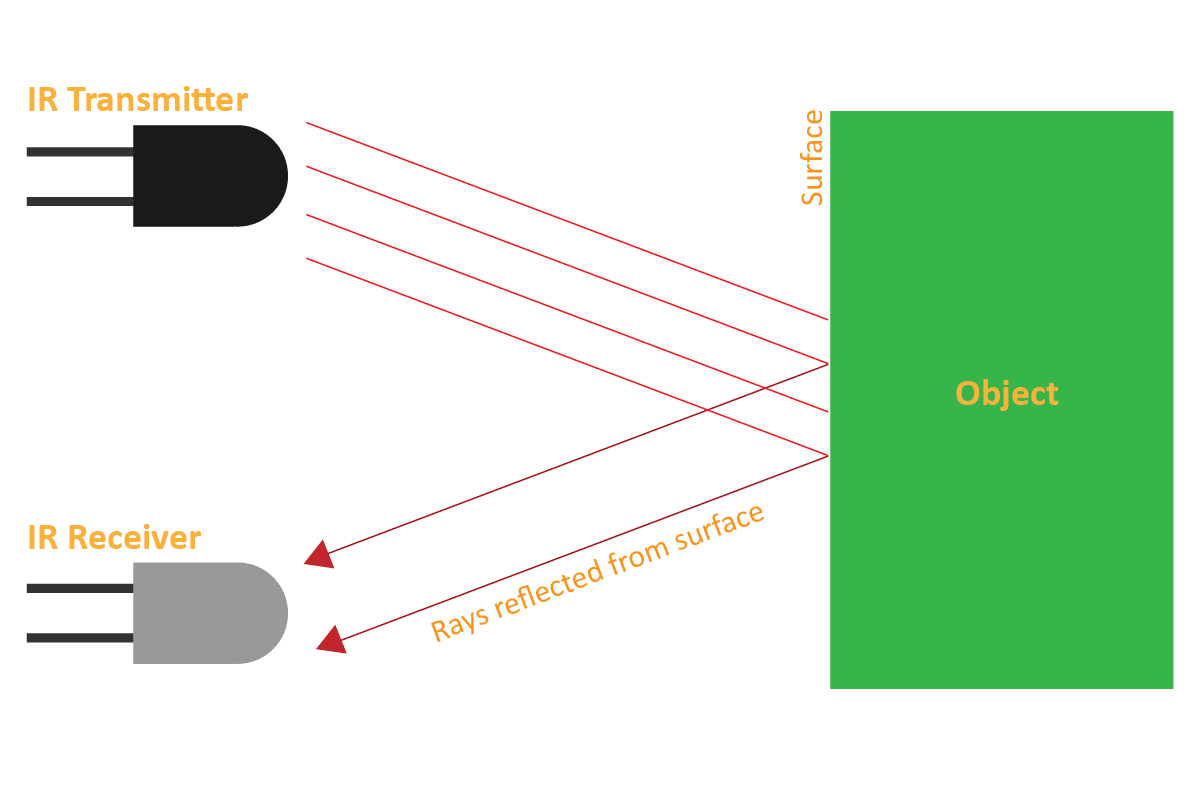
An IR sensor consists of 2 LEDs: one which transmits the IR light and one which receives the IR light. When the IR rays are transmitted, they bounce from the nearest surface and get back to the receiver LED. That’s how an IR sensor detects an object.
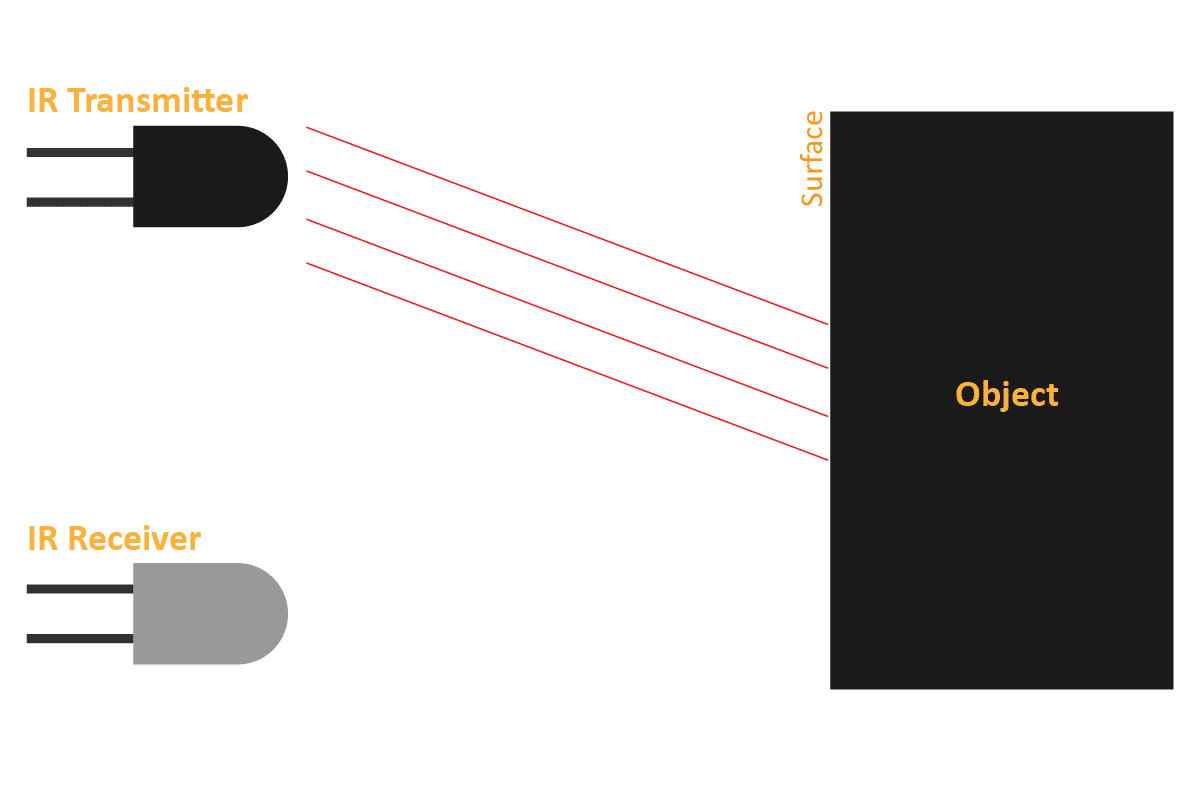
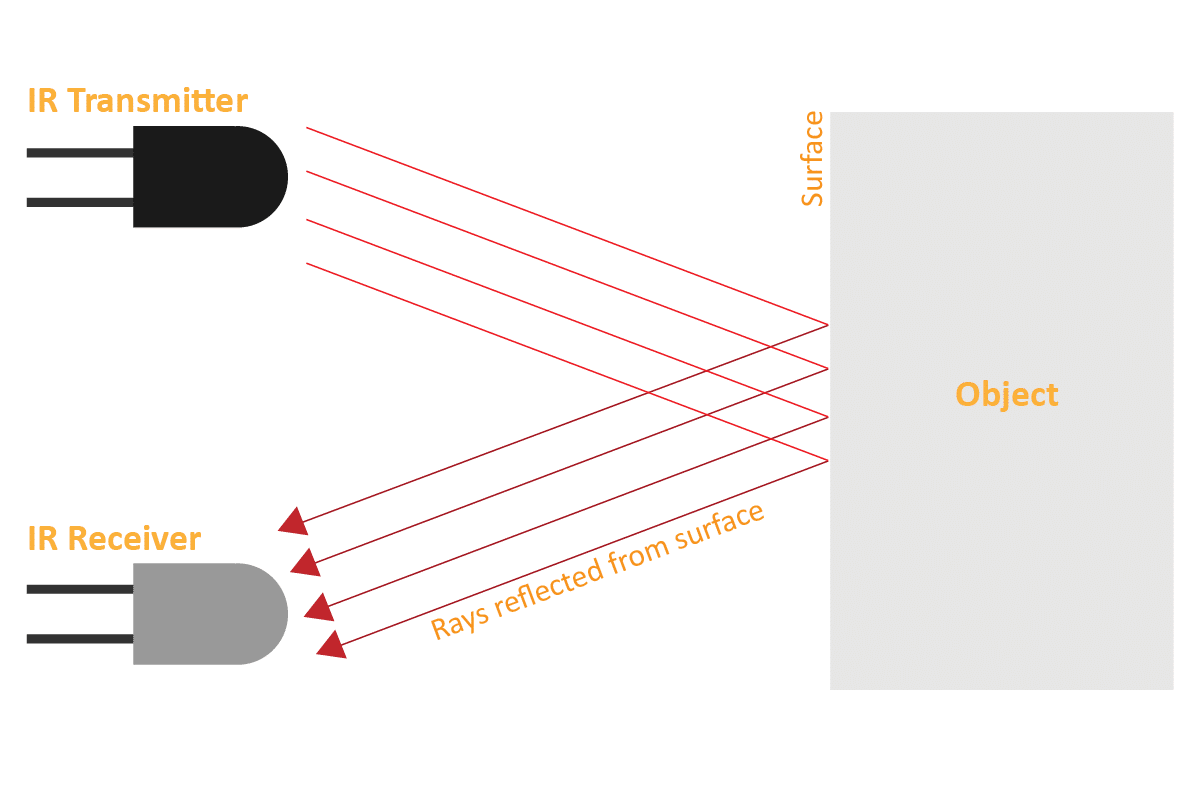
To detect colors, the IR sensor depend on the number of rays the surface reflects:
- The dark surface will absorb more IR rays and as a result, the receiver will get fewer IR rays.
- White or shiny objects will absorb fewer IR rays and as a result, the receiver will get more IR rays.
We can get the sensor values in PictoBlox and based on that value we can estimate whether the surface is black or white.
- If the sensor detects the black line, its output value is increased. This means that the sensor is active.
- If it detects the white area, its output value decreases. This means that the sensor is inactive.
We will call the threshold value above which the sensor detects the black line. If the sensor value is less than the threshold, it means that the sensor hasn’t detected the line yet.

Block Coding
In PictoBlox, you have the following blocks available for the IR sensor in the Sensing Extension:
- is () IR sensor active?: The block returns the state of the specified IR sensor. It returns True if the current IR sensor value is greater than the threshold value, else False.

- get value of (): The block returns the IR sensor analog reading. The reading varies from 0 to 4095.

- set () IR sensor threshold to (): The block sets the threshold value of the specified IR sensor to the specified value. The value can be from 0 to 4095.


Example 1: IR Sensor Calibration (Stage Mode)
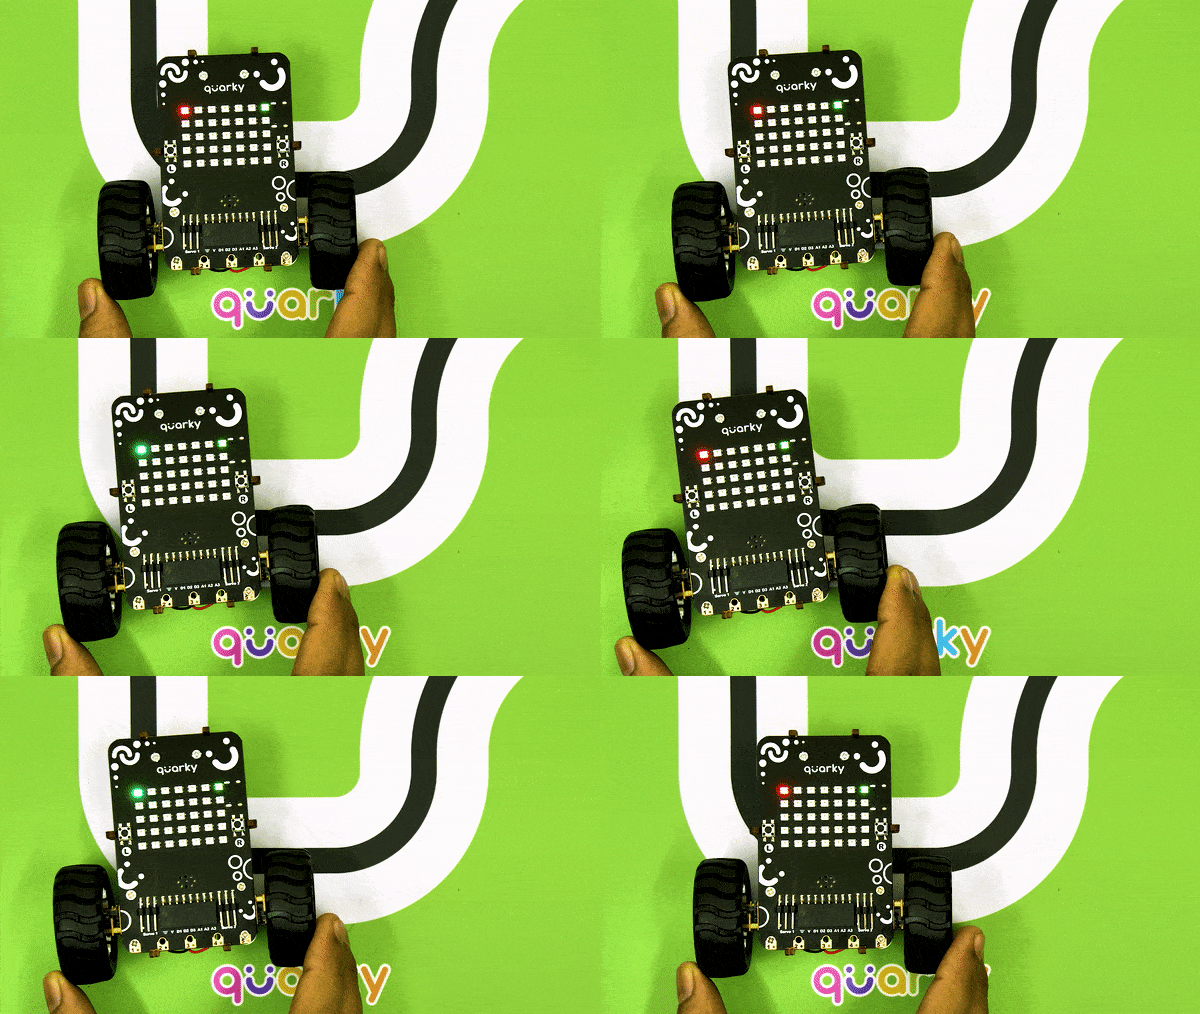
The example demonstrates how to calibrate the IR sensors to detect black lines on the white surface in Stage Mode.

Script
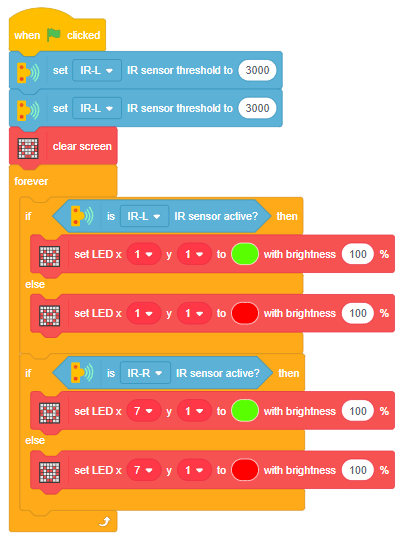
Calibrating the IR Sensors
Now, run the script by clicking the green flag and bringing the black line of the track close to the IR sensor. One of the following three conditions will happen:
- Your calibration value is HIGH: The black region will not be detected in this case. Reduce the calibration value.
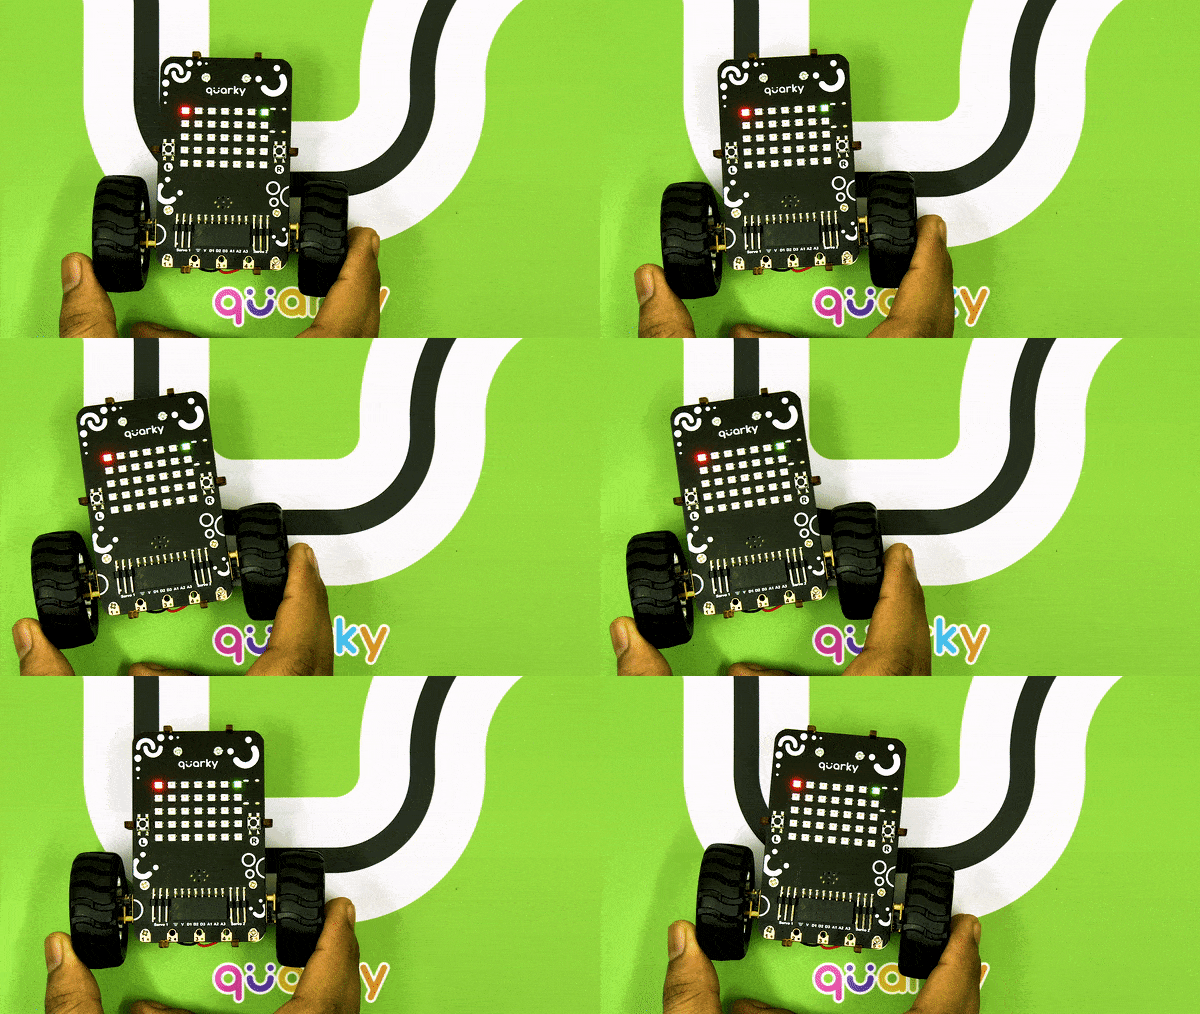
- Your calibration value is LOW: The white region will not be detected in this case. Therefore, increase the calibration value.
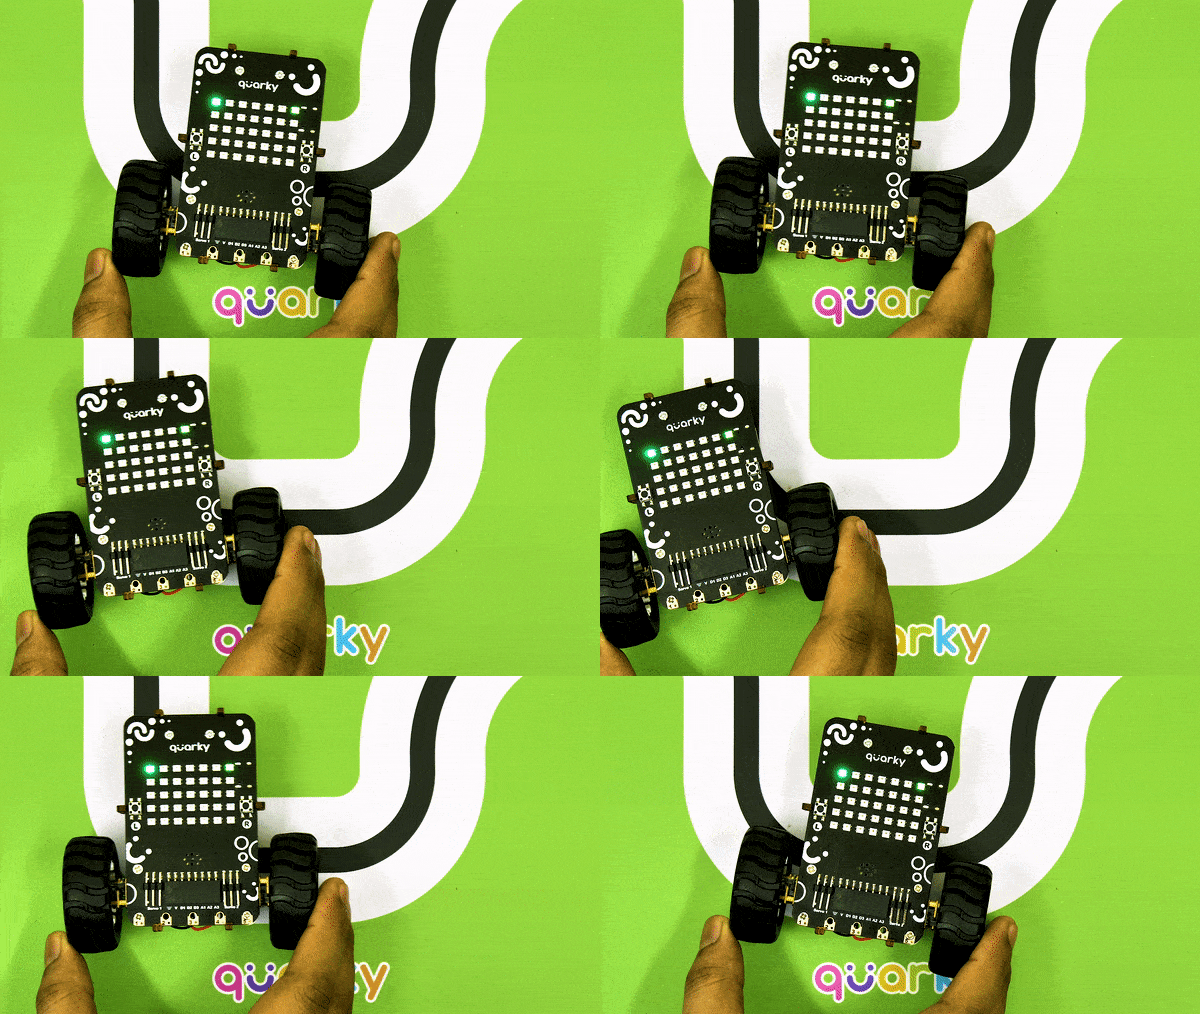
- Your calibration value is OK. The white and black regions are detected accurately.
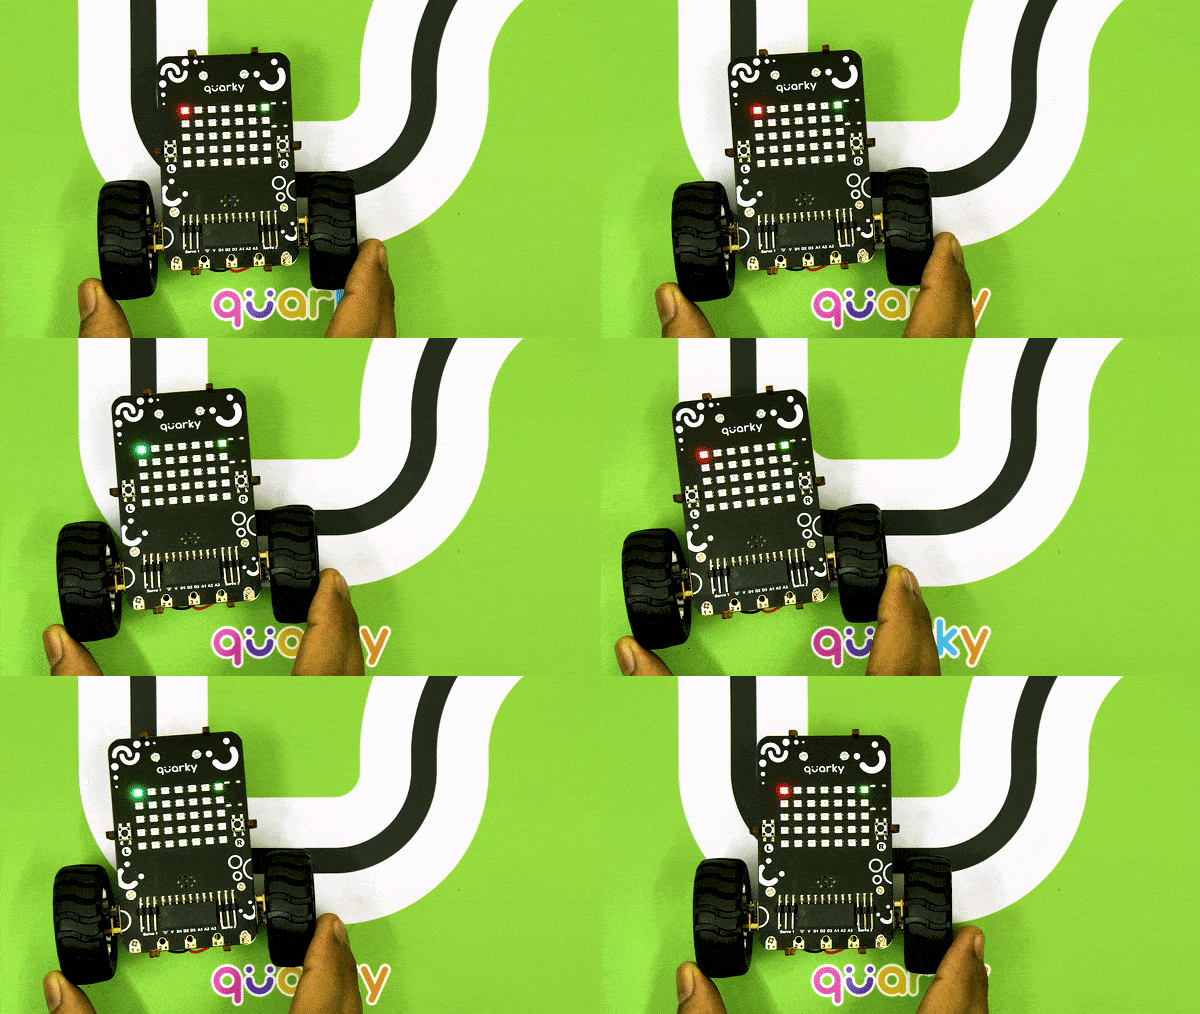
Now modify the script to add the detection value for the right IR sensor.
Example 2: Robot Pet (Upload Mode)
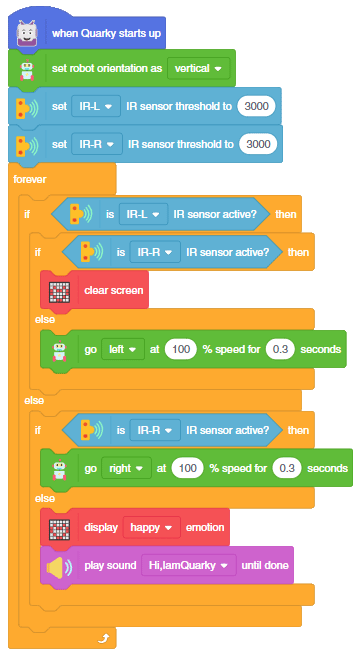
The example demonstrates how to make a vertical robot pet that senses the hand on the IR sensor and acts accordingly.
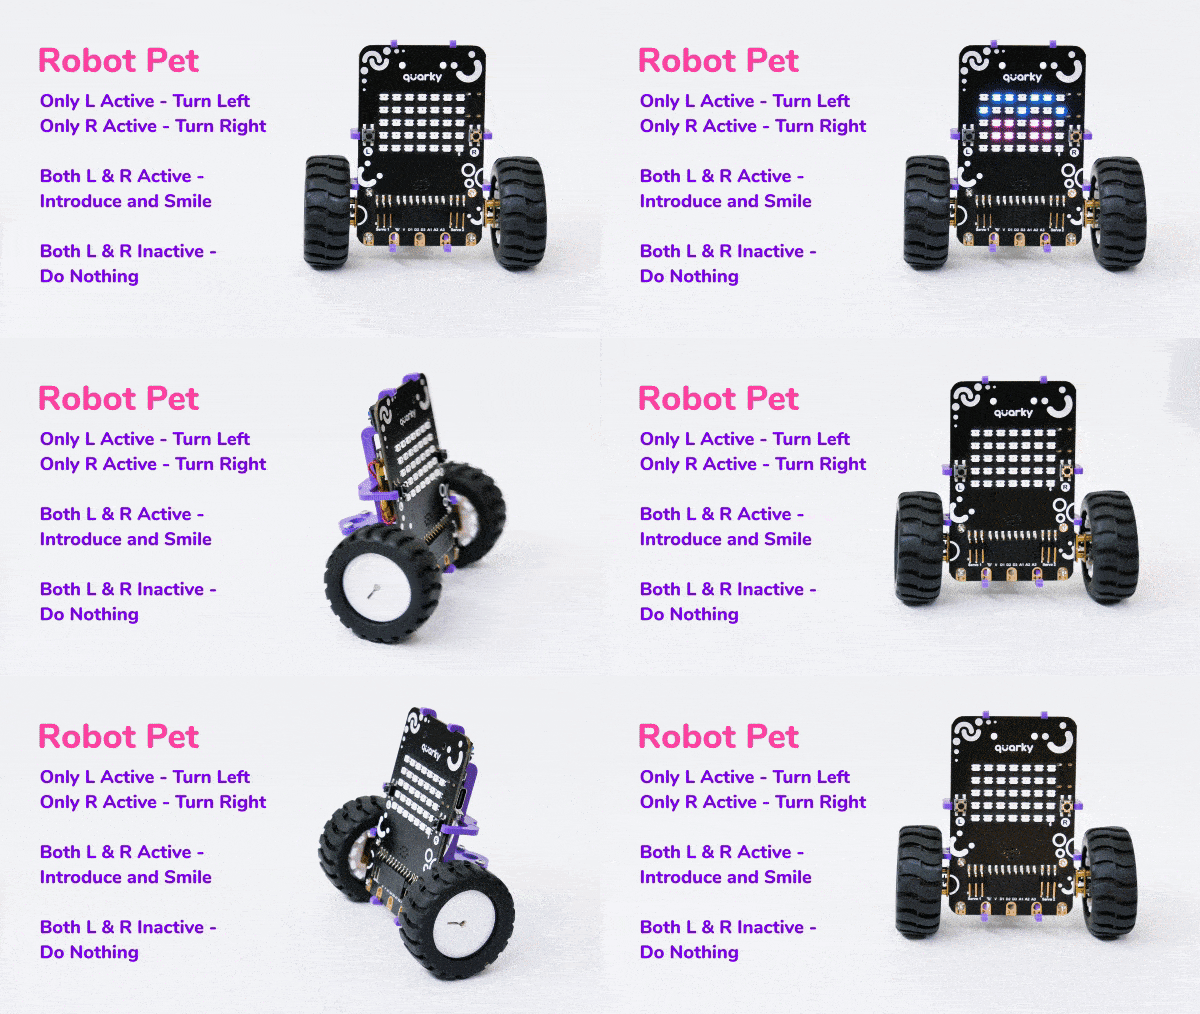

Script:
What If IR Sensors are Not Working?
Python Coding
In PictoBlox, you have the following Python function available for the IR sensor:
- readirsensor(): The function returns the IR sensor analog reading. The reading varies from 0 to 4095.
- getirstate(): The function returns the state of the specified IR sensor. It returns True if the current IR sensor value is greater than the threshold value, else False.
- setirthreshold(): The function sets the threshold value of the specified IR sensor to the specified value. The value can be from 0 to 4095.
Example 1: IR Sensor Calibration in Python (Stage Mode)
The example demonstrates how to calibrate the IR sensors to detect black lines on the white surface in Python Coding Environment in the stage mode.

sprite = Sprite('Tobi')

quarky = Quarky()

quarky.cleardisplay()
quarky.setirthreshold("IRL", 3000)
quarky.setirthreshold("IRR", 3000)

while True:
  if quarky.getirstate("IRL"):
    quarky.setled(1, 1, [0, 255, 0], 20)
  else:
    quarky.setled(1, 1, [255, 0, 0], 20)

  if quarky.getirstate("IRR"):
    quarky.setled(7, 1, [0, 255, 0], 20)
  else:
    quarky.setled(7, 1, [255, 0, 0], 20)
Calibrating the IR Sensors
Now, run the code by clicking the green flag and bringing the black line of the track close to the IR sensor. One of the following three conditions will happen:
- Your calibration value is HIGH: The black region will not be detected in this case. Reduce the calibration value.

- Your calibration value is LOW: The white region will not be detected in this case. Therefore, increase the calibration value.

- Your calibration value is OK. The white and black regions are detected accurately.

Now modify the script to add the detection value for the right IR sensor.
Example 2: Robot Pet in Python (Upload Mode)
The example demonstrates how to make a vertical robot pet that senses the hand on the IR sensor and acts accordingly in the Python Coding Environment.

Code:
from quarky import *

# imported modules
import time
from quarkyConstants import *

quarky.setorientation(2)
quarky.setirthreshold("IRL", 3000)
quarky.setirthreshold("IRR", 3000)
while True:
  if quarky.getirstate("IRL"):
    if quarky.getirstate("IRR"):
      quarky.cleardisplay()

    else:
      pass
      quarky.runrobot("LEFT", 100)
      time.sleep(0.3)
      quarky.stoprobot()

  else:
    pass
    if quarky.getirstate("IRR"):
      quarky.runrobot("RIGHT", 100)
      time.sleep(0.3)
      quarky.stoprobot()

    else:
      pass
      quarky.showemotion("happy")
      quarky.playsounduntildone("QuarkyIntro")
Conclusion
In this lesson, we learned about how to use the IR sensors in the Quarky robot. We saw how to make a line–following robot and a robot pet that senses the hand on the IR sensor and acts accordingly. We also learned how to calibrate the IR sensors in both PictoBlox (Block Coding) and Python Coding Environment for both Stage and Upload modes. This is an essential skill for any robotics enthusiast who wants to build a line–following robot or make an interactive robot.

