This block allows you to scale a value from one range of numbers to another. It is useful for creating calculations with different min/maxes or for creating visual effects such as color ramps or animation effects. It can also be used to map input values from one range into an output range such as when using sensors to control a game.

Learn about potentiometers, their working principle, and applications as variable resistors or voltage dividers.
Potentiometer and It’s working
A potentiometer is a versatile three-terminal resistor that forms an adjustable voltage divider or variable resistor (rheostat). It consists of two terminals connected to a resistive element and a third terminal connected to an adjustable wiper. The potentiometer can vary the amount of resistance in the circuit based on the wiper’s position.

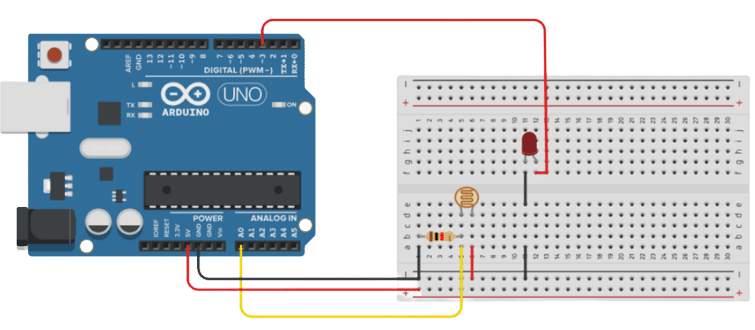
Circuit Diagram
Code
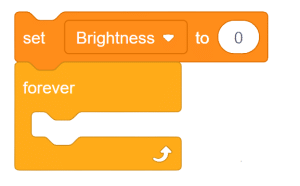
- Create a variable called “brightness” and set it to 0.
- Add the “forever” block from the control palette.
- Use the “map” block from the Arduino palette to convert the range of values (0-1023) to the desired range (0-255) for brightness control. Read the values from Arduino pin A0 and place them in the first space of the map function.

- Set the brightness variable to the mapped value using the “set brightness to” block.
- Use any PWM pin of the Arduino to connect an LED.

- Set the PWM value to the brightness variable.

- Add these two blocks inside the forever block.
- Finally, add when flag clicked event to complete the script.
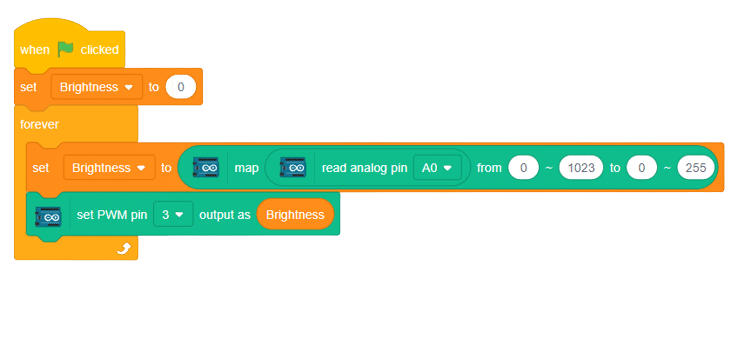
Script

Output
Read More

