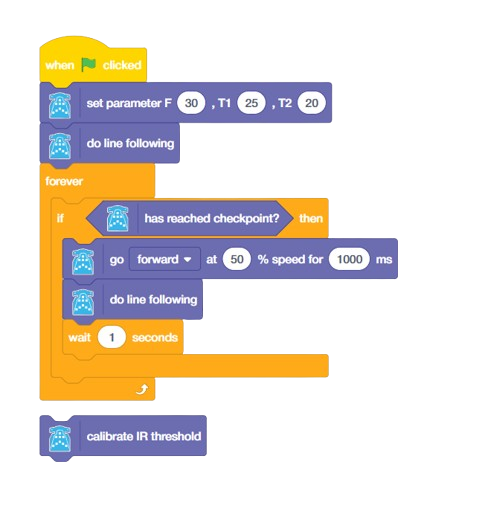


Using this block, the robot will move forward and reverse for a specific duration while collecting sample data from the IR sensor on both white and black lines.
Note:
- During calibration, ensure that the robot’s IR sensor passes over both the white and black surfaces to gather accurate reference data.
- Calibrate the IR sensor block to ensure accurate line following. This process will automatically set the threshold value based on the readings from the black and white surfaces.
- If the automatic calibration does not yield the desired results, you can manually adjust the threshold value yourself for optimal performance.
Calibration Process
- Calibrating Quarky’s Internal (in-built) IR Sensors
-
-
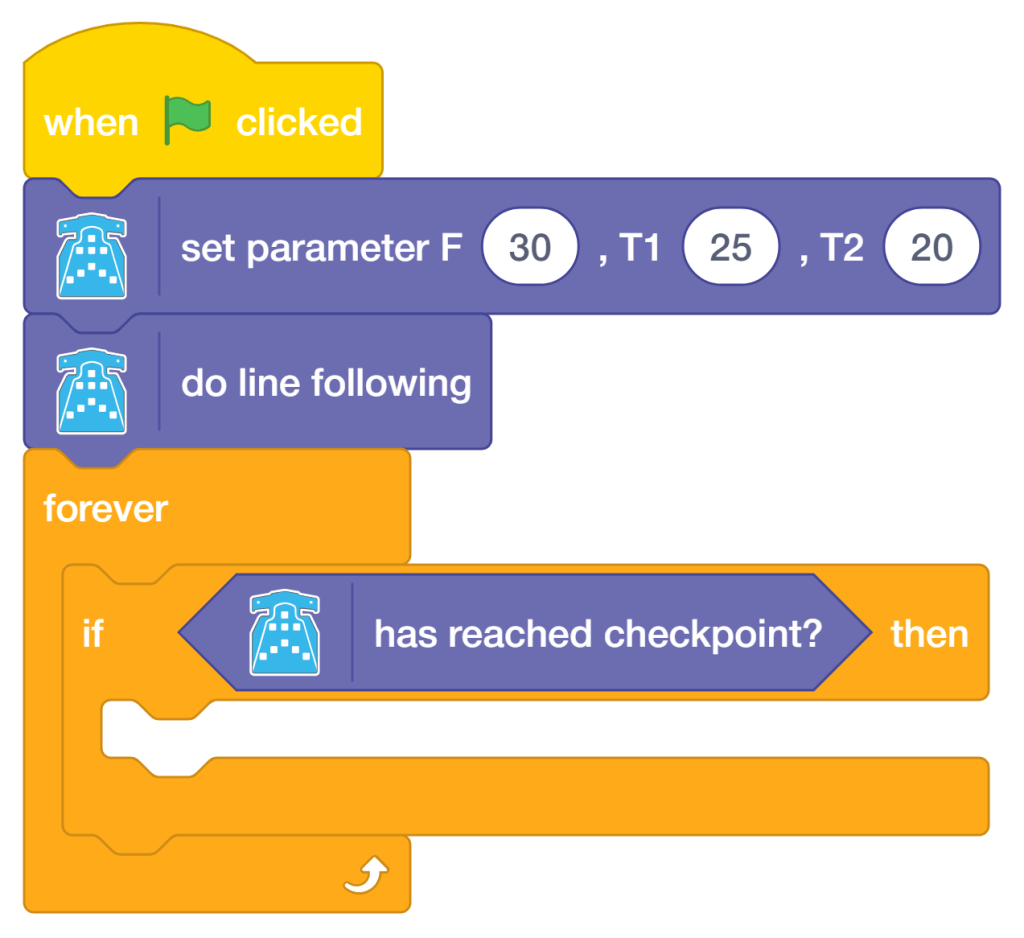
- Prerequisite: Ensure the “initialize block” has been used before starting.
- Procedure: Position the Quarky Robot a few steps before the checkpoint. Begin the calibration. The robot must traverse the checkpoint and the adjacent white space (covering both black and white areas) a total of three times.
- Optimal Setup: It is recommended to perform this on a straight line in the arena that includes a single checkpoint.
- The threshold values for the left and right IR sensors will be shown on the Pictoblox screen immediately following calibration.
-
- Calibrating Quarky’s External IR Sensors (Pins A1, A2, or A3)
-
- This procedure details the steps for calibrating external IR sensors connected to Quarky’s pins A1, A2, or A3.
- Prerequisites (Block Setup Order):
-
- Start with the “initialize block.”
-
- Designate the pins for the external sensors using the “change left IR to A1 pin” and “change right IR to A2 pin” blocks (use A3 if needed).
-
- Only after the initial and pin-assignment blocks are set, trigger the “Calibrate IR” block.
Note: Failure to follow this exact sequence will result in the system displaying calibration values for the internal sensors instead of the connected external ones.
- Calibration Procedure:
-
- Placement: Position the Quarky Robot a short distance before the designated checkpoint on the line-following arena.
- Movement: Start the calibration. The robot must move back and forth, successfully traversing the checkpoint and the adjacent white area (covering both black and white surfaces) a total of three times.
- Optimal Physical Setup:
- Ensure both external sensors are mounted at a consistent, low height.
- The calibration should be performed on a straight section of the arena that includes one distinct, clear checkpoint to ensure accurate data sampling.
Result:
The resulting threshold values for the selected external pins (e.g., A1 and A2) will be displayed on the Pictoblox screen immediately after the calibration is complete.