Pose Classifier (ML)
-
 Available in: Block Coding, Python Coding
-
 Mode: Stage Mode
-
 WiFi Required: No
-
 Compatible Hardware in Block Coding: evive, Quarky, Arduino Uno, Arduino Mega, Arduino Nano, ESP32, T-Watch, Boffin, micro:bit, TECbits, LEGO EV3, LEGO Boost, LEGO WeDo 2.0, Go DFA, None
-
 Compatible Hardware in Python: Quarky, None
-
 Object Declaration in Python: Not Applicable
-
 Extension Catergory: ML Environment
Introduction
Pose Classifier is the extension of the ML Environment is used for classifying different body poses into different classes.
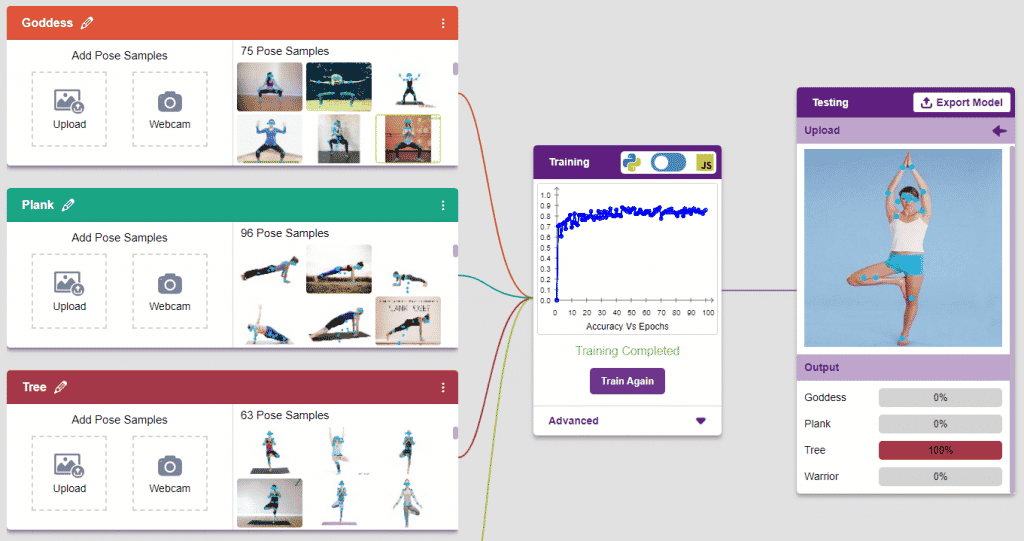
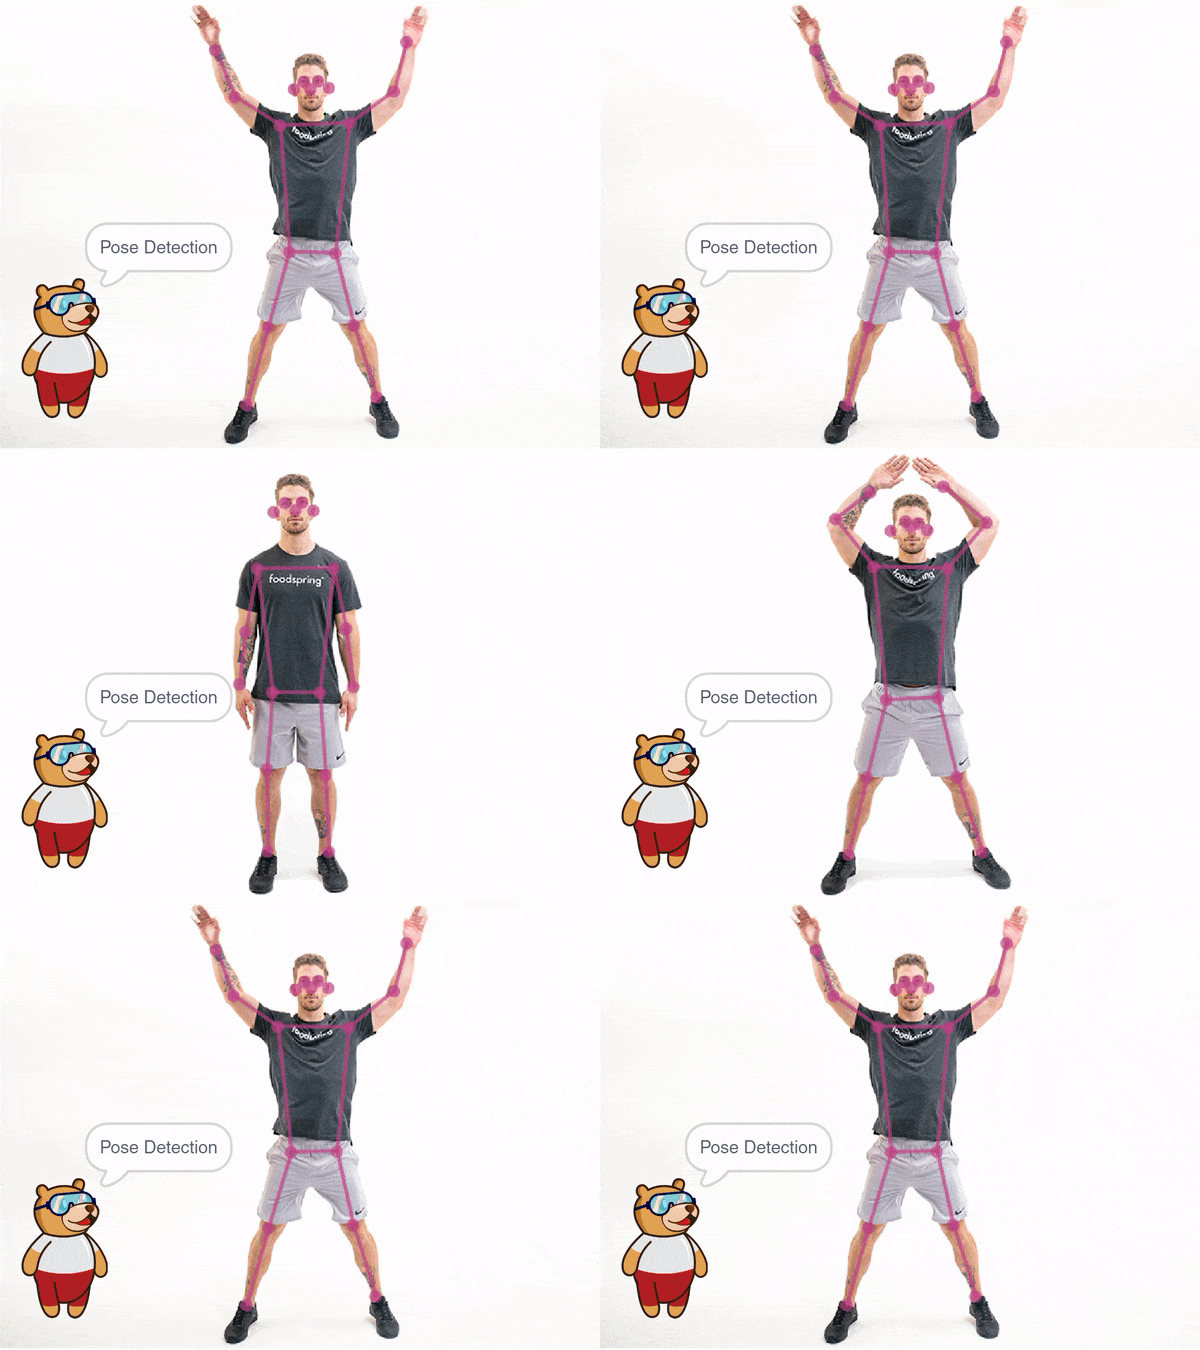
The model works by analyzing your body position with the help of 17 data points.
Tutorial on using Image Classifier in Block Coding
Tutorial on using Image Classifier in Python Coding
Pose Classifier Workflow

Follow the steps below:
- Open PictoBlox and create a new file.
- Select the coding environment as appropriate Coding Environment.
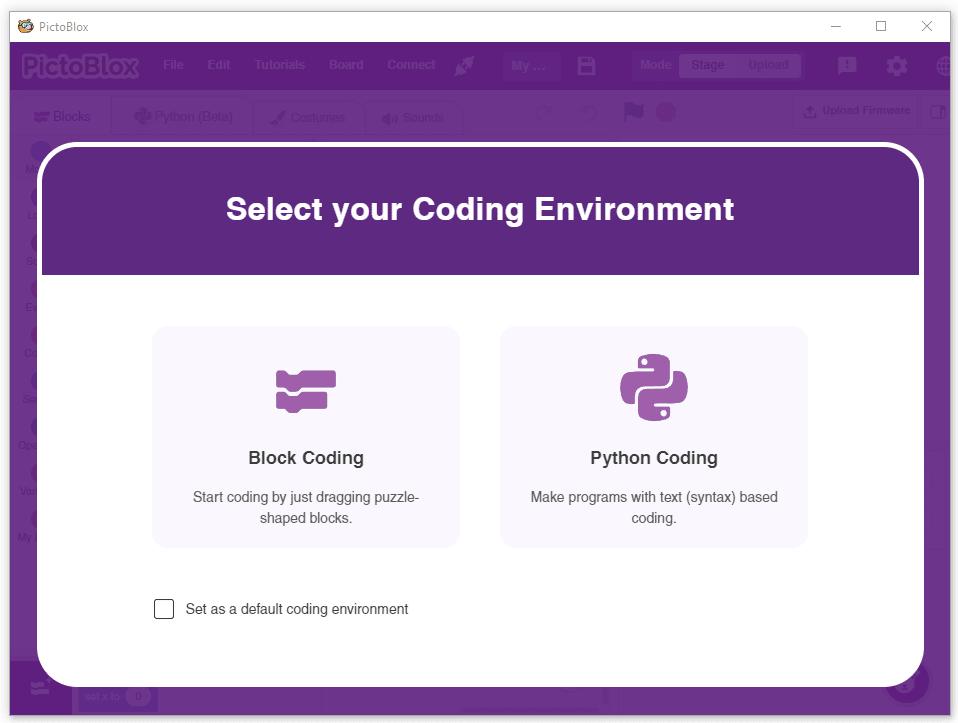
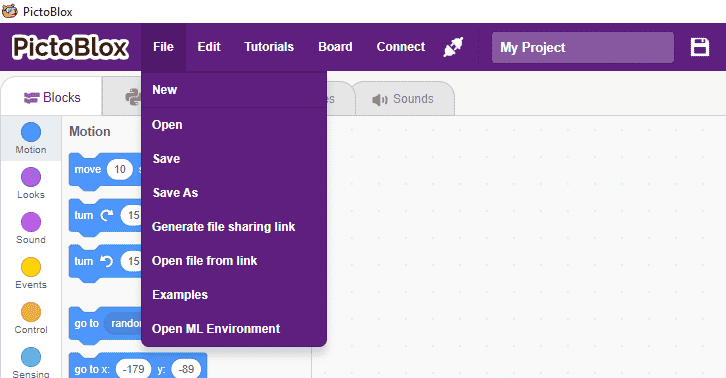
- Select the “Open ML Environment” option under the “Files” tab to access the ML Environment.

- You’ll be greeted with the following screen.
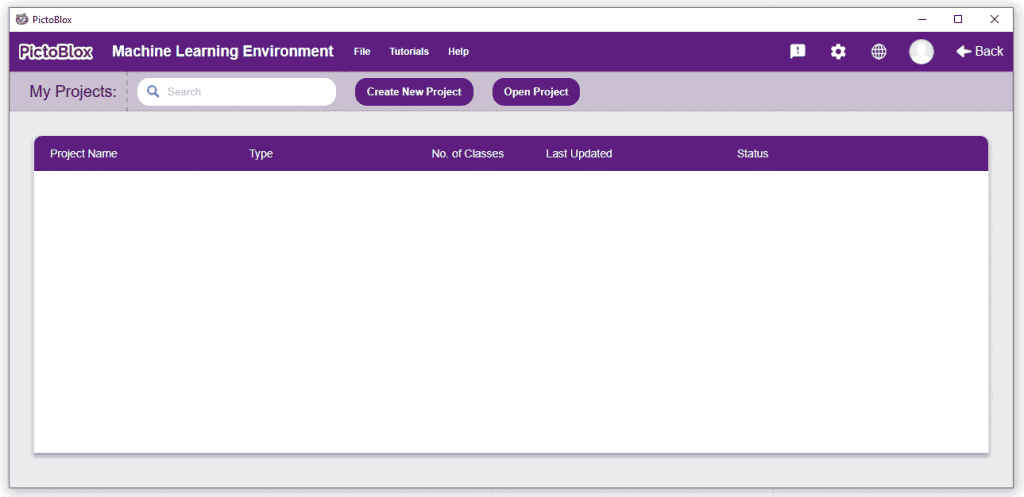 Click on “Create New Project“.
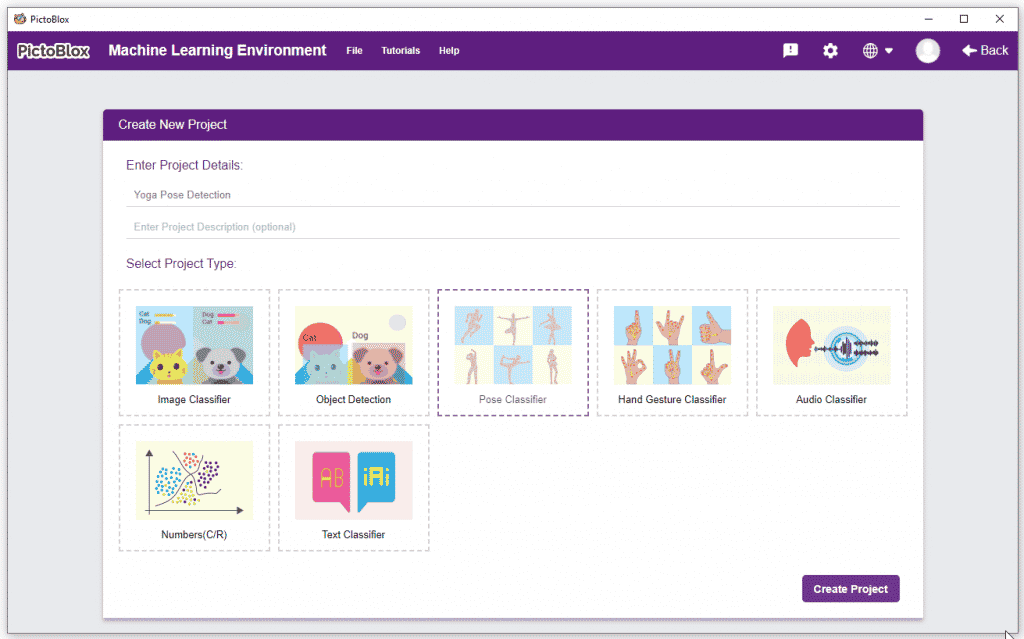
 - A window will open. Type in a project name of your choice and select the “Pose Classifier” extension. Click the “Create Project” button to open the Pose Classifier window.
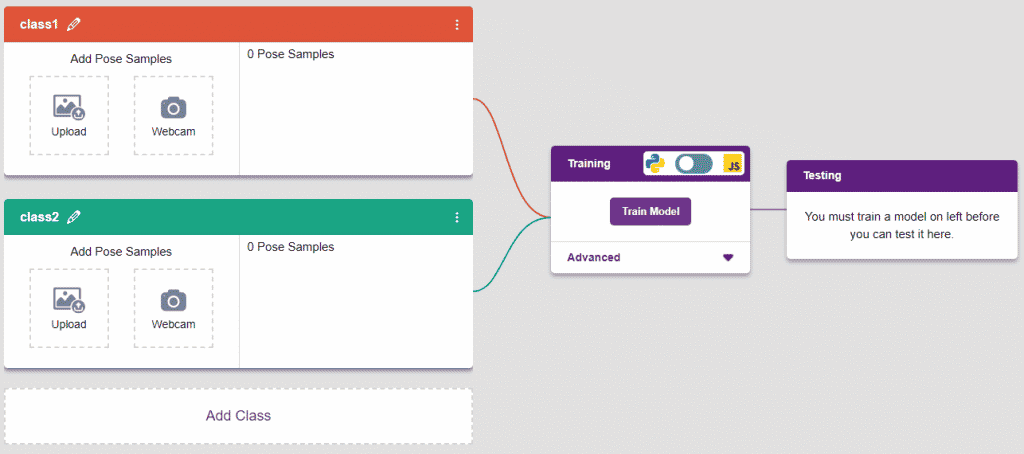
- You shall see the Pose Classifier workflow with two classes already made for you. Your environment is all set. Now it’s time to upload the data.
Class in Pose Classifier
Class is the category in which the Machine Learning model classifies the poses. Similar poses are put in one class.
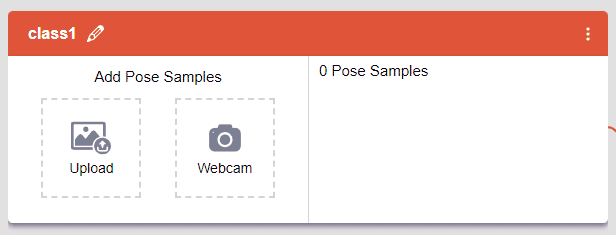
There are 2 things that you have to provide in a class:
- Class Name: It’s the name to which the class will be referred as.
- Pose Data: This data can either be taken from the webcam or by uploading from local storage.


Adding Data to Class
You can perform the following operations to manipulate the data into a class.
- Naming the Class: You can rename the class by clicking on the edit button.
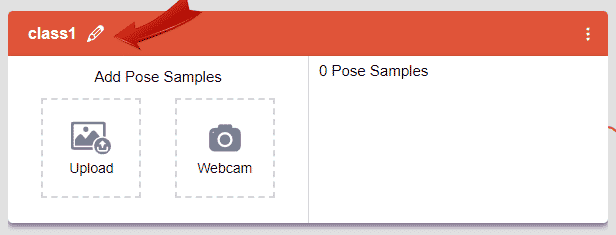
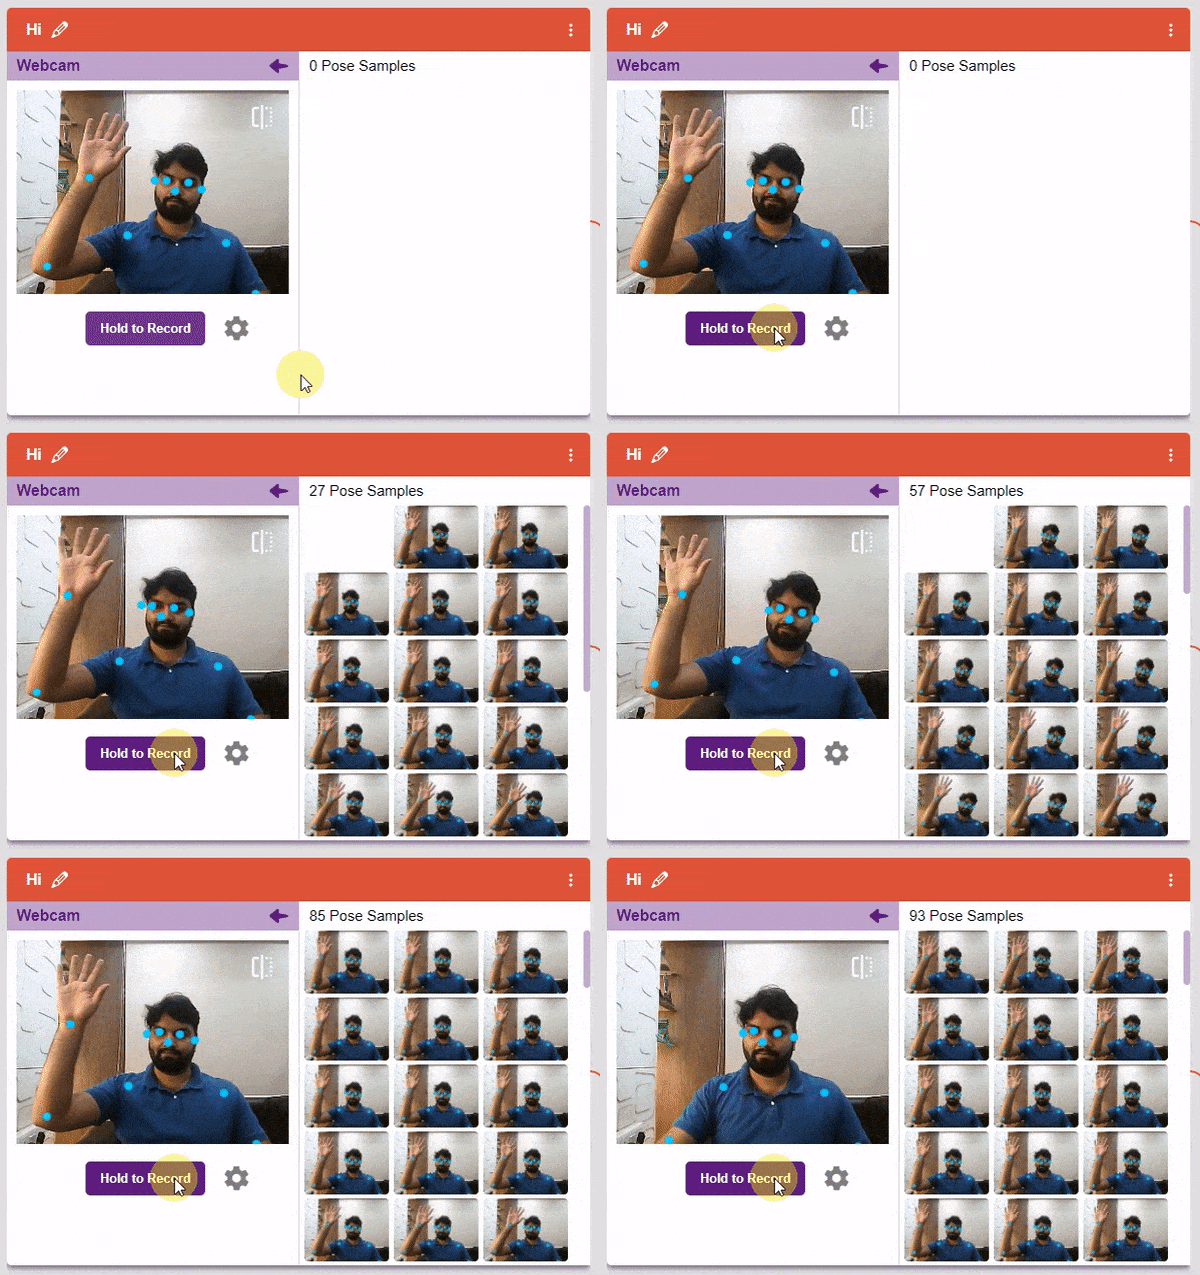
- Adding Data to the Class: You can add the data using the Webcam or by Uploading the files from the local folder.
- Webcam:
 Note: You can edit the capture setting in the camera with the following. Hold to Record allows you to capture images with pose till the time button is pressed. Whereas when it is off you can set the start delay and duration of the sample collection.
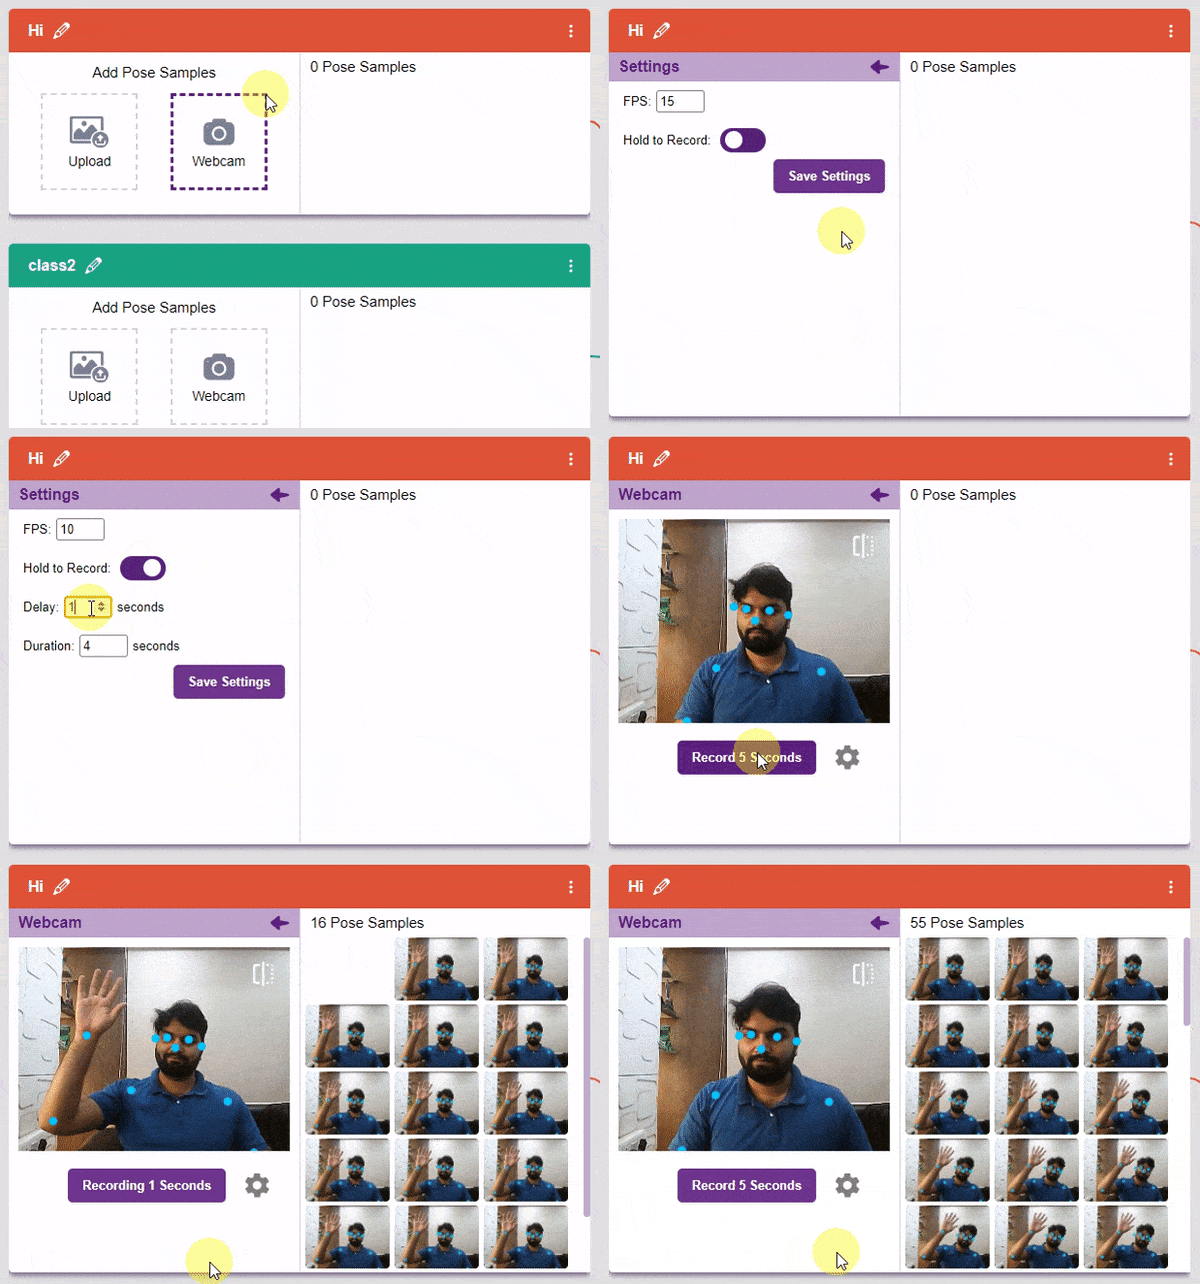 If you want to change your camera feed, you can do it from the webcam selector in the top right corner.

- Upload Files: You can also add bulk images from the local system.
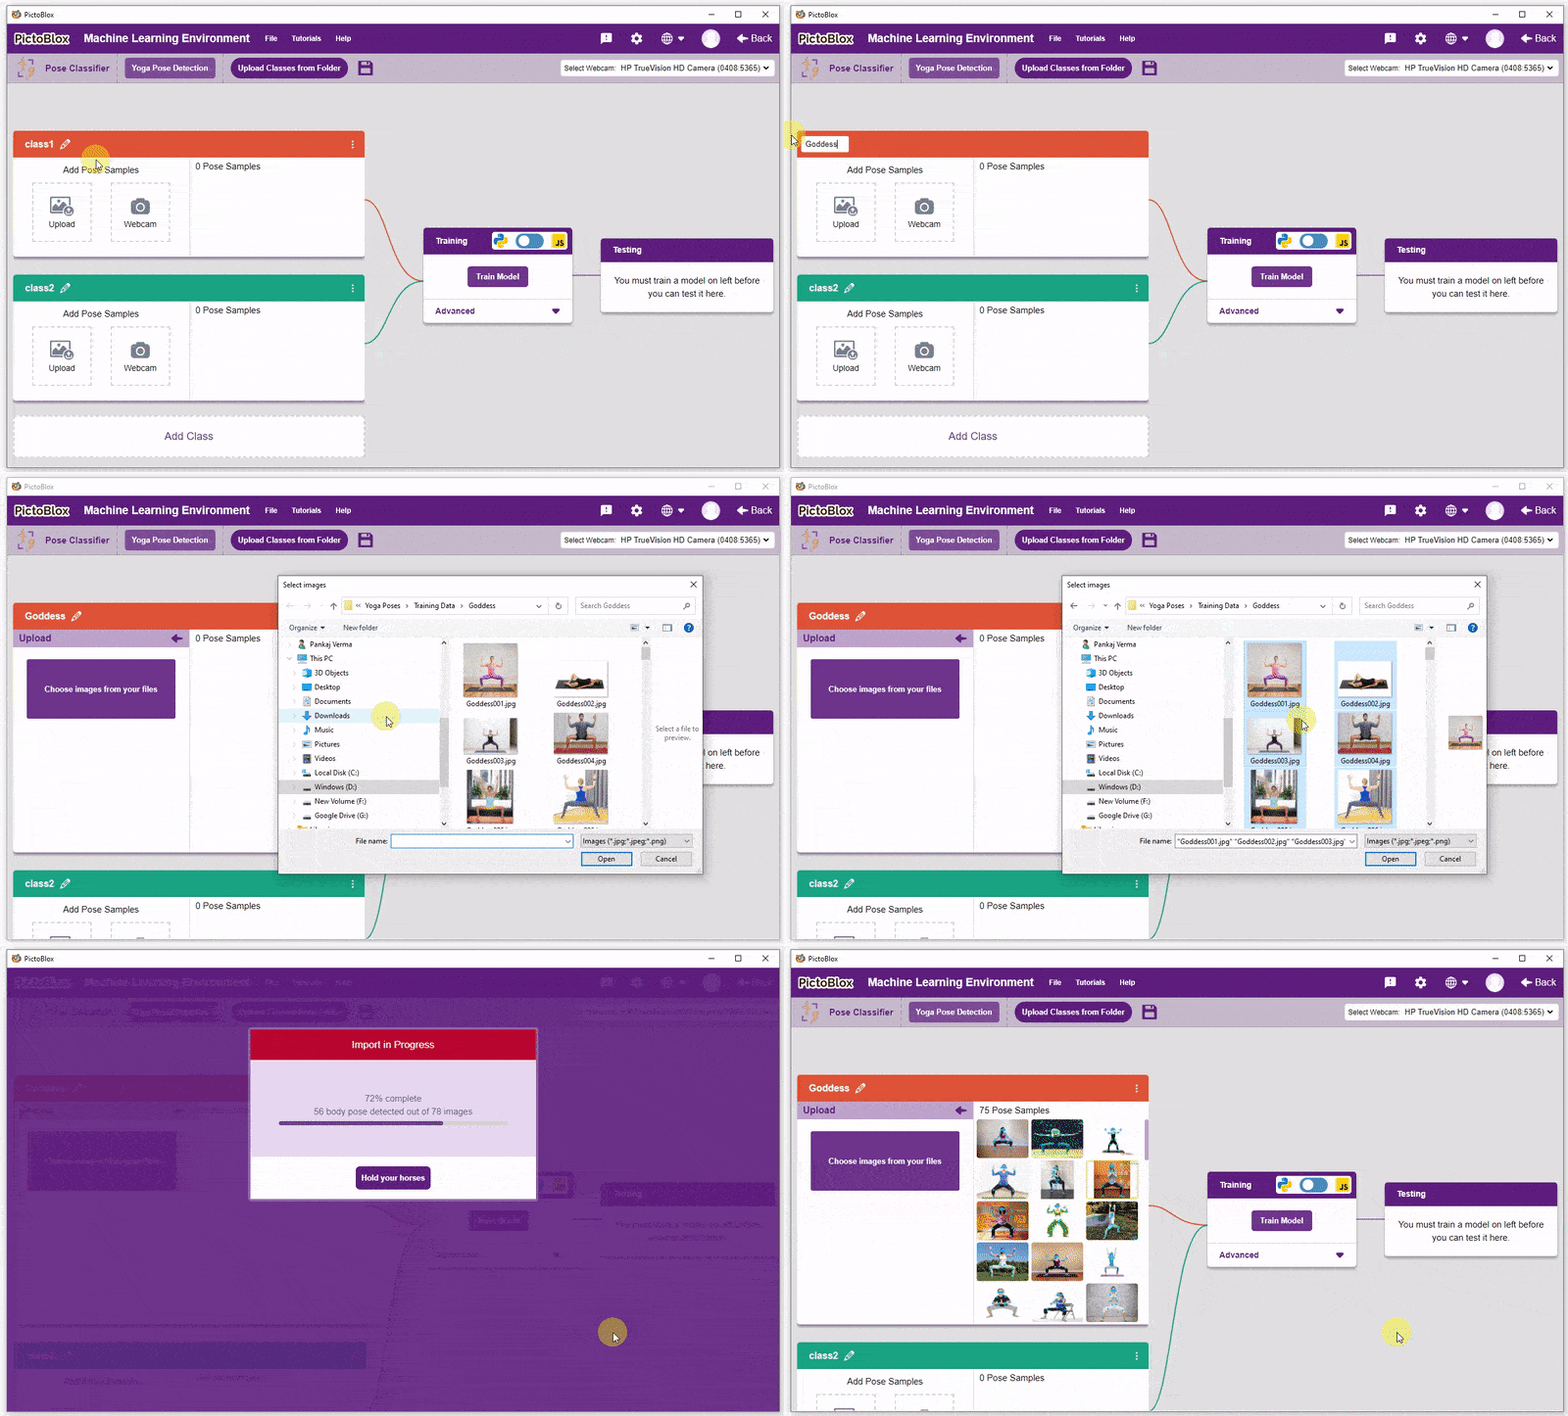
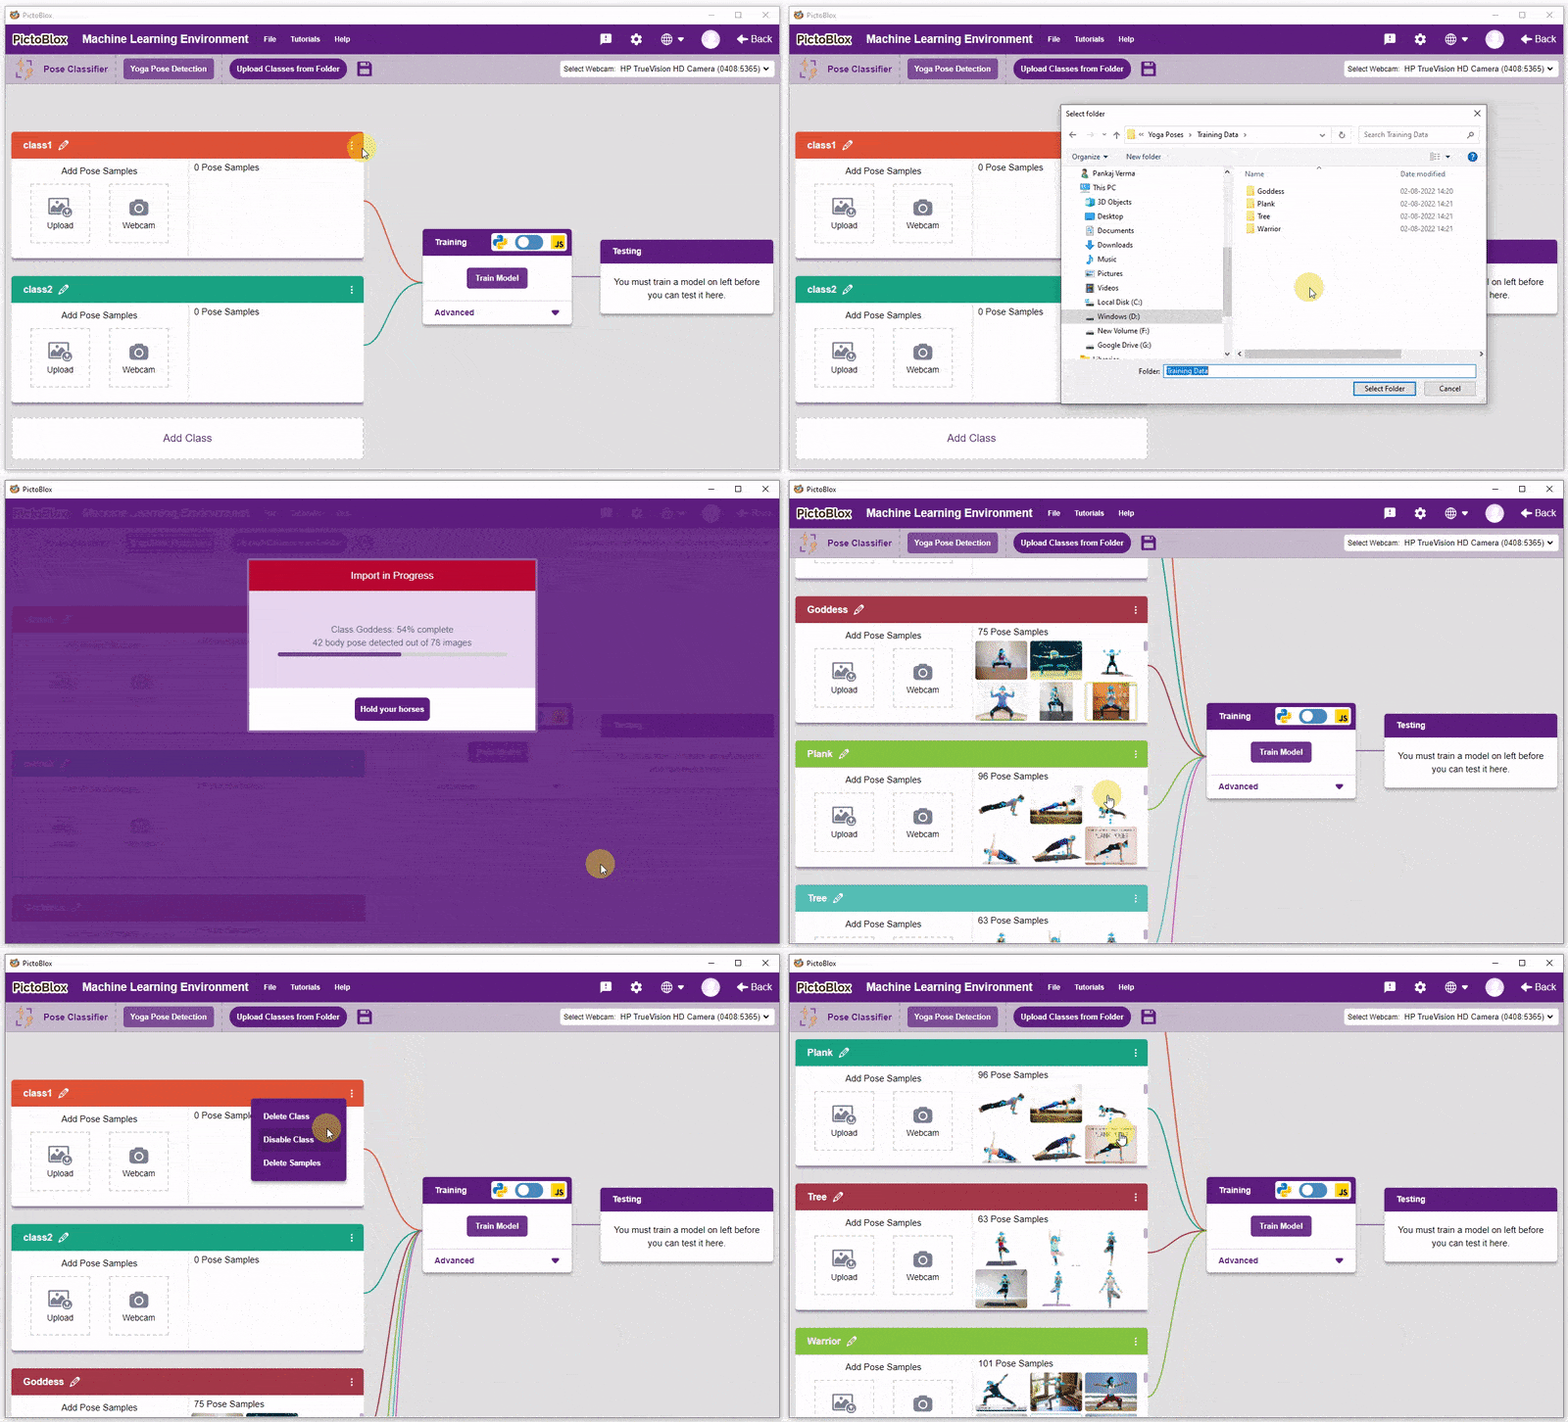
- Upload Class from Folder: You can upload bulk classes with the images available in the appropriate folder structure. PictoBlox imports the class with the class name as the folder name and data from the image files inside the folder. This is helpful if you have to import multiple classes.
- Webcam:
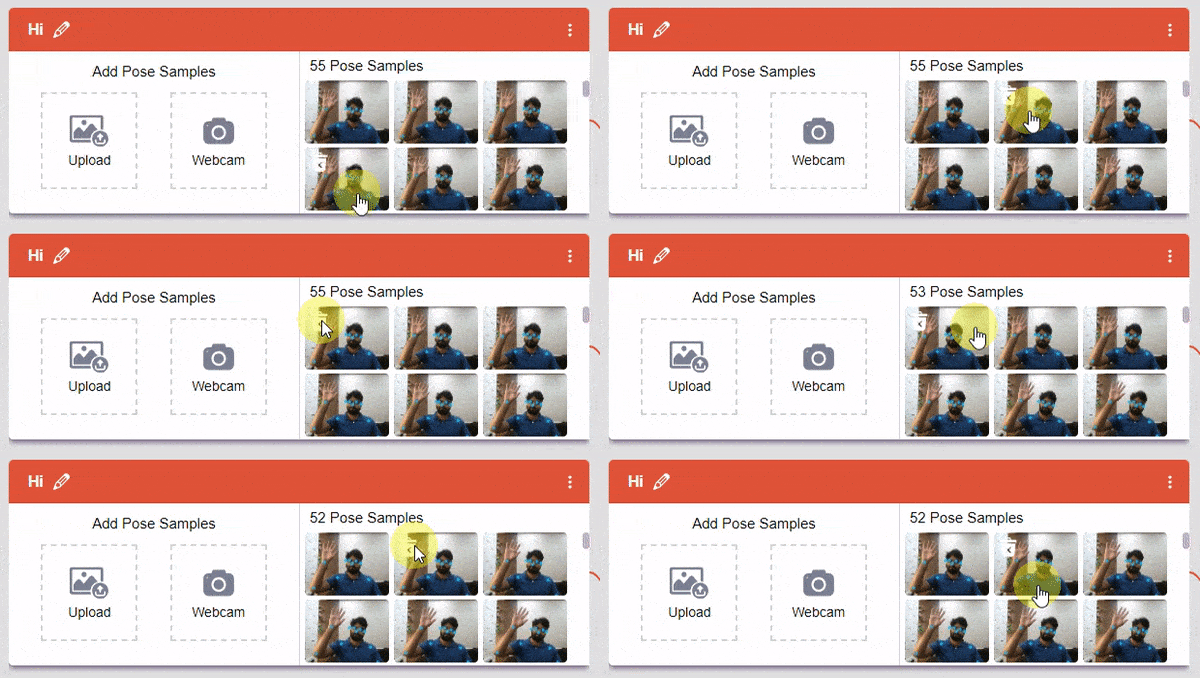
- Deleting individual samples:
- Delete all samples:
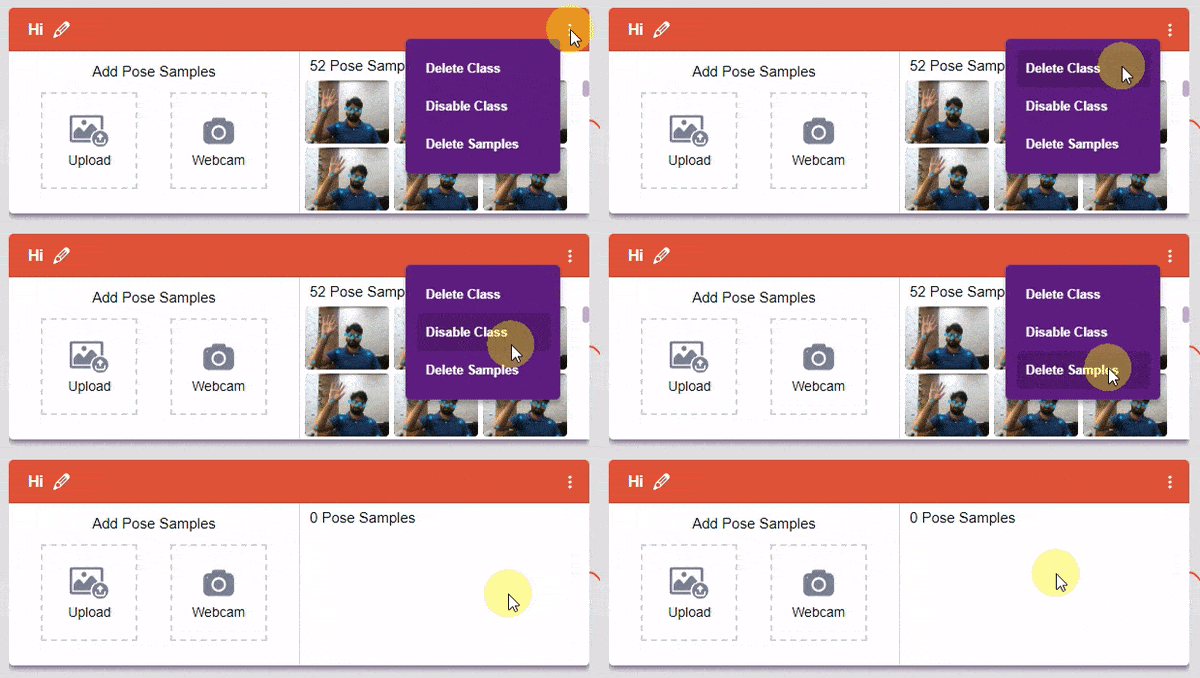
- Enable or Disable Class: This option tells the model whether to consider the current class for the ML model or not. If disabled, the class will not appear in the ML model trained.
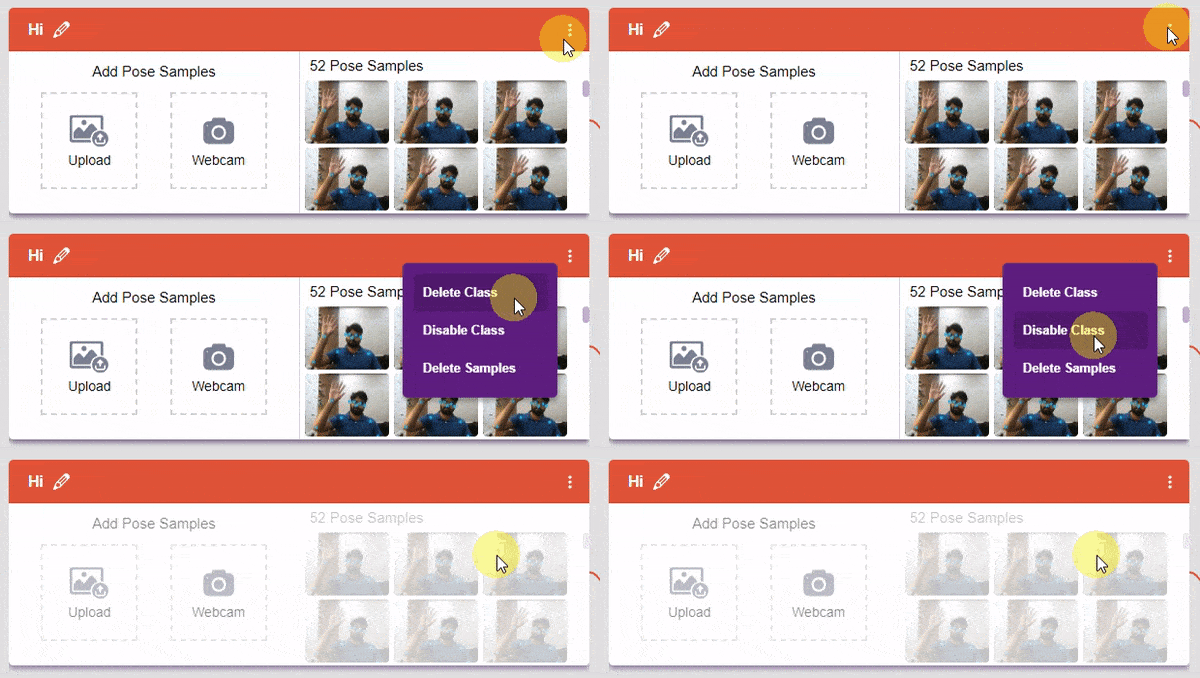

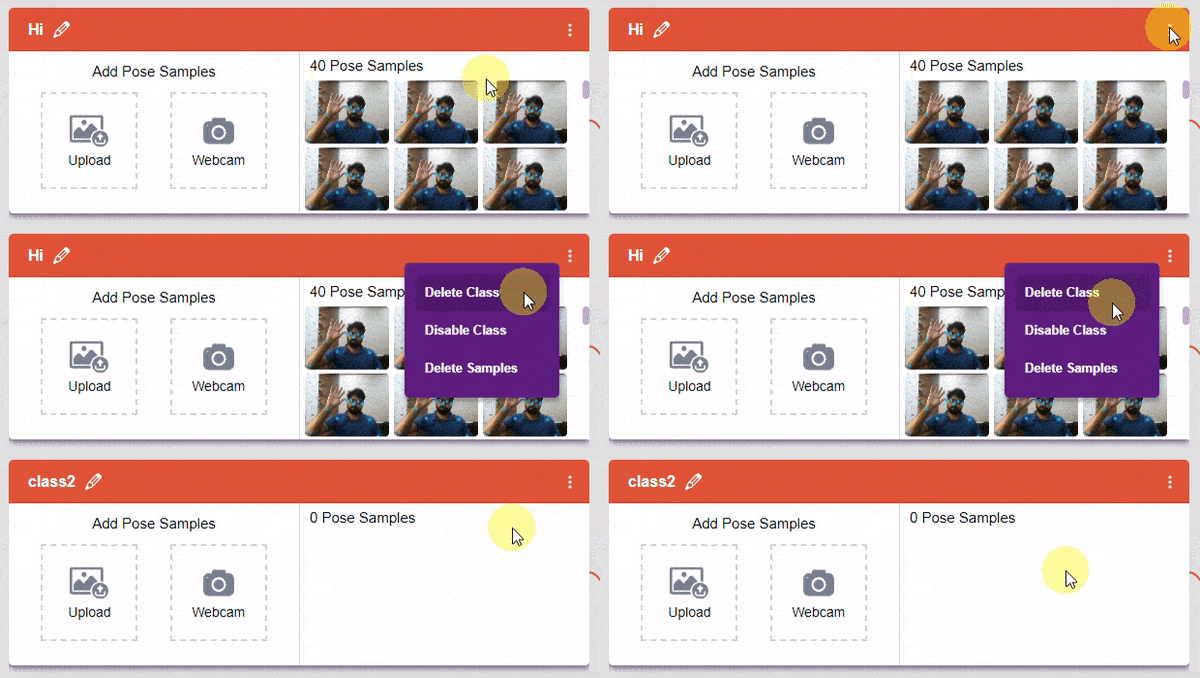
- Delete Class: This option deletes the full class.

Training the Model
After data is added, it’s fit to be used in model training. In order to do this, we have to train the model. By training the model, we extract meaningful information from the pose, and that in turn updates the weights. Once these weights are saved, we can use our model to make predictions on data previously unseen.
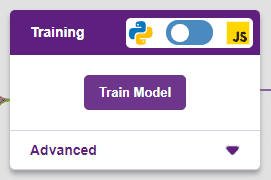
However, before training the model, there are a few hyperparameters that you should be aware of. Click on the “Advanced” tab to view them.

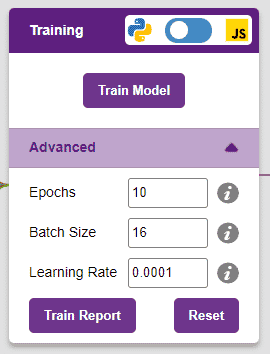
There are three hyperparameters you can play along with here:
- Epochs– The total number of times your data will be fed through the training model. Therefore, in 10 epochs, the dataset will be fed through the training model 10 times. Increasing the number of epochs can often lead to better performance.
- Batch Size– The size of the set of samples that will be used in one step. For example, if you have 160 data samples in your dataset, and you have a batch size of 16, each epoch will be completed in 160/16=10 steps. You’ll rarely need to alter this hyperparameter.
- Learning Rate– It dictates the speed at which your model updates the weights after iterating through a step. Even small changes in this parameter can have a huge impact on the model performance. The usual range lies between 0.001 and 0.0001.

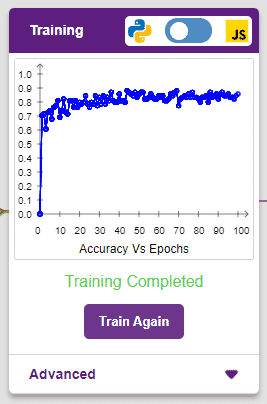
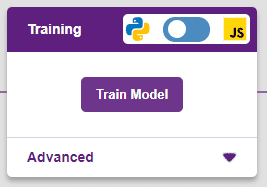
It’s a good idea to train a numeric classification model for a high number of epochs. The model can be trained in both JavaScript and Python. In order to choose between the two, click on the switch on top of the Training panel.

The accuracy of the model should increase over time. The x-axis of the graph shows the epochs, and the y-axis represents the accuracy at the corresponding epoch. Remember, the higher the reading in the accuracy graph, the better the model. The x-axis of the graph shows the epochs, and the y-axis represents the corresponding accuracy. The range of the accuracy is 0 to 1.
Testing the Model
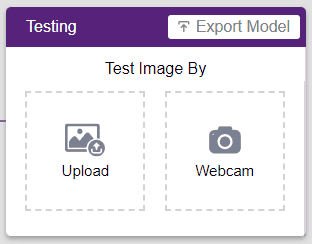
To test the model, simply enter the input values in the “Testing” panel and click on the “Predict” button.
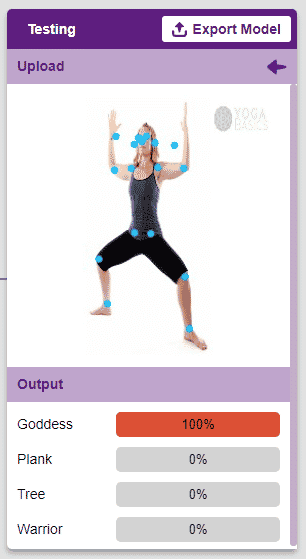
The model will return the probability of the input belonging to the classes.
Export in Block Coding
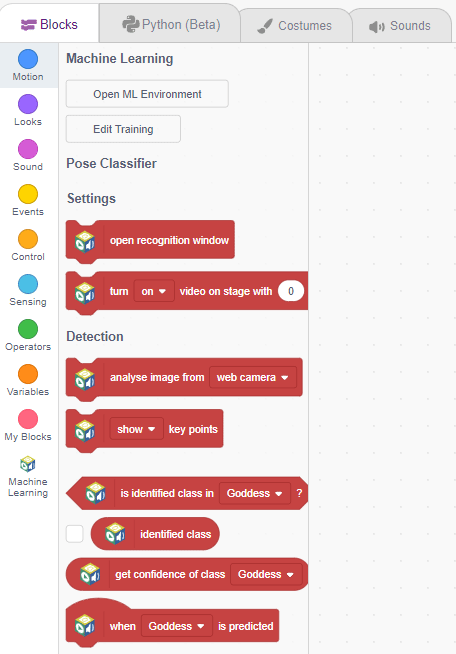
Click on the “Export Model” button on the top right of the Testing box, and PictoBlox will load your model into the Block Coding Environment if you have opened the ML Environment in the Block Coding.
Export in Python Coding

Click on the “Export Model” button on the top right of the Testing box, and PictoBlox will load your model into the Python Coding Environment if you have opened the ML Environment in Python Coding.
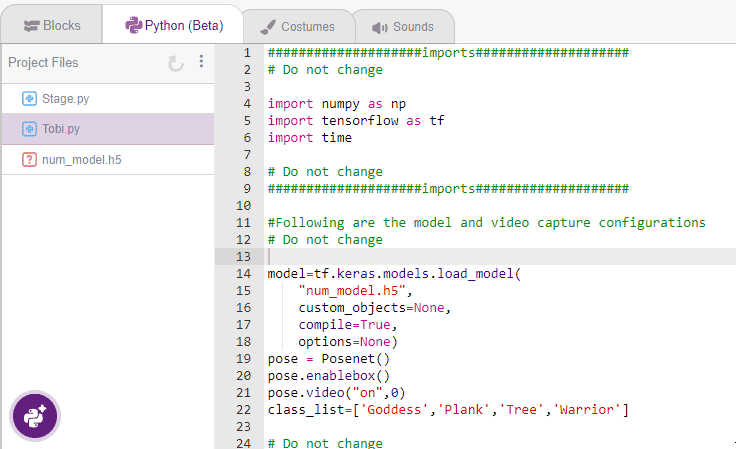 The following code appears in the Python Editor of the selected sprite.
####################imports####################
# Do not change

import numpy as np
import tensorflow as tf
import time

# Do not change
####################imports####################

#Following are the model and video capture configurations
# Do not change

model = tf.keras.models.load_model("num_model.h5",
                                   custom_objects=None,
                                   compile=True,
                                   options=None)
pose = Posenet()  # Initializing Posenet
pose.enablebox()  # Enabling video capture box
pose.video("on", 0)  # Taking video input
class_list = ['Goddess', 'Plank', 'Tree', 'Warrior']  # List of all the classes

# Do not change
###############################################

#This is the while loop block, computations happen here
# Do not change

while True:
  pose.analysecamera()  # Using Posenet to analyse pose
  coordinate_xy = []

  # for loop to iterate through 17 points of recognition
  for i in range(17):
    if (pose.x(i, 1) != "NULL" or pose.y(i, 1) != "NULL"):
      coordinate_xy.append(int(240 + float(pose.x(i, 1))))
      coordinate_xy.append(int(180 - float(pose.y(i, 1))))
    else:
      coordinate_xy.append(0)
      coordinate_xy.append(0)

  coordinate_xy_tensor = tf.expand_dims(
      coordinate_xy, 0)  # Expanding the dimension of the coordinate list
  predict = model.predict(
      coordinate_xy_tensor)  # Making an initial prediction using the model
  predict_index = np.argmax(predict[0],
                            axis=0)  # Generating index out of the prediction
  predicted_class = class_list[
      predict_index]  # Tallying the index with class list
  print(predicted_class)


