introduction
If you are here willingly, it means you already possess knowledge about programming and project-making. In programming, data from users is often needed, and valuable information needs to be displayed for users. Similarly, when coding for Arduino and creating projects, dealing with useful information is common. This information is referred to as serial data, and the process of sending or receiving data through the Serial monitor in Arduino is known as serial communication.
In this example, we will learn how to read Serial input for Arduino using the communication extension in Pictoblox.
Extension
- Go to the extensions section and add the communication extension.
 Change the mode from “stage” to “upload.”
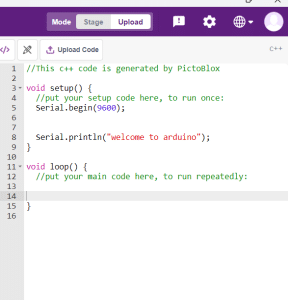
Code
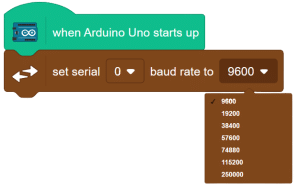
- Add the “when Arduino starts up” block from the Arduino palette

- From the communication palette, enable Serial communication using the “Set Serial() baud rate()” block. Set the baud rate to 9600 from the drop-down menu.
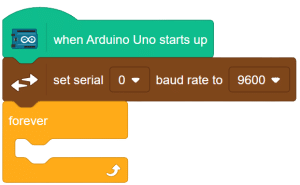
- From controls add forever block.
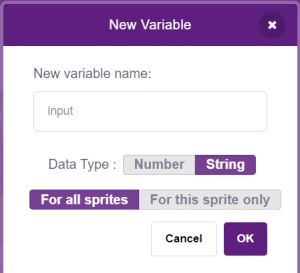
- Create a variable of type “string” and name it “input.”
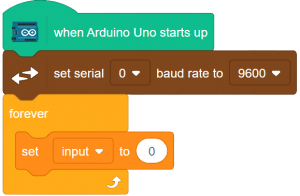
- Add the “set input to ()” block from “my variables” into the forever block.
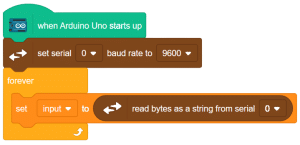
- Use the “Read byte as string from serial ()” block to read the collection of data (as a single word or sentence) from the Serial monitor.

- Set “input” to the value read from the Serial monitor using the “Read byte as string from serial ()” block.
- To display the user input on the screen, use the “write() on serial()” block and input the value of “input” as the output.
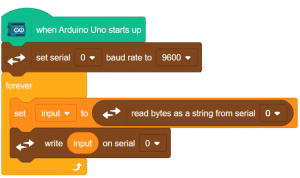
Script

Output
in the serial terminal, change the baud rate to 9600. enter the input in the place marked yellow. to fed this input hit the button marked in blue.
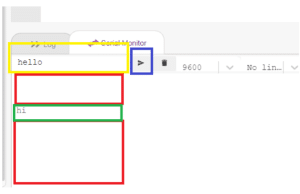
here you will notice that there are a lot of empty lines (space marked in red ) between the outputs you are entering. in the next example we will learn how to avoid such a problem.


