Introduction
A joystick is an input device used to control the movement or actions of a computer, video game console, or other electronic device. In gaming, joysticks are often used to control the movement of characters or vehicles in a virtual environment. They provide analog input, meaning the degree of movement can vary based on how far the handle is pushed in a particular direction. In aviation and flight simulation, joysticks are commonly used to simulate the control of aircraft, providing pitch, roll, and yaw inputs. Some advanced joysticks also come with additional features such as throttle controls, programmable buttons, and force feedback to enhance the gaming or simulation experience. below is a simple animation of a joystick.

In this example, we’ll be interfacing a joystick with Quarky and try to find different directions for our robot by moving the joystick along the x and y axis let’s begin!!
Circuit Diagram
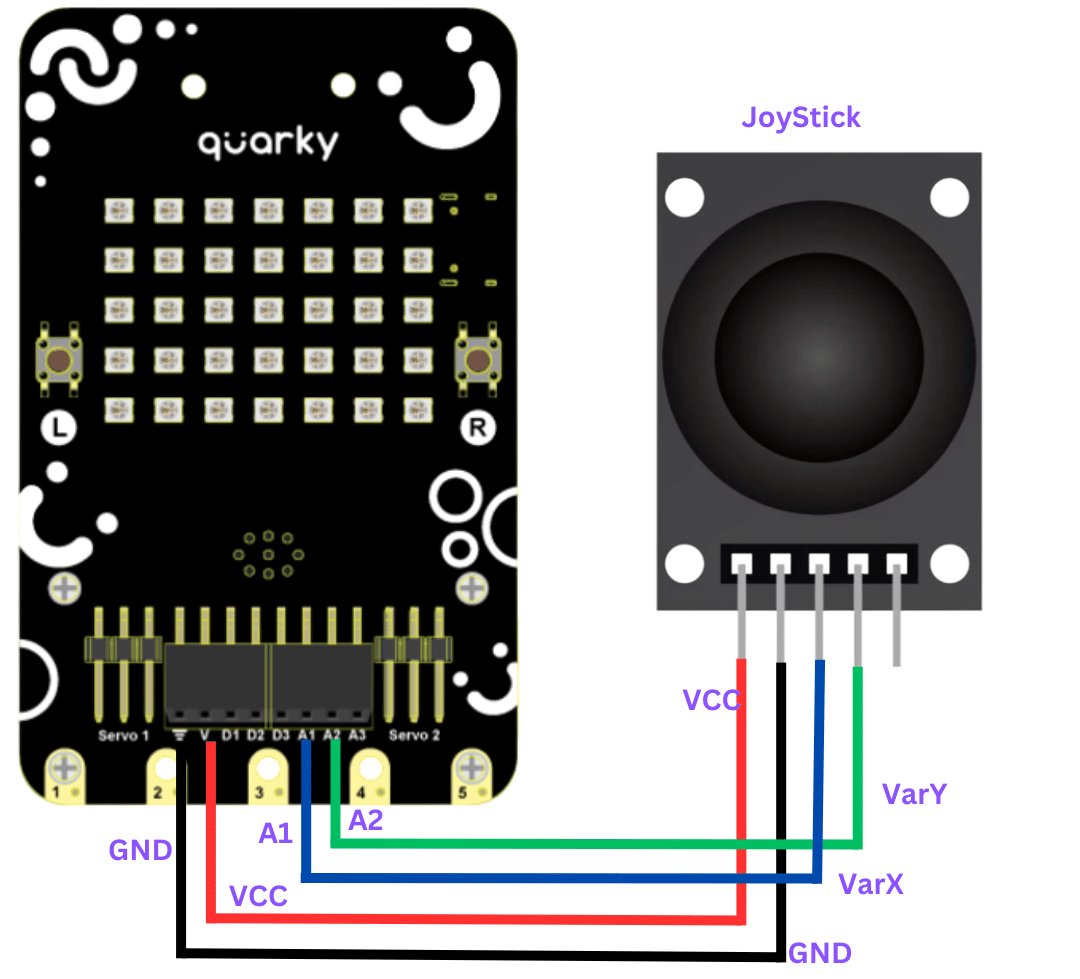
connection
JoyStick Quarky
GND GND
5V V
VarX A1
VarY A2
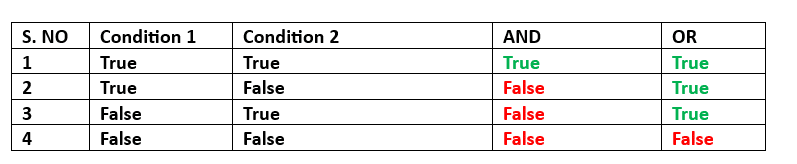
this is logic we will be using
Code
Remember that whenever we are moving the joystick in any direction, the value of both X and Y axis changes simultaneously, so we will be defining a range for both the X-axis and Y-axis so that when their values lie under this range our system must be able to decide the direction as forward,backward, left or right. based on the ranges and logic.
- Connect JoyStick as per the above connections.
- Open pictoblx and create a new file.
- Select Quarky from the board menu.
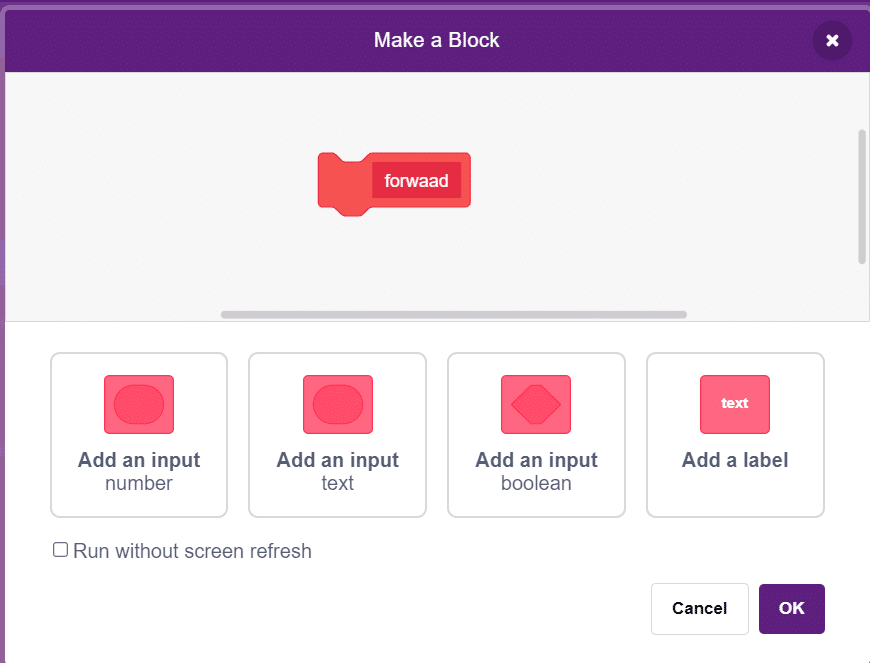
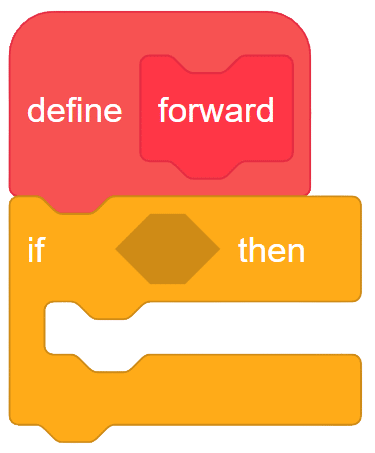
- Go to my blocks and create a new block as “forward”
- From controls palette, add if-than block with under forward block.
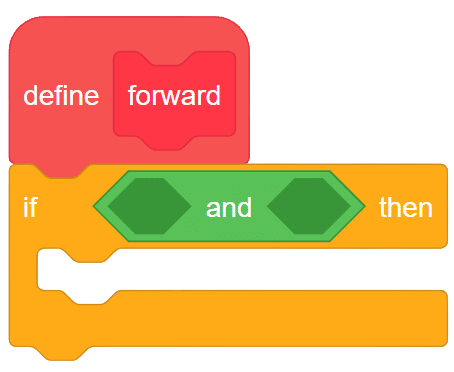
- From operators palette insert AND operator in if block.
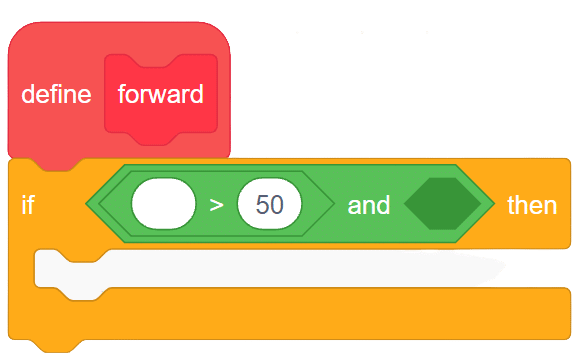
- Again from operator palette, add grater then operator and first space of the AND block.
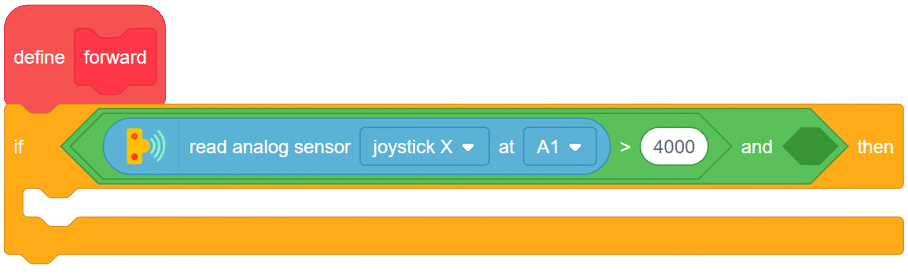
- From Sensor palette of Quarky, choose the block “read analog sensor () at pin()” select joystick X from the dropdown and A1 from the dropdowns. change the value from 50 to 4000
- Again from the operator palette drag less then operator and insert in second space if the AND operator.
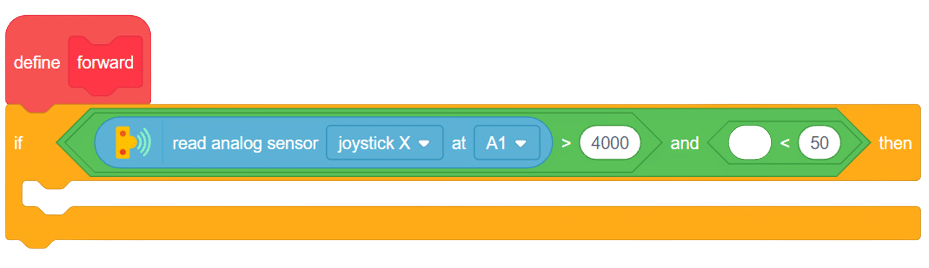
- From sensor palette of Quarky, insert read analog sensor () at pin (). in first space of the less than operator and change the value from 50 to 4100.

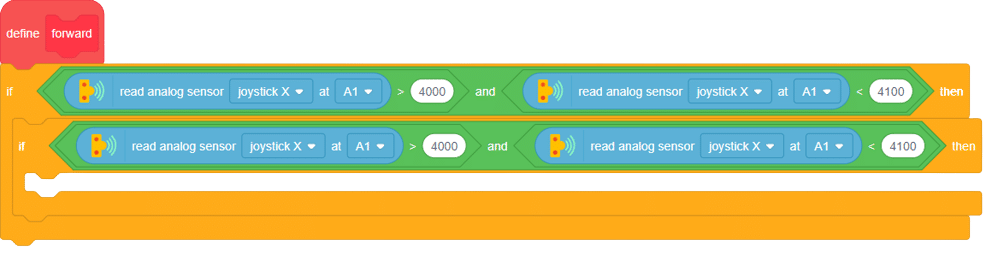
- Copy this if block and paste it inside the existing if block.
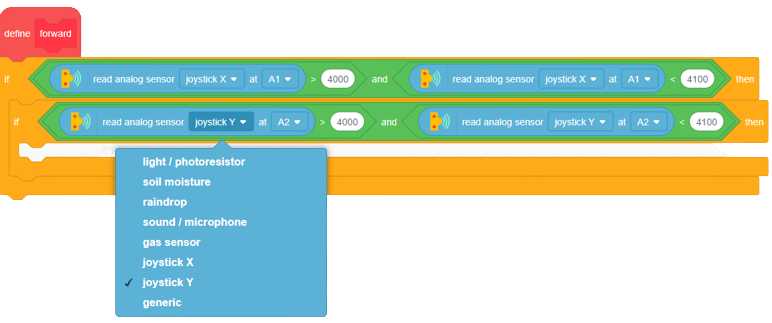
- this time change joystick X to joystick Y and pin from A1 to A2, as shown below.
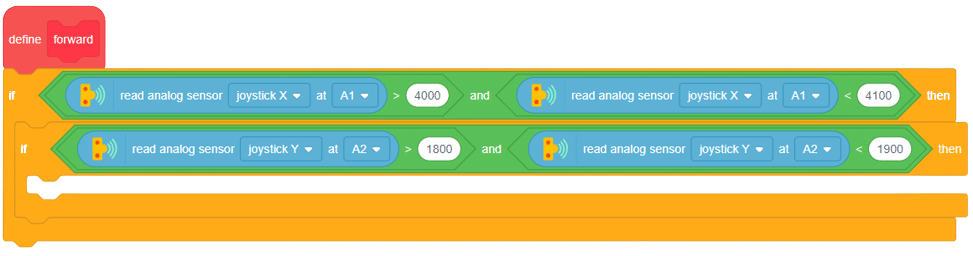
- this time change the range for y from 1800 to 900 in first and second space of grater than and less than operator respectively.
- From looks palette add say block in if block and inside the say block add join block from operators.
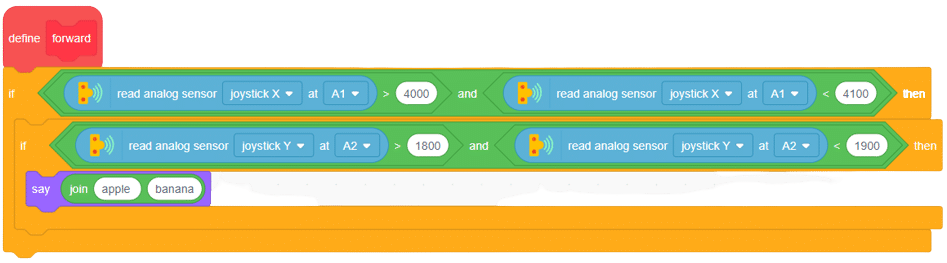
- replace apple with “forward >> ” and in place of banana add another join block.
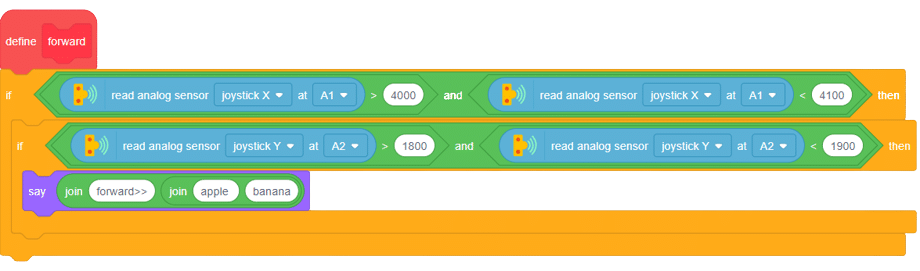
- This time in place of apple type “x = ” and again add join operator from operators palette in place of banana.
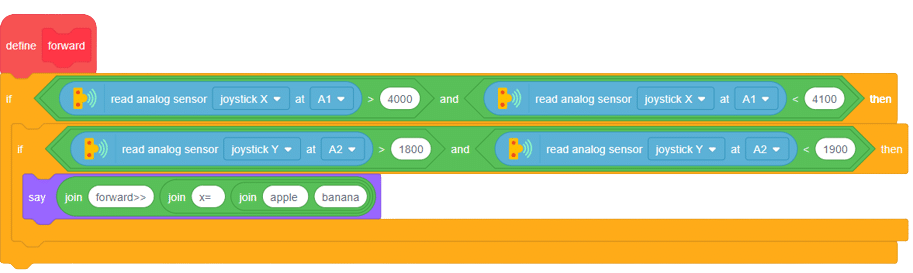
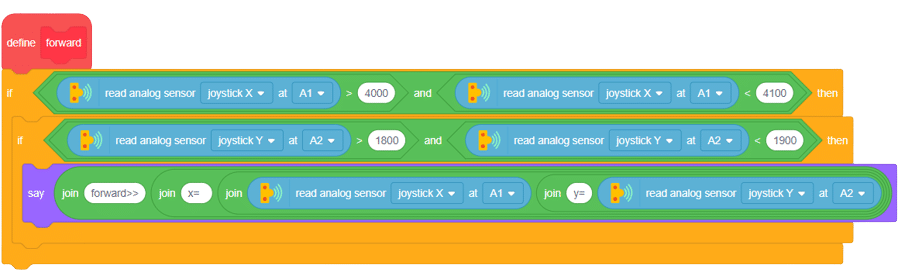
- In place of apple add “read analog sensor () at pin () ” from sensor palette. choose joystick X and A1 from dropdowns, Add another join block in place of banana.

- this time in replace appl with “ y = ” and banana with “read analog sensor () at () ” block and choose joystick Y and A2 from the dropdowns.
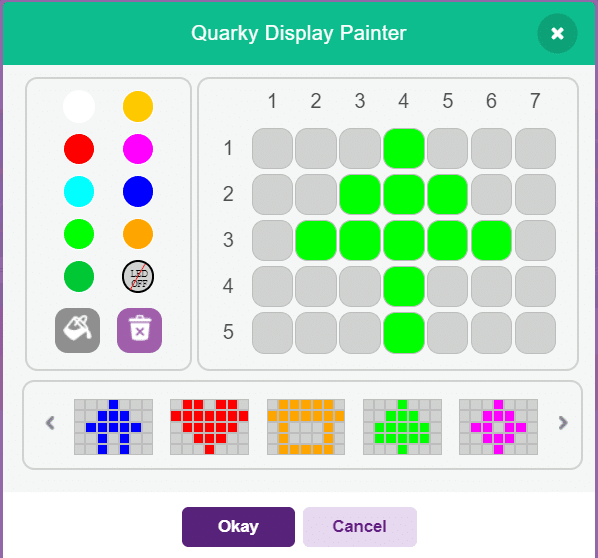
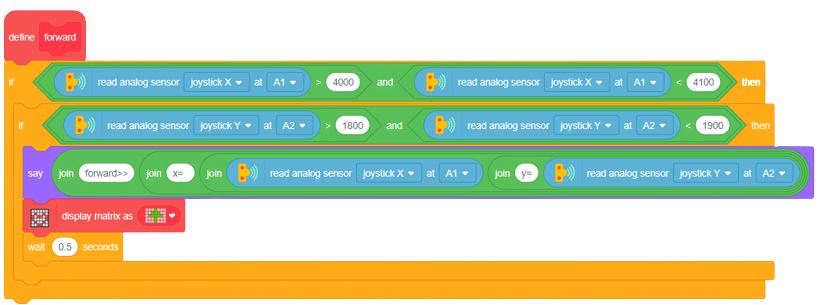
- Now from display palette of Quarky, drag “display matrix as ()” .
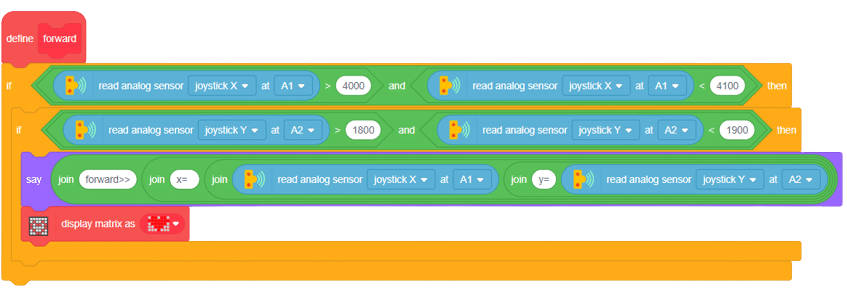
- Click on drop down and create a forward arrow on display.
- from Controls palette and wait for 0.25 seconds.
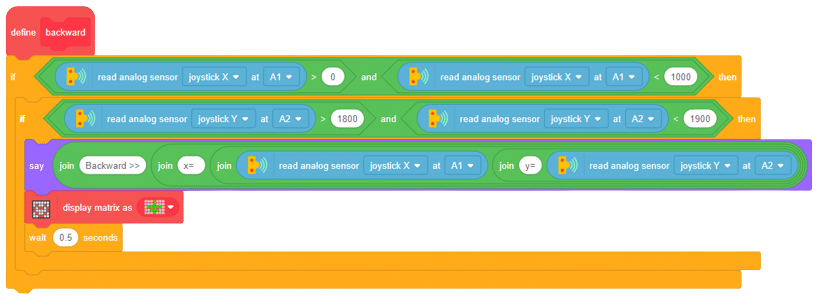
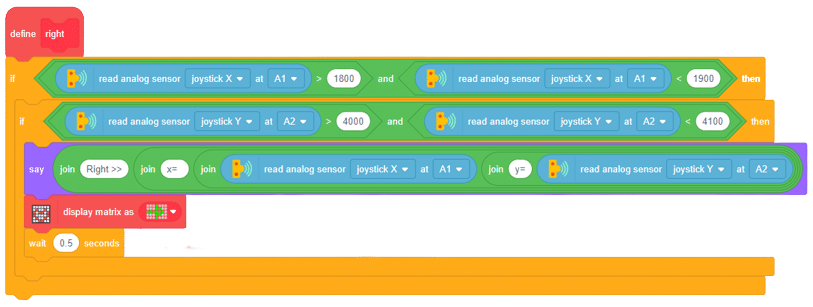
- create 3 more blocks for backwards, left and right prospectively. for backward.
- Left
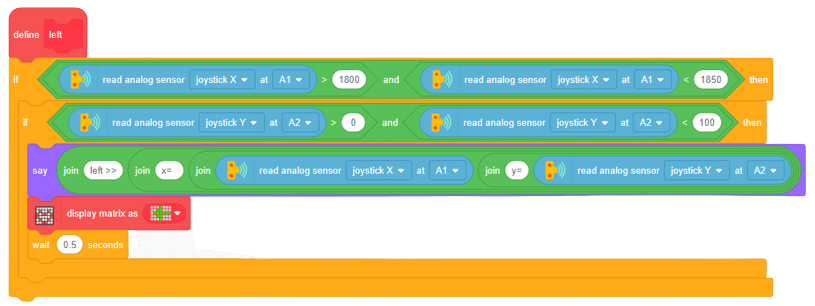
- Right
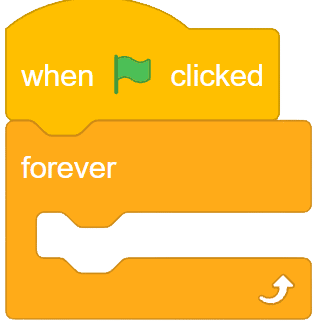
- Now let’s start writing the main script. from events palette add when flag clicked.

- From control palette add a forever block.
- finally, add all the blocks that you have created inside the forever block.
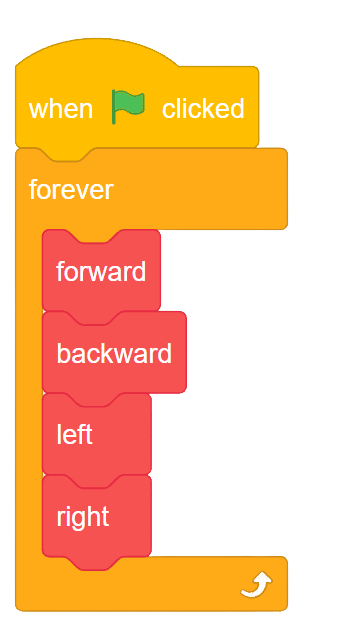
By following all the above steps, you will be able to control the robotic car in any direction you want.
Output