Introduction
An automatic robotic arm is a mechanical device that imitates a human arm. It can be programmed and used in many industries. The arm consists of linked parts that can move and rotate, enabling it to do various tasks. Technology advancements like AI and machine learning have led to more advanced robotic arms. These arms can adapt and work autonomously. As a result, they are now widely used across industries and play a crucial role in automation systems.
Code

Logic
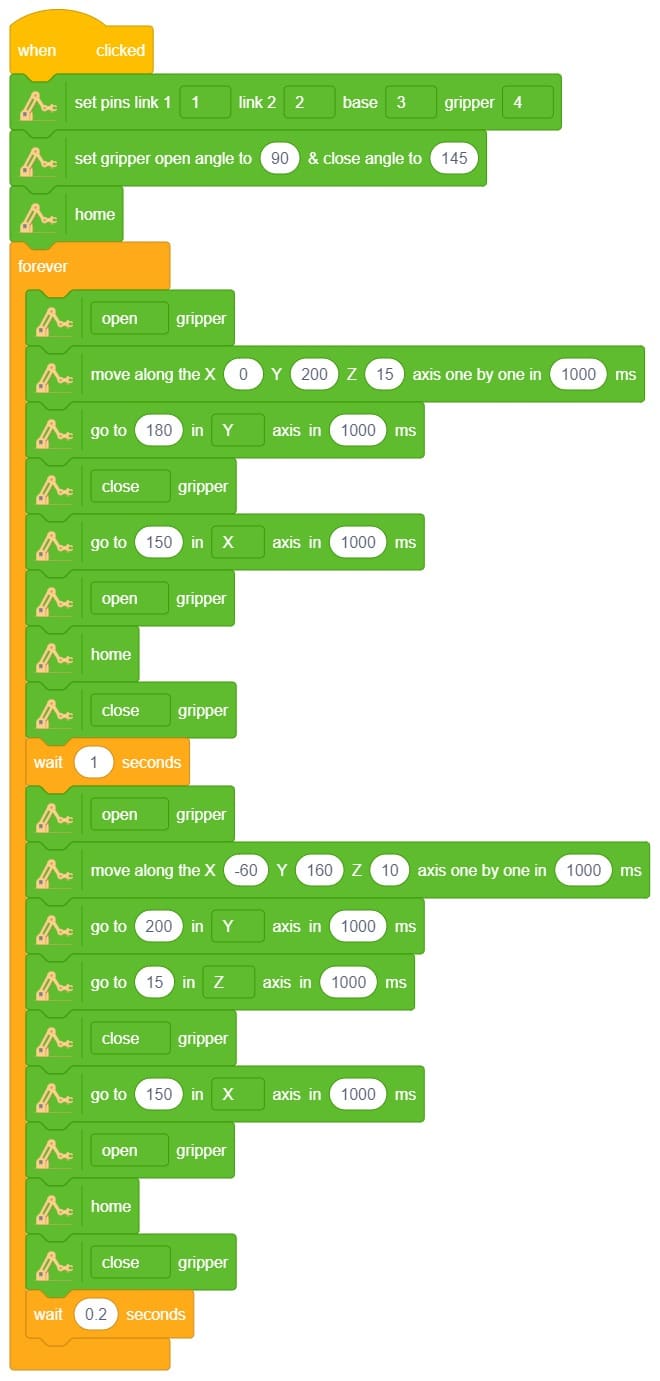
- Open the Pictoblox application. Select the block-based environment.
- Click on the robotic arm extension available in the left corner.
- Start by setting up pins for four different connections using set pin lis.
- Define the open angle () and close angle () for the gripper.
- Establish the home position for the gripper. Use a forever loop to continuously run the loop by dragging and dropping it.
- Then open () gripper. Then move position of robotic arm. Change the x, y, and z axes individually at specific intervals.
- Utilize the move along the X(), Y(), and Z() axis in ms block to move the arm.
- the gripper. Use the goto() block to change the arm’s position along a specific axis.
- Open the gripper. Return the arm to the home position. Close the gripper.
- Adjust the position of the robotic arm by moving it along the X(), Y(), and Z() axes one by one using move along the X() Y() Z() axis one by one in ()ms.
- We use go to () in () axis in () ms block to change position of arm.
- Open the gripper then return home() position then close the gripper().
- Add interval of 0.2 second.
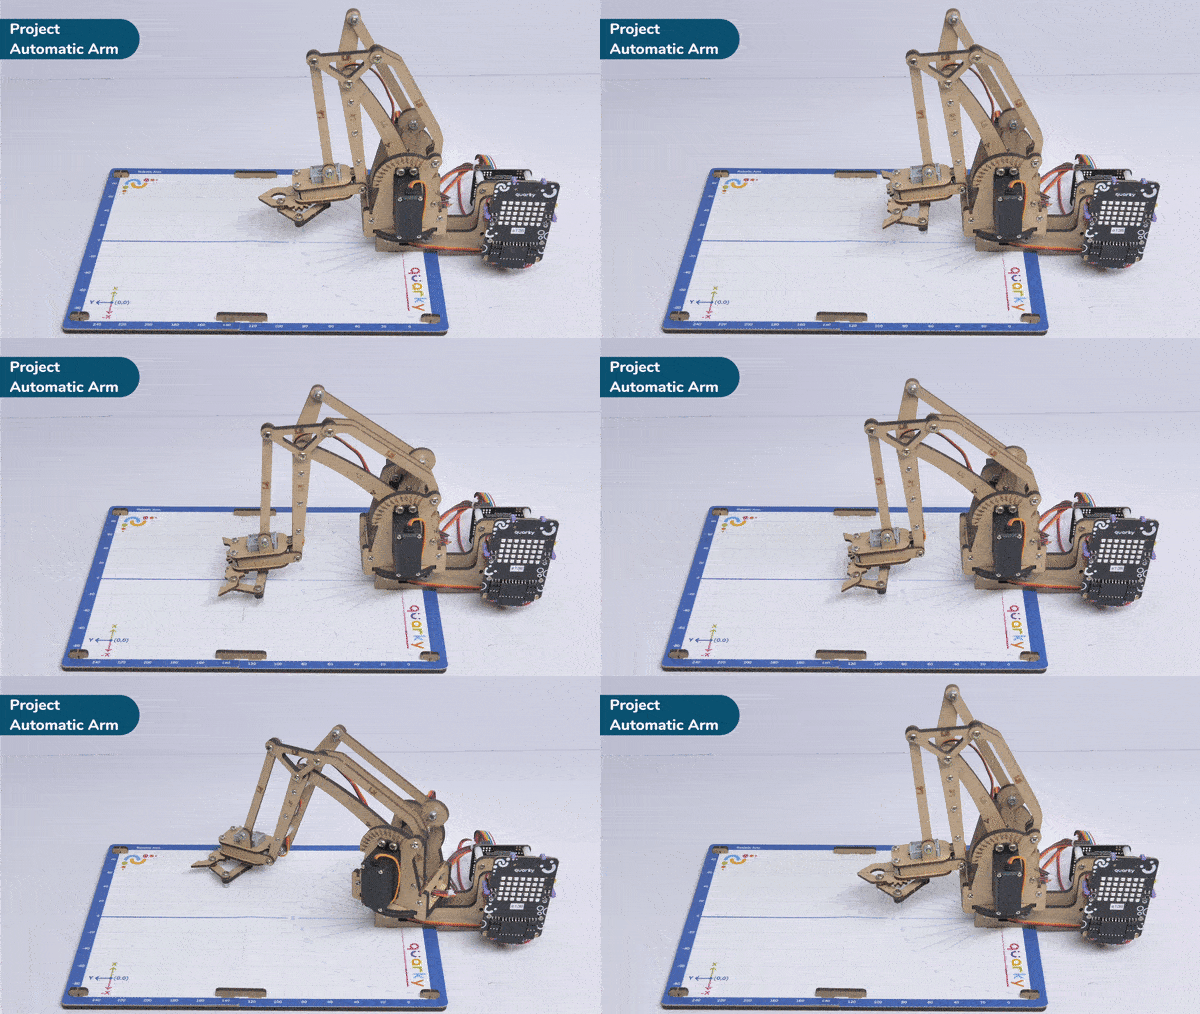
- Press Run to run the code.
Output


