


Introduction
A gesture-controlled robotic arm is an innovative and interactive system that allows users to control the movements and actions of a robotic arm using hand gestures. Instead of relying on traditional input methods such as buttons or joysticks, this technology utilizes computer vision or sensor-based techniques to recognize and interpret specific hand movements or gestures.
The purpose of a gesture-controlled robotic arm is to provide a more intuitive and natural way of interacting with automatic systems. By mimicking human arm movements, users can command the robotic arm to perform various tasks, such as picking and placing objects, manipulating tools, or performing precise movements in a specific direction.
Gesture-controlled robotic arms find applications in various fields, including industrial automation, medical assistance, prosthetics, and virtual reality. They offer advantages such as enhanced dexterity, improved human-robot interaction, and increased accessibility for individuals with limited mobility.
Hand Gesture Classifier Workflow
Follow the steps below:
- Open PictoBlox and create a new file.

- You can click on “Machine Learning Environment” to open it.
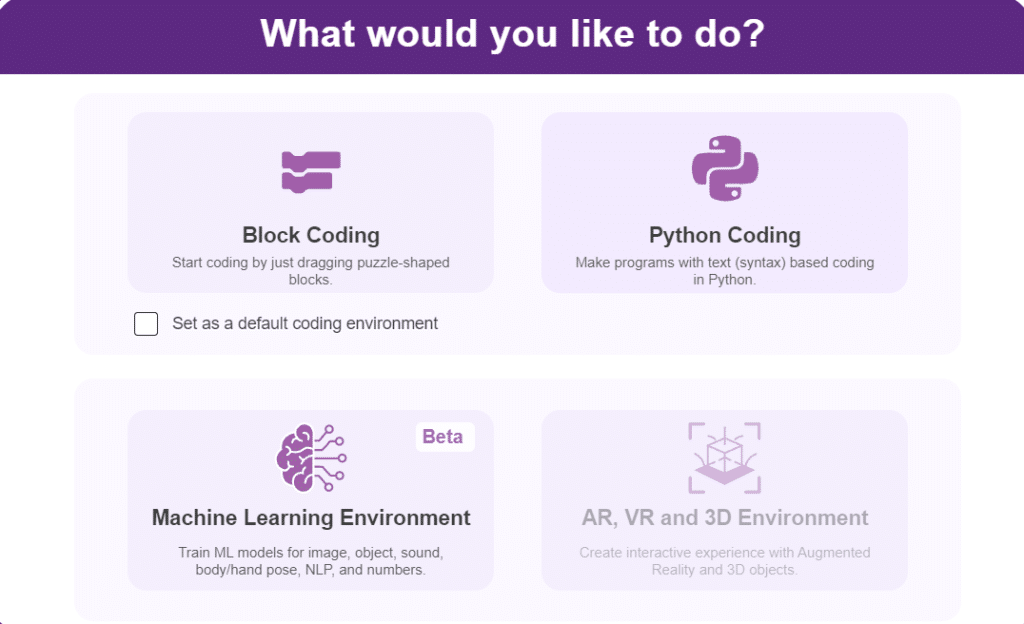
- Click on “Create New Project“.
- A window will open. Type in a project name of your choice and select the “Hand Gesture Classifier” extension. Click the “Create Project” button to open the Hand Pose Classifier window.
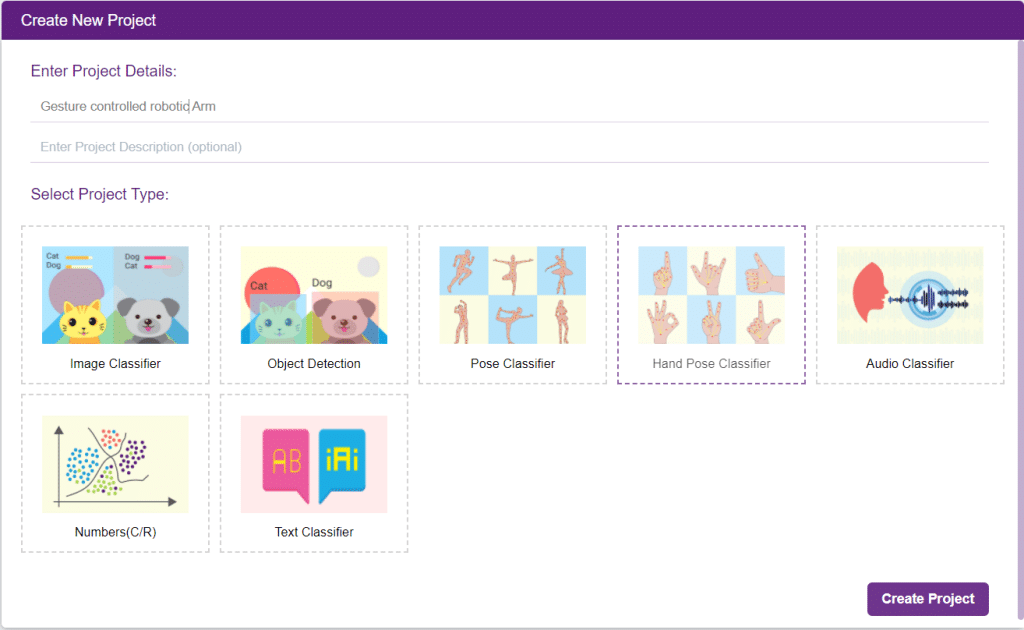
- You shall see the Classifier workflow with two classes already made for you. Your environment is all set. Now it’s time to upload the data.

Class in Hand Gesture Classifier
There are 2 things that you have to provide in a class:
- Class Name: It’s the name to which the class will be referred as.
- Hand Pose Data: This data can either be taken from the webcam or by uploading from local storage.


Adding Data to Class
You can perform the following operations to manipulate the data into a class.
- Naming the Class: You can rename the class by clicking on the edit button.
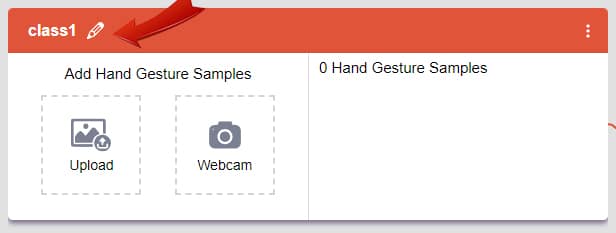
- Adding Data to the Class: You can add the data using the Webcam or by Uploading the files from the local folder.
- Webcam:
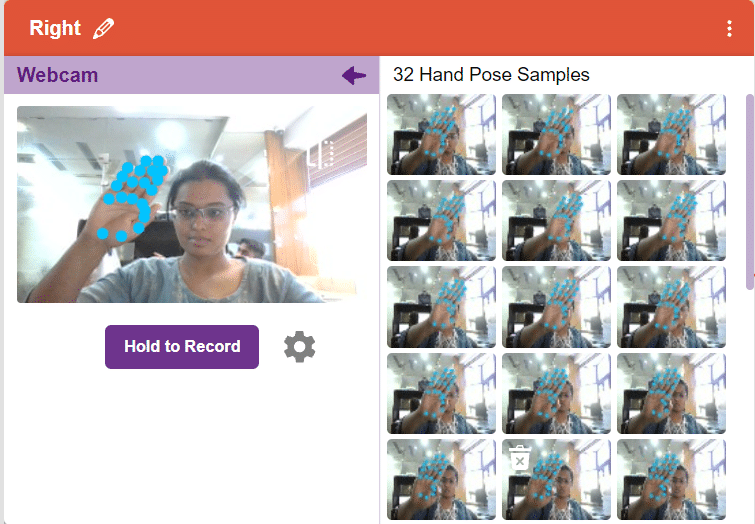
- Webcam:
Training the Model
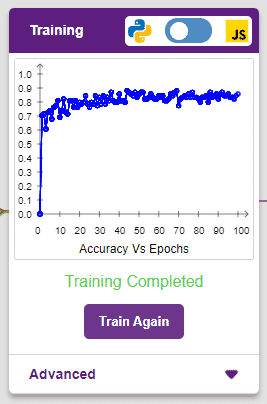
After data is added, it’s fit to be used in model training. In order to do this, we have to train the model. By training the model, we extract meaningful information from the hand pose, and that in turn updates the weights. Once these weights are saved, we can use our model to make predictions on data previously unseen.

The accuracy of the model should increase over time. The x-axis of the graph shows the epochs, and the y-axis represents the accuracy at the corresponding epoch. Remember, the higher the reading in the accuracy graph, the better the model. The range of accuracy is 0 to 1.
Testing the Model

To test the model, simply enter the input values in the “Testing” panel and click on the “Predict” button.
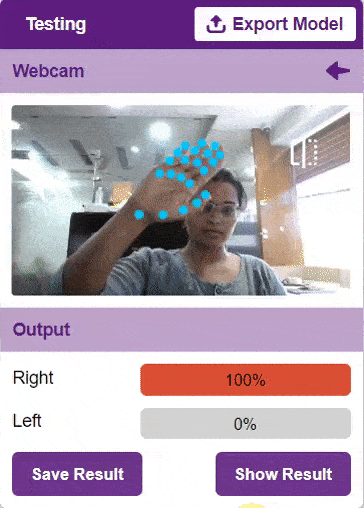
The model will return the probability of the input belonging to the classes.
Export in Python Coding
Click on the “Export Model” button on the top right of the Testing box, and PictoBlox will load your model into the Python Coding Environment if you have opened the ML Environment in Python Coding.
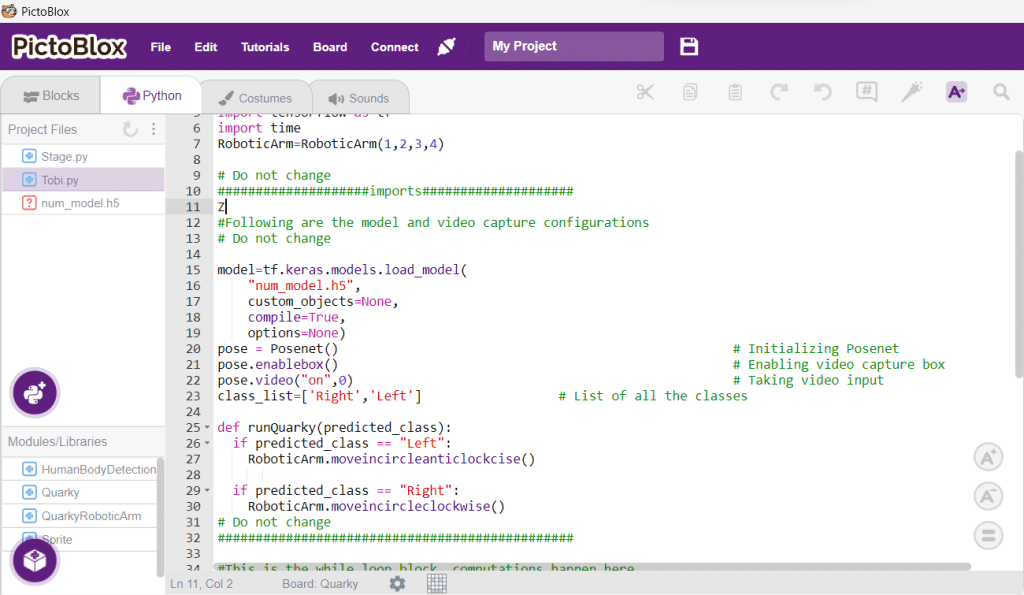
Code
The following code appears in the Python Editor of the selected sprite.
####################imports####################
# Do not change

import numpy as np
import tensorflow as tf
import time
RoboticArm=RoboticArm(1,2,3,4)

# Do not change
####################imports####################

#Following are the model and video capture configurations
# Do not change

model=tf.keras.models.load_model(
    "num_model.h5",
    custom_objects=None,
    compile=True,
    options=None)
pose = Posenet()                                                    # Initializing Posenet
pose.enablebox()                                                    # Enabling video capture box
pose.video("on",0)                                                  # Taking video input
class_list=['Right','Left']                  # List of all the classes

def runQuarky(predicted_class):
  if predicted_class == "Left":
    RoboticArm.moveincircleanticlockcise()

  if predicted_class == "Right":
    RoboticArm.moveincircleclockwise()
      # Do not change
###############################################

#This is the while loop block, computations happen here
# Do not change

while True:
  pose.analysehand()                                             # Using Posenet to analyse hand pose
  coordinate_xy=[]

    # for loop to iterate through 21 points of recognition
  for i in range(21):
    if(pose.gethandposition(1,i,0)!="NULL"  or pose.gethandposition(2,i,0)!="NULL"):
      coordinate_xy.append(int(240+float(pose.gethandposition(1,i,0))))
      coordinate_xy.append(int(180-float(pose.gethandposition(2,i,0))))
    else:
      coordinate_xy.append(0)
      coordinate_xy.append(0)

  coordinate_xy_tensor = tf.expand_dims(coordinate_xy, 0)        # Expanding the dimension of the coordinate list
  predict=model.predict(coordinate_xy_tensor)                    # Making an initial prediction using the model
  predict_index=np.argmax(predict[0], axis=0)                    # Generating index out of the prediction
  predicted_class=class_list[predict_index]                      # Tallying the index with class list
  print(predicted_class)
  runQuarky(predicted_class)
  # Do not change
Logic
- When the identified class is right, the robotic arm will move clockwise.
- When the identified class is left, the robotic arm will move counterclockwise.
def runQuarky(predicted_class):
  if predicted_class == "Left":
    RoboticArm.moveincircleanticlockcise()

  if predicted_class == "Right":
    RoboticArm.moveincircleclockwise()
Output
