The Four Wheel Drive Robot mainly focuses on how these robots differ from simpler designs and teaches how to control their movements. Through hands-on activities, learners will build and manually operate their own four-wheel-drive robots, gaining insights into their mechanics and applications.
Motor Controls
The Four Wheel Drive Robot has two controls – Left Motor and Right Motor. Since both the motors on either side are connected, they both move in a similar way.
Also, each motor has two parameters:
- Direction – Forward or Backward
- Speed – 0 to 100.
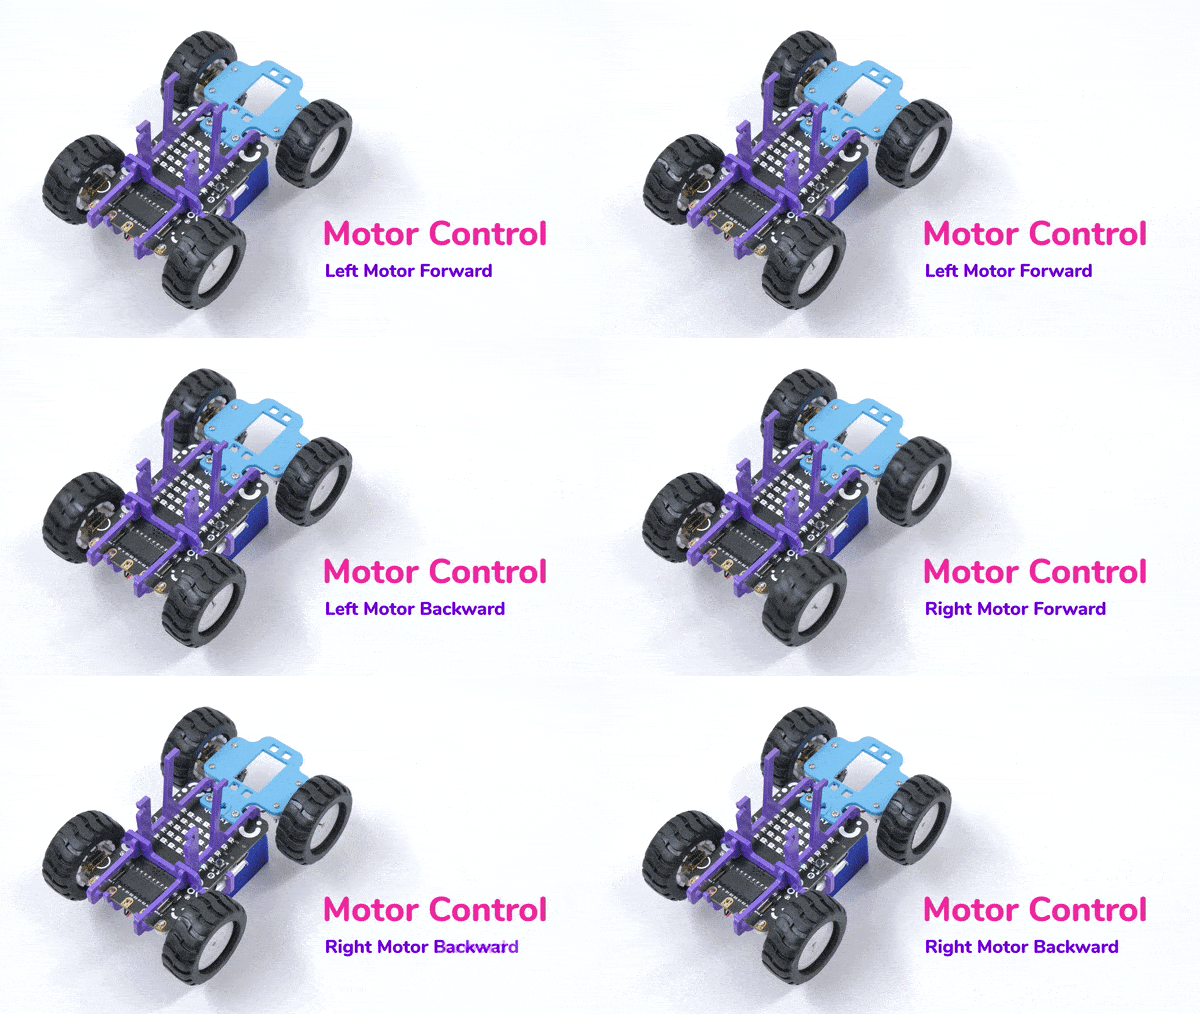
For controlling this robot we will be using the same blocks from the Robot palette.
Robot Motion
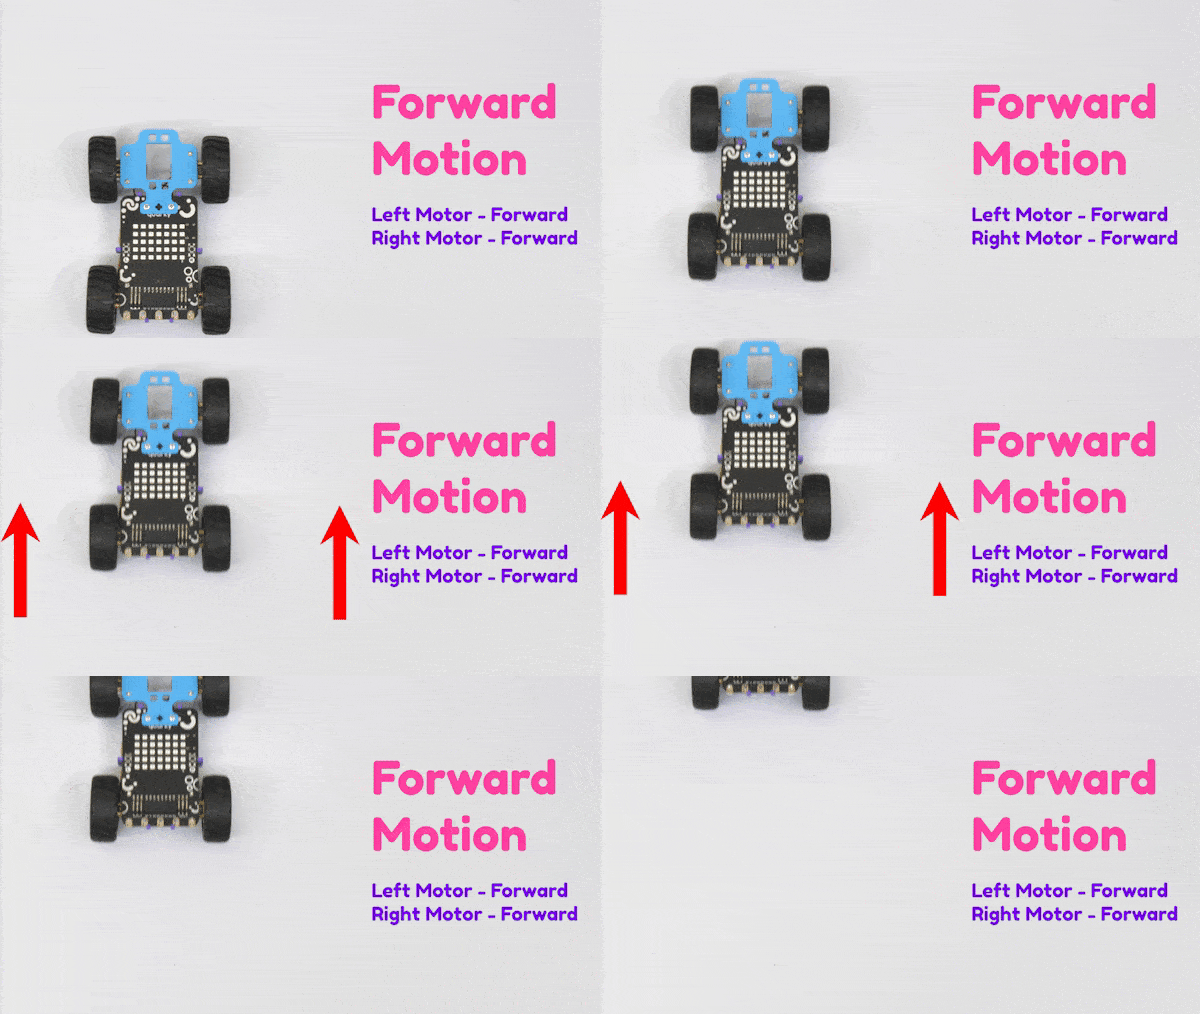
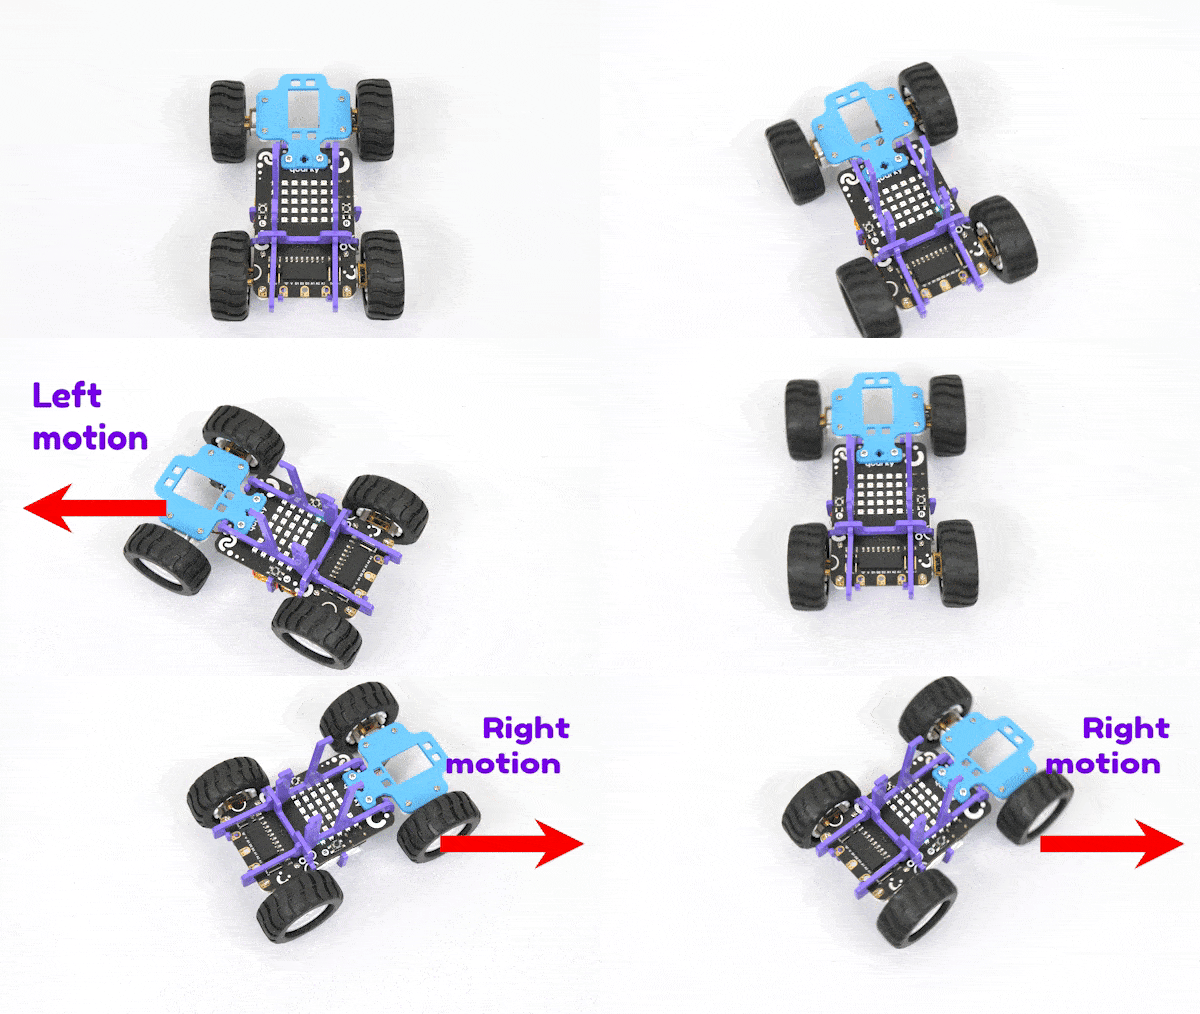
Following are the combinations of the Left Motor and Right Motor directions to make the robot perform different actions:
- Forward
- Left Right Motion
- Backward Motion
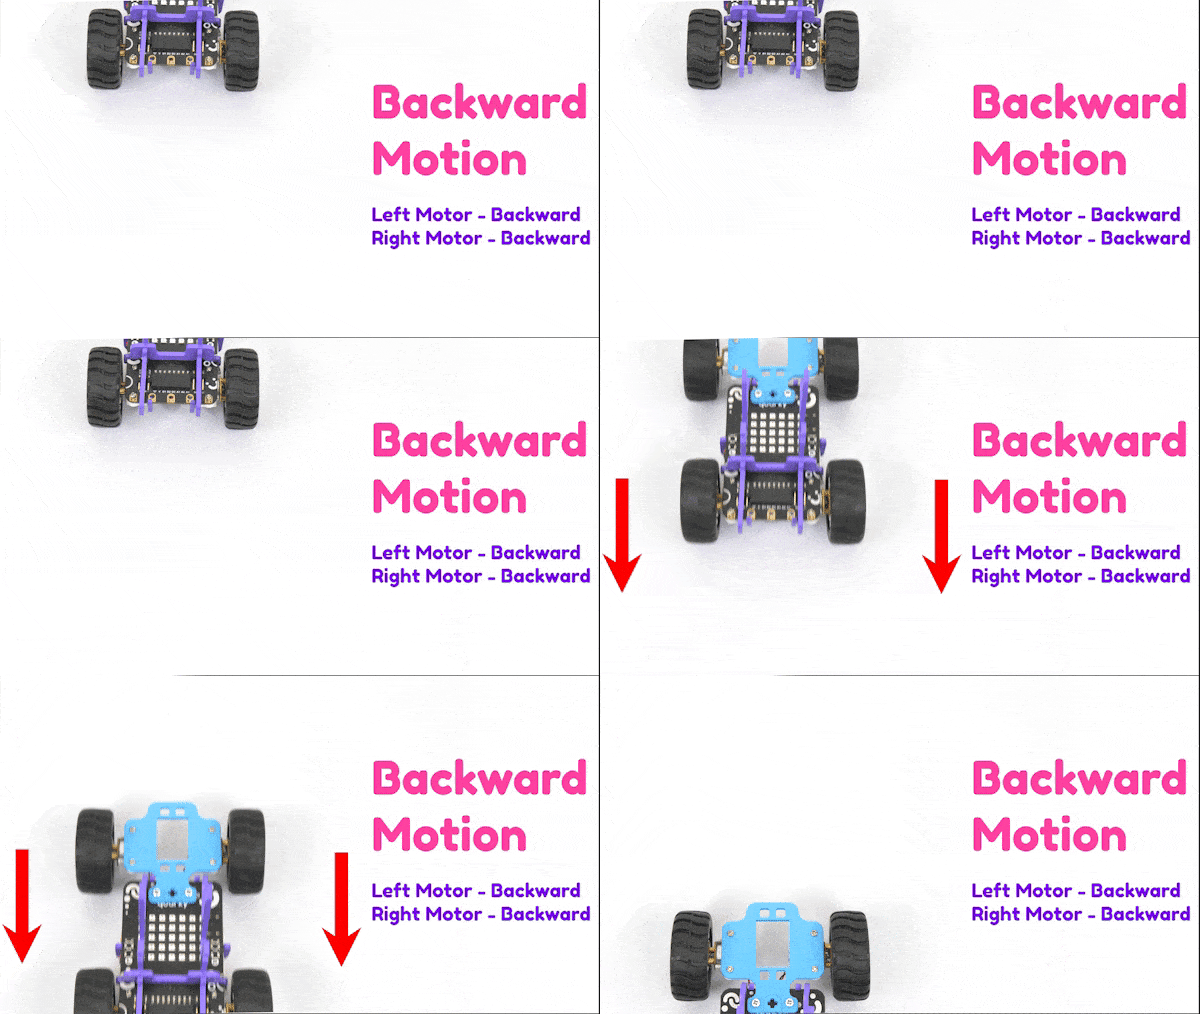
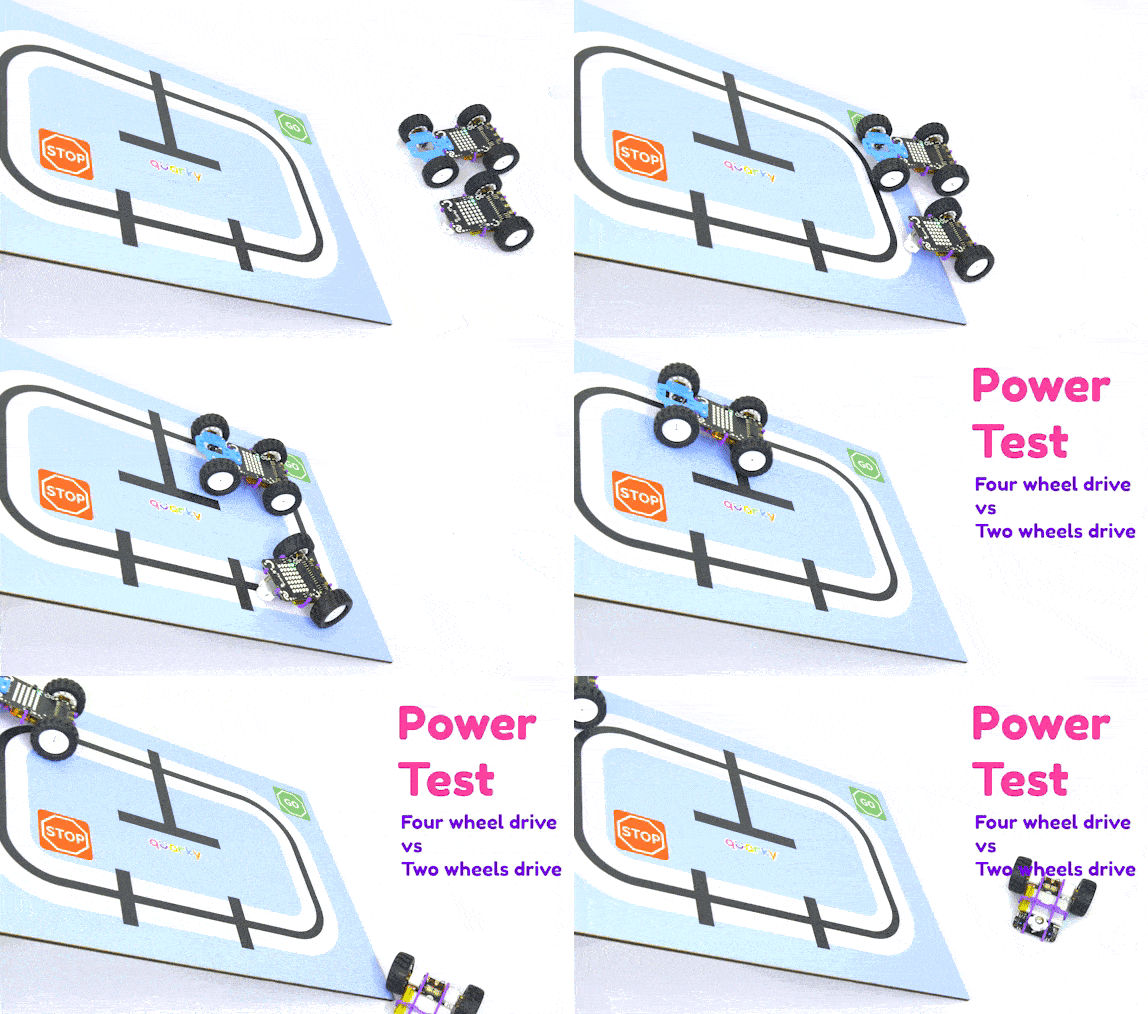
Note: The four-wheel-drive robot turning motion is not smooth and that’s the only drawback of the robot. But the four-wheel-drive robot is very powerful and stable.
Assembling the Robot
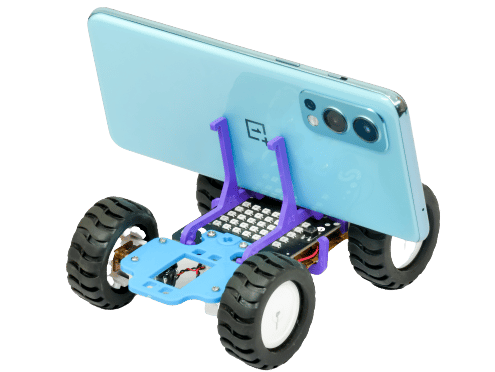
First things first, let’s see how to assemble the vertical steering robot before moving on to the activity.
We are starting with the Horizontal Robot.
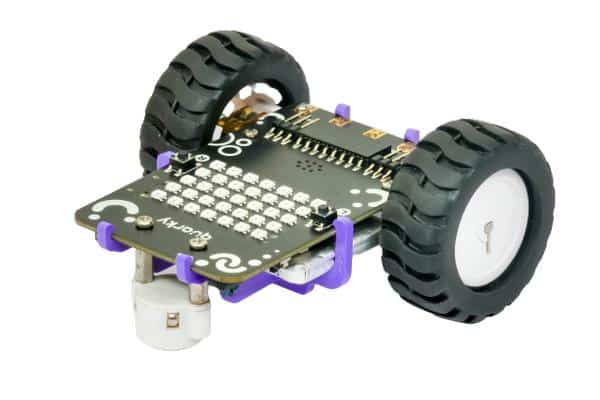
- First, detach the Castor Wheel from the Quarky Robot by removing the Bolt.
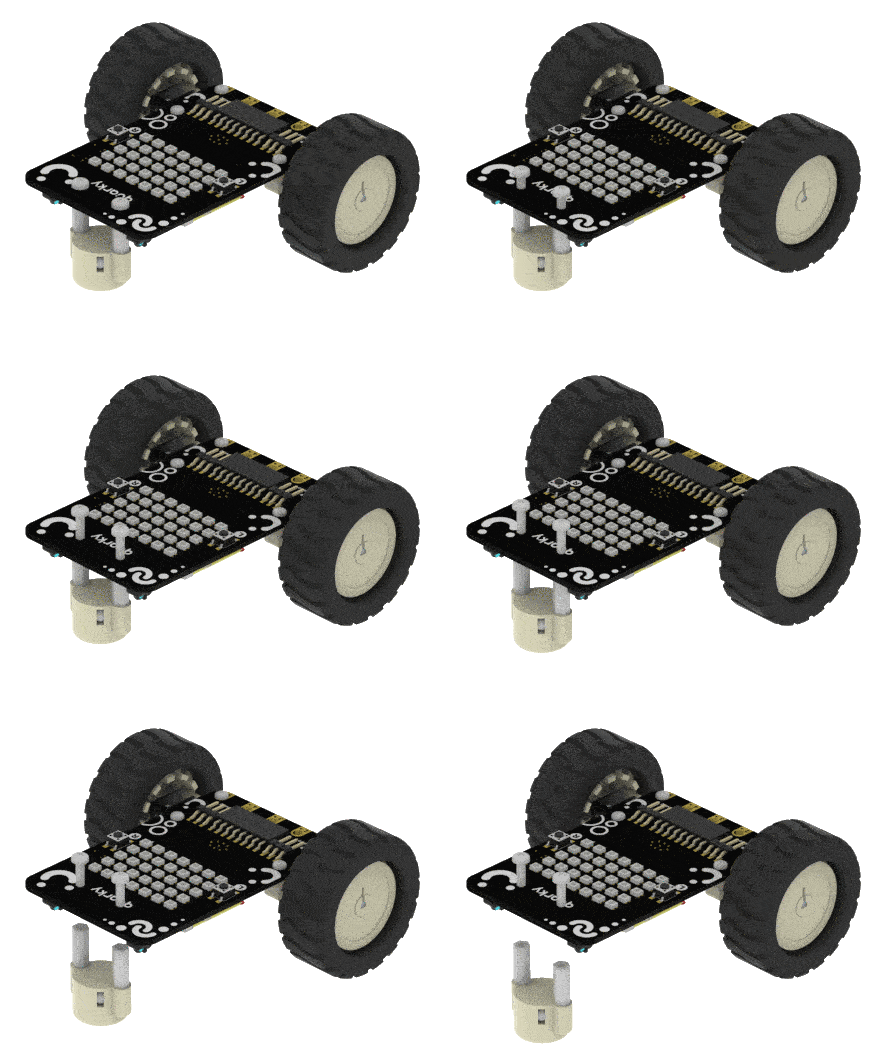
- Place the Motors on the top of the B1 Plate using the Motor Mount Bracket. Fasten it using M2 Bolt and M2 Nut that you get with Motors. Ensure the Motor is appropriately mounted.
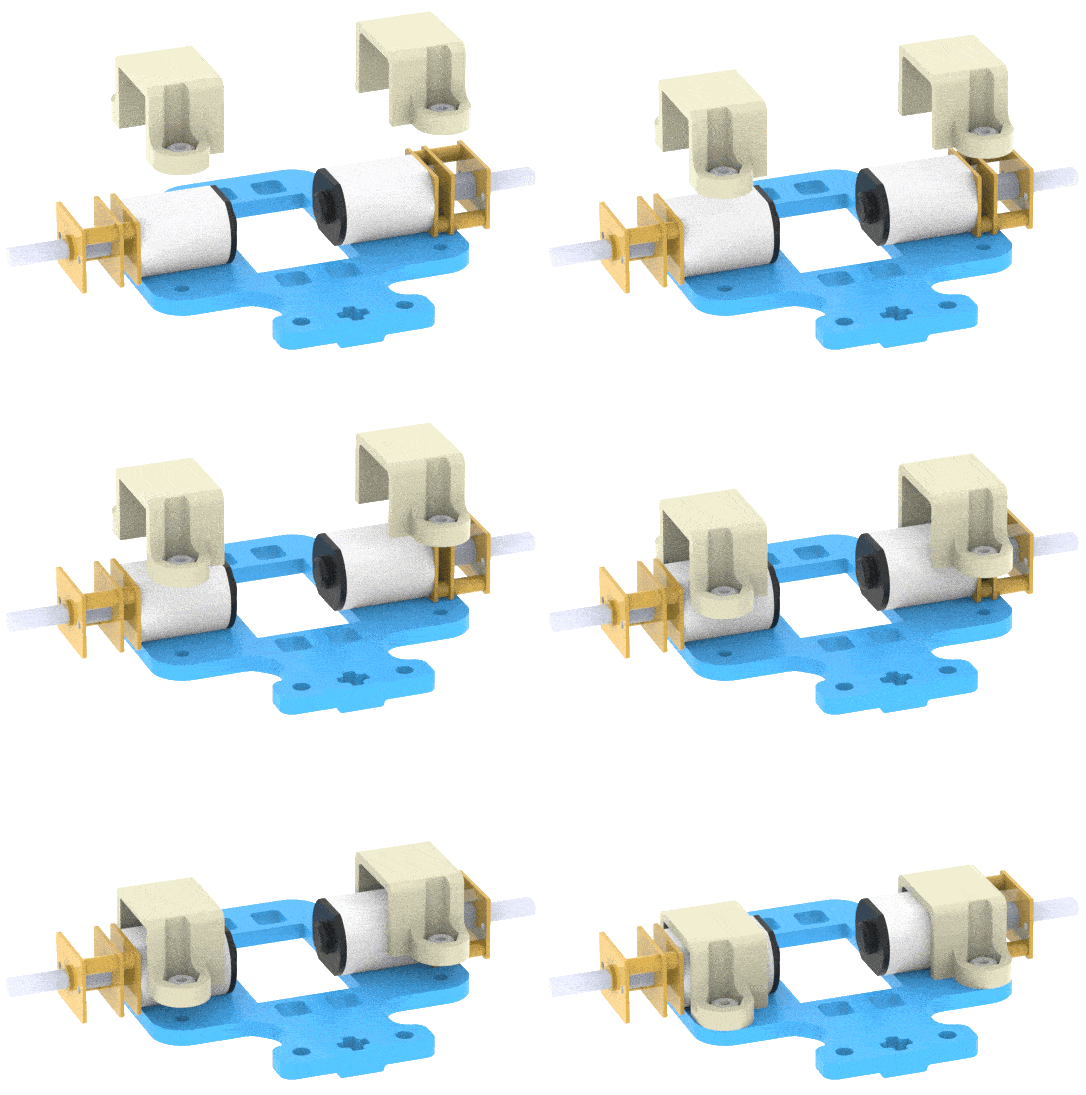
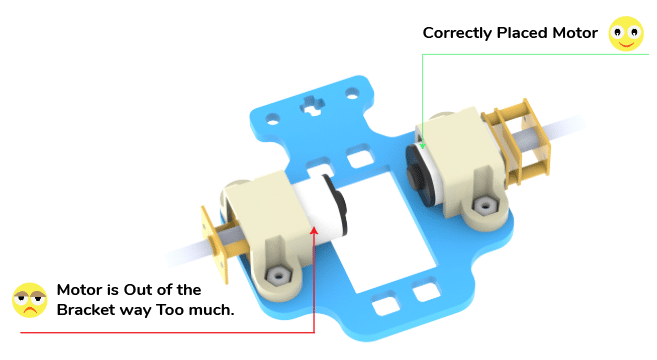 Note: Make sure the B1 is written on the opposite side of the Motor.
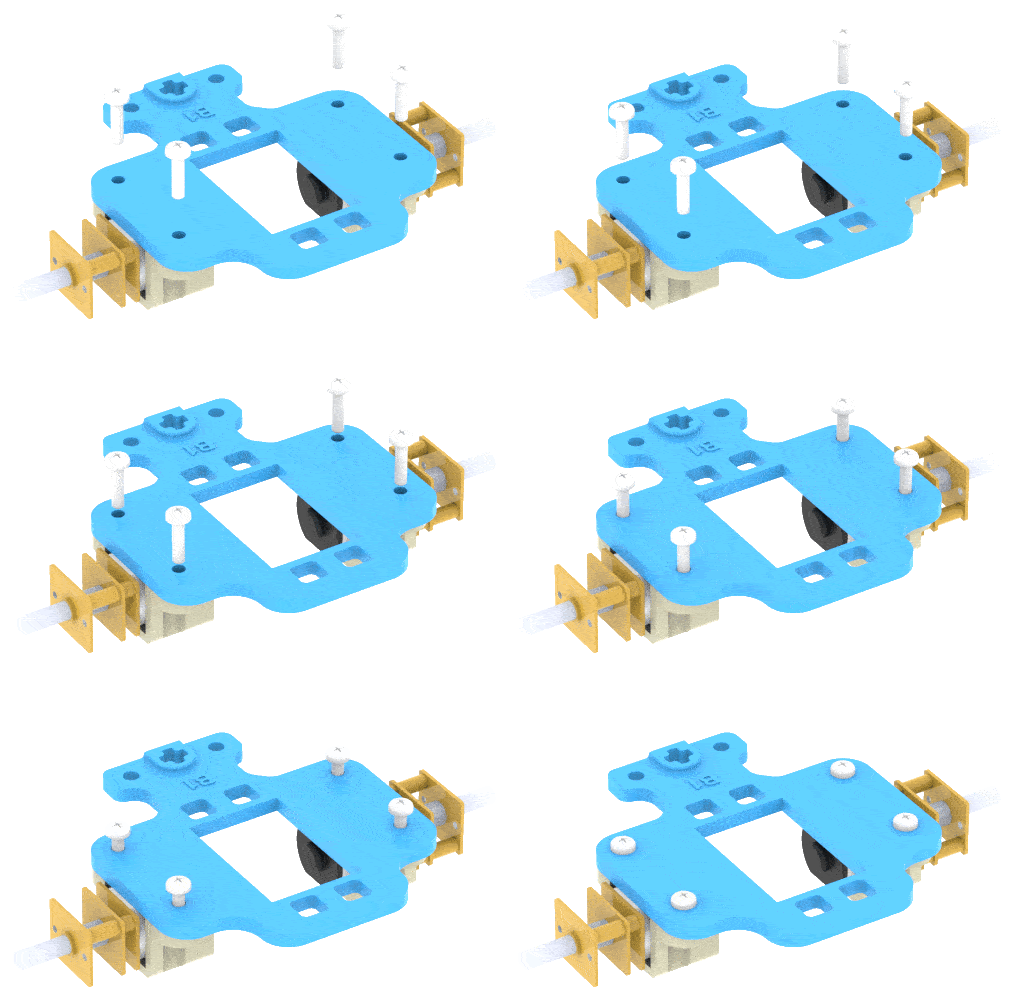
- Now attach the Wheels to the Motors.
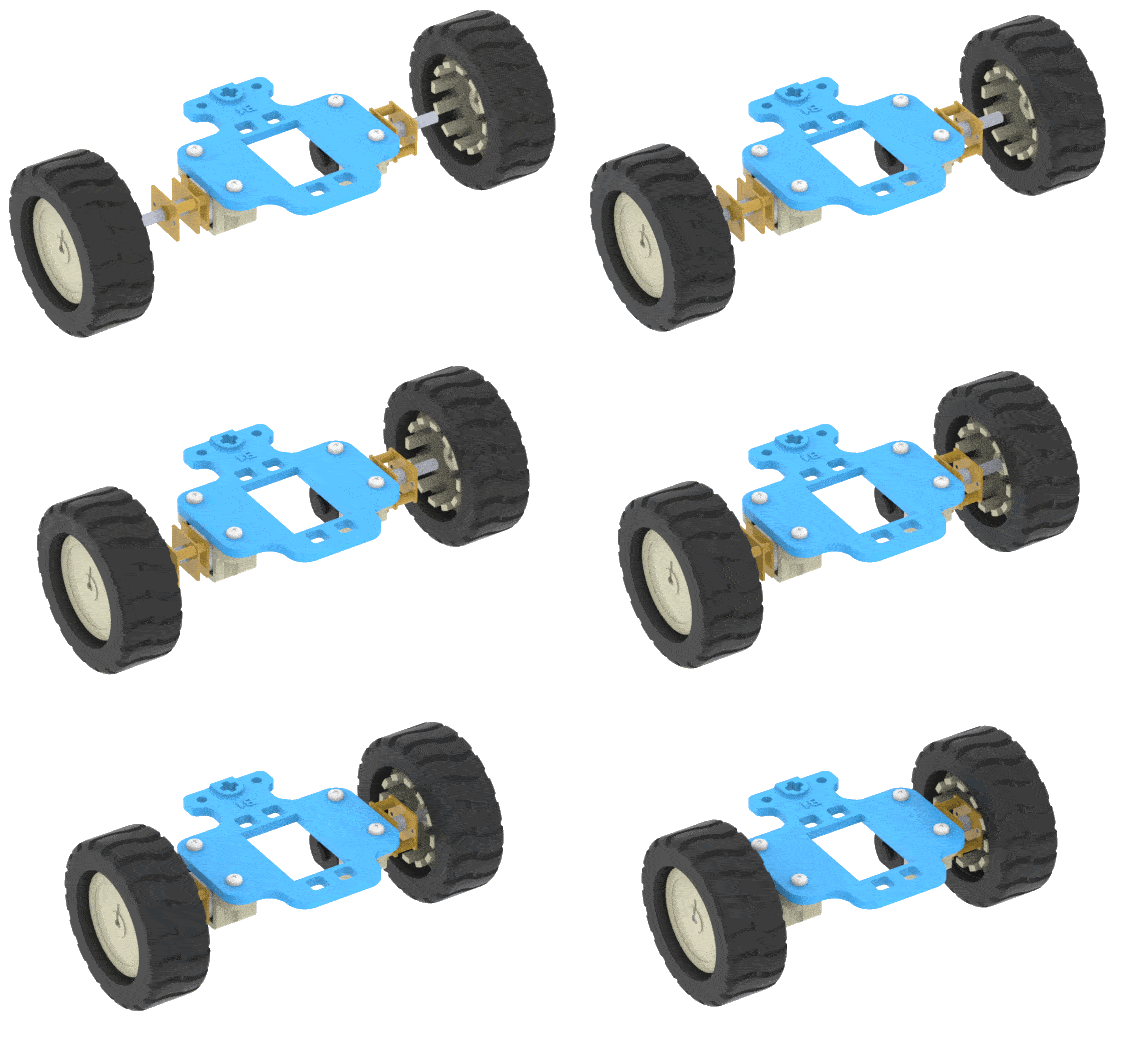
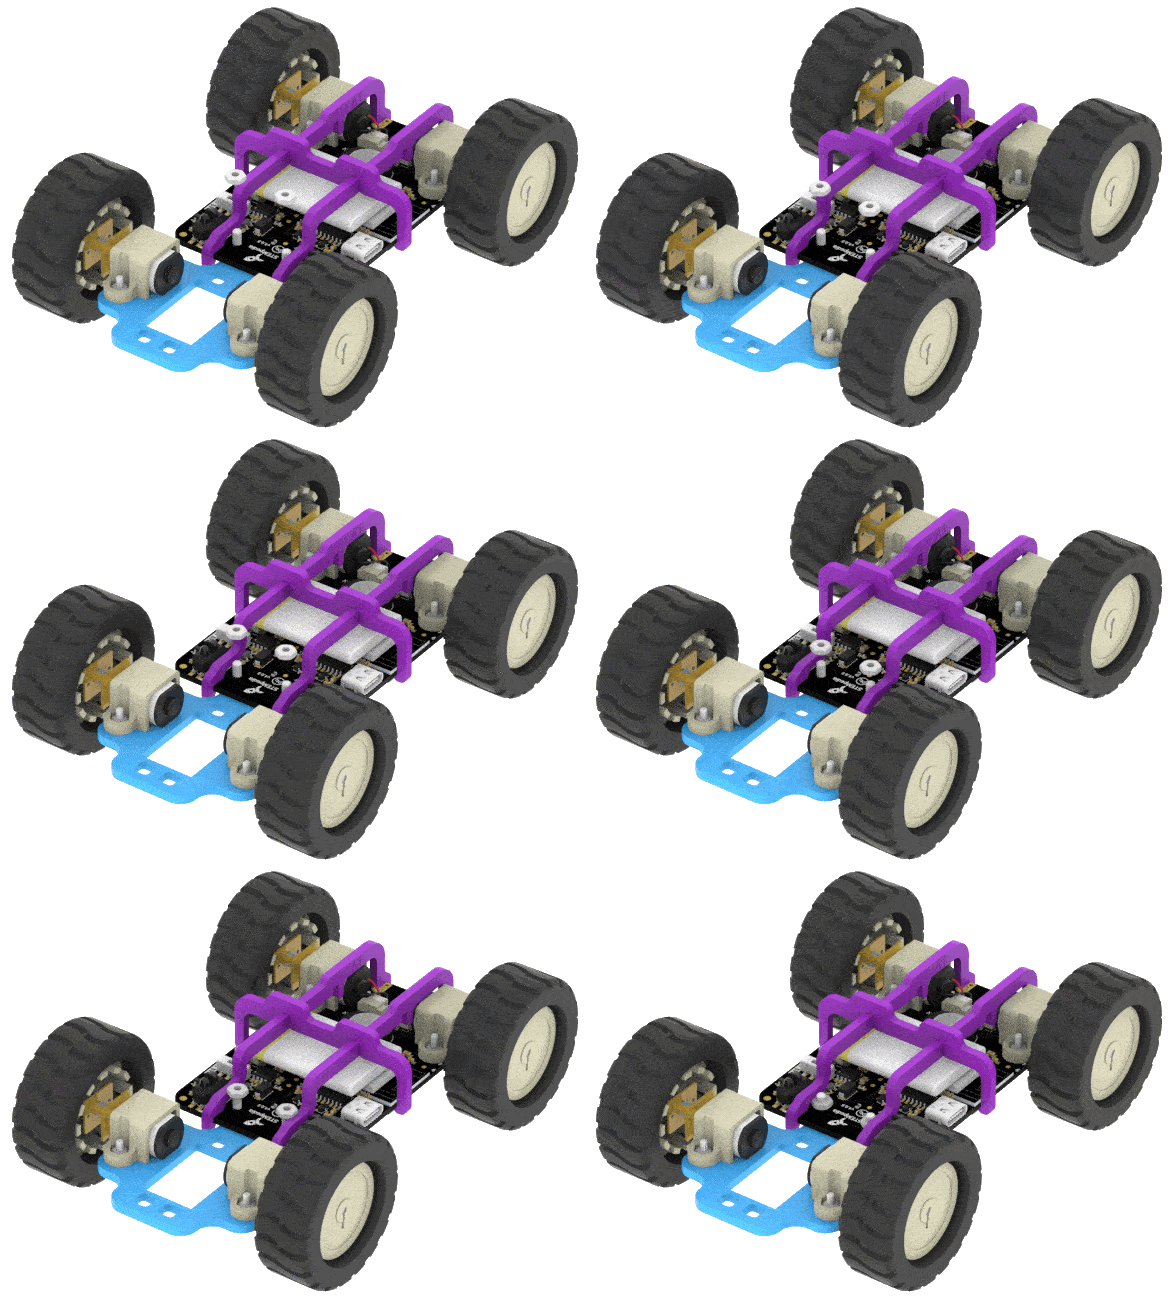
- After that, attach the Wheel sub-assembly (with wheels) in front of the Robot. Fasten it using M2.5 Nuts and Bolts.

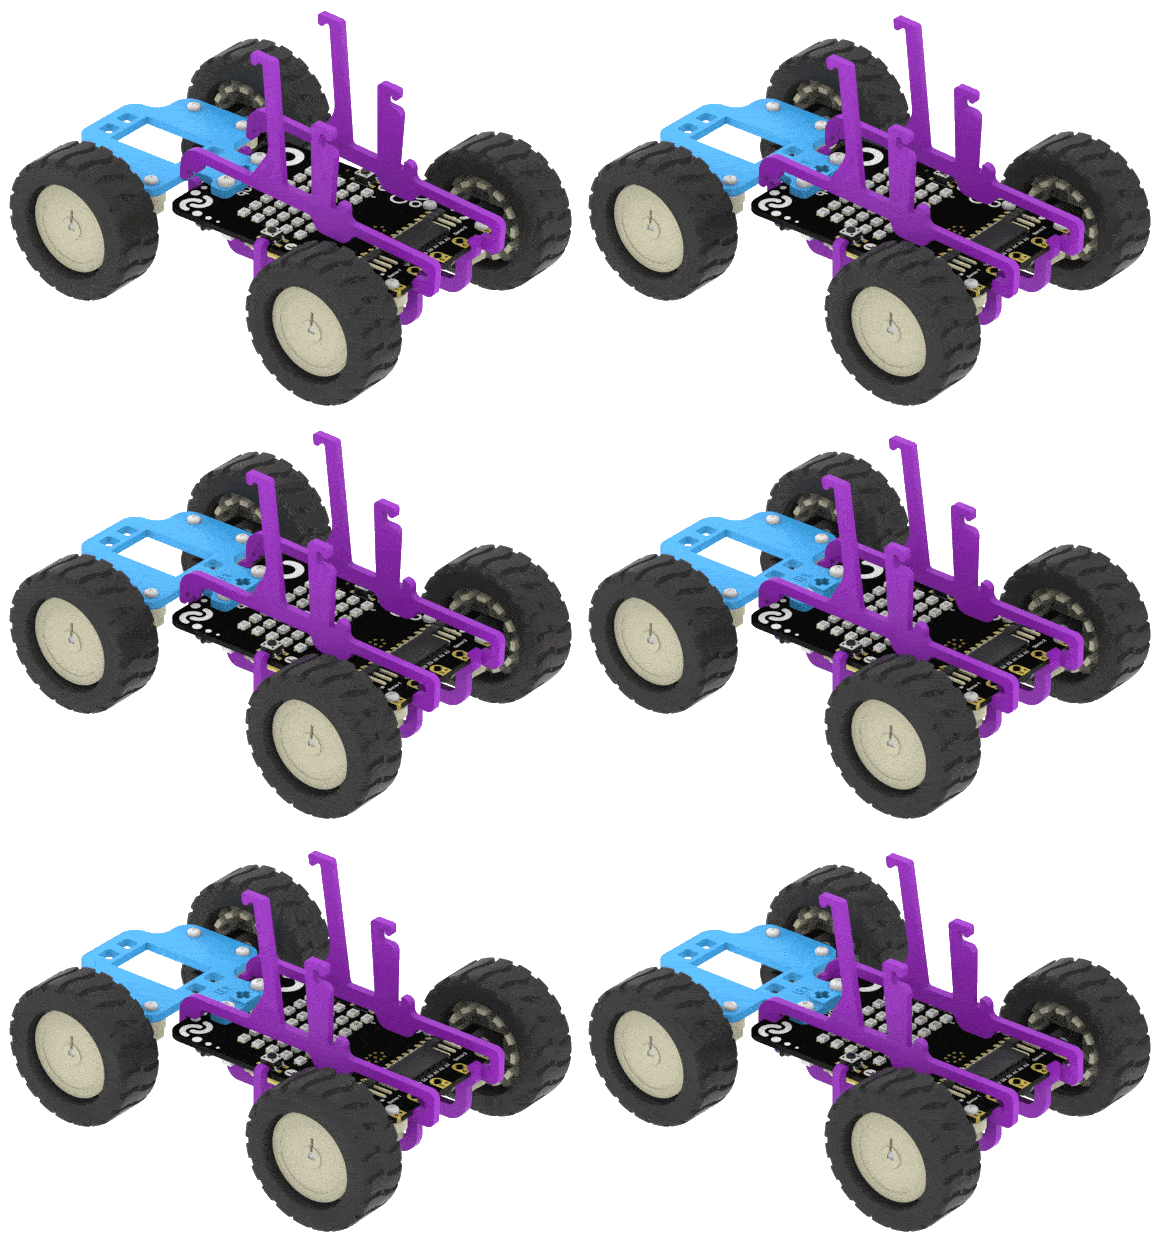
- To place a phone on the robot, mount two A3 Links on the Robot and snap it gently.
- Lock the A3 Links using the A4 Link.
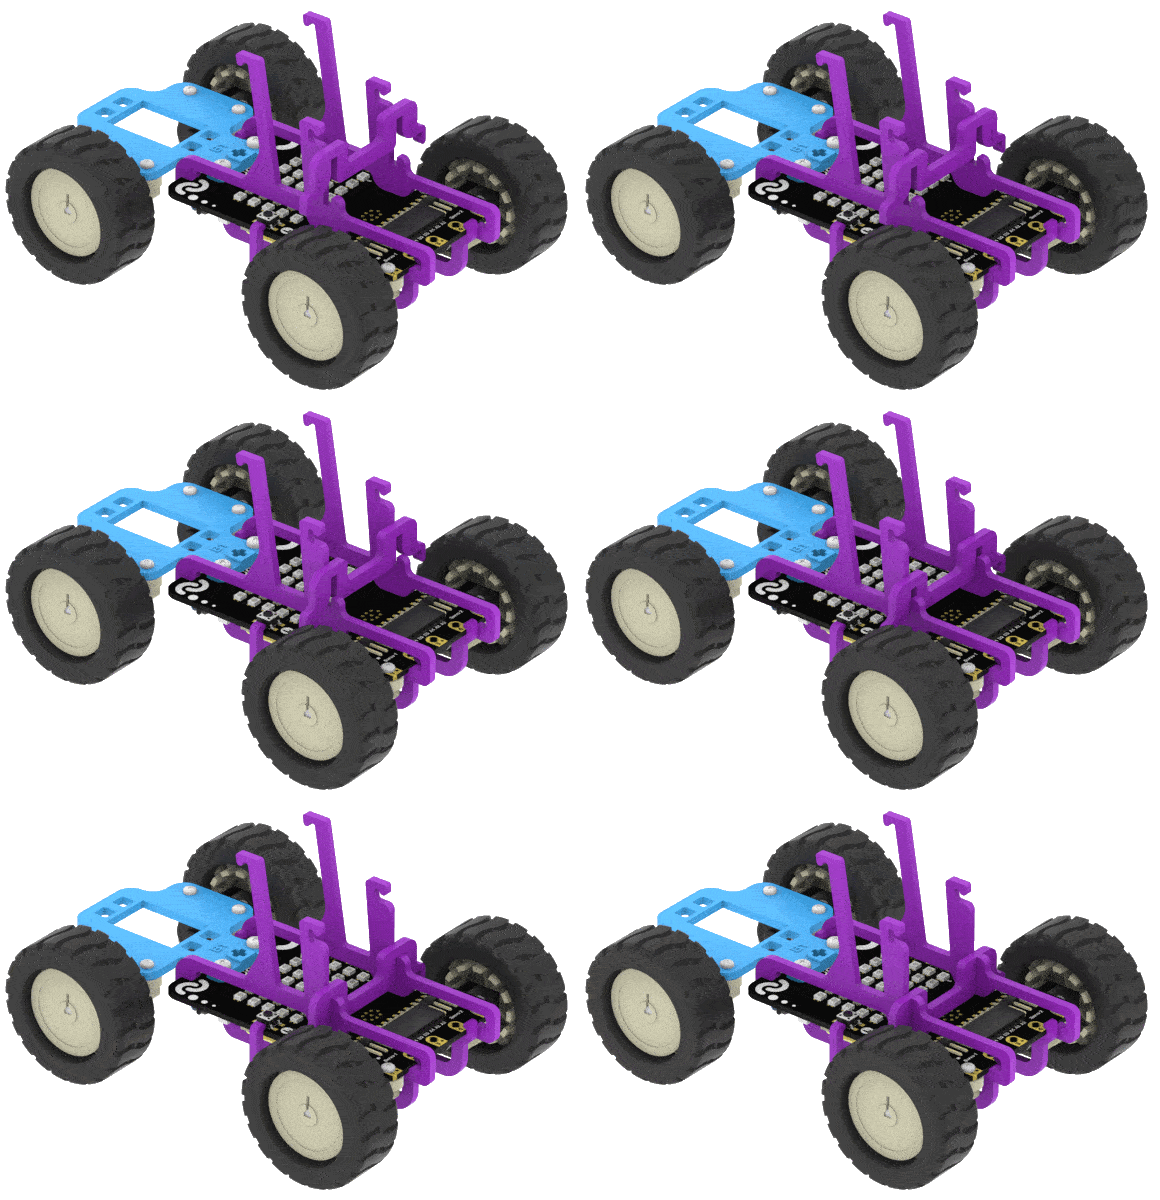
The mechanical assembly is complete.
Note: Mobile holder assembly (Steps 5 & 6) is optional.
Motor Connection
The motor connection is similar to the Steering Robot.

Connect the two left motors and then connect the wire to the Board. Do the same for the right motors. Connections are shown in the figure.
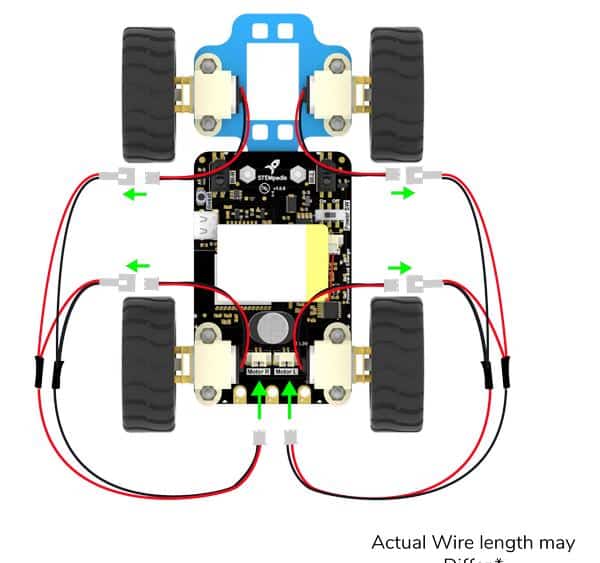
Our robot is ready.

Activity: Manually Controlled Robot
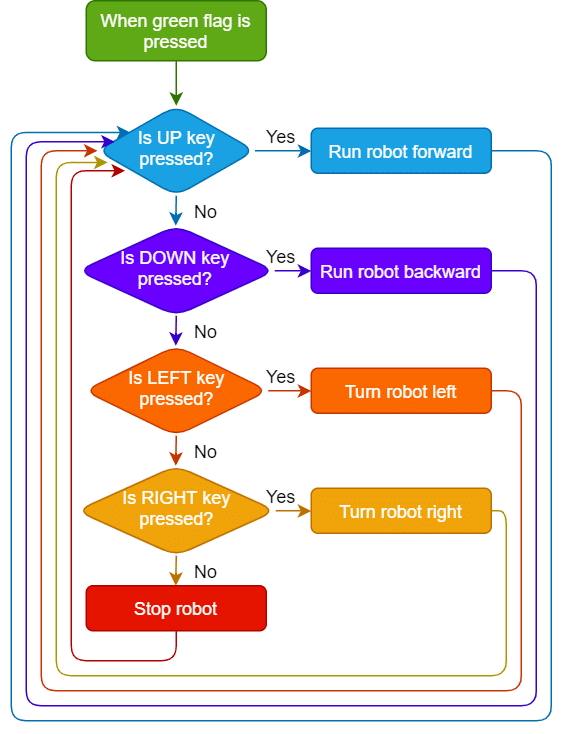
We’re going to control Quarky wirelessly using the arrow keys of the keyboard of your desktop/in the PictoBlox mobile app.
Here’s how:
- Using the up arrow key, we will make Quarky move forward.
- Using the down arrow key, we will make it move backward.
- Using the right arrow key, it will move right.
- Using the left arrow key, it will move left.
- When none of the arrow keys is pressed, Quarky should stop moving.
Now, let’s put our plan into action!
Coding
The code is similar to the Wireless Controlled Robot. Make the following script in Block coding environment of PictoBlox:
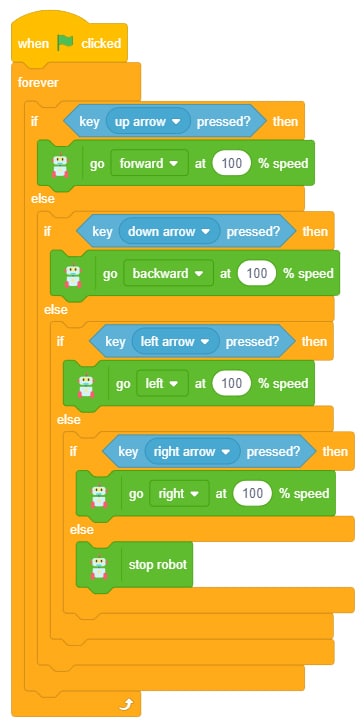
Now, run the script by clicking the green flag. Have fun playing with Quarky! 🙂

Conclusion
In conclusion, we have successfully assembled and programmed the Quarky Four-Wheel-Drive Robot. This comprehensive hands-on experience with four-wheel-drive robots equips learners with the skills to build and control these robots while understanding their mechanical advantages and practical applications. This knowledge lays a strong foundation for exploring advanced robotics and problem-solving in real-world scenarios.

