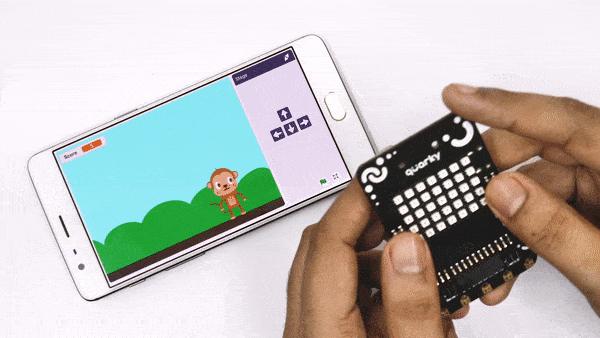
Introduction
In cases where your motors are moving opposite to the intended direction (motors move forward when commanded to move backward), your push buttons are unresponsive, or you want to change your device’s Bluetooth name, etc. You can use Quarky Settings to correct these issues.
Opening Quarky Setting Popups
Follow the process to open the Quarky Setting:
- Make sure you have PictoBlox installed in Windows, macOS, or Linux.
- Open the PictoBlox software by clicking on the PictoBlox icon.
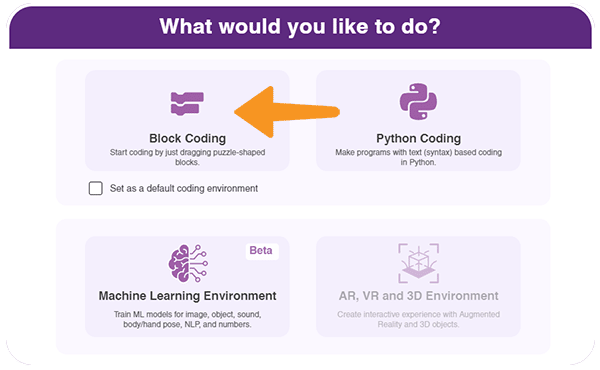
- Select the coding environment as Block Coding.
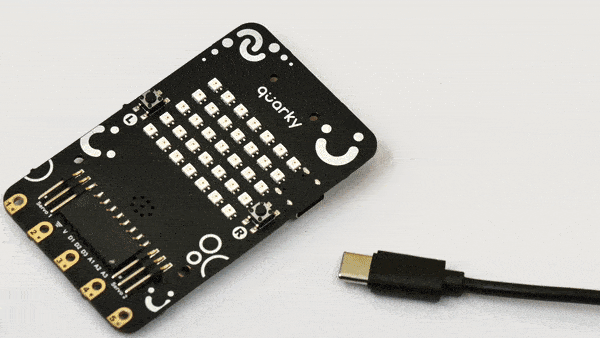
- Connect your Quarky to your computer using a USB cable.
- Then, click the Board button from the toolbar, and select board: Quarky.
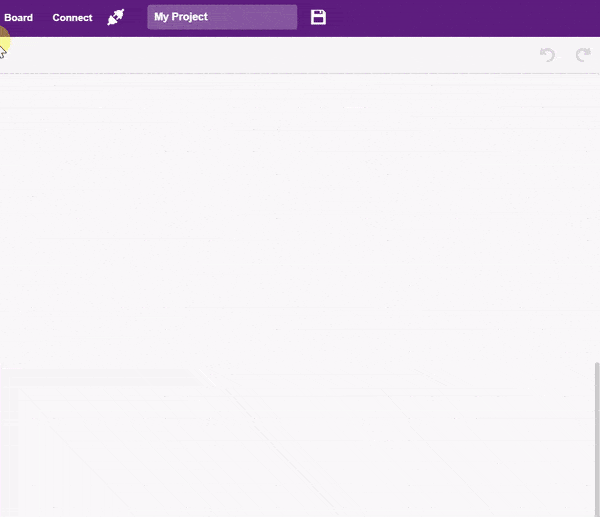
- Select the appropriate serial port from Serial Ports and click connect. Quarky is now connected to PictoBlox.
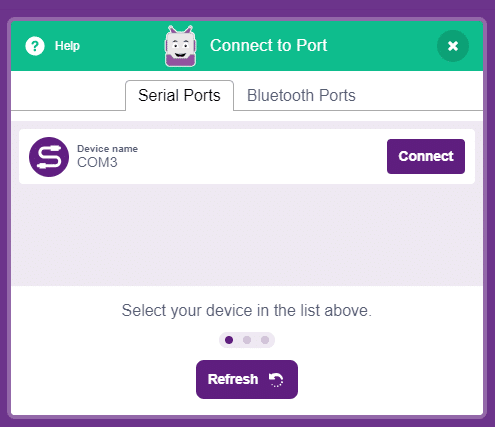
- Click on the setting button available on the Quarky Extension.

- A pop-up will open with the heading – Quarky Settings.

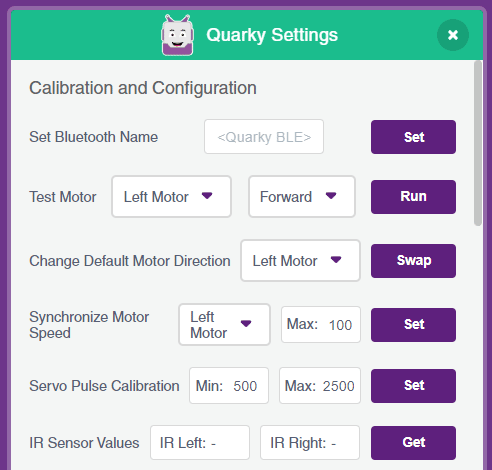
Motor Calibration
The motor calibration helps you to configure the motor direction, synchronize motor speed and test the motor.
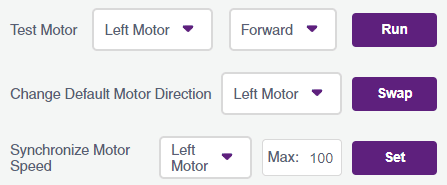
- Test Motor: The following option makes the motors of the quarky perform the selected options. This is useful to understand if the motor’s rotation direction is correct. There are two options and 1 action in it:
- Motor Selection: You have to select the appropriate motor you want to test. Options are – Left Motor, Right Motor, and Both Motors.
- Direction: You have to select the appropriate direction. Options are Forward and Backward.
Once selected, you need to click on Run. If the motor is running in the specified direction then it is correct, otherwise, you have to see the Change Default Motor Direction.
- Change Default Motor Direction: Now to change the direction of the incorrectly configured motor, you have to use this option. You need to select the motor in the dropdown and click the swap button. Now you can again run the motor using the Test Motor option and you will find the direction to be corrected.
- Synchronize Motor Speed: When you run both the motors in the forward direction, and observe that the robot is curving in one direction, then you have to use this option to change the speed of the motor.
- If the robot is turning left, then you have to select the right motor from the dropdown and edit the Max speed to 95. Click on Set and check if the robot is moving straight. If not change the Max number.
- If the robot is turning right, then you have to select the left motor from the dropdown and edit the Max speed to 95. Click on Set and check if the robot is moving straight. If not change the Max number.

Motor Troubleshooting
Servo Pulse Calibration
Servos are adjusted to the desired angle using PWM signals. The signals generally have 50Hz frequency and the angle of the servo is set by the width of the pulses, i.e. 0° corresponds to 500ms pulse width whereas the maximum angle (180° in our case) corresponds to around 2500ms pulse width.

These pulse width values are given just as an example and they may vary according to the servo used. So to calibrate your servo’s minimum and maximum position, you can set their values in the Min and Max field and click on the Set button. You can check the calibration result by running the set servo to [] angle from the robot palette.
Servo Troubleshooting
Touch Calibration
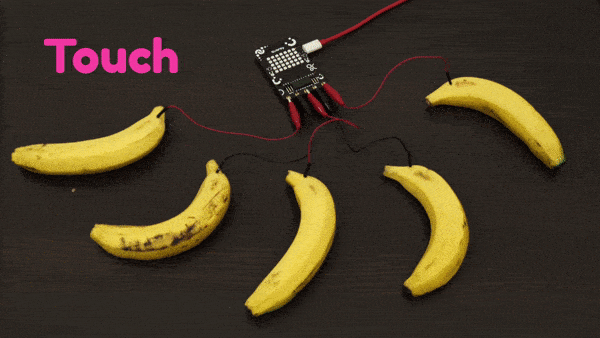
Quarky has five touch sensors.
For configuring the touch sensors, you have the following options:
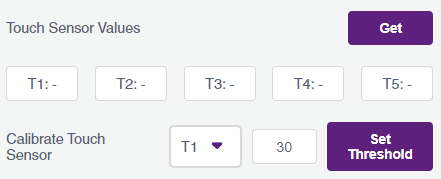
- Touch Sensor Values: You can check if the touch pads on Quarky are working properly using this option. Click on the Get button, this will start filling the T1, T2, etc. fields with the analog values of the touch pins that are being communicated to PictoBlox by Quarky. Try touching the pads and notice the drop in the readings.
- Calibrate Touch Sensor: You can then set the touchpad threshold accordingly using this option. Select the Touch sensor, write the value and click on Set Threshold.
Touch Pins Troubleshooting
Push Button Calibration
Quarky has two switches or pushes buttons. Pressing the left and right push buttons on Quarky sends analog values to PictoBlox. Pictoblox checks the range in which this value falls and based on that it declares if the left or right push button is pressed. If push buttons are not working on Quarky, users can check the same using the analog values fetching option and pressing the buttons, and observing the values.
For configuring the pushbutton, you have the following options: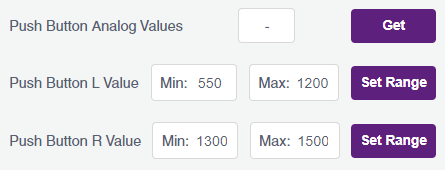
- Push Botton Analog Values: You can check if the pushbutton on Quarky is working properly using this option. Click on the Get button, this will start filling the box with the analog values of the pushbutton. If the value is shown as just -, it means the board is not responding (check if the firmware is uploaded on Quarky properly), if the value is stuck at 0, it may suggest a problem with the hardware.
- Push Button L & R-Value: The analog values may differ between boards and the user may wish to change this range for L and R push buttons. You can do the same using this option. Add the min and the max analog reading and click on Set Range.
Push Buttons Troubleshooting
Bluetooth Settings
For configuring the Bluetooth, you have the following options:
- Bluetooth Indication LED: On powering ON, Quarky shows its Bluetooth connectivity status through blue/green color on the bottom right LED of the display (BLUE: Bluetooth disconnected, GREEN: Bluetooth connected). Users can turn off the indicator using the toggle button to the right of the Bluetooth Indication LED option.

- Set Bluetooth Name: The default Bluetooth name of Quarky follows the format “Quarky wxyz” where the wxyz digits stand for the last four digits of the Bluetooth MAC address of the board. You can change the Bluetooth name to any 12-digit string including numbers and special characters.

Factory Reset
In case you wish to reset the configurations set through the Quarky settings, you can do so by clicking on the Factory Reset button which will delete all the saved Bluetooth names, pulse width, touch threshold, etc. from the board without having to erase the flash which achieves the same.

Conclusion
In conclusion, Quarky Settings can be used to troubleshoot issues related to motors, servos, touch sensors, Bluetooth, and more. It allows users to change the motor direction, synchronize motor speed, calibrate servo pulses, set touchpad thresholds, and set Bluetooth names. Additionally, Quarky Settings also provides a Factory Reset option to clear the configurations.