


Introduction
In this tutorial, we are going to create an AI that can detect the expressions of the face using Python in PictoBlox and then Mimic expressions on Quarky.
Python Functions for Face Detection in PictoBlox
In order to use the Face Detection functions for python in PictoBlox, we must first build the face detection object. For this we use this function:
fd=FaceDectection()
Next, we will use the variable ‘fd’ that contains the face detection object to build the Face Detection functions.
Facial Detection Function
To execute face detection, we can use two different functions, one to detect faces from the camera and another to detect faces from the stage.
- To detect a face from the camera use:
fd.analysecamera() - To detect face from the stage use:
fd.analysestage()
The above two functions analyze the image (from camera or stage) and save the face information locally, which can be accessed using other functions, similar to Computer Vision.
You have to run these functions every time you want to analyze a new image from the camera or stage.
Get expression on face ()
In order to get the facial expression of a face from the camera, we can use the expression() function. This function reports the recognized expression of the selected face. If the face selected is not detected then it reports NULL.
fd.expression()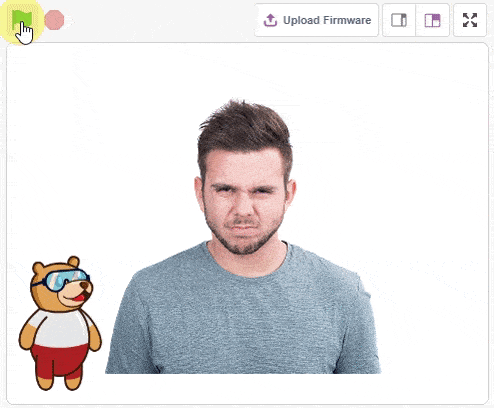
isexpression(face_number, emotion)
In order to check whether the detected face has a particular emotion or not, we can use the function isexpression(). If the emotion matches, then the block returns the value true, otherwise it returns the value false.
This function has two parameters as isexpression(face_number, emotion). The first parameter denotes the face number that you want to analyze and the second parameter denotes the serial number of emotion that needs to be checked on the face.
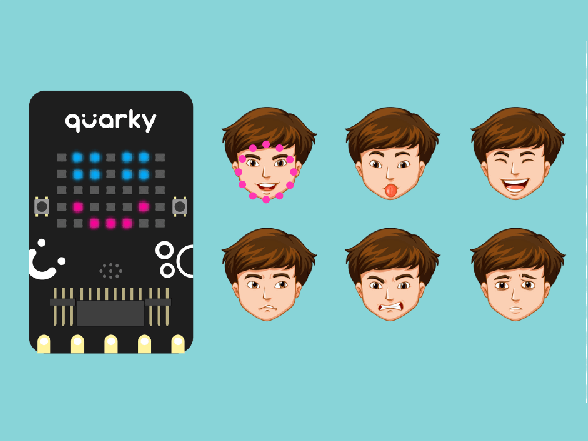
| Number | Emotions |
|---|---|
| 1 | Angry |
| 2 | Disgusted |
| 3 | Fear |
| 4 | Happy |
| 5 | Neutral |
| 6 | Sad |
| 7 | Surprised |
Example:
If we want to check whether for face 1 in the image, the emotion is Happy or not, we code:
fd.isexpression(1, 4)Let’s Code!
The code is pretty simple, let’s get straight into it, follow the below steps:
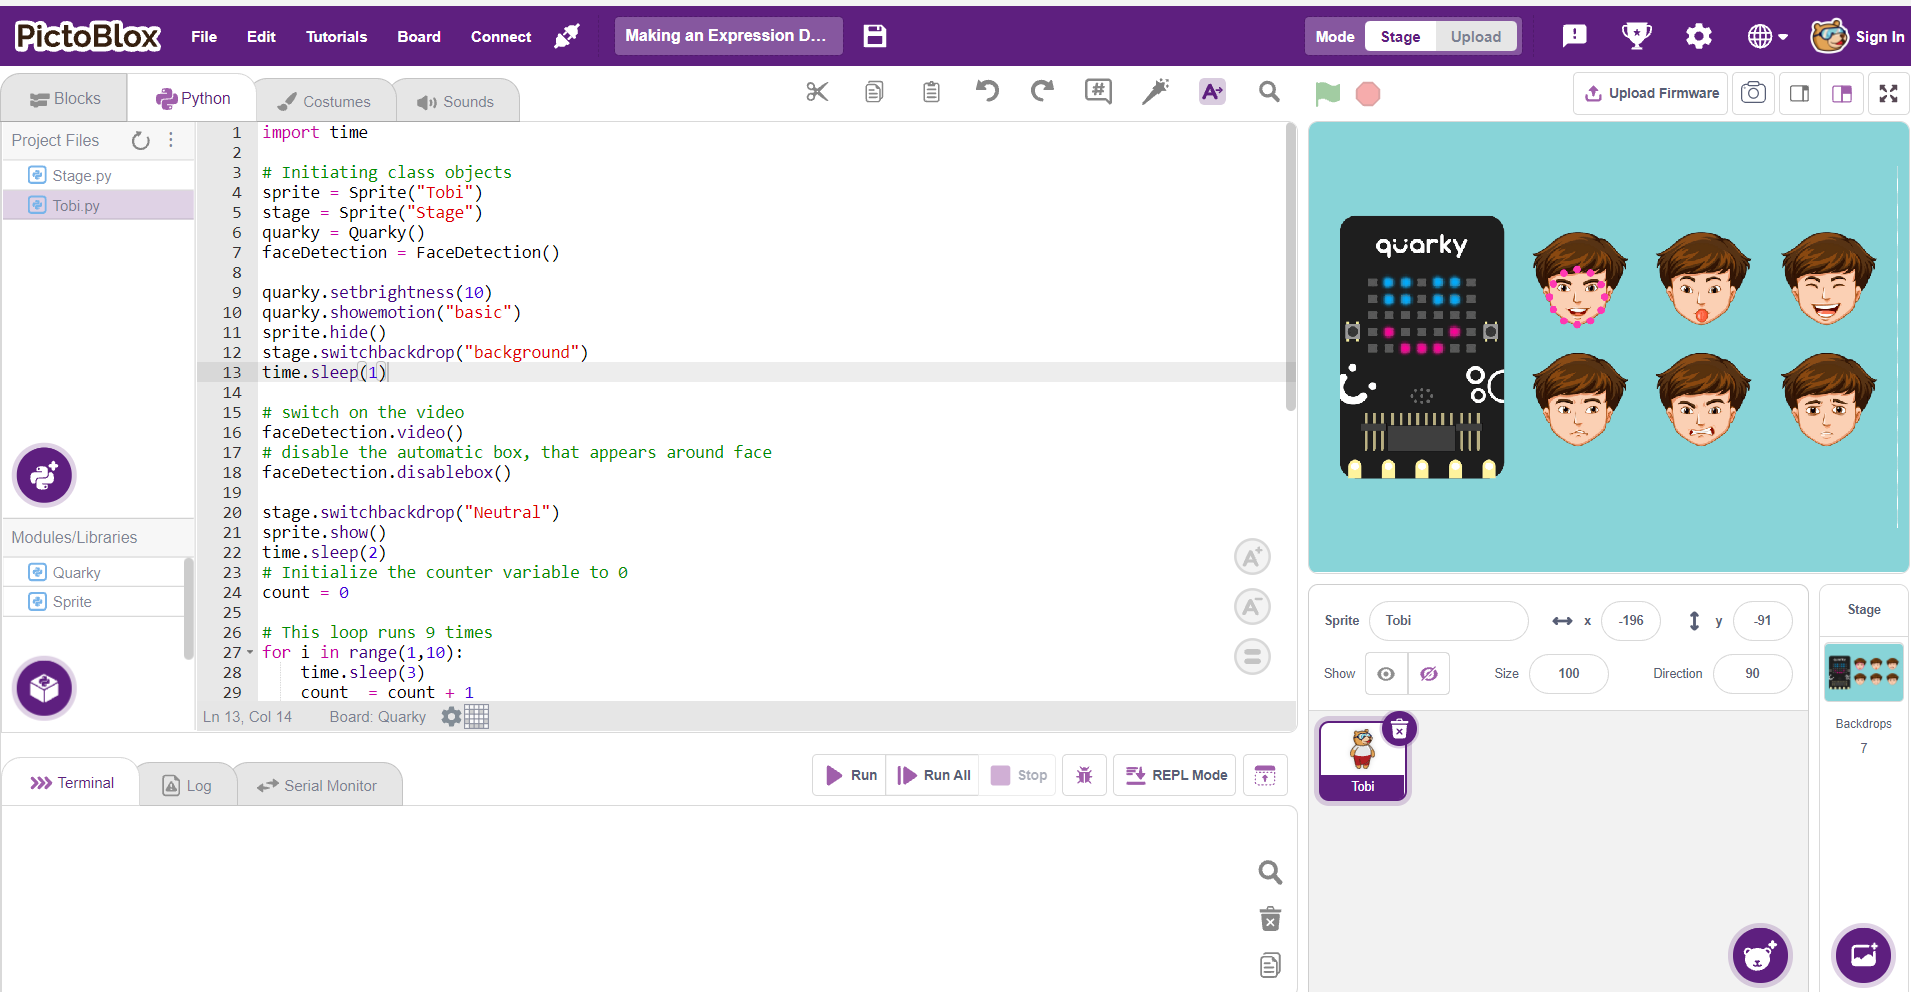
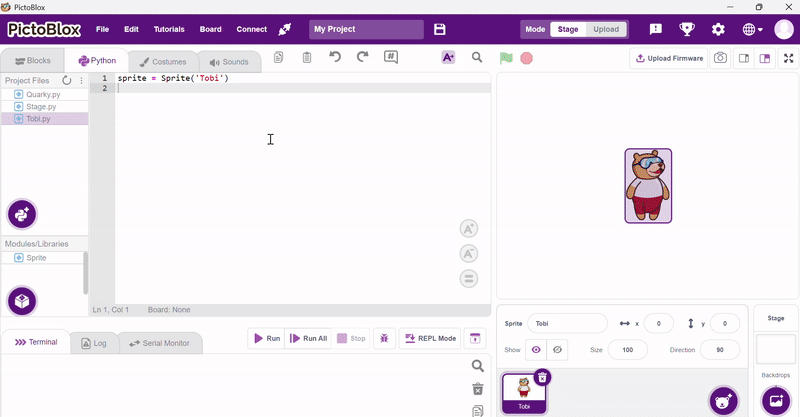
- Open PictoBlox from the onboarding screen and choose the Python coding interface. Select the Tobi.py file from the Project Files section and by default, the syntax will be written in sprite as an object.
- To begin, navigate to the Navbar and choose Quarky as your board. This action will automatically initialize Quarky and incorporate the necessary syntax into the coding environment.
- Add Face Detection Extension to use different functions related to it.
Import time⏳ time is a built-in Python module that helps us pause the program using sleep() to create visible delays between actions.
- Initialization
sprite = Sprite("Tobi")
stage = Sprite("Stage")
quarky = Quarky()
faceDetection = FaceDetection()
We create objects for:
- Tobi Sprite (used to say detected emotions)
- Stage (for changing backdrops)
- Quarky (to display expressions on LED)
- Face Detection (to recognize user experience using the camera)
- Initial Setup
quarky.setbrightness(10)
quarky.showemotion("basic")
sprite.hide()
stage.switchbackdrop("background")
time.sleep(1)
This block sets the LED brightness, shows a neutral face, hides the sprite temporarily, and sets a background. We pause for 1 second to allow these settings to apply smoothly.
- Start Camera and Disable Face Boxes
faceDetection.video()
faceDetection.disablebox()
Turns on the webcam feed on the stage and disables the bounding box around faces (for a cleaner visual display).
- Show Sprite and Initialize Backdrop
stage.switchbackdrop("Neutral")
sprite.show()
time.sleep(2)
The sprite becomes visible again, and we start with a “Neutral” expression backdrop
- Create Loop for Dynamic Testing
count = 0
    for i in range(1,10):
          time.sleep(3)
          count  = count + 1
A for loop that runs 9 times. We wait 3 seconds in each loop and keep a counter to rotate through different expressions.
- Change Backdrop Based on Loop Count
if(count == 1):

        stage.switchbackdrop("Neutral")

    elif(count == 2):

        stage.switchbackdrop("Angry")

    elif(count == 3):

        stage.switchbackdrop("Surprise")

    elif(count == 4):

        stage.switchbackdrop("Sad")

    elif(count == 5):

        stage.switchbackdrop("Happy")

        count = 0
This block helps to manually simulate emotions by changing the backdrop every few seconds to encourage the user to mimic that emotion.
- Detect and React to Emotions
faceDetection.analysestage()

  sprite.say(faceDetection.expression(1))
This block captures an image from the webcam, analyzes the face, and displays the detected emotion as speech from Tobi.
- Show Detected Emotion on Quarky
 if faceDetection.isexpression(1, "happy"):

        quarky.showemotion("happy")

    elif faceDetection.isexpression(1, "sad"):

        quarky.showemotion("crying")

    elif faceDetection.isexpression(1, "surprised"):

        quarky.showemotion("surprise")

    elif faceDetection.isexpression(1, "disgusted"):

        quarky.showemotion("angry")

    elif faceDetection.isexpression(1, "neutral"):

        quarky.showemotion("basic")
Quarky matches the detected facial expression and displays the corresponding LED face animation
“Happy” → 😊
“Sad” → 😢
“Surprised” → 😲
“Disgusted” → 😠
“Neutral” → 😐
Code
import time

# Initiating class objects
sprite = Sprite("Tobi")
stage = Sprite("Stage")
quarky = Quarky()
faceDetection = FaceDetection()

quarky.setbrightness(10)
quarky.showemotion("basic")
sprite.hide()
stage.switchbackdrop("background")
time.sleep(1)

# switch on the video
faceDetection.video()
# disable the automatic box, that appears around face
faceDetection.disablebox()

stage.switchbackdrop("Neutral")
sprite.show()
time.sleep(2)
# Initialize the counter variable to 0
count = 0

# This loop runs 9 times
for i in range(1,10):
time.sleep(3)
count = count + 1
# Change the backdrop of stage based on loop count
if(count == 1):
stage.switchbackdrop("Neutral")
elif(count == 2):
stage.switchbackdrop("Angry")
elif(count == 3):
stage.switchbackdrop("Surprise")
elif(count == 4):
stage.switchbackdrop("Sad")
elif(count == 5):
stage.switchbackdrop("Happy")
count = 0

# Detect expressions from the stage (via camera),
# make the sprite say the expression detected, and
# show the expression detected on stage on quarky LEDs
faceDetection.analysestage()
sprite.say(faceDetection.expression(1))
if faceDetection.isexpression(1, "happy"):
quarky.showemotion("happy")
elif faceDetection.isexpression(1, "sad"):
quarky.showemotion("crying")
elif faceDetection.isexpression(1, "surprised"):
quarky.showemotion("surprise")
elif faceDetection.isexpression(1, "disgusted"):
quarky.showemotion("angry")
elif faceDetection.isexpression(1, "neutral"):
quarky.showemotion("basic")
Conclusion
This program initializes the camera and Quarky. It then asks the user to make various facial expressions, which are detected through the webcam. The recognized expression is displayed as text using Tobi and simultaneously shown on Quarky’s LED face.
Output