Introduction
A piezoelectric sensor is a type of sensor that uses the piezoelectric effect to measure changes in pressure, acceleration, force, temperature, and other physical quantities. The piezoelectric effect is a phenomenon in which certain materials generate an electric charge in response to mechanical stress or deformation. This property makes piezoelectric sensors useful for a wide range of applications where accurate measurements of mechanical changes are required. Here’s how piezoelectric sensors work:
- Piezoelectric Material: Piezoelectric sensors are constructed using materials that exhibit the piezoelectric effect, such as quartz, certain ceramics, and some polymers. These materials have a crystalline structure that allows them to generate an electric charge when subjected to mechanical pressure or deformation
- Applications: Piezoelectric sensors find applications in various fields:
- Pressure Sensing: Measuring changes in pressure in industrial, medical, and automotive applications.
- Acceleration and Vibration Monitoring: Detecting vibrations and accelerations in devices, structures, and machinery.
- Acoustic and Sound Detection: Capturing sound waves for microphones and other acoustic applications.
- Force Measurement: Measuring forces in materials testing, robotics, and biomechanics.
- Temperature Compensation: Piezoelectric materials can be used for temperature compensation in electronic components.
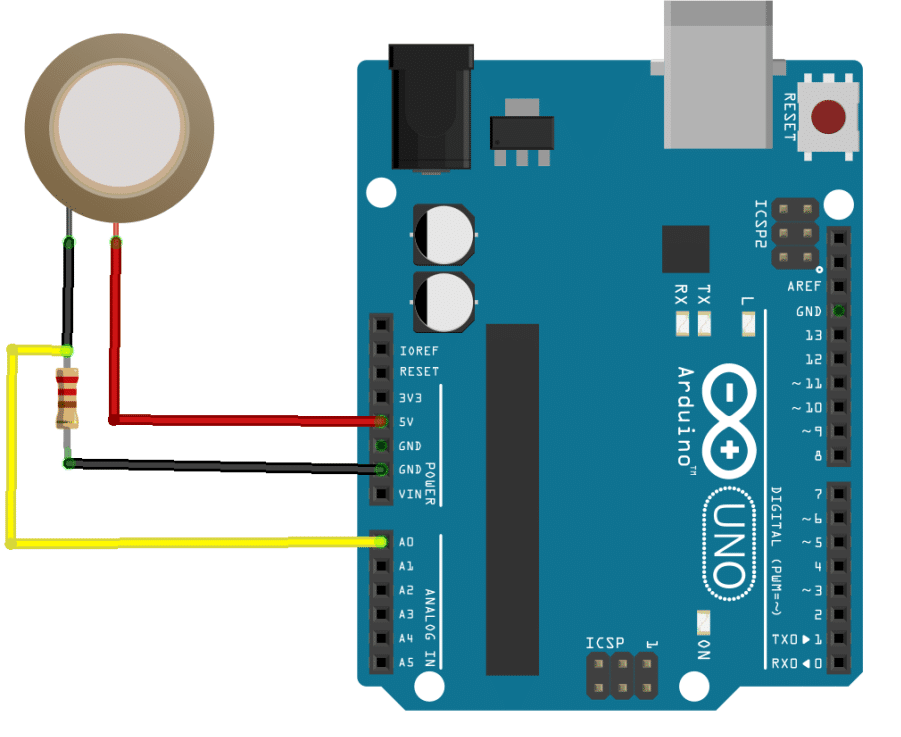
Circuit diagram

Code
- Open pictoblox and create a new file.
- Goto boards and select Arduino Uno.
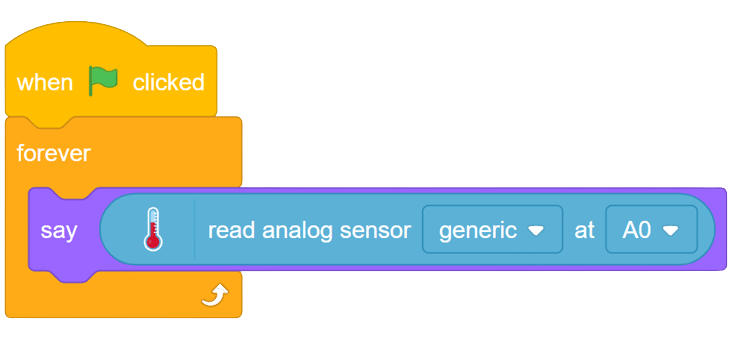
- Add ” When Flag Clicked” when from the event palette into the scripting area.

- Add Forever ” block from controls palette.

- From looks palette drag “say() ” block into the scripting area and place it inside the forever block.

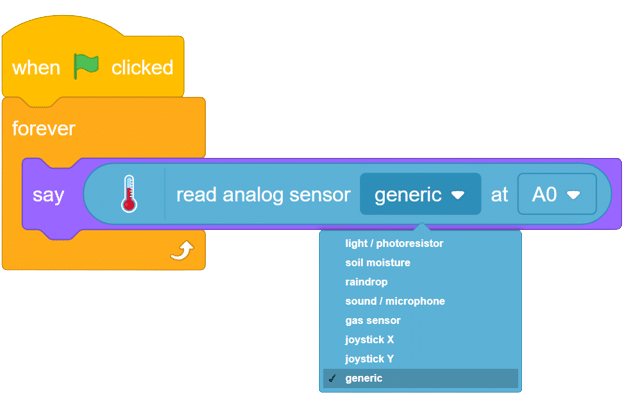
- From Sensor palette of Arduino, Drag ‘Read analog sensor () at ()” and place it inside the say block. Choose generic from the drop-down.

- Your final script will look like this.

Output
OUTPUT Gifs will be updated soon.


