Learn how to assemble the Quarky Robotic Arm with this step-by-step guide. Follow the steps to make the Quarky Robotic Arm look like the image shown in this guide, and use it to explore more complicated programs and activities.
Learn how to assemble the Quarky Robotic Arm with this step-by-step guide. Follow the steps to make the Quarky Robotic Arm look like the image shown in this guide, and use it to explore more complicated programs and activities.
“Learn to control a Quarky robotic arm remotely using Bluetooth and PictoBlox. Perfect for tasks like picking and tool manipulation, this project boosts productivity and safety in hazardous environments. Step-by-step coding guides included for precise X, Y, Z-axis, and gripper control.”
“Learn to control a Quarky robotic arm remotely using Bluetooth and PictoBlox. Perfect for tasks like picking and tool manipulation, this project boosts productivity and safety in hazardous environments. Step-by-step coding guides included for precise X, Y, Z-axis, and gripper control.”
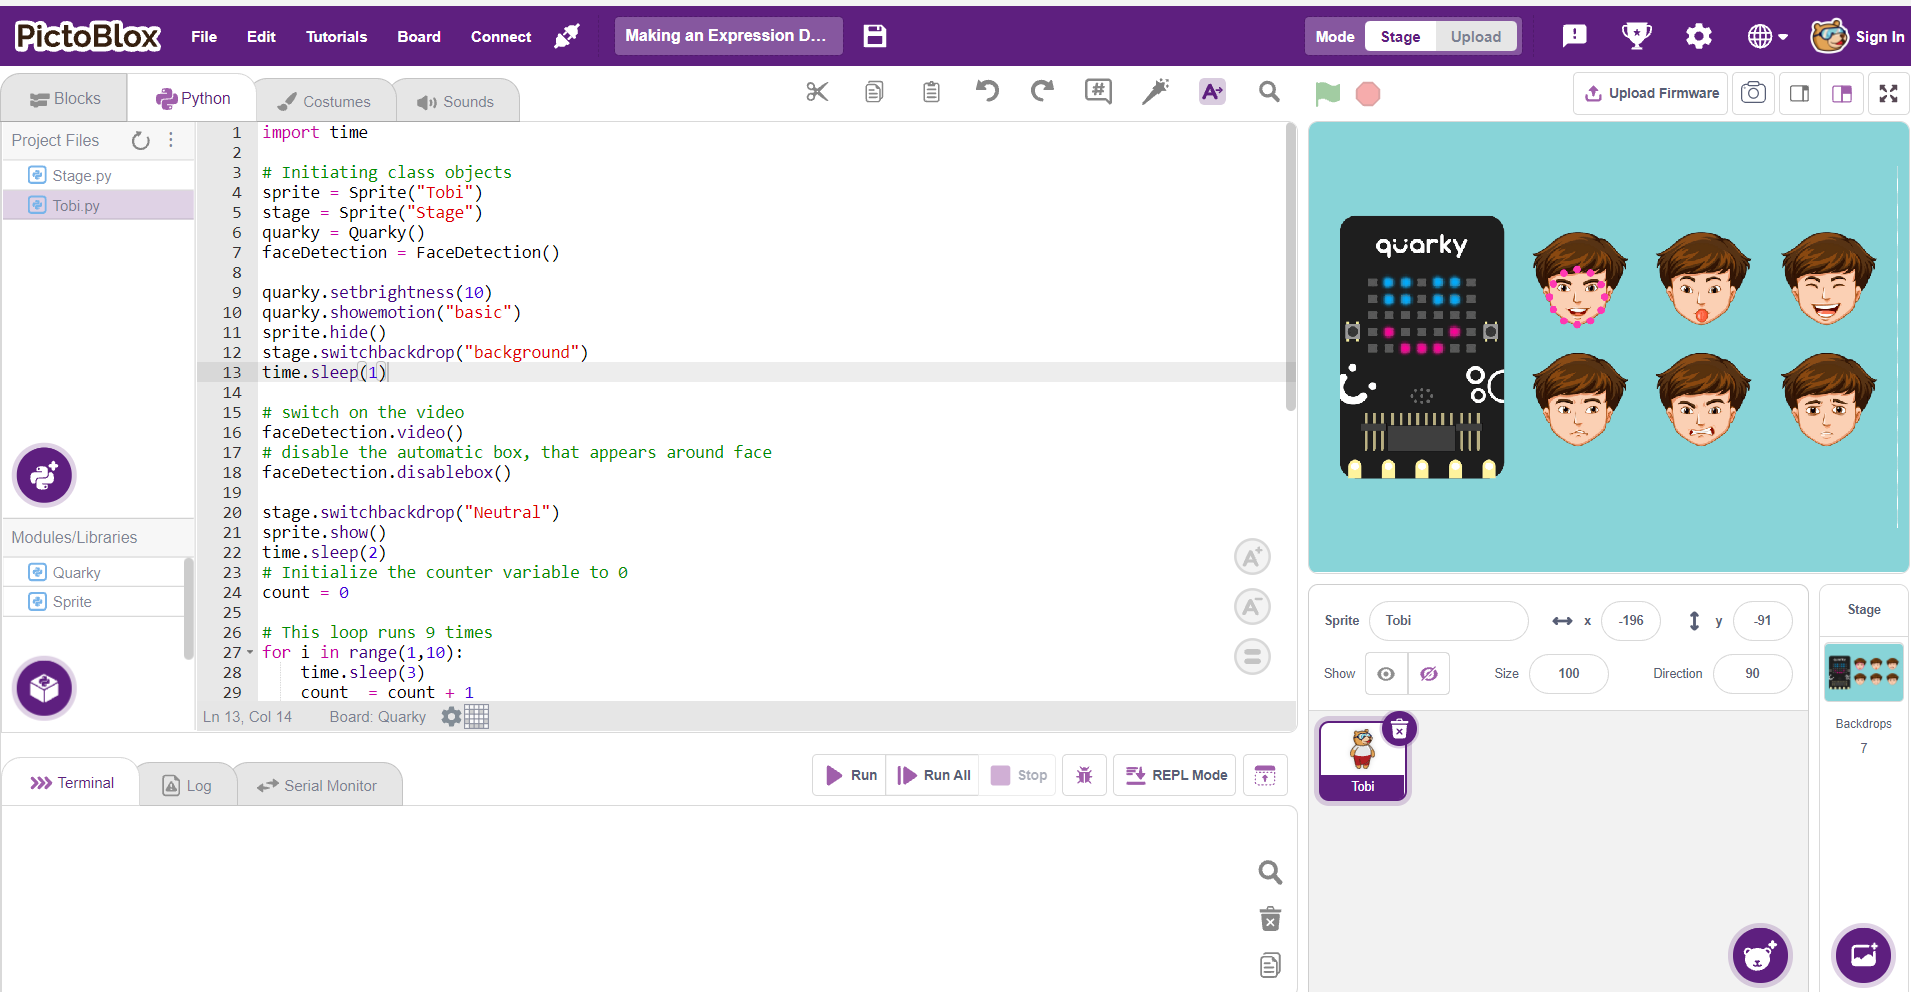
This activity focuses on programming a robotic arm using Python in PictoBlox, showcasing Python’s power in AI and ML. You’ll learn to initialize the arm, define movement functions for X, Y, and Z axes, control the gripper, and implement real-time control using a loop. This hands-on project sets the stage for embedding AI and ML into the robotic arm in future activities. Let’s get started!
This activity focuses on programming a robotic arm using Python in PictoBlox, showcasing Python’s power in AI and ML. You’ll learn to initialize the arm, define movement functions for X, Y, and Z axes, control the gripper, and implement real-time control using a loop. This hands-on project sets the stage for embedding AI and ML into the robotic arm in future activities. Let’s get started!
Learn how to make a robotic arm autonomous, moving beyond manual control to execute repetitive tasks efficiently. By following the coding steps in PictoBlox, you can program precise movements and actions, making it suitable for applications in industries like manufacturing and medical fields. With careful calibration and testing, you can successfully transform your robotic arm into an autonomous system, enhancing its functionality and versatility.
Learn how to make a robotic arm autonomous, moving beyond manual control to execute repetitive tasks efficiently. By following the coding steps in PictoBlox, you can program precise movements and actions, making it suitable for applications in industries like manufacturing and medical fields. With careful calibration and testing, you can successfully transform your robotic arm into an autonomous system, enhancing its functionality and versatility.
Learn how to program a robotic arm to operate autonomously using Python in Pictoblox. This activity guides you through initializing the robotic arm, writing movement and gripper actions, and using a continuous loop for independent operation. You’ll also explore the transition from stage mode to upload mode, allowing the robotic arm to function without an external system or Pictoblox connection. Ideal for robotics enthusiasts and learners, this guide will help you take full control of robotic arms in a simple, efficient way.
Learn how to program a robotic arm to operate autonomously using Python in Pictoblox. This activity guides you through initializing the robotic arm, writing movement and gripper actions, and using a continuous loop for independent operation. You’ll also explore the transition from stage mode to upload mode, allowing the robotic arm to function without an external system or Pictoblox connection. Ideal for robotics enthusiasts and learners, this guide will help you take full control of robotic arms in a simple, efficient way.
this activity introduces the integration of machine learning into robotics by developing a hand gesture recognition model in PictoBlox. Through systematic steps, you learn to train, test, and export the model to control a robotic arm using gestures. By combining gesture analysis with robotic arm settings, this project highlights the potential of machine learning in enabling intuitive and precise control in robotics, paving the way for innovative applications.
this activity introduces the integration of machine learning into robotics by developing a hand gesture recognition model in PictoBlox. Through systematic steps, you learn to train, test, and export the model to control a robotic arm using gestures. By combining gesture analysis with robotic arm settings, this project highlights the potential of machine learning in enabling intuitive and precise control in robotics, paving the way for innovative applications.
Quarky Robotic Arm Project - Block Coding
Refer to the tutorials to learn how to use PictoBlox Block Coding Environment to code Quarky Robotic Arm for different applications.
Learn how to use motion blocks and repeat loops for Grade 4 in PictoBlox Junior Blocks to program the Wizbot Maxx robot. Students will make the robot move in a precise geometric pattern and physically draw a six-pointed star on paper.
Learn how to design a cheerful animated birthday card for Grade 4 using PictoBlox Blocks. Students will use costume-switching sprites, a birthday soundtrack, and interactive on-screen messages that respond to keyboard input.
Learn how to program the Wizbot Neo robot for Grade 6 to autonomously follow a black line on the floor using IR sensors. Students will also make the robot perform a special forward movement at checkpoints using PictoBlox Blocks.
Learn how to build a real-time AI face filter for Grade 4–5 that tracks your face and overlays a sprite using the Face Detection extension and Quarky Intellio’s camera. Students will also learn to capture filtered snapshots with a sound effect using PictoBlox Blocks.
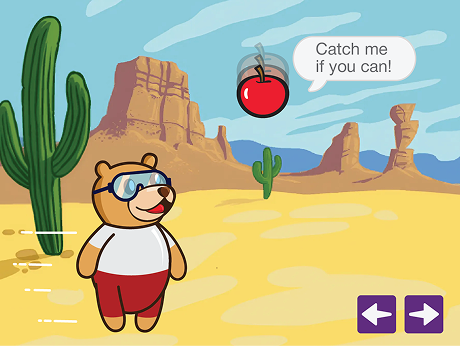
Learn how to create a fully playable falling-object game for 3rd grade in PictoBlox Junior Blocks, where Tobi catches falling apples using arrow key controls. The project includes collision detection, background music, and a Game Over scene with a Play Again button.
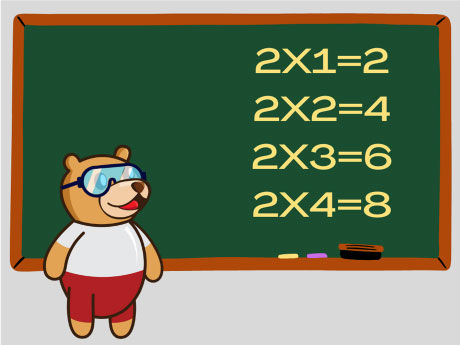
Learn how to write a Python program in PictoBlox that uses a for 5th grade with loop and the range() function to automatically calculate and print the complete multiplication table of 2, introducing variables, loops, and the print() function to beginner coders.
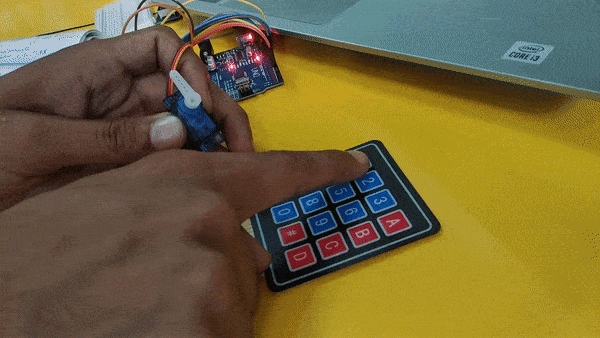
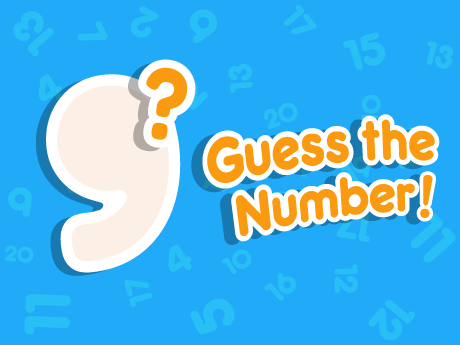
Learn how to write an Embedded C++ program for 7th grade in PictoBlox that generates a random secret number on an Arduino board. Students will let the player guess the number via the Serial Monitor and receive feedback with “Too high”, “Too low”, or “Correct” responses.
Learn how to use the Face Detection AI extension in PictoBlox Junior Blocks for 5th grade to make a ball sprite follow the tip of your nose in real time. This project demonstrates live facial landmark tracking using machine learning through the camera.
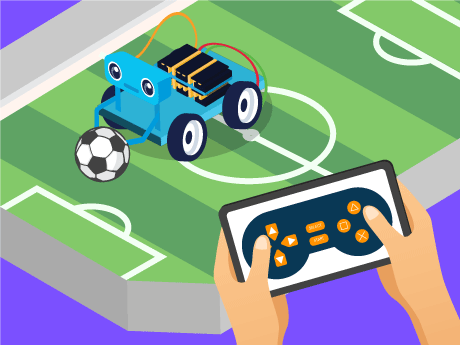
Learn how to build a high-performance, wireless control system for your robot for Grade 5 using Quarky and PictoBlox’s Dabble extension. In this project, students will learn how to interface a digital gamepad to command the robot’s movement in all directions.
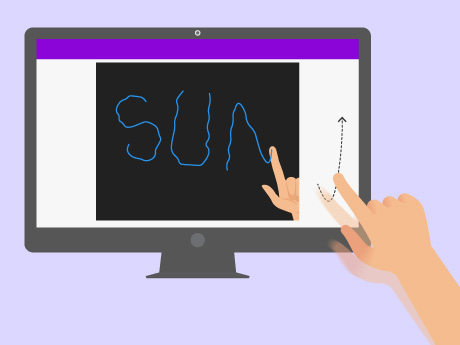
Learn how to create your own interactive drawing experience for Grade 3 using PictoBlox’s Human Pose Detection extension. In this project, students will control a pencil with their finger movements and draw in the air, with their motion reflected on the screen in real time.
Learn how to build your own AI talking character for Grade 4 using PictoBlox. In this project, students will program Tobi to speak, ask questions, and generate personalised responses based on user input. The project combines real-time voice output with animated lip-sync, simulating how virtual assistants work.
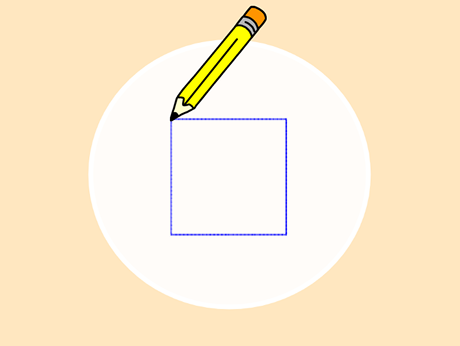
In this project, students in Grade 3 will learn how to bridge the gap between physical movement and digital art. By leveraging PictoBlox’s Human Body Detection (or Face Detection) extension, they will program a virtual pencil to trace a perfect square on the screen.
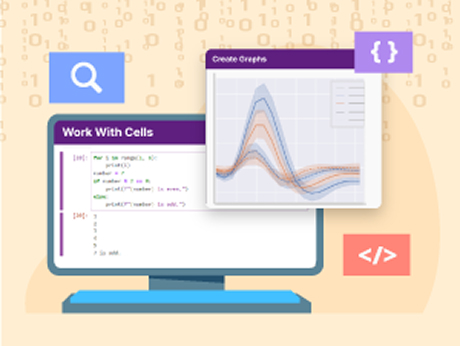
Learn how to explore Python programming for Grade 7 using PictoBlox’s built-in Python Notebook in this beginner-friendly tutorial. Students will write their first code, use variables, loops, and functions, and visualize data with simple graphs—all in one place.
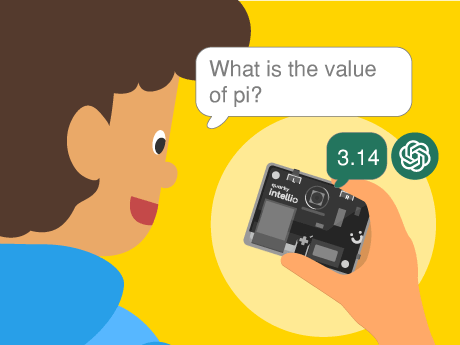
Learn how to create your own voice-activated, intelligent virtual assistant for Grade 6 using PictoBlox’s AI and Speech Recognition extensions. In this project, students will control the conversation by pressing a key, and have their AI listen and respond in real time.
Learn how to explore the fundamentals of digital colours for Grade 7 using PictoBlox’s Image Processing extension. In this project, students will break down any image into its primary colour components by converting the stage into green and blue channels in a continuous loop.
Learn how to create a code to drive your Wizbot for Grade 6 forward, in reverse, left, and right using the arrow keys with corresponding directional arrow costumes.
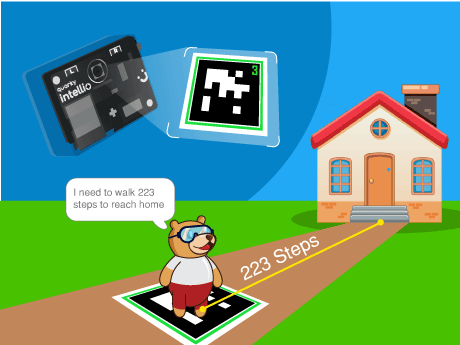
Learn how to use AprilTag recognition and computer vision for Grade 8 in this PictoBlox tutorial. Students will create an interactive program where a sprite follows a physical tag through the camera, calculating exactly how many “steps” it needs to reach home.
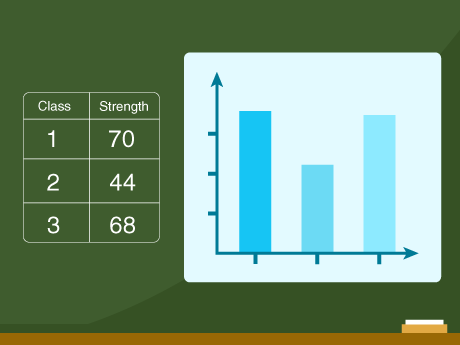
Learn how to transform raw data into visual insights for Grade 6 using PictoBlox’s Graph Extension. In this project, students will automatically populate a data table with student populations using loops and random generators.
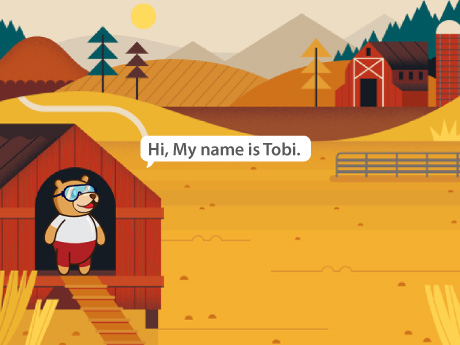
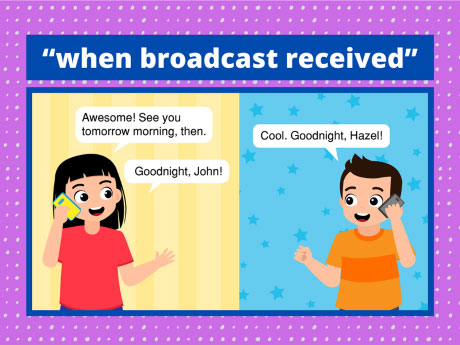
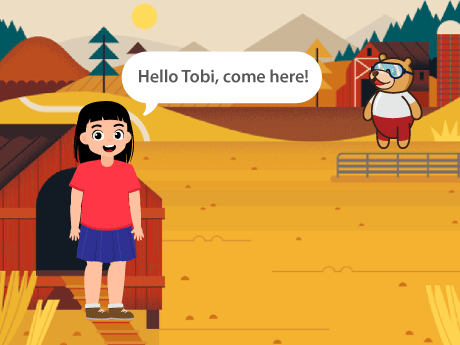
Learn how to create a story with Hazel and Tobi for Grade 3 in PictoBlox Junior Blocks, where Hazel speaks to Tobi and moves from one place to another on the stage.
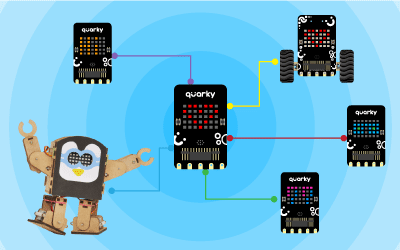
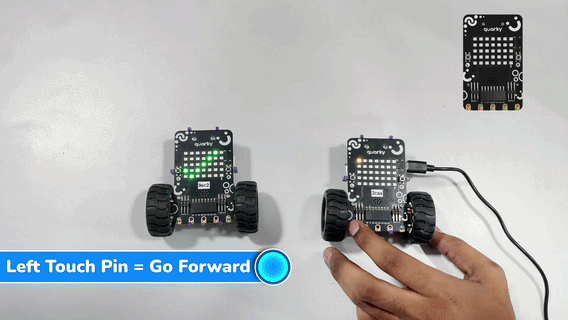
In this example, we will learn how to wirelessly control one Quarky (peer) using another Quarky (master). Using the Quarky Connect extension, commands can be sent from the master Quarky to control movement, display, and other actions on the peer Quarky without Wi-Fi or an internet connection.
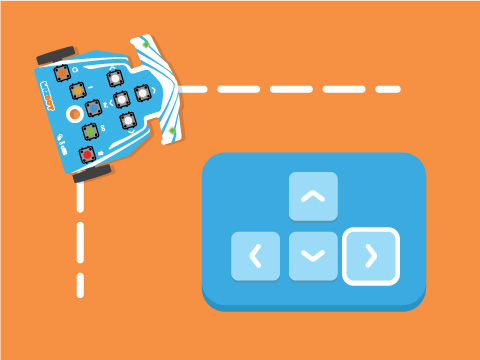
Learn how to create a remote controlled robot navigation system using Quarky and PictoBlox block coding. In this project, you will learn how to control your robot’s movement in all four directions using arrow keys, while also displaying direction indicators on the RGB LED display for real-time visual feedback.
All articles loaded
No more articles to load
PictoBlox Extension Documentation
Refer to the documentation of PictoBlox Extension to understand how to use the blocks and functions for the Robotic Arm.